BALMUDA The Brew K06H Series User manual

Control Code
Rev 1.0
Coee Maker (Household use only)
K06H Series
Instruction Manual Limited Warranty
Thank you for purchasing BALMUDA The Brew.
Before using the appliance, be sure to read this
manual thoroughly, particularly its “Safety
Precautions” (p. 2) section. In addition, pay
special attention to the contents marked with .
This manual also serves as a warranty. Carefully
store the manual after reading it together with
your proof of purchase, which shows the date of
purchase and dealer’s name.
Important
Be sure to read this manual before use.
Keep it in a safe place for future reference.
For information on our warranty policy,
please refer to the BALMUDA website
(https://us.balmuda.com).
FOR USE IN U.S. ONLY
WARRANTY VOID IF USED OUTSIDE U.S.
Contents
IMPORTANT SAFEGUARDS...............................1
SHORT CORD INSTRUCTIONS .........................1
Safety Precautions..............................................2
Contents of the Package ....................................7
Names of Parts...................................................8
Three Types of Modes ........................................9
Using the Appliance for the First Time.................9
How to Brew Coee .........................................10
Cleaning ...........................................................13
Specications ...................................................13
When an Error Is Indicated................................14
Troubleshooting................................................14
Items Sold Separately.......................................15
Product Registration.........................................15
Warranty Policy and Privacy Policy ...................15

1
IMPORTANT SAFEGUARDS
When using electrical appliances, basic safety precautions should always be followed,
including the following:
1. Read all instructions.
2. Do not touch hot surfaces. Use handles or knobs.
3. To protect against re, electric shock, and injury to persons, do not immerse the cord,
plugs, or main body in water or other liquid.
4. Close supervision is necessary when any appliance is used by or near children.
5. Unplug the power cord from the outlet when the appliance is not in use and before
cleaning it. Allow the appliance to cool before putting on or taking o the parts, and
before cleaning the appliance.
6. Do not operate the appliance with a damaged cord or plug, or after the appliance
malfunctions or has been damaged in any manner. Return the appliance to the nearest
authorized service facility for examination, repair, or adjustment.
7. The use of any accessory not evaluated for use with this appliance may cause injuries.
8. Do not use the appliance outdoors.
9. Do not let the cord hang over the edge of a table or counter, or touch hot surfaces.
10. Do not place the appliance on or near a hot gas or electric burner, or in a heated oven.
11. Always attach plug to appliance rst, then plug cord into the wall outlet. To disconnect,
turn any control to ”o,” then remove plug from wall outlet.
12. Close the lid completely or it may result in scalds. Hold the handle, when removing the lid.
13. Do not remove the lid during the brewing cycles. Doing so may result in scalds.
14. Do not use appliance for other than intended use.
15. The appliance is for household use only.
SAVE THESE INSTRUCTIONS
SHORT CORD INSTRUCTIONS
• A short power-supply cord is provided to reduce risks resulting from becoming entangled in or tripping over a
longer cord.
• Extension cords may be used if care is exercised in their use.
• If an extension cord is used:
1) The marked electrical rating of the extension cord should be at least as high as the electrical rating of
the appliance.
2) This appliance is equipped with a grounded plug. The extension cord should be a grounding type 3-wire cord.
3) The extension cord should be arranged so that it does not drape
over the counter top or table top where it can be pulled on by
children or tripped over.
About the plug
• This appliance has a grounded type plug for safety purposes. This plug
is only compatible with 3-pin outlets.
• In order to avoid disabling this safety function, connect it to correctly
grounded outlets only.
• Do not remove the grounding prong.
• Failing to connect the grounding conductor correctly may cause electric
shock. If it is unclear whether the outlet is correctly grounded, consult a
qualied electrician.
Grounding prong

2
Safety Precautions
Read the Safety Precautions carefully before use to ensure correct operation. The precautions described in
this manual must be followed to ensure safe use of this appliance and prevent hazards to you and other
people, as well as damage to the appliance and your home or property.
This appliance is intended for household use only.
These symbols indicate the degree of harm or
damage that may be caused by improper use.
These symbols indicate requirements
during use of this appliance.
Indicates actions that may cause
death or serious injury.
WARNING
Indicates actions that may cause
minor injury.
CAUTION
Indicates actions that may cause
property damage, including damage
to houses and household eects.
NOTICE
Indicates actions that must not
be performed.
Indicates actions that must be
performed.
Indicates general precautions.
WARNING
Preparations for Use
Do not use the appliance near ammable
materials such as curtains.
Do not place the appliance where it may
be subjected to heat, such as near a
range, heater, or microwave oven.
Do not use the appliance on a mat
sensitive to heat.
Doing so may cause re.
Do not cover the main body with a cloth
and the like.
Doing so may cause burns, re, or malfunction.
Do not insert any metallic objects or
other foreign objects into the drainage
hole in the bottom of the main body.
Doing so may cause electric shock or malfunction.
Do not place other electrical appliances,
wooden furniture, or books where they
may be exposed to steam or water
discharged from the main body.
The steam may cause surrounding items to
catch re, malfunction, or become discolored
or deformed.
Do not place the main body on top of
other appliances, such as a microwave
oven. Do not place any appliances on top
of the main body. Do not place the
product inside a cabinet.
Doing so may cause burns, re, failure,
or malfunction.
Do not use the appliance where there is a
large amount of humidity, such as in a
bathroom, in a wet place, or near a device
that discharges steam.
Doing so may cause electric shock, re,
or malfunction.
Do not place the appliance on ammable
surfaces such as wooden counters, wood
ooring, or carpet.
Doing so may cause re.
After carefully reading “Preparations”
(p. 9), take hold of the base or the
central section of the main body and
move the appliance to where it is to be
set up.
Holding other sections may make the appliance
unstable, causing injuries or malfunction.
Position the appliance on a stable and
horizontal surface.
Placing it on an unstable surface may cause
the appliance to fall over during use. In addition,
water or other kinds of liquid may spill, causing
electric shock. Do not use the appliance while
its base is not completely on a table. In addition,
do not place the appliance where it may touch
curtains and the like or where pets may come
close to it.
After carefully reading “Preparations”
(p. 9), position the appliance so that
there is space around the main body. If
walls are made of heat-sensitive material
such as plastic, position the appliance
with additional space around it.
Heat, steam, or vapor may accumulate,
causing re, malfunction, or discoloration or
deformation of surrounding objects. In addition,
coee may splash out, making the surrounding
area dirty.

3
Safety Precautions
Power cord
Do not disconnect or insert the power
plug with wet hands.
Doing so may cause electric shock.
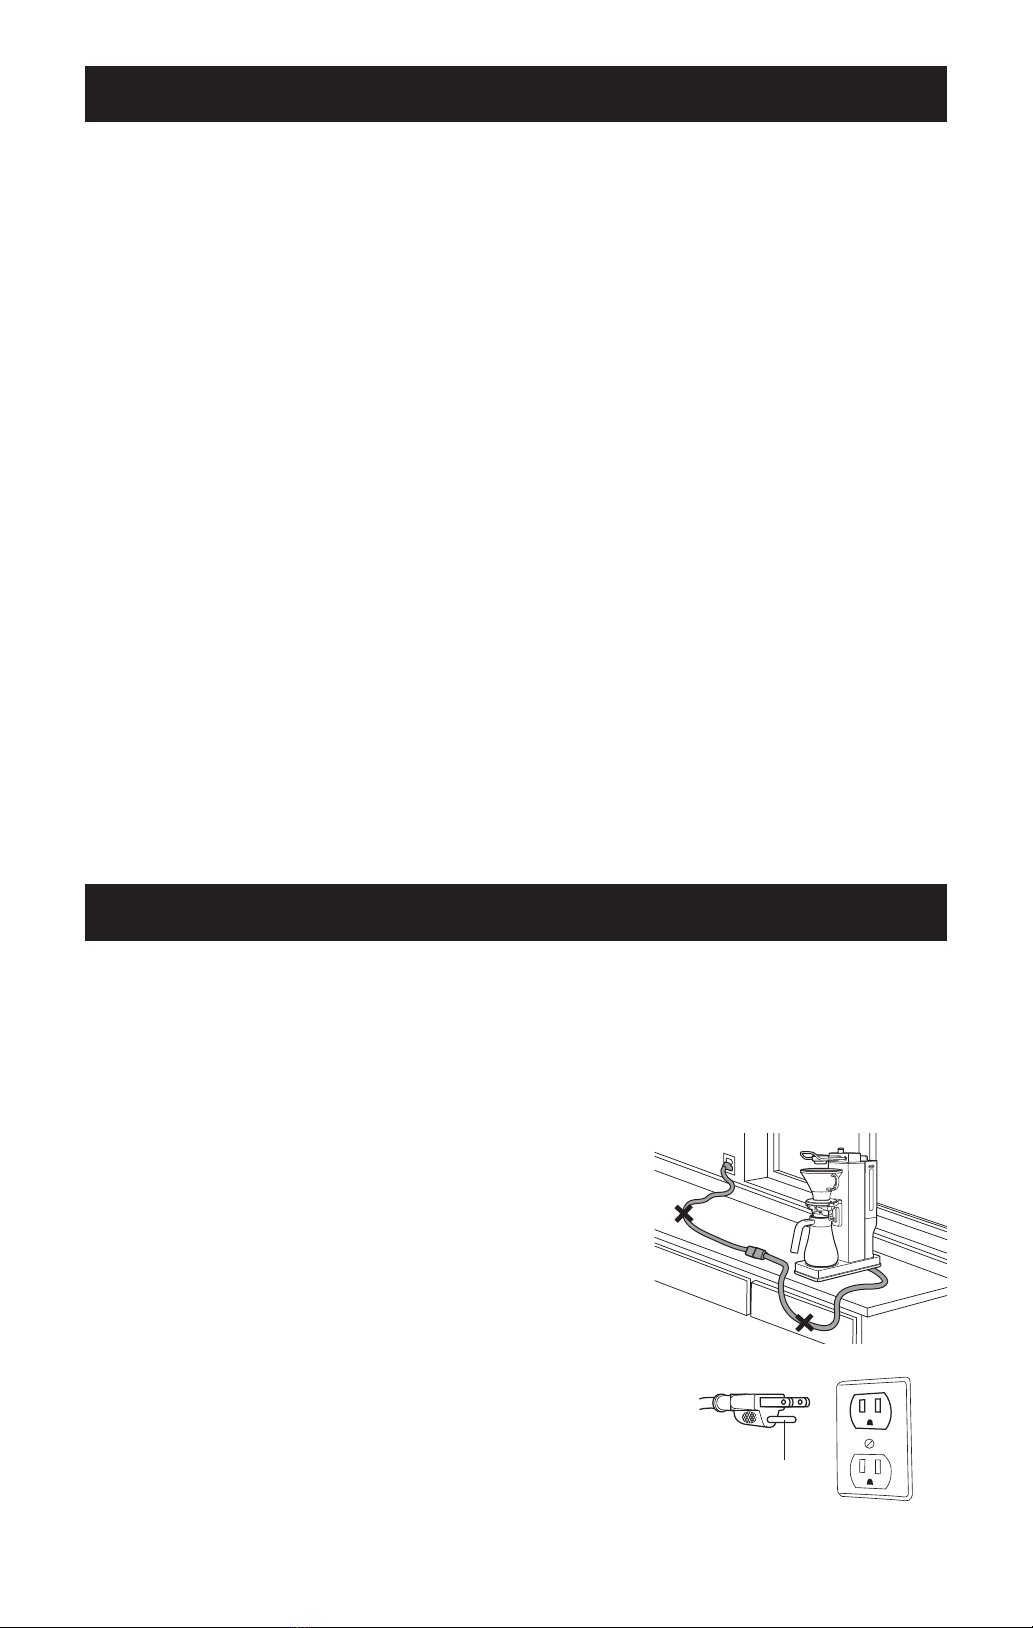
Do not apply tension to the power cord
while using the appliance.
Do not do any of the following, as this may
cause the power cord to overheat and catch
re: Scratch, modify, bend, pull, step on, or
twist the cord or place it near heating devices.
Do not place heavy items on the cord, or use it
while it is bundled.
Do not replace the power cord by yourself
if it is damaged.
Doing so may cause electric shock or re.
Please contact BALMUDA Support (p. 15) for
replacement of the power cord.
Use a dedicated outlet with a rated
current of 12.1 A or more and 120 V AC. In
addition, when using an extension cord,
use a dedicated cord with a rated current
of 12.1 A or more (1,450 W).
Using the appliance with an outlet that does
not meet the rating, or on a shared outlet with
other devices, may cause overheating, resulting
in re.
Insert the power plug fully into the outlet.
If the plug is not inserted properly, it may cause
electric shock or re due to heat.
When unplugging the power cord from
the outlet, pull on the power plug rather
than the cord.
Failure to do so may cause electric shock or re
due to short circuit.
Disconnect the power plug from the
outlet when the appliance is not in use.
Failure to do so may cause electric shock or re.
Be sure to use a grounded outlet.
This appliance uses a grounded 3-pin
plug for safety.
If the ground is not connected, it may cause
electric shock.
Usage and cleaning
This appliance is not intended for use by
persons (including children) with reduced
physical, sensory, or mental capabilities,
or lack of experience and knowledge,
unless they have been given supervision
or instruction concerning use of the
appliance by a person responsible for
their safety.
Children should be supervised to ensure
that they do not play with the appliance.
Doing so may cause burns and other injuries or
electric shock.
Do not disassemble, repair, or modify the
appliance. Do not remove the operation
panel (p. 8).
Doing so may cause re or malfunction. Please
contact BALMUDA Support (p. 15) for repair.
Do not submerge the main body, power
plug, or power cord in water. Do not use
the appliance near a bath, sink, or any
place where water is used. In addition, do
not use the appliance outdoors. Do not
splash water on the appliance.
Doing so may cause electric shock, re,
malfunction, or deformation of the main body.
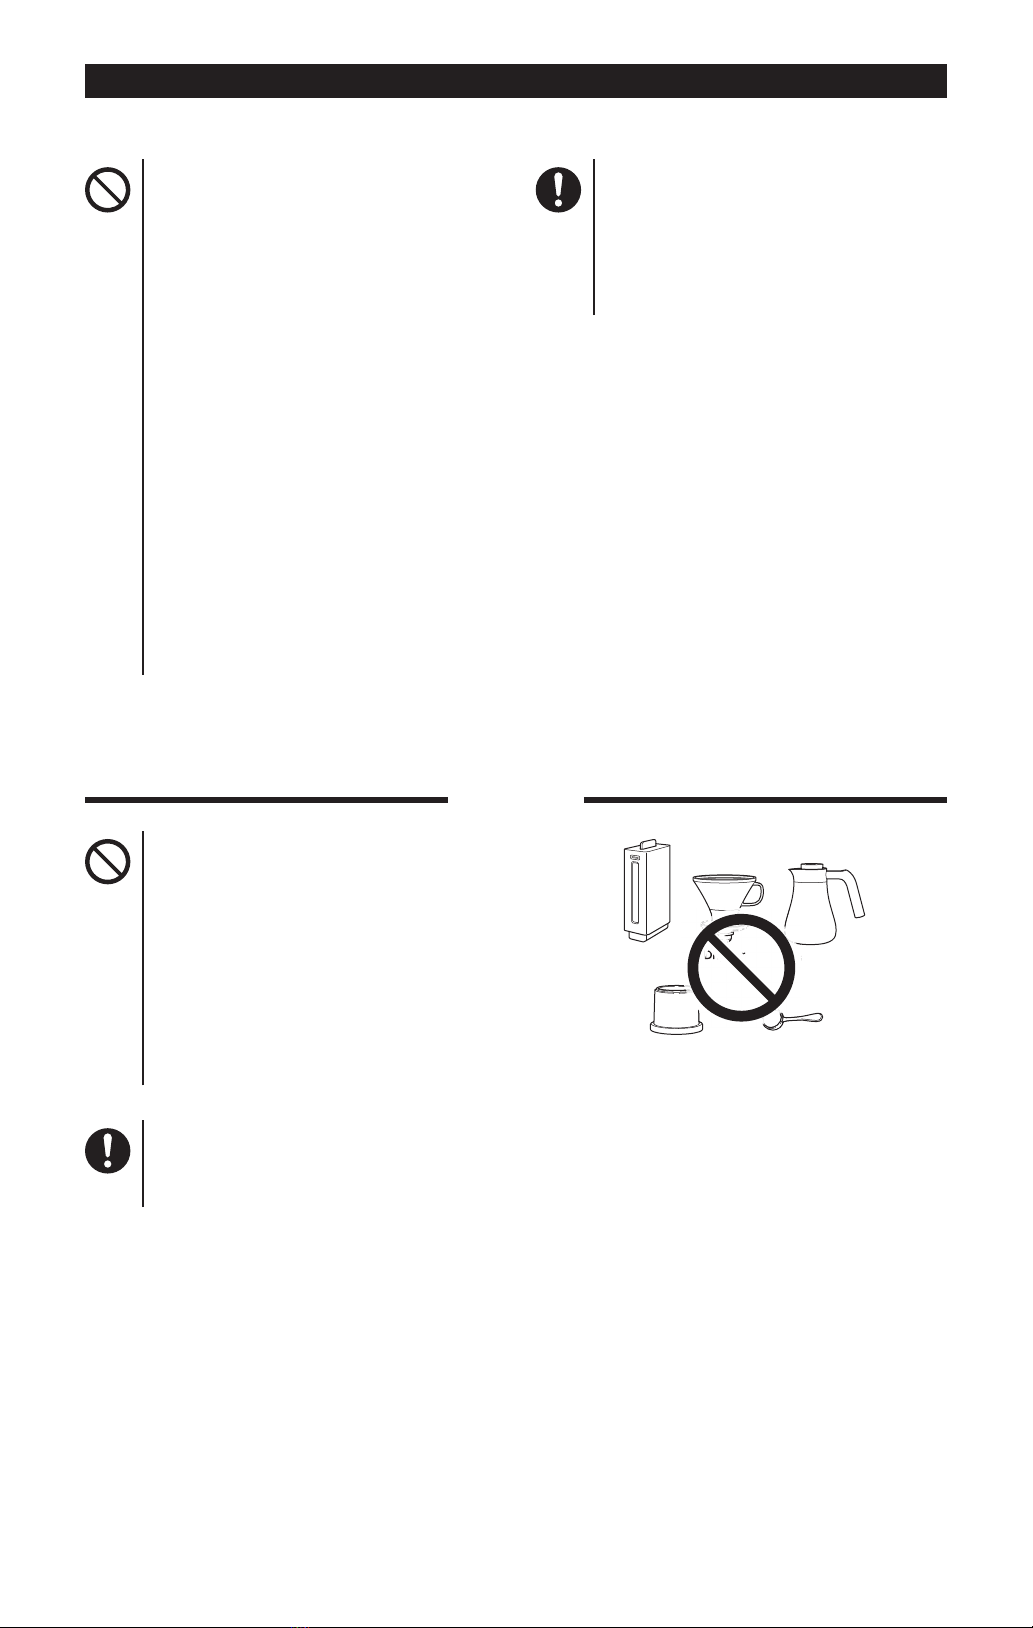
Do not use the appliance for any purpose
other than those recommended in this
instruction manual and by BALMUDA.
Doing so may cause accidents such as re or
electric shock. The dripper, carafe, and water
tank are exclusive for the product.
BALMUDA accepts no responsibility in case of
improper use or failure to follow these instructions.
Do not place the carafe on a range,
heater, etc. In addition, do not heat the
carafe in a microwave oven.
Doing so may cause re, malfunction,
or discoloration.
Do not connect the appliance with an
external timer or remote control system.
The appliance is not intended to be connected
with such devices.
Do not clean the main body with water. Do
not wipe the main body with a wet cloth.
Doing so may cause electric shock or
malfunction. Use a damp cloth with the water
thoroughly wrung out.

4
Do not drop or apply any impact to the
main body, water tank, dripper, or carafe.
Do not use the appliance in combination
with parts, accessories, carafes, etc. of
other products.
Doing so may cause burns and other injuries,
electric shock, re, or malfunction.
Do not use the appliance at an altitude of
6561.7 ft or higher.
Doing so may cause electric shock, re,
malfunction, or burns due to abnormal
discharge of steam.
Do not use the appliance in any countries
other than the U.S.
Doing so may cause re or malfunction.
Stop use of the appliance immediately if
malfunction or failure occurs.
Failure to do so may cause injuries, electric
shock, or re. Stop use of the appliance and
contact BALMUDA Support (p. 15).
Examples of malfunction and failure
• The power cord or plug is abnormally hot.
• The main body is deformed or abnormally hot.
• The power cord is damaged. The power cord
stops conducting electricity when the cord
is touched.
• The power plug cannot be fully inserted into
the outlet.
• The main body is warm (except during or
immediately after use).
• Water or coee is leaking from the main body.
• The main body has fallen over or been dropped.
• Cracks are found on the water tank, dripper,
or carafe.
Before moving the main body, drain all
water from inside and allow it to cool
suciently. Then, disconnect the power
plug, remove the carafe, and discard all
water from the water tank.
Moving the main body without following the
instructions above may cause burns and other
injuries, electric shock, or malfunction.
To drain water from inside the main body, set
the dripper and the carafe in place, insert the
power plug into the outlet, and perform 7 8
on p. 13.
Clean the power plug regularly.
Dust may accumulate on the power plug, causing
re. Disconnect the power plug from the outlet
and wipe the power plug with a dry cloth.
Safety Precautions

5
Safety Precautions
Usage and cleaning
Do not tilt the carafe excessively. Do not
tilt the carafe in the opposite direction to
its spout.
Coee may leak from the top of the carafe,
causing burns.
Do not use more than 1.8 ounces of
ground coee.
If you put too much ground coee in the lter,
the brewed coee may overow, causing
burns. In addition, ground coee may be
scattered by steam, making the surrounding
area dirty. Refer to p.
9 before adding
ground coee.
Do not move the main body during hot
water ushing or brewing, or with the
carafe in place.
You may drop the carafe, causing burns and
other injuries, electric shock, or malfunction.
Do not use the appliance without the
carafe. Do not perform hot water ushing
or brewing with the carafe lid removed.
Do not use items other than the supplied
carafe, such as a cup or carafe from other
manufacturers.
Coee may overow from the dripper or hot
water may spill from the bypass brewing spout
(p. 9), causing burns.
Do not use the appliance in an RV, boat,
ship, airplane, etc.
The appliance is intended for home use. The
appliance may fall over or be dropped due to
shaking or vibration, causing burns and other
injuries, malfunction, or other problems.
Do not put any kind of liquid other than
cold water (such as hot water, lukewarm
water, milk, alcohol, coee), mineral
water with a high hardness, ground
coee, etc. in the water tank. Do not put
anything other than ground coee (such
as sugar or milk) in the dripper.
Do not put anything other than coee or
ice (such as sugar or milk) in the carafe.
Doing so may cause burns or malfunction.
Mineral water and alkaline ionized water are not
recommended because they tend to cause
limescale to build up inside.
Do not leave the water tank lid open.
Foreign items or dust may enter the tank.
Do not ll the water tank above the
engraved MAX mark.
Doing so may cause electric shock or malfunction.
Always clean the appliance after use.
When doing so, discard all water from the
water tank and wipe any moisture o the
connection between the main body and
the tank.
Do not leave ground coee in the dripper or
leave water in the water tank. Doing so may
cause odor, health problems due to rotting
matter, malfunction, or discoloration.
Allow the appliance to cool before cleaning.
Touching the hot surface may cause burns.
Perform cleaning regularly according to
“Cleaning” (p. 13).
Hot water may splash out due to malfunction
or clogging inside the nozzle, causing burns.
CAUTION

6
During hot water ushing and brewing
Do not leave the appliance unattended
during use.
Doing so may cause burns and other injuries.
When you leave the appliance, be sure to press
the power button to turn the power o .
Keep away from steam or brewed hot
water during hot water ushing or
brewing. Keep your face and hands away
from the nozzle, the brewing spout, and
the bypass brewing spout (p. 9). Do
not touch anywhere other than the
operation panel. In addition, for a short
time after suspending or stopping
brewing, after stopping hot water
ushing, or after brewing, do not touch
anywhere other than the operation panel,
the dripper handle, the carafe handle, or
the power plug.
Steam may escape and water or co ee may
splash out, causing burns.
Do not re ll the dripper with water.
Co ee may over ow, causing burns.
Empty the carafe before use.
If hot water ushing or brewing is performed
with co ee, milk, ice, etc. in the carafe, hot
water or co ee may over ow, causing burns or
electric shock. Be sure to add ice after brewing
when making iced co ee. In addition, pay
attention to prevent co ee from over owing.
Safety Precautions
NOTICE
Do not bring a credit card, wristwatch, or
other device sensitive to magnetism
close to the water tank, dripper, or carafe.
Since magnets are used inside, malfunction or
failure may occur in devices sensitive
to magnetism.
Do not use a dishwasher or dish dryer for
cleaning the water tank, dripper, carafe,
dripper stand, or measuring scoop.
Doing so may cause discoloration, deformation,
or malfunction due to heat.
Always set a paper lter before putting in
ground co ee.
Failure to do so may make the dripper and the
carafe dirty or cause malfunction.
Dripper
Measuring scoopDripper stand
Carafe
Water tank
Dripper
Carafe
Not dishwasher safe

7
Contents of the Package
Main body
Water tank 1, 2
Carafe 2
Dripper 1
Measuring scoop
Dripper stand
Paper lter
(cone-shaped, 5 sheets)
Instruction manual
ControlCode
Rev1.0
(Household use only)
K06H Series
Instruction Manual Limited Warranty
Thank you for purchasing BALMUDA The Brew.
Before using the appliance, be sureto read this
manual thoroughly,particularly its “Safety
Precautions” (p. 2) section. In addition, pay
special attention to the contents marked with .
This manual also serves as a warranty.Carefully
store the manual after readingit together with
your proof of purchase,which shows the date of
purchase and dealer’sname.
Important
Besure to read this manual before use.
Keepit in a safe place for future reference.
Forinformation on our warranty policy,
pleaserefer to the BALMUDA website
(https://us.balmuda.com).
FOR USE IN U.S. O NLY
WARRANTYVOID IF USEDOUTSIDE U.S.
Contents
IMPORTANTSAFEGUARDS ...............................1
SHORT CORD INSTRUCTIONS.........................1
Safety Precautions..............................................2
Contents of the Package....................................7
Names of Parts...................................................8
Three Typesof Modes ........................................9
Using the Appliance for the First Time.................9
.........................................10
Cleaning...........................................................13
...................................................13
When an Error Is Indicated................................14
Troubleshooting................................................14
Items Sold Separately.......................................15
Product Registration.........................................15
WarrantyPolicy and Privacy Policy ...................15
Notes:
1. These items are installed on the main body at the time of purchase.
2. The lids of the water tank and the carafe are attached at the time of purchase.
Hot water ushing and brewing must be performed with the lids attached.

8
Names of Parts
Nozzle guard
Dripper handle
Dripper
Brewing spout
Carafe
Carafe handle
Base
Central section of
the main body
Nozzle
Operation panel
• Refer to p. 11 for
the names of the
buttons and other
components.
Water tank lid
Water tank
Guide lines for
the size
Carafe lid
• Brewing must be performed with the
lid attached.
If the coee is brewed without the lid
attached, the coee will stay in the dripper
instead of dropping into the carafe.
Bottom of the main body
• The label on the bottom of the main body
shows the serial number (13-digit
alphanumeric character sequence).
• Water may enter the space inside the main
body and drain from the drainage hole in
the bottom of the main body.
Power cord Power plug

9
Using the Appliance for the
First Time
1 Preparations
Take hold of the base or the central section of the main body to
move the appliance. Leave a wide space around the appliance.
Position the appliance on a stable and horizontal surface.
Leave at least 4 inches at the back of the appliance to facilitate
the placement of the water tank.
Nozzle
Base
Central section of the main body
At least
4 inches
Leave a wide space so that walls, furniture, the
ceiling, etc. will not be exposed to steam, water, or
coee discharged from the main body. Do not place
items you want to keep clean around the appliance.
The appliance generates steam while it is brewing coee.
The steam may reach more than 12 inches around and
28 inches above the nozzle. If an item around the
appliance is exposed to the steam or coee, it may be
discolored, deformed, or otherwise damaged.
2 Flushing with hot water
When using the appliance for the rst time or when the appliance
has not been used for a long period, ush the appliance with hot
water to clean the inside.
Do not use a paper lter or ground coee when
ushing the appliance with hot water.
2Flush the appliance with hot water.
Run the appliance with water only while referring to
1- 3on p. 10 to 3on p. 11.
Fill the water up to HOT on the guide line for the
size. Select the REGULAR mode and L (Large).
3Discard the water.
Discard the hot water in the carafe and water
remaining in the water tank.
Since hot water and steam are discharged during
the hot water ushing, be careful to keep your
face and hands away from the appliance.
Failure to do so may cause burns.
Dripper Carafe
1Wash the dripper and the carafe with water.
Follow the procedure in 1- 1on p. 10 to
remove the dripper. Wash the dripper and the carafe
with water.
Three Types of Modes
A new brewing system that uses a
unique method to deliver hot water
with ne temperature control
Precise control of the temperature, timing, and
amount of hot water delivered for each size and
mode setting vibrantly brings out the intrinsic features
of coee beans while minimizing bitterness and other
unpleasant tastes. The REGULAR mode also
balances rich avor with a clear aftertaste by delivering
hot water through a bypass during brewing.
Bypass brewing spout
Three modes for extracting the
individual characteristics of beans
Adjust the amount of ground coee as desired
according to the grind sizes and the roast levels.
Refer to the following as a guide.
In addition, use ground coee prepared for paper lters.
REGULAR Regular avor you can enjoy
every day
STRONG Strong avor with a clear,
consistent aftertaste
Size Amount of brewed
coee
Guide to the amount of
ground coee
(measuring scoop)
S (Small) Approx. 4.0 . oz. Approx. 1 scoop (0.4-0.5 oz.)
M (Medium)
Approx. 8.0 . oz. Approx. 2 scoop (0.7-1.0 oz.)
L (Large) Approx. 12.0 . oz. Approx. 3 scoop (1.0-1.3 oz.)
ICED Mix with ice to make iced coee
or milk to make cafe au lait
Size Amount of brewed
coee
Guide to the amount of
ground coee
(measuring scoop)
S (Small) Approx. 2.5 . oz. Approx. 1 scoop (0.4-0.6 oz.)
M (Medium)
Approx. 5.0 . oz. Approx. 2 scoop (0.8-1.1 oz.)
L (Large) Approx. 7.5 . oz. Approx. 3 scoop (1.3-1.4 oz.)
When residue is noticeable on the dripper stand or
the measuring scoop, wash them with water, and dry
them thoroughly before use.
Dripper stand
Measuring scoop
The amount of brewed coee will depend on the
modes and the sizes. In addition, the amount of
brewed coee may be increased or decreased
depending on the water content of the ground coee
and other factors.

10
How to Brew Coee
1Set ground coee
1
Turn the dripper 90 degrees so that the dripper handle
faces the front and remove the dripper from the main body.
2
While referring to the guide on p. 9, adjust
the amount of ground coee as desired.
While referring to the guide on p. 9, adjust
the amount of ground coee as desired.
Place the dripper on the dripper stand.
Fold a paper lter along the seam and set the paper lter.
Add enough ground coee for the size using the
measuring scoop.
Use the cone-shaped paper lters for 1 to 4 cups supplied
as accessories. Additional lters are commercially
available.
Level the ground coee
so it brews evenly.
Level the ground coee
so it brews evenly.
Insert the dripper into the main body straight from the
front while holding its handle as shown in the gure.
4
Turn the dripper 90 degrees to the left or right so that the
marks on the dripper and the main body are aligned.
2
Fill the water tank with water
1
Carafe lidCarafe lidCarafe lid
Hold the empty carafe with its lid attached and place the
carafe on the main body so it is straight.
Do not brew coee with the carafe lid
removed.
Do not put any ice or other
objects in the carafe before brewing.
The coee may overow, causing burns or
electric shock.
2
Grip the water tank by its sides while holding the main
body and remove the tank.
Remove the lid of the water tank. Fill the tank with water
up to the size you desire (for the REGULAR and STRONG
modes, refer to the measurements on the HOT side).
Attach the lid on the water tank.
Do not ll the water tank above the
engraved MAX mark.
Doing so may cause electric shock or malfunction.
4
Grip the water tank by its sides while holding the main
body and insert the tank.

11
3Brew coee
1Insert the power plug into the
outlet. Press the power button to
turn the power on.
The operation display lamp and the power display
indicator will light up. The mode indicator and the
size indicator will light up, showing the settings
selected the last time.
2Press the mode button repeatedly
to select the mode.
Press the size button repeatedly
to select the size.
4Press the start button to
begin brewing.
The brewing will be started. The
brew time is about 4 to 7 minutes,
depending on the mode and the
ambient temperature.
5Make sure the brewing is completed and the
operation display lamp is turned o.
6Make sure no hot water remains in the dripper.
7
Remove the dripper. Discard the paper lter and the
ground coee. Discard the water remaining in the water
tank as well.
8Disconnect the power plug from the outlet.
Notes:
• Press the start button to suspend brewing. Press
the start button again to resume.
• If the appliance is unattended for 5 minutes with the
power turned on only or the brewing suspended,
the power will be automatically turned o.
• Press the power button to stop brewing halfway.
If the brewing still continues, disconnect the
power plug.
For a short time after stopping brewing, do
not touch the appliance anywhere other
than the operation panel, the dripper handle,
the carafe handle, or the power plug.
Hot water or steam may continue to be discharged
for several seconds.
Operation panel
Power button
1
Mode button
2
Size button
Start button
4
Operation
display lamp
Power display indicator
Mode indicator Size indicator
Operation of the main body during the brewing
Bypass
brewing spout
Preheating of the heater is started with an operating
sound. In the REGULAR and STRONG modes, steam
is discharged from the bypass brewing spout to warm
up the carafe after the preheating is completed.
Nozzle
Hot water is delivered from the nozzle to pre-wet the
ground coee for 25 to 40 seconds.
After that, hot water is repeatedly delivered and
stopped while brewing the coee.
When brewing is completed, the operation display
lamp is turned o with the completion sound.
The power is automatically turned o.
Keep your face and hands away from the
nozzle, the brewing spout, and the bypass
brewing spout during brewing.
Steam spreads around the appliance during
brewing. Be careful as there is a risk of burns.

12
4Pour the coee
For REGULAR / STRONG
1Remove the carafe from the main body.
2Gently shake the carafe to even out the
strength of the coee.
Pour the coee into cups.
Empty the carafe so that no coee remains.
For ICED
After brewing
Guide for the amount of ice to
be put in the carafe: 1.6 oz.
for Small, 3.2 oz. for Medium,
and 4.8 oz. for Large
Guide for the amount of ice to
be put in the carafe: 1.6 oz.
for Small, 3.2 oz. for Medium,
and 4.8 oz. for Large
1Remove the carafe from the main body.
2Add some ice to the brewed coee in
the carafe.
By adding ice, the strength will be evened out
and the ice put in heat resistant glasses or cups
will melt more slowly.
Right after brewing, be careful with the carafe lid
because it is hot.
Gently shake the carafe to cool the coee
and even out its strength.
4Put some ice into the heat resistant
glasses or cups.
5Pour the coee into the heat resistant
glasses or cups.
Empty the carafe so that no coee remains.
RECIPES
Recommended modes for staple beverages.
Hot Cafe au Lait
STRONG
1.
Brew coee with the STRONG mode.
2.
Warm some milk while brewing
the coee.
. Pour 1 and 2 into cups.
Tips
We recommend warming the milk to about
140°F. Milk adds a mild sweetness and
pairs well with coee.
Iced Cafe au Lait
ICED
1.
Brew coee with the ICED mode.
2.
Put some milk and ice into glasses.
. Slowly pour 1 into 2.
Tips
Pour the coee slowly to create a beautiful
white and black gradation.
Coee with Whipped Cream
STRONG
1.
Brew coee with the STRONG mode.
2.
Pour 1 into cups and let them
cool slightly.
. Put whipped cream on top of 2.
Tips
Use low-fat cream to moderately bring out
the avor of the coee.

13
Cleaning
Keep the appliance clean while using it and perform cleaning frequently.
Cleaning to be performed every time after use
Wiping with a
damp cloth
(main body)
Disconnect the power plug and let the main body cool before performing the procedure. Wipe the
main body with a damp cloth or the like with the water thoroughly wrung out. Dry the main body
with a soft cloth or the like.
Cleaning with
water
The following parts can be cleaned with water. Disconnect the power plug and let the main body cool
before performing the procedure. Thoroughly dry the parts after cleaning them with water.
Dripper
Measuring scoopDripper stand
Carafe
Water tank
• When you clean the parts with detergent, use dishwashing detergent (neutral).
Thoroughly rinse them with water and dry them with a soft cloth or the like. If
moisture remains on the parts, it may cause deterioration or discoloration of
the resin and the like or scale accumulation.
• Use a sponge, soft cloth, etc.
• Do not use alcohols, acidic and alkaline detergents, benzine, thinners,
cleansers, scrub brushes, etc.
• Do not use a dishwasher or dish dryer.
Note: Clean the dripper stand and the measuring scoop when residue is noticeable.
Cleaning to be regularly performed about once per month or performed before storing the appliance
Cleaning run
The cleaning run uses an aqueous solution of citric acid to clean the main body. Prepare citric acid (one tablespoon).
After cleaning the main body with the aqueous solution of citric acid, rinse the main body with fresh water and drain.
Cleaning with an aqueous solution of citric acid
1Without using ground coee or a paper lter, place the
empty carafe with its lid attached and the dripper on the
main body.
2Put one tablespoon of citric acid and approximately 17
uid ounces of water into a separate container and mix
them well to prepare an aqueous solution of citric acid.
Remove the water tank from the main body. Fill the water
tank with the aqueous solution of citric acid up to HOT
, and return the water tank to the main body.
Insert the power plug into the outlet and press the
power button.
4Select the REGULAR mode and L (Large), and press the
start button.
Be careful as hot water and steam will be discharged.
When the cleaning with an aqueous solution of citric acid is
completed, you hear the completion sound.
5Discard the aqueous solution of citric acid in the carafe
and the water tank.
Rinsing with fresh water and draining
6Remove the water tank from the main body. Fill the water
tank with water up to HOT , and return the water
tank to the main body. Place the empty carafe on the main
body with its lid attached.
7Press the power button. Hold down the mode button and
select the Cleaning mode. Press the start button to
start rinsing.
When rinsing with fresh water is completed and the water
inside the main body is drained into the carafe, you hear the
completion sound.
8Discard the water in the carafe.
9Repeat steps to . .
Continue the procedure until no residue or smell of citric acid
is noticeable.
10 Disconnect the power plug from the outlet.
11 Wipe the main body with a damp cloth or the like with the
water thoroughly wrung out. Dry the main body with a soft
cloth or the like.
6 8
Specications
Applications Household, indoor (Household use only)
Dimensions W 5.5 in. × D 11.7 in. × H 14.9 in. (with the water tank, the
dripper, and the carafe placed on the main body, excluding
the power cord)
Weight Approx. 7.5 lb. (with the water tank, the dripper, and the
carafe placed on the main body)
Power cord
length Approx. 3.3 ft.
Maximum
capacity
Carafe: Approx. 17 . oz.
Water tank: Approx. 16.5 . oz.
Carafe materials Stainless steel (double-walled vacuum sealed structure), PP
Brew method Open drip type
Brew modes REGULAR, STRONG, and ICED
Amount of
brewed coee
Small, Medium, or Large
REGULAR and STRONG: Approx. 4.0 . oz., approx. 8.0 . oz.,
or approx. 12.0 . oz.
ICED: Approx. 2.5 . oz., approx. 5.0 . oz., or approx. 7.5 . oz.
Brew time Approx. 4 to 7 min. (depending on the modes and the
ambient temperature)
Ratings 120 V AC, 1,450 W, 60 Hz

14
When an Error Is Indicated
If a problem occurs, the operation display lamp and the indicators on the operation panel blink with the error sound.
Error Indication ● Points to check / ▶ Solutions
The size indicator blinks.
● Is the water tank lled with water? Is the water tank set
securely in place?
▶ Make sure the water tank is lled with water. Set the
water tank securely. Press the start button to resume.
Cleaning and ICED blink. ● Is the dripper set correctly in place?
Is a dripper other than the supplied one being used?
▶ While referring to p. 10, set the supplied dripper
securely. Press the start button to resume.
STRONG and
REGULAR blink. ● Is the carafe set correctly in place?
Is a carafe other than the supplied one being used?
▶ While referring to p. 10, set the supplied carafe
securely. Press the start button to resume.
All indicators for the modes
and the sizes blink. ▶It is possible that an internal malfunction has occurred.
Turn the power o and disconnect the power plug.
Please contact BALMUDA Support (p. 15).
Troubleshooting
Issue ● Points to check / ▶ Solutions
The hot water is smelly.
The hot water is delivered slowly.
● Has the appliance been unused for a long period after the last use?
▶If the appliance has been unused for a long period, perform “Flushing with hot water” (p. 9).
● Has the appliance been rinsed thoroughly after cleaning with an aqueous solution of citric acid?
▶While referring to p. 13, thoroughly rinse the appliance so that no residue or smell of citric
acid remains.
● Are foreign substances clogged in the connection between the main body and the water tank?
▶If you try to remove them forcibly, malfunction may occur. Please contact BALMUDA Support (p. 15).
Milky-colored grains formed on the
hot water outlet.
▶ Water scale may accumulate during use. It has no eect on health. If it concerns you, perform
“Cleaning run” (p. 13) and wipe it o with a soft cloth or the like.
The lamp will not light up when the
power button is pressed.
● Is the power plug inserted into the outlet?
▶Insert the power plug into the outlet.
No hot water is delivered.
No coee is brewed.
● Is the water tank lled with water? Is the water tank set securely in place?
▶ Make sure the water tank is lled with water. Set the water tank securely.
● Are foreign substances clogged in the hot water outlet?
▶If you try to remove them forcibly, malfunction may occur. Please contact BALMUDA Support (p. 15).
● Are the dripper and the carafe set correctly in place? Is a dripper other than the supplied one being
used? Is the carafe lid open?
▶While referring to p. 10, set the supplied dripper and carafe securely.
Water remains in the water tank
after brewing.
▶This does not indicate malfunction. The appliance precisely measures the amount of hot water
best suited for each brew mode and size. Even if the water is set according to the guide line for
the size, the specication allows water to remain after brewing. If water remains after brewing,
discard the water.
Coee overows.
● Has milk or ice been put in the carafe? Is there previously brewed coee remaining?
▶ Brew coee with an empty carafe.
● Are the carafe lid and the carafe set securely in place?
▶ If the carafe lid or the carafe is not set correctly in place, coee may overow. While referring to
p. 10, set them securely.
Coee is too strong or weak.
● Is the paper lter used a cone-shaped one for 1 to 4 cups? Is the amount of ground coee adequate?
Is the size set correctly?
▶ While referring to p. 9 and 10, set an appropriate lter and an adequate amount of ground
coee. The strength depends on the amount, grind size, roast level, and freshness of the ground
coee. In addition, set the size according to the amount of ground coee.
Coee is not hot enough.
● Are the dripper, the carafe, and the cups cold?
▶Depending on the usage environment, the dripper, the carafe, and the cups may be cold. Warm
them in advance.

15
Items Sold Separately
Consumables and exclusive parts are
sold separately.
To purchase:
https://us.balmuda.com/
Item name Model
number Item name Model
number
Dripper K06-A130 Carafe lid K06-E130
Water tank (lid included) K06-B130 Measuring scoop K06-F130
Water tank lid K06-C130 Dripper stand K06-G130
Carafe (lid included) K06-D130
Note: Store this manual with great care.
For information on our warranty and privacy policies, please
refer to the BALMUDA website (https://us.balmuda.com).
833-333-1033
https://us.balmuda.com
BALMUDA Inc. 5-1-21 Kyonancho, Musashino, Tokyo 180-0023, JAPAN
Importer: transcosmos America, Inc. 879 West 190th Street #410, Gardena, CA 90248
Warranty Policy and Privacy Policy
Product Registration
Register your product to receive convenient product
support and to sign up for news and exclusive oers.
Table of contents
Other BALMUDA Coffee Maker manuals
Popular Coffee Maker manuals by other brands

Mr. Coffee
Mr. Coffee ECM7 operating instructions

LaCimbali
LaCimbali M29 Selectron Use and installation

Mr. Coffee
Mr. Coffee SCTX Series user manual

Mr. Coffee
Mr. Coffee ECMP2 operating instructions

Silvercrest
Silvercrest SEM 1100 A1 operating instructions

Silvercrest
Silvercrest SKAS 1000 A16 operating instructions