7
SYNC FINISH
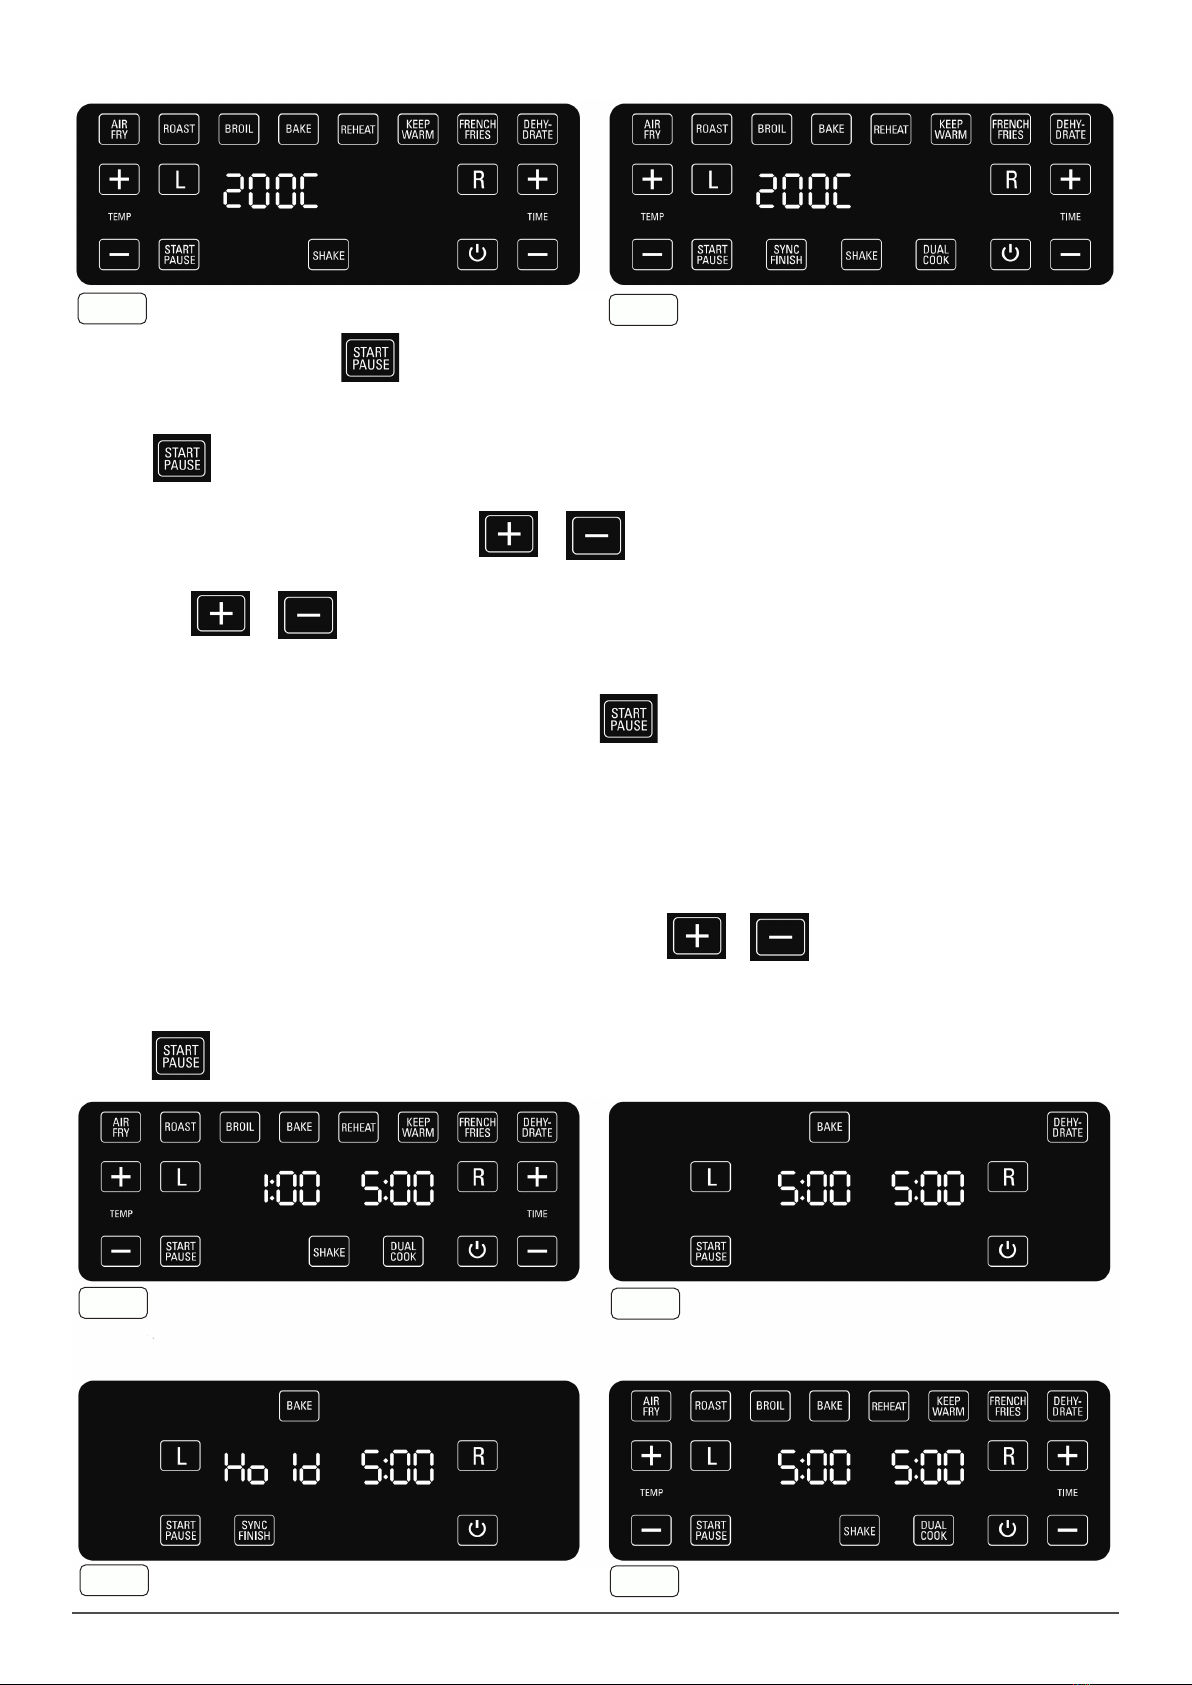
• 1. Programme the Dual Air Fryer LEFT and RIGHT baskets following Dual Basket: Manual Operating Steps1 through 3.
IMPORTANT: Both LEFT and RIGHT baskets must be programmed.
• 2. Press to ensure both baskets will complete cooking together.
• Press to begin operation.
• 3. HOLD will appear on the display on the basket side that is being held as the Dual Air Fryer sychronises the nal cooking times, g.8.
NOTE: Once cooking has started the SYNC function will not be operable.
DUAL COOK
• 1. Press Settings for both the Air Fryer’s baskets will be automatically duplicated, g.9.
• Press to begin operation.
AIR FRY TECHNIQUE
• Please consult the Air Fry/ Roast Cooking Chart and/or follow package directions for suggestedTIME and TEMP.
• 1. Always pat food dry before cooking to encourage browning and avoid excess smoke.
• 2. To assure even cooking/browning, ALWAYS open the active basket halfway through the cook time and check, turn or shake foods in the fryer
basket. Some recipes may call to brush or spray oil halfway through cooking. Adjust TEMP or TIME if needed.
• WARNING! Extreme caution must be used when handling any fryer basket or crisping tray. Avoid escaping steam from fryer basket and the food.
• CAUTION: Always use oven mitts when handling the hot air fryer basket.
• CAUTION: Hot oil can collect at the base of the basket. Use caution when removing cooking foods.
• 3. To avoid excess smoke, when cooking naturally high fat foods, such as bacon, chicken wings or sausages, it may be necessary to empty fat
from the fryer basket between batches.
• 4. To ensure crispiness, make sure the skin or exterior surface of your food is dry! Air fry small batches of freshly breaded foods. Create more
surface area by cutting food into smaller pieces.
• Press breading onto food to help it adhere. Refrigerate breaded foods for at least 30 minutes before frying.
• To improve crispiness, dust poultry skin or exterior surface lightly with corn starch. Spray with oil.
• 6. Arrange breaded food in fryer basket so that food is not touching to allow air ow on all surfaces.
• 7. Spray oils work best. Oil is distributed evenly and less oil is needed. Canola, olive, avocado, coconut, grapeseed, peanut, or vegetable oil work
well.
• 8. Shake air fried foods out onto serving area. Promptly insert any fryer basket into Air Fryer body and lock into place. Continue air frying
subsequent batches, if any.
• 9. Press REHEAT to air fry food for 6 minutes at 250°C. Simply pull out the active basket to interrupt air frying at any time to check on food serving
temperature. Repeat to extend cook time until food is heated to your liking.
10. Unplug the Dual Basket Air Fryer when not in use.
AIR FRYING PRE-PACKAGED FROZEN FOODS
• As a rule, depending on the food and amount to be cooked, suggested cook posted cook TIMES may have to be reduced slightly. Always check
food halfway through cooking time to determine nal cook TIME and TEMP.
• Always check cooking progress after TIME has expired.
HINTS FOR ROASTING
• A meat thermometer inserted into the centre of the meat should be used to determine whether meat is cooked through.
• Cook meats to 5 to 10 degrees below desired ‘doneness’ (internal temperature). Allow meat to stand 15 to 20 minutes before serving. The
temperature will continue to rise whilst standing.
• ROAST large, tender cuts of meat and poultry. Seasoning prior to cooking adds to the avour and the aroma during cooking.
• A layer of fat on the top of the roast promotes better browning and provides natural basting.
• To speed up browning, brush lean cuts of meat, chicken and sh with oil, margarine or melted butter.
• Place meat (fat side up) and turn over half-way through ROAST time.
• IMPORTANT: Turn and check food halfway through ROAST time.
• Press to turn this feature OFF. SHAKE will disappear from the screen.
HINTS FOR BROIL
• Use BROIL to melt cheese or to brown crumb toppings.
• Typically, BROIL is used for thinner, tender cuts of meats, or marinated meats, chops, poultry or sh, fruits and vegetables
• Dry marinated meats and sh before broiling. ALWAYS pat meat dry to reduce smoke and promote brownness during broiling.
• To speed up browning and add lusciousness, brush lean cuts of meat, chicken and sh with oil or melted butter.
• Trim excess fat from meat and score edges to prevent curling. Thaw frozen meats and sh before broiling.
• BROIL TIME is determined by the desired ‘doneness’. Always use a meat thermometer.
HINTS FOR BAKE
• When using BAKE, you may need to lower the bake recipe temperature by 10°C to a minimum of 15°C.
• Check package directions to determine if the container is suitable for use in an Air Fryer.
• Press to turn this feature OFF. SHAKE will disappear from the screen.
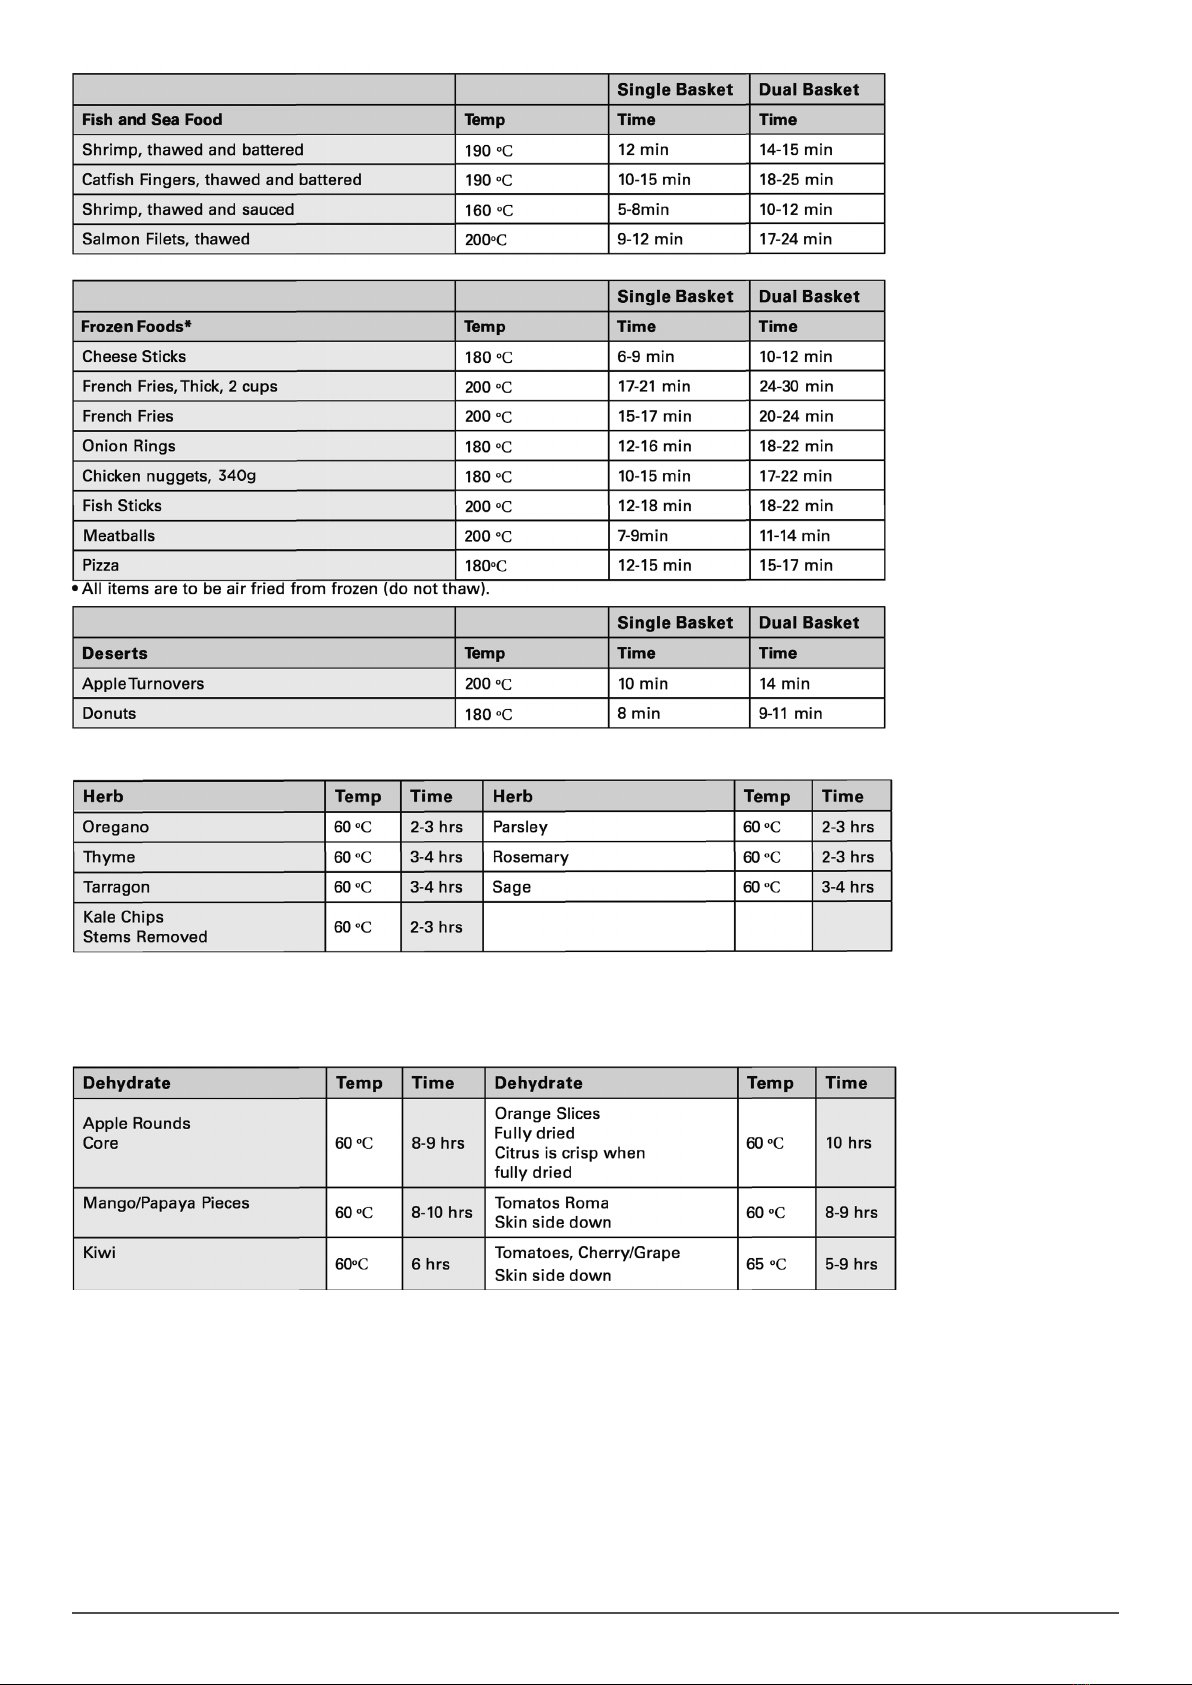
HINTS FOR DEHYDRATE
• NOTE: When manually programming DEHYDRATE menu selection, TIME will increase in 1 hour increments.
• Dehydrate fresh, ripe foods to preserve nutrients and enhance avour.
• Your Dual Basket Air Fryer’s automated drying makes home dehydration both simple and rewarding and ensures healthy, safe, preservative-free
results.
• DEHYDRATE combines low, steady heat with steady convection fan power.
• Precise low temperatures dry out foods evenly without cooking or overheating.
• NOTE: Turn food several times during DEHYDRATE.