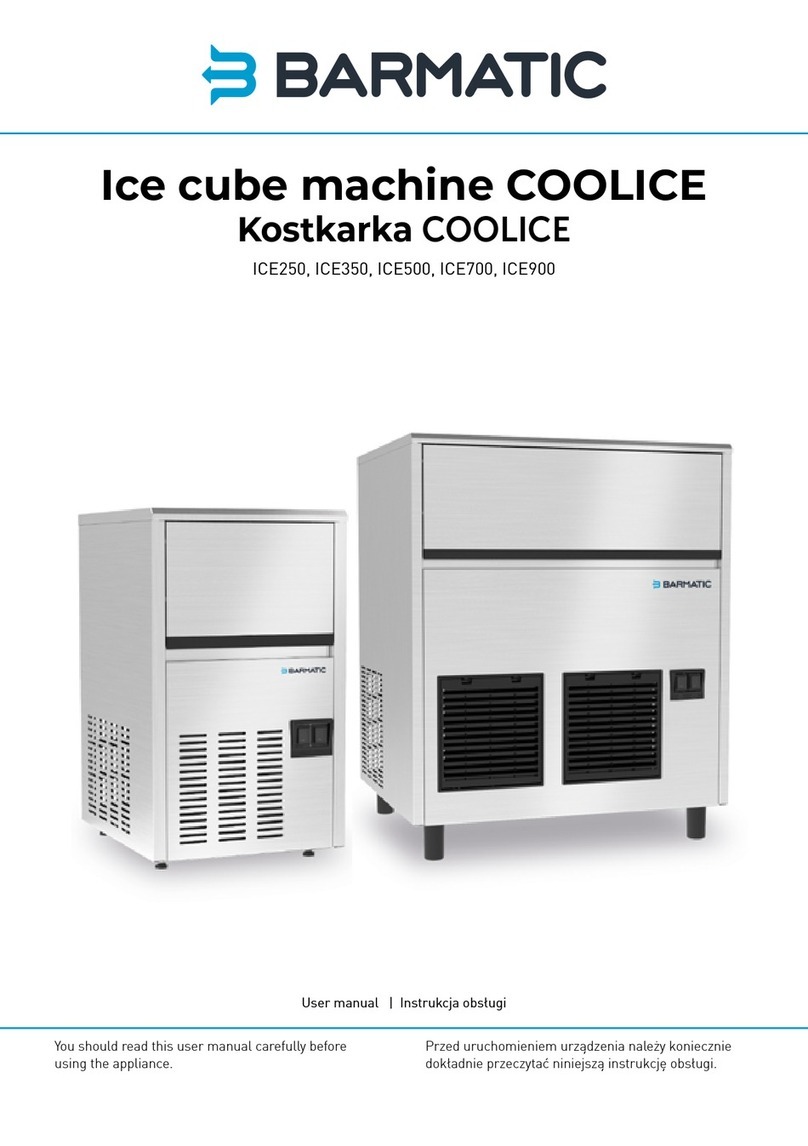
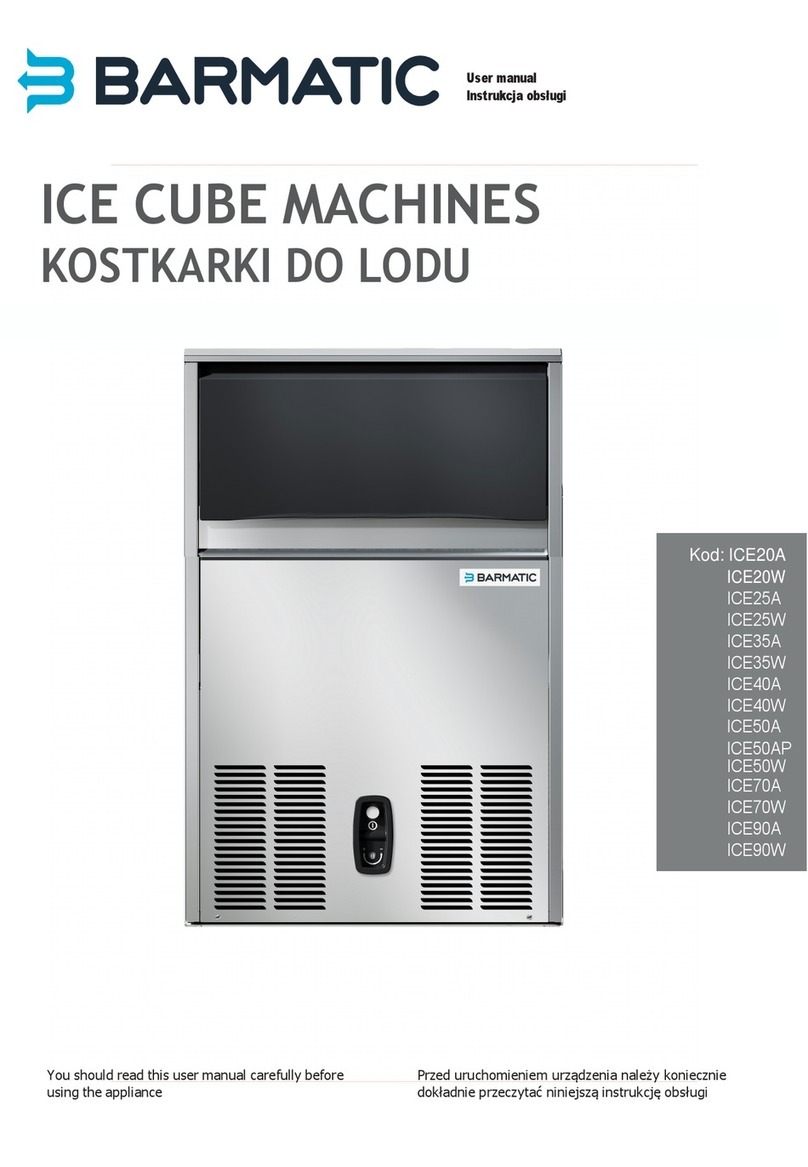
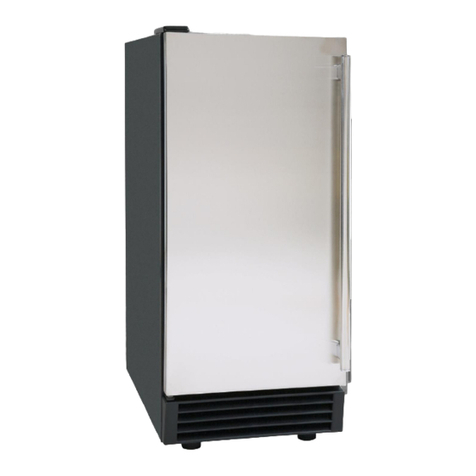
BARMATIC ICE400 User manual

English .............................................................. 6
Deutsch.............................................................. 12
Nederlands........................................................ 18
POLSKI............................................................... 25
Français ............................................................. 31
Italiano ............................................................... 38
Română.............................................................. 44
Ελληνικά............................................................. 51
Hrvatski.............................................................. 57
Čeština .............................................................. 63
Magyar ............................................................... 69
Український....................................................... 75
Eesti keel ........................................................... 82
Latviski............................................................... 88
Lietuvių .............................................................. 94
Português .......................................................... 100
Español .............................................................. 106
Slovenský ........................................................... 113
Dansk................................................................. 118
Suomalainen...................................................... 124
Norsk ................................................................. 130
Slovenščina........................................................ 136
Svenska.............................................................. 142
български .....................................................147
Русский.............................................................. 154
270462, 270479
ICE CUBE MACHINE
ICE400
GB
DE
NL
PL
FR
IT
RO
HR
CZ
HU
UA
LV
LT
FI
NO
BG
SI
SE
SK
DK
ES
PT
EE
GR
RU
ICE CUBE MACHINE
EISWÜRFELBEREITER
IJSBLOKJESMACHINE
KOSTKARKA DO LODU
MACHINE À GLAÇONS
FABBRICATORE DI
GHIACCIO
MAȘINĂ CUBURI DE
GHEAȚĂ
ΜΗΧΑΝΗ ΠΑΓΟΥ
STROJ ZA PRAVLJENJE
KOCKICA LEDA
VÝROBNÍK LEDU
JÉGGÉP
ЛЬОДОГЕНЕРАТОР
КУБИКОВОГО ЛЬОДУ
JÄÄKUUBIKU MASIN
LEDUS GABALIŅU
RAŽOTĀJS
LEDO GENERATORIUS
MÁQUINA DE CUBOS DE
GELO
MÁQUINA DE HIELOS
VÝROBNÍK KOCIEK ĽADU
ISTERNING MASKINE
LUOTIJÄÄPALAKONE
ISBITMASKIN
IZDELOVALEC LEDENIH
KOCK
ISKUBSMASKIN
МАШИНА ЗА ЛЕД НА
КУБЧЕТА
ЛЬДОГЕНЕРАТОР
GB:User manual
DE: Benutzerhandbuch
NL:Gebruikershandleiding
PL: Instrukcja obsługi
FR: Manuel de l’utilisateur
IT: Manuale utente
RO:Manual de utilizare
GR:Εγχειρίδιο χρήστη
HR:Korisnički priručnik
CZ: Uživatelská příručka
HU:Felhasználói kézikönyv
UA: Посібник користувача
EE: Kasutusjuhend
LV: Lietotāja rokasgrāmata
LT: Naudojimo instrukcija
PT: Manual do utilizador
ES: Manual del usuario
SK: Používateľská príručka
DK:Brugervejledning
FI: Käyttöopas
NO:Brukerhåndbok
SI: Navodila za uporabo
SE: Användarhandbok
BG:Ръководство за потребителя
RU:Руководство пользователя

2
GB: NOTE: This manual is translated from original English manual using AI and machine translations.
DE: HINWEIS: Dieses Handbuch wurde aus dem englischen Originalhandbuch mit KI und maschinellen Übersetzungen übersetzt.
NL: OPMERKING: Deze handleiding is vertaald vanuit de originele Engelse handleiding met behulp van AI en machinevertalingen.
PL: UWAGA: Niniejszy podręcznik został przetłumaczony z oryginalnego podręcznika w języku angielskim przy użyciu AI i tłumaczeń maszynowych.
FR: REMARQUE : Ce manuel est traduit à partir du manuel original en anglais à l’aide de l’IA et de traductions automatiques.
IT: NOTE: Questo manuale è tradotto dal manuale originale in inglese utilizzando l’intelligenza artificiale e le traduzioni automatiche.
RO: NOTĂ: Acest manual este tradus din manualul original în limba engleză folosind AI și traduceri automate.
GR: ΣΗΜΕΊΩΣΗ: Αυτό το εγχειρίδιο μεταφράζεται από το πρωτότυπο αγγλικό εγχειρίδιο χρησιμοποιώντας AI και αυτόματες μεταφράσεις.
HR: NAPOMENA: Ovaj priručnik je preveden iz izvornog engleskog priručnika s AI i strojnim prijevodima.
CZ: POZNÁMKA: Tato příručka je přeložena z původní anglické příručky pomocí umělé inteligence a strojových překladů.
HU:MEGJEGYZÉS: Ez a kézikönyv az eredeti angol kézikönyvből származik, mesterséges intelligencia és gépi fordítások segítségével.
UA: ПРИМІТКА: Цей посібник перекладається з оригінального англійського посібника з використанням штучного інтелекту та машинного
перекладу.
EE: MÄRKUS: Käesolev kasutusjuhend on tõlgitud originaal inglise keeles, kasutades AI ja masinate tõlkeid.
LV: PIEZĪME: Šī rokasgrāmata tiek tulkota no oriģinālās angļu valodas rokasgrāmatas, izmantojot mākslīgā intelekta un veļas mašīnas tulkojumus.
LT: PASTABA: Šis vadovas išverstas iš originalaus anglų kalbos vadovo naudojant dirbtinį intelektą ir mašininį vertimą.
PT: NOTA: Este manual é traduzido do manual original em inglês utilizando IA e traduções de máquinas.
ES: NOTA: Este manual está traducido del manual original en inglés utilizando IA y traducciones automáticas.
SK: POZNÁMKA: Táto príručka je preložená z pôvodnej anglickej príručky pomocou umelej inteligencie a strojového prekladu.
DK: BEMÆRK: Denne vejledning er oversat fra den originale engelske vejledning ved hjælp af AI og maskinoversættelser.
FI: HUOMAUTUS: Tämä opas on käännetty alkuperäisestä englanninkielisestä oppaasta käyttäen tekoälyä ja konekäännöksiä.
NO:MERK: Denne håndboken oversettes fra den originale engelske håndboken ved hjelp av AI og maskinoversettelser.
SI: OPOMBA: Ta priročnik je preveden iz izvirnega angleškega priročnika z uporabo umetne inteligence in strojnih prevodov.
SE: NOTERA: Denna handbok är översatt från den engelska originalmanualen med AI och maskinöversättningar.
BG: ЗАБЕЛЕЖКА: Това ръководство е преведено от оригиналното английско ръководство с помощта на AI и машинни преводи.
RU: ПРИМЕЧАНИЕ: Это руководство переведено из оригинального руководства на английском языке с использованием ИИ и машинных
переводов.
GB: Read user manual and keep this with the appliance.
DE: Lesen Sie das Benutzerhandbuch und bewahren Sie es
zusammen mit dem Gerät auf.
NL: Lees de gebruikershandleiding en bewaar deze bij het
apparaat.
PL: Należy przeczytać instrukcję obsługi i zachować ją wraz
z urządzeniem.
FR: Lisez le manuel d’utilisation et conservez-le avec
l’appareil.
IT: Leggere il manuale dell’utente e conservarlo con l’appa-
recchiatura.
RO: Citiți manualul de utilizare și păstrați-l împreună cu
aparatul.
GR: Διαβάστε το εγχειρίδιο χρήστη και φυλάξτε το μαζί με τη
συσκευή.
HR: Pročitajte upute za uporabu i sačuvajte ovo uz uređaj.
CZ: Přečtěte si uživatelskou příručku a uschovejte ji u
spotřebiče.
HU: Olvassa el a használati útmutatót, és tartsa azt a kés-
zülék közelében.
UA: Прочитайте посібник користувача та тримайте його
разом із приладом.
EE: Lugege kasutusjuhendit ja hoidke seda koos seadmega.
LV: Izlasiet lietošanas pamācību un saglabājiet to kopā ar
ierīci.
LT: Perskaitykite naudojimo instrukciją ir palikite ją su
prietaisu.
PT: Leia o manual do utilizador e guarde-o juntamente com
o aparelho.
ES: Lea el manual del usuario y consérvelo con el aparato.
SK: Prečítajte si návod na použitie a uschovajte ho spolu so
spotrebičom.
DK: Læs brugervejledningen, og opbevar den sammen med
apparatet.
FI: Lue käyttöohje ja säilytä se laitteen mukana.
NO: Les bruksanvisningen og ta vare på den.
SI: Preberite navodila za uporabo in jih shranite skupaj z
napravo.
SE: Läs bruksanvisningen och förvara den tillsammans med
produkten.
BG: Прочетете ръководството за потребителя и го запазете
заедно с уреда.
RU: Прочтите руководство пользователя и сохраните его
вместе с прибором.
GB: For indoor use only.
DE: Nur zur Verwendung im Innenbereich.
NL: Alleen voor gebruik binnenshuis.
PL: Do użytku wewnątrz pomieszczeń.
FR: Pour l’usage à l’intérieur seulement.
IT: Destinato solo all’uso domestico.
RO: Doar pentru uz la interior.
GR: Για χρήση μόνο σε εσωτερικό χώρο.
HR: Samo za unutarnju upotrebu.
CZ: Pouze pro vnitřní použití.
HU: Csak beltéri használatra.
UA: Використовувати тільки всередині приміщень.
EE: Ainult sisetingimustes kasutamiseks.
LV: Tikai lietošanai telpās.
LT: Naudoti tik patalpoje.
PT: Apenas para uso interno.
ES: Sólo para uso en interiores.
SK: Iba na vnútorné použitie.
DK: Kun til indendørs brug.
FI: Vain sisäkäyttöön.
NO: Kun til innendørs bruk.
SI: Samo za uporabo v zaprtih prostorih.
SE: Endast för inomhusbruk.
BG: Да се използва само на закрито.
RU: Использовать только в помещениях.
INDOOR
READ MANUAL
HEAVY

3
1
2
3

4
GB: Technical specifications / DE: Technische Angaben / NL: Technische gegevens / PL: Dane techniczne / FR: Données tech-
niques / IT: Parametri di base / RO: Parametrii de bază / GR: Βασικές παράμετροι / HR: Tehnički podaci / CZ: Technická specifikace
/ HU: Műszaki adatok / UA: Технічні характеристики / EE: Tehnilised andmed / LV: Tehniskās specifikācijas / LT: Techninės speci-
fikacijos / PT: Especificações técnicas / ES: Especificaciones técnicas / SK: Technické špecifikácie / DK: Technical specifications
/ FI: Tekniset tiedot / NO: Tekniske spesifikasjoner / SI: Tehnične specifikacije / SE: Tekniska specifikationer / BG: Технически
спецификации / RU: Технические данные
A 270462 270479
B ICE400ARN ICE400WRN
C 230 V 50 Hz
D 3350 W 3100 W
EI
FR452A / 2000g
GT
H5-43ºC
I 5-35ºC
J 1-6 bar
K 345kg/24h
L 1321x638x(H)978 mm
M 165kg
A: GB:Item no. / DE:Art.-Nr. / NL:Artikelnr. / PL:Nr pozycji / FR:N° d’article / IT:N. articolo / RO:Nr. articolului/ GR:Αρ. είδους /
HR:Broj stavke / CZ:Položka č. / HU:Cikkszám / UA:Номер елемента / EE:Artikli nr / LV:Vienums Nr. / LT:Prekės Nr. / PT:Item n.o
/ ES:N.o de artículo / SK:Č. položky / DK:Varenr. / FI:Kohteen nro / NO:Varenr. / SI:Št. izdelka / SE:Art.nr / BG:Номер на елемент
/ RU:Номер позиции
B: GB:Model / DE:Modell / NL:Model / PL:Model / FR:Modèle / IT:Modello / RO:Model / GR:Μοντέλο / HR:Model / CZ:Model / HU:-
Model / UA:Модель / EE:Mudel / LV:Modelis / LT:Modelis / PT:Modelo / ES:Modelo / SK:Model / DK:Model / FI:Malli / NO:Modell
/ SI:Model / SE:Modell / BG:Модел / RU:Модель
C: GB:Rated voltage and frequency / DE:Nennspannung und Frequenz / NL:Nominale spanning en frequentie / PL:Znamionowe
napięcie i częstotliwość / FR:Tension et fréquence nominales / IT:Tensione e frequenza nominali / RO:Tensiune nominală și
frecvență / GR:Ονομαστική τάση και συχνότητα / HR:Nazivni napon i frekvencija / CZ:Jmenovité napětí a frekvence / HU:Névleg-
es feszültség és frekvencia / UA:Номінальна напруга та частота / EE:Nimipinge ja -sagedus / LV:Nominālais spriegums un
frekvence / LT:Vardinė įtampa ir dažnis / PT:Tensão e frequência nominais / ES:Tensión y frecuencia nominales / SK:Menovité
napätie a frekvencia / DK:Nominel spænding og frekvens / FI:Nimellisjännite ja -taajuus / NO:Nominell spenning og frekvens /
SI:Nazivna napetost in frekvenca / SE:Märkspänning och frekvens / BG:Номинално напрежение и честота / RU:Номинальное
напряжение и частота
D: GB:Rated input power / DE:Nenneingangsleistung / NL:Nominaal ingangsvermogen / PL:Znamionowa moc wejściowa / FR:Pu-
issance d’entrée nominale / IT:Potenza nominale in ingresso / RO:Putere nominală de intrare / GR:Ονομαστική ισχύς εισόδου /
HR:Nazivna ulazna snaga / CZ:Jmenovitý vstupní výkon / HU:Névleges bemeneti teljesítmény / UA:Номінальна вхідна потужність
/ EE:Nimisisendvõimsus / LV:Nominālā ieejas jauda / LT:Vardinė įėjimo galia / PT:Potência de entrada nominal / ES:Potencia de
entrada nominal / SK:Menovitý vstupný výkon / DK:Nominel indgangseffekt / FI:Nimellistuloteho / NO:Nominell inngangseffekt /
SI:Nazivna vhodna moč / SE:Märkineffekt / BG:Номинална входяща мощност / RU:Номинальная входная мощность
E: GB:Protection class (Class) / DE:Schutzklasse (Klasse) / NL:Beschermingsklasse (klasse) / PL:Klasa ochrony (klasa) / FR:Classe
de protection (classe) / IT:Classe di protezione (classe) / RO:Clasă de protecție (clasă) / GR:Κλάση προστασίας (κατηγορία) /
HR:Klasa zaštite (klasa) / CZ:Třída ochrany (třída) / HU:Védelmi osztály (osztály) / UA:Клас захисту (клас) / EE:Kaitseklass (klass)
/ LV:Aizsardzības klase (klase) / LT:Apsaugos klasė (klasė) / PT:Classe de proteção (classe) / ES:Clase de protección (clase)
/ SK:Trieda ochrany (trieda) / DK:Beskyttelsesklasse (klasse) / FI:Suojausluokka (luokka) / NO:Beskyttelsesklasse (klasse) /
SI:Razred zaščite (razred) / SE:Skyddsklass (klass) / BG:Клас на защита (Клас) / RU:Класс защиты (класс)
F: GB:Refrigerant & amount / DE:Kältemittel & Menge / NL:Koelmiddel & hoeveelheid / PL:Czynnik chłodniczy i ilość / FR:Ré-
frigérant et quantité / IT:Refrigerante e quantità / RO:Refrigerant și cantitate / GR:Ψυκτικό & ποσότητα / HR:Rashladno sredstvo
i količina / CZ:Chladivo a množství / HU:Hűtőközeg és mennyiség / UA:Холодоагент і кількість / EE:Külmutusagens ja kogus /
LV:Aukstumaģents un daudzums / LT:Šaldymo agentas ir kiekis / PT:Refrigerante e quantidade / ES:Refrigerante y cantidad /
SK:Chladivo a množstvo / DK:Kølemiddel & mængde / FI:Kylmäaine ja määrä / NO:Kjølemiddel og mengde / SI:Hladilno sredstvo
in količina / SE:BG:RU:Хладагент и количество

5
G: GB:Climatic class / DE:Klimaklasse / NL:Klimaat klasse / PL:Klasa klimatyczna / FR:Classe climatique / IT:Classe di clima /
RO:Clasa de climă / GR:Κλιματική τάξη / HR:Klasa klime / CZ:Třída klimatu / HU:Klíma osztály / UA:Кліматичний клас / EE:Klii-
maklass / LV:Klimata klase / LT:Klimato klasė / PT:Classe de clima / ES:Clase climática / SK:Klimatická trieda / DK:klimaklasse
/ FI:ilmastoluokka / NO:klimaklasse / SI:klimatski razred / SE:klimatklass / BG:климатичен клас / RU:климатический класс
H: GB:Ambient temperature / DE:Umgebungstemperatur / NL:Omgevingstemperatuur / PL:Temperatura otoczenia / FR:Tempéra-
ture ambiante / IT:Temperatura ambiente / RO:Temperatura ambientala / GR:Θερμοκρασία περιβάλλοντος / HR:Temperatura
okoline / CZ:Teplota okolí / HU:Környezeti hőmérséklet / UA:Температура навколишнього середовища / EE:Ümbritsev tem-
peratuur / LV:Apkārtējās vides temperatūra / LT:Aplinkos temperatūra / PT:Temperatura ambiente / ES:Temperatura ambiente /
SK:Teplota okolia / DK:Umgebungstemperatur / FI:Omgivelsestemperatur / NO:Ympäristön lämpötila / SI:Omgivelsestemperatur
/ SE:Temperatura okolja / BG:Температура на околната среда / RU:Температура окружающей среды
I: GB:Water temperature / DE:Wassertemperatur / NL:Water temperatuur / PL:Temperatura wody / FR:La température de
l’eau / IT:Temperatura dell’acqua / RO:Temperatura apei / GR:Θερμοκρασία νερού / HR:Temperatura vode / CZ:Teplota vody /
HU:Vízhőmérséklet / UA:Температура води / EE:Vee temperatuur / LV:Ūdens temperatūra / LT:Vandens temperatūra / PT:Tem-
peratura da água / ES:Temperatura de agua / SK:Teplota vody / DK:Wassertemperatur / FI:Vandtemperatur / NO:Veden lämpötila
/ SI:Vanntemperatur / SE:Temperatura vode / BG:Температура на водата / RU:Температура воды
J: GB:Rated pressure / DE:Arbeitsdruck / NL:Werkdruk / PL:Ciśnienie znamionowe / FR:Pression / IT:Pressione di esercizio /
RO:Presiune de lucru / GR:Πίεση λειτουργίας / HR:Radni tlak / CZ:Pracovní tlak / HU:Víznyomás / UA:Робочий тиск / EE:Töörõhk
/ LV:Spiediens darbības laikā / LT:Darbinis slėgis / PT:Pressão de funcionamento / ES:Presión de funcionamiento / SK:Pra-
covný tlak / DK:Nominel tryk / FI:Nimellispaine / NO:Nominell trykk / SI:Nazivni tlak / SE:Märktryck / BG:Работно налягане /
RU:Рабочее давление
K: GB:Productivity / DE:Produktivität / NL:Productiviteit / PL:Wydajność / FR:Productivité / IT:Produttività / RO:Productivitate /
GR:Παραγωγικότητα / HR:Produktivnost / CZ:Produktivita / HU:Termelékenység / UA:Продуктивність / EE:Tootlikkus / LV:Produk-
tivitāte / LT:Produktyvumas / PT:Produtividade / ES:Productividad / SK:Produktivita / DK:Produktivitet / FI:Tuottavuus / NO:Pro-
duktivitet / SI:Produktivnost / SE:Produktivitet / BG:производителност / RU:Производительность
L: GB:Dimensions / DE:Abmessungen / NL:Afmetingen / PL:Wymiary / FR:Dimensions / IT:Dimensioni / RO:Dimensiuni /
GR:Διαστάσεις / HR:Dimenzije / CZ:Rozměry / HU:Méretek / UA:Розміри / EE:Mõõtmed / LV:Izmēri / LT:Matmenys / PT:Di-
mensões / ES:Dimensiones / SK:Rozmery / DK:Mål / FI:Mitat / NO:Mål / SI:Mere / SE:Mått / BG:Размери / RU:Размеры
M:GB:Net weight / DE:Nettogewicht / NL:Nettogewicht / PL:Waga netto / FR:Poids net / IT:Peso netto / RO:Greutate netă /
GR:Καθαρό βάρος / HR:Neto težina / CZ:Čistá hmotnost / HU:Nettó tömeg / UA:Вага нетто / EE:Netokaal / LV:Neto svars /
LT:Grynasis svoris / PT:Peso líquido / ES:Peso neto / SK:Čistá hmotnosť / DK:Nettovægt / FI:Nettopaino / NO:Nettovekt / SI:Neto
teža / SE:Nettovikt / BG:Нетно тегло / RU:Вес нетто
GB: Remark: Technical specification is subjected to change without prior notification.
DE: Anmerkung: Die technische Spezifikation kann ohne vorherige Ankündigung geändert werden.
NL: Opmerking: De technische specificatie zijn onderworpen aan wijzigingen zonder voorafgaande kennisgeving.
PL: Uwaga: Specyfikacja techniczna może zostać zmieniona bez powiadomienia.
FR: Remarque: La spécification technique peut être modifiée sans notification préalable.
IT: Osservazione: Le specifiche tecniche sono soggette a modifiche senza preavviso.
RO: Observație: Specificația tehnică se poate modifica fără notificare prealabilă.
GR: Σημείωση: Οι τεχνικές προδιαγραφές μπορούν να αλλάξουν χωρίς προειδοποίηση.
HR:Napomena: Tehničke specifikacije podložne su promjenama bez prethodne obavijesti.
CZ: Poznámka: Technická specifikace se může změnit bez předchozího upozornění.
HU:Megjegyzés: A műszaki adatok előzetes értesítés nélkül változhatnak.
UA: Зауваження: Технічні характеристики можуть змінюватися без попереднього повідомлення.
EE: Märkus: Tehnilisi andmeid võidakse muuta ilma eelneva teavitamiseta.
LV: Piezīme: Tehniskās specifikācijas var tikt mainītas bez iepriekšēja brīdinājuma.
LT: Pastaba: Techninė specifikacija gali būti keičiama be išankstinio įspėjimo.
PT: Observação: As especificações técnicas estão sujeitas a alterações sem notificação prévia.
ES: Observación: Las especificaciones técnicas están sujetas a cambios sin previo aviso.
SK: Poznámka: Technické špecifikácie podliehajú zmenám bez predchádzajúceho oznámenia.
DK: Bemærkning: Tekniske specifikationer kan ændres uden forudgående varsel.
FI: Huomautus: Teknisiä tietoja voidaan muuttaa ilman ennakkoilmoitusta.
NO:Merknad: Teknisk spesifikasjon kan endres uten forhåndsvarsel.
SI: Opomba: Tehnične specifikacije se lahko spremenijo brez predhodnega obvestila.
SE: Anmärkning: Tekniska specifikationer kan ändras utan föregående meddelande.
BG: Забележка: Техническите спецификации подлежат на промяна без предварително уведомление.
RU: Примечание. Технические характеристики могут быть изменены без предварительного уведомления.

6
GB
ENGLISH
Dear Customer,
Thank you for purchasing this Barmatic appliance. Read this
user manual carefully, paying particular attention to the safe-
ty regulations outlined below, before installing and using this
appliance for the first time.
Safety instructions
• Only use the appliance for the intended purpose it was de-
signed for, as described in this manual.
• The manufacturer is not liable for any damage caused by in-
correct operation and improper use.
• DANGER! RISK OF ELECTRIC SHOCK! Do not attempt
to repair the appliance by yourself. Do not immerse
the electrical parts of the appliance in water or other liquids.
Never hold the appliance under running water.
• NEVER USE A DAMAGED APPLIANCE! Check the electrical
connections and cord regularly for any damage. When dam-
aged, disconnect the appliance from the power supply. Any
repairs should only be carried out by a supplier or qualified
person to avoid danger or injury.
• WARNING! When positioning the appliance, route the power
cable safely if necessary to avoid unintentional pulling, being
damaged, coming into contact with the heating surface, or
causing a tripping hazard.
• WARNING! As long as the plug is in the socket the appliance
is connected to the power supply.
• WARNING! ALWAYS switch off the appliance before discon-
necting from the power supply, cleaning, maintenance or
storage.
• Only connect the appliance to an electrical outlet with the
voltage and frequency mentioned on the appliance label.
• Do not touch the plug/electrical connections with wet or
damp hands.
• Keep the appliance and electrical plug/connections away
from water and other liquids. If the appliance falls into wa-
ter, remove the power supply connections immediately. Do
not use the appliance until it has been checked by a certified
technician. Failure to follow these instructions will cause life
threatening risks.
• Connect the power supply into an easily accessible electrical
outlet so you can disconnect the appliance immediately in
case of emergency.
• Make sure the cord does not come in contact with sharp or
hot objects and keep it away from open fire. Never pull the
power cord to unplug it from the socket, always pull the plug
instead.
• Never carry the appliance by its cord.
• Never try to open the housing of the appliance yourself.
• Do not insert objects into the housing of the appliance.
• Never leave the appliance unattended during use.
• This appliance should be operated by trained personnel in
kitchen of the restaurant, canteens or bar staff, etc.
• This appliance should not be operated by persons with re-
duced physical, sensory or mental capabilities, or persons
that have a lack of experience and knowledge.
• This appliance should, under any circumstances, not be used
by children.
• Keep the appliance and its electrical connections out of reach
of children.
• Never use accessories or any extra devices other than those
supplied with the appliance or recommended by the manu-
facturer. Failure to do so could pose a safety risk to the user
and could damage the appliance. Only use original parts and
accessories.
• Do not operate this appliance by means of an external timer
or remote-control system.
• Do not place the appliance on a heating object (gasoline,
electric, charcoal cooker, etc.).
• Do not cover the appliance in operation.
• Do not place any objects on top of the appliance.
• Do not use the appliance near any open flames, explosive
or flammable materials. Always operate the appliance on a
horizontal, stable, clean, heat-resistant and dry surface.
• The appliance is not suitable for installation in an area where
a water jet could be used.
• Leave a space of at least 20 cm around the appliance for ven-
tilation during use.
• WARNING! Keep all ventilation openings on the appliance
free from obstruction.
Special safety instructions
• CAUTION! RISK OF FIRE! The refrigerant
used is R452A It is a flammable refriger-
ant.
• CAUTION! RISK OF BURNS! Refrigerant liquid sprayed on
the skin can cause critical burns. Keep eyes and skin pro-
tected. If refrigerant burns occur, rinse immediately with cold
water. In case burns are severe, apply ice and contact medical
treatment immediately
• WARNING! Do not damage the refrigerant circuit.
• WARNING! Do not place extension cords with multiple out-
lets or any type of external power supply on the back of the
appliance.
• The new hose-sets supplied with the appliance are to be used
and that old hose-sets should not be reused.
• Do not place any dangerous products, such as fuel, alcohol,
paint, aerosol cans with a flammable propellant, flammable
or explosive substances, etc. inside or near the appliance.
• It is recommended to use water softener with appliance.
Intended use
• This appliance is intended for commercial and professional
use only.
• The appliance is designed for making and storing ice cubes.
Any other use may lead to damage to the appliance or per-
sonal injury.
• Operating the appliance for any other purpose shall be
deemed a misuse of the device. The user shall be solely liable
for improper use of the device.
Grounding installation
This appliance is classified as protection class I and must be
connected to a protective ground. Grounding reduces the risk
of electric shock by providing an escape wire for the electric
current.
This appliance is fitted with a power cord with grounding plug
or electrical connections with grounding wire. The connections

7
GB
must be properly installed and grounded.
Operating principle
(Fig.1 on page 3)
Symbol Description Symbol Description
CCompressor SC Cycle probe
VFan SA Ambient probe
BPump PHigh pressure switch
EA Water inlet
valve TBin thermostat probe
GC Hot gas valve
Control panel
(Fig.2 on page 3)
1. ON/OFF: Power on: lights up the screen and starts at point
0. Powe off: It turns off the appliance at any time. It turns off
the display light and leaves the time showing. All relays off.
2. UP / DOWN ARROWS: Moving between menu options. In-
creasing or decreasing values.
3. OK: Confirmation the menu options or set values.
4. MENU: Entering to the main menu or back from one setting
level when navigating the menus.
Electric circuit diagram
(Fig.3 on page 3)
Symbol Description Symbol Description
#1 blue #2 red
#3 brown #4 back
#5 orange #6 violet
#7 white #8 grey
HHigh pressure
switch LLow pressure
switch
SA Air temperature
probe SC Cycle temperature
probe
T1 Bin thermostat PWater electrovalve
QHot gas electro-
valve SCompressor
BPump RFun
FFan control
Preparation before use
• Remove all protective packaging and wrapping.
• Check that the device is in good condition and with all ac-
cessories. In case of incomplete or damaged delivery, please
contact the supplier immediately. In this case, do not use the
device.
• Clean the accessories and the appliance before use (See ==>
Cleaning & Maintenance).
• Make sure the appliance is completely dry.
• Place the appliance on a horizontal, stable and heat resistant
surface that is safe against water splashes.
• Keep the packaging if you intend to store your appliance in
the future.
• Keep the user manual for future reference.
NOTE! Due to manufacturing residues, the appliance may emit
a light odor during the first few uses. This is normal and does
not indicate any defect or hazard. Make sure the appliance is
well ventilated.
Operating instructions
Installation
• Use the flexible connection (length 1.3 m.) with the two filter
joints supplied with the appliance. We do not advise the use
of double water outlet with two stopcocks as they may close
the rear one by mistake, leaving the appliance without water.
Water pressure must be between 1 Bar and 6 Bar. If the pres-
sure exceeds these values, install the necessary corrective
components.
• It is important that the water line does not pass close to
sources of heat, and that the flexible hose or the filter does
not receive hot air from the appliance. It could cause de-
creasing of production.
• The drain must be below the appliance, by at least 150 mm.
• In order to prevent bad smells, install a siphon. The drainage
pipe should have an internal diameter of 60 mm and a mini-
mum slope of 3 cm per metre.
• The electronic board has a button battery for timer. During
installation, please remove the protection (board in the upper
side, behind the display - remove two screws under the upper
air grille, to access the electric box).
Start up
After installation (checking ventilation, conditions of the prem-
ises, temperature, water quality, etc.), proceed as follows:
• Open the water inlet. Check that there are no leaks.
• Connect the appliance to the mains.
• Push the button on the display.
• Check that there is no part which is rubbing or vibrating.
• Check that the curtain can move freely.
• Check that the injectors send the water to the evaporator in
the correct direction.
• Check that the collectors turn freely on their axles.
• Once 10 minutes have passed, check that the water container
has no leaks through the maximum level overflow channel.
Control panel
• The time is shown on the display when the appliance is off
(no backlight). When the appliance is disconnected from the
power supply the time is lost. When reconnected time 00:00
will flashing to indicate that the time is not set.
• During the start up, on display will appear “Starting”.
• During the detachment time, on display will appear “Har-
vest”. At the bottom of the screen it will show the tempera-
ture indicated by the cycle probe (SC).
• When the detachment has finished the screen will show a
progress bar with the time remaining until the end of the cy-
cle. It will also show the following text at the bottom of the
screen: “Fabr.: -12ºC”, with the temperature indicated by the
SC cycle probe.
• As the production time is “tf=tfv+tff” and at the start it is not
known how long the “tfv” will last, since it depends on the
“Tfc”, take as a reference: cooling time “tfv” of the last cycle
+ set production time “tff”.

8
GB
• If the „tfv” of the last cycle is not known, use a time of 25
minutes (total production time „tf=tfv+tff”) for the calculation
(for example, in the first cycle of the appliance).
Menus
The parameters of the appliance can be adjusted, as required,
on the display menu. The appliance has 3 menus:
I. MAIN MENU: this menu is accessed by pressing the “Menu”
button while the appliance is Off. Use the arrows to select a
setting. Press “OK” to enter the selected setting.
Time setting:
• The time will be shown as “hh:mm”. Hours can be increased
or decreased using the arrow buttons in 24h format.
• Press “OK” for saving hour value and go to minutes setting.
Change the minutes using the arrows and press “OK” again
to save value and automatically return to the main menu.
Programmer:
• This option allows the user to programme a start and stop
time for the appliance.
• By pressing the down arrow the option “Activate” will appear.
If the “Activate” option is chosen, a new screen to set the hour
will be shown in “hh:mm” format (time of start the appliance
- the last time programmed will appear by default).
• After entering the minutes, you will automatically enter the
appliance end time setting by pressing “OK”. When you select
the minutes of the appliance end time by pressing “OK”, you
will return to the main menu. If the start time is before the
actual time, the programmer will begin the next day. Once the
programmer is on, it will continue every day.
• After returning to the main menu, to show the programmer
being on, the screen will show a special character that can be
chosen. This special character will be present whenever the
programmer is activated, with the appliance either off or on
(during production, detachment and alarms).
• During activation time, the appliance will start, and when the
end time arrives, there are two options:
1. If it is detaching time, it will turn off.
2. If it is the production process, the cycle will end, i.e., it
will turn off after detachment time has ended.
• To deactivate the programmer select the option “Deactivate”.
The programmer can be turned off at any time, turning off the
appliance and enter the menu. If power is lost, the program-
mer will turn off as the time will be reset to zero.
• With the programmer activated, two options are available:
1. If you turn on the appliance and start work with it, so:
If it is left on, the programmer will turn it off once the
programmed hour arrives.If the appliance is turned off
before the start time, the programmer will turn it on
when the start time arrives.
2. If the appliance is already on and working, it can be
turned off with the power button, so: If it is off before
the switch-off time, the programmer won’t use the
programmed switch-off time.If the appliance is started
again, the programmer will turn it off when the pro-
grammed time arrives.
Language:
• The language of all the texts shown on the display can be
changed with this option. Select the language you want and
press “OK” to save. This option will be saved even if the ap-
pliance is turned off.
• Avaiable languages: Spanish (default), English, French, Ital-
ian
II. INFORMATION MENU: you can access this menu at any
time while the appliance is working or with the appliance off by
pressing the “MENU” button for 3 seconds: This menu provides
access to:
• Ambient temperature probe “Amb.T” - it only works as a
thermometer, without affecting the working cycle of the ap-
pliance. It will show the instant temperature on the display. If
the probe is defective, the following will be indicated: “error”
instead of the °C value. As its installation is optional, if it is
not installed, the display will show some dashes “_ _ _ _”
• Cycle temperature probe “Cyc.T” - it will show the instant
cycle probe temperature on the display. If the probe is defec-
tive the appliance will stop and the display will show: “Cycle
probe”. Displayed with “Amb.T” in the same time.
• Last cycle production time “Freez.t” -time will be shown on
the screen in “hh:mm:ss”
• Last cycle complete time “Cyc.t” - time will be shown on the
screen in “h:mm:ss”. Displayed with “Freez.t” in the same
time.
• Instant production time of current cycle “Cur.F.t” - cycle is
equal to the production time plus the detachment time.
Therefore, there are two situations: production and detach-
ment. In each of them the display will change and show the
relevant information in the following way: Current cycle: pro-
duction (interval 3-5). Instant production time of current cycle
/ Remaining production time of current cycle “rem.H.t”. The
screen will show a timer with the current cycle production
time as “hh:mm:ss”.
• Remaining production time of current cycle “rem.F.t” - timer
will be shown on the screen as “hh:mm:ss”. When the cycle
is during the variable production time or cooling time, the
remaining production time is not known, since the setpoint
production temperature has not yet been reached.
• Instant detachment time of current cycle “cur.H.t” - timer will
also appear on the screen as “hh:mm:ss”.
• Remaining detachment time of current cycle “rem.F.t” - tim-
er will appear on the screen as “hh:mm:ss”. When the cycle
is during the variable detachment time or heating time, the
remaining detachment time is not known, since the setpoint
detachment temperature has not yet been reached. In this
case the screen will not show the timer with the remaining
detachment time. When the appliance reaches the setpoint
detachment temperature, it will also show on screen the tim-
er with the remaining time.
• Status of inputs “On/off” “I1234” / Status of outputs “On/off”
“O1234” - It will show information on active inputs and out-
puts. “I 1 2 3 4” or “1 2 3 4” will appear on the top screen.
The character will be completed with a full box on the lower
screen if the output/input is activated, and not be completed
(empty box) if it is not activated. The inputs/outputs are listed
as like on below table:
Inputs Outputs
1Bin thermostat 1Compressor / Fan
2Pressure switch 2Pump

9
GB
3Flooding 3Hot gas electro valve
4Free input 4Water inlet electro valve
• Cycle counter - A counter will appear on the screen showing
the total complete cycles the appliance has completed. One
cycle will be counted for each complete cycle time. By press-
ing the “OK” button for 3 seconds you can reset to 0, and the
screen will ask you that you want to reset number of cycle. If
you press “OK” the counter resets to zero and you will return
to the counter screen with zero cycles. If you press “MENU”,
the reset is cancelled and the screen will show the total cycle
number it had before. The value will remain stored even if the
appliance is disconnected from the mains.
• Exit - exit
III. CONFIGURATION MENU:
Access is provided by simultaneously pressing both arrows for
3 seconds. It can be accessed at any time with the appliance on
or with the appliance off. It allows you to change the working
parameters of the appliance. By pressing “OK”, you can save
setted parameter and go to the next one. The value will remain
stored even if the appliance is disconnected from the mains.
Temperature values can be set by 1ºC . Time values is meas-
ured in minutes and seconds and can be set by 1 second reso-
lution (excluding “max.appliance.t” which is measured in hours
and minutes and can be set by 1 minute resolution )
• Set production time “Freezing Time”
• Set production temperature “Freezing Temp” - This parame-
ter allows you to change the setpoint production temperature
of the appliance.
• Set detachment time “Harvest time”
• Set detachment temperature “Harvest Temp” - This param-
eter allows you to change the setpoint detachment tempera-
ture of the appliance.
• Water inlet time “water time” - The water inlet time occurs
during the set detachment time.
• Pump time during initial detachment “in.pump harv.t.” - The
pump time during initial detachment occurs at the start of
each variable detachment time.
• Pump time during final detachment “fin.pump harv.t.” - The
pump time during final detachment starts before each set
detachment time ends.
• Balance time (hot gas) during start-up “balancing time” - The
hot gas electro valve has to open during 5 seconds before the
compressor starts. DO NOT CHANGE.
• Start time “start t.” - The start time marks the time when
the appliance starts up. Both the hot gas and water electro
valves connect.
• Minimum downtime due to full stock “min stock t” - The min-
imum downtime due to full stock will be 2 minutes by default.
• Minimum downtime due to safety switch “min.security t” -
The minimum safety switch downtime will be 60 minutes by
default.
• Maximum variable detachment time “max. harvest t” - The
maximum variable detachment time will measure the maxi-
mum time the appliance has to wait to produce an alert with-
out reaching the setpoint detachment temperature.
• Maximum variable production time “max. Freez. t” - The
maximum variable production time will measure the maxi-
mum time the appliance has to wait to produce an alert with-
out reaching the setpoint production temperature.
• Minimum variable production time “min. Freez. t.” - The min-
imum variable production time will measure the minimum
time the appliance has to wait to start production.
• Maximum appliance time “max. appliance t” - The maximum
appliance time measures the maximum continuous opera-
tion time of the appliance without stops. It allows to defrost
the appliance with a given time.
ATTENTION: For industrial use of the appliance, it is recom-
mended to change the maximum appliance time to 20 minutes
every 2 days.
• Defrost pump time “defrost pump t” - The defrost pump time
starts when the maximum appliance time has finished.
• By default “standard values” - With this option you can re-
store the default factory settings of the appliance. By press-
ing the “OK” button, the display will showconfirmation ques-
tion. If you press “OK”, all the values will have the default
settings and you will go back to the configuration menu. If you
press “MENU”, you will leave this option without making any
change and return to the configuration menu.
• Exit - exit
Cleaning & maintenance
• ATTENTION! Always disconnect the appliance from the pow-
er supply and disconnect the water inlet or close the tap be-
fore storage, cleaning & maintenance.
• Do not use water jet or steam cleaner for cleaning and do not
push the appliance under the water as the parts will get wet
and electric shock might be resulted.
• If the appliance is not kept in a good state of cleanliness, this
can adversely affect the life of the appliance and result in a
dangerous situation.
• Checking and cleaning should be carried out at least every six
months. In very dusty places, it may be necessary to clean the
condenser in air-condensed appliances every month.
Cleaning
• Clean the exterior surface with a cloth or sponge slightly
dampened with a mild soap solution.
• Avoid water contacting the electrical components.
• Never immerse the appliance in water or other liquids.
• Never use aggressive cleaning agents, abrasive sponges, or
cleaning agents containing chlorine. Do not use steel wool,
metallic utensils, or any sharp or pointed objects for clean-
ing. Do not use petrol or solvents!
• No parts are dishwasher safe.
• For water condenser: Prepare a 50% solution of phosphoric
acid and distilled or demineralised water (or a suitable prod-
uct to clean the water condenser circuit). Pass the solution
through the condenser. (The mixture is more effective when
hot - between 35º and 40ºC)
NOTE: Do not use hydrochloric acid.
• For air condenser: Clean with the help of a vacuum cleaner,
non-metallic brush or low-pressure air.
• Inlet filters tend to become obstructed during the first few
days that the appliance is operating, particularly in newly
plumbed facilities. Release the hose and clean them under
the water tap.
• For collectors and injectors: Remove the curtain, clean with
phosphoric acid and rinse. Then remove the collectors from
their axles by pulling gently upwards. Remove the expulsion

10
GB
grille for fallen ice. (Clean it just like the curtain.). Disassem-
ble the injectors and the main filters of water pump - clean
them. Re-install all parts.
CAUTION: It is very important when you re-install the collector
that the injectors are put back in the same position.
Washing cycle (mixture for water condenser)
• Press the button and the power button for 3 seconds.
The pumps will recirculate the mixture through the evapora-
tors and containers. The compressor and other components
will remain disconnected during this cycle.
• Let the solution act for 10 minutes. After 10 minutes, halt the
washing cycle pressing the power button and the appli-
ance will stop.
• Remove the overflows installed inside the containers by the
back of the appliance. Once the containers are emptied, put
the overflows back in.
• If the containers and evaporators are completely clean, you
should run two washing cycles with water only to eliminate
any remains of dirt left by the previous cycle.
CAUTION: Discard the ice produced in this first cycle.
• Clean and assemble all the components, check that the grille
is clean and that the cubes slide well. Check that no slat is
jammed in the curtain.
• Check and/or change the water inlet filters.Check that the
injectors are in position. When necessary, disassemble, clean
and put them in the correct position.
Maintenance
• Whenever you open up the appliance, check all the water
connections, the condition of the washers and hoses to avoid
leaks and to prevent breakages and flooding.
• Check the operation of the appliance regularly to prevent se-
rious accidents.
• If you see that the appliance is not working properly or that
there is a problem, stop using it, switch it off and contact the
supplier.
• All maintenance, installation and repair work must be car-
ried out by specialised and authorised technicians, or recom-
mended by the manufacturer.
Transportation and Storage
• Before storage, always make sure that the appliance has
been disconnected from the power supply and water connec-
tion or the water tap is closed.
• Store the appliance in a cool, clean and dry place.
• Never place heavy objects on the appliance as this could
damage it.
• Do not move the appliance while it is under operation. Dis-
connect the appliance from power supply when moving and
hold it at the bottom.
Troubleshooting
If the appliance does not function properly, please check the
below table for the solution. If you are still unable to solve the
problem, please contact the supplier/service provider.
Problems Possible cause Possible solution
Appliance does not
work. The appliance is
unplugged. Plug the appli-
ance in.
The electrical
connection is
defective or in poor
condition.
Check connec-
tions.
High temperature
alarm. Check the fan
works and the
condenser
cleanliness. Check
the condensate
pressure switch.
Wrong settings or
defective safety
thermostat (full
bin).
Check and adjust
the settings or
replace it.
Appliance works.
The compressor
does not start.
Power not reaches
the compressor. Replace the elec-
tronic plate.
Defective com-
pressor. Replace the com-
pressor.
Ice is not produced
in the evaporator. Malfunctioning
pump. Replace the pump.
Lack or low level of
water. Check the water
inlet valve and re-
place if necessary.
Check the water
level tube.
Ineffective refriger-
ation system. Replace the
dehydrator.
Ice cubes are
produced but do
not detach.
Defective or wrong
connected hot gas
valve.
Check and replace
if necessary.
Low water pres-
sure. Increase the
pressure.
Fan malfunctioning
or condensation
pressure too low.
Adjust settings or
replace.
Water pressure
switch valve too
open or defective.
Adjust, repair or
replace.
Room or water
temperature below
7ºC.
Increase detach-
ment time.
Insufficient de-
tachment time.
Production time
is too long. The
cubes have rough
edges outside the
mould.
Change production
time.
Dirty water inlet
filters. Clean filters.

11
GB
Low ice production. Dirty condenser,
obstructed air flow
or hot air from
another appliance.
Clean condenser,
remove obstruction
or change the
location of the
appliance.
Defective hot gas
valve. Replace the hot
gas valve.
Too low settings or
defective pressure
switch of the fan
or of the conden-
sation water inlet
valve.
Adjust settings or
replace.
Water inlet valve
will not close
(drips).
Check and replace
if necessary.
Ineffective com-
pressor. Replace the com-
pressor.
Empty and too
white cubes with
uneven edges.
Lack of water.
Pump does not
flooding container.
Check the pump.
Obstructed
injectors. Clean injectors.
The curtain
slats don’t close
properly.
Adjust the curtain
slats or clean the
axle.
The appliance does
not stop even with
full bin.
Bin thermostat in-
correctly adjusted
or defective.
Adjust to the facto-
ry setting marked
with a red point
over the thermo-
stat label. Replace
it if is defective.
Drain pump does
not work. Drain pump is not
properly con-
nected.
Check drain pump
connection.
Water flow is
blocked. Clean drain pump
inlet.
Vent hose is
closed. Open vent hose.
Not enought water
to activate drain
pump.
There should be
minimum 710 ml
of water.
Drain pump works,
but water is not
pumped out.
Discharge hose is
blocked Clean discharge
hose
Discharge hose
is not properly
instaled.
Check that hose
not exceeded max-
imum horizontal
length of 6m and
maximum height
of 2m.
Alarms identification
Alarm Description
Full bin When the bin thermostat sensor is open (stock
full of ice), after checking it once the ice detach-
ment has finished, the appliance will stop while
indicating “Full stock”.
Cycle probe Indicates the temperature of the cycle probe on
the screen. If it is defective, the appliance will
stop and indicate “Cycle probe”.
Air temper-
ature probe If, for any reason, the probe is defective, instead
of indicating the temperature, it will indicate
“_____”. This alarm will not affect the operation
of the appliance, as this function is purely for
information purposes.
High pres-
sure This alarm will appear when the pressure in the
appliance reaches 30 Bar. The switching may
be manual or automatic as regulated by the
electronic plate.
• If dip-switch 2 is in the ON position, the
switching will be automatic. The minimum
downtime for safety is 60 minutes and the
“temporizing” alarm will appear on the
display.
• If dip-switch 2 is in the OFF position, the
switching will be manual and “Pressure” will
appear on the display.
Long
pre-heating If the detachment time is longer than the time
defined, the “long harv.time” alarm will appear
on the display.
Long
pre-cooling If the production time is longer than the time
defined, the appliance will stop working while
showing the “long freez.time” alarm on the
display.
Short
pre-cooling If the production time is shorter than the mini-
mum variable production time, the appliance will
start detaching. If this continues, the error will
be shown on the “short freez.time” display.
Warranty
Any defect affecting the functionality of the appliance which
becomes apparent within one year after purchase will be re-
paired by free repair or replacement provided the appliance has
been used and maintained in accordance with the instructions
and has not been abused or misused in any way. Your statutory
rights are not affected. If the appliance is claimed under war-
ranty, state where and when it was purchased and include proof
of purchase (e.g. receipt).
In line with our policy of continuous product development we
reserve the right to change the product, packaging and docu-
mentation specifications without notice.
Discarding & Environment
When decommissioning the appliance, the prod-
uct must not be disposed of with other household
waste. Instead, it is your responsibility to dispose
to your waste equipment by handing it over to a
designated collection point. Failure to follow this
rule may be penalized in accordance with applicable regula-
tions on waste disposal. The separate collection and recycling
of your waste equipment at the time of disposal will help con-
serve natural resources and ensure that it is recycled in a man-
ner that protects human health and the environment.
For more information about where you can drop off your waste
for recycling, please contact your local waste collection compa-
ny. The manufacturers and importers do not take responsibility
for recycling, treatment and ecological disposal, either directly
or through a public system.

12
DE
DEUTSCH
Sehr geehrter Kunde,
Vielen Dank, dass Sie dieses Barmatic Gerät gekauft haben.
Lesen Sie dieses Benutzerhandbuch sorgfältig durch und
achten Sie dabei besonders auf die unten aufgeführten Si-
cherheitsvorschriften, bevor Sie dieses Gerät zum ersten Mal
installieren und verwenden.
Sicherheitshinweise
• Verwenden Sie das Gerät nur für den vorgesehenen Zweck,
wie in diesem Handbuch beschrieben.
• Der Hersteller haftet nicht für Schäden, die durch unsach-
gemäßen Betrieb und unsachgemäßen Gebrauch verursacht
werden.
• GEFAHR! STROMSCHLAGGEFAHR! Versuchen Sie
nicht, das Gerät selbst zu reparieren. Tauchen Sie die
elektrischen Teile des Geräts nicht in Wasser oder andere
Flüssigkeiten. Halten Sie das Gerät niemals unter fließendem
Wasser.
• VERWENDEN SIE NIEMALS EIN BESCHÄDIGTES GERÄT!
Überprüfen Sie die elektrischen Anschlüsse und das Kabel
regelmäßig auf Schäden. Wenn das Gerät beschädigt ist,
trennen Sie es von der Stromversorgung. Alle Reparaturen
sollten nur von einem Lieferanten oder einer qualifizierten
Person durchgeführt werden, um Gefahren oder Verletzun-
gen zu vermeiden.
• WARNUNG! Verlegen Sie das Netzkabel bei der Positionie-
rung des Geräts bei Bedarf sicher, um unbeabsichtigtes Zie-
hen, Beschädigungen, Kontakt mit der Heizfläche oder Stol-
pergefahr zu vermeiden.
• WARNUNG! Solange sich der Stecker in der Steckdose be-
findet, ist das Gerät an die Stromversorgung angeschlossen.
• WARNUNG! Schalten Sie das Gerät STETS aus, bevor Sie es
von der Stromversorgung trennen, reinigen, warten oder la-
gern.
• Schließen Sie das Gerät nur mit der auf dem Geräteetikett
angegebenen Spannung und Frequenz an eine Steckdose an.
• Die Stecker-/Elektroanschlüsse nicht mit nassen oder feuch-
ten Händen berühren.
• Halten Sie das Gerät und die elektrischen Stecker/Anschlüs-
se von Wasser und anderen Flüssigkeiten fern. Wenn das Ge-
rät in Wasser fällt, entfernen Sie sofort die Netzanschlüsse.
Verwenden Sie das Gerät erst, wenn es von einem zertifizier-
ten Techniker überprüft wurde. Die Nichtbeachtung dieser
Anweisungen führt zu lebensbedrohlichen Risiken.
• Schließen Sie das Netzteil an eine leicht zugängliche Steck-
dose an, damit Sie das Gerät im Notfall sofort trennen kön-
nen.
• Stellen Sie sicher, dass das Kabel nicht mit scharfen oder
heißen Gegenständen in Kontakt kommt und halten Sie es
von offenen Bränden fern. Ziehen Sie niemals das Netzkabel,
um es aus der Steckdose zu ziehen, sondern ziehen Sie im-
mer den Stecker.
• Tragen Sie das Gerät niemals am Kabel.
• Versuchen Sie niemals, das Gehäuse des Geräts selbst zu
öffnen.
• Führen Sie keine Gegenstände in das Gehäuse des Geräts ein.
• Lassen Sie das Gerät während des Betriebs niemals unbe-
aufsichtigt.
• Dieses Gerät sollte von geschultem Personal in der Küche
des Restaurants, Kantinen oder Barpersonal usw. bedient
werden.
• Dieses Gerät darf nicht von Personen mit eingeschränkten
physischen, sensorischen oder geistigen Fähigkeiten oder
Personen mit mangelnder Erfahrung und Kenntnis betrieben
werden.
• Dieses Gerät darf unter keinen Umständen von Kindern ver-
wendet werden.
• Bewahren Sie das Gerät und seine elektrischen Anschlüsse
für Kinder unzugänglich auf.
• Verwenden Sie niemals anderes Zubehör oder andere Geräte
als das mit dem Gerät gelieferte oder vom Hersteller emp-
fohlene. Andernfalls könnte ein Sicherheitsrisiko für den
Benutzer bestehen und das Gerät beschädigt werden. Ver-
wenden Sie nur Originalteile und Zubehör.
• Betreiben Sie dieses Gerät nicht mit einem externen Timer
oder einer Fernbedienung.
• Stellen Sie das Gerät nicht auf ein Heizobjekt (Benzin, Elektro,
Holzkohle usw.).
• Decken Sie das Gerät nicht im Betrieb ab.
• Stellen Sie keine Gegenstände auf das Gerät.
• Verwenden Sie das Gerät nicht in der Nähe von offenen Flam-
men, explosiven oder brennbaren Materialien. Betreiben Sie
das Gerät immer auf einer horizontalen, stabilen, sauberen,
hitzebeständigen und trockenen Oberfläche.
• Das Gerät ist nicht für die Installation in einem Bereich ge-
eignet, in dem ein Wasserstrahl verwendet werden könnte.
• Lassen Sie während des Gebrauchs mindestens 20 cm um
das Gerät herum Platz für die Belüftung.
• WARNUNG! Halten Sie alle Lüftungsöffnungen am Gerät frei
von Hindernissen.
Besondere Sicherheitshinweise
• VORSICHT! BRANDGEFAHR! Das ver-
wendete Kältemittel ist R452A Es ist ein
entflammbares Kältemittel.
• VORSICHT! VERBRENNUNGSGEFAHR! Auf die Haut ge-
sprühte Kältemittelflüssigkeit kann kritische Verbrennungen
verursachen. Augen und Haut schützen. Wenn Kältemittel
verbrennt, sofort mit kaltem Wasser abspülen. Bei schweren
Verbrennungen Eis auftragen und sofort ärztliche Behand-
lung kontaktieren
• WARNUNG! Beschädigen Sie den Kältemittelkreislauf nicht.
• WARNUNG! Stecken Sie keine Verlängerungskabel mit meh-
reren Steckdosen oder anderen externen Netzteilen auf die
Rückseite des Geräts.
• Die neuen Schlauchsets, die mit dem Gerät geliefert werden,
sind zu verwenden und alte Schlauchsets dürfen nicht wie-
derverwendet werden.
• Keine gefährlichen Produkte wie Kraftstoff, Alkohol, Farbe,
Aerosoldosen mit entflammbarem Treibmittel, entflammba-
ren oder explosiven Substanzen usw. innerhalb oder in der
Nähe des Geräts platzieren.
• Es wird empfohlen, Wasserenthärter mit dem Gerät zu ver-
wenden.
Verwendungszweck
• Dieses Gerät ist nur für den kommerziellen und professionel-

13
DE
len Gebrauch bestimmt.
• Das Gerät ist für die Herstellung und Lagerung von Eiswür-
feln ausgelegt. Jede andere Verwendung kann zu Schäden
am Gerät oder zu Verletzungen führen.
• Der Betrieb des Geräts für andere Zwecke gilt als Miss-
brauch des Geräts. Der Benutzer haftet allein für die unsach-
gemäße Verwendung des Geräts.
Installation der Erdung
Dieses Gerät ist als Schutzklasse I eingestuft und muss an eine
Schutzerde angeschlossen werden. Die Erdung reduziert das
Risiko eines Stromschlags, indem ein Escape-Kabel für den
elektrischen Strom bereitgestellt wird.
Dieses Gerät ist mit einem Netzkabel mit Erdungsstecker oder
elektrischen Anschlüssen mit Erdungsdraht ausgestattet. Die
Anschlüsse müssen ordnungsgemäß installiert und geerdet
sein.
Funktionsprinzip
(Abb. 1 auf Seite 3)
Symbol Beschreibung Symbol Beschreibung
CKompressor SC Zyklus-Sonde
VLüfter SA Umgebungstempera-
tur-Sonde
BPumpe PHochdruckschalter
EA Wassereinlass-
ventil TBehälter-Thermost-
at-Sonde
GC Heißgasventil
Kontrollpanel
(Abb. 2 auf Seite 3)
1. EIN/AUS: Einschalten: Leuchtet den Bildschirm auf und be-
ginnt bei Punkt 0. Powe aus: Das Gerät wird jederzeit aus-
geschaltet. Es schaltet das Display aus und lässt die Zeit
sichtbar. Alle Relais aus.
2. PFEILE NACH OBEN/UNTEN: Wechseln zwischen Menüop-
tionen. Erhöhen oder Verringern von Werten.
3. OK: Bestätigen Sie die Menüoptionen oder legen Sie Werte
fest.
4. MENU: Aufrufen des Hauptmenüs oder Zurück von einer
Einstellungsstufe aus, wenn Sie durch die Menüs navigie-
ren.
Elektrischer Schaltplan
(Abb. 3 auf Seite 3)
Symbol Beschreibung Symbol Beschreibung
#1 blau #2 rot
#3 braun #4 Rückseite
#5 Orange #6 violett
#7 weiß #8 grau
HHochdruckschalter LNiederdruck-
schalter
SA Lufttempera-
tur-Sonde SC Temperaturfühler
für Zyklus
T1 Behälter-Ther-
mostat PWasser-Elektro-
ventil
QHeißgas-Elektro-
ventil SKompressor
BPumpe RSpaß
FLüfter-Steuerung
Vorbereitung vor Gebrauch
• Entfernen Sie alle Schutzverpackungen und Verpackungen.
• Überprüfen Sie, ob das Gerät in gutem Zustand ist und mit
allen Zubehörteilen ausgestattet ist. Bei unvollständiger oder
beschädigter Lieferung kontaktieren Sie bitte umgehend den
Lieferanten. Verwenden Sie in diesem Fall das Gerät nicht.
• Reinigen Sie das Zubehör und das Gerät vor dem Gebrauch
(siehe ==> Reinigung und Wartung).
• Stellen Sie sicher, dass das Gerät vollständig trocken ist.
• Stellen Sie das Gerät auf eine horizontale, stabile und hitze-
beständige Oberfläche, die gegen Wasserspritzer sicher ist.
• Bewahren Sie die Verpackung auf, wenn Sie beabsichtigen,
Ihr Gerät in Zukunft zu lagern.
• Bewahren Sie das Benutzerhandbuch zur späteren Bezug-
nahme auf.
HINWEIS! Aufgrund von Herstellungsrückständen kann das
Gerät während der ersten Verwendungen einen leichten Ge-
ruch abgeben. Dies ist normal und weist nicht auf einen De-
fekt oder eine Gefahr hin. Stellen Sie sicher, dass das Gerät
gut belüftet ist.
Bedienungsanleitung
Installation
• Verwenden Sie den flexiblen Anschluss (Länge 1,3 m) mit den
beiden Filterverbindungen, die dem Gerät beiliegen. Wir ra-
ten von der Verwendung eines doppelten Wasserauslasses
mit zwei Absperrhähnen ab, da diese den hinteren Hahn ver-
sehentlich schließen und das Gerät ohne Wasser belassen
können. Der Wasserdruck muss zwischen 1 bar und 6 bar
liegen. Wenn der Druck diese Werte überschreitet, installie-
ren Sie die erforderlichen Korrekturkomponenten.
• Es ist wichtig, dass die Wasserleitung nicht in der Nähe von
Wärmequellen verläuft und dass der flexible Schlauch oder
der Filter keine heiße Luft aus dem Gerät aufnimmt. Dies
könnte zu einer Abnahme der Produktion führen.
• Der Ablauf muss mindestens 150 mm unterhalb des Geräts
liegen.
• Um unangenehme Gerüche zu vermeiden, installieren Sie
einen Siphon. Das Drainagerohr sollte einen Innendurch-
messer von 60 mm und eine minimale Neigung von 3 cm pro
Meter aufweisen.
• Die Elektronikplatine verfügt über eine Tastenbatterie für
den Timer. Entfernen Sie bei der Installation bitte den Schutz
(Platine oben, hinter dem Display – entfernen Sie zwei
Schrauben unter dem oberen Luftgitter, um Zugang zum
Elektrokasten zu erhalten).
Inbetriebnahme
Gehen Sie nach der Installation (Kontrolle der Belüftung, Zu-
stand der Räumlichkeiten, Temperatur, Wasserqualität usw.)
wie folgt vor:

14
DE
• Öffnen Sie den Wassereinlass. Prüfen Sie, ob keine Lecks
vorhanden sind.
• Schließen Sie das Gerät an das Netz an.
• Drücken Sie die Taste auf dem Display.
• Vergewissern Sie sich, dass kein Teil reibt oder vibriert.
• Überprüfen Sie, ob sich der Vorhang frei bewegen kann.
• Prüfen Sie, ob die Einspritzdüsen das Wasser in die richtige
Richtung zum Verdampfer leiten.
• Prüfen Sie, ob sich die Kollektoren frei an ihren Achsen dre-
hen.
• Sobald 10 Minuten vergangen sind, überprüfen Sie, ob der
Wasserbehälter keine Lecks durch den maximalen Füll-
standsüberlaufkanal aufweist.
Kontrollpanel
• Die Uhrzeit wird im Display angezeigt, wenn das Gerät aus-
geschaltet ist (keine Hintergrundbeleuchtung). Wenn das
Gerät von der Stromversorgung getrennt wird, geht die Zeit
verloren. Wenn die Verbindung wieder hergestellt wird, blinkt
00:00, um anzuzeigen, dass die Zeit nicht eingestellt ist.
• Während des Starts erscheint auf dem Display „Starting“.
• Während der Ablösezeit erscheint auf dem Display „Harvest“.
Am unteren Bildschirmrand wird die Temperatur angezeigt,
die von der Zyklussonde (SC) angezeigt wird.
• Wenn die Trennung abgeschlossen ist, zeigt der Bildschirm
einen Fortschrittsbalken mit der verbleibenden Zeit bis zum
Ende des Zyklus an. Am unteren Bildschirmrand wird au-
ßerdem der folgende Text angezeigt: „Fabr.: -12oC“, mit der
Temperatur, die von der SC-Zyklussonde angegeben wird.
• Da die Produktionszeit „tf=tfv+tff“ ist und zu Beginn nicht
bekannt ist, wie lange der „tfv“ halten wird, da es von der
„Tfc“ abhängt, ist als Referenz zu nehmen: Kühlzeit „tfv“ des
letzten Zyklus + Produktionszeit „tff“ einstellen.
• Wenn der „tfv“ des letzten Zyklus nicht bekannt ist, verwen-
den Sie für die Berechnung eine Zeit von 25 Minuten (Ge-
samtproduktionszeit „tf=tfv+tff“) (z. B. im ersten Zyklus des
Geräts).
Menüs
Die Parameter des Geräts können nach Bedarf im Displayme-
nü eingestellt werden. Das Gerät verfügt über 3 Menüs:
I. HAUPTMENÜ: Dieses Menü wird durch Drücken der Taste
„Menü“ aufgerufen, während das Gerät ausgeschaltet ist. Ver-
wenden Sie die Pfeile, um eine Einstellung auszuwählen. Drü-
cken Sie „OK“, um die ausgewählte Einstellung einzugeben.
Zeiteinstellung:
• Die Uhrzeit wird als „hh:mm“ angezeigt. Die Stunden kön-
nen mit den Pfeiltasten im 24-Stunden-Format erhöht oder
verringert werden.
• Drücken Sie „OK“, um den Stundenwert zu speichern, und
gehen Sie zur Minuteneinstellung. Ändern Sie die Minuten
mit den Pfeilen und drücken Sie erneut auf „OK“, um den
Wert zu speichern und automatisch zum Hauptmenü zurück-
zukehren.
Programmierer:
• Mit dieser Option kann der Benutzer eine Start- und Stopp-
zeit für das Gerät programmieren.
• Durch Drücken des Abwärtspfeils erscheint die Option „Ac-
tivate“. Wenn die Option „Activate“ gewählt wird, wird ein
neuer Bildschirm zur Einstellung der Stunde im Format
„hh:mm“ angezeigt (Uhrzeit des Gerätestarts – das zuletzt
programmierte Mal wird standardmäßig angezeigt).
• Nach Eingabe der Minuten geben Sie automatisch die Ein-
stellung für die Geräteendzeit ein, indem Sie auf „OK“
drücken. Wenn Sie die Minuten der Geräteendzeit durch
Drücken von „OK“ auswählen, kehren Sie zum Hauptmenü
zurück. Wenn die Startzeit vor der tatsächlichen Zeit liegt,
beginnt das Programmiergerät am nächsten Tag. Sobald
das Programmiergerät eingeschaltet ist, wird es jeden Tag
fortgesetzt.
• Nachdem Sie zum Hauptmenü zurückgekehrt sind, wird
auf dem Bildschirm ein Sonderzeichen angezeigt, das aus-
gewählt werden kann, um anzuzeigen, dass das Program-
miergerät eingeschaltet ist. Dieses Sonderzeichen ist immer
dann vorhanden, wenn das Programmiergerät aktiviert wird,
wenn das Gerät ausgeschaltet oder eingeschaltet ist (wäh-
rend der Produktion, beim Abnehmen und bei Alarmen).
• Während der Aktivierungszeit startet das Gerät und wenn die
Endzeit eintrifft, gibt es zwei Optionen:
1. Wenn sich die Zeit löst, wird sie ausgeschaltet.
2. Wenn es sich um den Produktionsprozess handelt, en-
det der Zyklus, d. h. er wird nach Ablauf der Ablösezeit
ausgeschaltet.
• Zum Ausschalten des Programmiergeräts wählen Sie die
Option „Deactivate“. Das Programmiergerät kann jederzeit
ausgeschaltet werden. Schalten Sie das Gerät aus und rufen
Sie das Menü auf. Bei Stromausfall schaltet sich das Pro-
grammiergerät aus, da die Zeit auf Null zurückgesetzt wird.
• Bei aktiviertem Programmiergerät stehen zwei Optionen zur
Verfügung:
1. Wenn Sie das Gerät einschalten und mit der Arbeit be-
ginnen, gehen Sie wie folgt vor: Wenn das Gerät einge-
schaltet bleibt, schaltet es nach Eintreffen der program-
mierten Stunde aus.Wenn das Gerät vor der Startzeit
ausgeschaltet wird, schaltet es es nach Eintreffen der
Startzeit ein.
2. Wenn das Gerät bereits eingeschaltet ist und funktio-
niert, kann es mit dem Ein-/Ausschalter ausgeschaltet
werden, also: Wenn es vor der Ausschaltzeit ausge-
schaltet ist, verwendet das Programmiergerät nicht die
programmierte Ausschaltzeit.Wenn das Gerät erneut
gestartet wird, schaltet es es aus, wenn die program-
mierte Zeit eintrifft.
Sprache:
• Mit dieser Option kann die Sprache aller auf dem Display an-
gezeigten Texte geändert werden. Wählen Sie die gewünsch-
te Sprache aus und drücken Sie zum Speichern auf „OK“.
Diese Option wird auch dann gespeichert, wenn das Gerät
ausgeschaltet ist.
• Verfügbare Sprachen: Spanisch (Standard), Englisch, Fran-
zösisch, Italienisch
II. INFORMATIONSMENÜ: Sie können dieses Menü jederzeit
aufrufen, während das Gerät arbeitet oder wenn das Gerät aus-
geschaltet ist, indem Sie die Taste „MENU“ 3 Sekunden lang
drücken: Dieses Menü bietet Zugriff auf:
• Umgebungstemperaturfühler „Amb.T“ – er funktioniert nur
als Thermometer, ohne den Arbeitszyklus des Geräts zu be-

15
DE
einträchtigen. Es zeigt die sofortige Temperatur auf dem Dis-
play an. Wenn die Sonde defekt ist, wird Folgendes angezeigt:
„Fehler“ anstelle des °C-Wertes. Da die Installation optional
ist, zeigt das Display, wenn es nicht installiert ist, einige Bin-
destriche „_ _ _ _“ an.
• Zyklustemperaturfühler „Cyc.T“ – zeigt die sofortige Zyk-
lustemperaturfühlertemperatur auf dem Display an. Wenn
die Sonde defekt ist, stoppt das Gerät und das Display zeigt
Folgendes an: „Taktsonde“. Wird gleichzeitig mit „Amb.T“
angezeigt.
• Letzte Zyklus-Produktionszeit „Freez.t“ -Zeit wird auf dem
Bildschirm in „hh:mm:ss“ angezeigt
• Die letzte Zyklus-Abschlusszeit „Cyc.t“ – die Zeit wird auf
dem Bildschirm in „h:mm:ss“ angezeigt. Gleichzeitig mit
„Freez.t“ angezeigt.
• Sofortige Produktionszeit des aktuellen Zyklus „Cur.F.t“ – Zy-
klus ist gleich der Produktionszeit plus der Ablösezeit. Daher
gibt es zwei Situationen: Produktion und Ablösung. In jedem
von ihnen ändert sich die Anzeige und zeigt die relevanten
Informationen wie folgt an: Aktueller Zyklus: Produktion (In-
tervall 3-5). Sofortige Produktionszeit des aktuellen Zyklus /
Verbleibende Produktionszeit des aktuellen Zyklus „rem.H.t“.
Der Bildschirm zeigt einen Timer mit der aktuellen Zyk-
lusproduktionszeit als „hh:mm:ss“ an.
• Verbleibende Produktionszeit des aktuellen Zyklus „rem.F.t“
– Timer wird auf dem Bildschirm als „hh:mm:ss“ angezeigt.
Wenn der Zyklus während der variablen Produktionszeit oder
Abkühlzeit liegt, ist die verbleibende Produktionszeit nicht
bekannt, da die Soll-Produktionstemperatur noch nicht er-
reicht wurde.
• Sofortige Ablösezeit des aktuellen Zyklus „cur.H.t“ - Timer
wird auch auf dem Bildschirm als „hh:mm:ss“ angezeigt.
• Verbleibende Ablösezeit des aktuellen Zyklus „rem.F.t“ - Ti-
mer erscheint auf dem Bildschirm als „hh:mm:ss“. Wenn
sich der Zyklus während der variablen Ablösezeit oder Heiz-
zeit befindet, ist die verbleibende Ablösezeit nicht bekannt, da
die Sollablösetemperatur noch nicht erreicht ist. In diesem
Fall zeigt der Bildschirm den Timer mit der verbleibenden
Ablösezeit nicht an. Wenn das Gerät die Soll-Trenntempera-
tur erreicht hat, wird auch der Timer mit der verbleibenden
Zeit auf dem Bildschirm angezeigt.
• Status der Eingänge „Ein/Aus“ „I1234“ / Status der Ausgänge
„Ein/Aus“ „O1234“ – Es zeigt Informationen zu aktiven Ein-
gängen und Ausgängen an. Auf dem oberen Bildschirm er-
scheint „I 1 2 3 4“ oder „1 2 3 4“. Das Zeichen wird mit einem
vollständigen Feld auf dem unteren Bildschirm ausgefüllt,
wenn der Ausgang/Eingang aktiviert ist, und nicht ausgefüllt
(leeres Feld), wenn es nicht aktiviert ist. Die Ein-/Ausgänge
sind wie in der folgenden Tabelle aufgeführt:
Eingänge Ausgänge
1Behälter-Ther-
mostat 1Kompressor/Lüfter
2Druckschalter 2Pumpe
3Überschwem-
mung 3Heißgas-Elektroventil
4Freie Eingabe 4Wassereinlass-Elekt-
roventil
• Cycle counter – Auf dem Bildschirm erscheint ein Zähler, der
die gesamten abgeschlossenen Zyklen des Geräts anzeigt.
Für jede vollständige Zykluszeit wird ein Zyklus gezählt.
Wenn Sie die Taste „OK“ 3 Sekunden lang gedrückt halten,
können Sie auf 0 zurücksetzen, und der Bildschirm fordert
Sie auf, die Zyklusanzahl zurückzusetzen. Wenn Sie auf „OK“
drücken, wird der Zähler auf Null zurückgesetzt und Sie keh-
ren mit Null Zyklen zum Zählerbildschirm zurück. Wenn Sie
auf „MENU“ drücken, wird der Reset abgebrochen und auf
dem Bildschirm wird die gesamte Zyklusnummer angezeigt,
die er zuvor hatte. Der Wert bleibt auch dann gespeichert,
wenn das Gerät vom Netz getrennt ist.
• Exit - Verlassen
III. KONFIGURATIONSMENÜ:
Der Zugriff erfolgt durch gleichzeitiges Drücken beider Pfeile
für 3 Sekunden. Sie kann jederzeit bei eingeschaltetem oder
ausgeschaltetem Gerät aufgerufen werden. Sie können damit
die Betriebsparameter des Geräts ändern. Durch Drücken von
„OK“ können Sie den eingestellten Parameter speichern und
zum nächsten wechseln. Der Wert bleibt auch dann gespei-
chert, wenn das Gerät vom Netz getrennt ist.
Temperaturwerte können um 1 °C eingestellt werden. Die Zeit-
werte werden in Minuten und Sekunden gemessen und kön-
nen mit einer Auflösung von 1 Sekunde eingestellt werden (mit
Ausnahme von „max.appliance.t“, die in Stunden und Minuten
gemessen wird und mit einer Auflösung von 1 Minute einge-
stellt werden kann).
• Produktionszeit „Freezing Time“ einstellen
• Produktionstemperatur „Freezing Temp“ einstellen – Mit die-
sem Parameter können Sie die Soll-Produktionstemperatur
des Geräts ändern.
• Ablösezeit „Harvest time“ einstellen
• Stellen Sie die Ablösetemperatur „Harvest Temp“ ein – Mit
diesem Parameter können Sie die Sollablösetemperatur des
Geräts ändern.
• Wasserzulaufzeit „water time“ - Die Wasserzulaufzeit erfolgt
während der eingestellten Ablösezeit.
• Pumpzeit bei Erstablösung „in.pump harv.t“. - Die Pumpzeit
während der Erstablösung erfolgt zu Beginn jeder variablen
Ablösungszeit.
• Pumpzeit während Endablösung „fin.pump harv.t“. - Die
Pumpzeit während der Endablösung beginnt, bevor jede ein-
gestellte Ablösungszeit endet.
• Ausgleichszeit (Heißgas) während der Anfahr-„balancing
time“ – Das Heißgas-Elektroventil muss sich 5 Sekunden
lang öffnen, bevor der Kompressor startet. NICHT ÄNDERN.
• Startzeit „Start t“. - Die Startzeit gibt die Zeit an, zu der das
Gerät in Betrieb genommen wird. Sowohl die Warmgas- als
auch die Wasser-Elektroventile werden angeschlossen.
• Minimale Ausfallzeiten aufgrund von „min stock t“ – Die mi-
nimale Ausfallzeit aufgrund des vollständigen Bestands be-
trägt standardmäßig 2 Minuten.
• Minimale Ausfallzeit aufgrund von Sicherheitsschalter „min.
security t“ – Die minimale Ausfallzeit des Sicherheitsschal-
ters beträgt standardmäßig 60 Minuten.
• Maximale variable Ablösungszeit „max. harvest t“ – Die maxi-
male variable Ablösungszeit misst die maximale Zeit, die das
Gerät warten muss, um einen Alarm auszulösen, ohne die
Sollablösungstemperatur zu erreichen.
• Maximale variable Produktionszeit „max. Freez. t” – Die ma-
ximale variable Produktionszeit misst die maximale Zeit, die

16
DE
das Gerät warten muss, um einen Alarm auszulösen, ohne
die Soll-Produktionstemperatur zu erreichen.
• Minimale variable Produktionszeit „min. Freez. t.“ - Die mini-
male variable Produktionszeit misst die Mindestzeit, die das
Gerät bis zum Start der Produktion warten muss.
• Maximale Gerätezeit „max. appliance t“ – Die maximale Ge-
rätezeit misst die maximale Dauerbetriebszeit des Geräts
ohne Stopps. Sie ermöglicht das Abtauen des Geräts zu ei-
nem bestimmten Zeitpunkt.
ACHTUNG: Für den industriellen Gebrauch des Geräts wird
empfohlen, die maximale Gerätezeit alle 2 Tage auf 20 Minuten
zu ändern.
• Abtaupumpenzeit „defrost pump t“ – Die Abtaupumpenzeit
beginnt, wenn die maximale Gerätezeit abgelaufen ist.
• Standardmäßige „standard values“ – Mit dieser Option kön-
nen Sie die Werkseinstellungen des Geräts wiederherstel-
len. Durch Drücken der Taste „OK“ wird auf dem Display die
Bestätigungsfrage angezeigt. Wenn Sie auf „OK“ drücken,
haben alle Werte die Standardeinstellungen und Sie kehren
zum Konfigurationsmenü zurück. Wenn Sie auf „MENU“ drü-
cken, verlassen Sie diese Option, ohne Änderungen vorzu-
nehmen, und kehren zum Konfigurationsmenü zurück.
• Exit - Verlassen
Reinigung und Wartung
• ACHTUNG! Trennen Sie das Gerät immer von der Stromver-
sorgung und trennen Sie den Wassereinlass oder schließen
Sie den Wasserhahn vor der Lagerung, Reinigung und War-
tung.
• Verwenden Sie keinen Wasserstrahl oder Dampfreiniger zur
Reinigung und schieben Sie das Gerät nicht unter das Was-
ser, da die Teile nass werden und ein Stromschlag entstehen
könnte.
• Wenn das Gerät nicht in einem guten Sauberkeitszustand
gehalten wird, kann dies die Lebensdauer des Geräts beein-
trächtigen und zu einer gefährlichen Situation führen.
• Die Überprüfung und Reinigung sollte mindestens alle sechs
Monate erfolgen. An sehr staubigen Stellen kann es notwen-
dig sein, den Kondensator jeden Monat in luftkondensierten
Geräten zu reinigen.
Reinigung
• Reinigen Sie die Außenfläche mit einem Tuch oder Schwamm,
der leicht mit einer milden Seifenlösung angefeuchtet ist.
• Vermeiden Sie, dass Wasser mit den elektrischen Kompo-
nenten in Kontakt kommt.
• Tauchen Sie das Gerät niemals in Wasser oder andere Flüs-
sigkeiten.
• Verwenden Sie niemals aggressive Reinigungsmittel, abra-
sive Schwämme oder chlorhaltige Reinigungsmittel. Ver-
wenden Sie zur Reinigung keine Stahlwolle, Metallutensilien
oder scharfe oder spitze Gegenstände. Keine Benzine oder
Lösungsmittel verwenden!
• Keine Teile sind spülmaschinenfest.
• Für Wasserkondensator: Bereiten Sie eine 50%ige Lösung
aus Phosphorsäure und destilliertem oder entmineralisier-
tem Wasser (oder ein geeignetes Produkt zur Reinigung des
Wasserkondensatorkreislaufs) vor. Führen Sie die Lösung
durch den Kondensator. (Die Mischung ist effektiver, wenn sie
heiß ist – zwischen 35 °C und 40 °C)
HINWEIS: Verwenden Sie keine Salzsäure.
• Für Luftkondensator: Reinigen Sie mit Hilfe eines Staub-
saugers, einer nichtmetallischen Bürste oder einer Nieder-
druckluft.
• Einlassfilter neigen dazu, während der ersten Tage, an denen
das Gerät in Betrieb ist, verstopft zu werden, insbesondere in
neu geschleuderten Einrichtungen. Lassen Sie den Schlauch
los und reinigen Sie ihn unter dem Wasserhahn.
• Für Kollektoren und Injektoren: Vorhang entfernen, mit
Phosphorsäure reinigen und abspülen. Entfernen Sie dann
die Sammler von ihren Achsen, indem Sie sie vorsichtig nach
oben ziehen. Entfernen Sie das Ausstoßgitter für gefallenes
Eis. (Reinigen Sie es wie den Vorhang.) Zerlegen Sie die Ein-
spritzdüsen und die Hauptfilter der Wasserpumpe – reinigen
Sie sie. Bauen Sie alle Teile wieder ein.
VORSICHT: Beim Wiedereinbau des Kollektors ist es sehr wich-
tig, dass die Injektoren wieder in die gleiche Position gebracht
werden.
Waschgang (Mischung für Wasserkondensator)
• Drücken Sie die Taste und die Einschalttaste 3 Sekunden
lang. Die Pumpen zirkulieren das Gemisch durch die Ver-
dampfer und Behälter. Der Kompressor und andere Kompo-
nenten bleiben während dieses Zyklus getrennt.
• Lassen Sie die Lösung 10 Minuten lang wirken. Halten Sie
nach 10 Minuten den Waschgang an und drücken Sie die
Ein-/Aus-Taste . Das Gerät stoppt dann.
• Entfernen Sie die Überläufe, die in den Behältern an der Ge-
räterückseite installiert sind. Sobald die Behälter entleert
sind, die Überläufe wieder einfüllen.
• Wenn die Behälter und Verdampfer vollständig sauber sind,
sollten Sie zwei Waschzyklen mit Wasser durchführen, um
Schmutzreste zu entfernen, die im vorherigen Zyklus zurück-
geblieben sind.
VORSICHT: Entsorgen Sie das in diesem ersten Zyklus produ-
zierte Eis.
• Reinigen und montieren Sie alle Komponenten, überprüfen
Sie, ob das Gitter sauber ist und ob die Würfel gut gleiten.
Prüfen Sie, ob sich keine Lamelle im Vorhang befindet.
• Überprüfen und/oder wechseln Sie die Wassereinlassfil-
ter.Prüfen Sie, ob die Einspritzdüsen in Position sind. Falls
erforderlich, zerlegen, reinigen und in die richtige Position
bringen.
Wartung
• Wenn Sie das Gerät öffnen, überprüfen Sie alle Wasseran-
schlüsse, den Zustand der Unterlegscheiben und Schläuche,
um Leckagen und Bruch und Überschwemmungen zu ver-
meiden.
• Überprüfen Sie regelmäßig den Betrieb des Geräts, um
schwere Unfälle zu vermeiden.
• Wenn Sie feststellen, dass das Gerät nicht ordnungsgemäß
funktioniert oder ein Problem vorliegt, verwenden Sie es
nicht mehr, schalten Sie es aus und wenden Sie sich an den
Lieferanten.
• Alle Wartungs-, Installations- und Reparaturarbeiten müs-
sen von spezialisierten und autorisierten Technikern durch-
geführt oder vom Hersteller empfohlen werden.
Transport und Lagerung
• Stellen Sie vor der Lagerung immer sicher, dass das Gerät
von der Stromversorgung und dem Wasseranschluss ge-

17
DE
trennt oder der Wasserhahn geschlossen wurde.
• Lagern Sie das Gerät an einem kühlen, sauberen und tro-
ckenen Ort.
• Stellen Sie niemals schwere Gegenstände auf das Gerät, da
dies zu Schäden führen könnte.
• Bewegen Sie das Gerät nicht, während es in Betrieb ist. Tren-
nen Sie das Gerät beim Bewegen von der Stromversorgung
und halten Sie es unten.
Fehlerbehebung
Wenn das Gerät nicht ordnungsgemäß funktioniert, sehen Sie
in der folgenden Tabelle nach, welche Lösung Sie finden. Wenn
Sie das Problem immer noch nicht lösen können, wenden Sie
sich bitte an den Lieferanten/Dienstleister.
Probleme Mögliche Ursache Mögliche Lösung
Gerät funktioniert
nicht. Das Gerät ist nicht
angeschlossen. Schließen Sie das
Gerät an.
Die elektrische
Verbindung ist
defekt oder in
schlechtem
Zustand.
Anschlüsse über-
prüfen.
Alarm bei hoher
Temperatur. Prüfen Sie, ob der
Lüfter funktioniert
und der Konden-
sator sauber ist.
Prüfen Sie den
Kondensatdruck-
schalter.
Falsche Ein-
stellungen oder
defekter Sicher-
heitsthermostat
(voller Behälter).
Überprüfen und
passen Sie die Ein-
stellungen an oder
ersetzen Sie sie.
Gerät funktioniert.
Der Kompressor
startet nicht.
Leistung erreicht
den Kompressor
nicht.
Bringen Sie die
elektronische
Platte wieder an.
Defekter Kom-
pressor. Tauschen Sie den
Kompressor aus.
Im Verdampfer
wird kein Eis
produziert.
Fehlfunktion der
Pumpe. Tauschen Sie die
Pumpe aus.
Fehlender oder
niedriger Wasser-
stand.
Überprüfen Sie
das Wasserein-
lassventil und
tauschen Sie es
gegebenenfalls
aus. Überprüfen
Sie den Wasser-
standsschlauch.
Ineffektives Kühl-
system. Tauschen Sie den
Dehydrator aus.
Eiswürfel werden
produziert, lösen
sich aber nicht.
Defektes oder
falsch angeschlos-
senes Heißgas-
ventil.
Überprüfen und bei
Bedarf ersetzen.
Niedriger Wasser-
druck. Erhöhen Sie den
Druck.
Lüfterstörung oder
Kondensations-
druck zu niedrig.
Einstellungen
anpassen oder
ersetzen.
Wasserdruck-
schalterventil zu
offen oder defekt.
Justieren, reparie-
ren oder ersetzen.
Raumtemperatur
oder Wassertem-
peratur unter 7 °C.
Verlängern Sie die
Ablösezeit.
Unzureichende
Ablösezeit.
Die Produktions-
zeit ist zu lang. Die
Würfel haben raue
Kanten außerhalb
der Form.
Ändern Sie die
Produktionszeit.
Schmutzwas-
ser-Einlassfilter. Filter reinigen.
Geringe Eispro-
duktion. Verschmutzter
Kondensator, blo-
ckierter Luftstrom
oder heiße Luft
von einem anderen
Gerät.
Reinigen Sie den
Kondensator,
entfernen Sie
Hindernisse oder
ändern Sie die Po-
sition des Geräts.
Defektes Heißgas-
ventil. Ersetzen Sie das
Heißgasventil.
Zu niedrige
Einstellungen
oder defekter
Druckschalter des
Lüfters oder des
Kondensations-
wassereinlass-
ventils.
Einstellungen
anpassen oder
ersetzen.
Das Wasserein-
lassventil schließt
sich nicht (tropft).
Überprüfen und bei
Bedarf ersetzen.
Ineffektiver Kom-
pressor. Tauschen Sie den
Kompressor aus.
Leere und zu weiße
Würfel mit une-
benen Kanten.
Mangel an Wasser.
Die Pumpe flutet
den Behälter nicht.
Überprüfen Sie die
Pumpe.
Verstopfte Ein-
spritzdüsen. Reinigen Sie die
Einspritzdüsen.
Die Vorhanglamel-
len schließen nicht
richtig.
Stellen Sie die
Vorhanglamellen
ein oder reinigen
Sie die Achse.

18
NL
Das Gerät hält
auch bei vollem
Behälter nicht an.
Behälterthermost-
at falsch einge-
stellt oder defekt.
Passen Sie die
Werkseinstellung
an, die mit einem
roten Punkt über
dem Thermostate-
tikett gekennzeich-
net ist. Tauschen
Sie es aus, wenn
es defekt ist.
Ablasspumpe
funktioniert nicht. Die Ablaufpumpe
ist nicht richtig
angeschlossen.
Den Anschluss
der Ablaufpumpe
überprüfen.
Der Wasserfluss
ist blockiert. Reinigen Sie den
Einlass der Ablauf-
pumpe.
Entlüftungs-
schlauch ist
geschlossen.
Entlüftungs-
schlauch öffnen.
Nicht genug
Wasser, um die
Ablaufpumpe zu
aktivieren.
Es sollten min-
destens 710 ml
Wasser vorhanden
sein.
Ablaufpumpe
funktioniert, aber
Wasser wird nicht
herausgepumpt.
Ablaufschlauch ist
blockiert Ablaufschlauch
reinigen
Der Auslass-
schlauch ist nicht
richtig befestigt.
Prüfen Sie, ob
der Schlauch die
maximale horizon-
tale Länge von 6 m
und die maximale
Höhe von 2 m nicht
überschreitet.
Identifizierung von Alarmen
Alarm Beschreibung
Voller
Behälter Wenn der Behälterthermostatsensor geöffnet ist
(eisgefüllter Bestand), stoppt das Gerät nach der
Überprüfung, sobald die Eisablösung abge-
schlossen ist, und zeigt „Full stock“ an.
Zyklus-Son-
de Zeigt die Temperatur der Zyklussonde auf dem
Bildschirm an. Ist er defekt, stoppt das Gerät
und zeigt „Cycle probe“ an.
Lufttempe-
ratur-Sonde Wenn die Sonde aus irgendeinem Grund defekt
ist, wird anstelle der Anzeige der Temperatur
„_____“ angezeigt. Dieser Alarm hat keinen
Einfluss auf den Betrieb des Geräts, da diese
Funktion ausschließlich zu Informationszwecken
dient.
Hoher
Druck Dieser Alarm erscheint, wenn der Druck im
Gerät 30 bar erreicht. Die Schaltung kann
manuell oder automatisch erfolgen, wie von der
elektronischen Platte geregelt.
• Befindet sich der Dip-Schalter 2 in der
Stellung ON, erfolgt die Umschaltung
automatisch. Die minimale Ausfallzeit für die
Sicherheit beträgt 60 Minuten und der Alarm
„Temporierung“ erscheint auf dem Display.
• Wenn sich der Dip-Schalter 2 in der Position
OFF befindet, erfolgt der Schalter manuell
und auf dem Display erscheint „Pressure“.
Langes
Vorheizen Wenn die Ablösezeit länger als die festgelegte
Zeit ist, erscheint der Alarm „Long Harv.time“
auf dem Display.
Lange Vor-
kühlung Wenn die Produktionszeit länger als die festge-
legte Zeit ist, funktioniert das Gerät nicht mehr,
während der Alarm „Long Freez.time“ auf dem
Display angezeigt wird.
Kurze Vor-
kühlung Wenn die Produktionszeit kürzer ist als die
minimale variable Produktionszeit, beginnt sich
das Gerät zu lösen. Wenn dies fortgesetzt wird,
wird der Fehler auf der Anzeige „short freez.
time“ angezeigt.
Garantie
Defekte, die die Funktionsfähigkeit des Geräts beeinträchtigen
und innerhalb eines Jahres nach dem Kauf sichtbar werden,
werden durch kostenlose Reparatur oder Ersatz repariert, so-
fern das Gerät gemäß den Anweisungen verwendet und gewar-
tet wurde und in keiner Weise missbraucht oder missbraucht
wurde. Ihre gesetzlichen Rechte bleiben unberührt. Wenn das
Gerät im Rahmen der Garantie beansprucht wird, geben Sie an,
wo und wann es gekauft wurde, und legen Sie einen Kaufbeleg
(z. B. Beleg) bei.
Im Einklang mit unserer Richtlinie der kontinuierlichen Pro-
duktentwicklung behalten wir uns das Recht vor, die Produkt-,
Verpackungs- und Dokumentationsspezifikationen ohne Vor-
ankündigung zu ändern.
Entsorgung und Umwelt
Bei der Außerbetriebnahme des Geräts darf das
Produkt nicht mit anderem Hausmüll entsorgt
werden. Stattdessen liegt es in Ihrer Verantwor-
tung, Ihre Abfallausrüstung zu entsorgen, indem
Sie sie an eine dafür vorgesehene Sammelstelle
übergeben. Die Nichteinhaltung dieser Regel kann gemäß den
geltenden Vorschriften zur Abfallentsorgung bestraft werden.
Die separate Sammlung und Wiederverwertung Ihrer Abfall-
ausrüstung zum Zeitpunkt der Entsorgung trägt zum Schutz
natürlicher Ressourcen bei und stellt sicher, dass sie auf eine
Weise recycelt wird, die die menschliche Gesundheit und die
Umwelt schützt.
Für weitere Informationen darüber, wo Sie Ihren Abfall zum
Recycling abgeben können, wenden Sie sich bitte an Ihr örtli-
ches Abfallsammelunternehmen. Die Hersteller und Importeu-
re übernehmen weder direkt noch über ein öffentliches System
die Verantwortung für Recycling, Aufbereitung und ökologische
Entsorgung.
NEDERLANDS
Geachte klant,
Bedankt voor de aankoop van dit Barmatic-apparaat. Lees
deze gebruikershandleiding zorgvuldig door en let vooral op
de hieronder beschreven veiligheidsvoorschriften voordat u
dit apparaat voor het eerst installeert en gebruikt.
Veiligheidsinstructies
• Gebruik het apparaat alleen voor het beoogde doel waarvoor
het is ontworpen, zoals beschreven in deze handleiding.
• De fabrikant is niet aansprakelijk voor schade veroorzaakt
door onjuiste bediening en onjuist gebruik.
• GEVAAR! RISICO OP ELEKTRISCHE SCHOKKEN! Pro-
beer het apparaat niet zelf te repareren. Dompel de

19
NL
elektrische onderdelen van het apparaat niet onder in water
of andere vloeistoffen. Houd het apparaat nooit onder stro-
mend water.
• GEBRUIK NOOIT EEN BESCHADIGD APPARAAT! Controleer
de elektrische aansluitingen en het snoer regelmatig op
schade. Als het apparaat beschadigd is, koppelt u het los
van de stroomtoevoer. Reparaties mogen alleen worden uit-
gevoerd door een leverancier of gekwalificeerd persoon om
gevaar of letsel te voorkomen.
• WAARSCHUWING! Leid bij het plaatsen van het apparaat het
netsnoer zo nodig veilig om onbedoeld trekken, beschadiging,
contact met het verwarmingsoppervlak of struikelgevaar te
voorkomen.
• WAARSCHUWING! Zolang de stekker in het stopcontact zit, is
het apparaat aangesloten op de stroomvoorziening.
• WAARSCHUWING! Schakel het apparaat ALTIJD uit voordat
u het loskoppelt van de stroomtoevoer, reiniging, onderhoud
of opslag.
• Sluit het apparaat alleen aan op een stopcontact met de
spanning en frequentie die op het label van het apparaat
staan vermeld.
• Raak de stekker/elektrische aansluitingen niet aan met natte
of vochtige handen.
• Houd het apparaat en de elektrische stekker/aansluitingen
uit de buurt van water en andere vloeistoffen. Als het appa-
raat in water valt, verwijder dan onmiddellijk de voedingsaan-
sluitingen. Gebruik het apparaat niet voordat het is gecontro-
leerd door een gecertificeerde technicus. Het niet opvolgen
van deze instructies leidt tot levensbedreigende risico’s.
• Sluit de voeding aan op een gemakkelijk toegankelijk stop-
contact, zodat u het apparaat in geval van nood onmiddellijk
kunt loskoppelen.
• Zorg ervoor dat het snoer niet in contact komt met scherpe of
hete voorwerpen en houd het uit de buurt van open vuur. Trek
nooit aan het netsnoer om het uit het stopcontact te halen,
trek altijd aan de stekker.
• Draag het apparaat nooit aan het snoer.
• Probeer nooit zelf de behuizing van het apparaat te openen.
• Steek geen voorwerpen in de behuizing van het apparaat.
• Laat het apparaat nooit onbeheerd achter tijdens gebruik.
• Dit apparaat moet worden bediend door getraind personeel in
de keuken van het restaurant, kantines of barpersoneel, enz.
• Dit apparaat mag niet worden gebruikt door personen met
beperkte fysieke, zintuiglijke of mentale capaciteiten of per-
sonen met een gebrek aan ervaring en kennis.
• Dit apparaat mag onder geen enkele omstandigheid door kin-
deren worden gebruikt.
• Houd het apparaat en de elektrische aansluitingen buiten het
bereik van kinderen.
• Gebruik nooit accessoires of extra apparaten die niet bij het
apparaat zijn geleverd of door de fabrikant worden aanbevo-
len. Als u dit niet doet, kan dit een veiligheidsrisico vormen
voor de gebruiker en het apparaat beschadigen. Gebruik al-
leen originele onderdelen en accessoires.
• Gebruik dit apparaat niet met een externe timer of afstands-
bediening.
• Plaats het apparaat niet op een verwarmingsobject (benzine,
elektrisch, houtskoolfornuis, enz.).
• Dek het apparaat niet af als het in werking is.
• Plaats geen voorwerpen op het apparaat.
• Gebruik het apparaat niet in de buurt van open vuur, explo-
sieve of ontvlambare materialen. Gebruik het apparaat altijd
op een horizontaal, stabiel, schoon, hittebestendig en droog
oppervlak.
• Het apparaat is niet geschikt voor installatie in een ruimte
waar een waterstraal kan worden gebruikt.
• Laat een ruimte van ten minste 20 cm rond het apparaat voor
ventilatie tijdens gebruik.
• WAARSCHUWING! Houd alle ventilatieopeningen op het ap-
paraat vrij van obstakels.
Speciale veiligheidsinstructies
• LET OP! RISICO OP BRAND! Het gebruik-
te koudemiddel is R452A Het is een ont-
vlambaar koudemiddel.
• LET OP! RISICO OP BRANDWONDEN! Koudemiddel dat op
de huid wordt gespoten, kan ernstige brandwonden veroorza-
ken. Bescherm ogen en huid. Als het koelmiddel verbrandt,
onmiddellijk spoelen met koud water. Als de brandwonden
ernstig zijn, breng dan ijs aan en neem onmiddellijk contact
op met de medische behandeling
• WAARSCHUWING! Beschadig het koudemiddelcircuit niet.
• WAARSCHUWING! Plaats geen verlengsnoeren met meerde-
re stopcontacten of andere externe voeding op de achterkant
van het apparaat.
• De nieuwe slangensets die bij het apparaat worden geleverd,
moeten worden gebruikt en oude slangensets mogen niet
opnieuw worden gebruikt.
• Plaats geen gevaarlijke producten, zoals brandstof, alcohol,
verf, spuitbussen met een ontvlambaar drijfgas, ontvlambare
of explosieve stoffen, enz. in of in de buurt van het apparaat.
• Het wordt aanbevolen om waterontharder te gebruiken met
het apparaat.
Beoogd gebruik
• Dit apparaat is uitsluitend bedoeld voor commercieel en pro-
fessioneel gebruik.
• Het apparaat is ontworpen voor het maken en opslaan van
ijsblokjes. Elk ander gebruik kan leiden tot schade aan het
apparaat of persoonlijk letsel.
• Gebruik van het apparaat voor andere doeleinden wordt be-
schouwd als misbruik van het apparaat. De gebruiker is als
enige aansprakelijk voor onjuist gebruik van het apparaat.
Aarding installatie
Dit apparaat is geclassificeerd als beschermingsklasse I en
moet worden aangesloten op een beschermende aarding. Aar-
ding vermindert het risico op elektrische schokken door een
ontsnappingsdraad voor de elektrische stroom te leveren.
Dit apparaat is voorzien van een netsnoer met aardingsstekker
of elektrische aansluitingen met aardingskabel. De aansluitin-
gen moeten correct worden geïnstalleerd en geaard.
Werkingsprincipe
(Afb. 1 op pagina 3)
Symbool Beschrijving Symbool Beschrijving
CCompressor SC Cyclus sonde

20
NL
VVentilator SA Omgevingssonde
BPomp PHogedrukschakelaar
EA Waterinlaatklep TThermostaatsonde
voor afvalbak
GC Heet gasklep
Bedieningspaneel
(Afb. 2 op pagina 3)
1. AAN/UIT: Inschakelen: licht het scherm op en begint bij punt
0. Poeder uit: Het schakelt het apparaat op elk moment uit.
Het schakelt het displaylampje uit en laat de tijd zichtbaar.
Alle relais uit.
2. PIJLEN OMHOOG/OMLAAG: Overstappen tussen menuop-
ties. Waarden verhogen of verlagen.
3. OK: De menuopties bevestigen of waarden instellen.
4. MENU: Ga naar het hoofdmenu of terug vanaf één instel-
lingsniveau wanneer u door de menu’s navigeert.
Elektrisch circuitdiagram
(Afb. 3 op pagina 3)
Symbool Beschrijving Symbool Beschrijving
#1 blauw #2 rood
#3 bruin #4 achterkant
#5 oranje #6 violet
#7 wit #8 grijs
HHogedrukscha-
kelaar LSchakelaar lage
druk
SA Luchttempera-
tuursonde SC Temperatuurson-
de cyclus
T1 Afvalbak thermo-
staat PWater elektroklep
VElektroklep voor
heet gas SCompressor
BPomp RPlezier
FVentilatorregeling
Voorbereiding voor gebruik
• Verwijder alle beschermende verpakkingen en wikkels.
• Controleer of het apparaat in goede staat verkeert en alle
accessoires heeft. Neem in geval van onvolledige of bescha-
digde levering onmiddellijk contact op met de leverancier.
Gebruik in dit geval het apparaat niet.
• Reinig de accessoires en het apparaat voor gebruik (zie ==>
Reiniging en onderhoud).
• Zorg ervoor dat het apparaat volledig droog is.
• Plaats het apparaat op een horizontaal, stabiel en hittebe-
stendig oppervlak dat veilig is tegen waterspatten.
• Bewaar de verpakking als u van plan bent uw apparaat in de
toekomst op te bergen.
• Bewaar de gebruikershandleiding voor toekomstig gebruik.
OPMERKING! Vanwege productieresten kan het apparaat tij-
dens de eerste paar keer gebruik een lichte geur afgeven. Dit is
normaal en duidt niet op een defect of gevaar. Zorg ervoor dat
het apparaat goed geventileerd is.
Bedieningsinstructies
Installatie
• Gebruik de flexibele aansluiting (lengte 1,3 m) met de twee
filterverbindingen die bij het apparaat zijn geleverd. We raden
het gebruik van een dubbele wateruitlaat met twee afslui-
ters niet aan, omdat deze de achterkant per ongeluk kunnen
sluiten, waardoor het apparaat zonder water kan blijven. De
waterdruk moet tussen 1 bar en 6 bar liggen. Als de druk
deze waarden overschrijdt, installeer dan de benodigde cor-
rigerende componenten.
• Het is belangrijk dat de waterleiding niet dicht bij warmte-
bronnen komt en dat de flexibele slang of het filter geen hete
lucht van het apparaat ontvangt. Het kan leiden tot een afna-
me van de productie.
• De afvoer moet minimaal 150 mm onder het apparaat staan.
• Installeer een sifon om slechte geurtjes te voorkomen. De
afvoerleiding moet een binnendiameter hebben van 60 mm
en een minimale helling van 3 cm per meter.
• De elektronische kaart heeft een batterijknop voor de timer.
Verwijder tijdens de installatie de bescherming (bord aan de
bovenkant, achter het display - verwijder twee schroeven on-
der het bovenste luchtrooster, om toegang te krijgen tot de
elektrische kast).
Opstarten
Ga na de installatie (controleren van ventilatie, omstandig-
heden van het gebouw, temperatuur, waterkwaliteit, enz.) als
volgt te werk:
• Open de waterinlaat. Controleer of er geen lekken zijn.
• Sluit het apparaat aan op het stroomnet.
• Druk op de knop op het display.
• Controleer of er geen onderdeel is dat wrijft of trilt.
• Controleer of het gordijn vrij kan bewegen.
• Controleer of de injectoren het water in de juiste richting naar
de verdamper sturen.
• Controleer of de collectors vrij op hun assen draaien.
• Controleer na 10 minuten of het waterreservoir geen lekk-
ages meer heeft via het maximale overloopkanaal.
Bedieningspaneel
• De tijd wordt op het display weergegeven als het apparaat uit
staat (geen achtergrondverlichting). Wanneer het apparaat
wordt losgekoppeld van de stroomtoevoer, gaat de tijd ver-
loren. Bij opnieuw verbinden knippert 00:00 om aan te geven
dat de tijd niet is ingesteld.
• Tijdens het opstarten verschijnt er op het display “Starting”.
• Tijdens de loskoppeltijd verschijnt er op het display “Har-
vest”. Onderaan het scherm wordt de temperatuur weerge-
geven die wordt aangegeven door de cyclussonde (SC).
• Wanneer het loskoppelen is voltooid, toont het scherm een
voortgangsbalk met de resterende tijd tot het einde van
de cyclus. Het toont ook de volgende tekst onderaan het
scherm: “Fabr.: -12oC”, waarbij de temperatuur wordt aan-
gegeven door de SC-cyclussonde.
• Aangezien de productietijd “tf=tfv+tff” is en het bij aanvang
niet bekend is hoe lang de “tfv” meegaat, aangezien deze af-
hankelijk is van de “Tfc”, als referentie nemen: koeltijd “tfv”
van de laatste cyclus + ingestelde productietijd “tff”.
• Als de „tfv” van de laatste cyclus niet bekend is, gebruik dan
een tijd van 25 minuten (totale productietijd „tf=tfv+tff”) voor
Table of contents
Languages:
Other BARMATIC Ice Maker manuals
Popular Ice Maker manuals by other brands
Maxx Ice
Maxx Ice MIM250 Service manual
Hubbard Systems
Hubbard Systems Scotsman NW 458 installation guide
U-Line
U-Line 1200 series quick start guide

Manitowoc
Manitowoc QF0400 Installation, use & care manual

Hoshizaki
Hoshizaki FM-1200ALKE-R452-SB installation manual
U-Line
U-Line SP18FC Quick reference guide
Marvel
Marvel 30iM-BB Installation, operation & maintenance instructions
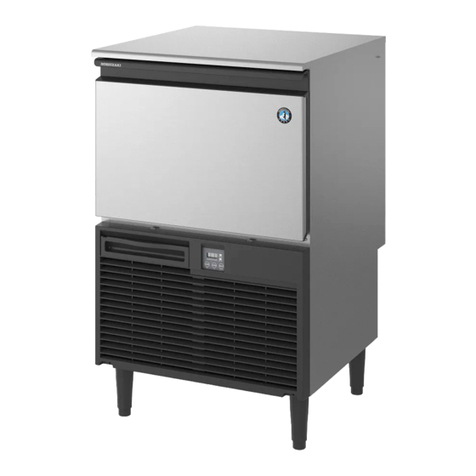
Hoshizaki
Hoshizaki KM-40C-HC Service manual

Goldmedal
Goldmedal Sno-King 1888 instruction manual

Silvercrest
Silvercrest SEMK 105 A1 operating instructions
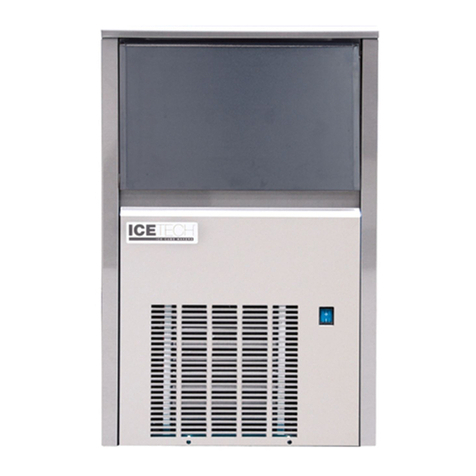
Ice-Tech
Ice-Tech SP 25 Technical & service manual
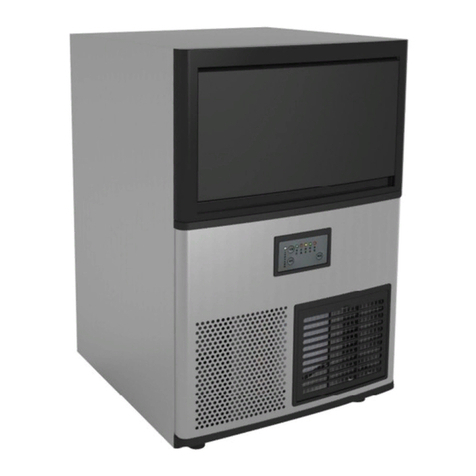
VALPRO
VALPRO VPIM55 user manual
