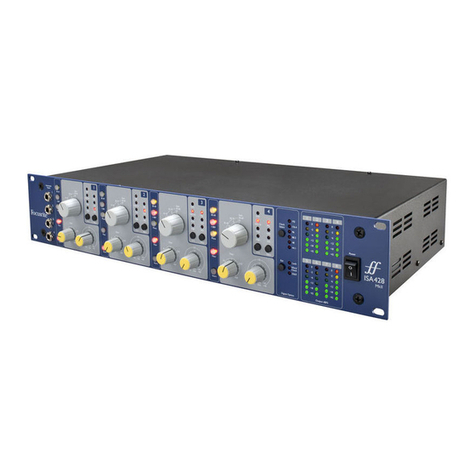
Bartington PA1 User manual

Operation Manual for
PA1 Power Amplier

BARTINGTON INSTRUMENTS
© Bartington Instruments Page 2 of 17 OM3225/3
Table of Contents
1. About this Manual 3
1.1. Symbols Glossary 3
2. Safe Use 4
3. Introduction 4
4. PA1 Power Amplifier Features 5
4.1. PA1 Power Amplifier Front Panel 5
4.2. PA1 Power Amplifier Rear Panel 6
5. Compatibility 6
6. PA1 Power Amplifier Operation 7
6.1. PA1 Location and Ventilation Requirements 7
6.2. Connecting to the Helmholtz Coils 7
6.3. Connecting to the CU1 Control Unit and/or CU2 Closed-Loop Module 8
6.3.1. Pin-Outs 8
6.4. PA1 Power Amplifier Connection to Mains Power 9
6.5. PA1 Power Amplifier Output Circuit Breakers 9
6.6. Cooling 9
7. Powering Sequence 10
8. System Calibration 11
8.1. Static Field Compensation 11
8.2. Scaling 12
8.3. Orthogonality 12
9. Air Intake Filter Cleaning and Replacement 12
10. Absolute Maximum Voltages and Ratings 13
11. Troubleshooting, Care and Maintenance 13
12. Storage and Transport 14
13. Disposal 14
13.1. Waste Electrical and Electronic Equipment (WEEE) Regulations 14
Appendix A: Connecting the Components of the Helmholtz Coil System 15
Appendix B: Guidance for Connection to Mains Supply 16

BARTINGTON INSTRUMENTS
© Bartington Instruments Page 3 of 17 OM3225/3
About this Manual
This manual provides the information necessary to help customers install and operate the PA1
Power Amplifier. The PA1 Power Amplifier is one component of Bartington Instruments’ One,
Two or Three-Axis Helmholtz Coil System. This manual should therefore be read in conjunction
with:
• Compatible Helmholtz Coils Operation Manuals
• CU1 Control Unit Operation Manual OM3224
• CU2 Closed-Loop Module (if applicable) OM3999
• Helmholtz Coil Control Software OM3596.
All manuals are available from the Helmholtz Coil System Operation Manual page. The relevant
products outline drawings can be found Helmholtz Coil System outline drawing page.
This manual should also be read in conjunction with the product brochure DS2613 which can
also be found on the product page.
Photographs of key components are included, labelled with numbers. A number in the text in
square brackets [ ] refers to that label.
Bartington Instruments cannot advise on the integration of this equipment with any third party
products.
Symbols Glossary
The following symbols used within this manual call your attention to specific types of
information:
WARNING: Indicates a situation in which serious bodily injury or death could result if the
warning is ignored.
Caution: Indicates a situation in which bodily injury or damage to your instrument, or both,
could result if the caution is ignored.
Identifies items that must be disposed of safely to prevent unnecessary damage to the
environment.
Note: A paragraph in this format provides useful supporting information on how to make
better use of your purchase.

BARTINGTON INSTRUMENTS
© Bartington Instruments Page 4 of 17 OM3225/3
Safe Use
WARNING: The PA1 Power Amplifier is powered by mains electricity and contains
uninsulated parts. Ensure that the unit is properly earthed at all times. Do not open the
casing or have contact with any internal parts except where following a procedure precisely
as described in this manual. Safety protection will be impaired if the unit is used in a
manner not specified in this manual.
WARNING: The electromagnetic field from this product may interfere with the operation
of pacemakers and other medical devices. Consult your device’s manufacturer before
operation.
WARNING: These products are not qualified for use in explosive atmospheres or life
support systems. Consult Bartington Instruments for advice.
WARNING: Personal injury may result from lifting the PA1 Power Amplifier. Use more than
one person to move this device. It should be carried by each of the four lower corners.
CAUTION: When operated at full power for extended periods of time, thermal cut-out may
be activated to protect the equipment from overheating. Should this occur, the power to the
PA1 will be cut. In such event, it is advised to allow the unit to cool down before restarting
it. To prevent the thermal cut-out from activating, the equipment should be used in a
cooled temperature controlled environment (refer to Section 4.6)
Introduction
The PA1 Power Amplifier is the power amplifier for our Helmholtz Coil System. It delivers power
to the coil so as to generate the appropriate the required field. Additionally a permanent DC
offset can be applied to the Helmholtz Coils via the PA1 front panel DC offset potentiometers.
The following items allow to consitute a complete Helmholtz Coil System:
• HC1, HC2, HC9 or HC16 Helmholtz Coils: an assembly of up to three Helmholtz coils. See
related operation manuals.
• PA1 Power Amplifier.
• CU1 Control Unit: the control unit for the system which enables it to interface with a PC-
based test, measurement and control system. See OM3224.
• Optional CU2 Closed-Loop Module: allows active cancellation of external DC and AC
magnetic field disturbances using the CU2 Reference Magnetometer. See OM3999.
• A National Instrument acquisition card or PXI system.

BARTINGTON INSTRUMENTS
© Bartington Instruments Page 5 of 17 OM3225/3
A diagram showing the connection of these separate items into one system is given in Appendix
A.
The PA1 Power Amplifier is available in a number of variants to match the coil assembly it is
being used with:
• PA1-1X, PA-1Y, and PA1-1Z Single Axis versions
• PA1-2XY, PA1-2YZ, and PA1-2XZ Two Axes versions
• PA1-3 Three Axes version
Figure 1. PA1 Power Amplifier Front Panel
1. Upper front panel
2. Current control input (takes input from signal generator)
3. Calibration controls, behind transparent plastic cover
4. Current monitor output
5. Static field offset controls
51
8 79
2 4
6
6
3
10

BARTINGTON INSTRUMENTS
© Bartington Instruments Page 6 of 17 OM3225/3
6. Fastening screws
7. Rocker switch
8. Lower front panel
9. Centre front panel (grille)
10. Amplifier O/P circuit breakers
14
11
16 13
15
12
12
Figure 2. PA1 Power Amplifier Rear Panel
11. Blank ventilation panel
12. Fastening screws
13. Coil drive output to Helmholtz Coils (HC1, HC2, HC9 or HC16)
14. Lower rear panel
15. Circuit breaker
16. Mains power input socket
Compatibility
The PA1 is compatible to use with Bartington Instruments Helmholtz Coils HC1, HC2, HC9 and
HC16). It is also suitable for use with Ferronato™Helmholtz Coils BHC2000. The PA1 can also be
connected to our CU1 Control Unit and/or CU2 Closed-Loop Module.

BARTINGTON INSTRUMENTS
© Bartington Instruments Page 7 of 17 OM3225/3
The PA1 has ventilation panels on the front, back and on either side. These should remain
unobstructed to allow air movement through the PA1.
Note: The PA1 should be positioned around 3m away from the Helmholtz Coils to reduce
PA1 distorting and interfering with the magnetic field generated by the Helmholtz Coils.
Note: For optimum results the ambient temperature should not exceed the maximum
specified in the datasheet.
Connecting to the Helmholtz Coils
The compatible Helmholtz Coils are fitted with a cable with a plug for connection to the PA1
Power Amplifier.
The PA1 Power Amplifier and the Helmholtz Coil must be connected before the PA1 is turned on.
The supplied cable is plugged into the Output socket to the Helmholtz Coil on the rear of the PA1
Power Amplifier [13].
Figure 3. Output to Helmholtz Coils
Caution: The coil drive output socket is reserved for the cable connecting the Helmholtz
Coil and the PA1 Power Amplifier. No other connection should be made to this socket.
Note: The amplifier and any other control or measuring equipment must be at least 3m
away from the Helmholtz Coils.
Note: The PA1 Power Amplifier varies for Helmholtz Coils with different numbers of axes.
One, two, and three axis PA1 versions are available. If an HC1 has a greater number of axes
than the PA1 then only the number of axes corresponding to the PA1 can be used.
13

BARTINGTON INSTRUMENTS
© Bartington Instruments Page 8 of 17 OM3225/3
Connecting to the CU1 Control Unit and/or CU2 Closed-Loop Module
Figure 4. Zoom on PA1 Front Panel Input and Output
The PA1 Power Amplifier is connected to the CU1 Control Unit via the current control input [2].
The current monitor output [4], located on the upper front panel of the PA1 Power Amplifier, is
also connected to the CU1.
When using the optional CU2 Closed-Loop Module, the PA1 Power Amplifier is connected to the
CU2 Closed-loop module via the current control input [2]. The current monitor output [4], located
on the upper front panel of the PA1 Power Amplifier, remains directly connected to the CU1.
Note: A diagram showing the interconnection of components of the HCS1 System is given
in Appendix A.
Note: When using CU2 Closed-Loop Module, please refer to the CU2 operation manual for
connections.
Current Control Input and Current Monitor Output are both differential for increased noise
rejection. Ensure to use the interconnecting cables provided with the PA1 and CU1.
WARNING: Do not connect either current control differential inputs or current monitor
differential outputs to ground.
6.3.1. Pin-Outs
Pin-out information for the current control input and the current monitor output can be found on
the PA1 Outline Drawing DR3047 available on our website.
4
2

BARTINGTON INSTRUMENTS
© Bartington Instruments Page 9 of 17 OM3225/3
Details of suitable power supply for the PA1 Power Amplifier are provided in the product
brochure, with the supply beeing earthed/grounded. The supply from a standard wall outlet
should be suitable in most countries. A compatible mains cable supplied with a UK 13A plug,
an EU plug or bare ends can be specified at the time of ordering. In the latter case, refer to
Appendix B.
A 16A circuit breaker is situated on the rear panel [15] which is suitable for the supply stated in
the product brochure. Contact Bartington Instruments for advice if a lower voltage is to be used.
Figure 5. Mains Circuit Breaker on back panel.
Each amplifier output is fitted with a resettable 20A circuit breaker [10], which protects both the
amplifiers and the coil assembly in the event of a fault. The breakers are normally in the reset
position. If a breaker trips, it can be reset by pressing in the appropriate button on the front
panel. Repeated tripping may be an indication of a system fault.
Figure 6. Amplifier Output circuit breakers
Cooling
The amplifier is fan-cooled so needs an unimpeded airflow from front to rear. A self-resetting
thermal shut-down mechanism will prevent damage through overheating.
15

BARTINGTON INSTRUMENTS
© Bartington Instruments Page 10 of 17 OM3225/3
Caution: If used on full power ensure that the equipment is placed in a cool, controlled
environment to prevent activation of the thermal cut-out.
Caution: The air filter in the front panel [9] should be inspected regularly, and cleaned or
replaced when necessary. See Section 9.
Before powering the system, you should ensure that all the connections between the Helmholtz
Coil and the PA1, the PA1 and the CU1 and/or CU2 as well as the CU1 to a suitable National
Instruments acquisition card (or PXI-system) are done.
Once all connections are done, the following sequence should be used:
• Power the PC and National Instruments acquisition card or PXI system
• If using a CU2, ensure that the CU2 Reference Magnetometer is connected to the CU2 Module
• Power the CU1
• Power the PA1
To power down the system, the reverse sequence should be followed.
Please note that the equipment should be left to warm up for at least 12 hours before any of the
calibration is undertaken.
9

BARTINGTON INSTRUMENTS
© Bartington Instruments Page 11 of 17 OM3225/3
System Calibration
The ambient DC magnetic field can be compensated for by introducing a DC offset into the
amplifier input. The level of offset applied is set by lockable potentiometers [5] present on
the amplifier upper front panel. This will enable a user to measure a 0 magnetic field when
generating a 0 magnetic field in the software.
17
18
5
Figure 7. DC Field Offset Potentiometers
This adjustment is done one axis at a time using the Static Field Offset potentiometers.
Additional equipment required include a suitable magnetometer, and a mounting jig to position
the magnetometer in the centre of the coils, with the sensor’s axes mechanically aligned to the
axes of the Helmholtz Coil. A suitable magnetometer and mounting jig are both available from
The static offset potentiometers are locked by the outer hexagonal lock [17]. This should be
loosened with a spanner. The compensation is adjusted by turning the central shaft [18] with a
screwdriver.
Place first a suitable magnetometer in it’s mounting jig, with the X, Y and Z axis of the sensor
aligned with the X, Y and Z axes of the Helmholtz Coil. The magnetometer’s sensing element
should be located in the centre of the coils in the area of highest homogeneity. The sensor can be
typically connected via the DUT or AUX connection of the CU1 (when no CU2 is connected).
Once the system is powered and has been left to warm-up, turn off the field generation (using
the Generate tab of the software - see Helmholtz Coil Control Software operation manual).
Using the Measure tab of the Helmholtz Coil Control Software, take readings from the sensor
(in DC setup). Turn the front panel Static Field Offset potentiometers until the readings of the
magnetometer are as close to 0 as possible. A residual DC magnetic field field of below 100nT
should be easily attained. The Static Field Offsets potentiometers locking rings should then be
tightened whilst holding the centre shaft with the screwdriver. Once complete, recheck the offset
of each axis.

BARTINGTON INSTRUMENTS
© Bartington Instruments Page 12 of 17 OM3225/3
Note: The compensation current will appear as part of the field current measured by the
field monitor. This adjustment should be checked regularly and will certainly need setting
on installation, and be checked after moving the coils or placing magnetic objects nearby.
Note: The largest coil of the Helmholtz Coil should be positioned so that the field it
generates is in the direction of the lowest ambient field strength. This will reduce the
level of DC offset applied, and optimise the maximum field which can be generated in that
direction.
Note: Do not overtighten the locking rings.
Scaling
When supplied as a pair, the PA1 and Helmholtz Coil will have been factory set up. Description
for the scaling adjustment procedure is available on request from Bartington Instruments -
Scaling should be checked on installation as the presence of metal nearby the coil may interfere
with the field generated.
In order to check and adjust for orthogonality, a suitable magnetometer and mounting jig is
required. For information about a suitable magnetometer and the orthogonality adjustment
procedure, please contact sales@bartington.com.
Figure 8. Internal view of ventilated front panel.
The air filter consists a 440x85mm (approx.) foam pad [32] fitted behind the centre front panel of
the PA1 Power Amplifier. It should be cleaned or replaced when necessary.
33 33
32
34
34

BARTINGTON INSTRUMENTS
© Bartington Instruments Page 13 of 17 OM3225/3
WARNING: Remove the power connector from the lower rear panel before removing the
centre front panel. The earth bonding connector can then be disconnected if required. Fan
filter maintenance must be performed by suitably trained personnel only.
The centre front panel can be removed by loosening the four fastening screws in the corners of
the panel [33].
The filter may be cleaned by brushing off any dust from the front and blowing through from the
inside surface.
Caution: Air should be blown with a low pressure air line. Use appropriate personal
protective equipment (PPE).
Should the filter need replacing, the old filter can be removed by taking out the six screws [34]
holding the filter retaining bracket. Replace the filters with appropriate flame retardant filter
material (contact Bartington Instruments for details). Replace the filter retention bracket and
screws.
When filter maintenance is complete, replace the earth bonding wire connector (if disconnected),
before replacing the centre front panel.
WARNING: Ensure the earth bonding wire is firmly re-attached to the panel before
refitting.
See the product brochure for the maximum voltages that may be applied to the PA1 Power
Amplifier control input, and mains power inlet.
Refer to the product brochure for this product’s maximum environmental, electrical and
mechanical ratings.
Caution: Exceeding the maximum environmental ratings may cause irreparable damage to
the equipment.
Caution: If these voltages are exceeded, this may cause damage to the equipment.
Caution: Do not make any other connection to these ports.
Troubleshooting, Care and Maintenance
In the event of any apparent malfunction, email: service@bartington.com or telephone the
Bartington Instruments service team on: +44 (0)1993 706565.

BARTINGTON INSTRUMENTS
© Bartington Instruments Page 14 of 17 OM3225/3
Storage and Transport
The PA1 Power Amplifier is a precision electronic instrument and should be treated as such.
Bartington Instruments has supplied this product in appropriate packaging for transportation.
This packaging should be used for any future transport.
Due to the weight of the equipment it should be moved by at least two people and carried by each
of the four lower corners.
Disposal
This product should not be disposed of in domestic or municipal waste. For information about
disposing of this product safely, check local regulations for disposal of electrical / electronic products.
This product complies fully with Restriction of the Use of Certain Hazardous Substances in
Electrical and Electronic Equipment (RoHS) and WEEE Regulations current at the time of
printing.

BARTINGTON INSTRUMENTS
© Bartington Instruments Page 15 of 17 OM3225/3
Appendix A: Connecting the Components of the Helmholtz Coil System
PXI CHASSIS
CU1
PA1
DAQ DAQ
Connector 0 Connector 1
Current
Control
Output
Aux
Input
Current
Monitor
Input
Device
Test
Input
Current
Control
Input
Current
Monitor
Output
DUT
Sensor
Optional
aux sensor
if required
HC1

BARTINGTON INSTRUMENTS
© Bartington Instruments Page 16 of 17 OM3225/3
1. Ensure that the mains feed is from a clean AC supply with the following characteristics:-
Voltage Range 100V to 240V AC
Frequency 47 – 63Hz
It is highly recommended that this mains feed is via an appropriate Residual Current Circuit
Breaker, rated at 30mA trip current. This must comply with local regulations.
2. The mains input connectors are as follows:-
Device Input Connector Mating Cable Connector
Power Amplifier PA1 IEC C20 IEC C19
Control Unit CU1 IEC C14 IEC C13
These cables are available in specific versions for most countries.
3. If an un-terminated IEC connector lead is supplied with the equipment, the wires must be
wired accordingly:-
BROWN LIVE
BLUE NEUTRAL
GREEN/YELLOW EARTH
4. It is essential that the control unit CU1 and the Power Amplifier PA1 are properly earthed at all
times.
5. It is recommended that the mains to each unit is supplied via an appropriate mains fuse:-
Power Amplifier PA1 13A
Control Unit CU1 13A
This is appropriate for the use over the whole supply voltage range.
6. This installation MUST be carried out by a trained, competent person.
7. Before initial switch-on, an appropriate earth bonding test should be performed to ensure a
robust earth connection.

OM3225/3
Bartington Instruments Limited
5 Thorney Leys Business Park,
Witney, Oxford, OX28 4GE, England.
www.bartington.com
T: +44 (0)1993 706565
F: +44 (0)1993 774813
E: sales@bartington.com
The copyright of this document is the property of Bartington Instruments Ltd.
Bartington® is a registered trade mark of Bartington Instruments Limited in the following countries:
United Kingdom, Australia, Brazil, Canada, China, European Union, India, Japan, New Zealand, Norway
and the United States of America.
Other manuals for PA1
1
Table of contents
Other Bartington Amplifier manuals
Popular Amplifier manuals by other brands
Sony
Sony XM-1600GSD Marketing Specifications,... operating instructions

Stagg
Stagg BASS BACKLINE 500 BAH user manual
Extron electronics
Extron electronics DA2 HD 8K L Setup guide
Crown
Crown Com-Tech CT-810 Specifications

Blaupunkt
Blaupunkt TSA 1300 Installation & operating instructions

JDS Labs
JDS Labs O2+ODAC Assembly guide

