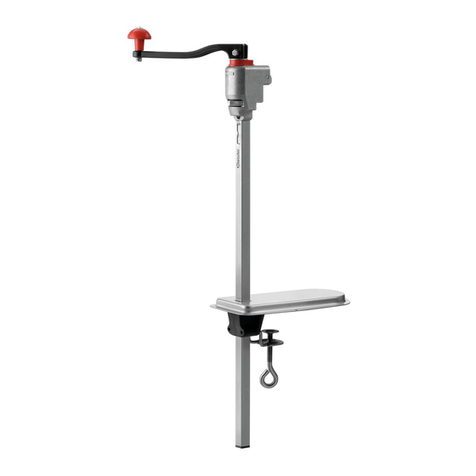
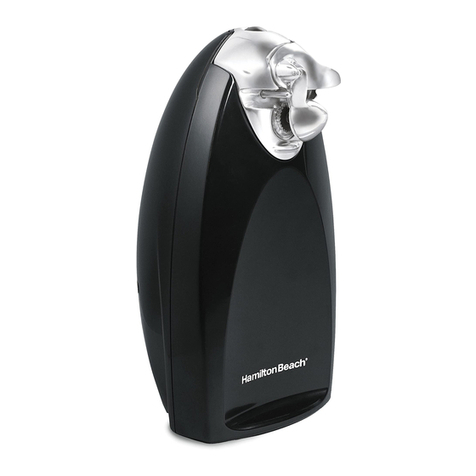
Bartscher KB330 User manual

KB330
A120350
Original-Gebrauchsanleitung
V1/1117

- 9 -
General guidelines
Before the operation carefully read this operating manual and then
store it in an easy accessible place near the device.
Children should be supervised to ensure that they are not playing with the
device.
Prevent access of children to the package materials like plastic bags and foamed
polystyrene elements. Choking hazard!
The device can be used only when it is in good working order and allows for safe
operation. In case of malfunction, contact the service company or sales agent.
The can opener is designed only for opening cans.
0.25 kg to 10 kg cans may be opened with the can opener.
Technical data
Description
Can opener KB330
Code-No.:
A120350
Material:
CNS 18/10, aluminium, plastic;
Work surface: CNS 18/10, painted;
Knife: stainless steel
Model:
crank drive
clip attachment (prepared for screw attachment)
tabletop thickness max.: 45 mm
plastic lever for secure handling of cans
Can height:
max. 330 mm
Dimensions:
W 125 x D 290 x H 720 mm
Clip attachment
dimensions:
W 98 x D 218 mm
Weight:
1.9 kg
We reserve the right to implement the technical modifications!
GB/UK

- 10 -
List of components
Fig. 1

- 11 -
Description of figure 1 on page 10
01
Crank handle screw
13
Guard
02
Crank handle
14
M6x15 screws (2)
03
M6x35 hexagon socket screw
15
Transport wheel
04
Crank drive
16
Centring plate
05
M6 Nuts (2)
17
Square pipe
06
Plastic lever
18
Clip attachment
07
Lock pin
19
Clamp handle
08
Bearing
20
Clamp plate
09
Double stainless steel knife
21
Clamp guide
10
Sleeves
22
Eye bolt
11
Washers
23
Cap
12
M6x15 screws
Additional accessories (not included in the delivery!)
Knife KB330
• Material: stainless steel
• Dimensions: W 20 x D 17 x H 50 mm
• Weight: 0.03 kg
Code-No. A120351
Transport wheel KB330
• Material: stainless steel
• Dimensions: W 38 x D 38 x H 10 mm
• Weight: 0.08 kg
Code-No. A120352
Properties
Tanks to the double stainless steel knife it is possible to quickly and cleanly open
cans without using excessive force.
The can opener is effective, easy to use and ensures safe and clean operation in the
working environment.
Assembly and disassembly of the can opener is easy; the device can be mounted
practically at any place.
The can opener is equipped with a plastic lever to ensure firm and secure grip
of the can.
A square pipe with adjustable height enables opening of cans of up to 330 mm height.

- 12 -
Operation
Prepare the device
Unpack the device and remove and dispose of all package materials according to
the environmental protection regulations.
Select an appropriate place for mounting the can opener. The tabletop thickness
may not exceed 45 mm.
Do not mount the device near the sources of heat such as ovens, cookers or heaters.
There is a risk of decolouration or damaging plastic elements of the can opener.
Installation of the can opener
Mount the device in the selected place. Observe the following instructions:
1. Place the clip attachment on an even,
non-skid surface.
2. Turn the eye bolt counter clockwise
until the clip attachment is tightly
bolted to the tabletop.
Fig. 2
3. The clip attachment may be additionally
attached to the tabletop with 3 bolts by
screwing them into designated holes.
Fig. 3

- 13 -
4. Insert the square pipe of the can opener to
the hole in the clip attachment. Put a cap
on a lower end of the square pipe.
5. The square pipe may be set at different
heights, depending on the can.
Fig. 4
Opening of cans
Before the first use, make sure that the stainless steel knife and transport wheel are
clean, because they will come into contact with food. Follow the instructions included in
section “Cleaning “.
Before opening, clean the can’s lid with a moist cloth.
WARNING!
Use caution when working with the stainless steel knife, because it is very
sharp!
Do not operate the device with wet hands!
Fig. 5
Fig. 6
1. Pull the square pipe upwards and
place the can on the clip
attachment, so that it stands
directly next to the pipe and
below the transport wheel.
2. Turn the plastic lever forward
counter clockwise.

- 14 -
Fig. 7
Fig. 8
3. Press firmly the crank to cut
through the can’s lid with a knife.
4. By pressing the crank on the
centring plate an optimum
position of the can’s edge
between the knife and cutting
surface is determined.
Fig. 9
Fig. 10
5. Turn the plastic lever counter
clockwise until reaching the lock pin.
The distance between the stainless
steel knife and the transport wheel is
reduced. The can is tightly clamped
between the knife and the transport
wheel.
6. Press the plastic lever with one
hand and keep in this position
(pos. 01, fig. 10). Turn the crank
clockwise using another hand
(pos. 02, fig. 10), until opening
the can.

- 15 -
Cleaning
WARNING!
There is a risk of formation of bacteria which may reach the contents of the can
and result in health problems. The can opener must be thoroughly cleaned.
CAUTION!
Do not use any scouring agents that include solvents or corrosive cleaning
agents for cleaning. They may damage the surface.
oRegularly clean the can opener at the end of the working day, or more frequently if
necessary.
oPay particular attention to cleaning of the transport wheel and the stainless steel knife,
because they come into contact with food.
Clean the stainless steel knife and transport wheel with cloth soaked in warm water
with mild cleaning agent. In case of more stubborn dirt, the transport wheel may be
cleaned with a brush for dish washing or a toothbrush. Wipe with a clean cloth to
remove the cleaning agent residues.
oClean other elements of the device with a soft, moist cloth and dry thoroughly or
leave the device to dry in the air.
oIf the device is not used for any lengthy periods, clean it thoroughly as per description
and store (preferably in the original packaging) at the room temperature in dry, clean
place protected against sun and children. Do not place any heavy objects on the
device.
Maintenance
oIn case of intense use of the can opener, the stainless steel knife and transport wheel
may get deformed, therefore they should be regularly checked. If the elements are
worn out, replace them by contacting the service company.
oRegularly inspect the mounting of stainless steel knife, if necessary tighten the
screws.
- 16 -
Possible defects
Problem
Possible reason
Solution
The crank is not turning
or moves but with
resistance
Food residues on the
transport wheel
Clean the transport wheel
Can cannot be open
Damaged stainless steel
knife
Contact the service
company.
Damaged transport wheel
Contact the service
company.
Loose bolts for mounting
the stainless steel knife
Tighten the bolts
The can opener is
wobbling during the
operation
Loose clamp of the clip
attachment
Tighten the clamp
When turning the crank
the can is sliding off, the
can is not opening
correctly (sharp edges)
The plastic lever was not
properly screwed to the lock
pin or is not firmly held
Pay attention to the position
of the hands when opening
the can (Section 6, Fig. 10).
Bartscher GmbH phone: +49 5258 971-0
Franz-Kleine-Str. 28 fax: +49 5258 971-120
33154 Salzkotten Service-Hotline: +49 5258 971-197
Germany www.bartscher.com
This manual suits for next models
1
Table of contents
Other Bartscher Can Opener manuals