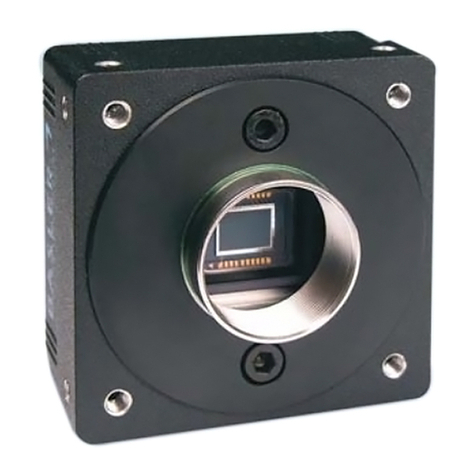
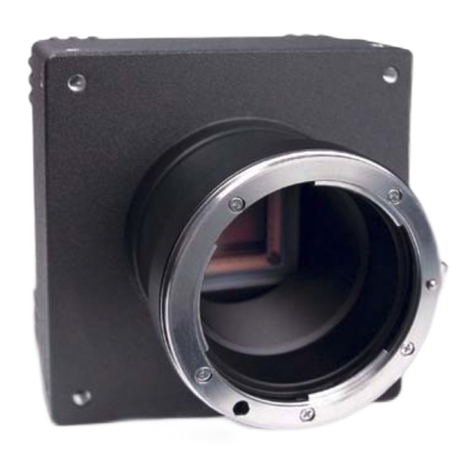
Basler L100k User manual

Basler L100k
USER’S MANUAL
Document Number: DA000509
Version: 05 Language: 000 (English)
Release Date: 08 April 2008
Draft

For customers in the U.S.A.
This equipment has been tested and found to comply with the limits for a Class A digitaldevice,
pursuant to Part 15 of the FCC Rules. These limits are designed to provide reasonable protec-
tion against harmful interference when the equipment is operated in a commercial environ-
ment. This equipment generates, uses, and can radiate radio frequency energy and, if not
installed and used in accordance with the instruction manual, may cause harmful interference
to radio communications. Operation of this equipment in a residential area is likely to cause
harmful interference in which case the user will be required to correct the interference at his
own expense.
You are cautioned that any changes or modifications not expressly approved in this manual
could void your authority to operate this equipment.
The shielded interface cable recommended in this manual must be used with this equipment
in order to comply with the limits for a computing device pursuant to Subpart J of Part 15 of
FCC Rules.
For customers in Canada
This apparatus complies with the Class A limits for radio noise emissions set out in Radio In-
terference Regulations.
Pour utilisateurs au Canada
Cet appareil est conforme aux normes Classe A pour bruits radioélectriques, spécifiées dans
le Règlement sur le brouillage radioélectrique.
Life Support Applications
These products are not designed for use in life support appliances, devices, or systems where
malfunction of these products can reasonably be expected to result in personal injury. Basler
customers using or selling these products for use in such applications do so at their own risk
and agree to fully indemnify Basler for any damages resulting from such improper use or sale.
Warranty Note
Do not open the housing of the camera. The warranty becomes void if the housing is opened.
All material in this publication is subject to change without notice and is copyright
Basler Vision Technologies.

Contacting Basler Support Worldwide
Europe:
Basler AG
Ander Strusbek 60 - 62
22926 Ahrensburg
Germany
Tel.: +49-4102-463-500
Fax.: +49-4102-463-599
vc.support.europe@baslerweb.com
Americas:
Basler, Inc.
855 Springdale Drive, Suite 160
Exton, PA 19341
U.S.A.
Tel.: +1-877-934-8472
Fax.: +1-877-934-7608
vc.support.usa@baslerweb.com
Asia:
Basler Asia Pte Ltd
8 Boon Lay Way
#03-03 Tradehub 21
Singapore 609964
Tel.: +65-6425-0472
Fax.: +65-6425-0473
vc.support.asia@baslerweb.com
www.basler-vc.com


Contents
BASLER L100k Series I
DRAFT
Table of Contents
1 Introduction
1.1 Camera Models. . . . . . . . . . . . . . . . . . . . . . . . . . . . . . . . . . . . . . . . . . . . . . . . . . . . 1-1
1.2 Performance Specifications. . . . . . . . . . . . . . . . . . . . . . . . . . . . . . . . . . . . . . . . . . . 1-2
1.3 Environmental Requirements . . . . . . . . . . . . . . . . . . . . . . . . . . . . . . . . . . . . . . . . . 1-3
1.3.1 Temperature and Humidity . . . . . . . . . . . . . . . . . . . . . . . . . . . . . . . . . . . . . . 1-3
1.3.2 Ventilation . . . . . . . . . . . . . . . . . . . . . . . . . . . . . . . . . . . . . . . . . . . . . . . . . . . 1-3
1.4 Precautions . . . . . . . . . . . . . . . . . . . . . . . . . . . . . . . . . . . . . . . . . . . . . . . . . . . . . . . 1-4
2 Camera Interface
2.1 Connections. . . . . . . . . . . . . . . . . . . . . . . . . . . . . . . . . . . . . . . . . . . . . . . . . . . . . . . 2-1
2.1.1 General Description. . . . . . . . . . . . . . . . . . . . . . . . . . . . . . . . . . . . . . . . . . . . 2-1
2.1.2 Pin Assignments . . . . . . . . . . . . . . . . . . . . . . . . . . . . . . . . . . . . . . . . . . . . . . 2-2
2.1.3 Connector Types. . . . . . . . . . . . . . . . . . . . . . . . . . . . . . . . . . . . . . . . . . . . . . 2-3
2.2 Cable Information . . . . . . . . . . . . . . . . . . . . . . . . . . . . . . . . . . . . . . . . . . . . . . . . . . 2-4
2.2.1 Camera Link Cable . . . . . . . . . . . . . . . . . . . . . . . . . . . . . . . . . . . . . . . . . . . . 2-4
2.2.2 Power Cable . . . . . . . . . . . . . . . . . . . . . . . . . . . . . . . . . . . . . . . . . . . . . . . . . 2-4
2.3 Camera Link Implementation in the L100k . . . . . . . . . . . . . . . . . . . . . . . . . . . . . . . 2-4
2.4 Input Signal . . . . . . . . . . . . . . . . . . . . . . . . . . . . . . . . . . . . . . . . . . . . . . . . . . . . . . . 2-6
2.4.1 ExSync: Controls Line Readout and Exposure Time . . . . . . . . . . . . . . . . . . 2-6
2.5 Output Signals. . . . . . . . . . . . . . . . . . . . . . . . . . . . . . . . . . . . . . . . . . . . . . . . . . . . . 2-7
2.5.1 Pixel Clock. . . . . . . . . . . . . . . . . . . . . . . . . . . . . . . . . . . . . . . . . . . . . . . . . . . 2-7
2.5.2 Line Valid Bit . . . . . . . . . . . . . . . . . . . . . . . . . . . . . . . . . . . . . . . . . . . . . . . . . 2-7
2.5.3 Data Valid Bit. . . . . . . . . . . . . . . . . . . . . . . . . . . . . . . . . . . . . . . . . . . . . . . . . 2-7
2.5.4 Video Data. . . . . . . . . . . . . . . . . . . . . . . . . . . . . . . . . . . . . . . . . . . . . . . . . . . 2-8
2.5.5 Video Data Output Modes. . . . . . . . . . . . . . . . . . . . . . . . . . . . . . . . . . . . . . . 2-9
2.5.6 Integrate Enabled Signal. . . . . . . . . . . . . . . . . . . . . . . . . . . . . . . . . . . . . . . 2-16
2.6 RS-644 Serial Communication . . . . . . . . . . . . . . . . . . . . . . . . . . . . . . . . . . . . . . . 2-17
2.6.1 Making the Serial Connection . . . . . . . . . . . . . . . . . . . . . . . . . . . . . . . . . . . 2-17
2.7 Converting Camera Link Output to RS-644 with a k-BIC . . . . . . . . . . . . . . . . . . . 2-18
2.8 DC Power . . . . . . . . . . . . . . . . . . . . . . . . . . . . . . . . . . . . . . . . . . . . . . . . . . . . . . . 2-18
2.9 Status LED . . . . . . . . . . . . . . . . . . . . . . . . . . . . . . . . . . . . . . . . . . . . . . . . . . . . . . 2-18
3 Basic Operation and Features
3.1 Functional Description. . . . . . . . . . . . . . . . . . . . . . . . . . . . . . . . . . . . . . . . . . . . . . . 3-1
3.2 Exposure Time Control Modes . . . . . . . . . . . . . . . . . . . . . . . . . . . . . . . . . . . . . . . . 3-3
3.2.1 ExSync Controlled Operation . . . . . . . . . . . . . . . . . . . . . . . . . . . . . . . . . . . . 3-3
3.2.1.1 Basics of ExSync Controlled Operation . . . . . . . . . . . . . . . . . . . . . . 3-3
3.2.1.2 Recommendations When Using ExSync . . . . . . . . . . . . . . . . . . . . . 3-5
3.2.2 Free Run . . . . . . . . . . . . . . . . . . . . . . . . . . . . . . . . . . . . . . . . . . . . . . . . . . . . 3-6
3.2.2.1 Basics of Free-run Controlled Operation . . . . . . . . . . . . . . . . . . . . . 3-6
3.2.2.2 Recommendations When Using Free-run . . . . . . . . . . . . . . . . . . . . 3-8

Contents
II BASLER L100k Series
DRAFT
3.3 Video Data Output Modes . . . . . . . . . . . . . . . . . . . . . . . . . . . . . . . . . . . . . . . . . . . . 3-9
3.4 Integrate Enabled Signal . . . . . . . . . . . . . . . . . . . . . . . . . . . . . . . . . . . . . . . . . . . . . 3-9
3.5 Gain and Offset . . . . . . . . . . . . . . . . . . . . . . . . . . . . . . . . . . . . . . . . . . . . . . . . . . . 3-10
3.5.1 Balancing the Gain on Odd and Even Pixels. . . . . . . . . . . . . . . . . . . . . . . . 3-11
3.5.1.1 Refresher on dB. . . . . . . . . . . . . . . . . . . . . . . . . . . . . . . . . . . . . . . 3-11
3.5.1.2 Calculating Gain Settings on the L101k and L103k
with Binary Commands . . . . . . . . . . . . . . . . . . . . . . . . . . . . . . . . . 3-12
3.5.1.3 Calculating Gain Settings on the L104k with Binary Commands. . 3-14
3.5.2 Setting the Offset. . . . . . . . . . . . . . . . . . . . . . . . . . . . . . . . . . . . . . . . . . . . . 3-16
3.6 Shading Correction . . . . . . . . . . . . . . . . . . . . . . . . . . . . . . . . . . . . . . . . . . . . . . . . 3-17
3.6.1 Shading Correction Guidelines . . . . . . . . . . . . . . . . . . . . . . . . . . . . . . . . . . 3-17
3.6.2 Using the CCT+ to Work With Shading Correction . . . . . . . . . . . . . . . . . . . 3-17
3.6.3 Using Binary Commands to Work With Shading Correction . . . . . . . . . . . . 3-19
3.6.3.1 Creating a Shading Correction Table. . . . . . . . . . . . . . . . . . . . . . . 3-19
3.6.3.2 Taking Dropped Pixels into Account . . . . . . . . . . . . . . . . . . . . . . . 3-22
3.6.3.3 Enabling Shading Correction . . . . . . . . . . . . . . . . . . . . . . . . . . . . . 3-22
3.6.4 The Shading Data Test Image. . . . . . . . . . . . . . . . . . . . . . . . . . . . . . . . . . . 3-23
3.7 Digital Shift . . . . . . . . . . . . . . . . . . . . . . . . . . . . . . . . . . . . . . . . . . . . . . . . . . . . . . 3-24
3.7.1 Digital Shift in 10 bit Output Mode. . . . . . . . . . . . . . . . . . . . . . . . . . . . . . . . 3-24
3.7.2 Digital Shift in 8 bit Output Modes. . . . . . . . . . . . . . . . . . . . . . . . . . . . . . . . 3-26
3.7.3 Precautions When Using Digital Shift . . . . . . . . . . . . . . . . . . . . . . . . . . . . . 3-28
3.8 Area of Interest (AOI) . . . . . . . . . . . . . . . . . . . . . . . . . . . . . . . . . . . . . . . . . . . . . . 3-29
3.9 Test Images . . . . . . . . . . . . . . . . . . . . . . . . . . . . . . . . . . . . . . . . . . . . . . . . . . . . . 3-31
3.9.1 Test Image One. . . . . . . . . . . . . . . . . . . . . . . . . . . . . . . . . . . . . . . . . . . . . . 3-31
3.9.2 Test Image Two. . . . . . . . . . . . . . . . . . . . . . . . . . . . . . . . . . . . . . . . . . . . . . 3-32
3.9.3 Guidelines When Using Test Images . . . . . . . . . . . . . . . . . . . . . . . . . . . . . 3-32
3.10 Configuration Sets. . . . . . . . . . . . . . . . . . . . . . . . . . . . . . . . . . . . . . . . . . . . . . . . 3-33
3.11 Camera Temperature . . . . . . . . . . . . . . . . . . . . . . . . . . . . . . . . . . . . . . . . . . . . . 3-34
3.12 Camera Status. . . . . . . . . . . . . . . . . . . . . . . . . . . . . . . . . . . . . . . . . . . . . . . . . . . 3-34
4 Configuring the Camera
4.1 Configuring the Camera with the Camera Configuration Tool Plus (CCT+) . . . . . . 4-2
4.1.1 Opening the Configuration Tool. . . . . . . . . . . . . . . . . . . . . . . . . . . . . . . . . . . 4-2
4.1.2 Closing the Configuration Tool . . . . . . . . . . . . . . . . . . . . . . . . . . . . . . . . . . . 4-2
4.1.3 Configuration Tool Basics . . . . . . . . . . . . . . . . . . . . . . . . . . . . . . . . . . . . . . . 4-3
4.1.4 Configuration Tool Help. . . . . . . . . . . . . . . . . . . . . . . . . . . . . . . . . . . . . . . . . 4-4
4.2 Configuring the Camera with Binary Programming Commands . . . . . . . . . . . . . . . 4-5
4.2.1 Command Frame and Response Format . . . . . . . . . . . . . . . . . . . . . . . . . . . 4-6
4.2.2 Error Checking. . . . . . . . . . . . . . . . . . . . . . . . . . . . . . . . . . . . . . . . . . . . . . . . 4-8
4.2.2.1 ACK/NAK . . . . . . . . . . . . . . . . . . . . . . . . . . . . . . . . . . . . . . . . . . . . . 4-8
4.2.2.2 Time-outs . . . . . . . . . . . . . . . . . . . . . . . . . . . . . . . . . . . . . . . . . . . . . 4-8
4.2.2.3 Read Command. . . . . . . . . . . . . . . . . . . . . . . . . . . . . . . . . . . . . . . . 4-8
4.2.2.4 Write Command . . . . . . . . . . . . . . . . . . . . . . . . . . . . . . . . . . . . . . . . 4-8

Contents
BASLER L100k Series III
DRAFT
4.2.3 Example Commands . . . . . . . . . . . . . . . . . . . . . . . . . . . . . . . . . . . . . . . . . . 4-9
4.2.3.1 Read Command. . . . . . . . . . . . . . . . . . . . . . . . . . . . . . . . . . . . . . . . 4-9
4.2.3.2 Write Command . . . . . . . . . . . . . . . . . . . . . . . . . . . . . . . . . . . . . . . . 4-9
4.2.3.3 Calculating the Block Check Character . . . . . . . . . . . . . . . . . . . . . 4-10
4.2.4 Commands for Setting Camera Parameters . . . . . . . . . . . . . . . . . . . . . . . . 4-11
4.2.4.1 Video Data Output Mode . . . . . . . . . . . . . . . . . . . . . . . . . . . . . . . . 4-11
4.2.4.2 Exposure Time Control Mode. . . . . . . . . . . . . . . . . . . . . . . . . . . . . 4-12
4.2.4.3 Timer 1. . . . . . . . . . . . . . . . . . . . . . . . . . . . . . . . . . . . . . . . . . . . . . 4-13
4.2.4.4 Timer 2. . . . . . . . . . . . . . . . . . . . . . . . . . . . . . . . . . . . . . . . . . . . . . 4-14
4.2.4.5 Digital Shift. . . . . . . . . . . . . . . . . . . . . . . . . . . . . . . . . . . . . . . . . . . 4-15
4.2.4.6 Area of Interest Starting Pixel. . . . . . . . . . . . . . . . . . . . . . . . . . . . . 4-16
4.2.4.7 Area of Interest Length in Pixels . . . . . . . . . . . . . . . . . . . . . . . . . . 4-17
4.2.4.8 Shading Correction . . . . . . . . . . . . . . . . . . . . . . . . . . . . . . . . . . . . 4-18
4.2.4.9 Shading Correction Data Transfer . . . . . . . . . . . . . . . . . . . . . . . . . 4-19
4.2.4.10 Shading Correction Data . . . . . . . . . . . . . . . . . . . . . . . . . . . . . . . 4-20
4.2.4.11 Odd Pixel Gain. . . . . . . . . . . . . . . . . . . . . . . . . . . . . . . . . . . . . . . 4-21
4.2.4.12 Odd Pixel Offset. . . . . . . . . . . . . . . . . . . . . . . . . . . . . . . . . . . . . . 4-21
4.2.4.13 Even Pixel Gain . . . . . . . . . . . . . . . . . . . . . . . . . . . . . . . . . . . . . . 4-22
4.2.4.14 Even Pixel Offset . . . . . . . . . . . . . . . . . . . . . . . . . . . . . . . . . . . . . 4-22
4.2.5 Test Image Command. . . . . . . . . . . . . . . . . . . . . . . . . . . . . . . . . . . . . . . . . 4-23
4.2.6 Camera Reset Command . . . . . . . . . . . . . . . . . . . . . . . . . . . . . . . . . . . . . . 4-23
4.2.7 Query Commands . . . . . . . . . . . . . . . . . . . . . . . . . . . . . . . . . . . . . . . . . . . . 4-24
4.2.7.1 Read Vendor Information. . . . . . . . . . . . . . . . . . . . . . . . . . . . . . . . 4-24
4.2.7.2 Read Model Information. . . . . . . . . . . . . . . . . . . . . . . . . . . . . . . . . 4-24
4.2.7.3 Read Product ID. . . . . . . . . . . . . . . . . . . . . . . . . . . . . . . . . . . . . . . 4-24
4.2.7.4 Read Serial Number. . . . . . . . . . . . . . . . . . . . . . . . . . . . . . . . . . . . 4-25
4.2.7.5 Read Camera Version . . . . . . . . . . . . . . . . . . . . . . . . . . . . . . . . . . 4-25
4.2.7.6 Read Reference Gain Values. . . . . . . . . . . . . . . . . . . . . . . . . . . . . 4-26
4.2.7.7 Read Microcontroller Firmware Version. . . . . . . . . . . . . . . . . . . . . 4-27
4.2.7.8 Read FPGA Firmware Version. . . . . . . . . . . . . . . . . . . . . . . . . . . . 4-27
4.2.7.9 Read Camera Temperature . . . . . . . . . . . . . . . . . . . . . . . . . . . . . . 4-28
4.2.8 Commands for Manipulating Configuration Sets. . . . . . . . . . . . . . . . . . . . . 4-29
4.2.8.1 Copy the Factory Set or the User Set into the Work Set . . . . . . . . 4-29
4.2.8.2 Copy the Work Set into a User Set . . . . . . . . . . . . . . . . . . . . . . . . 4-30
4.2.8.3 Select the Startup Pointer . . . . . . . . . . . . . . . . . . . . . . . . . . . . . . . 4-31
4.2.9 Camera Status Command. . . . . . . . . . . . . . . . . . . . . . . . . . . . . . . . . . . . . . 4-32
4.2.10 Bitrate Command. . . . . . . . . . . . . . . . . . . . . . . . . . . . . . . . . . . . . . . . . . . . 4-33
5 Mechanical Considerations
5.1 Camera Dimensions and Mounting Facilities . . . . . . . . . . . . . . . . . . . . . . . . . . . . . 5-1
5.2 C-Mount Adapter Dimensions . . . . . . . . . . . . . . . . . . . . . . . . . . . . . . . . . . . . . . . . . 5-3
5.3 F-Mount Adapter Dimensions . . . . . . . . . . . . . . . . . . . . . . . . . . . . . . . . . . . . . . . . . 5-3
5.4 Positioning Accuracy of the Sensor Chip . . . . . . . . . . . . . . . . . . . . . . . . . . . . . . . . 5-4
Contents
IV BASLER L100k Series
DRAFT
6 Troubleshooting
6.1 Fault Finding Using the Camera LED . . . . . . . . . . . . . . . . . . . . . . . . . . . . . . . . . . . 6-1
6.2 Troubleshooting Charts. . . . . . . . . . . . . . . . . . . . . . . . . . . . . . . . . . . . . . . . . . . . . . 6-2
6.2.1 No Image. . . . . . . . . . . . . . . . . . . . . . . . . . . . . . . . . . . . . . . . . . . . . . . . . . . . 6-2
6.2.2 Poor Quality Image . . . . . . . . . . . . . . . . . . . . . . . . . . . . . . . . . . . . . . . . . . . . 6-4
6.2.3 Interfacing . . . . . . . . . . . . . . . . . . . . . . . . . . . . . . . . . . . . . . . . . . . . . . . . . . . 6-5
6.2.4 RS-644 Serial Communication . . . . . . . . . . . . . . . . . . . . . . . . . . . . . . . . . . . 6-6
6.3 Before Calling Basler Technical Support. . . . . . . . . . . . . . . . . . . . . . . . . . . . . . . . . 6-7
Revision History . . . . . . . . . . . . . . . . . . . . . . . . . . . . . . . . . . . . . . . . . . . . . .i
Feedback . . . . . . . . . . . . . . . . . . . . . . . . . . . . . . . . . . . . . . . . . . . . . . . . . . .iii
Index . . . . . . . . . . . . . . . . . . . . . . . . . . . . . . . . . . . . . . . . . . . . . . . . . . . . . . . v

Introduction
BASLER L100k Series 1-1
DRAFT
1 Introduction
L100kseries line scan cameras are versatile cameras designed for industrial use. Superb image
sensing features are combined with a robust, high precision manufactured housing.
Important features are:
• High sensitivity
• Anti-blooming
• Electronic exposure time control
• High signal-to-noise ratio
• Single or dual video data output
• Programmable via an RS-644 serial port
• Industrial housing manufactured with high planar, parallel and angular precision
• Super compact size
• Complies with the Camera Link standard
1.1 Camera Models
L100kseries line scan camerasare availablein differentversions;theversion depends onthepixel
clock speed. Each version of the camera is available with a 1024 or a 2048 pixel sensor.
All models are monochrome.
Throughout the manual, the camera will be called the L100k. Passages that are only valid for a
specific version will be so indicated.
Camera Version Pixel Clock
(single output mode) Pixel Clock
(dual output mode)
L101k20 MHz 20 MHz
L103k40 MHz 20 MHz
L104k62.5 MHz 31.25 MHz
Table 1-1: Versions of the L100kSeries Camera

Introduction
1-2 BASLER L100k Series
DRAFT
1.2 Performance Specifications
Specifications L101kL103kL104k
Sensor 1024 pixel or 2048 pixel linear CCD Thomson TA7813
Pixel Size 10 µm x 10 µm (10 µm pitch)
Fill Factor 100 %
Spectral Response 300 - 1000 nm, peak at 700 nm (See Figure 1-1)
Anti-blooming 1:100 or better
Fixed Pattern Noise ± 1 gray value
Photo Resp. Non-uniformity ± 5 % typical
Pixel Clock Speed
Single Output Modes:
Dual Output Modes: 20 MHz
20 MHz 40 MHz
20 MHz 62.5 MHz
31.25 MHz
Maximum Line Rate
1024 Pixel Cameras:
2048 Pixel Cameras: 18.7 kHz
9.5 kHz 35.7 kHz
18.7 kHz 58.5 kHz
29.2 kHz
Minimum Line Rate 1 kHz
Pixel Depth Programmable 8 bit or 10 bit
Video Output Type Camera Link LVDS (RS-644 LVDS when used with the op-
tional Basler Interface Converter (k-BIC))
Video Output Formats Single 8 Bit, Single 10 Bit, Dual 8 Bit, or Dual 10 Bit
Synchronization Via external ExSync signal or free-run
Exposure Time Control Edge-controlled, level-controlled, or programmable
Gain and Offset Programmable via a serial link
Connectors One, 26 pin, female MDR connector
One, 6 pin, Hirose micro-miniature push-pull receptacle
Power Requirements 12 VDC ± 10%
max. 6.5 W 12 VDC ± 10%
max. 8.5 W 12 VDC ± 10%
max. 10 W
Lens Adapters 1024 Pixel Cameras: C-mount or F-mount
2048 Pixel Cameras: F-mount
Housing Size (L x W x H) without lens adapter: 37.6 mm x 62 mm x 62 mm
with C-Mount Adapter: 40.1 mm x 62 mm x 62 mm
with F-mount adapter: 69.1 mm x 62 mm x 62 mm
Weight without lens adapter: ~ 175 g
with C-mount adapter: ~ 220 g
with F-mount adapter: ~ 285 g
Conformity CE, FCC
Table 1-2: L100kSeries Performance Specifications

Introduction
BASLER L100k Series 1-3
DRAFT
Figure 1-1: Responsivity for L100kSeries Cameras
1.3 Environmental Requirements
1.3.1 Temperature and Humidity
Housing temperature during operation: 0 °C ... + 50 °C (+ 32 °F ... + 122 °F)
Humidity during operation: 20 % ... 80 %, relative, non-condensing
Housing temperature during storage: - 20 °C ... + 80 °C (- 4 °F ... + 176 °F)
Humidity during storage: 5 % ... 95 %, relative, non-condensing
1.3.2 Ventilation
Allow sufficient air circulation around the camera to prevent internal heat build-up in your system
and to keep the camera housing temperature during operation below 50 °C. Provide additional
cooling such as fans or heat sinks if necessary.
Warning!
Without sufficient cooling, the camera can get hot enough during opera-
tion to cause burning when touched.
0
2
4
6
8
10
12
14
300 350 400 450 500 550 600 650 700 750 800 850 900 950 1000
Wavelength (nm)
Responsivity
(V/µJ/cm2)

Introduction
1-4 BASLER L100k Series
DRAFT
1.4 Precautions
Power
Do not remove the camera’s serial number label
If the label is removed and the serial number can’t be read from the camera’s registers, the
warranty is void.
Read the manual
Read the manual carefully before using the camera.
Keep foreign matter outside of the camera
Do not open the casing. Touching internal components may damage them.
Be careful not to allow liquid, flammable, or metallic material inside the camera housing. If
operated with any foreign matter inside, the camera may fail or cause a fire.
Electromagnetic Fields
Do not operate the camera in the vicinity of strong electromagnetic fields. Avoid electrostatic
charging.
Transporting
Only transport the camera in its original packaging. Do not discard the packaging.
Cleaning
Avoid cleaning the surface of the CCD sensor if possible. If you must clean it, use a soft, lint free
cloth dampened with a small quantity of pure alcohol. Do not use methylated alcohol.
Because electrostatic discharge can damage the CCD sensor, you must use a cloth that will not
generate static during cleaning (cotton is a good choice).
Caution!
Be sure that all power to your system is switched off before you make or break
connections to the camera. Making or breaking connections when power is on
can result in damage to the camera.
Caution!
The camera has no overvoltage protection. An input voltage higher than
14 VDC will damage the camera.
Caution!
Do not reverse the polarity of the input power to the camera. Reversing the
polarity of the input power can severely damage the camera and leave it non-
operational.

Introduction
BASLER L100k Series 1-5
DRAFT
To clean the surface of the camera housing, use a soft, dry cloth. To remove severe stains, use a
soft cloth dampened with a small quantity of neutral detergent, then wipe dry.
Do not use volatile solvents such as benzine and thinners; they can damage the surface finish.

Introduction
1-6 BASLER L100k Series
DRAFT

Camera Interface
BASLER L100k Series 2-1
DRAFT
2 Camera Interface
2.1 Connections
2.1.1 General Description
L100kseries cameras are interfaced to external circuitry via two connectors located on the back
of the camera:
• a 26 pin, .050” Mini D Ribbon (MDR) female connector used to transmit video data, control
data, and configuration data,
• a 6 pin, micro-miniature, push-pull receptacle used to provide power to the camera.
A status LED located on the back of the camera is used to indicate power present and signal
integrity. Figure 2-1 shows the connectors and the LED.
Figure 2-1: L100kConnectors and LED
Micro-miniature
6 Pin Receptacle
26 Pin Female
MDR Connector
LED

Camera Interface
2-2 BASLER L100k Series
DRAFT
2.1.2 Pin Assignments
26-Pin MDR Connector
The pin assignments for the 26 pin, MDR connector used to transmit video data, control data, and
configuration data are shown in Table 2-1.
Pin
Number Signal
Name Direction Level Function
15 Tx X0+ Output Camera Link
LVDS Data from Camera Link Transmitter
2TxX0-
16 Tx X1+ Output Camera Link
LVDS Data from Camera Link Transmitter
3TxX1-
17 Tx X2+ Output Camera Link
LVDS Data from Camera Link Transmitter
4TxX2-
19 Tx X3+ Output Camera Link
LVDS Data from Camera Link Transmitter
6TxX3-
18 Tx Clk+ Output Camera Link
LVDS Transmit Clock from Camera Link Transmitter
5Tx Clk-
12 CC4+ Not Connected
25 CC4-
24 CC3+ Output RS-644
LVDS Integrate Enabled
11 CC3-
10 CC2+ Input RS-644
LVDS Not Used
23 CC2-
22 CC1+ Input RS-644
LVDS External Trigger (ExSync)
9CC1-
21 SerTFG+ Output RS-644
LVDS Serial Communication Data Transmit
8SerTFG-
7SerTC+ Input RS-644
LVDS Serial Communication Data Receive
20 SerTC-
1, 13,
14, 26 1DC Gnd Input Ground DC Ground
1Pins 1, 13, 14, and 26 are all tied together inside of the camera.
Table 2-1: L100kPin Assignments for the 26-pin MDR Connector
*The camera housing is not grounded and is electrically isolated from the
circuit boards inside of the camera.

Camera Interface
BASLER L100k Series 2-3
DRAFT
6-Pin Micro-miniature Receptacle
The pin assignments for the6 pin, micro-miniature receptacle used tosupply power to the camera
are shown in Table 2-2.
Figure 2-2: L100kPin Numbering
2.1.3 Connector Types
The 26 pin connector on the camera will be a female .050” MDR connector as called for in the
Camera Link Specification.
The6 pin connector on the camera is a Hirose micro-miniature locking receptacle (part # HR10A-
7R-6PB) or the equivalent. The recommended mating connector is the Hirose micro-miniature
locking plug (Part # HR10A-7P-6S). This plug will be shipped with each camera. It should be used
to terminate the cable on the power supply for the camera.
Pin
Number Signal
Name Direction Level Function
1, 2 1 12 V In Input +12 VDC Camera Power Input
3Not Connected
4Not Connected
5, 6 2DC Gnd Input Ground DC Ground
1Pins 1 and 2 are tied together inside of the camera.
2Pins 5 and 6 are tied together inside of the camera.
Table 2-2: L100kPin Assignments for the 6-pin Micro-miniature Receptacle

Camera Interface
2-4 BASLER L100k Series
DRAFT
2.2 Cable Information
2.2.1 Camera Link Cable
A Camera Link compatible MDR cable assembly is available from Basler as a stock item (part #
1000013041 for a 3 meter cable and part # 1000013042 for a 5 meter cable). Alternatively, you
can use the cable assembly manufactured by 3M (part # 14X26-SZLB-XXX-0LC).
The maximum allowed length for the MDR cable used with an L100kis 10 meters.
2.2.2 Power Cable
For proper EMI protection, the power supply cable attached to the Hirose plug must be a twin-
cored, shielded cable. Also, the housing of the Hirose plug must be connected to the cable shield
and the cable must be connected to earth ground at the power supply.
Power requirements are given in Section 2.8.
2.3 Camera Link Implementation in the L100k
The L100kuses a National Semiconductor DS90CR287 as a Camera Link transmitter. For a
Camera Link receiver, we recommend that you use the National Semiconductor DS90CR288, the
National Semiconductor DS90CR288A or an equivalent. Detailed data sheets for these
components are available at the National Semiconductor web site (www.national.com). The data
sheets contain all of the information that you need to implement Camera Link, including
application notes.
The L100kuses a National Semiconductor DS90LV048A differential line receiver to receive the
RS-644 camera control input signals and the serial communication input signal defined in the
Camera Link specification. A DS90LV047A differential linetransmitteris used to transmit the serial
communication output signal defined in the specification. Detailed spec sheets for these devices
are available at the National Semiconductor web site (www.national.com).
The schematic in Figure 2-3 shows the interface for L100kand a typical implementation for the
frame grabber interface.
*Note that in order to access the Integrate Enabled signal, you must use the Basler
stock cable (see Sect. 2.5.6).
*Note that the timing used for sampling the data at the Camera Link receiver in the
frame grabber varies from device to device. On some receivers, TTL data must be
sampled on the rising edge of the receive clock, and on others, it must be sampled
on the falling edge. Also, some devices are available which allow you to select either
rising edge or falling edge sampling. Please consult the data sheet for the receiver
that you are using for specific timing information.

Camera Interface
BASLER L100k Series 2-5
DRAFT
Figure 2-3: Camera / Frame Grabber Interface
Port A0
Port A1
Port A2
Port A3
Port A4
Port A5
Port B0
Port B1
Port B2
Port B3
Port B4
Port B5
Port C0
Port C1
Port C2
Port C3
Port C4
Port C5
LVAL
Not Used
DVAL
Port A6
Port A7
Port B6
Port B7
Port C6
Port C7
Not Used
PClk
X0+
X0-
X1+
X1-
X2+
X2-
X3+
X3-
DS90CR287 Transmitter
L100k
15
2
16
3
17
4
19
6
Tx0
Tx1
Tx2
Tx3
Tx4
Tx6
Tx7
Tx8
Tx9
Tx12
Tx13
Tx14
Tx15
Tx18
Tx19
Tx20
Tx21
Tx22
Tx24
Tx25
Tx26
Tx27
Tx5
Tx10
Tx11
Tx16
Tx17
Tx23
TxCLKIn
Xclk+
Xclk-
18
5
24
11
12
25
10
23
22
9
Reserved
Reserved
ExSync
SerTC+
SerTC-
SerTFG+
SerTFG-
7
20
21
8
SerTC
SerTFG
1
13
14
26
Gnd
15
2
16
3
17
4
19
6
18
5
24
11
12
25
10
23
22
9
7
20
21
8
1
13
14
26
MDR Cable
Port A0
Port A1
Port A2
Port A3
Port A4
Port A5
Port B0
Port B1
Port B2
Port B3
Port B4
Port B5
Port C0
Port C1
Port C2
Port C3
Port C4
Port C5
LVAL
Not Used
DVAL
Port A6
Port A7
Port B6
Port B7
Port C6
Port C7
Not Used
PClk
X0+
X0-
X1+
X1-
X2+
X2-
X3+
X3-
DS90CR288A Receiver
Frame Grabber
12
25
11
24
10
23
8
21
Rx0
Rx1
Rx2
Rx3
Rx4
Rx6
Rx7
Rx8
Rx9
Rx12
Rx13
Rx14
Rx15
Rx18
Rx19
Rx20
Rx21
Rx22
Rx24
Rx25
Rx26
Rx27
Rx5
Rx10
Rx11
Rx16
Rx17
Rx23
Xclk+
Xclk-
9
22
CC3+
CC3-
CC4+
CC4-
CC2+
CC2-
CC1+
CC1-
3
16
15
2
17
4
5
18
Reserved
Reserved
Reserved
ExSync
SerTC+
SerTC-
SerTFG+
SerTFG-
20
7
6
19
SerTC
SerTFG
1
13
14
26 Gnd
12
25
11
24
10
23
8
21
9
22
3
16
15
2
17
4
5
18
20
7
6
19
1
13
14
26
Pair 1+
Pair 1-
Pair 2+
Pair 2-
Pair 3+
Pair 3-
Pair 5+
Pair 5-
Pair 4+
Pair 4-
Pair 10+
Pair 10-
Pair 11+
Pair 11-
Pair 9+
Pair 9-
Pair 8+
Pair 8-
Pair 6+
Pair 6-
Pair 7+
Pair 7-
Inner Shield
Inner Shield
Inner Shield
Inner Shield
R1
C1
Note: R1 should be
zero ohm. C1 is optional.
R1 and C1 can be used
to prevent ground loops
if needed.
RxCLKOut
DS90LV048A Rcvr.
DS90LV047A Tmtr.
DS90LV047A Tmtr.
DS90LV047A Tmtr.
DS90LV048A Rcvr.
1
2
3
4
5
6
Not Connected
Not Connected
12 V In
Gnd
EMI
Filter
Ferrite
Bead
IntEn
DS90LV047A Tmtr.
CC3+
CC3-
CC4+
CC4-
CC2+
CC2-
CC1+
CC1-
26-pin Female
MDR Connector
26-pin Male
MDR Connector
6-pin
Micro-miniature
Receptacle

Camera Interface
2-6 BASLER L100k Series
DRAFT
2.4 Input Signal
The only control signal that can be input into theL100kis an external sync (ExSync) signal. ExSync
is an RS-644 LVDS signal as specified in the Camera Link standard. Section 2.4.1 describes the
function of the ExSync signal.
2.4.1 ExSync: Controls Line Readout and Exposure Time
The ExSync input signal is used to control exposure time and line read out. When the camera is
operating with an ExSync signal, three exposure time control modes are available: edge-
controlled, level-controlled and programmable. For more detailed information on the three modes,
see Section 3.2.
ExSync can be a periodic or non-periodic function. The frequency of the ExSync signal
determines the camera’s line rate:
Note that ExSync is edge sensitive and therefore must toggle.
Minimum high time for the ExSync signal is 0.2 µs.
Maximum line rate 1
Minimum ExSync signal period
----------------------------------------------------------------------------------=
Table of contents
Other Basler Digital Camera manuals

Basler
Basler A202k Configuration guide

Basler
Basler A302f User manual

Basler
Basler acA2040-55 User manual

Basler
Basler acA2000-340km User manual

Basler
Basler A102f User manual

Basler
Basler racer User manual

Basler
Basler blaze-101 User manual

Basler
Basler A620f User manual

Basler
Basler acA1300-75gc Instruction sheet

Basler
Basler A102K User manual

Basler
Basler GIGE VISION ace acA640-100gm/gc User manual

Basler
Basler A400K User manual

Basler
Basler A101f User manual

Basler
Basler GigE VISION CAMERAS User manual

Basler
Basler GigE CAMERAS User manual

Basler
Basler CXP-12 User manual

Basler
Basler L301kc User manual

Basler
Basler ace User manual

Basler
Basler Pioneer User manual

Basler
Basler daA2500-14um User manual