1
Small Waterproof Series
Camera
Fix expansion rubber plugs to the wall first if it is concrete wall. Install it directly with
screws if it is a wooden wall.
The installation of all terminal equipment such as control, display, and recording of
the camera should be smooth and easy to operate.
All cables in the control room shall be provided with cable troughs and inlet holes
according to the installation location of the equipment. They shall be arranged,
bundled neatly, numbered, and permanently marked.
The pictures in this manual are for reference only. Please refer to the actual product
for the final product.
Remind:
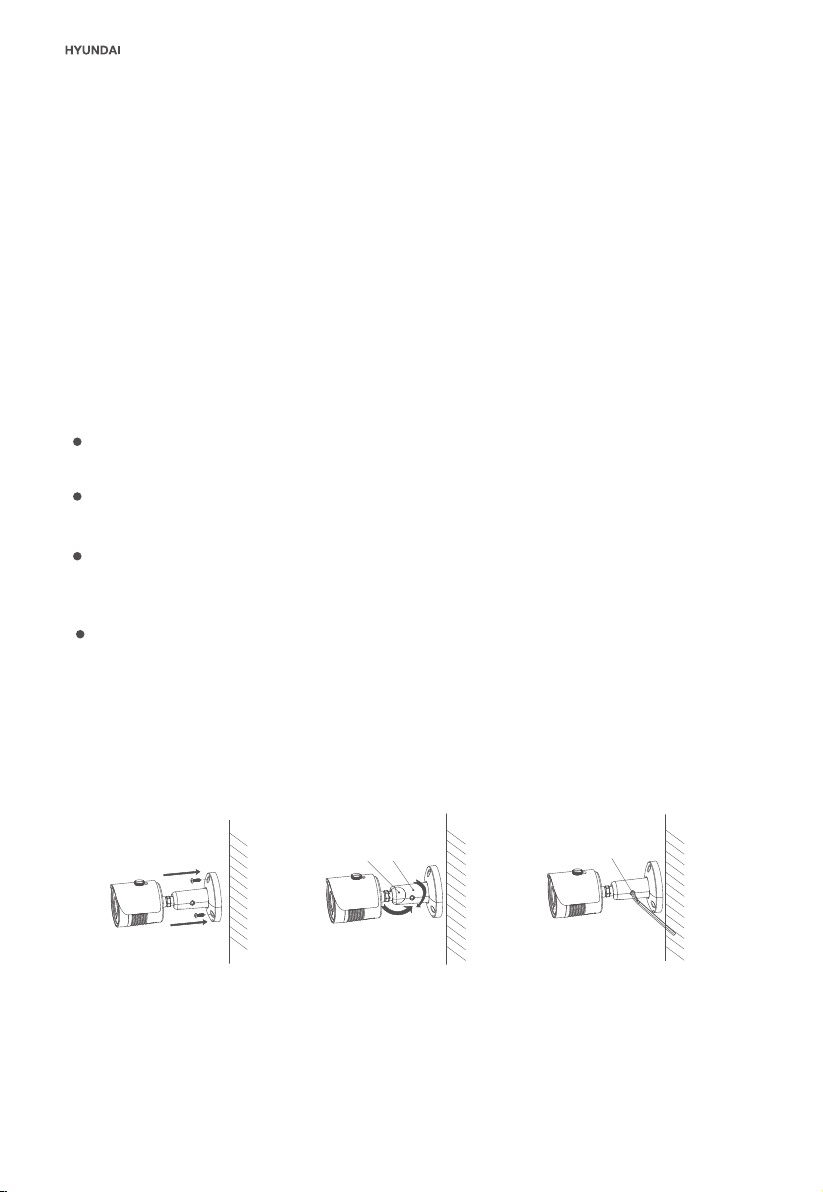
Fix the bracket
to the wall with screws.
A B
Adjust the viewing angle.
Loosen the screws to adjust
the angle (A for vertical
angle, B for axial angle).
Hex wrench
Tighten the screws with
hex wrench to complete
the installation.
1 2 3
Quick Installation Guide


