BASSFACE SD200.1 User manual


!Warning!
Bass Face products can produce sound pressure levels that can
permanently damage your hearing. Please exercise extreme caution
when setting volume levels. Also be mindful of other listeners, they might
not enjoy listening at the same levels as you. We will not be held in any
way responsible for injuries caused by the misuse of our products.
Please take care when attempting any alterations or installations with the
Please take care when attempting any alterations or installations with the
electrical system of the car. ALWAYS disconnect the positive terminal at
the battery.
BassBass Face operates a policy of continuous improvement and reserves the right to update
and alter the content and design of both product and instructions as it sees fit. Although
the information contained in the instruction manuals is given in good faith based on
extensive testing and experience the final responsibility for the installation and operation
of your system must rest with the installer and the operator. If you are installing your
equipment yourself please be realistic about your abilities and seek professional advice
if you are unsure about any aspect of the task that you are undertaking.
If
If you face a particular problem with your installation or product we will be happy to
answer your questions. Please email info@bassfaceaudio.co.uk - please note that our
response time is 2 to 3 days, and that we are closed over the weekend. For more urgent
help please contact your country distributor. In the UK this is Thompsons Ltd
(www.thompsonsltd.co.uk)
Please note that Bass Face is unable to process warranty support directly. For warranty
support you MUST contact your distributor.
Introduction:Introduction:
Firstly, thank you for your purchase. Every element of this product has been optimised to
give you the best possible performance for your money. We think that Bass Face
represents the highest quality to price ratio available on the market today.
Please take the time to read these instructions carefully. You will need to follow them to
have a successful install and get the most from the product.
Do
Do remember that incorrect installation or abuse is NOT covered under warranty – it is
YOUR responsibility to make sure that your installation and partnered product is suitable
and compatible.

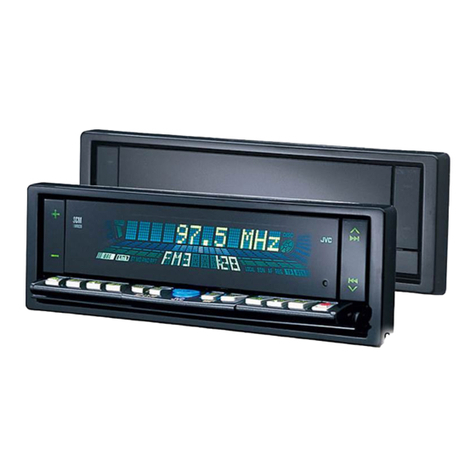
The SD200.1 is a fully featured car source unit with a fixed ront panel and RCA outputs
for system building. By following these guidelines we hope that you get the most from
your unit.
Physically the unit conforms to the standard DIN size, although since there is no CD deck
you will notice that the depth is less than many units, which can make installation easier.
The
The surround trim of the unit is removable which allows integration into vehicles where
the dashboard surround itself becomes that trim. You can install the unit using side
screws or with the provided cage.
The unit is pre fitted with a proper wiring harness and ISO female which can be plugged
into many ISO compatible cars without further work.
IT
IT IS ABSOLUTELY CRITICAL THAT YOU TEST THE VEHICLE ISO PLUG BEFORE
YOU COMMIT TO PLUGGING IN YOUR NEW BASSFACE UNIT. MANY VEHICLES
HAVE STRANGE AERIAL OR IGNITION SET UP’S WHICH CAN DAMAGE THE NEW
RADIO OR THE CAR IF THE CONFIGURATION IS NOT ALTERED BEFORE THE
UNIT IS POWERED UP.
Because there is a proper wiring harness, it is easy to cut the cables between the radio
and the ISO plug and make changes without modifying the vehicle.
Please
Please refer to the wiring diagram on the top of the radio for detailed colour instructions
for the wires.
If
If you have to remove the ISO plug because you are installing the unit into a caravan or
other vehicle that requires a bare ended cable setup then please pay extreme attention
to the wiring. Use proper soldered or ratchet crimped connections and ensure that
insulation is made in a correct and professional way. Note that the earth needs to be
made really well to get the most out of the integrated amplifier. Note also that the unit
needs to see power on the memory wire (yellow) AND power on the ignition switch wire
(red) for it to power up. You can run up to 4 speakers at 4 ohms each off this unit. DO
NOT attempt to run the unit with a nominal impedance of less than this value, otherwise
NOT attempt to run the unit with a nominal impedance of less than this value, otherwise
non-warrantable damage can result. (ie leaving existing rear speakers connected when
you add additional speakers in a parcel shelf etc)

Once the unit is installed and working you can refer to the following guidelines:
1 Power Button
2 Play/Pause Button
3 Mute Button
4 Clock Button
5 Mode / Preset Button (switches listening source / on radio sets a preset – press and
5 Mode / Preset Button (switches listening source / on radio sets a preset – press and
hold for 1 second)
6 Intro Button (plays the first 10 seconds of each track)
7 Band Button (Access to each of the levels of FM presets)
8 Infra Red Eye
9 USB Slot
10 SD/MMC Slot
11 3.5mm Aux Input
11 3.5mm Aux Input
12 Skip Track Back
13 Reset Button (hold for 5 seconds)
14 Skip Track Forward
15 Volume Knob

Remote control Operations
1.Power/off
2. Radio memory number
3. Scan
4. Band switching/Auto-search/
5. Volume increase
6. Previous song6. Previous song
7. Volume decrease
8. Next 10 songs
9. Sound effect setting
10.Switch mode
11. Mute
12. Random
13. Repeat13. Repeat
14. Clock
15. Next song
16. Next 10 songs
Basic Operation
Power/Mute Button:
PressPress once for power on. Once power is on, press again to put on/off mute. Hold button
down to power off.
Volume Control / Sound Control:
Turn to control volume. Push in to cycle through sound options (BASS - TREBLE - FAD -
BAL) Once display shows BASS/TREBLE etc. Turn to increase/decrease level.
MOD/APS Button:
This button is to change mode to Radio/SD MMC/USB
WhenWhen is radio mode, hold down for 5 seconds to scan the radio stations that have been
saved.
Radio/Track Forward and Back Buttons:
In Radio mode:
Press these buttons to search the radio, it will stop automatically when it gets to a station.
Hold this button down to search manually, once left for 5 seconds, the unit will go back to
automatic search function.
In MP3 Mode: In MP3 Mode:
Press once to change track up/down hold down skip 10 tracks at a time.

EQ Button:
Press to cycle through the preset EQ modes (POP ROCK CLASSIC FLAT)
Clock Button:
Push to display current time. To set the time - when the time is displayed, hold the button
down until the time starts flashing, then you can use the track forward and backward
buttons to set the hours and minutes. To save, do not press any button for 5 seconds.
Reset Button: Reset Button:
This button can be used to reset the unit should it choose to misbehave in some way.

Wiring Diagram
Table of contents
Other BASSFACE Car Stereo System manuals
