Bavaria Yachts 301 User manual

Edition: 12/2006
Instruction Manual
for Operating Panel
301 and 302

2Edition: 12/2006

Contents
3
Edition: 12/2006
1 Introduction and Overview. . . . . . . . . . . . . . . . . . . . . . . . 5
1.1 Panel 301 Controls . . . . . . . . . . . . . . . . . . . . . . . . . . . . . . . . . . . . . . . . 6
1.1.1 Function Buttons . . . . . . . . . . . . . . . . . . . . . . . . . . . . . . . . . . . . . . . . . . . 7
1.1.2 Lighting Buttons. . . . . . . . . . . . . . . . . . . . . . . . . . . . . . . . . . . . . . . . . . . . 9
1.2 Menu Structure . . . . . . . . . . . . . . . . . . . . . . . . . . . . . . . . . . . . . . . . . . 10
1.2.1 Menu . . . . . . . . . . . . . . . . . . . . . . . . . . . . . . . . . . . . . . . . . . . . . . . . . . . 11
1.2.2 Alarms. . . . . . . . . . . . . . . . . . . . . . . . . . . . . . . . . . . . . . . . . . . . . . . . . . 12
1.3 Overview of Panel 302 . . . . . . . . . . . . . . . . . . . . . . . . . . . . . . . . . . . . 12
1.3.1 Warning Symbols on Panel 302 . . . . . . . . . . . . . . . . . . . . . . . . . . . . . . 14
2 Electrical Connections. . . . . . . . . . . . . . . . . . . . . . . . . . 15
2.1 Safety Instructions . . . . . . . . . . . . . . . . . . . . . . . . . . . . . . . . . . . . . . . 15
2.2 Rear View of Panel 301 . . . . . . . . . . . . . . . . . . . . . . . . . . . . . . . . . . . . 15
2.2.1 Terminal Assignment. . . . . . . . . . . . . . . . . . . . . . . . . . . . . . . . . . . . . . . 17
2.3 Rear View of Panel 302 . . . . . . . . . . . . . . . . . . . . . . . . . . . . . . . . . . . . 22
2.3.1 Terminal Assignment. . . . . . . . . . . . . . . . . . . . . . . . . . . . . . . . . . . . . . . 22
2.4 Circuit Diagram . . . . . . . . . . . . . . . . . . . . . . . . . . . . . . . . . . . . . . . . . . 23

4Edition: 12/2006
5
Edition: 12/2006
Introduction and Overview
1 Introduction and Overview
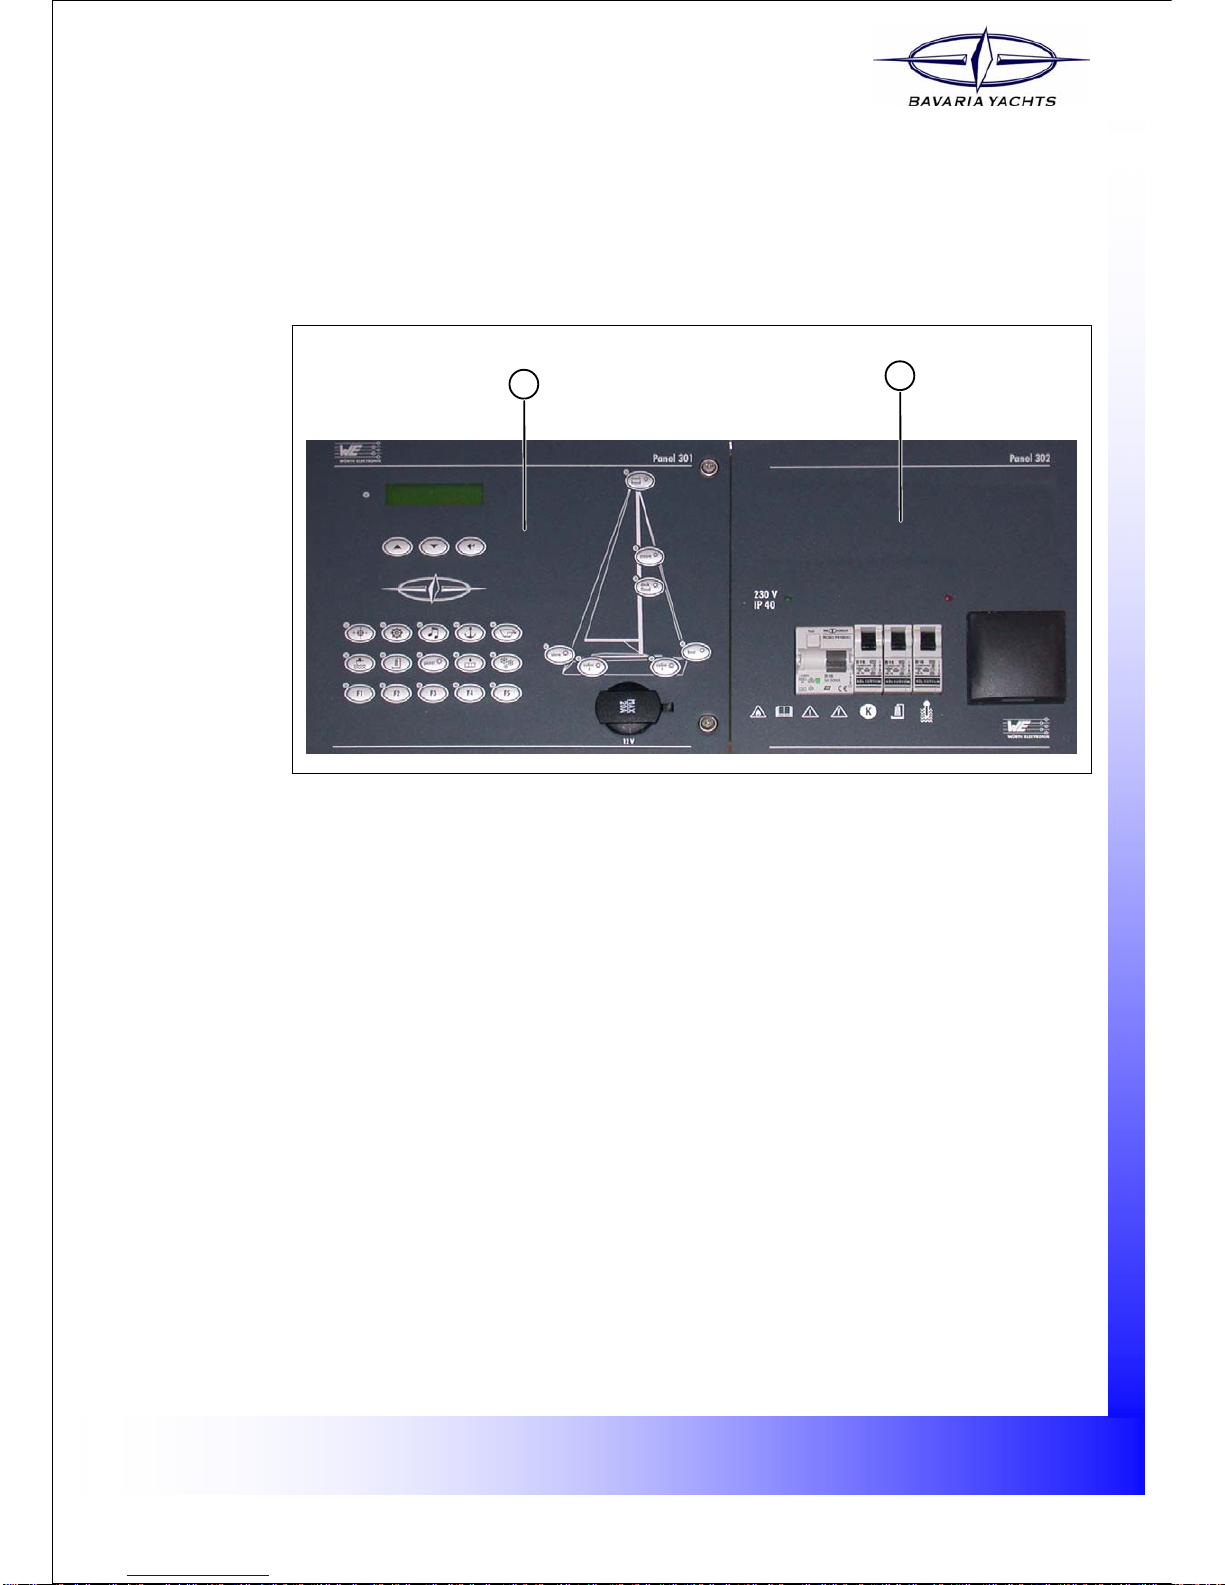
Two panels are available for the operation and power supply. Panel 301 is designed for central
monitoring and control of all electrical functions on board the yacht. Panel 302 supplies the 230V
devices with power when there is a land connection. 1
1
Fig. 1 Overview - panel 301/302
Key
(1) Panel 301 (2) Panel 302
12

6Introduction and Overview
Edition: 12/2006
1.1 Panel 301 Controls
1
Fig. 2 Overview of panel 301
Key
The current status of the function and lighting buttons is shown by the respective LED. 1
(1) Display (2) Scroll and acknowledgment buttons
(3) Function buttons (4) Socket 12V/20A
(5) Lighting buttons 1
LED Status Meaning
Yellow LED on Button function is switched on
Yellow LED flashes Malfunction
Yellow LED off Button function is switched off
2
3
5
1
4

7
Edition: 12/2006
Introduction and Overview
1.1.1 Function Buttons
2
Button Description/Function
Compass
Switches the compass on and off. The button status is saved when the power
supply has been switched off and is kept until the power is switched back on
again.
Navigation
Switches the navigation device on and off. The button status is saved when
the power supply has been switched off and is kept until the power is
switched back on again. In the event of a malfunction, the yellow LED will
flash until the fault has been removed.
Radio
Switches the radio on and off. The button status is saved when the power
supply has been switched off and is kept until the power is switched back on
again. In the event of a malfunction, the yellow LED will flash until the fault
has been removed.
Anchor
Switches the anchor relay on and off. 1
The status of this button (ON/IOFF) is not stored after the power supply has
been switched off. When you switch on the power again, this function will
always be OFF.
NOTE:
For technical reasons, the LEWMAR windlass (type H3) can not be operated
via this button.
Bilge pump
Switches the bilge pump on and off. The button status is saved when the
power supply has been switched off and is kept until the power is switched
back on again. In the event of a malfunction, the yellow LED will flash until
the fault has been removed.
CAUTION:
Do not dry run the bilge pump!
Fresh water
Switches the fresh water pump on and off. The button status is saved when
the power supply has been switched off and is kept until the power is
switched back on again.
CAUTION:
Do not dry run the fresh water pump!

8Introduction and Overview
Edition: 12/2006
Waste water
Switches the waste water pump on and off. The button status is saved when
the power supply has been switched off and is kept until the power is
switched back on again.
CAUTION:
Do not dry run the waste water pump!
Panel
Switches the background lighting of the panel and display on. This
background lighting stays on for about 1 minute.
The background lighting of the panel and display lights up and then turns off
if you do not press either the up/down scroll button, the acknowledgment
button or the panel button, during this time.
Heating
Switches the heating pump on and off. The button status is saved when the
power supply has been switched off and is kept until the power is switched
back on again.
Fridge
Switches the fridge on and off. The button status is saved when the power
supply has been switched off and is kept until the power is switched back on
again. In the event of a malfunction, the yellow LED will flash until the fault
has been removed.
F1 to F5
Switches the reserve outputs on and off. These extra outputs are provided in
addition to the functions set by the shipyards and are reserved for the use of
otherequipment.Thebuttonstatusissaved whenthepowersupplyhasbeen
switched off and is kept until the power is switched back on again.
Button Description/Function
9
Edition: 12/2006
Introduction and Overview
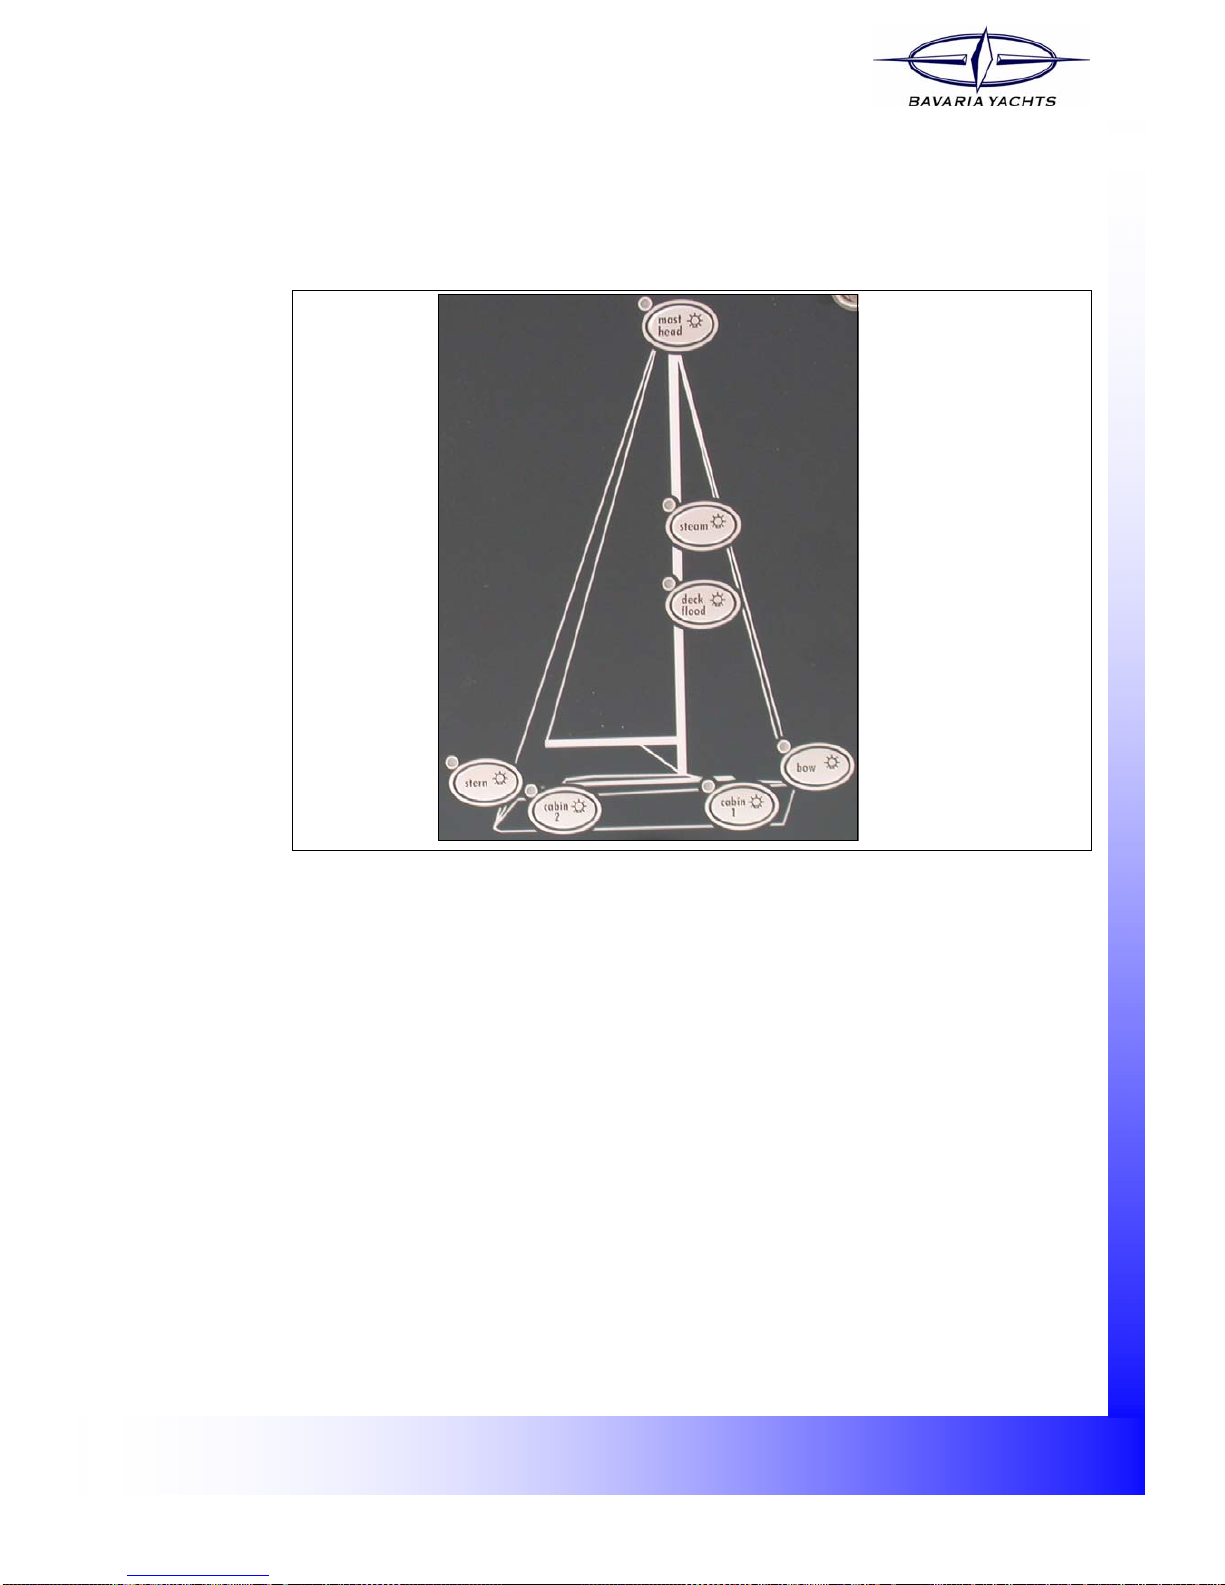
1.1.2 Lighting Buttons
These buttons are used to switch the various lighting sources on and off. The button status is
saved when the power supply has been switched off and is kept until the power is switched back
on again. 1
1
Fig. 3 Detailed view of the lighting buttons
Outside lighting
The yellow LED will flash in the event of a malfunction. 1
–Stern
–Bow
– Steam
– Mast head
No function monitoring for: 1
– Deck flood
Inside lighting
– Cabin 1
– Cabin 2
10 Introduction and Overview
Edition: 12/2006
1.2 Menu Structure
This section describes how to access the various menu functions and how to change settings. 1
As soon as the panel is connected to the power source, a function test will be performed and the
LEDs will light up for approx. 1 second. After this, the panel is ready for operation. 1
Alarms will be shown when triggered. See also section 1.2.2. 1
After activating the main switch, you will see the following start screen on the display: 1
3
3
3
With the help of the scroll buttons and the acknowledgment button, you can select and view the
various information and menus. 1
1
You can now perform the required settings at the panel. 1
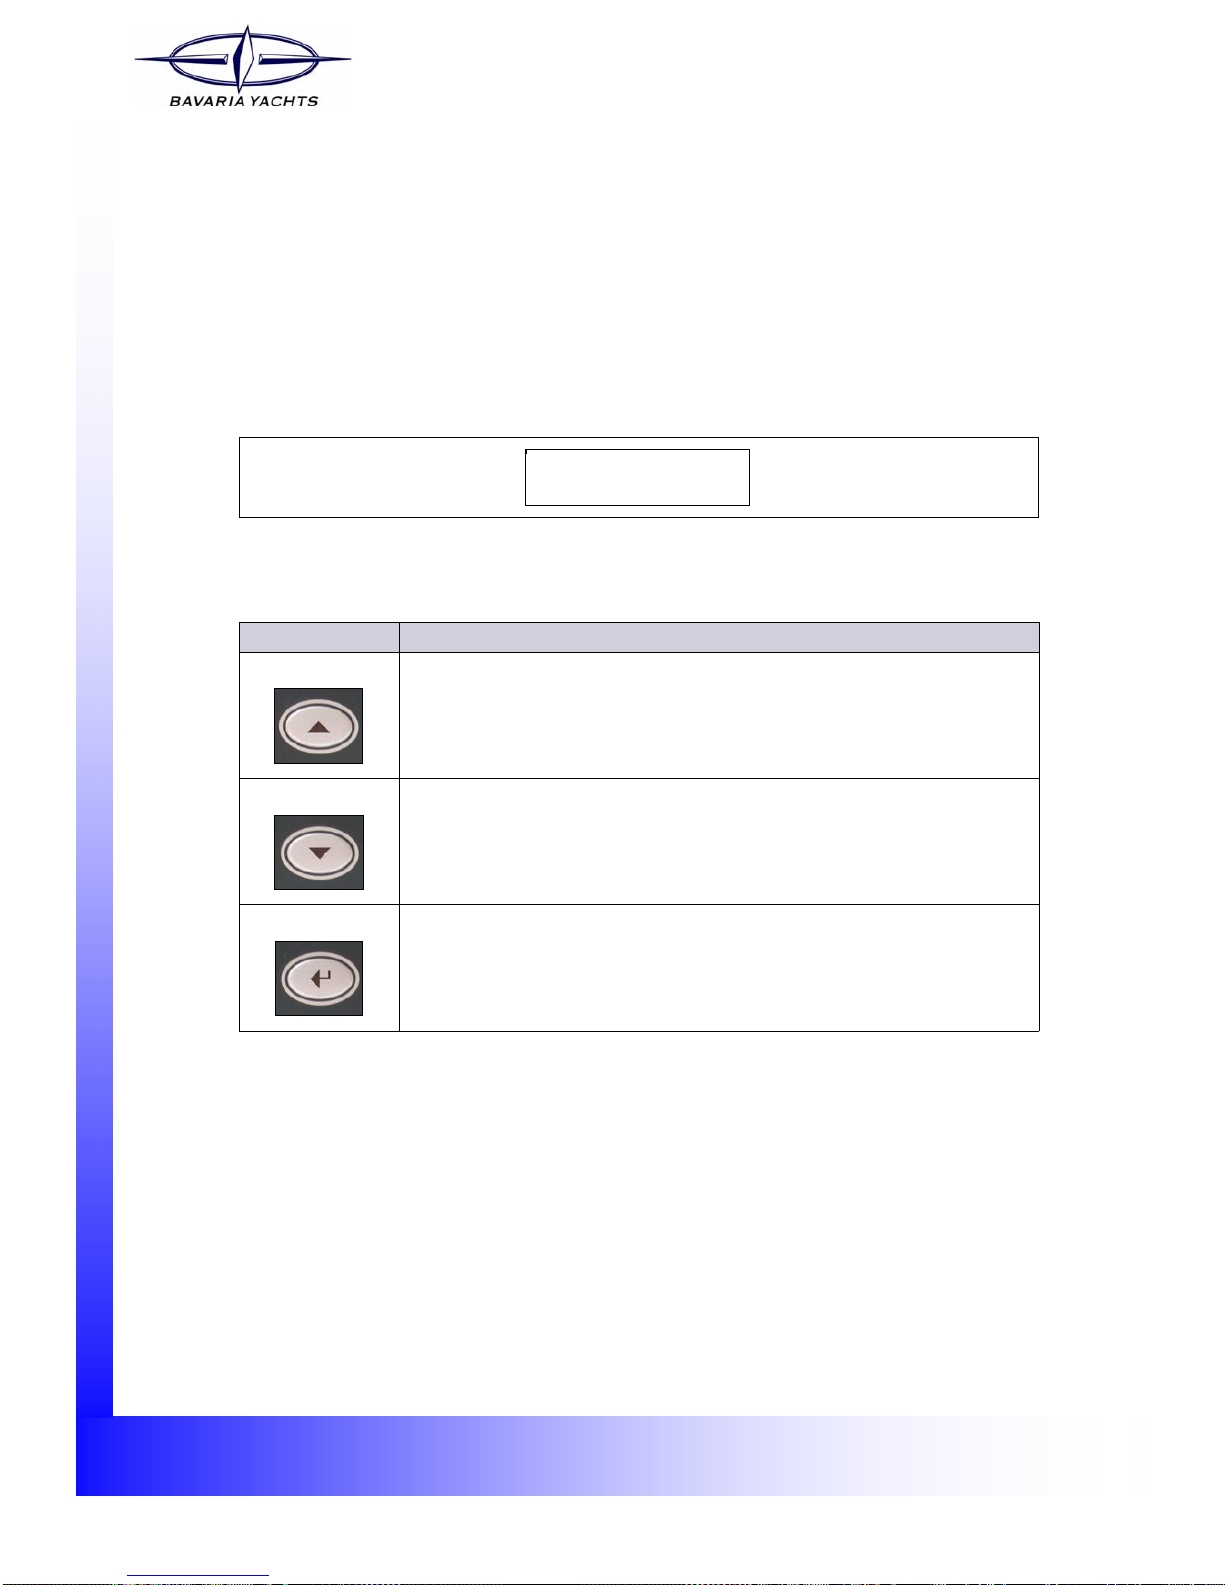
Button Description/Function
Scroll button - up
Navigates up the menu. 1
Scroll button - down
Navigates down the menu. 1
Acknowledgment button
Saves or confirms your entries. 1
BAVARIA YACHTS

11
Edition: 12/2006
Introduction and Overview
1.2.1 Menu
3
Fig. 4 Panel 301 menu
The alarm value for the holding tank
is preset to issue an alarm at a level
of 75%.
BAVARIA YACHTS
-~}
Possible values: 25%, 50%
and 75%
Yachts with only one freshwater tank do not
differentiate between VS and AC.
Set the alarm value for the
freshwater tank (VS)
Set the alarm value for the
freshwater tank (AC) Possible values: 25%, 50%
and 75%
MIN Å+ ·- OK~
øøåÆÆÆÆÆÆÆ 25%
Set the alarm value for the
holding tank (VS)
Change the alarm value for the
consumer battery (BV).
BAVARIA YACHTS
-~}
Key
Scroll buttons
Acknowledgement
button
Bow
Sern
VS
AC
Select the language in which the
display texts are to be shown.
Select the alarm value for the level
of the freshwater tank.
Selects the alarm value for the
minimum charging status of the
starter battery.
Selects the alarm value for the
minimum charging status of the
consumer battery .
Sprache
deutsch
MIN Å+ ·- OK~
øøåÆÆÆÆÆÆÆ 25%
MIN Å+ ·- OK~
ÆÆÆÆÆÆÆÆÆÆ 11.5V
Possible values:
11.5 V to 13.5 V
MIN Å+ ·- OK~
ÆÆÆÆÆÆÆÆÆÆ 11.5V
Possible values:
11.5 V to 13.5 V
Change the alarm value for
the starter battery (BS)
Å+ ·- OK~
english
freshwater VS
øøøøøÆÆÆÆÆ 50%
freshwater AC
øøøøøøøøøø 100%
Battery BS
øøåÆÆÆÆÆÆÆ 12.0V
Battery BV
øøåÆÆÆÆÆÆÆ 12.0V
If following symbol is displayed -~}
charging of battery is indicated .
Holding tank
ÆÆÆÆÆÆÆÆÆÆ 0%

12 Introduction and Overview
Edition: 12/2006
1.2.2 Alarms
If an alarm is triggered, the red LED next to the display will flash. The display will show the menu
which has issued the alarm and the alarm itself will be shown by a flashing exclamation mark next
to the menu bar. To acknowledge the alarm, press the acknowledgment button for 2 seconds. 1
4
Fig. 5 Alarm display
The red LED extinguishes when you acknowledge the alarm. 1
1.3 Overview of Panel 302
Panel 302 supplies the 230V devices with power when there is a land connection. 1
1
WARNING
Observe the current consumption and power input 1
–The consumer devices connected must not exceed a total power input of 3.600 W and a max.
current consumption of 16 A.
1
Press for 2 secs.
If "Alarm" appears on the display , this means that
an alarm has been acknowledged but the cause of
the alarm has not
y
et been fixed.
Acknowledgement
button
BAVARIA YACHTS
Alarm -~}
freshwater AC
øøøøøøøøøø 100%

13
Edition: 12/2006
Introduction and Overview
5
Fig. 6 Overview of panel 302
Key
Function description
– When the residual current circuit breaker is switched on, a green LED indicates the existing
land connection.
– The red LED indicates that the heating boiler is switched on.
– The residual current circuit breaker and fuse B16 are connected upstream of the three auto-
matic circuit breakers (5,6,7).
– The kitchen fuse also serves the integrated socket (8).
(1) Installation point for radio (optional) (2) LED (green) for residual current circuit
breaker
(3) Residual current circuit breaker FI /
B16 (4) Observe warning symbols
(5) Automatic circuit breaker - kitchen
(16A) (6) Automatic circuit breaker - shower (16A)
(7) Automatic circuit breaker - boiler (16A) (8) Socket 220V
(9) LED (red) for boiler on 1
1
7
8
9
2
3
65
4
14 Introduction and Overview
Edition: 12/2006
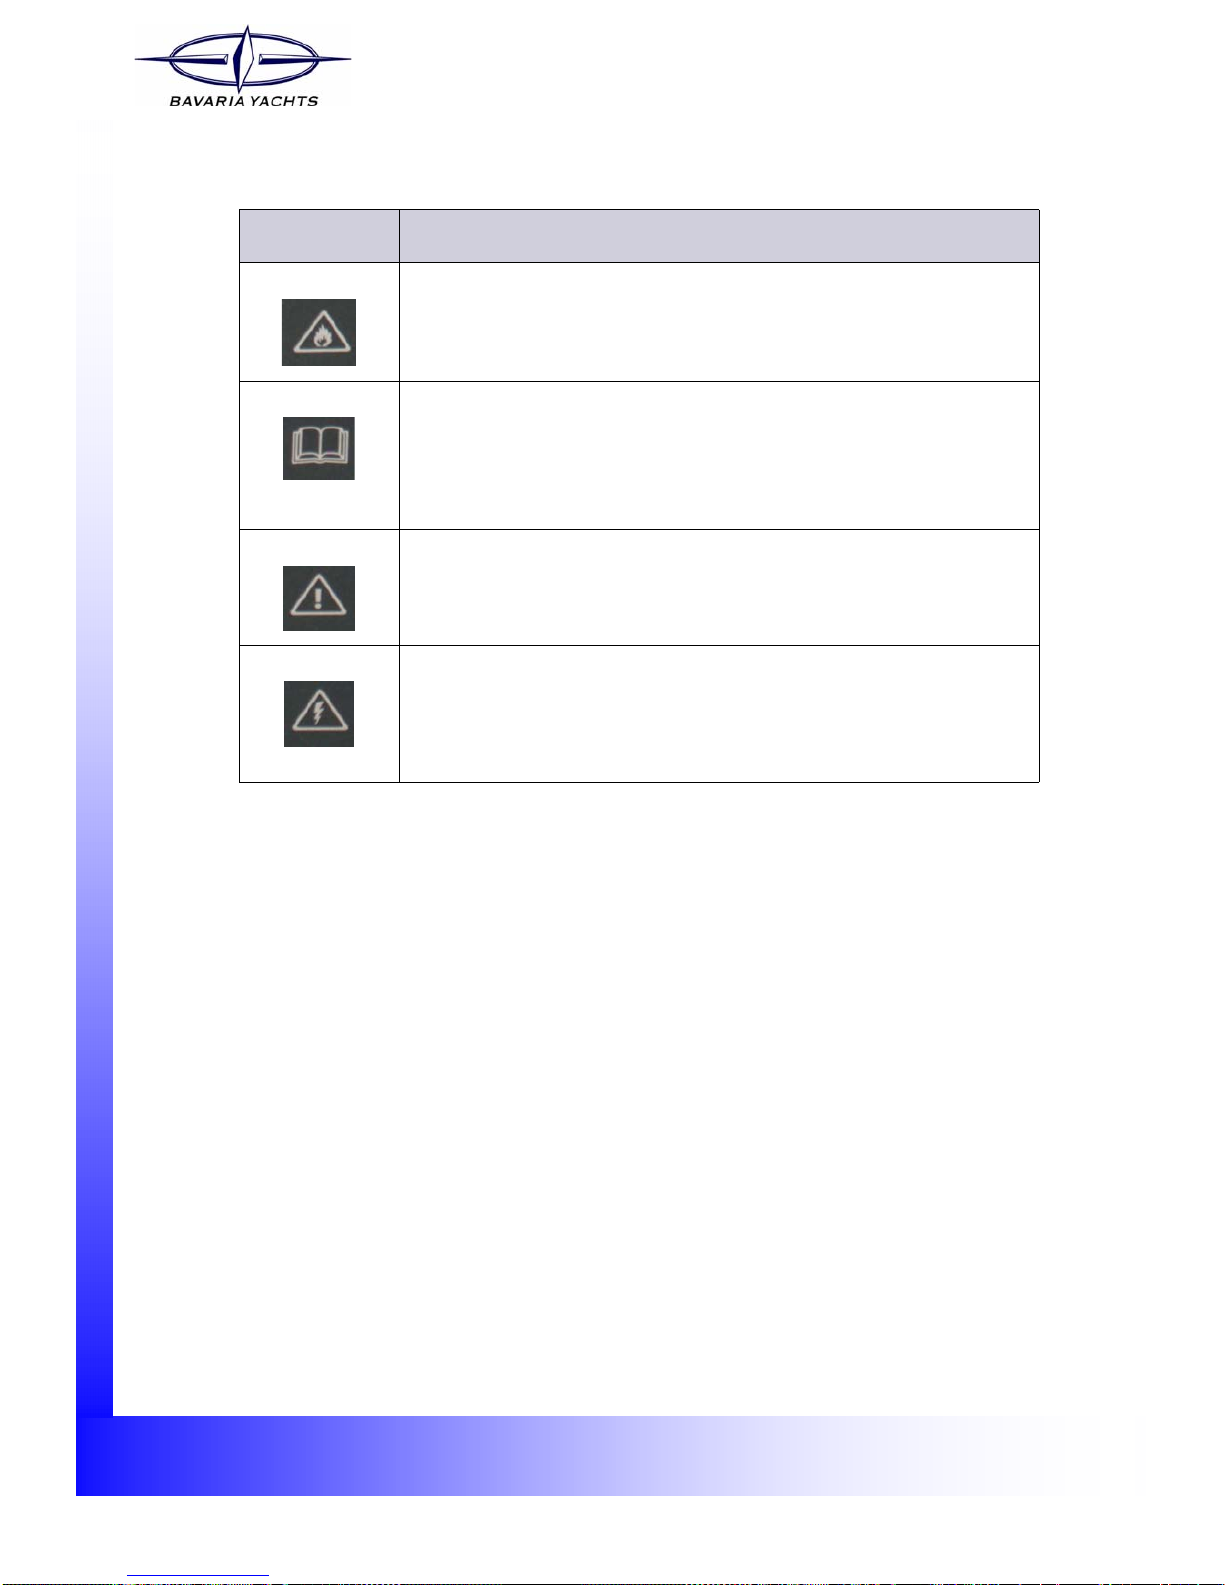
1.3.1 Warning Symbols on Panel 302
6
Warning
Symbols Description
Fire or heat warning
– Panel 301/302 must be protected against fire and extreme heat.
Read the operating instructions
– Read and observe the information in this instruction manual.
– Thesafety instructionsandhazardwarningsin theboatbuilder'soperating
manual take precedence when using panels 301/302.
Warning against unauthorized opening of panels 301/302
– Measurementand serviceworkto panels301/302mayonly beperformed
by specially qualified personnel.
Warning against dangerous voltages.
– Potentially lethal voltages are still present at some parts on the rear of
panels 301/302 - even when the panels have been switched off at the
main switch.
15
Edition: 12/2006
Electrical Connections
2 Electrical Connections
2.1 Safety Instructions
2
DANGER
Panel 302 is supplied with 230 V~ ± 5 %, 50/60 Hz line voltage. 2
– Potentially lethal voltages are therefore still present at some parts on the rear of this panel (in-
put B16/FI) - even when the panel has been switched off at the residual current circuit breaker.
– Measurement and service work to panels 301/302 may only be performed by specially quali-
fied personnel.
– Incorrect usage of panels 301/302 may cause serious or even lethal injuries and considerable
damage to property.
– The safety instructions and hazard warnings in the boatbuilder's operating manual take prece-
dence when using panels 301/302.
– Observe the applicable accident prevention and DIN regulations (particularly DIN EN 60 204,
Part 1) or the respective regulations in your country.
– Before performing any service or maintenance work, always switch off panel 302 at the resid-
ual current circuit breaker and disconnect it from the power supply.
– Securethepaneltopreventunauthorizedreconnectionofthepowersupply.Touchingliveparts
can lead to serious or lethal injuries.
2
2.2 Rear View of Panel 301
The connections and micro-fuses can be found on the rear of the operating panel 301. 2
ÆLoosen the two fastening screws at the front and swing the panel open to the side.

16 Electrical Connections
Edition: 12/2006
6
Fig. 7 Rear view of the panel 301 - terminal assignment
Key
(1) Monitoring of fresh water tank 2 (bow) (2) Monitoring of waste tank 2
(3) Monitoring of fresh water tank 1 (AC) (4) Monitoring of waste tank 1
(5) Monitoring of charger (6) Monitoring of diesel tank (not used)
(7) Bow cable (not used) (8) Stern cable
(9) Bilge pump (10) Anchor
(11) Battery - negative pole (12) Socket 12V with fuse
(13) Battery - positive pole 12C DC (14) Reserve function buttons F1-F5
(15) Options (autopilot/navigation) (16) Light cable
(17) Shower suction extractor pump (18) Fridge
1
2
3
4
5
6
78
9
10
11
12
13
14
15 16 17 18

17
Edition: 12/2006
Electrical Connections
2.2.1 Terminal Assignment
2
2
2
2
2
Connector [1] Monitoring fresh water tank 2 (bow) Cable
1 Fresh water tank 2 4/4, wt
2 Fresh water tank 2 3/4, br
3 Fresh water tank 2 2/4, gr
4 Fresh water tank 2 1/4, ye
5 Fresh water tank 2 COM/GND
Connector [2] + [4] Monitoring waste tank Cable
1 Waste tank 1 3/4
2 Waste tank 2 COM/GND
Connector [3] Monitoring fresh water tank 1 (stern) Cable
1 Fresh water tank 1 4/4, wt
2 Fresh water tank 1 3/4, br
3 Fresh water tank 1 2/4, gr
4 Fresh water tank 1 1/4, ye
5 Fresh water tank 1 COM/GND
Connector [5] Monitoring charger Cable
1GNDinput --
2LEDinput --
Connector [6] Monitoring diesel tank Cable
1 Not used --
2 Not used --
3 Not used --
18 Electrical Connections
Edition: 12/2006
2
2
2
2
Connector [7] Bow cable (only for Match series) Cable
1 Top light - not used 1
2 Steam light - not used 2
3 Sailing light - not used 3
4 Fresh water pump - not used 12
Connector [8] Stern cable, plus option
cable Cable Description Connectio
n
1 Stern light 1 Function monitoring
Button
10W/2A
2 Compass light 2 No function monitoring
Button
10W/1A
3 Fresh water pump 3 No function monitoring
Button
90W/8A
4 Navigation instrument
(autopilot and chart plotter option)
4
[item14]
factory
configuratio
n or
[item15]
optional
Monitoring fuses
Button
240W/20A
5 Fresh water pump 5 No function monitoring
Button
90W/8A
Connector [9] Bilge pump Cable Description Connectio
n
Bilge pump 11 Function monitoring
Button
Pump 12V
80W/10A
Connector [10] Windlass Cable Description Connectio
n
Windlass 10 No function monitoring
Button
Control external power relay
60W/5A

19
Edition: 12/2006
Electrical Connections
2
2
2
Connector [12] Socket Cable Description Connectio
n
Socket 12V 17 No function monitoring
NOT switched
192W/16A
Connector [14] Reserved for function
buttons F1-F5 Cable Description Connectio
n
1 Reserve button 1 -- No function monitoring
Button
60W/5A
2 Reserve button 2 -- No function monitoring
Button
60W/5A
3 Reserve button 3 -- No function monitoring
Button
60W/5A
4 Reserve button 4 -- No function monitoring
Button
180W/15A
5 Reserve button 5 -- No function monitoring
Button
240W/20A
Connector [16] Light cable Cable Description Connectio
n
1 12 V battery 1+, starter battery,
connection only for measuring
battery
1-- --
2 !Not connected, occupied
internally! -- -- --
3 Top light 3 Function monitoring
Button
10W/1A
4 Steam light 4 Function monitoring
Button
25W/2A
5 Bow light 5 Function monitoring
Button
25W/2A
6 Sailing light 6 No function monitoring
Button
50W/4A
7+8 Inside lighting 1+2 7+8 No function monitoring
Button
240W/20A
9+10 Inside lighting 3+4 9+10 No function monitoring
Button
240W/20A
20 Electrical Connections
Edition: 12/2006
2
2
11 Heating 11 No function monitoring
Button
Control line for thermostat
60W/5A
12 Radio (optional) 12 Function monitoring
Button
120W/10A
CB radio (optional) -- Function monitoring
Button
Connector [16] Light cable Cable Description Connectio
n
Connector [17] Sower suction extractor
pump Cable Description Connectio
n
Shower suction extractor pump 13+13a+
13b No function monitoring
Button
270W/30A
Connector [18] Fridge Cable Cable
Cooling unit 16+16a+
16b+16c Monitoring fuses
Button
360W/30A
This manual suits for next models
1
Table of contents
Popular Control Panel manuals by other brands

KUHN
KUHN Quantron S instructions

Pentair Pool Products
Pentair Pool Products EasyTouch 8 Installation and user guide

GE Security
GE Security 1501 Installation and operation manual

Siemens
Siemens SIMATIC HMI 177 operating instructions

Controls
Controls MVP-62350 product manual

Miranda
Miranda RCP-200 Guide to installation and operation


