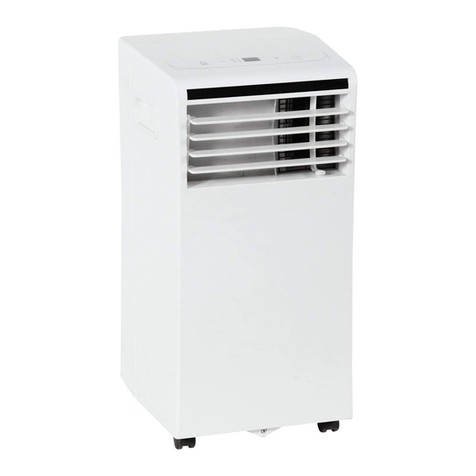
BCB 14000 BTU User manual

SKY5325Ver. 1
INSTRUCTION
MANUAL
14000 BTU
Portable Air Conditioner

2|
POWER CORD
•This appliance must be grounded with the 3-prong grounding plug.
•Do not use a 3-prong adaptor or cut o the grounding plug.
•Do not share a wall outlet with other appliances.
•Using an extension cord is not recommended as the cord may overheat.
Power cord comes with an integrated circuit breaker. Routinely test the
circuit breaker by doing the following:
-With the power cord plugged in, press the TEST button and the
RESET button should pop out.
-Press the RESET button and make sure it engages.
Please retain these instructions for future reference.
•This appliance is not a toy.
•Do not allow children to operate this appliance. Keep appliance out of reach of children.
•This item is intended for indoor, household use only.
•Place appliance on a stable and level surface.
•Unplug appliance before moving, assembly, disassembly, or cleaning.
•Ensure that your voltage is consistent with specifications.
•Make sure that no other high current appliances are plugged into the same circuit with the air
conditioner as an overload could occur.
•This appliance is not intended for use by persons (including children) with reduced physical, sensory or
mental capabilities, or lack of experience and knowledge, unless they have been given supervision or
instruction concerning use of the appliance by a person responsible for their safety.
•If any parts are missing, broken, damaged, or worn, stop using this product until repairs are made
and/or factory replacement parts are installed.
•Do not use this item in a way inconsistent with the manufacturer’s instructions as this could void the
product warranty.
NOTICE
•Do not hit, shake, or damage the appliance.
•Do not place outdoors or in a damp environment.
•Do not operate in the immediate vicinity of water, such as near a bathtub, washbowl, bathroom, or
swimming pool.
•Keep appliance away from direct sunlight and other heat sources (stove, heater, etc.).
•Do not spray insecticides or other combustible materials near the appliance.
•Never obstruct the air inlet and outlet openings. Do not place objects on the appliance or allow objects
to obstruct the inlet or outlet openings.
•Do not insert objects or fingers into inlet/outlet openings.
•Do not cover the unit when in operation.
•Do not place the cord under carpet or cover with throw rugs or furniture. Arrange the cord so that it
cannot be tripped over.
•Do not run power cord over sharp edges/corners or a hot surface.
•Do not immerse the appliance or power cord in water or any other liquid.
•Do not spill water on the electrical components or connectors.
•Do not touch the plug or operate appliance with wet hands.
•Do not unplug the appliance by pulling on the power cord. Always grasp the plug firmly and pull
straight out from the outlet.
•Do not use if the plug or any components are damaged.
•Do not use any accessory or fitting other than original accessories and fittings.
WARNING
TEST
RESET

| 3
DIAGRAM
CONTROL PANEL
AIR OUTLET
VENTS
CASTORS
HANDLES
HANDLES
REMOVABLE FILTER
REMOVABLE FILTER
AIR INLET
AIR INLET
CORD WRAP
UNIVERSAL PLUG
Wrap cord and plug
here for storage
REMOTE STORAGE
DRAIN OUTLET
DRAIN OUTLET
EXHAUST OUTLET
POWER CORD

DOWN ARROW
UP ARROW
SLEEP
H
M
L
HR
˚C
˚F
WATER FULL SLEEP
•MODE: Cycle between cool, dehumidify, and fan mode
•UP ARROW: Increase temperature/time
•DOWN ARROW: Decrease temperature/time
•SPEED: Toggle fan speed between low, medium, and high
•TIMER: Set timer from 1 to 24 hours
•OSCILLATE: Press Speed and Timer at same time to toggle vent oscillation
•SLEEP: Press Timer and Up Arrow at same time to enter Sleep mode (see Remote section)
•WATER FULL INDICATOR: Indicates water tank is full and needs to be drained
•SLEEP INDICATOR: Indicates unit is in Sleep mode
•TOGGLE °F/°C: Press Up Arrow and Down Arrow at same time
CONTROL PANEL
•Install 2 AAA batteries in the remote control.
•SLEEP: Unit enters Sleep mode
1. Fan turns to low
2. After 2 hours, temperature increases 1°F
3. After 2 hours, temperature increases 1°F again
4. Temperature remains unchanged afterwards
REMOTE
4|
POWER
SPEED
TOGGLE °F/°C
OSCILLATE
WATER FULL
INDICATOR
SLEEP OSCILLATE
SLEEP INDICATOR
TIMER SLEEP

SETTING UP THE APPLIANCE
•Remove all packaging and accessories. Inspect appliance to make sure that it is in good condition.
•Place appliance on a stable and level surface near a window and wall outlet.
•Make sure there is at least 20 inches of clearance from the wall and on all sides.
•Keep unit at least 40 inches away from TV and radios to avoid electromagnetic interference.
•Do not place outdoors or in a damp environment.
•Do not operate in the immediate vicinity of water, such as near a bathtub, washbowl, bathroom, or
swimming pool.
•Keep appliance away from direct sunlight and other heat sources (stove, heater, etc.).
PARTS
HARDWARE
A
1 PC
EXHAUST HOSE
E
1 PC
REMOTE
B
1 PC
HOSE ADAPTOR C
1 PC
VENTING ADAPTOR D
1 SET
WINDOW VENTING
KIT
1
6 PCS
M4 x 10mm SCREW 2
6 PCS
M4 x 8mm SCREW
TOOLS REQUIRED
APPROXIMATELY
15 MIN.
ASSEMBLY
2 PERSON
ASSEMBLY
PHILLIPS
SCREWDRIVER
2 AAA BATTERIES
+AAA -
| 5

Pull apart part A exhaust hose so the folds
are separated. Insert exhaust hose into the
part B hose adaptor and rotate clockwise to
lock it in place.
Insert the hose adaptor into the exhaust outlet
and turn counterclockwise to lock it in place.
Insert the other end of the exhaust hose into the part C venting adaptor and rotate clockwise to
lock it in place.
PRODUCT ASSEMBLY
1
2
6|
C
A
B

Line up the tabs on the venting adaptor with the hole in the part D window venting kit and slide
it to lock it in place. Secure the venting adaptor (from the opposite side) with a part 1 screw.
Slide the panels of the window venting kit together.
PRODUCT ASSEMBLY
3
4
HORIZONTAL | 7
VERTICAL
INSTALLATION OPTIONS
D
1

If necessary, line the window opening with weather seal (not included).
Install the window venting kit horizontally or vertically. If necessary, secure venting kit with part 1
or part 2 screws.
NOTE: The exact screws depend on your window and installation.
If window is too small, you may cut the
panels to fit the window.
NOTE: Make sure exhaust hose is not bent
more than 45°. Do not stretch hose beyond
the expanded length of the hose.
5
PRODUCT ASSEMBLY
8|

DRAINING WATER
MANUAL: Recommended if using cooling mode because water is recycled in unit for more eective cooling.
When the water full indicator turns on, the internal water tank must be drained.
1. Remove the cap and stopper from the lower drain outlet.
2. Tilt unit slightly backwards to drain water into an appropriate vessel or outside.
CONTINUOUS: Recommended if using dehumidifying mode.
Continuous draining requires a 13mm drain hose (not included).
1. Remove the cap and stopper from the lower or upper drain outlet.
-Upper drain outlet is recommended for dehumidifying.
2. Attach drain hose to drain outlet.
-Make sure drain hose is straight and in good condition.
3. Place other end of hose in appropriate draining location or outside.
OPERATING INSTRUCTIONS
NOTE: It is recommended that you leave appliance o for at least 3 minutes before turning back on.
COOLING
•Do not use cooling mode if ambient temperature is higher than 95°F.
1. Press Mode button until cool indicator turns on.
2. Adjust to desired room temperature (62°F-86°F).
3. Press Speed button to select desired fan speed.
DEHUMIDIFYING
•Fan speed or temperature cannot be adjusted in dehumidifying mode.
1. Press Mode button until dehumidify indicator turns on.
2. When the water full indicator turns on, drain water through the drain outlet.
FAN
•Temperature cannot be adjusted in fan mode.
•Exhaust hose not required in fan mode.
1. Press Mode button until fan indicator turns on.
2. Press Speed button to select desired fan speed.
TIMER
SET TIMER AUTO-START
1. With the air conditioner turned o, press the Timer button.
2. Set the desired timer start time within 1 to 24 hours from now. Unit will turn on when timer ends.
CANCEL TIMER
Press the Timer button to display remaining time, then press again to cancel.
SET TIMER AUTO-STOP
1. With the air conditioner turned on, press the Timer button.
2. Set the desired timer end time within 1 to 24 hours from now. Unit will turn o when timer ends.
| 9
REMOVE CAP AND STOPPER ATTACH DRAIN PIPE

MOVING UNIT
•Always use handles to move unit.
•Drain water from tank before handing or moving.
•Keep unit upright during transportation or storage. Do not move unit on its side.
•Unit is heavy and 2 people are recommended during moving and installation.
CLEANING
•Turn o and unplug appliance before cleaning or storage. Allow unit to cool completely.
•It is very common for dust to gather in the inlet/outlet and cause overheating. Routinely clean the
housing and openings with a slightly damp cloth, vacuum cleaner, or dusting brush.
•Do not clean with gasoline, benzine, thinner, or harsh cleaners.
•Clean air filter as necessary:
-Slide out the removable air filters.
-Carefully clean air filter with mild detergent and lukewarm water.
-Allow air filter to completely dry and reinsert.
STORAGE
•Keep unit upright during transportation or storage. Do not move unit on its side.
•For prolonged storage, do the following:
-Tilt unit slightly backwards to drain all water from tank, then replace cap and stopper
-Run fan mode for half a day to dry the interior
-Remove batteries from remote
-Turn o and unplug appliance. Wrap cord and plug into universal plug
-Clean air filters and remove exhaust hose
-Cover appliance
-Store in a cool, dry place away from direct sunlight and dirt
TROUBLESHOOTING
REASON
Overheat feature activated
Remote has low battery
Not plugged in
Water full indicator on, water tank full
PROBLEM
Not working when
turned on
Does not turn on
SOLUTION
Allow unit to cool for 3 minutes
then try again
Replace remote batteries
Make sure unit plugged in properly
Drain water and restart unit
Room temperature lower than set
temperature (cooling mode) Adjust temperature
Doors/windows open
Heat sources in room
Unit in direct sunlight
Exhaust hose not attached or blocked
Temperature set too high
Air inlet blocked
Dirty filters
Not cool enough
Close doors/windows
Remove heat sources
Block direct sunlight
Connect or clean exhaust hose
Adjust temperature
Clean air inlet
Clean filters
Too far from unit, remote not
aimed correctly
Remote not working
Bring remote closer and
point directly at unit
Low battery Replace battery
Uneven ground
Excessive noise Set unit on a flat, stable surface

ERROR CODES
CODE
E1
PROBLEM
Coil temperature sensor failure
E2 Room temperature sensor failure
E4 Anti-freeze protectiont
This device complies with part 15 of the FCC rules. Operation is subject to the following two conditions: (1)
This product may not cause harmful interference, and (2) this device must accept any interference
received, including interference that may cause undesired operation.
NOTE: This equipment has been tested and found to comply with the limits for a Class B digital device,
pursuant to part 15 of the FCC Rules. These limits are designed to provide reasonable protection against
harmful interference in a residential installation.
This equipment generates, uses, and can radiate radio frequency energy and, if not installed and used in
accordance with the instructions, may cause harmful interference to radio communications. However, there
is no guarantee that interference will not occur in a particular installation.
If this equipment does cause harmful interference to radio or television reception, which can be determined
by turning the equipment o and on, the user is encouraged to try to correct the interference by one or
more of the following measures:
•Reorient or relocate the receiving antenna.
•Increase the separation between the equipment and receiver.
•Connect the equipment to an outlet on a circuit dierent from that to which the receiver is connected.
•Consult the dealer or an experienced radio/TV technician for help.
WARNING: Any changes or modifications to this unit not expressly approved by the party responsible for
compliance could void the user's authority to operate the equipment.
Responsible party (contact for FCC matters only):
Quality Control Dept.
5642 Ontario Mills Parkway
Ontario, CA 91764
FCC COMPLIANCE STATEMENT
WARNINGS REGARDING BATTERIES
The following safety hazards may result in serious injury or death:
•Do not mix alkaline, standard (carbon zinc) and rechargeable (nickel hydride) batteries.
•Do not mix old and new batteries.
•Non-rechargeable batteries should not be charged.
•Rechargeable batteries should be charged under adult supervision only.
•Exhausted batteries should be removed.
•The supply terminals should not be short-circuited.
•Do not put batteries next to or in a heat source (fire, electronic heating device, etc.).
•Do not hit batteries against hard objects.
•Do not submerge batteries in water.
•Batteries should be inserted with the correct polarity.
| 11

All items can be returned for any reason within 60 days of the receipt and will receive a full refund as long
as the item is returned in its original product packaging and all accessories from its original shipment are
included. All returned items will receive a full refund back to the original payment method. All returned
items will not be charged a re-stocking fee.
All returned items require an RA (Return Authorization) number, which can only be provided by a Best
Choice Products Customer Service Representative when the return request is submitted. Items received
without an RA may not be accepted or may increase your return processing time. Once an item has been
received by Best Choice Products, refunds or replacements will be processed within 5 business days.
All returns must be shipped back to the Best Choice Products Return Center at the customer’s expense. If
the reason for return is a result of an error by Best Choice Products then Best Choice Products will provide
a pre-paid shipping label via email. Boxes for return shipping will not be provided by Best Choice Products,
and is the customer’s responsibility to either use the original shipping boxes or purchase new boxes.
Pictures may be required for some returns to ensure an item is not damaged prior to its return. Items
returned are not considered undamaged until they are received by Best Choice Products and verified as
such. All damages to items are the customer’s responsibility until the item has been received by and
acknowledge by Best Choice Products as undamaged.
PRODUCT WARRANTY INFORMATION
Manufacturer and seller expressly disclaim any and all liability for personal injury, property damage or
loss, whether direct, indirect, or incidental, resulting from the incorrect attachment, improper use,
inadequate maintenance, or neglect of this product.
HELP CENTER
Product Assembly
Product InquiryChat Support Returns & Refunds
Orders FAQ
WARNING
Question about your product? We're here to help. Visit us at:
help.bestchoiceproducts.com
CHAT
US!
Table of contents
Popular Air Conditioner manuals by other brands

SPT
SPT WA-1511S user manual

Panasonic
Panasonic CS-S18HKQ Service manual

Frigidaire
Frigidaire FAK103J1V4 owner's guide
Daikin
Daikin FDA125A5VEB Installer and user reference guide

Olimpia splendid
Olimpia splendid maeStro Pro Instructions for installation, use and maintenance
Haier
Haier HDU-42HT03/H Operating & installation manual

Nordyne
Nordyne WARRCOIL01 quick start guide
Dimplex
Dimplex DCEVP5WG instruction manual

Mitsubishi
Mitsubishi PQHY-P200YGM-A installation manual
GE
GE AGM24DH Owner's manual and installation instructions

Mitsubishi Electric
Mitsubishi Electric MSZ-SF25VE Service manual

Mitsubishi Electric
Mitsubishi Electric City Multi PLFY-WL-VEM-E Series installation manual
