manuals.online logo
Brands
  1. Home
  2. •
  3. Brands
  4. •
  5. Haier
  6. •
  7. Air Conditioner
  8. •
  9. Haier HDU-42HT03/H Manual

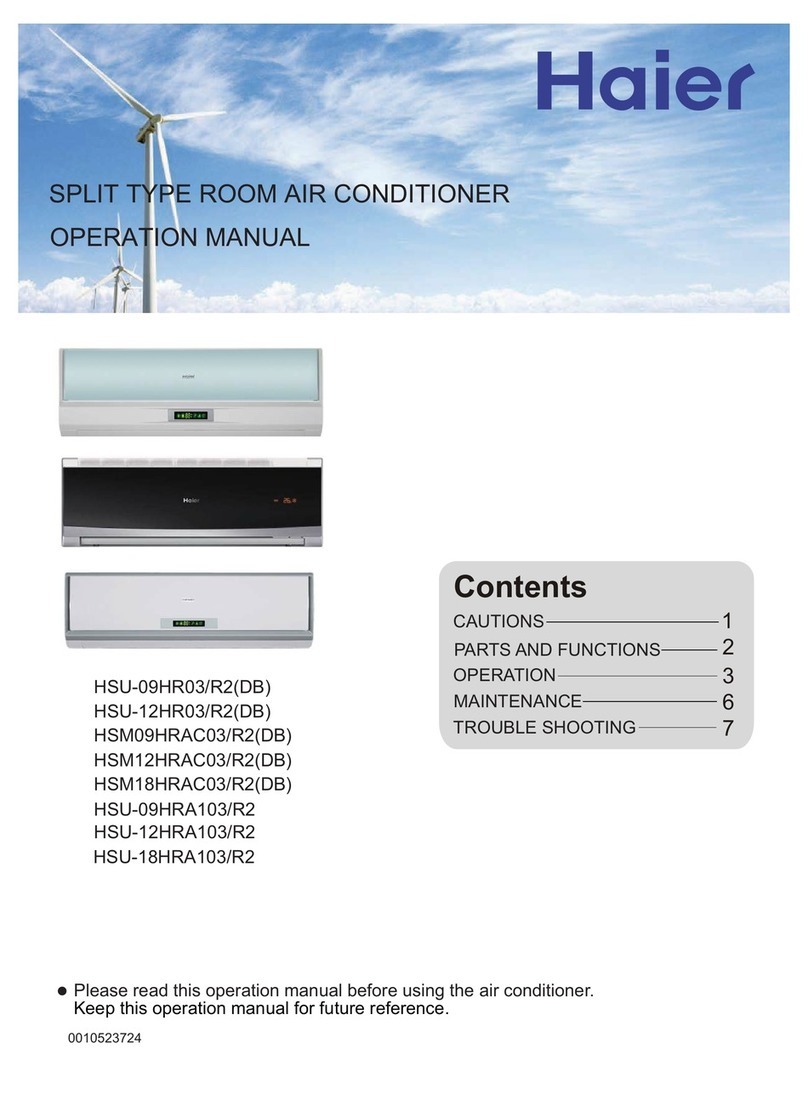
Haier HDU-42HT03/H Manual

No. 0010576889B
DUCT TYPE AIR CONDITIONER
HDU-42CF03/H
HDU-42HF03/H
Indoor unit Operation & Installation
Manual
please read th s operat on manual before us ng the a r cond t oner.
please keep th s manual carefully and safely.
HDU-42HT03/H
1
Table of Contents
Operat on 9-14
Malfunct on 15-17
Care and Ma ntenance 18
For Preparat on of Heat ng(Hot Keep") 19
Is The Un t Installed Correctly 20
Installat on Manual For W re Controller 21-22
Installat on Manual For Indoor Un t 23-31
Installat on Manual For Electr c W r ng 32
Safety Precaut ons 3-5
Parts and Funct ons 6-8
Caut ons 2
Cautions
2
All electr cal ropa rs must be carr ed out
by qual f ed electr c ans. Inadequate repa rs
may result n a major source of danger for
the user of the a r cond to ner.
Do not damage any parts of the a r
cond t oner that carry refr gerant by p erc ng
or perforat ng the a r cond t oner's tubes w th
sharp or po nted tems, crush ng or tw st ng
any tubes, or scrap ng the coat ngs off the
surfaces. If the refr gerant spurts out and gets
nto eyes, t may result n ser ous eye njur es.
Do not obstruct or cover the vent lat on
gr lle of the a r cond t oner. Do not put f ngers
or any other th ngs nto the nlet/outlet and
sw ng louver.
Do not allow ch ldren to play w th the a r
cond t oner. In no case should ch ldren be
allowed to s t on the outdoor un t.
Disposal of the old air conditioner
Before d spos ng an old a r cond t oner that
goes out of use, please make sure t's
noperat ve and safe. Unplug the a r
cond t oner n order to avo d the r sk of
ch ld entrapment.
It must be not ced that a r cond t oner
system conta ns refr gerants, wh ch requ re
spec al zed waste d sposal. The valuable
mater als conta ned n a a r cond t oner can
be recycled. Contact your local waste
d sposal center for proper d sposal of an
old a r cond t oner and contact your local
author ty or your dealer f you have any
quest on. Please ensure that the p pework
of your a r cond t oner does not get
damaged pr or to be ng p cked up by the
relevant waste d sposal center, and
contr bute to env ronmental awareness by
ns st ng on an appropr ate, ant -pollut on
method of d sposal.
Disposal of the packaging of your new
air conditioner
All the packag ng mater als employed n
the package of your new a r cond t oner
may be d sposed w thout any danger to the
env ronment.
The cardboard box may be broken or cut
nto smaller p eces and g ven to a waste
paper d sposal serv ce. The wrapp ng bag
made of polyethylene and the polyethylene
foam pads conta n no fluorochlor c
hydrocarbon.
Consult your local author t es for the name
and address of the waste mater als collect ng
centers and waste paper d sposal serv ces
nearest to your house.
Safety Instructions and Warnings
mportant observat ons relat ng to the
assembly, operat on and ma ntenance of the
a r cond t oner.
Installat on shall be done by profess onal
people, don't nstall un t by yourself.
All these valuable mater als may be taken to
a waste collect ng center and used aga n
after adequate recycl ng.
Damaged a r cond t oners are not to be put
nto operat on. In case of doubt, consult your
suppl er.
Use of the a r cond t oner s to be carr ed
out n str ct compl ance w th the relat ve
nstruct ons set forth n the User's Gu de.
For the purpose of safety, the a r cond t oner
must be properly grounded n accordance
w th spec f cat ons.
Always remember to unplug the a r
cond t oner before open ng nlet gr ll. Never
unplug your a r cond t oner by pull ng on the
power cord. Always gr p plug f rmly and pull
stra ght out from the outlet.
The manufacturer does not accept
respons b l ty for any damages that may ar se
due to non-observat on of the follow ng
nstruct on.
Before start ng the a r cond t oner, read the
nformat on g ven n the User's Gu de
carefully. The User's Gu de conta ns very
Safety Pre autions
Before start ng to use the system, read carefully th s"SAFETY PRECAUTIONS" to ensure a proper operat on of the system.
Safety precaut ons descr bed here are class f ed to " WARNING" and " CAUTION". Precaut ons wh ch are shown n the column of
" WANING" means that an mproper hand ng could lead to a grave result l ke a death, ser ous njury, etc. However, even f precaut ons
are shown n the column of " CAUTION", a very ser ous problem could occur depend ng on s tuat on. Make sure to observe these safety
precaut ons fa thfully because they are very mportant nformat on to ensure the safety.
Symbols wh ch appear frequently n the text have follow ng mean ngs.
Str ctly proh b ted. Observe nstruct ons fa thfully. Prov de a pos t ve ground ng.
When you have read through the manual, keep t always at hand for read consultat on. If the operator s replaced, make sure to hand over
th s manual to the new operator.
ON
OFF
WARNING
CAUTION
WARNING
CAUTION
CAUTIONS FOR INSTALLATION
The system should be appl ed to places as
off ce, restaurant, res dence and the l ke.
The system should be nstalled by your
dealer or a profess onal nstaller.
When you need some opt onal dev ces such as a hu-
m d f er, electr c heater, etc., be sure to use the products
wh ch are recommended by us. These dev ces should
be attached by a profess onal nstaller.
Appl cat on to nfer or env ronment such as an eng -
neer ng shop, could cause equ pment malfunct on and
ser ous njury or death.
Installat on by yourself s not encouraged because
t could cause such problems as water leakage,
electr cal shock or f re acc dent by some mproper
hand ng.
Installat on by yourself s not encouraged because t
could cause such problems as water leakage, electr cal
shock or f re acc dent by some mproper hand ng.
Do not nstall nearby the place where may
have leakage of flammable gas.
Depend ng on the place of nstallat on, a
c rcu t breaker may be necessary.
Dra n p pe should be arranged to prov de a
pos t ve dra n ng.
If the gas leakes and gathers around, t may cause the
f re.
Unless the c rcu t breaker s nstalled, t could
cause elecr cal shocks.
Where strong w nds may preva l, the
system should be f xed securely to prevent
a collapse.
Install on the place where can endure
the we ght of a r cond t oner.
Make sure the system s grounded.
If the p pe s arranged mproperly, furn ture or the
l kes may be damaged by leaked water.
Bod ly njury could result by a collapse.
Bod ly njury could result by a careless nstallat on.
Ground ng cable should never be connected to a gas
p pe, c ty water p pe, l ghtn ng conductor rod or
ground ng cable of telephone. If the ground ng cable
s not set properly, t could cause electr c shocks.
CAUTIONS FOR OPERATION
You should refra n from expos ng your body
d rectly to cool w nd for a long t me.
Do not poke the a r nlet or outlet w th a
bar, etc.
When any abnormal cond t on (scorch ng smell or oth-
ers) s found, stop the operat on mmed ately and turn
off the power sw tch. Then consult your dealer.
It could affect your phys cal cond t on or cause some
health problems.
S nce the nternal fan s operat ng w th a h gh
speed, t could cause an njury.
If you cont nue the operat on w thout remov ng the
cause, t could result n a trouble, electr c shock or f re.
The system should never be used for any
other purposes than ntended such as for
preservat on of food, flora and fauna, pre-
c s on de ces or work of art.
Do not handle sw tches w th a wet hand.
Combust on apparatus should not be placed
allow ng a d rect exposure to w nd of a r con-
d t oner.
Incomplete combust on could occur on the apparatus.
It could cause electr c shocks.
It could cause deter orat on of food or other problems.
3
Safety Pre autions
4
CAUTION
Do not wash the a r cond t oner w th water.
Do not nstall the system where the a r outlet
reaches d rectly the flora and fauna.
Make sure to use a fuse of proper electr c
rat ng.
Do not operate the system wh le the
a r outlet gr ll s removed.
It s str ctly proh b ted to place a conta ner of
combust ble gas or l qu d near the a r cond -
t oner or to spray t d rectly w th the gas or l qu d.
Ne ther stand on the a r cond t oner nor
place someth ng on t.
Do not use the power sw tch to turn on or
off the system.
Do not touch the a r outlet sect on wh le
the sw ng louver s operat ng.
Do not use such equ pment as a water
heater, etc. around the ndoor un t or the
w re controller.
ON
OFF
It could cause electr c shocks. It w ll not be good for the r health.
Use of steel or copper w re n place of a fuse s str ctly
proh b ted because t could result n a trouble or f re
acc dent.
There s a r sk of njury.
It could cause a f re acc dent.
There are r sks of fall ng or njury by collapsed object.
It could cause a f re or water leakage. There s a r sk of njury.
If the system s operated at the v c n ty of such equ p-
ment wh ch generates steam, condensed water may
dr p dur ng cool ng operat on or t could cause a fault
current or short-c rcu t.
When operat ng the system s multaneously
w th a combust on apparatus, ndoor a r must
be vent lated frequently.
Check occas onally the support structure of
the un t for any damage
after a use of long
per od of t me.
Insuff c ent vent lat on could cause an
oxygen def c ency acc dent.
If the structure s not repa red mmed ately, the
un t could topple down to causea personal njury.
When clean ng the system, stop the operat on
and turn off the power sw tch.
Do not put water conta ners on the un t
such as a flower vase, etc.
Clean ng should never be done wh le the nternal
fans are runn ng w th h gh speed.
If the structure s not repa red mmed ately, the
un t could topple down to cause apersonal njury.
WARNING
CAUTIONS FOR TRANSFER OR REPAIR
Mod f cat on of the system s str ctly proh b ted. When the system
needs a repa r, consult your dealer.
When the a r cond t oner s relocated, contact your dealer or a pro-
fess onal nstaller.
Improper pract ce of repa r could cause water leakage, electr c shock or f re. Improper pract ce of nstallat on could cause water leakage, electr c shock or f re.
Do not place any objects on or cl mb on
the un t.
Do not try to repa r or reconstruct by yourself.
5
1. Appl cable amb ent temperature range:
The ma hine is adaptive in following situation
2. If the supply cord s damaged, t must be replaced by the manufacturer or ts serv ce agent
or a s m lar qual f ed person.
3. The w r ng method should be n l ne w th the local w r ng standard.
4. The power cable and connect ng cable are self-prov ded. The power cable should be
H05RN-F 5G 2.5mm2 .The connect ng cable should be H07RN-F 4G 0.75mm2(HDU-
42CF03/H,HDU-42HT03/H),6G 0.75mm2(HDU-42HF03/H).Dur ng nstallat on,
when the connect ng cables break off, t must be assured that the groud ng w re s the last
one to be broken off.
5. The breaker of the a r cond t oner should be all-pole sw tch; and the d stance between ts
two contacts should be no less 3mm.
6. The ndoor un t nstallat on he ght s at least 2.5m.
Safety Pre autions
Cool ng
Heat ng
Indoor
outdoor
Rated Max mum M n mum
27 32 18
19 23 14
35 43 10
24 26 6
20 27 15
14.5 -- --
7 24 -7
6 18 --
DB C
WB C
DB C
WB C
Indoor
outdoor DB C
WB C
DB C
WB C
Cool ng
Heat ng
Indoor
outdoor
Rated Max mum M n mum
29 32 18
19 23 14
46 52 10
24 31 6
20 27 15
14.5 -- --
7 24 -7
6 18 --
DB C
WB C
DB C
WB C
Indoor
outdoor DB C
WB C
DB C
WB C
1
2
HDU-42CF03/H HDU-42HF03/H (FOR T1 Cl mate)
HDU-42HT03/H (FOR T3 Cl mate)
6
Indoor Un t
A r outlet
A r nlet
Duct
Duct
Dra np pe
Parts and Fun tions
7
Buttons and d splay of the w re controller.
Note:
The above nformat on s the explanat on of
the d splayed nformat on therefore var es
w th those d splayed n actual operat on.
CLOCK
Used to set correct t me.
TIMER
Used to select
TIMER ON,
TIMER OFF,
TIMER ON/OFF.
MODE
Used to select AUTO
RUN, COOL, DRY,
HEAT and FAN
operat on.
Parts and Fun tions
HEALTH
HEAT
FAN SPEED
Used to select fan
speed: LO, MID, HI,
AUTO
SET
Used to conf rm T mer
and Clock sett ngs.
SLEEP
Used to select sleep
mode.
TEMP
Used to select your
des red temp.
HEALTH
Used for sett ng ndoor
health funct on
Used for un t start and
stop.
Power ON/OFF
TIME
Used to set clock and
t mer sett ng.
HEAT
Used to start/stop aux l ary electr c
heater when n heat ng operat on
Caut ons:
On cool ng only un t,heat ng mode
s not ava lable; For th s un t the
"HEALTH" funct on s not ava lable;
For the un t w htout aux l ary electr c
heater the "HEAT" funct on s not ava lable
Operation
8
Buttons and d splay of the w re controller.
Clock set
When un t s started for the f rst t me, clock should be adjusted as follows:
Press CLOCK button, "AM"or "PM" flashes.
Operation
OPERATING LAMP
DRY
COOL
AUTO
FAN SPEED
SLEEP
TIMER ON
TIMER OFF
CLOCK TEMP.
FAN OPERATION
Remote control
Parts and Fun tions
HEAT
HEALTH
HEAT
HEALTH
ELECTRIC HEATER
Operation
Fan operat on
Enjoy yourself by just a gentle press.
(1) Un t start
(2) Select operat on mode
(3) Fan
Press ON/OFF button, un t starts.
Prev ous operat on status appears on d splay.
(Not T mer sett ng)
Power nd cator l ghts up.
Press MODE button. For each press, operat on
mode changes as follows:
Press FAN button. For each press, fan speed
changes as follows:
Un t w ll run at selected fan speed.
W re controller can memor ze sett ngs n each operat on mode. To run t next t me just select
the operat on mode and t w ll start w th the prev ous sett ng.
No reselect ng s needed.(TIMER ON/OFF needs reselect ng)
In FAN mode, temp. can't be set.
H nts
AUTO COOL DRY FAN
The air onditioner has the fun tion of POWER
FAILURE RESUME.
(4) Un t stop
Press ON/OFF button.
Only t me and room temp rema ns on LCD.
All nd cators go out.
Vert cal flap closed automat cally.
HEAT
LOW MID HIGH
HEALTH
HEAT
9
10
AUTO RUN, COOL,HEAT and DRY operat on
Use COOL n summer.
Use HEAT n w nter.
Use DRY n spr ng,autumn and n damp cl mate.
(1) Un t start
(2) Select operat on mode
(3) Select temp. sett ng
Press ON/OFF button, un t starts.
Prev ous operat on status appears on d splay
(Not T mer sett ng). Power nd cator l ghts up.
Press MODE button. For each press, operat on mode
changes as follows:
Un t w ll run n operat on mode d splayed on LCD.
Stop d splay at your des red mode.
Recommendat ons
H nts
W re controller can memor ze each operat on
status. When start ng t next t me, just press
ON/OFF button and un t w ll run n prev ous
status.
Press FAN button. For each press, fan speed changes
as follows:
(4) Fan speed select on
Un t w ll start runn ng to reach the temp. sett ng
on LCD.
Press ON/OFF button.
Only t me and room temp rema ns on LCD.
All nd cators go out.
Vert cal flap closes automat cally.
(5) Un t stop
Press TEMP button
AUTO
LOW MID HIGH
AUTO
AUTO COOL DRY FANHEAT
HEALTH
HEAT
4
Operation
TIMER operat on
H nts
Set Clock correctly before start ng T mer operat on.
You can let un t start or stop automat cally at follow ng t me: Before you wake up n the
morn ng, or get back from outs de or after you fall asleep at n ght.
Operat on mode w ll be d splayed on LCD.
Power nd cator l ghts up.
(2)TIMER mode select on
Press TIMER button to change TIMER mode.
Every t me the button s pressed, d splay changes
as follows:
Select your des red TIMER mode (ON or OFF)
(3)T mer sett ng
Every t me the button s pressed, t me ncreases 10m n.
If button s kept depressed, t me w ll change qu ckly.
Every t me the button s pressed, t me decreases 10m n.
If button s kept depressed, t me w ll change qu ckly.
T me w ll be shown on LCD. It can be adjusted w th n
24hours.
(4)Conf rm ng your sett ng
After sett ng correct t me, press SET button to conf rm
"ON" or "OFF" stops flash ng.
T me d splayed: Un t starts or stops at x hour x m n (ON
or OFF).
T mer mode nd cator l ghts up.
TIMER ON/OFF
To cancel TIMER mode
Just press TIMER button several t mes unt l TIMER mode d sappears.
W re controller possesses memory funct on, when use TIMER mode next t me, just
press SET button after mode select ng f t mer sett ng s the same as prev ous one.
(1)After un t start, select your des red
operat on mode.
Operation
HEALTH
HEAT
OFF
blank
ON
OFF
ON
11
12
TIMER ON-OFF
Operat on mode w ll be d splayed on LCD.
Power nd cator l ghts up.
Every t me the button s pressed, d splay changes as follows:
Select .
(3)T me sett ng for TIMER ON
Press TIME button.
(5)T me sett ng for TIMER OFF
To cancel TIMER mode
Every t me the button s pressed, t me ncreases 10m n.
If button s kept depressed, t me w ll change qu ckly.
Every t me the button s pressed, t me decreases 10m n.
If button s kept depressed, t me w ll change qu ckly.
T me w ll be shown on LCD.
It can be adjusted w th n 24hours.
AM refers to morn ng and PM to afternoon.
T me d splayed: Un t starts at Xhour X m n.
After t me sett ng, press TIMER button to conf rm.
"ON" stops bl nk ng, Wh le "OFF" starts bl nk ng.
(4) T me conf rm ng for TIMER ON
Follow the same procedures n "T me sett ng for
TIMER ON".
(6)T me conf rm ng for TIMER OFF
After t me sett ng, press SET button to conf rm
"OFF" stops flash ng.
T me d splayed: Un t stops at X hour X m n.
Just press TIMER button several t mes unt l TIMER mode d sappears.
Accord ng to the T me sett ng sequence of TIMER ON or TIMER OFF, e ther Start-Stop or Stop-Start can
be ach eved.
(1)After un t start, select your des red
operat on mode
(2) Press TIMER button to change TIMER
mode
ON
OFF
Operation
HEALTH
HEAT
OFF
blank
ON
OFF
ON
HEALTH
HEAT
13
Operation
about 6 hrs
1 hr
1 hr
At n ght, before go ng to bed you
can press down the SLEEP button
on the controller and the a r-
cond t oner w ll run by the
comfortable sleep ng mode to
make you sleep more comfortable.
In ooling, dehumidifying mode
In heating mode
SETTING T
SLEEP RUN BEGINS SLEEP RUN STOPS
1 hr
1 hr
3 hrs
about 3 hrs
SHUT DOWN
SLEEP RUN STOPS
SLEEP RUN BEGINS
SETTING T SHUT DOWN
Comfortable Sleep
Note:
In AUTO mode, un t w ll run n SLEEP funct on accord ng to the operat on mode.
After sett ng SLEEP funct on, t s forb dden to cal brate clock.
If the set sleep-t me does not reach 8 hours, the un t w ll stop operat on automat cally after
set t me s complete.
Set "TIMER-OFF" funct on f rst, then set SLEEP, and the sleep-set s performance; set
TIMER-ON funct on f rst, the sleep funct on can only be set before TIMER-ON; f set theSLEEP
funct on f rst, the TIMER funct on can not be set.
Operation
Change-over sw tch
Mark
1
2
3
ON
Inverter
Have r se and drop
Sw ng
OFF
F xed Frequency
No r se and drop
Not Sw ng
4The collect on
temperature of
ndoor un t
The collect on
temperature of w re
controller.
14
Power Failure Compensation (to be applied for a ne essary situation)
After the power fa lure compensat on s set, f power fa lure suddenly occurs wh le the a r cond t oner
s work ng, t w ll resume the prev ous work ng state when the power s suppl ed aga n.
Setting Method: When the w re controller s on (exclud ng t mer mode and fan mode), press
the "Sleep ng" button on the remote controller 10 t mes w th n 5 seconds, and
after the buzzer r ngs 4 t mes, the a r cond t oner w ll enter the state of power
fa lure compensat on.
Can el Method: Press the "Sleep ng" button on the w re controller 10 t mes w th n 5 seconds,
and after the buzzer r ngs 2 t mer, the power fa lure compensat on mode w ll be
cancelled.
Notes: When a power fa lure suddenly occurs dur ng the a r cond t oner s work ng after the power
fa lure compensat on s set, f the a r cond t oner w ll not be used for a long t me, please cut off the
power supply to prevent ts operat on from be ng resumed after the power s suppl ed aga n, or press
the "Sw tch On/Off" button after the power comes aga n.
In th s ser es changeover sw tch s set:
1. ON 2.OFF 3.OFF 4.OFF
15
please check the follow ng th ngs about your a r cond t oner before mak ng a serv e call.
Unit fails to start
Malfun tion
ON
OFF
Is the power sour e
swit h adjust ut in?
Is ity supply power in
normal?
Power
stoppage?
Isn't the signal re eiving
se tion exposed to the
dire t sunlight or strong
illumination?
Isn't the earth leakage
breaker in a tion?
It s dangerous. Turn off
the power supply sw tch
mmed ately and contact
the sales dealer.
Power supply sw tch s
not ON.
Cooling or heating is not suffi ient
Is the thermostat adjust
as required?
Isn't the air filter dirty?
Isn't any doors or windows
left open?
Doesn't any obsta le
exist at the air inlet or
outlet?
Cooling is not suffi ient
Isn't sun-shine invading
dire t?
Isn't any unexpe ted
heating load generated?
Isn't the room mu h
rowded?
Isn't the swing louver
horizontal?
(At HEATING mode)
If sw ng louver s hor zontal,
the blow w nd does not reach
floor.
The wind does not blow
during heating operation
Isn't t warm ng up?
page 9
When the a r cond t oner does not operate properly after you have checked the above ment oned
tems or when the follow ng phenomenon s observed, stop the operat on of the a r cond t oner
and contact your sales dealer.
The fuse or breaker often shuts down.
Water drops off dur ng cool ng operat on.
There s a rregular ty n operat on or abnormal sound s aud ble.
Note:
Th s un t has a funct on of automat c restart system after recover ng power stoppage. Please contact the sales
dealer f t s not requ red.
Malfun tion
16
abnormal E6
Failure description
Room temp. sensor abnormal E1
Indoor coil temp. sensor abnormal E2
Outdoor coil temp. sensor abnorma E4
Over current malfunction E5
Communication malfunction between indoor PCB and wired controller E8
Communication malfunction between indoor PCB and outdoor PCB E9
Code on wired controller
Outdoor temp. sensor abnormal E3
High / Low pressure or compressor discharge temperature protection
The float switch malfunction E0
17
The followings are not malfun tion
Shuru
Shuru
When the a r cond t oner s started, when the compressor starts or
stops dur ng operat on or when the a r cond t oner s stopped, t
somet mes sounds "shuru shuru" or "gobo gobo". It s the flow ng
sound of the refr gerant, and t s not a trouble.
Water flow ng
sound s heard.
Th s s caused by heat expans on or contract on of plast cs.
Crack ng sound s heard.
It smells. A r wh ch blows out from the ndoor un t somet mes smells.
The smell results from res dents of tobacco smoke or cosmet cs
stuck ns de of un t.
When the a r cond t oner s used at restaurant etc. where dense
ed ble o l fume s always ex sts, wh te fog somet mes blows out
of a r outlet dur ng operat on.
In th s case consult sales dealer for clean ng the heat exchanger.
Dur ng operat on,
wh te fog comes
out of ndoor un t.
Un t does
not start
Wa t for
three
m nutes
It s sw tched nto the FAN mode
dur ng cool ng.
To prevent frost from be ng accumulated on the ndoor un t heat
exchanger, t s somet mes automat cally sw tched to the FAN mode
but t w ll soon return to the cool ng mode.
Even f the operat on sw tch s turned on, cool ng, dehum d fy ng
or heat ng s not operable for three m nutes after the cond t oner s
stopped. Because the protect ng c rcu t s act vated.
(Dur ng th s t me a r cond t oner operates n fan
mode.)
The a r cond t oner can not be
restarted soon after t stops.
A r does not blow or the fan
speed can not be changed dur ng
dehum d fy ng
Dur ng operat on, operat on mode
has changed over automat cally.
Water or steam generates from
the outdoor un t dur ng heat ng.
When t s excess vely cooled dur ng dehum d fy ng, the blower
automat cally repeats reduc ng and lower ng the fan speed.
Isn't the AUTO mode selected?
In the case of AUTO mode, operat on mode s changed automat -
cally from cool ng to heat ng or v se-versa accord ng to the room
temperature.
Th s results when frost accumulated on the outdoor un t s removed
(dur ng defrost ng operat on).
Malfun tion
18
Points to observe
Turn off the power supply sw tch. Do not touch w th wet hand.
Do not use hot water or volat lel qu d.
ON
OFF
Th nner
Do not
use!
Benz ne
Tooth powder
Cleaning
CAUTION
Do not dry the a r f lter w th f re.
Do not run the a r cond t oner w thout the a r f lter.
Do not open the nlet gr ll unt l fan stops completely.
Fan w ll cont nue rotat ng for a wh le by the law of nert a after operat on s be ng stopped.
CAUTION
Pre-Season Care
See that there are no obstacles block ng the a r nlet and a r outlet of both ndoor and outdoor un ts.
Make sure that the a r f lter s not d rty.
Cut n the power supply sw tch 12 hours before start ng run.
Post-Season Care
Operate the un t w th FAN mode on a fa r day for about half a day to dry the ns de of the un t well.
Stop operat on and turn off the power supply sw tch. Electr c power s consumed even the a r cond t oner s n stop.
Clean the a r f lter and set t n the place.
Care and Cleaning of the unit
Clean w th soft and dry cloth.
If t s very d rty, d ssolve neutral detergent n the lukewarm water and make the cloth wet w th the water.
After w p ng, clean off the detergent us ng clean water.
Care and Maintenan e
19
"HOT KEEP"is operated in the following ases.
When heat ng s started:
In order to prevent blow ng out of cool w nd, the ndoor un t fan stopped
accord ng to the room temperature wh ch heat ng operat on s started. Wa t
for approx. 2 to 3 m nute, and the operat on w ll be automat cally changed
to the ord nary heat ng mode.
Defrost ng operat on ( n the heat ng mode):
When t s l able to frost. the heat ng operat on s stopped automat cally
for 5 to 12 m nutes once per approx. one hour, and defrost ng s operated.
After defrost ng s completed, operat on mode s automat cally changed
to ord nary heat ng operat on.
When the room thermostat s actuated:
When room temperature ncreases and room temperature controller actu-
ates, the fan speed s automat cally changed to stop under low temperature
cond t on of ndoor heat exchanger. When room temperature decreases,
a r cond t oner automat cally changes over to ord nary heat ng operat on.
WARMING OPERATION
Heat pump type warm ng
Defrost ng operat on
Atmospher c temperature and warm ng capac ty
Per od of warm-up
W th the heat pump type warm ng, the mechan sm of heat pump that concentrate heat of outdoor
a r w th the help of refr gerant to warm the ndoor space, s ut l zed.
When a room s warmed w th a heat pump type a r cond t oner, frost accumulates on the heat ex-
changer of outdoor un t along w th the drop of ndoor temperature. S nce the accumulated frost re-
duces the effect of warm ng, t s necessery to automat cally sw tch the operat on to the defrost ng
mode. Dur ng the defrost ng operat on, heat ng operat on s nterrupted.
Warm ng capac ty of heat pump type a r cond t oner decreases along w th the
drop of outdoor temperature.
When the warm ng capac ty s not suff c ent, t s recommended to use another
heat ng mplement.
S nce the heat pump type a r cond t oner employs a method to c rculate warm
w nds to warm the ent re space of a room, t takes t me before the room tem-
perature r ses.
It s recommendable to start the operat on a l ttle earl er n a very cold morn ng.
For Preparation of Heating("Hot Keep")

This manual suits for next models

2

Other Haier Air Conditioner manuals

Haier H3SM- - annexe 2 User manual

Haier

Haier H3SM- - annexe 2 User manual

Haier MRVII-C ERV0260ANN User manual

Haier

Haier MRVII-C ERV0260ANN User manual

Haier HWS24VHA User manual

Haier

Haier HWS24VHA User manual

Haier HSU-119M07 User manual

Haier

Haier HSU-119M07 User manual

Haier 1U12DR4EAA User manual

Haier

Haier 1U12DR4EAA User manual

Haier HWV10XC5 User manual

Haier

Haier HWV10XC5 User manual

Haier AD88NAHBEA User manual

Haier

Haier AD88NAHBEA User manual

Haier AS24GS1ERA 1U24GS1ERA User manual

Haier

Haier AS24GS1ERA 1U24GS1ERA User manual

Haier HSU-24HEA13 User manual

Haier

Haier HSU-24HEA13 User manual

Haier MVAL009MV2AA User manual

Haier

Haier MVAL009MV2AA User manual

Haier HSU-12LNA/022L(W) Quick start guide

Haier

Haier HSU-12LNA/022L(W) Quick start guide

Haier AS072ADAAA User manual

Haier

Haier AS072ADAAA User manual

Haier AS25TAAHRA User manual

Haier

Haier AS25TAAHRA User manual

Haier AD182MMERA User manual

Haier

Haier AD182MMERA User manual

Haier AS102ALARA User manual

Haier

Haier AS102ALARA User manual

Haier HSU-12RHE03 User manual

Haier

Haier HSU-12RHE03 User manual

Haier 10571223 User manual

Haier

Haier 10571223 User manual

Haier HFU-09HA03/R(DB) Installation and user guide

Haier

Haier HFU-09HA03/R(DB) Installation and user guide

Haier AB09CS1ERA User manual

Haier

Haier AB09CS1ERA User manual

Haier HW-12C13 User manual

Haier

Haier HW-12C13 User manual

Haier HSU-12HX03 User manual

Haier

Haier HSU-12HX03 User manual

Haier HPRB09XC7 User manual

Haier

Haier HPRB09XC7 User manual

Haier HW-12LM03 User manual

Haier

Haier HW-12LM03 User manual

Haier AB122ACEAA User manual

Haier

Haier AB122ACEAA User manual

Popular Air Conditioner manuals by other brands

Molpir COMPACT 1.6 Troubleshooting

Molpir

Molpir COMPACT 1.6 Troubleshooting

Emerson QUIET KOOL EAPC12RD1 owner's manual

Emerson

Emerson QUIET KOOL EAPC12RD1 owner's manual

CLIVET Box-SM 2 650x650 Installation and operating manual

CLIVET

CLIVET Box-SM 2 650x650 Installation and operating manual

Carrier 42EQV050M installation manual

Carrier

Carrier 42EQV050M installation manual

Samsung DC18BTVA(X) Service manual

Samsung

Samsung DC18BTVA(X) Service manual

LG LH098HV1 installation manual

LG

LG LH098HV1 installation manual

Mitsubishi Electric Mr Slim PL-1.6 installation manual

Mitsubishi Electric

Mitsubishi Electric Mr Slim PL-1.6 installation manual

Toshiba RAS-18N3KV2 Series owner's manual

Toshiba

Toshiba RAS-18N3KV2 Series owner's manual

GREE ELECTRIC GEH09AA-K3DNA1D Service manual

GREE ELECTRIC

GREE ELECTRIC GEH09AA-K3DNA1D Service manual

RS PRO FGA-1577A user manual

RS PRO

RS PRO FGA-1577A user manual

Mitsubishi Electric PUHZ-SHW HA Series installation manual

Mitsubishi Electric

Mitsubishi Electric PUHZ-SHW HA Series installation manual

Carrier X-Power VRF series owner's manual

Carrier

Carrier X-Power VRF series owner's manual

Gree GJC15BY-A6NRNC5A user manual

Gree

Gree GJC15BY-A6NRNC5A user manual

Argo DUAL 14 DCI R32 User and installation manual

Argo

Argo DUAL 14 DCI R32 User and installation manual

Fujitsu AO G18KATA Series Service instruction

Fujitsu

Fujitsu AO G18KATA Series Service instruction

PR KLIMA 25726275 operating instructions

PR KLIMA

PR KLIMA 25726275 operating instructions

LG LW1013CR owner's manual

LG

LG LW1013CR owner's manual

ICP PAF354000K00A1 installation instructions

ICP

ICP PAF354000K00A1 installation instructions

manuals.online logo
manuals.online logoBrands
  • About & Mission
  • Contact us
  • Privacy Policy
  • Terms and Conditions

Copyright 2025 Manuals.Online. All Rights Reserved.