BEA 82BS4K20 User manual

USER’S MANUAL
82” 4K ULTRA HD TELEVISION
For technical assistance or troubleshooting please call
1-800-350-2376 or Visit www.beatelevision.com
82BS4K20


Important Safety Instructions
1. Read these instructions.
2. Keep these instructions.
3. Heed all warnings.
4. Follow all instructions.
5. Do not use this apparatus near water.
6. Clean only with dry cloth.
7. Do not block any ventilation openings. Install in accordance with the manufacturer’s instructions.
8. Do not install near any heat sources such as radiators, heat registers, stoves, or other apparatus (includ-
9. Do not defeat the safety purpose of the polarized or grounding-type plug. A polarized plug has two blades
with one wider than the other. A grounding type plug has two blades and a third grounding prong. The
consult an electrician for replacement of the obsolete outlet.
10. Protect the power cord from being walked on or pinched particularly at plugs, convenience receptacles,
and the point where they exit from the apparatus.
-
paratus. When a cart is used, use caution when moving the cart / apparatus combination to avoid injury
from tip-over.
13. Unplug this apparatus during lightning storms or when unused for long periods of time.
damaged in any way, such as power-supply cord or plug is damaged, liquid has been spilled or objects
have fallen into the apparatus, the apparatus has been exposed to rain or moisture, does not operate
normally, or has been dropped.
15. To Reduce The Risk Of Fire Or Electric Shock, Do Not Expose This Apparatus To Rain Or
Moisture.
shall be placed on the apparatus.
17. The mains plug is used as the disconnect and shall remain readily operable.
18. This TV is not designed for outdoors installation. Do not expose the TV to rain, as it may
become damaged.
Safety:
TO REDUCE THE RISK OF ELECTRICAL SHOCK DO NOT REMOVE COVER
(OR BACK). NO USER SERVICEABLE PARTS ARE INSIDE. REFER TO QUALIFIED
SERVICE TECHNICIAN ONLY.
intended to alert the user to the presence of uninsulated “dangerous voltage” within the product’s
Instruction: The exclamation point within an equilateral triangle is intended to alert the user to the
presence of important operating and servicing instructions in the literature accompanying the
appliance.
to constitute a risk of electric shock to the users.
1

Safety Instructions
Please read these instructions carefully.
This product complies with all applicable US federal safety requirements, as well as those of the Canadian
Standards Association.
1. Cleaning
Always unplug the TV before cleaning. Do not use liquid or aerosol cleaners. Use a soft, slightly damp cloth to
clean.
2. Water and Moisture
Do not use this TV near water. Avoid using this TV in an excessively damp environment.
3. Stand
This TV should always be placed on a solid, sturdy surface.
4. Ventilation
To prevent overheating, do not block or obstruct the vent openings on the TV’s back panel. Also, avoid placing this
TV in a confined area with poor air flow.
5. Power Sources
This TV should be operated only from the type of power source indicated on the marking label. If you are not sure of
The type of power supply to your home, consult your electronics retailer or local power company.
6. Power Cord Polarization
This TV is equipped with a three-wire grounding type plug, a plug with a third (grounding) pin. As a safety feature, this
plug will only t into a grounded power outlet. If you are unable to insert the plug into the outlet, contact your electrician
to replace the obsolete outlet. Do not defeat the safety purpose of the grounding-type plug.
7. Power Cord Protection
Power-supply cords should be routed so that they are not likely to be walked on or pinched by items placed upon or
against them. Pay particular attention to cords at plugs, convenience receptacles, and the point where they exit from
the TV.
8. Lightning
To protect the TV during a lightning storm, or when it is left unattended and unused for long periods of time, unplug it
from the wall outlet and disconnect the antenna or cable system. This will prevent damage to the TV from lightning
and power-line surges.
2

Safety Instructions
9. Outdoor Antenna Grounding
If an outside antenna or cable system is connected to the TV be sure the antenna or cable system is grounded so
as to provide some protection against voltage surges and built up static charges. Article 810 of the National Electri-
cal Code (U.S. A.), ANSI / NFPA 70 provides information with regard to proper grounding of the mast and supporting
structure, grounding of the lead-in wire to an antenna discharge unit, size of grounding conductors, location of anten-
na-discharge unit, connection to grounding electrodes, and requirements for the grounding electrode.
Example of Grounding According to National
Electrical Code Instructions
NEC - National Electrical Code
10. Power Lines
An outside antenna system should not be located in the vicinity of overhead power lines or other electric light or power
circuits, or where it can fall on to power lines or circuits. When installing an outside antenna system, extreme care
should be taken to keep from touching such power lines or circuits as contact with them might be fatal.
11. Overloading
12. Object and Liquid Entry
Never push objects of any kind into this TV through openings as they may touch dangerous voltage points or short-out
TV.
13. Servicing
Do not attempt to service this TV yourself as opening or removing covers may expose you to dangerous voltage or
14. Damage Requiring Service
a. If the power-supply cord or plug is damaged.
b. If liquid has been spilled, or objects have fallen into the product.
c. If the TV has been exposed to rain or water.
d. If the TV does not operate normally by following the operating instructions. Adjust only those controls that are
covered by the operating instructions as an improper adjustment of other controls may result in damage and will
e. If the TV has been dropped or the cabinet has been damaged.
f. If the TV exhibits a distinct change in performance.
Ground Clamp Antenna Lead in Wire
Antenna Discharge Unit
(NEC Section 810-20)
Grounding Conductor
(NEC Section 810-21)
Ground Clamps
Electric Service
Equipment
Power Service Grounding
Electrode System (NEC
Art 250, Part H)
15. Replacement Parts
When replacement parts are required, be sure that only an authorized service technician has used replacement parts
specified by the manufacturer or have the same characteristics as the original part. Unauthorized substitutions may
result in fire, electric shock, or other hazards and void any warranty.
3

Safety Instructions
16. Safety Check
Upon completion of any service or repairs to this TV, ask the service technician to perform safety checks to determine
whether the product is in proper operating condition.
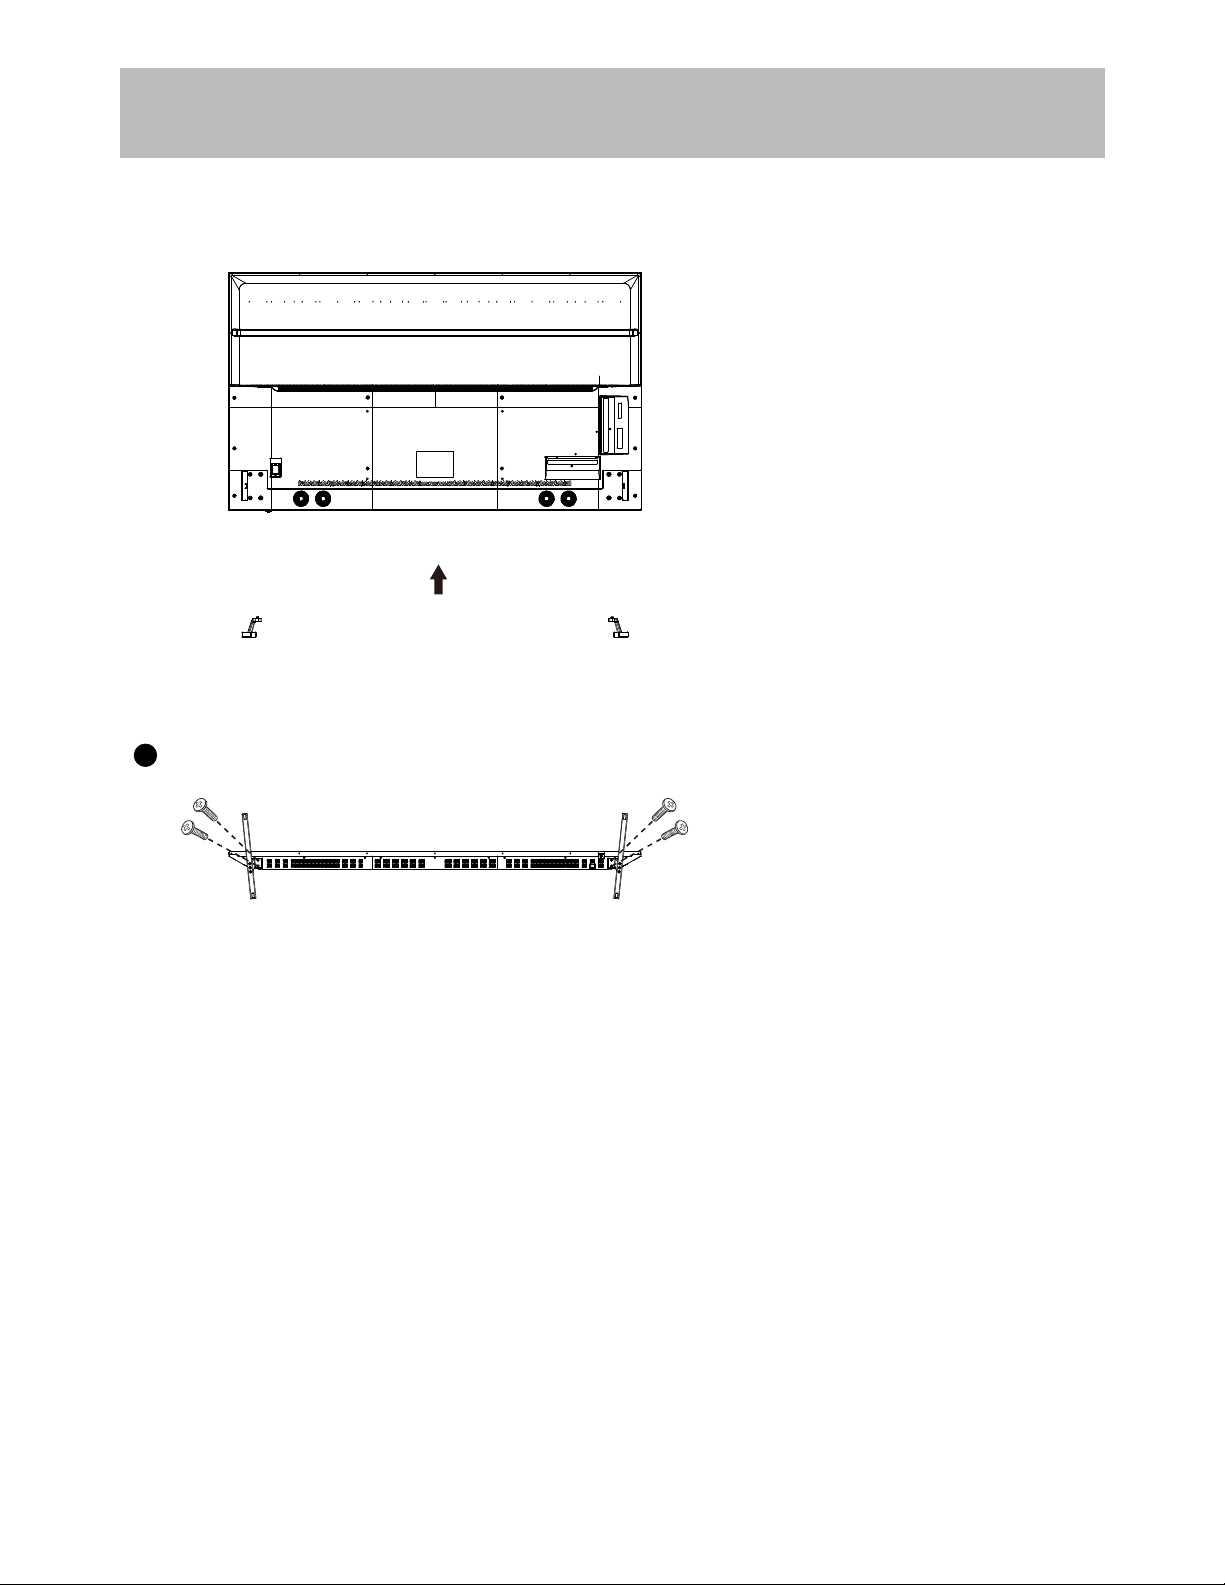
17. Wall Mounting
The TV should be mounted to a wall only by a professional. The TV may slide or fall, causing serious injury to a child
or adult, and serious damage to the product
Wall hanging height of the whole machine shall not exceed 2m.
. Warranty shall be voided.
18. Heat
The TV should be situated away from heat sources such as radiators, heat registers, stoves, or other products
This reminder is provided to call the CATV system installer’s attention to Article 820-40 of the National Electric
should be connected to the grounding system of the building, as close to the point of the cable entry as practical.
This television has been tested and found to comply with the limits for a Class B digital device, pursuant to Part 15
of the FCC Rules. These limits are designed to provide reasonable protection against harmful interference in a residen-
tial installation. This television generates, uses and can radiate radio frequency energy and, if not installed and used
in accordance with the instructions, may cause harmful interference to radio communications. However, there is no
electronic equipment, which can be determined by turning the television off and on, then the user is encouraged to try
to correct the interference by one or more of the following measures:
- Reorient or relocate the receiving antenna.
- Increase the separation between the equipment and television.
- Connect the equipment into an outlet on a circuit different from that to which the television is connected.
- Consult your dealer or an experienced radio / TV technician for assistance.
authority to operate the equipment.
guarantee that interference will not occur in a particular installation. If this television does cause interference to other
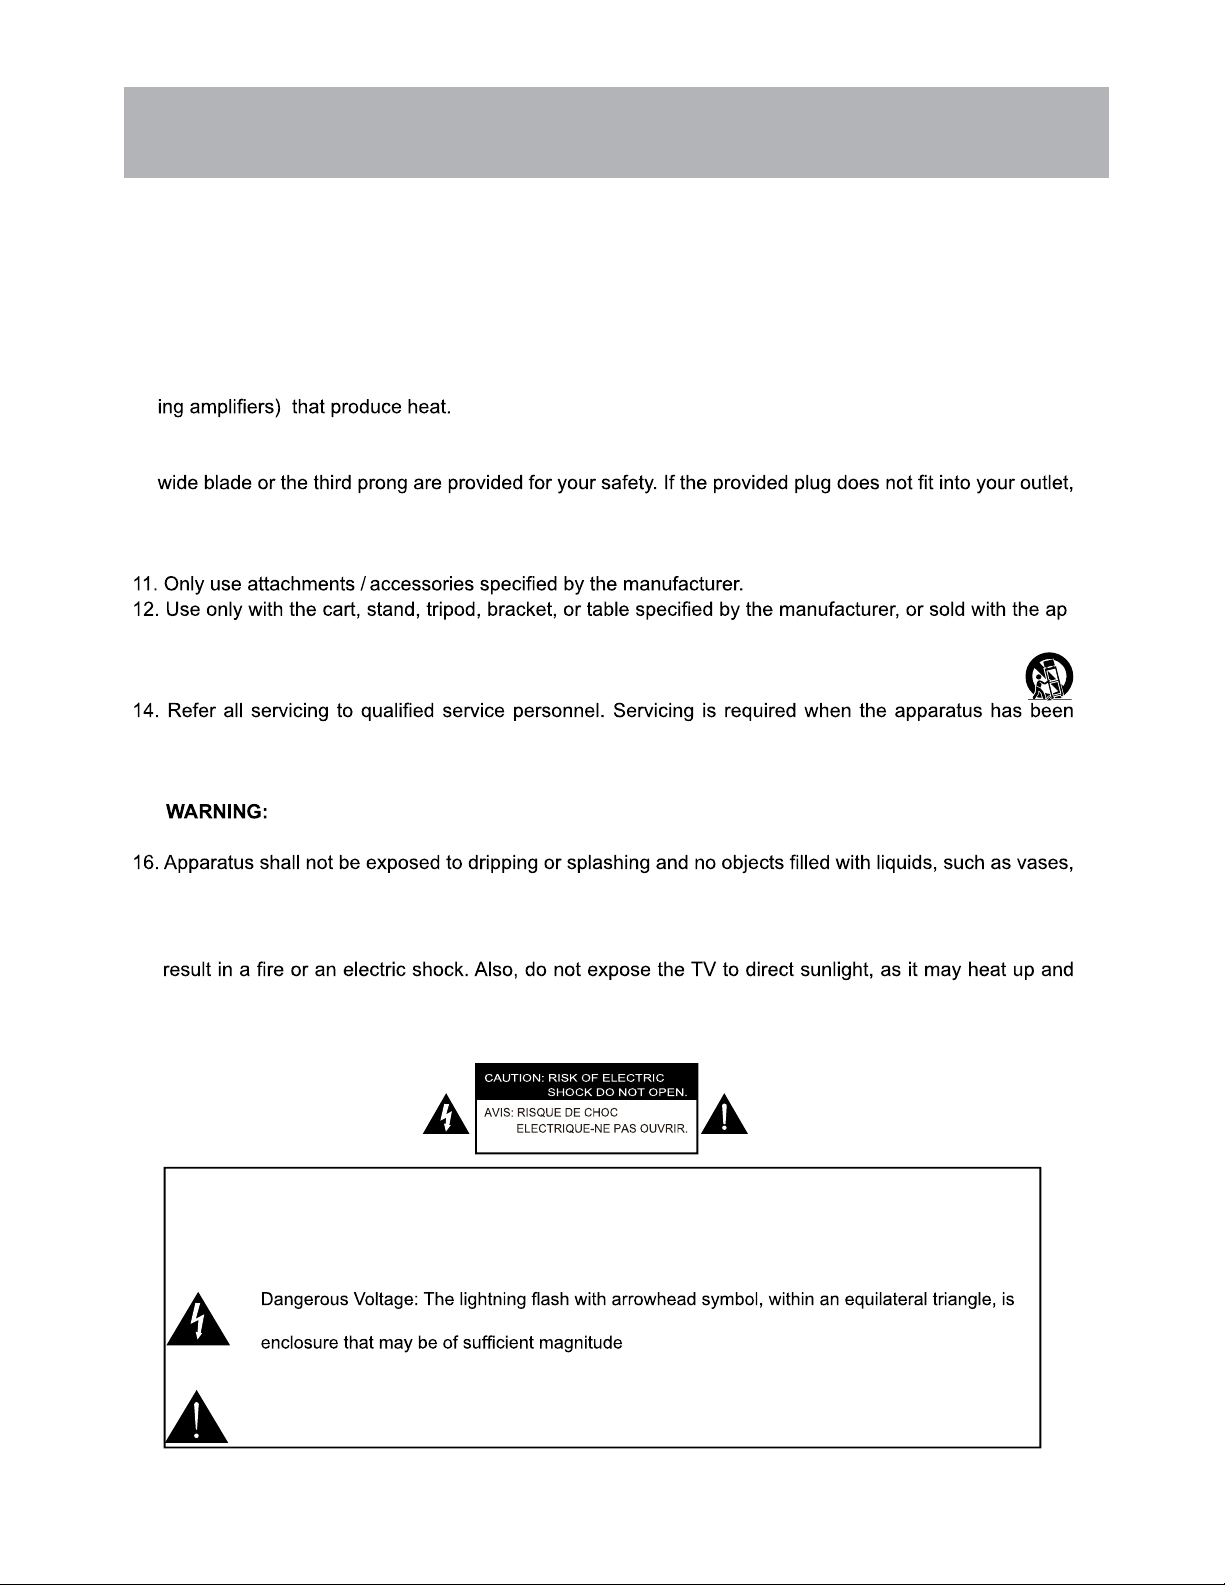
(including amplifiers) that produce heat.
19. Remote Control
Do not expose the remote control to liquids, direct sunlight or sources of excessive heat.
Code (USA). The code provides guidelines for proper grounding and, in particular, specifies that the cable ground
Any changes or modifications not expressly approved by the party responsible for compliance may void the user’s
Never place a television set in an unstable location. A television set may fall, causing serious personal injury or
death. Many injuries, particularly to children, can be avoided by taking simple precautions such as:
- Using cabinets or stands recommended by the manufacturer of the television set.
- Only using furniture that can safely support the television set.
- Ensuring the television set is not overhanging the edge of the supporting furniture.
- Not placing the television set on tall furniture (for example, cupboards or bookcases) without anchoring both the
furniture and the television set to a suitable support.
- Not placing the television set on cloth or other materials that may be located between the television set and
supporting furniture.
- Educating children about the dangers of climbing on furniture to reach the television set or its controls.
If your existing television set is being retained and relocated, the same considerations as above should be applied.
• This equipment is a Class II or double insulated electrical appliance. It has been designed in
such a way that it does not require a safety connection to electrical earth.
4

Table of Contents
Important Safety Instructions .........................................................................................................................................1
Table of Contents ..........................................................................................................................................................5
Introduction ....................................................................................................................................................................6
Installing the Base .........................................................................................................................................................7
Remote Control
Battery Install .................................................................................................................................................................8
Overview .......................................................................................................................................................................9
TV Overview
Front Panel ................................................................................................................................................................. 10
Rear Panel .....................................................................
...............................................................................................................................12
............................................................................................ 11
Connecting External Devices
.......................................................................................................................................13
Customizing TV Settings
...........................................................................................................................................................29
Troubleshooting .......................................................................................................................................................30
5

Introduction What’s In The Box
The package includes the following items. Save the carton & packing for future shipping
• Remote Control
• AAA Batteries (2)
• Quick Start Guide
• User Manual
• Child Safety
teg lliw koob noitcurtsni sihT .snoitcnuf dna serutaef tuoba snoitseuq evah uoy revenehw ediug siht ot refer esaelP
you up and running with the best possible connection type for your devices. Enjoy!
This TV uses a 600x300 VESA mounting bracket attachment pattern. Please take this information with you when
purchasing a wall mount for this TV.
Wall Mount Information
6
• Pedestal Base
• Screws for Pedestal Base (4)

Installing the Base
7
Place the TV face down
on a soft cloth or cushion.
Position base as shown.
1
through the holes in the bottom
of the base into the post holes
and tighten securely.
Do not over-tighten.
Insert 4 screws M5X25 (provided)

Battery Install
Remote Control
• Effective remote range is approximately 16 feet at an
angle of no greater than 30° to the left / right or 20° up /
down to the IR sensor.
• To avoid possible damage from battery chemical
leakage, remove the batteries if you do not plan to use
the remote for an extended period of time. Do not mix
batteries of different age and / or type. Always discard
used batteries safely.
• Do not expose the remote control to liquids, direct sun-
light or sources of excessive heat.
• The IR receiver on the TV will not work properly if the set
is in direct sunlight.
NOTE: Improper use of batteries can result in a chemical
leakage or explosion.
• Turn the remote over and remove
battery cover.
• Place two (2) “AAA” batteries into
the battery compartment with the “+”
and “-“ ends facing as indicated.
• Replace the cover
8
30 30
IR Receiver

Remote Control Overview
9
Prime
CC
Video
Enter multiple program channel number such as 2-1.
Closed Caption selection:ON/OFF/CC On Mute.

TV Overview Front & Rear Panel
1. POWER - Press the button to turn the TV ON/ OFF (power). The screen image will
appear within a few seconds, and the LED will turn on.
0 1
A
IR Receiver
soft light illuminates when the
television power is on.

NOTE: You must remove the
pedestal before wall mounting.
TV Overview Rear Panel
Wall Mounting
It is recommended that you
consult a professional before
mounting this TV a wall.
Use VESA 600x300 wall
mount hardware.
6. CABLE-ANTENNA - Connect an antenna or cable connection for television reception.
Note: Use an outdoor antenna, cable or satellite for best reception.
7. USB Input Port
supports MP3 and JPEG).
2. OPTICAL OUT - Connect to an AV Receiver for high quality digital audio.
3. EARPHONE - Connect a stereo headphone for private listening.
1. RJ45 - RJ45 plug for connecting to external modem or network access equipment.
5. AV - Connect an external device to the composite VIDEO (V) and AUDIO (L/R) out jacks found on most
equipment.
4. HDMI1/2/3 IN - To connect to a High Definition (HD) signal output device, such as a set top box, blu ray
disc player or AV receiver.
1 1
Wall mount screws size: 4 x (M8 x 12)

Connecting External Devices
2 1

Show the Installation Guide page after booting up for the first time
Press the [Up and Down] button to switch the OSD Language and press [OK] button to enter the
next setting page.
Data collection and firmware updates notice page
Press the [Up and Down] button on the remote control to switch the options, and the [OK] button
to confirm the selection. It is recommended to select [ACCEPT].
Items Method Directions
[VIEW ADDITIONAL DETAILS] [OK] button See more detailed firmware/software
network download update instructions.
[ACCEPT] [OK] button Accept all agreements and agree to the
firmware/software network to
Customizing TV Settings
3 1

automatically download updates
If you press [OK] key in the [VIEW ADDITIONAL DETAILS] box it will go to the data
collection and firmware updates notice view additional details page. Default focus text section,
[Up and Down] key pulls down the text to the bottom and press the [Down] key to switch to the []
DECLIN ALL box, press [OK] key to confirm the selection and go to the next setting page.
The default country channel tuning settings page
Press the [Up and Down] button on the remote control to select the menu option, [OK] button to
confirm the selection and go to the next setting page.
Items Method Directions
[ACCEPT ALL] [OK] button Accept all agreements and agree to
the firmware/software network to
automatically download updates.
[ACCEPT AUTOMATIC UPDATES] [OK] button Accept all protocol parts and
manually select whether to agree to
the firmware/software network
download update if there is a
firmware/software update
[ACCEPT USAGE INFORMATION
COLLECTION]
[OK] button Accept the agreement and agree to
collect some non-personal user
information.
[DECLINE ALL] [OK] button Reject all protocols and disable
firmware/software network updates.
Customizing TV Settings
4 1

5The time zone setting page
Press the [Up and Down] button on the remote control to select the menu option, [OK] button to
confirm the selection and go to the next setting page.
6The daylight saving time setting page
Press the [Up and Down] button on the remote control to select the menu option, [OK] button to
confirm the selection and go to the next setting page.
Customizing TV Settings
5 1

7The network type setting page
Press the [Up and Down] button on the remote control to select the menu option, [OK] button to
confirm the selection and go to the next setting page.
Items Method Directions
Wi-Fi Network [OK] button Go to the wireless network connection page
(automatically search for attachment wifi)
Wired Network [OK] button Go to the wired network connection page
Skip [OK] button Skip the network settings and go to the next
level settings page.
8If you do not need to connect to the network, select the“Skip”option, press [OK] button to
confirm, and you will be taken to skip the network settings page.
6 1
Customizing TV Settings

Items Method Directions
Set up network [OK] button Go back to the network settings page
Skip [OK] button Confirm to skip the network settings
and enter input source setting page.
9The input source setting page
Press the [Up and Down] button on the remote control to select the menu option, Press the [OK]
button to confirm the selection and go to the next setting page. Pressing the [DOWN] button all
the way will turn the page to the USB source.
Items Method Directions
TV [OK] button Go to the channel tuning page
AV HDMI1 HDMI2...USB [OK] button Switch the source channel
7 1
Customizing TV Settings

10 The channel tuning page
The UI default focus the “Skip” option, Press the [OK] button to skip the DTV channel tuning
then enter the ATV channel tuning.
8 1
Customizing TV Settings
Table of contents
Other BEA TV manuals