BEAULIEU R 16 Automatic B Operating instructions

how to use your camera Beaulieu R
16 ((
Automatic»


1 Battery
2 Power Socket for the Camera
3 Handgrip with Built in Battery
4 Master Control Switch
5 Release Button with Cable Release
Socket
6 Isolating Switch for Power Supply
to Camera
7 Footage Counter
8 Frame Counter
9 Zero Reset Control for Frame Counter
10
Single Frame Release Socket
11
Siqnal Generator Socket
12
Turret Locking Catch
13
Remote Release Socket
14
Eyesight Correction Adjustment for
Viewfinder
15
Speed Control Knob
16
Tachometer for Exact Speed Setting
17
Speed Range Switch 24/25 or 2-64
Frames per Second
18
Film Sensitivity and Filming Speed
Adjustment for Light Meter
19
Automatic Diaphram (Regulomatic)
Control.
2
Servo Motor for Automatic Diaphram
21
Iris Diaphram Setting Ring
22
Focal Length Adjusting Ring
23
Focus Adjustment Ring.
24
Zoom Lever Socket.

1. Battery
2. Power Socket for Camera
3. Handgrip with built in battery
4. Master Control Switch
5. Release Button with Cable Release Socket
6. Isolating Switch for Power Supply to Camera
7. Footage Counter
8. Frame Counter
9. Zero Reset Control for Frame Counter
10. Single Frame Release Socket
11. Signal Generator Socket
12. Turret Locking Catch
13. Remote Release Socket
14. Eyesight Correction Adjustment for View-
finder
15. Speed Range Switch 24 to 25 and 2 to 64
Frames per Second
16. Speed Control Knob
17. Tachometer for Exact Speed Setting
18. Film Sensitivity and Filming Speed Adjust-
ment
19. Automatic Diaphragm (Regulamatic) Control
20. Servo Motor of Automatic Diaphragm
21. Iris Diaphragm Setting Ring.
PRELIMINARY DESCRIPTION
2

BEFORE FILMING
1. Loading ~e Came~
2. Loading the Film
3. Holding the Camera
4. Adjusting the Viewfinder
5. Setting the Filming Speed
6. Adjusting the Exposure: Control (Filming
Speed/Film Sensitivity)
7. Operating the Automatic Diaphragm
8. Operating the Manual Diaphragm
<li
J
9. Operating the Camera with "a 3 Lens Turret
10. Viewing and Focussing ~ -
11. Unloading the Film
SPECIAL APPLICATIONS
1. Filming on a Tripod
2. Reverse Filming
3. Single Frame Filming
4. Remote control filing
a)
Cable Release
b)
Electric Remote Lead
c)
Radio Control
5. Micro and Macro Photography
6. Sound Synchronisation
7. Low Temperature Operation
3

USE OF ACCESSORIES
1. Mains Charging of Batteries
2. Charging Batteries from Car
3. Using the 200' Magazine
4. Various Accessories
. MAINTENANCE
1. Lens
2. The Gate
3. Reflex Viewing
4. Lubrication
5. Electrical features
4

The instructions are intended for the R16 Automatic Model B camera,
but they are just as suitable for the R16 B Reflex Control Semi Auto-
matic Mono or Triple Turret Cameras; there are some special instructions
which apply to the latter.
To obtain the best results, we suggest that you study the operation of
the different controls of the equipment.
DESCRIPTION
1. Battery:
The R16 camera is powered by nickel cadmium batteries. There are
two types of battery: the 500 milliamp battery which, when fully charged,
power will the camera to take 7100' films at 25 frames per second, and the
1 amp battery which, when fully charged, will power the camera to
take 16 films at 25 frames per second. The number of 100' films which
can be used depends on capacity of the battery and the speed of the
camera.
No. of films No. of films No. of films
a 2 f.p.s. a 25 f.p.s. a 64 f.p.s.
500 mA Battery 1 7 14
1amp Battery 2 16 32
2. 5 amp. Battery
5

In the case of 200' films in the magazine, divide the figures by two.
Filming times will vary depending on the length of film and the filming
speed.
2
f.p.s.
25 t.p.s, 64 f.p.s,
100' Reels
...
32 minutes 2 min. 30 sees.
1
minute
200' Reels
...
65 minutes 5 minutes 2 minutes
The electrical consumption diminishes about 50
%
between the highest
and lowest filming speed. This is because of the time taken for the
film to run through the camera at 2 frames per second is much longer
than for the time at 64 frames per second.
2.
Method of Powering the Camera:
3. Handgrip with Battery Incorporated:
This handgrip will take two sorts of batteries - 500 mA and 1 amp
It also has an isolating switch which cuts off the current from the camera.
Different batteries are available for special applications.
6
4. Master Switch:
It has four positions:
" Stop" the camera is Switched off.
- "Normal" the camera films forward.

- "Retour" the camera films backwards.
- .. Control" Batteries can be tested. The camera will operate as
long as the isolating switch is aressed in the handgrip.
6. Release Button (and Cable Release Socket):
There are two positions-when pushed in the film will run through the
camera-when pushed in and turned a quarter of a turn in a clockwise
direction. it will lock and film continuously. When the switch is released
the camera will stop always showing a picture in the viewing system.
In the centre of the button there is a thread which will take the cable
release.
5. The Isolating Switch:
To disconnect the Power from the camera. This switch has three posi-
tions: When the switch is fully extended, no power reaches the camera.
When the switch is pushed in the switch is . on ' and the camera will
run. The locked position is when the switch is pressed in turned a
quarter of a turn clockwise. This is the position in which you use the
power grip with the camera on a tripod, or when you use it with a long
release. If you accidently leave the switch in this position, the battery
will discharge in 6 hours.
The operation of the camera is entirely controlled by the Master Switch
and the Isolating Switch on the pistol grip.
7. The Footage Counter:
The footage counter reads in metres on the top scale and in feet on the
bottom scale and indicates the amount of film already exposed. The
counter zeros
Itself
automatically when the camera is at neloaded.
7

8 and 9. The Frame Counter and Reset Control:
The frame counter is gratuaded zero to 100 and the small wheel allows
you to re-set the scale to zero.
10. Single Frame Release Socket:
In
order to film at single frame put the cable release into to single frame
socket and depress each time you wish to expose with the handgrip
switched on and the master switch set to normal. .
11. Signal Generator Socket:
This allows a 50 cycle 25 frame or 60 cycle 24 frame signal generator
to be screwed in for lip synch sound filming.
12. Turret locking Catch:
This catch is on all the cameras but is only used on the camera with
the three lens turret.
13. The Remote Release Socket:
This enables a remote release cable to be fitted.
14. Eyesight Correction Adjustment for Viewfinder:
This allows the viewfinding system to be adjusted to your individual
eyesight.
15. Speed Control Knob:
This allows you to set the camera at any marked speed.
8

16. Tachometer for Exact Speed Setting:
The purpose of the tachometer is to visually control the speed of the
camera and will enable you to set the speed that you require. The
first of the red dots on the top line represents 24 frames and the second
red dot on the top line represents 25 frames when the speed control is
set to 24/25 frames. This control enables an extremely accurate
setting most suitable for use with the signal generator for sound filming.
When the switch is in the 2-64 f.p.s. position, the scale lower indicates
speeds between 8 and 64 f.p.s.
17. Speed Range Switch
24/25
frames or 2-64
f.p.s.:
When switched to the left the speed range can be adjusted to speeds
between 2 and 64 frames per second. When switched to the right
position the speed range condensed enables the 24-25 frames for
sound film shooting, to be set with exerted accuracy.
NOTE: It is recommended that you change the speed selecter switch
with the camera is switched off.
18. Film Sensitivity and Filming Speed Adjustments:
This control enables you to select the filming speed in accordance
with the sensitivity of the film on the usunnd. The control is linked
to the light meter system and immediately corrects the sensitivity of
the light cell.
19. Housing for Automatic Diaphram Control:
There are two positions. In the automatic position the diaphram auto-
matically adjusts itself according to the amount of light on the subject.
9

In the semi automatic posrtion. the diaphram can be controlled by
manual adjustment, the correct exposure being indicated by the galvino-
meter needle being directly over the cross in the viewfinder.
21.
Iris Diaphram Setting Ring:
In the automatic position this ring is driven by the servo motor which
is controlled by the transistorised amplifier which translates the variation
in light indicated by the light cell in the camera.
In the semi automatic position the ring is operated manually until the
needle in the viewfinder is over the cross.
BEFORE YOU FILM
1. Checking the battery
Before filming it is always a good idea to check the charge in the battery.
The equipment for doing this is incorporated in the camera.
a)
Set the master switch to the control position.
b)
Make certain the speed control is in the left position, 2-64 f.p.s.
c)
Switch on the isolating switch and at the same time press the
release button. The needle on the tachometer will into on to the red
zone. Wait for 30 seconds. If the needle returns to the white area
there is not enough charge in the battery. You will, therefore, have to
recharge the battery.
d)
If the battery is charged re-set the master switch to the normal
position, put on the position stop if you do not want to film at the moment.
1.
Loading the
camera:
Loading the camera is done in shaded daylight:
10

a)
To open the catch on the side of the camera and turn the 'catch
in a direction when the arrow points to '
Q
(J).
Take out the take-up
when using reel, as you do this the counter re-sets to zero (K). To
turn to page
0000
the
200
magazine instructions. Open the film
gate (L).
b)
Unroll 30" of the 3 films leader. Put the feed reel on the feed
. spindle, the film coming off the reel at the bottom, in the direction
marked on the plate.
c) Insert the film in between the top spindle and the spindle guide.
The perforations on the film will fit themselves on the corresponding
teeth of the feed spindle. In order to do this, push the edge of the
film framly and turn the camera on.
Check that the perforations are well in the teeth of the feed sprocket
(M). and run off some film. Follow the film feed path on the gate
and insert it in the gate. Close the gate. If the film has been correctly
positioned it will automatically find its place in the gate. Check that
this has been done by moving the film up and down slowly.
When the gate is opened the claw is lifted away from the film. When
you close the gate the claw is re-positioned and should catch on to
the film. Check that this has been done.
d)
After having made certain the film is in the gate, put the film in the
lower guide and proceed to position as in
c).
e)
Put the film on the take-up spool and make certain it is engaged
with three or four turns.
f)
Make certain the counter has returned to zero. Replace the take-up
spool on its axle. Run a few inches to makes sure that all is correct
and make certain that the feed sprockets are properly laced.
g)
Put the side back on the camera and turn the catch to
f
for closed.
11

h
Run the film on until the red part of the counter is finished and
the zero comes to the line 11).
2 Holding the camera
When you are using the camera with the handgrip with a built in battery,
the photo shows how the camera should be held in the hand. The
hand then automaticaliy switches on the isolating switch and the
camera is ready to film. To film forward all you need to do is squeeze
the release button make certain that the camera is set to normal on the
master switch).
IMPORTANT:
If you should stop the camera by using the isolating
switch, the electronic circuit may not stop the camera with the mirror
in position and there is a risk of fogging the frame. In order to set
this right it is necessary for you to push in the release button nad squeeze
the isolating switch. This will close the shutter without wasting any
more film.
The isolating switch is there for safety. In its normal position the
camera cannot run or discharge the battery.
3 Adjusting the viewfinder:
a
Set the zoom lens to wide angle.
b
Set the focussing distance to infinity.
c
Set the control button on the Regulomatic to Semi.
d
Open the diaphram to maximum.
e
Point the camera towards the subject at infinity and turn the rim
of the eyepiece until the subject appears to be absolutely sharp. The
eyepiece is then adjusted to your eyesight. If you normally use glasses,
12

in order to see more comfortably it is better to use the camera without
them as the correction range is from minus 2 to plus 2 dioptres.
There is no mark on the tachometer for 2 frames and 4 frames per second.
The speeds are marked on the variable speed control and as they are
so extreme, tachometer control is unnecessary.
Table Showing the Exposure at the Various Filming Speeds:
2 frames per second
=
1/5 of a second exposure
4 frames per second
=
1/10 of a second exposure
8 frames per second
=
1/20 of a second exposure
16 frames per second
=
1/40 of a second exposure
25 frames per second
=
1/62 of a second exposure
32 frames per second
=
1/80 of a second exposure
48 frames per second
=
1/120 of a second exposure
64 frames per second
=
1/160 of a second exposure
6. Adjusting the light meter (filming speeds and
sensitivity) :
Set the filming speed chosen against the dial using the A.S.A. rating
in the photograph opposite, the chosen filming speed is 16 f.p.s. and
the film sensitivity is 50 A.S.A.
It is always possible to set intermediate film sensitivities. The space
between each marked setting represents one complete aperture. The
spaces between each filming speed marked are equal. To set, for
example, a filming speed of 150 A.S.A. you set the speed at an equal
distance between 100 and 200 A.S.A.
There is a mathematical relationship between the sensitivity of the
film and the speed of the exposure (depending on the filming speed),
therefore filming at 16 f.p.s. with a film of 50 A.S.A. corresponds to
filming at:
13

32 f.p.s. with a film of 100 A.SA
8 f.p.s. with a film of 25 A.S.A.
The exposure is exactly the same.
1M PORTANT:
For filming in conditions of exceptionally dull light
with film of 200 A.S.A. at filming speeds of 2 or 4 frames per second,
it is necessary to use a separate, very sensitive, exposure meter. When
filming at speeds less that 8 frames per second, you must film with the
exposure control set in the semi automatic position.
The exposure system is designed to give a perfect exposure under
normal conditions of illumination. In difficult lighting conditions
(against the light, by the sea, on the snow) it is necessary to make
adjustments. This can be done by taking a reading on semi automatic,
using the zoom lens in the telephoto position and pointing the camera
specifically at the darker areas of the subject which you wish to have
exposed correctly. When the sky is very bright and the subject is in
shade, the meter will tend to give an average reading. This can be
corrected by taking a close up reading in the semi automatic position
on that part of the subject which is to be exposed exactly.
If you are filming under conditions where you know that you should
alter the exposure by one or two apertures, this can be done on the
automatic system, merely by changing the film sensitivity.
7.
The automatic aperture setting system:
a)
Check that the Regulomatic control is in the position
«
Auto
»,
b)
Make certain the isolation switch is pressed on and the camera
is connected to the battery.
To obtain the exact position the needle in the viewfinder must remain
on the cross in the viewfinder. If the needle is not in the zone of tole-
rance (see diagram opposite) the conditions of light are not suitable
14

for. filming. If the needle is on the left there is too much light. You
can use the neutral density filter in front of the lens or a slightly faster
filming speed.
The automatic camera is equipped with automatic lenses, as follows:
Angenieux 4 x 17b
Angenieux 10 x 12
Angenieux 6 x 12.5.
ATTENTION: The automatic camera will take the majority of the C
mount lenses and lenses whose mount diameter is not greater than 2"
in the first 2
Y2 .
When other lenses are used, the meter is set on
semi automatic. It is quite easy to use the microscope adaptors.
When changing the lenses make certain in the case of the 4
x
17b,
the Zoom lever is unserewed. Turn the lens clockwise with the isolat-
ing switch in off position.
8.
Using the manual aperture control :
Whether you are using a semi automatic camera (mono or turret) or
an automatic camera, when you adjust the diaphram, as long as the
needle is within the area of tolerance shown in paragraph 8, the expo-
sure will be correct. The cell is behind the lens and any extension
device or filter will make its own exposure correction. It is not neces-
sary to adjust the A.S.A. settings so that if you are using artificial light
film in daylight with an 85 filter, set the film to the artificial sensitivity,
not to the corrected daylight one.
9. Beaulieu R 16 B reflex control
cameras
are equipped with a turret which will take three lenses. To change
the lenses, push in the turret locking catch to free the turret. To turn
15

the turret (it does not matter which way) use the three chrome knobs
which are in between the lenses.
The turret locking catch automatically locks the turret when the lens
is in the correct position.
The usual range of lenses are as follows:
Normal lens of 25 mm focal length
Wide Angle lens of 10 mm focal length
Telephoto lens of 75 mm focal length.
All lenses of standard C mount film plane distance (17.52 mm) are
suitable for mounting on the turret, as long as the rear part of the thread,
when set at infinity, is not longer than 3.8 mm. This is because of the
thickness of the turret plate.
It is also possible to use the turret camera with zoom and very long
telephoto lenses. Owing to their weight, we recommend the turret
locking screw. For evry heavy lenses, we would recommend the
turret strengthening plate.
Mono turret cameras are normally fitted with. zoom lenses. Mono
and turret Model B Reflex Control Cameras can be converted to auto-
matic cameras as long as the specially adapted zoom lenses are fitted.
10. Focussing :
The viewfinder is adjusted to suit the eye of the cameraman. The sub-
ject to be the filmed should be framed in the viewing screen, then
the focussing control turned until the subject is sharp in the view-
finder and it will then be sharp on the film.
Focussing is easier if the lens is at full aperture.
If the camera is equipped with a zoom lens it is easier to focus if you
set the zoom control to the telephoto position.
16

11. Taking out the film :
When the letter
f
appears at the end of the film counter the film is
finished. Continue to run the camera until the
f
has completely dispa-
peared. Open the camera, run the motor until the film is completely
on the take-up spool. II you wish to take the film out before it has
finished, this can be done by taking out the film guide. This enables
you to change a film in mid reel to another sort of emulsion. To replace
the film guide, merely push it back until it is secure.
SPECIAL APPLICATIONS
1. Tripod use:
Before fixing the camera to a tripod, do not forget to switch on the
isolating switch of the handgrip to the continuous position (turn the
button a quarter of a turn clockwise). After use remember to switch
off the power.
2. Reverse filming:
Set the master control to the position
«
Retour
».
Filming in reverse
for special effects: Rewind the film so that a superimposition or
a
change
of film can be achieved. When winding the film backwards remember
to lover the lens. The footage counter and the frame cou nter enable
you to check exactly how much film has been re-wound.
NOTE: Filming in reserve is effective at all speeds but not with the
200
rnaqazine..
17

3. Single picture filming:
This is for animation or time lapse.
When filming single shot it is necessary to use a tripod and to use the
cable release in the special release socket. The exposure times per
frame on single picture are as follows:
2 frames per second
=
1/5 of a second
4 frames per second
=
1 1 0 of a second
8 frames per second
=
1/20 of a second
16 frames per second
=
1/40 of a second
25 frames per second
=
1/62 of a second
32, 48 or 64 f.p.s.
=
1/80 of a second.
NOTE: When you want to film single picture, never put the cable release
in a position for continuous filming. There is a danger that you may
jam the mechanism.
4. Remote control filming:
This facility is offered by the BEAULIEU camera and is useful to any-
body who wishes to keep away from the subject (animal life, children,
etc.) or when there is a certain amount of danger (wild animals, auto-
mobile racing and aerobatic maneouvres and scientific experiments,
etc.). Put the isolating switch in the locked position and do not forget
to cover the viewfinder window. .
Filming at long Distance with Mechanical Realease :
a)
In this case long distance operation is achieved using the cable
release or, better by using a pneumatic release or solonoid release
connected to the cable release.
b)
Filming at a distance with the Electric vellert: Plug in to the jack
plug socket, cover the viewfinder window with blanking screw. Swith
the camera release button to continuous run.
18
Other manuals for R 16 Automatic B
3
Table of contents
Other BEAULIEU Camcorder manuals

BEAULIEU
BEAULIEU R 16 Automatic B Operating instructions

BEAULIEU
BEAULIEU 2008 S Installation and operating instructions
BEAULIEU
BEAULIEU 6008 S Guide
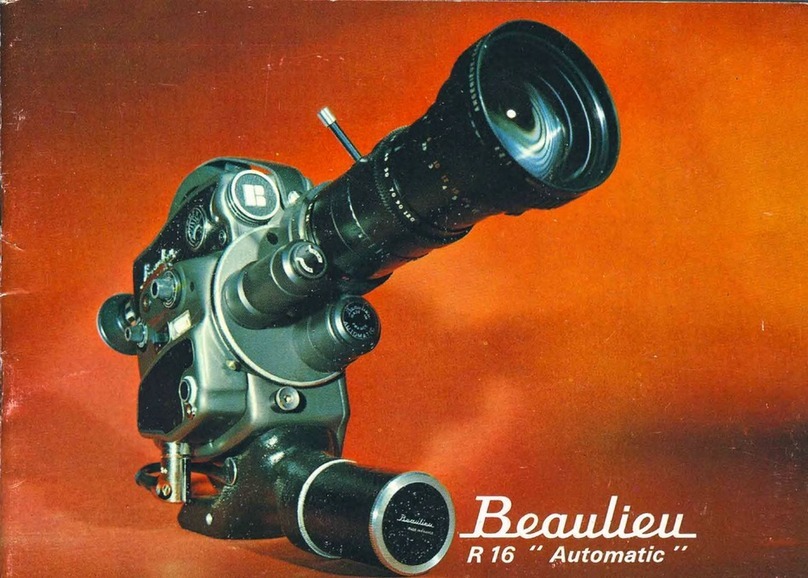
BEAULIEU
BEAULIEU R 16 Automatic B User manual
BEAULIEU
BEAULIEU R8 User manual
BEAULIEU
BEAULIEU 4008 ZM II User manual

BEAULIEU
BEAULIEU R 16 Automatic B User manual

