manuals.online logo
Brands
  1. Home
  2. •
  3. Brands
  4. •
  5. Kodak
  6. •
  7. Camcorder
  8. •
  9. Kodak SIX-20 Brownie User manual

Kodak SIX-20 Brownie User manual

ACTUAL SIZE _of picture (?% " 4% inches) made
with ,the Jiffy Kodak Series ti Sl"_f Oi.t ,"p ir"t 1;fj
snapshot made with Kodak "SS', pan Film.
FOR BEST RESULTS, LOAD YOUR
www.orphancameras.com
*:J,Th,'
L1il/
5::Hi
fK;,?',A
i:;1"",']
#i:
Jitry picture made with Kodak Verichrome Film.
wlTH theJitry Kodak Series
II it is easy
to
rnake clear, sharp pictures, right from the
start, outdoors or indoors) in the daytime
or at night. You needonly become famlliar
with the few workin g parts of the camera
and observe the simple suggestions on the
pages that follow.
KODAK WITH KODAK Fl LM (See Page 20)
This extension should be used when
making horizontal time exposures,
see illustration at right. (No €Xt€o.
sion needed on Six- t 6 Model.)
4
www.orphancameras.com
TheJIFFY KODAK SERIES
ll
Simplicity ls lts Keynote Throughout
A CLOSE-UP of the Jitry Kodak Series II.
Its simple working parts are labeled for
your convenience. Locate them on your
own camera as you identifv them in the
illustration . '
1. Lock for Back.Fastens
the
back
ofthe
c^mera.
Toopenthe
back,
move
the
slideto "OPEN.
"
2. Camera Standard. Holds the camera
levelwhen
seton a table.Foldsback when not in use.
3. Twindar Lens. Adjustablefor takine pictures
of
subjects
"5 to 10 Feet" from the cametaor "Beyond
10Feet."
4. Finders for locating subjects
to bephotographed
vertically or horizont
ally.
5. Button for opening
front of camera.
Whenpressed,
camera
front "pops" out to properposition.
9. Vinding l(nob for turning anew sectionof film
into position after eachpicture.
7. Indicator Lever. Setat "I" to take snapshots.
Set
at "T" to take time exposures.
8. Exposure Lever. Press
down asfarasit will go-
once
fot a snapshot;twice for a time exposure.
9. Diaphragm Slide. Has threesizes
of lensopen-
ingsthrough which light is allowed to enterthe cam-
era.
It is pulledout to bring the two
smallersize openings
into position.
10. Metal Cover for red window
onback
of camera
through which pic-
trlrenumbersarevisible.
HOW
TO LOAD
the J
I
FFY KODAK SER
IES II
www.orphancameras.com
The word TOP
on the papet
rnusr
beon the side
op-
posite the wind-
irg knob.
Thread the pa-
per through the
longer slit in the
empy reel as far
as it will go
(Figure 3).
Turn thewind-
itg knob onceor
twice to bind the
paper on the reel
(Figure 4). Be
sure the paper is
started straight.
Closethe back
and rnove slide
under the handle
to "LOCK."
Pushthe round metal slide that covers
the red window on the back of the camera
to one
side and
rurn the
windirg knob until
a srnall hand W appears
in rhe cenrer of
the window. Then rurn the knob slowly
until the figure one (1) appears in the
window.
After each
picrure, rurn the knob until a
new number appe
ars in the red window.
TO take
Series
II
nphy is
rules and
staft.
How to take SNAPSHOTS with
the JIFFY KODAK SERIES ll
snapshots
no special
necess
afY
.
you'll get
1. When ready to take a snapshot, press tbe but-
ton on the side of the cameta, and the carrl'era
front will automatically "pop" out to the cor-
rect picture-taking position.
2. Set tbe indicator leuer on top of the camera
front at position "I."
3
. Reaolae the lens so the white dot on the flange
is at the arrow marked "Beyond 1OFeetr" ot at
the arrow marked " 5 to 10 Feetr" depending
upon the distance between camera and subject.
4. See tbat tbe sun is bebind your back or over
your right or left shoulder. Do not let the sun
shine directly into the lens.
5. Be sure your subject is in tbe open sunligbt,
with the Jitry Kodak
knowledge
of photog-
Observe
these
simple
goodpictures
frorn the
How to hold the Jiffy to
take a vertical picture. How to hold the Jiffy to
take a hofizontal picture.
www.orphancameras.com
6. For a snapsbotof a nearby sub-
ject in the open, or a nearby
landscape showing little or no
sky, use the largest lens open-
itg, utitb tbe diapbragm slide
pusbed in as far as it will go.
For an ordinary landscape in
which sky shows, with a prin-
cipal object in the foreground,
use the middle lens opening.
Pull tbe diapbragm slide balfutay
out, until the middle lens open-
ing is centered in front of the
lens, where it will catch.
For distant landscapes, marine
or beach scenes, or for snow
scenes without dark obiects in
foreground, use the smallest
lens opening. Pull the dia-
phragm slide out as
far as it ur;ll
go, where it will catch.
7
. Locate tbe object or scene you wish to photo-
graph in eitber tbe uertical or horizontalfi.nder.
Be sure to hold the camera level.
8. Hold tbe cantera steady, and press tbe exposure
leuer downward once, as far asit will go. Do not
jerk the leuefr' press it slouly.
9. After eacb picture, push the metal slide on
the back of the camera in the direction of the
arrot' and turn the uinding knob until a new
nuniber appears in the red window.
1O. Keep tbe lens clean and occasionally wipe
out the inside of the camera.
I 1. If the subiect is below normal height, like
a child or a dog, the Kodak should be held
down level with the center of the subiect.
9
HOW TO UNLOAD
the J
I
FFY KODAK SERI
ES I
t
TO unload
the Jitry
KodakSeriesII after
the last picture on a roll of film has been
rn_ade,turn the winding knob until the end
of the paper on the roll passes
the red win-
dow on the back of the camera.
In a subdued light, open the back of
the camera. Hold the end of the paper tavt
and turn the knob until all the plper is on
the roll (Figure 1). If the sticker folds un-
der the roll,_
rurn the knob to bring it up.
Take hold of the end of the protective
papet ?nd sticker ro prevenr the paper from
loosenirg. Draw our the winding Lnob and
remove the film (Figure 2). Fold under
about one-half inch of the prorective paper,
and fasten it with the sticker.
The film is now rcady for developrnenr,
which should be done as soon aspossible.
You may have the work done by ^ photo-
finishe
r, or you may do it yoorrelf. Our
www.orphancameras.com
Service Departrnenr will be glad ro send
you, upon request, cornplete instructions
for developing andprinting.
Remove the ernpty spool in the catnera
by pushing one end of the spool ro one
side
, zt the sarnetirne pressing back the
spring on the opposite end of the spool
(Figure 3).
Place
the spoolin the windirg endof the
camera
(Figure 4). The Jltry is-then ready
for reloadirg. Load with Kodak Filrn-the
filrn that cornesin the famrhar yellow box.
Keep a roll in the came'raand it will be
ready at aII tirnes to take pictures. (See
Page 20, "What Filrn To Use in Jitry
Kodak Series
II and
Why.")
11
IMPORTANT: After removing the film
from the l(odak, do nor wind the film
tightly with a twisting motion, or it may
become scratched.
DAYTIME PORTRAITS
INDOORS
With J
IFFY KODAK SERI
ES I
I
TO make an indoor poftrait by ordinary
daylight, simrlar to that shown here, have
the subjectstand or be seated
in front of an
unshaded window, with the body prefer-
ably at a diagonal to the camera.
Place a reflector (a sheet or table-cloth
thrown over a screen or chat will do) a
few feet from the sub lect and at the angle
Setthe indicator lever
on top of the camera
front at "T. " The dia-
phragm slide should be
aII the way in; this
brings ,!. largest. lens
openlng lnto poslrlon.
Place the camera in
either a vertical or hori-
zontal position on a
solid support a little
higher than an ord rnarv
table. The camera musr
not bernore than two or
three inches frorn the
edge of the support.
Locate the sublect in
T2
www.orphancameras.com
the finder. Turn the lens so that the white
dot is at the arrow marked "5 to 10 Feet,"
or at the arrow marked ''Beyond 10Feet,'
'
dependirg upon the distance between the
subject and the camera.
If in doubt as to the proper exposure,
take two pictures ,of the sarne subigct,
allowing twice as long an exposure time
for the secondpicture asfor the first.
Time Exposu
re
PORTRAITS
OUTDOORS
CLOSE-UP time exposures can be made
outdoorswith the sunshining brigh dy, by
placing the subiect in the shadow of a
building or a large tree, but with clear
and unobstructed sky overhead. This
avoids unpleasant shadows on the face.
one to two seconds
for the exposure.
L1
ROOM INTERIORS
by DAYLIGHT
TO make a picture of a room interior by
dayltght, set the indicator lever on top of
the camera front at "T r" and pull the
diaphr agm slide half way out until it
catches to bring the middle lens opening
into position.
Place the camera on a solid support in
either a vertrcal or hortzontal position,
and compose your subiect in the finder to
include more of the floor of the room than
of the ceiling.
So far as possible, leave the furniture in
the room in its usual place, but be sure
there are
no pieces
close to the camera
lens.
Turn the lens until the white dot is at
the arrow marked '
'5 to 10 Feet,'
' or
at the arrow marked "Beyond 10 Feet,
"
dependirg upon the average distance the
objects are from the camera.
www.orphancameras.com
t
I
3
lF
g
E
,
rr
t
These _exposures are for rooms where windows set the
direct light from the sky and for hours from three hours
after sunrise until three hours before sunset. If earlier
or later the exposures must be longer.
When ready'to take the picture, sready
the cameta and press the exposure lever
o.nce
t9 opel the shutter. When the proper
time has elapsed (see Exposure Guide),
press
the lever again ro close the shutter.
After the last time exposure has been
made, move indicator lever on rop of cam-
era front to "I" to be ready for snapshots.
EXPOSUREGUIDE
For Daylight Interiors Using the Middle Lens
Openins or "Stop."
With largest lens opening gjve one-half the time;
with the smallest opening, double the time.
Bright I Hazv lC CIoudy
sun I sun lbrightl dull
4l10lzo
secs.lsecs.lsecs.
30
secs.
40
secs.
40
secs.
1
min.
1
min.
20
secs.
2
mins.
I
min.
1t?
mrn. I mrns.
20140
secs. I secs.
-irr. | ,.,ir,..
40lzo
secs. I secs.
rU(hitewalls and more
than one window.
Vhite walls and only
one window.
Medium-colored walls
and furnishings and
morethan onewindow.
M"dt"*."1"r"d *"11.
and furnishings and
only one window.
Dark.colored walls
and furnishings and
more than onewindow.
6
secs.
8
secs. 20
secs.
30
secs.
40
secs.
1
min.
20
secs.
20
secs.
40
secs.
Dark-colored walls
and furnishings and
only one window.
15
SNAPS
HOTS and other
INDOOR PICTURES AT NIGHT
by Artificial Light
TO take
snapshots
orother
indoor
pictures
atnight with theJitry Kodak Series
II, you
need-only a roll of Kodak Film, a few
KodakHandyReflectors,and
afew Photo-
floodor Photo/ashbulbs.The bulbscan
be
screwed
into ail regular
lampsockets.
PhotoFLOoD gives a steady light ol
great brilliance. Contesin twc1sizes
for the amateur: No. 1, 25 cents;
No. 2, 50
cents.
The No. 2 bulb gives
twice the light and lasts three times
as long.
PhotoFLASH si
ves
an irrstantaneous
flash; it is good for one picture. No
smoke. no noise. Comes in twcr sizes
for the amateur: No. 10, 15 cents;
No. 20, 25 cents.
The No. 10 size
is
suitable for most indoor shots.
SNAPSHOTS
with PHOTOFLOODS
TO take snapshots at night with the Jiffy
Kodak Series
II in rooms with light-colored
wails, load camera with Kodak "SS" Pan
Film. Arrange two bridge-type lamps* as
*Rooms with dark-colored walls usually require the
useof additional Photoflood lamps and reflectors.
16
www.orphancameras.com
shown in the illus tration, one about three
feet from the sub
lect; the other about four
feetfrom the sublect,
Replace the regular shadeson the lamps
with inexpensive Kodak Handy Reflectors,
Model B, and place a No. 2 Photoflood
bulb in each of the lamps.
See that the
indicator lever
on top of the
camera front is
set at "Ir " and
besure that the
diaphr agmslide
is pushed in as
farasit will go.
Compose
your
sublect
in either
the vertical or
horrzontal finder of the camera and press
the exposure lever just as you would to
takea inapshot outdoors.
After each picture you take be sure to
turn the winding knob until the next num-
berappears
in the red window on the back
of the camera.
CAUTION: Photoflood lamps, especially
the No . 2 size,
become quite hot andshould
not be kept burnin g any longer than neces-
sary to take a picture. Do not permit the
bulbs to come into contact with the fabrtc
of shadeson home lamps.
17
Quick TIME EXPOSURES
with PHOTOFLOODS
TO make
quicktime
exposures
with Pho-
tofloods, load the camera with Kodak
"SS" Pan,Panatomic, or Verichrome Film.
Set the indicator lever on top of. camera
front at "T." Place camera on a solid sup-
port. Compose picture in finder. Revolve
lens until white dor is in proper position.
To make the exposure, press
exposure lever
once to open shutter, and.again ro close it.
Use the Exposure Table Felow:
EXPOSURE TABLE
FOR TWO PHOTOFLOOD LAMPS
Using Kodak "SS" Pan Film
Double the exposure with Panatomic or
Verichrome Film
(J
q')
9{-o
EA
He
Aq
ti Oi
al
F,l
6 ft.
ta
to f"
aa
aa
Exposure in Seconds
Lens
Opening
Largest
Middle
Smallest
t*tl"*
Middle
Smallest
In Kodak
Handy
Reflectors
(Model B)
Vithout
Reflectors
L45
(|lr
co
!!?
Aq
a&
No. I
Lamps
u,
t
Llz
I
2
No.2
Lamps
L12
L/2
1
No. 1
Lamps No. t
Lamps No.2
Lamps
Ut
t
2
L12
t
2
I
)
4
2
4
8t
2
4
*Vith No. 2 Photofloods the exposure should be one-
half or two-thirds of the exposule given for the No. r
Lamps, depending upon kind of reflettors used.
18
www.orphancameras.com
PhotoFLASH PICTURES
FOR
usingthe Photof,asb
bulb, adjust rhe
camerathe sameas fot making tirne ex-
po-sures
with Photofloods, see page 18.
or a por tab
UseaPhot
of,ash
bulb in any
homelamp
a Dortable
reflec
tor uni t
having flash-
light batteries.
To make the
exposure, turn
out aII lights
(except a small
light behind
camera), direct
the Photof,ash
at sub
lect, openatsuDlect,open
shutter, flash the bulb, and close shutter.
EXPOSURE TABLE
FOR NO. 10 PHOTOFLASH LAMP
Use the larS;est lens opening. tJfith the No. 2O Photo-
flash Lamp use the middle lens opening.
In Kodak
Handy Reflector
(either size)
Pana-
tomrc
of
Veri-
chrome
In Ordinary
Reflector
"ss"
Pan
Film
..SS"
Pan
Film
Pana-
tomrc
of
Veri-
chrome
l(/ithout
Reflec-
tof
.6SS"
Pan
Film
Distance
Lamp to
Subiect 15 ft. 6 ft. 6 ft.

Other manuals for SIX-20 Brownie

3

This manual suits for next models

1

Other Kodak Camcorder manuals

Kodak PalmPix m100 User manual

Kodak

Kodak PalmPix m100 User manual

Kodak ZM2 Service manual

Kodak

Kodak ZM2 Service manual

Kodak ZI6 - Pocket Video Camera Camcorder User manual

Kodak

Kodak ZI6 - Pocket Video Camera Camcorder User manual

Kodak PLAYFULL ZE1 Service manual

Kodak

Kodak PLAYFULL ZE1 Service manual

Kodak PLAYSPORT Zx3 User manual

Kodak

Kodak PLAYSPORT Zx3 User manual

Kodak PLAYSPORT Zx5 User manual

Kodak

Kodak PLAYSPORT Zx5 User manual

Kodak Camcorder User manual

Kodak

Kodak Camcorder User manual

Kodak ZM1 Service manual

Kodak

Kodak ZM1 Service manual

Kodak PalmPix m100 Manual

Kodak

Kodak PalmPix m100 Manual

Kodak ZxD User manual

Kodak

Kodak ZxD User manual

Kodak ELDT zi8 Service manual

Kodak

Kodak ELDT zi8 Service manual

Kodak ZE2 User manual

Kodak

Kodak ZE2 User manual

Kodak Pixpro SPZ1 User manual

Kodak

Kodak Pixpro SPZ1 User manual

Kodak PLAYTOUCH ZI10 Service manual

Kodak

Kodak PLAYTOUCH ZI10 Service manual

Kodak ELDT zi8 User manual

Kodak

Kodak ELDT zi8 User manual

Kodak ZM1 User manual

Kodak

Kodak ZM1 User manual

Kodak ZE2 User manual

Kodak

Kodak ZE2 User manual

Kodak ZM2 User manual

Kodak

Kodak ZM2 User manual

Kodak ZI6 - Pocket Video Camera Camcorder User manual
Kodak

Kodak ZI6 - Pocket Video Camera Camcorder User manual

Kodak DVC325 - Digital Internet Camera User manual

Kodak

Kodak DVC325 - Digital Internet Camera User manual

Kodak PlayTouch User manual

Kodak

Kodak PlayTouch User manual

Kodak Zx1 - Zx1 1.6MP 2x Digital Zoom 720p High Definition Weather-Resistant Pocket Video... Service manual

Kodak

Kodak Zx1 - Zx1 1.6MP 2x Digital Zoom 720p High Definition Weather-Resistant Pocket Video... Service manual

Kodak PLAYTOUCH ZI10 User manual

Kodak

Kodak PLAYTOUCH ZI10 User manual
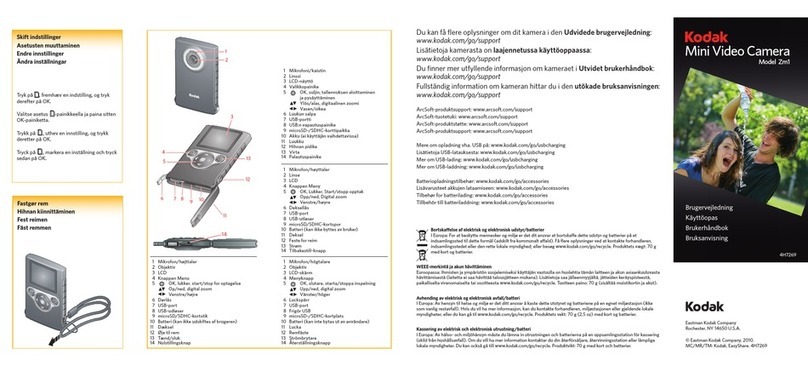
Kodak ZM1 User manual

Kodak

Kodak ZM1 User manual

Popular Camcorder manuals by other brands

Panasonic NV-RX70B operating instructions

Panasonic

Panasonic NV-RX70B operating instructions

Canon Vixia HV40 instruction manual

Canon

Canon Vixia HV40 instruction manual

Sony HDCAM HDW-750 Maintenance manual

Sony

Sony HDCAM HDW-750 Maintenance manual

JVC GR-DX series Service manual

JVC

JVC GR-DX series Service manual

Panasonic AG-DVC10 Specifications

Panasonic

Panasonic AG-DVC10 Specifications

JVC GS-TD1 user manual

JVC

JVC GS-TD1 user manual

Sony PCS-C150 Service manual

Sony

Sony PCS-C150 Service manual

Sony Handycam DCR-TRV270E Service manual

Sony

Sony Handycam DCR-TRV270E Service manual

Sony Handycam DCR-HC23E Service manual

Sony

Sony Handycam DCR-HC23E Service manual

Canon XA10 user manual

Canon

Canon XA10 user manual

SVP DV-12T Specifications

SVP

SVP DV-12T Specifications

Sony NXCAM NEX-FS700U operating guide

Sony

Sony NXCAM NEX-FS700U operating guide

Olympus iS-3 DLX instructions

Olympus

Olympus iS-3 DLX instructions

LG LD120N owner's manual

LG

LG LD120N owner's manual

Panasonic HDC-HS250P operating instructions

Panasonic

Panasonic HDC-HS250P operating instructions

Philips CAM102B user manual

Philips

Philips CAM102B user manual

LG LVC-SX703PC instruction manual

LG

LG LVC-SX703PC instruction manual

Canon ETT 555 Basic use

Canon

Canon ETT 555 Basic use

manuals.online logo
manuals.online logoBrands
  • About & Mission
  • Contact us
  • Privacy Policy
  • Terms and Conditions

Copyright 2025 Manuals.Online. All Rights Reserved.