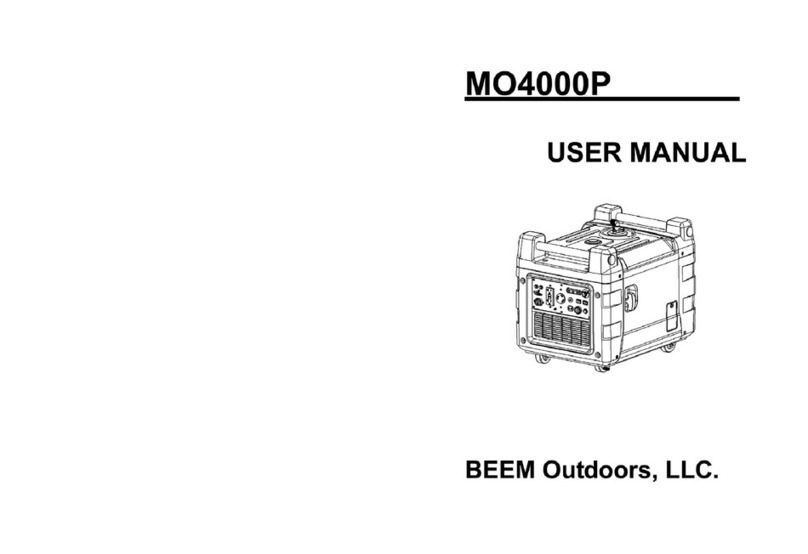
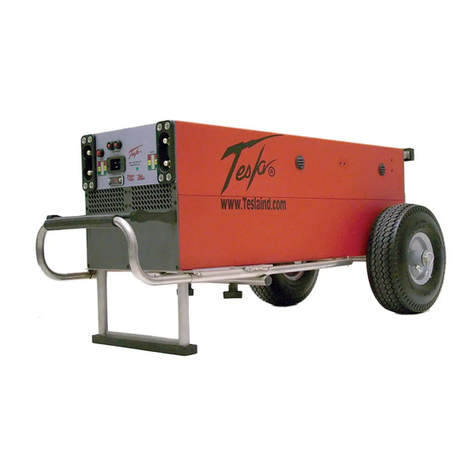
Beem BMG5 Quick start guide

BEEM Outdoors LLC. MODEL NO. : BMG5
BEEM Outdoors LLC. Natural Gas & LPG
Generator Set Model # BMG5
Operation Instruction & Owner’s Manual
Caution:
Carefully read and understand this Owner’s Manual before starting this generator

1
Congratulations on your purchaseof our generator. We design and build generators to strict
specifications. With proper use and maintenance, this generator will bring you years of satisfying
service.
This unit is LPG or natural gas enginedriven, alternating current (AC) generator. It is designed to
supplyelectrical power for lighting,appliances, tools and similar equipment. Do not use gasoline or
other fuels.
This manualcovers operation and maintenance.All information in this publicationis based on the
latest productinformation available at the time of approval for printing.Every effort has been made
to ensure theaccuracy and completenessof the information in this manual. Wereserve the right to
change,alter and / or improve the products and this documentat any time without prior notice and
without incurring any obligation.
Record the model and serial numberas well as date and places of purchasefor future reference.
Have this information available when ordering parts and when technical or warranty inquiries.
Authorized Sales & Service Distributor:
Model Number:
Engine Serial Number:
Air-Fuel Mixer Serial Number:
Date Of Purchase:
Purchase Location:
Introduction
Introduction
Generator Set
This Booklet

This manual uses the following symbols to help differentiate between different kinds of information.
The safety symbol is used with a key word to alert you to potential hazards in operating and owning
power equipment.
Following all safety messages to avoid or reduce the risk of serious injury or death.
Danger
Danger indicates an imminentlyhazardous situation which, if not avoided, will result in death or
serious injury.
Warning
Warningindicatesa potentially hazardous situation which, if not avoided, could result in death or
serious injury.
Caution
Caution indicatesa potentially hazardous situation which, if not avoided, may result in minor or
moderate injury.
Notice
!
!
!
Notice gives helpful information.
Manual Conventions
Manual Conventions
!
2

Safety Rules
Please read and understandthis manualthoroughlybefore operating your generator. Failure to
follow instructions could result in serious injury even death.
Exhaust gas contains poisonous carbon monoxide, which is harmful to the health. Never use the
generator set at the confined places or poor ventilated locations. If it’s necessary to run the
generator set, be sure to provide the adequateventilation.
Generator produces powerful voltage.
1. DO NOT touch bare wires or receptacles.
2. DO NOT use electrical cords that are worn, damaged or frayed.
3. DO NOT operate generator in wet condition or with wet hand.
4. DO NOT allow children or unqualifiedpersons to operate or service thegenerator.
5. DO NOT use a groundfault circuit interrupter (GFCI) in damp areas and areas containing
conductive material such as metal decking.
Use approved transfer equipmentto isolate generator from your electric utility and notify your utility
company before connectingyour generator to your power system.
Sparks can result in fire or electrical shock. Whenservicing the generator, disconnect the spark
plug wire and place it where it cannotcontact the plug. DO NOT check for spark with the plug
removed. Use only approved spark plug testers.
Warning
!
Warning
!
Danger
!
Warning
!
Warning
!
3

Safety Rules
Runningengines produceheat. Severe burnscan occur on contact. Combustiblematerial can catch
fire on contact.
Warning
!
1. Propane (LPG) and natural gas (NG) is highly flammable and explosive. Fire or explosion can
cause severe burns or death if the gas is ignited.
2. Before starting the generator, inspect your LPG tank and NG pipeline and valve for damage
or leaks, attach only approved tanks that have been properly filled by an approved station,
DO NOT light or smoke cigarette.
3. Replace the hose at the first sign of a leak or if age-cracking becomes apparent.
4. Whenstarting the generator DO NOT attempt to start a damagedgenerator, make certain
thatthe LPG tank, air filter, spark plug,fuel lines and exhaust system are properly in place,
make certain that the generator resting firmly on level ground.
5. Whenoperating the generator DO NOT move or tip the generator duringoperation, DO NOT
tip the generator or allow oil to spill.
6. Whentransportingor servicing thegenerator make certain that thegenerator is disconnected
and properly shut off, disconnectthe spark plug wire.
7. Whenstoring the generator store away from sparks, open flames, pilot lights, heat and other
sources of ignition.
Danger
!
1. Rapid retraction of the starter cord will pull hand and arm towards the engine faster than you
can let go. Unintentionalstartup can result in entanglement,traumaticamputationor
laceration. Broken bones, fractures, bruises or sprains could result in.
2. Whenstarting engine,pull the starter cord slowly until resistance is felt and then pull rapidly
to avoid kickback.
3. DO NOT start or stop the enginewith electrical devices pluggedin.
Warning
!
1. The battery contains acid. Acid is strongly corrosive.
2. DO NOT use, store or expose the battery in high temperature situations, as in the direct
sunlight,inside automobiles duringhot weather, directly in front of a heater, etc.
3. Be sure to turn off the equipmentafter use.
Warning
!
1. DO NOT touch hot surfaces.
2. Avoid contact hot exhaust gas.
3. Never touching the equipment until it’s cool.
4. Maintain at least 3 feet (about 1meter) of clearance on all sides to ensure adequate cooling.
5. Maintain at least 5 feet (about 1.5 meters) of clearance from combustiblematerials.
4

Safety Rules
Warning
!
The noise is harmful to your health when the generator set is running.Serious noise will result in
tinnitus,earache, hearing damage even deafness, eye and nervous system damage, etc. Please do
something for noise protection before running the generator set if it’s necessary, like as wearing
hearing protector and so on.
Caution
!
Exceeding the generator’s running capacity can damage the generator and/or electrical devices
connected to it.
Impropertreatment or use of thegenerator can damage it, shorten its life and void your warranty.
Use the generator only for intendeduse.
Caution
!
Use only genius AUTHORIZED SALES& SERVICEDEALER/DISTRIBUTOR parts or their
equivalent. The set of replacement which is not equivalent quality may damageyour generator.
Warning
!
1. DO NOT overload the generator.
2. Start the generator and allow the engine to stabilize before connecting electrical loads.
Connect electrical equipmentin the off position, and then turn them on for operation.
3. Turn electrical equipmentoff and disconnectbefore stoppingthe generator.
4. DO NOT tamperwith the speed governor.
5. DO NOT modify the generator in any way.
1. Operate only on level surfaces.
2. DO NOT expose generator to excessive moisture, dust,or dirt.
3. DO NOT allow any material to block the cooling slots.
4. If connected devices overheat, turn them off and disconnectthem from the generator.
5. DO NOT use the generator if electrical outputis lost, equipmentsparks, smokes or emits
flames and equipmentvibrates excessively.
5

Component Identification
BMG5
Cooling fan
Enginecover
(Front cover)
Alternator
(Generator)
Power output panel
Air-fuel mixer
series number
Auto
choke
valve
Spark plug cap
Air filter
Rubberleg
(Rubber mount)
Low oil sensor
Engineoil drain plug
Engineoil drain hole
Engineoil fill cap
(Dipstick)
Starter
Alternator cover
(Back cover)
Muffler
LPG / NG
Change-Over-Switch
Exhaust outlet
LPG
NG
LPG/NGchange-over-switch

Component Identification
Read this owner’s manual before operating your generator. Familiarize yourself with the location
and function of the controls and features. Save this manualfor future reference.
Oil Fill Cap:
Check and fill engine oil level.
Engine:
Used to power generator (alternator).
Air Cleaner:
Protects the engine by filtering dust and debris from the intake air.
Engine & Air-fuel Mixer Serial Number:
Please have this numberavailable when calling for assistance.
Low Oil Sensor:
Senses the level of oil in the crankcase and shuts the engine down if the level falls too low.
Auto Choke Valve:
Used to control air flow rate.
Bolt:
Used to fix the enginecover (front cover).
Power Output Panel:
Please refer to “Power output Panel” description.
Controls & Features
7

Electric start
Hour meter
Circuit breaker
Voltage meter
AC output
DC fuse
DC output
Gas inlet
Ground terminal
Engineswitch (fuel switch)
Power output panel
Read this owner’s manual before operating your generator. Familiarize yourself with the location
and function of the controls and features. Save this manualfor future reference.
Controls & Features
8

Description Nos.
Generator set 1
Spark plug socket 1
AC plug 2
DC battery cable 1
Gas pipe clip 1
Wrench 1
Vibration mount 4
12V, 15AH battery 1
Cap screw M8*25 4
Cap screw M5*12 2
Washer Φ5 2
Spring Washer Φ5 2
Nut M5 2
Owner’s Manual 1
Certificate of Quality 1
Assembly
Parts Included
Your generator set ships with the following parts.
9

Your generator requires some assembly.
This unit ships from our factory without engine oil.
It must be properly serviced with fuel and oil before operation.
If you have any question regarding theassembly or your generator, call your help line of authorized
sales & service distributor/dealer. Please have your engine & air-fuel mixer serial numberand
model numberavailable.
Assembly
Before installing vibration mount,make sure NO LUBE OIL inside the crankcase .
Assembly Introduction
Install vibration mount
Install Battery
Attach the red lead to the red terminal on the battery with cap screw & nut.
Warning
!
The 12V DC Battery is usually equippedwith ELECTRICAL START GENERATOR SET.
1. DO NOT use the battery if it is leaking, or abnormal in any other way.
2. DO NOT connect the battery in reverse polarity.
3. Charge thebattery equippedwith generator for firstly use.
Warning
All thevibration mountsmustbe installed to ensure enoughair flow rate.
Otherwise the generator will be easily over heating & break down.
!
10

Assembly
1. Place the generator on a flat, level surface.
2. Remove OIL FILL CAP / DIPSTICK to add oil. Use the DIPSTICK to measure the oil level.
The engine oil level must be in regulated range.
3. Add engineoil and reinstall OIL FILL CAP / DIPSTICK.
4. Check engineoil level for each use and add as needed.
Lubeoil capacity for different generator
Running theengine with insufficient engineoil can cause serious enginedamage.
Caution
!
Model BMG5
Oil Capacity 1.1L
Add Engine Oil (Lube Oil)
Filler hole
Engineoil cap/ dipstick
11
4-stroke motor oil. 5W-30
15W-50
20W-50
10W-30
(SG or higher level)

Assembly
To Gas Supply Source
Step 01:
Keep gas supplysource closed and
ENGINE SWITCHat OFF position.
Step 02:
Attachedthe gas pipeline to GAS INLET
and gas supplysource.
Step 03:
tightenthe clip at each end of gas pipeline
until it’s not easy to pull down from gas
pipeline and prevent gas leaking.
1. All gas pipejoints shouldbe fixed tightlybefore operating the machine.
2. Usually checkthe joints and gas hose for leakage or breaks, replace the damaged if necessary.
3. Changethe gas pipeline for each 18 months use.
4. LPG & Nature gas is extremely flammable and explosive.
Warning
!
Connect Gas Supply Source
12

13
Assembly
Your generator must be properly connected to an appropriate ground to help preventing electric shock.
Warning
!
1. To prevent electrical shock from faulty
appliances, the generator should be
grounded.Connect a length of heavy wire
between the groundterminal and the
groundsource.
2. We strongly recommend that you consult
with a qualified electrician to ensure
compliance with local electrical codes.
Grounding
Connections for emergency power to household circuits must be made by a qualified
electrician and must comply with all applicable laws and electrical codes. Improper
installation may result in personal injury or damageto equipmentor property.
Change-over-switch must be used when connect generator power for household use.
Caution
!
Installation Guide for Household use
To
household
electric
appliance
Mainpowersupply
3Grounding
4Change-Over-Switch
Min. 9mm 1Gas
Supply
Source

Type BMG5
Flow rate QLPG≥2.0 kg/h
or QLPG ≥1 m3/h
Regulator outlet pressure 2.8±0.5KPa
(0.4 ±0.07 PSI)
14
1. LPG Pressure Regulator should be equippedon LPG cylinder.
2. Be sure place the LPG cylinder vertically.
Regulator outlet pressure should be as follow:
Working Condition
Environment Requirement
Gas Requirement
Temperature: for NG powered generator set: -30 ℃~40 ℃;
for LPG powered generator set: -5 ℃~40 ℃.
Sea level: Height above sea level: below 1000m
The generator outputpower will decline if working above sea level 1000m.
LPG
Main Gas Valve should be equippedon main gas pipe.
Recommendedgas pressure: 2.0~6.0kPa( 0.29~0.87PSI)
Natural Gas
NG
Gas switch (main gas valve)
Gas pressure regulator

Pre-operation Check
15
(2) Check if engine oil is enough.
(3) Check gas supplysource is in good condition.
Check gas inlet connectionis tightly fixed, not leaking.
(4) AC circuit breaker is at OFF position.
(5) AC outputno load connected.
Disconnect all electrical loads from the generator set
before starting engine. The generator may be hard to
start if a load is connected.
(6) DC outputis nothingconnected.
(7) Groundterminal is properly grounded.
(1) LPG / NG Change-Over-Switch
LPG
NG

16
Start Engine
Notice
If your engine is starting, do an inspection on
the top cooling fan, and ensure it is operating.
Otherwise, you should stop the engine.
If the engine starts but does not run, make certain that the generator is on a flat, level surface. The
engine is equippedwith a low oil sensor that will prevent the enginefrom runningwhen the oil level
falls below a critical threshold.
Notice
1. This generator musthave at least 5 feet (about 1.5 meters) of clearance from combustiblematerial.
2. Leave at least 3 feet (about 1 meter) of clearance on all side of thegenerator to allow for adequate
cooling, maintenanceand servicing.
3. Place the generator in a well-ventilated area.
4. DO NOT place the generator near vents or intakes.
Caution
!
!
!
Step 1: Open gas fuel source (NG or LPG).
Step 2: Turn engine switch at ON position.
Step 3: Pushelectric start push buttonto
start engine. If the engine fails to start
with 5 seconds, release the buttonand
wait at least 5 seconds before attempting
to start engineagain.
Step 4: Turn circuit breaker at ON position.

17
Start Engine
Notice
If your engine is starting, do an inspection on
the top cooling fan, and ensure it is operating.
Otherwise, you should stop the engine.
If the engine starts but does not run, make certain that the generator is on a flat, level surface. The
engineis equippedwith a low oil sensor that will prevent the enginefrom running when the oil level
falls below a critical threshold.
Notice
1. This generator musthave at least 5 feet (about 1.5 meters) of clearance from combustible
material.
2. Leave at least 3 feet (about 1 meter) of clearance on all side of thegenerator to allow for
adequatecooling, maintenanceand servicing.
3. Place the generator in a well-ventilated area.
4. DO NOT place the generator near vents or intakes.
Caution
!
!
!

Use Generator
1. Limit operation requiring maximum power to 30 minutes.
2. For continuousoperation, DO NOT exceed therated power. Recommendcontinuousrunning
time is not more than 8 hourswithout stop.
3. DO NOT exceed the current limit specified for any one receptacle.
4. Connection for emergency power to household circuit must be made by a qualified electrician
and must comply with all applicable laws and electrical codes.
5. Improperinstallation may result in personal injury or damageto equipmentor property.
6. Be sure that appliances DO NOT exceed the rated load for more than 30 minutes,and never
exceed themaximum load. Substantialoverloading will switch off the circuit breaker. Lesser
overloading will not switch off the circuit breaker and will shorten the service life of the generator.
Caution
!
1. If the power outputreduces when in on-load status, adjust by closing the choke valve
gradually till the desired result.
2. Appliances / Equipmentsdrawing highercurrent should be switched on firstly. Wattagewould
differ amongst different brands. Hence, kindly check the same before use.
Notice
AC application
!
18
Step 1:
Connect AC
plug to socket.
Step 2:
Turn circuit
breaker to ON.

1. For 18AH/15AHstorage battery: charge electricity not more than 2 hours
2. For 9AH storage battery: charge electricity not more than 1 hour
Notice
Use Generator
DC application
1. The DC output(12V, 8.3A)can be used to charge 12Vaccumulative battery. ConnectDC
output(+)with battery positive, ConnectDC output(-) with battery negative.
2. DO NOT attemptto start an automobile engine with the generator still connect to the battery.
The generator may be damaged.
3. DO NOT reverse the charging cables, or serious damage to the generator and / or battery
may occur.
Caution
!
Battery producesexplosive gases. Keep sparks, flames, and cigarettes away. To prevent
the possibility of creating a spark near the battery, connect chargingcables first to the
battery, then to the generator, and disconnectcables first at the generator.
Warning
!
!
Charge battery:
Red, positive (+)
Black, negative (-)
Storage
battery
Warning
!
Do not connect DC outputto generator battery,
Otherwise, there will be serious alternator damage
and other potentialaccidents.
1. Make sure correct connection of battery for positive (+) and negative (-).
2. Battery needs maintenancefor every 6months.Wesuggestto charge storage battery by
special battery charger.
Battery type Charger outputampere Charger outputvoltage
15AH 0.9A 13.5~ 14.8V
Battery Maintenance
19
Table of contents
Other Beem Portable Generator manuals
Popular Portable Generator manuals by other brands
Doosan
Doosan G400-SIIIA Operation & maintenance manual

Harbor Freight Tools
Harbor Freight Tools PREDATOR 59134 Owner's manual & safety instructions
Champion Global Power Equipment
Champion Global Power Equipment 100396 Operator's manual
SDMO
SDMO HX 4000 Generating set user and maintenance manual
Elgar
Elgar 251B instruction manual
Winco
Winco W3000H Installation and operator's manual
