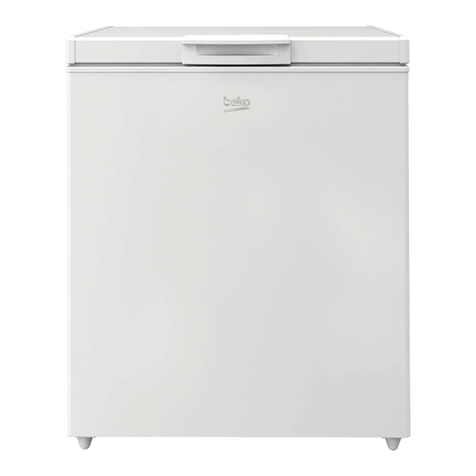
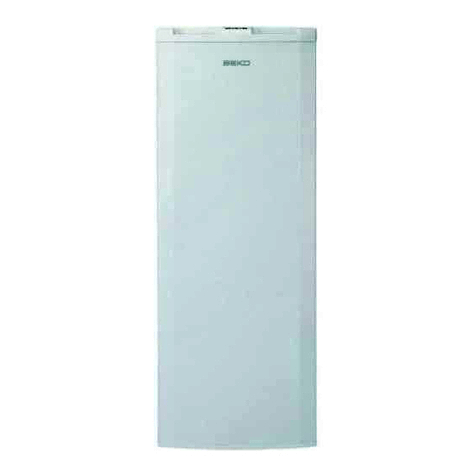
Beko CS5824W User manual

CS5824W
CS5824B
EN
Fridge/Freezer
Usermanual

Please read this manual first!
DearCustomer,
Wehopethatyourproduct, which has been producedin a1st-class
manufacturingfacility and checkedunderthemostmeticulousqualitycontrol
procedures,willprovideyouwithyearsofgoodservice.
Forthis,werecommendyouto carefully readtheentire manual ofyour
product beforeusingitandkeep it athandforfuturereference.
This manual
• Willhelpyouuseyourappliancequicklyandsafely.
• Readthemanualbeforeinstallingandoperatingyourproduct.
• Followtheinstructions,especiallythoseforsafety.
• Keepthemanualinaneasilyaccessibleplaceasyoumayneeditlater.
• Besides,readalsotheotherdocumentsprovidedwithyourproduct.
Pleasenote thatthismanualmaybevalidforothermodelsaswell.
Symbols and their descriptions
Thisinstructionmanualcontains the followingsymbols:
CImportantinformationorusefulusagetips.
AWarningagainstdangerousconditionsforlifeandproperty.
BWarningagainstelectricvoltage.

EN
2
1 Your refrigerator 3
2 Warnings 4
Electricalrequirements...........................6
Warning! This appliancemustbe
earthed..........................................................6
Energy savingtips.....................................7
Compliance with WEEE Directive and
Disposingofthe Waste Product: .......8
Compliance with rohsdirective:.........8
Package information................................9
3 Installation 10
TransportationInstructions................10
Important....................................................10
InstallationInstructions.......................10
Changingtheilluminationlamp .......12
ReversingTheDoors.............................13
Reversingthedoors...............................15
4 Before operating 16
FinalCheck.................................................16
5 Using your refrigerator 17
TemperatureControlAnd
Adjustment................................................17
Thermostatsettingbutton.................17
SuggestedArrangementOfFoodIn
TheFridge/Freezer.................................18
FreezingFresh Food...............................19
MakingIceCubes.....................................19
Defrosting.................................................20
Chillerzone.................................................21
6 Maintenance and
cleaning 22
7 Do's and Don'ts 23
Problem Solvıng......................................24
8 Guarantee Details 25
9 How To Obtain Service 26

EN
3
1Your refrigerator
Congratulations on your choice of a Beko quality Appliance which has been
designedtogive youserviceformanyyears.
CFiguresthattakeplaceinthisinstructionmanualareschematicandmaynot
correspondexactlywithyourproduct.Ifthesubjectpartsarenotincludedinthe
productyouhavepurchased,thenitisvalidforothermodels.
1. Temperaturesettingcontrol
2. Cabinetshelves
3. Defrostwatercollectionchannel
4. Saladcrisper
5. Icebank
6. Fastfreeze compartment
7. Frozenfoodstoragedrawers
8. Adjustablefeet
9. Dairycompartment
10. Eggtray
11. Doorshelves
12. ChillerZone
13. Fridge compartment
14. Freezercompartment
9
13
12
11
10
14
5
2
3
4
6
7
8

EN
4
2Warnings
• Donotconnectyour
appliancetothe
electricitysupplyuntil
allpackingandtransit
protectorshavebeen
removed.
• Iftransported
horizontallyleaveto
standuprightforat
least4hoursbefore
switchingontoallow
compressoroiltosettle
• Ifyouarediscardingan
oldrefrigeratorwitha
lockorlatchfittedtothe
door,disablethelock/
latch,ensurethatitis
leftinasafeconditionto
preventtheentrapment
ofyoungchildren.
• Thisfridge/freezer
mustonlybeusedforits
intendedpurposei.ethe
storingandfreezingof
ediblefoodstuff.
• Donotdisposeofthe
applianceonafire.
AtBeko,thecare
andprotectionofour
environmentisan
ongoingcommitment.
Thisappliancewhichis
amongthelatestrange
introducedisparticularly
environmentfriendly.
Yourappliance
contains nonCFC/HFC
naturalsubstances
inthecoolingsystem
(CalledR600a)and
intheinsulation
(Calledcyclopentane)
whicharepotentially
flammableifexposed
tofire.Therefore,take
carenottodamage,
thecoolingcircuit /
pipesoftheappliance
intransportation
andinuse.Incaseof
damagedonotexpose
theappliancetofire
orpotentialignition
sourceandimmediately
ventilatetheroom
wheretheapplianceis
situated.
• Wesuggestyoucontact
yourlocalauthorityfor
disposalinformation
andfacilitiesavailable.
• SeeInstallation
Instructionsonpage
11forinformationon
suitablelocation.

EN
5
• Toobtainthebest
possibleperformance
andtroublefree
operationfromyour
applianceitisvery
importanttocarefully
readtheseinstructions.
• Ondelivery,checkto
makesurethatthe
productisnotdamaged
andthatalltheparts
andaccessoriesarein
perfectcondition.
• Ensurethatthe
plugremainsreadily
accessible.Donotuse
multipleadapteror
extensioncable.
• Failuretoobserve
theseinstructionsmay
invalidateyourrightto
freeserviceduringthe
guaranteeperiod.
• Keepventilation
openings,inthe
applianceenclosureor
inthebuilt-instructure,
clearofobstruction.
• Donotusemechanical
devicesorothermeans
toacceleratethe
defrostingprocess,
otherthanthose
recommendedbythe
manufacturer.
• Donotdamagethe
refrigerantcircuit.
• Donotuseelectrical
appliancesinside
thefoodstorage
compartmentsof
theappliance,unless
theyareofthetype
recommendedbythe
manufacturer.
• Wesuggestyoukeep
theseinstructionsin
asafeplaceforeasy
reference.
• Thisappliancecan
beusedbychildren
agedfrom8yearsand
aboveandpersons
withreducedphysical,
sensoryormental
capabilitiesorlack
ofexperienceand
knowledgeiftheyhave
beengivensupervision
orinstruction
concerninguseofthe
applianceinasafe
wayandunderstand
thehazardsinvolved.
Childrenshallnotplay
withtheappliance.
Cleaninganduser
maintenanceshallnot
bemadebychildren
withoutsupervision.

EN
6
• Childrenshouldbe
supervisedtoensure
thattheydonotplay
withtheappliance.
Electrical
requirements
Before you insert
the plug into the wall
socket make sure that
the voltage and the
frequency shown on the
rating plate inside the
appliance corresponds to
yourelectricitysupply.
Ratinglabelisontheleft
hand side of fridge inner
liner.
Werecommendthatthis
appliance be connected
to the mains supply
via a suitable switched
and fused socket. The
appliance must be
positioned so that the
plugis accessible.
WARNING:
When positioning the
appliance ensure the
supplycordisnottrapped
ordamaged.
Should the mains lead
of the appliance become
damaged or should it
need replacing at any
time, it must be replaced
by a special purpose
made mains lead which
can only be obtained
from a Beko authorised
service agent.
Warning! This
appliance must be
earthed
If the fitted moulded
plug is not suitable for
your socket, then the
plug should be cut off
and an appropriate plug
fitted. Destroy the old
plug which is cut off as
a plug with bared cord
could cause a shock
hazard if inserted into a
socket elsewhere in the
house.
Themouldedplugonthis
appliance incorporates
a 13 A fuse. Should the
fuse need to be replaced
an ASTABEAB approved
BS1362fuseofthesame
rating must be used. Do
not forget to refit the
fusecover.Intheeventof
losing the fuse cover the
plug must not be used
until a replacement fuse
coverhas beenfitted.

EN
7
FITTED WITH
BS 1362 13A FUSE ALWAYS
FIT BS 1362 REPLACEMENT
CARTRIDGE FUSE
GREEN &
YELLOW
OR
GREEN
N
BLUE
OR
BLACK
L
BROWN
OR
RED
22mm.
6mm.
6mm.
6mm. 32mm.
12mm.
FUSE
CORD GRIP
Colour of the
replacement fuse cover
must be the same colour
as that visible on the pin
face of the plug. Fuse
covers are available from
anygoodelectrical store.
Important! Fitting A
Different Plug
1.Asthecoloursofthe
wiresinthemains
leadofthisappliance
maynotcorrespond
withthecoloured
markingsidentifyingthe
terminalsinyourplug
proceedasfollows:(See
diagram).
2.Connectthegreen-
yelloworgreen(Earth)
wiretotheterminal
intheplugmarked‘E’
orwiththesymbol
orcolouredgreenand
yelloworgreen.
3.Connecttheblue
(Neutral)wiretothe
terminalintheplug
marked‘N’orcoloured
black.
4.Connectthebrown
(Live)wiretothe
terminalintheplug
marked‘L’orcoloured
red.
5.Withalternativeplugsa
13Afusemustbefitted
eitherintheplugor
adaptororinthemain
fusebox.Ifindoubt
contactaqualified
electrician.
Energy saving tips
1.Ensureyourappliance
isinstalledinawell
ventilatedarea.
2.Ensurethetime
betweenbuyingchilled/
frozenfoodandplacing
theminyourappliance
iskeptatminimum,
particularlyinsummer.
Werecommendyouuse
acoolbagoraspecial
carrierbagtocarry
perishablefood.

EN
8
3.Donotleavethedoor(s)
ofyourapplianceopen
longerthannecessary
andensuretheyare
closedproperlyafter
eachopening.
4.Defrostfrozen
foodinthefridge
compartment,sothat
frozenfoodactsasan
icepacktoassistcooling
inthefridge.
5.Energyconsumption
ofthisapplianceis
measuredwhilefreezer
compartmentisloaded
withoutuseoftopshelf
lidandthedrawers
exceptthebottom
drawer.Itisadvisedthat
freezercompartment
isloadedwithoutuse
ofdrawersexceptthe
bottomdrawerinorder
toachievemaximum
loadingcapacity.
Compliance with
WEEE Directive and
Disposing of the
Waste Product:
Thisproduct
complies withEU
WEEEDirective
(2012/19/EU).
Thisproductbears a
classification symbol for
wasteelectrical and
electronicequipment
(WEEE).Thisproducthas
beenmanufacturedwith
highquality partsand
materialswhich canbe
reusedandare suitable
forrecycling.Donot
disposeofthewaste
productwithnormal
domesticand other
wastesattheendofits
service life.Takeit tothe
collection centerforthe
recyclingofelectricaland
electronicequipment.
Pleaseconsultyourlocal
authoritiestolearn
aboutthese collection
centers.
Compliance with rohs
directive:
Theproductyouhave
purchasedcomplies
withEU RoHSDirective
(2011/65/EU).It does
not containharmfuland
prohibitedmaterials
specifiedin theDirective.

EN
9
Package information
Packagingmaterials
of theproductare
manufacturedfrom
recyclablematerialsin
accordancewith our
National Environment
Regulations.Do not
disposeofthepackaging
materialstogether
withthe domesticor
other wastes.Take
themtothe packaging
materialcollectionpoints
designatedbythelocal
authorities.

EN
10
3Installation
Transportation
Instructions
1. Theapplianceshould be
transported only in a verticalupright
position.Thepackingassupplied
mustbeintactduring transportation.
2. Ifduringthecourseof
transporttheappliance has tobe
transported horizontally, it must only
belaidonitsrighthand side when
standinginthefrontoftheappliance.
Afterbringingittouprightposition,it
mustnotbe operatedforatleast4
hourstoallow the systemtosettle.
3. Failuretocomply with the
above instructions couldresult in
damageoccuringtotheappliance.
Themanufacturerwillnotbeheld
responsible if these instructions are
disregarded.
4. Theappliancemust be
protectedagainstrain,moistureand
otheratmosphericinfluences.
5. Whenpositioningyour
appliancetakecarenottodamage
yourflooring, pipes,wall coverings
etc. Do notmove the applianceby
pullingbythe door or handle.
6. Emptyanywaterinthedrain
tray beforemoving.See section
‘Defrosting’and‘Care&cleaning’for
furtherinformation.
7. Makesurethatthedefrost
waterpipeatthe back oftheproduct
isfixed totheplasticevaporatingpan
onthetopof the compressor, toavoid
defrostwaterspillageonthefloor.
Important :
Care must be taken while cleaning
/ carrying the appliance to avoid
touchingthebottomofthecondenser
metal wires at the back of the
appliance as you might injure your
fingersandhands.
Do not attempt to sit or stand on top
of your appliance as it is not designed
for such use. You could injure yourself
ordamagetheappliance.
Important :
Make sure that mans cable s not
caughtundertheapplancedurngand
after carryng / movng the applance,
toavodthe manscablebecomngcut
ordamaged.”
Important :
Ths applance s not desgned for
stackng wth any other applance.
When postonng your applance,
takecarenottodamage yourfloorng,
ppes,wallcoverngs etc.
Do not allow chldren to play wth
the applance or tamper wth the
controls. Beko declnes to accept any
lablty should the nstructons not be
followed.
Important
Installation Instructions
1. Thespacein the roomwhere
theapplianceis installed must notbe
smallerthan10cubicmetres.
2. Donotput yourfridgefreezer
inacoldroomwhere the temperature
islikelytogobelow+5degrees C
(41degrees F) during nighttime
and/orespeciallyinwinter.This
fridgefreezerhasbeendesignedto

EN
11
operateinambienttemperatures
between +5 and +32 degreesC(41
and90degrees F) Thereforeif the
applianceis installed in an unheated/
coldroom(eg:conservatory/annex/
shed/garageetc)thentheappliance
willnotoperatecausingthefreezer
compartment torunwarmerand as a
result the storagetimeoffrozen food
3. Donotplacetheappliancenear
cookers, radiators or in directsunlight
asthiswillcauseyourappliance
tousemoreelectricityIfinstalled
nexttoa source ofheat orfreezer,
maintainthe following minimum side
clearances:
FromCookers 50mm(2”)
FromRadiators 300mm(12”)
FromFreezers 25mm(1”)
4. Makesurethatsufficientroom
isprovidedaroundthe applianceto
ensure freeaircirculation.Fitthetwo
plasticwallspacerssuppliedwiththe
applianceontothecondenser on the
backofthe appliancebyrotating1/4
turn(SeeDiagram).
5. Thefridge/freezershould
belocated on a smoothsurface.
Thetwofrontfeet canbe adjusted
asrequired.To ensurethatyour
applianceis standing uprightadjust
thetwofrontfeetbyturning
clockwiseoranti-clockwise,until
theproduct is in firm contactwith
thefloor.Correctadjustment offeet
avoids excessivevibration and noise.
6. Refertocleaningandcare
sectiontoprepareyourappliancefor
use.
7. Aspecialreceptacleissupplied
tostorethemainsplugduringtransit.
8. Thereceptacleisfixedatthe
backofthe cabinet,onthesideof
thecompressor.(Seediagram)Gently
removetheplugfrom the receptacle.
Never pull the mains cord, youmay
damagetheappliance.In the case
oftransportation,ensure youlocate
thepluginthereceptacleprovidedto
avoid transitdamage.
WARNING:
Do not locate extension sockets
or charging transformers/power
supplies or Lithium-Iron battery
operated products adjacent to the
compressorastheycouldoverheat.

EN
12
Changing the illumination
lamp
To change the Bulb/LED used for
illumination of your refrigerator, call
yourAuthorisedService.
The lamp(s) used in this appliance
is not suitable for household room
illumination. The intended purpose of
this lamp is to assist the user to place
foodstuffs in the refrigerator/freezer
inasafeandcomfortableway.

EN
13
Reversing The Doors
We recommend that you reverse
doorsbefore switchingonforthe first
time.
Toolsrequired:Smallandmediumsize
flat and cross-headed screwdrivers, a
pairofpliers.
Spare Parts supplied in the plastic
bag: The following parts, which are
exclusively for left hand side fitted
hinge operation are supplied in a
plasticbagwiththeappliance:
- Upper door top trim hinge covers
– there are 2 different parts, one for
eachsideoftoptrim.
- Upper door middle hinge bushing/
doorstopperassembly.
We suggest you keep all the parts
supplied in the plastic bag and also
parts, which have been removed
when reversing doors, in a safe place
forpossiblefuture,re-use.
IMPORTANT:
We suggest you ask somebody to
help you when moving the appliance
around and to hold doors when
removing/re-fitting hingesanddoors
to avoid any injury and damage to the
product.
Please refer to diagrams supplied.
To follow numbers in brackets below,
refer tothemaindiagram.
1. Switchofftheappliance atthe
socket outletandpulloutthemains
plug.
2. Removealllooseitemsand
fittingsandfood,ifany, frominside
theapplianceand door racks.
3. Gentlyprise offplastichinge
coverofupper door toptrimand
hingecoversonbothsides offront
toppanelusingasmallflat-headed
screwdriver. (1)
4. Gentlytilt the applianceback
againstastrong wallonitsrearside
sufficientlytoallowthelower hinge
toberemoved.Takecare toprotect
theappliance,yourwallandfloor
coverings.You can utilise the original
packagingtodo this. Onceyoutilt the
applianceback, check tomakesure
theapplianceis completely stable and
safebefore youcarryon.(2)
5. Unscrew and removethe
lower hinge using a cross-headed
screwdriverwhileholdingthelower
doorfirmly.(3)
6. Removelowerdoor carefully
offthe middle hinge and stand door
uprightin a safeplace.(4)
7. Openupperdoorandunscrew
andremovethemiddlehingewhile
holdingtheupperdoorfirmly.Usea
flat-headedscrewdriver.Middlehinge
willneedtoberotated180degrees
before re-fittingon the oppositeside.
(5)
8. Removeupperdoorcarefully
offthe upper hinge and stand door
uprightin a safeplace.(6)
9. Unscrew and removethe
upperhingeusingaflat-headed
screwdriver.(7)
10. Rotatetheupperhinge180
degrees and then unscrewand
removethehingepinusingapairof
pliersandre-fit tooppositesideof
hinge.(8)
11. Repositionplugsandhinge
pinbushingsontopof doors on the
oppositesideof bothdoors.Usesmall
flatheadedscrewdriverstoremove
plugsandbushings.Takecare notto
markdoors.(9)

EN
14
12. Repositionleft hand side feet
ontheoppositeside.(10)
Unscrew and remove the bottom
door hinge pin bushing/door
stopper using a cross-headed
screwdriver. (11)Unscrew and
remove the upper door middle
hinge pin bushing/door stopper
using a cross-headed screwdriver.
IMPORTANT:Thispartcannotbe
usedontheoppositeside;left hand
sidemiddlehingepinbushing/door
stopperpartissuppliedintheplastic
bag.(11)
13. Re-fittheupperhingeonthe
lefthand side using flat-headed
screwdriver.(12)
14. Fitupperdoorlefthand side
middlehingepinbushing/door
stoppersuppliedintheplasticbag
usingcross-headed screwdriver.(13)
15. Repositionthreesmallplastic
plugsonthelefthand side, which are
coveringmiddlehingeholes,onthe
oppositesideto cover holes left
empty.(14)
16. Locateandre-fit upper door to
upperhingeandholdthedoorfirmly.
(15)
17. Locatethemiddlehingepin
tomiddlehingepinbushingof upper
dooronthelefthand side and re-fit
the middlehinge.(16)First fit the
leftscrewwhen the door is closed
andthenfittherightscrewafter
openingthedoor foraccess.
18. Repositionthescrewfittedto
lowerhingeholeonthelefthand side
atthe bottomof the cabinetonthe
oppositeside.(17)
19. Locateandre-fit lowerdoor
tomiddlehingepinandthenre-fit
thelower hinge on the lefthandside.
(18),(19)
20. Carefullystandtheappliance
uprightand adjust the twofront feet
ifnecessary.
21. Checkthatdoors open and
closeeasily, they arealignedcorrectly
andthatthereare no gaps allowing
irinto the cabinet.Ifthere aregaps
between the door seal and the
cabinet,adjust the door seal bygently
pullingawayfrom the door using
fingers.
22. Checkthatall the hinge screws
are tightened.Avoidovertightening
thescrews.
23. Putallitems,fittingsbackin
theappliance.
24. Fitupperdoortoptrimand
fronttoppanelplastichingecovers.
Upperdoortoptrimhingecoversare
suppliedintheplasticbag.(20)
25. Wait for atleast4hoursto
allowthesystemtosettlebefore
switchingon.
26. Oncethe correctstorage
temperatureshave been reachedin
theappliance,put back all the food.
Using the screws and plastic plugs
supplied in the installation kit inside
the fridge, fit handles to the desired
side(seediagramP12forlocations)

EN
15
1
17
1
20
11
13 9
6
2
10
5
14
3
20
20
8
12
18
16
17
19
180°
(8) (13)
45°
15
4
Reversing the doors
Proceedinnumericalorder

EN
16
4Before operating
Final Check
Before you start using the fridge/
freezercheckthat:
1. Thefeethavebeenadjusted
forperfect levelling.
2. Theinterior is dry and air can
circulatefreely attherear ofthe
cabinet.
3. Cleantheinterior as
recommendedunder“CLEANINGAND
CARE.”
4. Insertthepluginto the wall
socket and switchontheelectricity
supply.
5. Whenthedoorisopenthe
fridgeinterior lightwillcomeon.
6. You will hear a noise as the
compressorstartsup.Theliquidand
gasessealedwithintherefrigeration
systemmayalsogive rise tonoise,
whetherthe compressorisrunning
ornotwhich is quitenormal.“Due
tooperationofthefan inside the
frost freefreezercompartment,
overallnoiselevel is slightlyhigher
incomparisontonon-frostfree
appliances.This is quitenormalandis
nota fault.”
7. Setthe settinghalfway
between min and max.
8. Front edges ofthecabinetmay
feelwarm.Thisisnormal.Theseareas
are designed tobewarmtoavoid
condensation.
9. “Donotload the appliance
immediately it is switchedon.Wait
untilthe correctstorage temperature
hasbeenreached. Werecommend
thatyoucheckthetemperature
withanaccuratethermometer
(see;TemperatureControland
Adjustment)”
10. Whenthefreezerreaches the
desired temperature the freezer fan
willstop.Whenthefreezerfanison,
thenoisewillbelouderwhenthe
freezerdoorisopened.
11. Avoidspillageoffood
particularlysmallitemslike rice,
peas,beansthrough the fanguardas
theymay cause the coolingsystem
toblockandtherefore operateless
efficiently.

EN
17
5 Using your refrigerator
Temperature Control And
Adjustment
Theoperating temperatureis
regulatedby the temperature control.
Warm Cold
1 2 3 4 5
(Or) Min. Max.
1=Lowest cooling setting
(Warmest setting).
5=Highest cooling setting
(Coldest setting).
The average temperature inside the
fridgeshouldbearound +5°C.
Please choose the setting according
tothedesiredtemperature.
Please note that there will be
different temperatures in the cooling
area.
The coldest region is immediately
above the vegetablecompartment.
The interior temperature also
depends on ambient temperature,
the frequency with which the door is
opened and the amount of foods kept
inside.
Frequently opening the door causes
theinterior temperaturetorise.
For this reason, it is recommended
to close the door again as soon as
possibleafteruse.
Thermostat setting button
The interior temperature of your
refrigerator changes for the following
reasons;
• Seasonaltemperatures,
• Frequentopeningofthedoorand
leavingthedooropenforlong
periods,
• Foodputintotherefrigerator
withoutcoolingdowntotheroom
temperature,
• Thelocationoftherefrigeratorin
theroom(e.g.exposingtosunlight).
• Youmayadjustthevaryinginterior
temperatureduetosuchreasons
byusingthethermostat.Numbers
aroundthethermostatbutton
indicatesthecoolingdegrees.
• Iftheambienttemperatureishigher
than25°C,turnthethermostat
buttontomaximumposition.
• Iftheambienttemperatureislower
than25°C,turnthethermostat
buttontominimumposition.

EN
18
Suggested Arrangement
Of Food In The Fridge/
Freezer
2. Thefreezercompartment
is ratedandsuitablefor
thefreezing offreshfoodand
storage ofpre-frozen food.The
recommendation for storage
asstated on the foodpackaging
shouldbeobservedat all times.
3. Cooked dishes must be stored
inairtightcoveredcontainers.
4. Freshwrapped producecanbe
placedon the shelf. Freshfruitand
vegetables should be cleaned and
storedinthecrisperbins.
5. Bottlescan be placedinthe
doorsection.
6. To storerawmeat,wrapin
polythenebagsandplaceon the
lowestshelf.Donot allowtocome
into contactwith cookedfoodtoavoid
contamination.Forsafety,onlystore
rawmeatfortwotothreedays.
7. Keepthefood packedwrapped
orcovered. Allowhotfoodand
beveragestocoolbeforeplacingthem
inthefridge.Donotstoreexplosive
substances.High proofalcohol
mustbestoreduprightinsealed
containers. Leftover canned food
shouldnotbe storedin the can.
8. Fizzydrinksshouldnotbe
frozen and productssuchasflavoured
watericesshould notbeconsumed
toocold.
9. Somefruitandvegetables
sufferdamageifkept at
temperaturesnear0°C.Therefore
wrappineapples,melons,cucumbers,
tomatoesandsimilarproducein
polythenebags.
10. Placechilled cookedfoodand
similarfoodneartherearofthe
fridgeinnerlinerwhere the coldwall
islocated.
Arrangement Examples (See
dagram)
1. Baked,chilled cookedfood,
dairyproducts, cans.
2. Meat,sausages, coldcuts.
3. Fruit, vegetables,salads.
4. Making,storingice cubes.
5. Frozenfood.
6. Frozenfoodandfreezing of
fresh food.
7. Butter,cheese.
8. Smallbottles,cans, tubes.
9. Eggs.
10. Tall/Large bottles.
The followng gudelnes and
recommendatons are suggested to
obtan the best results and storage
hygene.
1. Thefridgecompartment is for
theshorttermstorageoffresh food
anddrinks.
10
7
1
3
4
6
9
2
8
5

EN
19
11. Shelves,racks, crisper bins,
drawers, flaps, bottlegrippersare all
removable.
12. Donotleavefrozenfood at
room temperature tothaw;thebest
waytodefrost foodis toputitinthe
fridgetothawslowly.Make sureyou
avoid defrosting foodor foodjuices
driponto otherfood.
13. Forhygienereasons, always
wrapfoodusingasuitablepackaging
material beforestoringinyour
appliancetoavoid contactwiththe
appliancesurface.
14. StoringFrozenFood
15. Prepackedcommerciallyfrozen
foodshouldbestored in accordance
withthefrozen foodmanufacturer’s
instructionsfora frozenfood
storage compartment.
16. To ensurethat the high
qualityachieved bythefrozen food
manufacturerandthefood retailer is
maintained,the following should be
remembered:
17. Putpackets in the freezeras
quicklyaspossibleafterpurchase.
18. Ensure thatcontentsare
labelledanddated.
19. Donotexceed “Use By”,“Best
Before” dateson the packaging.If
there is a powerfailuredonotopen
thedoor.Frozen foodshould notbe
affectedifthefailure lasts forless
than18hrs. If the failureislonger,
thenthefoodshouldbecheckedand
eithereaten immediatelyorcooked
andthenre-frozen.
Freezing Fresh Food
Please observe the followng
nstructonstoobtanthebestresults.
Do not freeze too large a quantty at
any one tme. The qualty of the food
s best preserved when t s frozen
rght through to the core as quckly as
possble.
Do not exceed the freezng capacty
of your applance n 24 h whch s 4 kg
(8.8lb)
Placng warm food nto the freezer
compartmentcausestherefrgeraton
compressor to operate contnuously
untl the food s frozen sold. Ths can
temporarly lead to excessve coolng
ofthe refrgeraton compartment.
When freezng fresh food turn the
control toward MAX. Small quanttes
of food up to 1/2 kg. (1 lb) can be
frozen wthout havng to rotate the
temperaturecontrol.
Youmayplacefreshfoodtobefrozen
nanypartof the freezer.
Take specal care not to mx already
frozen foodand freshfood.
Making Ice Cubes
Fll the ce - cube tray 3/4 full wth
water and place t n the Ice Bank.
Loosen frozen trays wth the handle
of a spoon, never use sharp edged
objects such as knves, forks. Store
ce-cubesn the IceBank.
Note: If freshly made ce cubes are
not consumed for several weeks
and stored n Ice Bank, they wll
slowly reduce n sze and eventually
dsappearcompletely.
This manual suits for next models
1
Table of contents
Other Beko Freezer manuals

Beko
Beko RFNE290L21W User manual

Beko
Beko CSK34000 User manual

Beko
Beko RFNE200E20W User manual

Beko
Beko FSA 21320 X User manual

Beko
Beko CDA751F User manual

Beko
Beko CSTM3546W User manual

Beko
Beko B3RFNE314XB User manual

Beko
Beko BVF404W User manual

Beko
Beko HSA47520F Instruction Manual

Beko
Beko UFC524W User manual

Beko
Beko HSA47530N Instruction Manual

Beko
Beko BFFD1577 Instruction Manual

Beko
Beko RCNA420SX User manual

Beko
Beko FNP4686PS User manual

Beko
Beko FNE312E41WN User manual

Beko
Beko LBI 2201 User manual

Beko
Beko HS221520 Instruction Manual

Beko
Beko CF300 User manual

Beko
Beko CDA660F User manual

Beko
Beko RCNA400E40ZXP User manual