Beko BFR569DDX User manual

BFR569DDX - BFR575PX
EN /
57 8374 0000/AU -EN
Refrigerator
User Manual

Dear Customer,
Please read this manual before using the product.
Thank you for choosing this product. We would like you to achieve the optimal efficiency
from this high quality product which has been manufactured with state of the art technol-
ogy. To do this, carefully read this manual and any other documentation provided before
using the product and keep it as a reference.
Heed all information and warnings in the user manual. This way, you will protect yourself
and your product against the dangers that may occur.
Keep the user manual. Include this guide with the unit if you hand it over to someone else.
The following symbols are used in the user guide:
Hazard that may result in death or injury.
NOTICE A hazard that may cause material damage to the product or its
surroundings
Important information or useful tips on operation.
Read the user manual.
Risk of fire / Flammable materials

2 / 28 EN Refrigerator / User Manual
1. Safety and environment instructions3
2 Your Refrigerator 6
3 Installation 7
3.1 Appropriate location for installation . . . . . . . .7
3.2 Installing the plastic wedges . . . . . . . . . . . . .7
3.3* Adjusting the feet . . . . . . . . . . . . . . . . . . . .8
3.4 Electric connection . . . . . . . . . . . . . . . . . . . .9
4 Preparation 11
4.1 Things to be done for saving energy . . . . .11
4.2 Recommendations about the fresh food
compartment. . . . . . . . . . . . . . . . . . . . . .11
4.3 Initial use. . . . . . . . . . . . . . . . . . . . . . . . .11
5 Operating the product 13
5.1 Indicator panel . . . . . . . . . . . . . . . . . . . . . .13
5.2 Indicator panel. . . . . . . . . . . . . . . . . . . . .17
5.3 Freezing fresh food. . . . . . . . . . . . . . . . . . .20
5.4 Recommendations for preserving the frozen
food . . . . . . . . . . . . . . . . . . . . . . . . . . . .20
5.5 Deep-freeze information . . . . . . . . . . . . . . .20
5.6 Placing the food . . . . . . . . . . . . . . . . . . . . .21
5.7 Door open warning . . . . . . . . . . . . . . . . . . .21
5.8 Frost Free Chill compartment . . . . . . . . . . .21
5.9 The dairy (cold storage) compartment . . . . .21
5.10 Crisper. . . . . . . . . . . . . . . . . . . . . . . . . . .21
5.11 Humidity-controlled crisper . . . . . . . . . . . .21
Everfresh+(R) . . . . . . . . . . . . . . . . . . . . . . . . . .21
5.12 Egg tray . . . . . . . . . . . . . . . . . . . . . . . . . .22
5.13 Movable Middle Section . . . . . . . . . . . . . .22
5.14 Blue light . . . . . . . . . . . . . . . . . . . . . . . . .22
5.15 Odour filter. . . . . . . . . . . . . . . . . . . . . . . .22
5.16 Use of internal water dispenser and water
dispenser at the door . . . . . . . . . . . . . . . .23
5.17 Dispensing water . . . . . . . . . . . . . . . . . . .23
5.18 Maintaining water dispenser . . . . . . . . . . .24
5.19 Icematic . . . . . . . . . . . . . . . . . . . . . . . . .25
5.20 Icematic and ice storage container . . . . . .25
6 Maintenance and Cleaning 26
7. Troubleshooting 27

3 / 28 EN Refrigerator / User Manual
1. Safety and environment instructions
This section provides the safety instructions
necessary to prevent the risk of injury and material
damage. Failure to observe these instructions will
invalidate all types of product warranty.
Intended use
AWARNING:
Keep ventilation openings, in the
appliance enclosure or in the built-
in structure, clear of obstruction.
A
WARNING:
Do not use mechanical
devices or other means to
accelerate the defrosting process,
other than those recommended by
the manufacturer.
AWARNING:
Do not damage the refrigerant
circuit.
A
WARNING:
Do not use electrical
appliances inside the food
storage compartments of the
appliance, unless they are of
the type recommended by the
manufacturer.
This appliance is intended to be used in household
and similar applications such as
– staff kitchen areas in shops, offices and other
working environments;
– farm houses and by clients in hotels, motels and
other residential type environments;
– bed and breakfast type environments;
– catering and similar non-retail applications.
1.1. General safety
• This product should not be used by persons
with physical, sensory and mental disabilities,
without sufficient knowledge and experience
or by children. The device can only be used by
such persons under supervision and instruction
of a person responsible for their safety.
Children should not be allowed to play with this
device.
• In case of malfunction, unplug the device.
• After unplugging, wait at least 5 minutes before
plugging in again.
• Unplug the product when not in use.
• Do not touch the plug with wet hands! Do not
pull the cable to plug off, always hold the plug.
• Do not plug in the refrigerator if the socket is
loose.
• Unplug the product during installation,
maintenance, cleaning and repair.
• If the product will not be used for a while,
unplug the product and remove any food inside.
• Do not use the product when the compartment
with circuit cards located on the upper back
part of the product (electrical card box cover)
(1) is open.
1
1
• Do not use steam or steam cleaning materials
for cleaning the refrigerator and melting the ice
inside. Steam may contact the electrified areas
and cause short circuit or electric shock!
• Do not wash the product by spraying or pouring
water on it! Danger of electric shock!
• In case of malfunction, do not use the product,
as it may cause electric shock. Contact an
authorised service agent before doing anything.
• Plug the product into an earthed socket.
Earthing must be done by a qualified
electrician.

4 / 28 EN Refrigerator / User Manual
Important instructions regarding safety and environment
• If the product has LED type lighting, contact and
authorised service agent for replacing or in case
of any problem.
• Do not touch frozen food with wet hands! It may
adhere to your hands!
• Do not place liquids in bottles and cans into the
freezer compartment. They may explode.
• Place liquids in upright position after tightly
closing the lid.
• Do not spray flammable substances near the
product, as it may burn or explode.
• Do not keep flammable materials and products
with flammable gas (sprays, etc.) in the
refrigerator.
• Do not place containers holding liquids on top
of the product. Splashing water on an electrified
part may cause electric shock and risk of fire.
• Exposing the product to rain, snow, sunlight
and wind will cause electrical danger. When
relocating the product, do not pull by holding the
door handle. The handle may come off.
• Take care to avoid trapping any part of your
hands or body in any of the moving parts inside
the product.
• Do not step or lean on the door, drawers and
similar parts of the refrigerator. This will cause
the product to fall down and cause damage to
the parts.
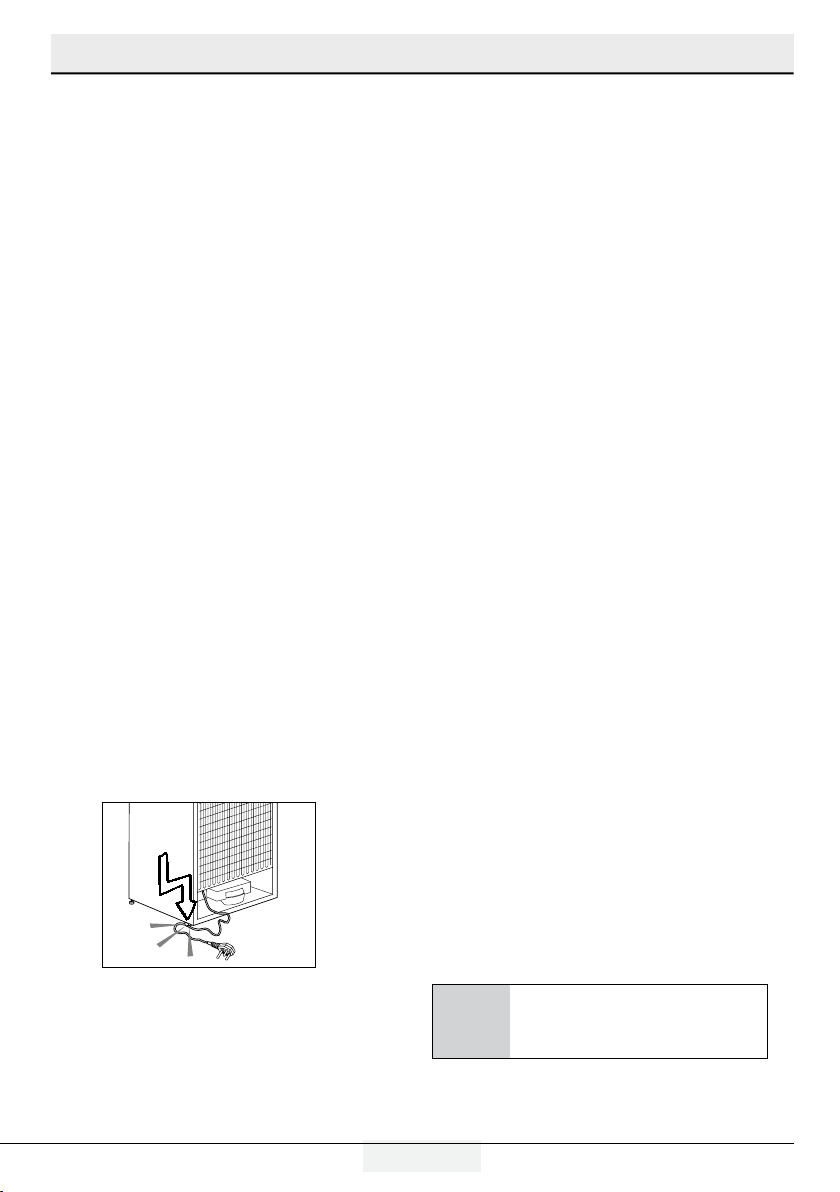
• Take care not to trap the power cable.
• When positioning the appliance, ensure the
supply cord is not trapped or damaged.
• Do not locate multiple portable socket-outlets
or portable power supplies at the rear of the
appliance.
• To avoid contamination of food, please respect
the following instructions:
• Opening the door for long periods can cause a
significant increase of the temperature in the
compartments of the appliance.
• Clean regularly surfaces that can come in
contact with food and accessible drainage
systems.
• Clean water tanks if they have not been used
for 48 h; flush the water system connected to
a water supply if water has not been drawn for
5 days.
• Store raw meat and fish in suitable containers
in the refrigerator, so that it is not in contact with
or drip onto other food.
• Two-star frozen-food compartments are
suitable for storing pre-frozen food, storing or
making icecream and making ice cubes.
• One-, two- and three-star compartments are not
suitable for the freezing of fresh food.
• If the refrigerating appliance is left empty for
long periods, switch off, defrost, clean, dry,
and leave the door open to prevent mould
developing within the appliance.
• When postonng the applance,
ensure the supply cord s not trapped
or damaged.
• Do not locate multple portable
socket-outlets or portable power
supples at the rear of the applance.
1.1.1 HC warning
If the product comprises a cooling system using
R600a gas, take care to avoid damaging the
cooling system and its pipe while using and moving
the product. This gas is flammable. If the cooling
system is damaged, keep the product away from
sources of fire and ventilate the room immediately.
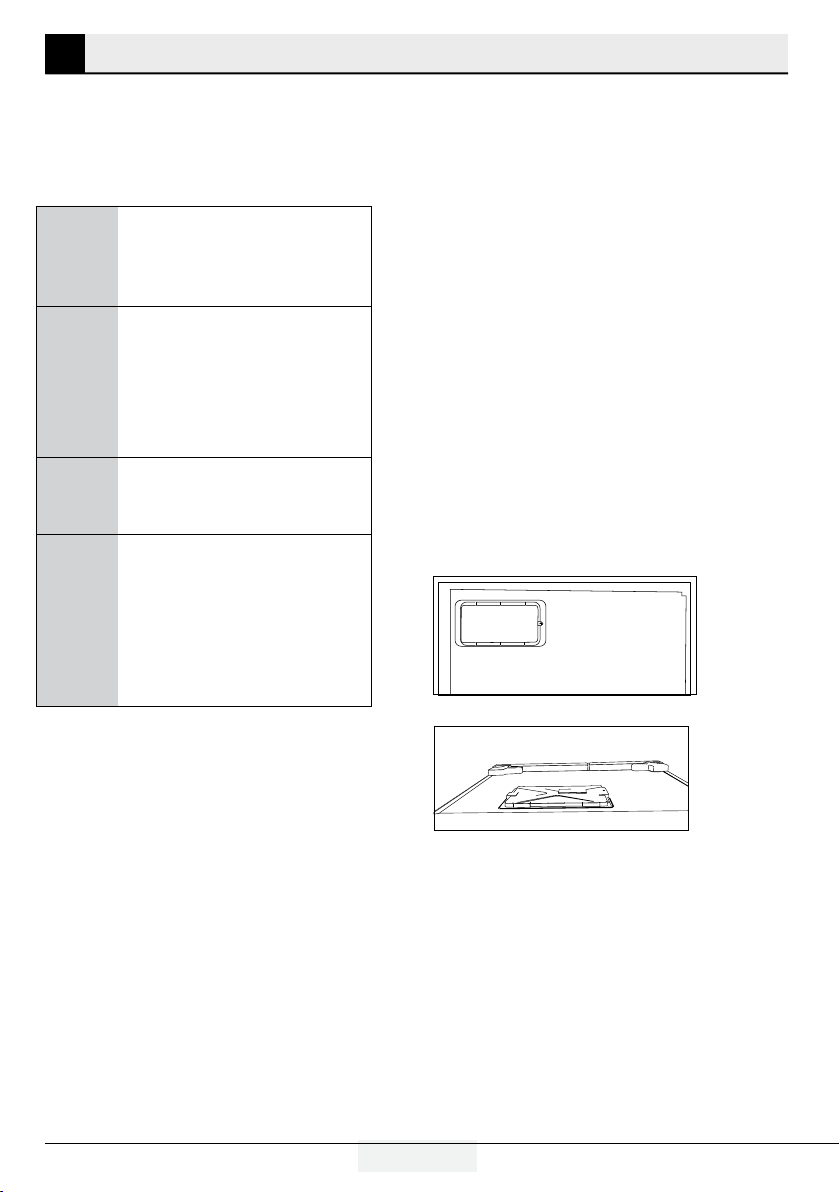
CThe label on the inner left side
indicates the type of gas used in
the product.

5 / 28 EN Refrigerator / User Manual
Important instructions regarding safety and environment
1.1.2 For models with
water dispenser
• Pressure for cold water inlet shall be maximum
90 psi (620 kPa). If your water pressure
exceeds 80 psi (550 kPa), use a pressure
limiting valve in your mains system. If you do
not know how to check your water pressure,
ask for the help of a professional plumber.
• If there is risk of water hammer effect in
your installation, always use a water hammer
prevention equipment in your installation.
Consult Professional plumbers if you are not
sure that there is no water hammer effect in
your installation.
• Do not install on the hot water inlet. Take
precautions against of the risk of freezing
of the hoses. Water temperature operating
interval shall be 33°F (0.6°C) minimum and
100°F (38°C) maximum.
• Use drinking water only.
1.2. Intended use
• This product is designed for home use. It is not
intended for commercial use.
• The product should be used to store food and
beverages only.
• Do not keep sensitive products requiring
controlled temperatures (vaccines, heat
sensitive medication, medical supplies, etc.) in
the refrigerator.
• The manufacturer assumes no responsibility
for any damage due to misuse or mishandling.
• Original spare parts will be provided for 10
years, following the product purchasing date.
1.3. Child safety
• Keep packaging materials out of children’s
reach.
• Do not allow the children to play with the
product.
• If the product’s door comprises a lock, keep
the key out of children’s reach.
1.4. Compliance with WEEE Directive
and Disposing of the Waste Product
This product complies with EU WEEE
Directive (2012/19/EU). This product bears a
classification symbol for waste electrical and
electronic equipment (WEEE).
This product has been manufactured
with high quality parts and materials
which can be reused and are suitable
for recycling. Do not dispose of the
waste product with normal domestic
and other wastes at the end of its
service life. Take it to the collection
center for the recycling of electrical and electronic
equipment. Please consult your local authorities to
learn about these collection centers.
1.5. Compliance with RoHS Directive
• This product complies with EU WEEE Directive
(2011/65/EU). It does not contain harmful and
prohibited materials specified in the Directive.
1.6. Package information
Packaging materials of the product are
manufactured from recyclable materials in
accordance with our National Environment
Regulations. Do not dispose of the packaging
materials together with the domestic or other
wastes. Take them to the packaging material
collection points designated by the local authorities.

6 / 28 EN Refrigerator / User Manual
CFigures in this user manual are schematic and may not match the product exactly. If the subject parts
are not included in the product you have purchased, then those parts are valid for other models.
2 Your Refrigerator
1- Control and indicator panel
2- Butter & Cheese section
3- 70 mm moving door shelf
4- Fridge compartment glass shelf
5- Fridge compartment crisper
6- Gallon door shelf
7- The dairy (cold storage) compartment
8- Freezer compartment glass shelf/cooler
9- Freezer compartment drawers
10- Icebox drawer
11- Water tank
12- Inner Water Dispenser
* OPTIONAL
*2
*3
4
5
6
7
*8
1
9
*10
*12
5

7 / 28 EN Refrigerator / User Manual
3.1 Appropriate location
for installation
In order to prepare the product for use, refer the
information in the user manual and ensure that
electrical installation and water installation are
appropriate. If not, call a qualified electrician and
plumber to arrange the utilities as necessary.
BWARNING: Manufacturer shall not
be held liable for damages that may
arise from procedures carried out by
unauthorised persons.
BWARNING: Product must not be plugged
in during installation. Otherwise, there is
the risk of death or serious injury!
A
WARNING: : If the door clearance of the
room where the product shall be placed is
so tight to prevent passing of the product,
remove the door of the room and pass the
product through the door by turning it to
its side; if this does not work, contact the
authorised service agent.
•Placetheproductonalevelfloorsurfaceto
prevent jolts.
•Installtheproductatleast30cmawayfrom
heat sources such as cooktops, heater cores
and stoves and at least 5 cm away from
electrical ovens.
•Productmustnotbesubjectedtodirectsunlight
and kept in humid places.
•Appropriateairventilationmustbeprovided
around your product in order to achieve an
efficient operation. If the product is to be placed
in a recess in the wall, pay attention to leave at
least 5 cm distance with the ceiling and side
walls.
•Donotinstalltheproductinplaceswherethe
temperature falls below -5°C.
3 Installation
3.2 Installing the plastic wedges
Plastic wedges supplied with the product are
used to create the distance for the air circulation
between the product and the rear wall.
1.
To install the wedges, remove the screws on the
product and use the screws supplied together with the
wedges.
2.
Insert the 2 plastic wedges onto the rear ventilation
cover as illustrated in the figure.

8 / 28 EN Refrigerator / User Manual
Installation
3.3* Adjusting the feet
If the product stands unbalanced after installation,
adjust the feet on the front by rotating them to the
right or left.
* If your product does not have a wine
compartment or is not a glass door, your product
does not have adjustable stands, the product has
fixed stands.
To adjust the doors vertically,
Loosen the fixing nut located at the bottom.
Rotate the adjusting nut according to the position
of the door (clockwise/counter-clockwise).
Tighten the fixing nut in order to fix the position.
To adjust the doors horizontally,
Loosen the fixing nut located at the top.
Rotate the side adjusting nut according to the
position of the door (clockwise/counter-clockwise).
Tighten the fixing nut which is at the top in order to
fix the position.
adjusting nut
fixing nut
fixing nut
adjusting nut

9 / 28 EN Refrigerator / User Manual
Installation
3.4 Electric connection
AWARNING: Do not make connections via
extension cables or multi-plugs.
BWARNING: Damaged power cable must
be replaced by the Authorised Service
Agent.
CIf two coolers are to be installed side
by side, there should be at least 4 cm
distance between them.
• The manufacturer shall not be liable for any
damages that will arise when the product
is used without grounding and electrical
connection in accordance with the national
regulations.
• Power cable plug must be within easy reach
after installation.
• Do not use extension cords or cordless multiple
outlets between your product and the wall
outlet.
-Upper hinge group is fixed with 3 screws.
-The hinge cover is attached after the sockets are
installed.
- Then the hinge cover is fixed with two screws.

10 / 28 EN Refrigerator / User Manual
Installation
731
mm
mm
mm
mm mm
mm
mm
mm
mm
mm
mm
mm
mm

11 / 28 EN Refrigerator / User Manual
4 Preparation
4.2 Recommendations about the
fresh food compartment
• Make sure that the food does not touch the
temperature sensor in fresh food compartment.
To allow the fresh food compartment to keep
its ideal storage temperature, the sensor must
not be hindered by food.
• Do not place hot foods or beverages inside the
product.
4.3 Initial use
Before using the product, make sure that all
preparations have been made in accordance
with the instructions given in the "Important
instructions regarding safety and environment" and
"Installation" chapters.
• Clean the interior of the refrigerator as
recommended in the “Maintenance and
cleaning” section. Before you start the
refrigerator, make sure that the interior is dry.
4.1 Things to be done for
saving energy
AConnecting your refrigerator to systems
that save energy is dangerous as they may
cause damage on the product.
• Do not leave the doors of your refrigerator open
for a long time.
• Do not put hot food or drinks in your
refrigerator.
• Do not overload the refrigerator. Cooling
capacity will fall when the air circulation in the
refrigerator is hindered.
• Do not place the refrigerator in places subject
to direct sunlight. Install the product at least 30
cm away from heat sources such as cooktops,
ovens, heater units and stoves and at least 5
cm away from electrical ovens.
• Pay attention to store your food in refrigerator
in closed containers.
• Since hot and humid air will not directly
penetrate into your product when the doors
are not opened, your product will optimize
itself in conditions sufficient to protect your
food. Functions and components such as
compressor, fan, heater, defrost, lighting,
display and so on will operate according to
the needs to consume minimum energy under
these circumstances.
• Thawing the frozen foods in the fridge
compartment both saves energy and reserves
the quality of the foods.
CTemperature of the room where your
refrigerator is located should at least
be 10ºC /50°F. Operating your
refrigerator under cooler conditions is not
recommended with regard to its efficiency.
CInside of your refrigerator must be cleaned
thoroughly.
CIf two coolers are to be installed side
by side, there should be at least 4 cm
distance between them.

12 / 28 EN Refrigerator / User Manual
Preparation
• Plug the refrigerator in a grounded socket. The
interior illumination is lit when the door of the
refrigerator is opened.
• Operate the refrigerator for 6 hours without
placing any food in it and do not open its door
unless it is necessary.
CYou will hear a noise when the compressor
starts up. The liquids and gases sealed
within the refrigeration system may also
give rise to noise, even if the compressor is
not running and this is quite normal.
CFront edges of the refrigerator may
feel warm. This is normal. These areas
are designed to be warm to avoid
condensation.

13 / 28 EN Refrigerator / User Manual
5 Operating the product
5.1 Indicator panel
Touch-controlled indicator panel allows you to set the temperature and control the other functions of the
product. Just press the relevant buttons for function settings.
CFigures in this user manual are schematic and may not match the product exactly. If the subject parts
are not included in the product you have purchased, then those parts are valid for other models.
(* optionol)
Select
Quick FreezeQuick Cool
FN
OK
3 “
3 “
12 3 45 6 89 10
11
12
13
14
15
1617
18
19
20
26
27
28
29
30
31
Select
Quick FreezeQuick Cool
FN
OK
3 “
3 “
7
*
22 21
23
24
25

14 / 28 EN Refrigerator / User Manual
Operating the product
1. Quick cooling function indicator
It turns on when the quick cool function is
activated.
2. Fridge compartment temperature indicator
Temperature of the fridge compartment is shown;
it can be set to 8,7,6,5,4,3,2,1.
3. Fahrenheit indicator
It is a Fahrenheit indicator. When the Fahrenheit
indication is activated, the temperature set values
are shown in Fahrenheit and the relevant icon
turns on.
4. Key lock
Press key lock button simultaneously for 3 sec-
onds. Key lock symbol will light up and key lock
mode will be activated. Buttons will not function if
the Key lock mode is active. Press key lock button
simultaneously for 3 seconds again. Key lock
symbol will turn off and the key lock mode will be
exited.
Press the key lock button if you want to prevent
changing of the temperature setting of the
refrigerator.
5. Power failure/High temperature / error
warning
This indicator illuminates during power failure, high
temperature failures and error warnings. During
long-term power failures, the highest temperature
value that the freezer compartment reaches will
blink on the digital display. After checking the food
located in the freezer compartment, press the
alarm off button to clear the warning.
Please refer to "solutions recommended for
troubleshooting" section on your manual if you
observe that this indicator is illuminated.
6. Filter reset icon
This icon turns on when the filter needs to be
reset.
7. Temperature change cabin icon
Indicates the cabin whose temperature is to be
changed. When the temperature change cabin icon
starts flashing, it is understood that the relevant
cabin has been selected.
8. Freezer compartment temperature
indicator
Temperature of the fridge compartment is shown;
it can be set to -16, -18, -19, -20, -21, -22, -24.
9. Quick freeze function indicator
It turns on when the quick freeze function is
activated.
10. Fahrenheit indicator
It is a Fahrenheit indicator. When the Fahrenheit
indication is activated, the temperature set values
are shown in Fahrenheit and the relevant icon
turns on.
11. Quick freeze function button
Press this button to activate or deactivate the quick
freeze function. When you activate the function,
the freezer compartment will be cooled to a
temperature lower than the set value.
CUse the quick freeze function when you
want to quickly freeze the food placed
in freezer compartment. If you want
to freeze large amounts of fresh food,
activate this function before putting the
food into the product.
CIf you do not cancel it, Quick Freeze
will cancel itself automatically after 24
hours.
CThis function is not recalled when
power restores after a power failure.
12. Filter reset
The filter is reset when the quick freeze button is
pressed for 3 seconds. Filter reset icon goes off.
13. FN button
Using this key, you can switch between the
functions that you want to select. Upon pressing
this key, the icon, whose function is required to be
activated or deactivated, and this icon's indicator
starts flashing. The FN button gets deactivated if
not pressed for 20 seconds. You need to press this
button to change the functions again.

15 / 28 EN Refrigerator / User Manual
Operating the product
14. Celsius indicator
It is a Celsius indicator. When the Celsius indication
is activated, the temperature set values are shown
in Celsius and the relevant icon turns on.
15. OK button
After navigating the functions using the FN button,
when the function is cancelled via the OK button,
the relevant icon and the indicator flashes. When
the function is activated, it remains on. The
indicator continues to flash in order to show the
icon it is on.
16. Temperature change cabin icon
Indicates the cabin whose temperature is to be
changed. When the temperature change cabin icon
starts flashing, it is understood that the relevant
cabin has been selected.
17. Temperature change cabin icon
Indicates the cabin whose temperature is to be
changed. When the temperature change cabin icon
starts flashing, it is understood that the relevant
cabin has been selected.
18. Set increasing button
Select the relevant cabin with the select button;
the cabin icon representing the relevant cabin will
start to flash. If you press the set increasing button
during this process, the set value gets increased. If
you keep pressing it in a loop, the set value returns
to the beginning.
19. Temperature change cabin icon
Indicates the cabin whose temperature is to be
changed. When the temperature change cabin icon
starts flashing, it is understood that the relevant
cabin has been selected.
20. Set decreasing button
Select the relevant cabin with the select button;the
cabin icon representing the relevant cabin will start
to flash. If you press the set decreasing button
during this process, the set value gets decreased.
If you keep pressing it in a loop, the set value
returns to the beginning.
21.Setting the Celsius and Fahrenheit
indicator
Hover over this icon using the FN key and select
via the OK key. When the relevant temperature
type is selected, the Fahrenheit or Celsius indicator
turns on.
22. Ice machine off icon
Press the FN key (until it reaches the ice machine
off icon and the lower line) to switch off the ice
machine. The ice machine off icon and the lower
line indicator start flashing when you hover over
them. When you press the OK button, the ice
machine icon lights continuously and the lower
line continues to flash during this process. If you
do not press any button after 20 seconds, the the
ice machine off icon remains on. Thus, the ice
machine is switched off. In order to switch on the
ice machine again, hover over the indicator; thus,
both the ice machine off icon and the lower line
will start flashing. When you press the OK button
and if you do not press any button within 20
seconds, the ice machine off icon and the lower
line will go off and thus the ice machine will be
switched on again.
CIndicates whether the ice machine
is on or off.
CWater flow from water tank
will stop when this function is
selected. However, ice made
previously can be taken from the
ice machine.
23. Eco fuzzy function icon
Press the FN key (until it reaches the letter e
icon and the lower line) to activate the eco fuzzy.
When you hover over the eco fuzzy icon and the
eco fuzzy function indicator, they start flashing.
Thus, you can understand whether the eco fuzzy
function will be activated or deactivated. When you
press the OK button, the eco fuzzy function icon
lights continuously and the Indicator continues to
flash during this process. If you do not press any
button after 20 seconds, the icon and the indicator
remains on. Thus, the eco fuzzy function is
activated. In order to cancel the eco fuzzy function,

16 / 28 EN Refrigerator / User Manual
Operating the product
hover over the icon and the indicator again and
press the OK key. Thus, both the eco fuzzy function
icon and the indicator will start flashing. If you do
not press any button within 20 seconds, the icon
and the indicator will go off and the eco fuzzy
function will be cancelled.
24. Vacation function icon
Press the FN key (until it reaches the umbrella
icon and the lower line) to activate the vacation
function. When you hover over the vacation
function icon and the vacation function indicator,
they start flashing. Thus, you can understand
whether the vacation function will be activated or
deactivated. When you press the OK button, the
vacation function icon lights continuously and thus
the Vacation function is activated. The Indicator
continues to flash during this process. Press the
OK key to cancel the vacation function. Thus, both
the vacation function icon and the indicator will
start flashing and the vacation function will be
cancelled.
25. Celsius indicator
It is a Celsius indicator. When the Celsius indication
is activated, the temperature set values are shown
in Celsius and the relevant icon turns on.
26. Temperature change cabin icon
Indicates the cabin whose temperature is to be
changed. When the temperature change cabin icon
starts flashing, it is understood that the relevant
cabin has been selected.
27. Temperature change cabin icon
Indicates the cabin whose temperature is to be
changed. When the temperature change cabin icon
starts flashing, it is understood that the relevant
cabin has been selected.
28. Key lock
Press key lock button simultaneously for 3 sec-
onds. Key lock symbol will light up and key lock
mode will be activated. Buttons will not function if
the Key lock mode is active. Press key lock button
simultaneously for 3 seconds again. Key lock sym-
bol will turn off and the key lock mode will be exited.
Press the key lock button if you want to prevent
changing of the temperature setting of the
refrigerator.
29.Select button
Use this button to select the cabin whose tem-
perature you want to change. Switch between
the cabins by pressing this button. The selected
cabin can be understood from the cabin icons
(7,16,17,19,26,27). Whichever cabin icon is
flashing, the cabin, whose temperature set value
you want to change, is selected. Then, you can
change the set value by pressing the cabin set
value decreasing button (20) and the cabin set
value increasing button (18). If you do not press
the select button for 20 seconds, the cabin icons
will go off. You need to press this key to select a
cabin again.
30. Alarm off button
In case of power failure/high temperature
alarm, after checking the foods in the freezer
compartment, press the alarm off button to clear
the warning.
31. Quick cooling function button
The button has two functions. To activate or
deactivate the quick cool function, press it briefly.
Quick Cool indicator will turn off and the product
will return to its normal settings.
CUse quick cooling function when you want
to quickly cool the food placed in the
fridge compartment. If you want to cool
large amounts of fresh food, activate this
function before putting the food into the
product.
CIf you do not cancel it, Quick Cooling
will cancel itself automatically after
1 hours.
CThis function is not recalled when power
restores after a power failure.

17 / 28 EN Refrigerator / User Manual
Operating the product
5.2 Indicator panel
Touch-control indicator panel allows you to set the temperature and control the other functions related to
the refrigerator. Just press the relevant buttons for function settings.
CFigures in this user manual are schematic and may not match the product exactly. If the subject parts
are not included in the product you have purchased, then those parts are valid for other models.
1-On/Off function
Press the On/Off button for 3 seconds to turn off
or turn on the fridge.
2. Quick freeze function button
Press this button to activate or deactivate the
quick freeze function. When you activate the
function, the freezer compartment will be cooled
to a temperature lower than the set value.
CUse the quick freeze function when you
want to quickly freeze the food placed
in freezer compartment. If you want
to freeze large amounts of fresh food,
activate this function before putting the
food into the product.
CIf you do not cancel it, Quick Freeze
will cancel itself automatically after 24
hours.
CThis function is not recalled when
power restores after a power failure.
3.Select button
Use this button to select the compartment whose
temperature you want to change. Switch between
the compartment pressing this button.The
compartment from the compartment icons (6, 22,
23) whichever compartment is the temperature set
value you want to change, is selected. Then, can
the set value by pressing the compartment value
Temperature Adjustment button (4)
4.Temperature Adjustment / Temperature
Decrease
When pressed, decreases the temperature of the
selected compartment.
5-Quick freeze Indicator
This icon lits when the Quick freeze function is
active.
6. Fridge compartment indicator
When this indicator is active, the temperate
of the fridge compartment is displayed on the
temperature value indicator.Fridge compartment
can be set to 8, 7, 6, 5, 4, 3, 2 or 1°C / 46, 45,
44, 43, 42, 41, 40,39,38,37,36,35,34 or 33°F by
pressing Temperature Adjustment button (4).
2
167
58*
21
9
20
11 12 14 15 16
3410
19 18 *17
13
22 23
(* optionol)

18 / 28 EN Refrigerator / User Manual
Operating the product
7. Temperature value indicator
Shows the temperature value of the selected
compartment.
8. Fahrenheit indicator
It is a Fahrenheit indicator. When the Fahrenheit
indication is activated, the temperature set values
are shown in Fahrenheit and the relevant icon
turns on.
9. Power failure/High temperature / error
warning
This indicator illuminates during power failure, high
temperature failures and error warnings. During
long-term power failures, the highest temperature
value that the freezer compartment reaches will
blink on the digital display. After checking the food
located in the freezer compartment, press the
alarm off button (16) to clear the warning.
10.Setting the Celsius and Fahrenheit
indicator
Hover over this key using the FN key and select
Fahrenheit and Celsius via the OK key. When
the relevant temperature type is selected, the
Fahrenheit and Celsius indicator turns on.
11. Vacation function icon
Press the FN key (until it reaches the umbrella
icon) to activate the vacation function. When you
hover over the vacation function icon, it starts
flashing. Thus, you can understand whether the
vacation function will be activated or deactivated.
When you press the OK button, the vacation
function indicator lights continuously and thus the
Vacation function is activated. Press the OK key
to cancel the vacation function. Thus, the vacation
function indicator will start flashing and the
vacation function will be cancelled.
12. Quick cooling function indicator
It turns on when the quick fridge function is
activated.
13. FN button
Using this key, you can switch between the
functions that you want to select. Upon pressing
this key, the icon, whose function is required to be
activated or deactivated, and this icon’s indicator
starts flashing. The FN button gets deactivated if
not pressed for 20 seconds. You need to press this
button to change the functions again.
14. OK button
After navigating the functions using the FN button,
when the function is cancelled via the OK button,
the relevant indicator flashes. When the function is
activated, it remains on. The indicator continues to
flash in order to show the icon it is on.
15. Quick cooling function button
The button has two functions. To activate or
deactivate the quick cool function, press it briefly.
Quick Cool indicator will turn off and the product
will return to its normal settings.
16. Alarm off button
In case of power failure/high temperature
alarm, after checking the foods in the freezer
compartment, press the alarm off button to clear
the High temperature warning icon (9).
17. Filter reset
The filter is reset when the alarm off button (16) is
pressed for 3 seconds. Filter reset icon goes off.
18. Eco fuzzy function icon
Press the FN key (until it reaches the letter e
icon) to activate the eco fuzzy. When you hover
over the eco fuzzy icon it start flashing. Thus,
you can understand whether the eco fuzzy
function will be activated or deactivated. When
you press the OK button, the eco fuzzy function
icon lights continuously during this process. If you
do not press any button after 20 seconds, the
icon remains on. Thus, the eco fuzzy function is
activated. In order to cancel the eco fuzzy function,
hover over the icon again and press the OK key.
Thus, the eco fuzzy function icon will start flashing.
If you do not press any button within 20 seconds,
the icon will go off and the eco fuzzy function will
be cancelled.
19. Ice machine off icon
Press the FN key (until it reaches the ice icon) to
switch off the ice machine. The ice machine off
icon start flashing when you hover over it, thus you
can understand whether the ice machine will be
turned on or off. When you press the OK button,

19 / 28 EN Refrigerator / User Manual
Operating the product
the ice machine icon lights continuously during
this process. If you do not press any button after
20 seconds, the icon and the indicator remains on.
Thus, the ice machine is switched off. In order to
switch on the ice machine again, hover over the
icon. The ice machine off icon will start flashing. If
you press ok button, the icon will go off and thus
the ice machine will be switched on again.
CIndicates whether the ice machine is
on or off.
CWater flow from water tank will
stop when this function is selected.
However, ice made previously can be
taken from the ice machine.
20. Filter reset icon
This icon turns on when the filter needs to be
reset.
21. Celsius indicator
It is a Celsius indicator. When the Celsius indication
is activated, the temperature set values are shown
in Celsius and the relevant icon turns on.
22. Freezer compartment indicator
When this indicator is active, the temperate of
the freezer compartment is displayed on the
temperature value indicator.Freezer compartment
can be set to -16, -18, -19, -20, -21, -22 and -24
°C /0, -2, -4, -6, -8, -10 and -12°F by pressing
Temperature Adjustment button (4).
23. Joker compartment indicator
When this indicator is active, the temperate of the
joker compartment is displayed on the temperature
value indicator. Joker compartment can be set to
FRZ mode(-16, -18, -19, -20, -21, -22 and -24°C
/ 0, -2, -4, -6, -8, -10 and -12°F) FF mode(10, 8,
6, 4, 2, 0, -2 and -6°C / 50, 46, 42, 39, 35, 32
and 28°F) by pressing Temperature Adjustment
button (4).
This manual suits for next models
1
Table of contents
Other Beko Refrigerator manuals

Beko
Beko RBI 2300 HCA User manual

Beko
Beko B1RCHE363XB User manual

Beko
Beko B3RMLNE444HW User manual

Beko
Beko B5RCNE66HXB User manual

Beko
Beko RCNE520E30JGB User manual

Beko
Beko RCNA400E3 User manual

Beko
Beko RCNA366I40ZXBN Instruction Manual

Beko
Beko RCHA300K20XP User manual

Beko
Beko CN164221DX User manual

Beko
Beko FNE 265 User manual

Beko
Beko CVA34123X User manual

Beko
Beko RCNA320E30W Instruction Manual

Beko
Beko GN162330XBRN User manual

Beko
Beko DSA25012S User manual

Beko
Beko DS25CB-PBW10 User manual

Beko
Beko RSSE415 M 23 DS User manual

Beko
Beko RDNE600K20DX User manual

Beko
Beko DSA25020 User manual

Beko
Beko CH142120 DX User manual

Beko
Beko CSA240M30W User manual