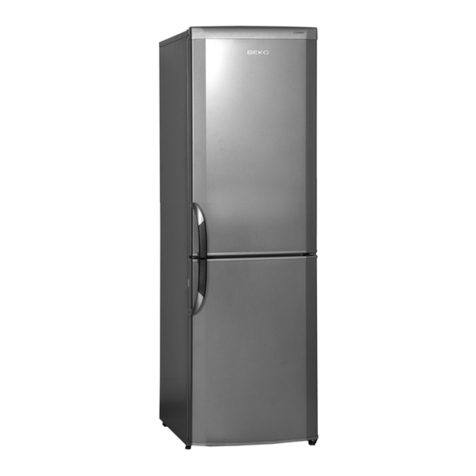
Beko NDU 9950 User manual


1
Congratulations on your choice of a Quality
Appliance, designed to give you many years of service.
Safety first!
Do not connect your appliance to the electricity supply
until all packing and transit protectors have been
removed.
• Leave to stand for at least 4 hours before switching
on, to allow compressor oil to settle, if transported
horizontally.
• If you are discarding an old appliance with a lock or
latch fitted to the door, ensure that it is left in a safe
condition to prevent the entrapment of children.
• This appliance must only be used for its intended
purpose i.e. the storing and freezing of edible foodstuff.
• Do not dispose of the appliance on a fire. Your
appliance contains non CFC substances in the insulation
which are flammable. We suggest you contact your
local authority for information on disposal and available
facilities.
• We do not recommend use of this appliance in an
unheated, cold room. (e.g. garage, conservatory, annex,
shed, out-house etc.)
To obtain the best possible performance and trouble
free operation from your appliance it is very important
to read these instructions carefully. Failure to observe
these instructions may invalidate your right to free
service during the guarantee period.
Please keep these instructions in a safe place for easy
reference.
Instructions for useGB

2
Electrical requirements
Before inserting the plug into the wall socket
make sure that the voltage and the frequency
shown in the rating plate inside the appliance
corresponds to your electricity supply.
We recommend that this appliance be
connected to the mains supply via a
suitably switched and fused socket in a readily
accessible position.
Warning! This appliance must be grounded.
Repairs to electrical equipment should only
be performed by a qualified technician.
Incorrect repairs carried out by an unqualified
person carry risks that may have critical
consequences for the user of the appliance.
Transportation instructions
1. The appliance should be transported only
in upright position. The packing as supplied
must be intact during transportation.
2. If during the course of transport the
appliance, has been positioned horizontally,
it must not be operated for at least 4 hours, to
allow the system to settle.
3. Failure to comply with the above instructions
could result in damage to the appliance, for
which the manufacturer will not be held liable
for.
4. The appliance must be protected against
rain, moisture and other atmospheric
influences.
Important!
• Do not attempt to sit or stand on top of your
appliance as it is not designed for such use.
You could injure yourself or damage the
appliance.
• Make sure that the mains cable is not caught
under the appliance during and
after moving, as this could damage the cable.
• Do not allow children to play with the
appliance or tamper with the controls.
Installation instructions
1. Do not keep your appliance in a room where
the temperature is likely to fall below 10
degrees C at night and/or especially in winter,
as it is designed to operate in ambient
temperatures between +10 and +43 degrees
C. At lower temperatures the appliance may
not operate, resulting in a reduction in the
storage life of the food.
2. Do not place the appliance near cookers or
radiators or in direct sunlight, as this will cause
extra strain on the appliance's functions. If
installed next to a source of heat or a freezer,
maintain the following minimum side
clearances:
From Cookers 30 mm
From Radiators 300 mm
From Freezers 25 mm
3. Make sure that sufficient room is provided
around the appliance to ensure free air
circulation.
• Fit the bottom airing lid given in your appliance
as shown in the diagram to the pins facing
one another on the feet at the bottom of the
door. Make sure claws and pins to hold each
other for the pins-claws connection (Fig. 3).
4. The appliance should be positioned on a
smooth surface. The two front feet can be
adjusted as required. To ensure that your
appliance is standing upright adjust the two
front feet by turning clockwise or counter
clockwise, until firm contact is secured with
the floor. Correct adjustment of feet prevents
excessive vibration and noise.
5. Refer to "Cleaning and Care" section to
prepare your appliance for use.
Instructions for useGB

3
and in good quality.
•Food should be separated into portions
according to the daily or meal needs.
•Even if food will be stored for a short period,
food should be wrapped so that will not leak
air to prevent drying. Packing materials should
be resistant to cold, being torn, moisture, odor,
oil and acid. And also should not let air-pass
through. Besides they should be closed well,
handy and made of convenient material for
using in the deep freezers.
4. Dairy products should be stored in the special
compartment provided in the door liner.
5. Cooked dishes should be stored in airtight
containers.
6. Fresh wrapped products can be kept on the
shelf. Fresh fruit and vegetables should be
cleaned and stored in the crisper bins.
7. Bottles can be kept in the door section.
8. To store raw meat, wrap in polythene bags
and place on the zero temperature
compartment. Do not allow to come into contact
with cooked food, to avoid contamination. For
safety, only store raw meat for two to three
days.
9. For maximum efficiency, the removable
shelves should not be covered with paper or
other materials to allow free circulation of cool
air.
10. Do not keep vegetable oil on door shelves.
Keep the food packed, wrapped or covered.
Allow hot food and beverages to cool before
refrigerating. Leftover canned food should not
be stored in the can.
11. Fizzy drinks should not be frozen and
products such as flavoured water ices should
not be consumed too cold.
12. Some fruit and vegetables suffer damage
if kept at temperatures near 0 °C. Therefore
wrap pineapples, melons, cucumbers,
tomatoes and similar produce in polythene
bags and store in vegetable crisper.
13. High-proof alcohol must be stored upright
in tightly closed containers. Never store
products that contain an inflammable propellant
gas (e.g. cream dispensers, spray cans, etc.)
or explosive substances. These are an
explosion hazard.
Suggested arrangement of
food in the appliance
Guidelines for obtaining optimum storage and
hygiene:
1. The fridge compartment is for the short-
term storage of fresh food and drinks.
2. The freezer compartment is rated
and suitable for the freezing and storage of
pre-frozen food. The recommendation for
storage as stated on the food
packaging should be observed at all times.
3.•Hot meals should be cooled down to room
temperature before putting into the refrigerator.
•Food that you want to freeze should be fresh
Getting to know your
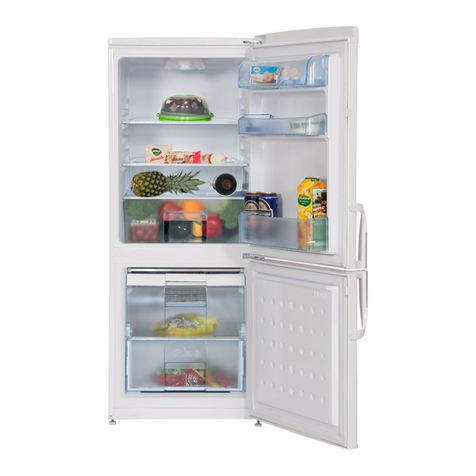
appliance (Fig. 1)
Freezer - compartment lighting
Freezer - compartment plastic shelf
Ice - matic water transfer box
Ice – matic
Ice – box
Ice - matic back cover
Ionizer
Odor filters
Bottle - holder shelf
Bottle – holders
Fridge - compartment sliding glass shelf
Fridge - compartment glass shelf
Fridge - compartment lighting
Fridge - compartment crisper glass shelf
Second floor crisper
Humidity filters
Crispers
Lower air - circulation cover
Adjustable front feets
Freezer - compartment door shelf
Egg racks
Fridge - compartment door shelf with slider
Sliding storage boxes
Fridge - compartment door shelf
Bottle holder
Wire frame
Freezer - compartment
Fridge – compartment
1.
2.
3.
4.
5.
6.
7.
8.
9.
10.
11.
12.
13.
14.
15.
16.
17.
18.
19.
20.
21.
22.
23.
24.
25.
26.
27.
28.
Instructions for useGB
4
Before operating
Final Check
Before you start using the appliance check
that:
1. The feet have been adjusted for perfect
levelling.
2. The interior is dry and air can circulate freely
at the rear.
3. The interior is clean as recommended under
"Cleaning and care.”
4. The plug has been inserted into the wall
socket and the electricity is switched on. When
the door is open the interior light will come on.
And note that:
5. You will hear a noise as the compressor
starts up. The liquid and gases sealed within
the refrigeration system may also make some
(noise), whether the compressor is running or
not. This is quite normal.
6. Slight undulation of the top of the cabinet
is quite normal due to the manufacturing
process used; it is not a defect.
7. We recommend leaving the temperature
setting at the factory value (e. g. -18/+4) and
monitor the temperature to ensure the
appliance maintains desired storage
temperatures (See section Temperature Control
and Adjustment).
8. Do not load the appliance immediately it is
switched on. Wait until the correct storage
temperature has been reached. We
recommend checking the temperature with an
accurate thermometer (see; Temperature
Control and Adjustment).
Instructions for useGB
Temperature control and
adjustment
Operating the refrigerator
When you first turn on the appliance, the
refrigerating -compartment indicator will show
a temperature of +4 °C, while the freezer-
compartment indicator shows the temperature
as set at dispatch from the factory; -18 °C
(Fig. 2 - 2 and Fig. 2 - 5 ).The compressor
will begin to function approximately 1 minutes
after the appliance is plugged in. After the
compressor has begun functioning, the
temperatures of the various compartments will
reach their respective settings within 24 hours,
depending on the ambient temperature and
the degree to which the refrigerator is loaded.
You can monitor the cooling from the
refrigerating and freezer compartment
temperature indicator.
Important !
•When the temperatures of the freezer and
refrigeration compartments are adjusted to
maximum, food stored in zero temperature
compartment .

5
Instructions for useGB
make the bacteria in air ineffective.
Quick fridge indicator
(Fig. 2 - 13)
As the Quick fridge function is begun
functioning, the icon lights on.
Quick ice function display indicator
(Fig. 2 - 15)
As the Quick ice function is begun functioning,
the display will light on.
Control buttons
The control buttons, which are flexible parts,
provide the operating simplicity without opening
and closing the doors and they also prevent
the temperature loss from the appliance.
Freezer-compartment temperature
adjustment button (Fig. 2 - 7 )
The temperature of the freezer-compartment
is adjusted by the button. When you push the
button everytime, one of the numbers given -
18, -20, -22, -24 on the freezer-compartment
control display will light on.
Fridge-compartment temperature
adjustment button (Fig. 2 - 12)
The temperature of the refrigerating
compartment is set by this button. As pushed
the button every time, one of the numbers
given 8, 6, 4, 2 will light on the display panel.
Vacation function button
(Fig. 2 - 9 )
It is used as wanted to set the vacation function.
When pressed the vacation function button at
least three seconds, it starts to work.
Eco-fuzzy function button (Fig. 2 - 8)
It is used as wanted to set the economy
function.
Quick freeze button (Fig. 2 - 11 )
It is used to set the Quick freeze function.
Quick fridge button (Fig. 2 - 10 )
It is used to operate the Quick fridge function.
Refrigerator Operation
Display panel and control buttons:
Display panel
This display panel simplifys operation with its
auditory and visual functions while you are
using your appliance. It is possible to use your
appliance without opening-closing the doors
by operating the all functions via the display
panel which is located on the outside of the
freezer-compartment door.
Freezer-compartment temperature indicator
(Fig. 2 - 4 )
The display shows the temperature in the
freezer-compartment.
Freezer-compartment set temperature
indicator (Fig. 2 - 5 )
It shows the temperature which has been
adjusted for the freezer-compartment.
Fridge-compartment temperature indicator
(Fig. 2 - 3 )
This shows the temperature in the refrigerating
compartment.
Fridge-compartment set temperature
indicator (Fig. 2 - 2 )
This shows the temperature which has been
adjusted for the refrigerating-compartment.
Vacation indicator (Fig. 2 - 1 )
As the vacation function is begun functioning,
the bulb starts to flash.
Economy function indicator
(Fig. 2 - 6 )
When freezer set is -18 or when the Eco-fuzzy
function is active, the Economy icon bulb will
be on.
Quick freeze indicator
(Fig. 2 - 14 )
As it is selected, the relating icon lights on.
Ionizer indicator
(Fig. 2 - 16)
The icon is always on. It shows that your
refrigerator has an ionizer and the ionizer

6
slowly. If you operate your appliance to the
Quick - freeze position by mistake or want to
cancel the procedure, push the Quick freeze
button a second time. It is sufficient to cancel
the operation.
Quick ice function
This function is used for getting ice quickly.
When you want to activate the quick ice
function, push the Quick freeze button
once. The Quick ice icon will flash after 10
seconds the display indicator will be on.
(Fig.5) The Quick ice process lasts 2 hours
and at the end of the process, the Quick ice
display lamp is off and the refrigerator reverts
to the previous adjusted settings.
Quick fridge function
It has to be used for only the foods are put
into the refrigerating - compartment and are
required to be cold quickly. Press the Quick
fridge button for making start this function. As
the process, the Quick fridge display will light
on (Fig.6) and this compartment gets cool to
a certain temperature whatever the
temperature of the refrigerating-compartment
is. At that moment all temperature display
indicators of the refrigerating-compartment
can be alight. The Quick fridge process lasts
2 hours and at the end of the process, the
Quick fridge display lamp is off and the
refrigerator reverts to the previous adjusted
settings.
Vacation function
If you don’t use the refrigerating-compartment
for a long time, the “Vacation function” button
is pushed at least 3 seconds continuously,
this function will begin to work and the Vacation
function light will flash (Fig. 8). The freezer-
compartment cooling is performed as if the
freezer set is -18°C and the cooling-function
of the refrigerating-compartment will stop.
When the “Vacation function” button is pressed
again, it will come out of the “Vacation function”
setting and the refrigerator will revert to the
previous setting.
Instructions for useGB
Temperature Control
Freezer-compartment temperature control
When you want to change the temperature of
the freezer-compartment, you have to push
(Fig. 2 - 7 ) “the freezer-compartment
temperature adjustment button”. As you push
the button every time, the display of the freezer-
compartment can be set lower temperatures
(like -18, -20, -22, -24, -18, -20, ...etc.)
(Fig. 2 - 5 )
Fridge-compartment temperature control
When you want to change the temperature of
your refrigerator, you have to push “the
refrigerating-compartment temperature
adjustment button” (Fig. 2 - 12 ). As you push
the button every time, the display of the
refrigerating-compartment can be set lower
temperatures (like 8, 6, 4, 2, 8, 6, ...etc.)
(Fig. 2 - 2 ).
Functions Operation
Quick freeze function
This function is used for getting ice quickly
and providing the foods are put at the first time
will be frozen faster into the freezer-
compartment. Firstly, apply the Quick freeze
procedure for storing the foods will be frozen
for a long time. It is the healthiest way for
keeping the foods for a long time. During the
quick-freeze process time, the temperature of
the freezer-compartment goes down
automatically to -27 °C.
“Quick - freezing” When you want to use the
“Quick freeze” function, push the Quick freeze
button. At the time of pressing the button the
Quick-ice display indicator will flash. If you
push the button second time Quick freeze
function is activated and display indicator is
on. While the Quick freeze function is
functioning, this compartment arrives lower
temperatures. After 2 hours you can put the
foods that will be frozen (Fig. 4). The Quick-
freezing process lasts 12 hours maximum.
When the process stops, it will be turned off
automatically and the temperature in the
compartment drops to the adjusted temperature

7
Before setting the refrigerator for “Vacation
function”, remove all foods from the
refrigerating-compartment. When your
refrigerator is operated for “Vacation
function”, leave the refrigerating-
compartment door close.
Fridge Mode
If the fridge compartment is used often,
refrigerator understands and stars to cool-
down the fridge compartment immediately,
until the desired situation is obtained.
“Double Power” Cooling System
The refrigerator has separate cooling system
for freezer and fridge compartment. This
system is called “Double Power” cooling
system. In this system, inside air of the
compartments are not mixed, so the smells.
It also supplies a better cooling performance
compared to the other ones. And your
refrigerator saves the energy by reducing the
unneeded defrost for each compartment with
this system.
Multi-Hygiene
Consists of 3 main protection systems.
Hygiene+: The photocatalyst filter in the air
channel of refrigerator helps to clean the air
inside. Also this filter reduces bad smell.
Silver+: Inner surface of the refrigerator and
the crispers are both have anti-bacterial
property with silver ingredient. So bacteria can
not reproduce on these surfaces. Thus the
unpleasant smell will not be produced by the
bacteria on the surfaces.
Ion+: Ionizer, that is in the air channel of
refrigerator, ionize the air. With the help of this
system airborne bacteria and the bad smell
originated from these bacteria will be reduced.
Instructions for useGB
Eco-fuzzy function
When the Eco-fuzzy button is pushed if the
temperature of the freezer-compartment is set
for -20 °C, -22 °C or -24 °C, especially in these
circumstances if the refrigerator is not used
for long periods (unless the doors are left open
and the settings are changed), electronic
control system will provide more energy saving
by making the appliance start to economize
on energy. When this function has begun to
work, Eco-fuzzy icon will light on (Fig. 7) the
display of the freezer-compartment and the
economy icon (Fig. 2 - 6) will be seen instead
of the previous adjusted freezer settings. If
either of the freezer door is opened or settings
are changed, Eco-fuzzy icon will be
disappeared and the refrigerator will revert to
the previous settings.
Warning of extreme
temperature rise
(Fig. 9 - 1 )
As the internal temperature has risen, which
means a danger for foods will go off at the
extreme temperature in the appliance, the high
temperature warning light will begin to flash.
In this circumstance it is important to open the
doors as infrequently as possible and warm
foods shouldn’t be put into it. If the warning
light remains on for more than 24 hours, you
should contact the Authorised Service.
If freezer-compartment temperature display
shows a message like E0, E1, ....,
(Fig. 9 - 2 ! ) you should contact the
Authorised Service.

8
Instructions for useGB
“Door open” warning
If the door has been left open for than one
minute, the alarm will give a sound warning.
When the door is closed, the alarm will be
silenced.
In order to pause door open alarm, press
vacation button for 1 second and release it.
Storing frozen food
Your freezer is suitable for the long-term
storage of commercially frozen foods and also
can be used to freeze and store fresh food.
If there is a power failure, do not open the
door. Frozen food should not be affected if the
failure lasts for less than 15 hrs. If the failure
is longer, then the food should be checked
and either eaten immediately or cooked and
then re-frozen
Freezing fresh food
Please observe the following instructions to
obtain the best results.
Do not freeze too large a quantity at any one
time. The quality of the food is best preserved
when it is frozen right through to the core as
quickly as possible.
Do not exceed the freezing capacity of your
appliance in 24 h.
Placing warm food into the freezer
compartment causes the refrigeration machine
to operate continously until the food is frozen
solid. This can temporarily lead to excessive
cooling of the refrigeration compartment.
When freezing fresh food, keep the freezer
set temperature below than -20 °C or press
Quick Freeze button. Small quantities of food
up to 1/2 kg. (1 lb) can be frozen without
adjusting the temperature control knob.
Take special care not to mix already frozen
food and fresh food.
How to use the accessories
Zero temperature compartment
(Fig. 10/11)
This compartment has been designed to store
frozen food which would be thawed slowly
(meat, fish, chicken...etc.) as required or food
wouldn’t be frozen and after a short time would
be consumed in a better and healthier
condition. Don’t put dairy products or similar
foods won’t be frozen as required into this
compartment which is the coldest place of the
refrigerating compartment.
Crisper separators (Fig. 12)
These colourful separators in the crispers have
been designed to keep your vegetables and
fruit fresh and protect them against smashing.
By moving the separator forward, you can
keep them in the created room at the back of
it. As it is not required in use, the separator
can be pushed back and locked.
Ice – matic (Fig. 13-14)
Ice – matic water is fed from the ice – matic
water transfer box. After removing the ice -
matic water transfer box, it should be filled
with water. Waiting for two minutes, put it on
its place. The water reservoirs of the ice –
matic will be filled automatically. Your ice will
be ready in about two hours. You needn’t take
the ice-matic out in order to get ice; just turn
it 90 to the right., and the ice will drop into the
ice-bowl below. Then take out the ice-bowl to
serve the ice. If you wish, you can leave the
ice in the bowl for a while.
Attention! After filling and putting on its place,
the ice-matic water transfer box should be
pushed until hearing the “click” voice. If there
exists some ice in the box you should wait it
to melt. When the elastic part, which is attached
to the front of the ice-matic water transfer box,
is removed it should be reattached so that
the water transfer hole should be placed to
the bottom. It should be carefully controlled
that this elastic part attached well.
Fridge – Compartment sliding glass shelf
(Fig. 15)
By the help of the sliding system the shelf can
be moved front and back. Consequently you
can reach the foods at the back of the shelf
easily.
Adjustable bottle racks (Fig. 17)
You can use the adjustable bottle racks by
moving them right and left. You can also move
them one into another so you don’t have any
volume problem.
Sliding storage boxes (Fig. 16)

9
Instructions for useGB
Cleaning and care
1. We recommend that you switch off the
appliance at the socket outlet and pull out the
mains plug before cleaning.
2. Never use any sharp instruments or abrasive
substances, soap, household cleaner,
detergent or wax polish for cleaning.
3. Use lukewarm water to clean the cabinet
of the appliance and wipe it dry.
4. Use a damp cloth wrung out in a solution
of one teaspoon of bicarbonate of soda to one
pint of water to clean the interior and wipe it
dry.
5. Make sure that no water enters the
temperature control box.
6. If the appliance is not going to be used for
a long period of time, switch it off, remove all
food, clean it and leave the door ajar.
7. We recommend that you polish the metal
parts of the product (i.e. door exterior, cabinet
sides) with a silicone wax (car polish) to protect
the high quality paint finish.
8. Check door seals regularly to ensure they
are clean and free from food particles.
9. Never:
•Clean the appliance with unsuitable material;
e.g. petroleum based products.
•Subject it to high temperatures in any way,
•Scour, rub etc., with abrasive material.
10. Removal of dairy cover and door tray :
•To remove the dairy cover, first lift the cover
up by about an inch and pull it off from the
side where there is an opening on the cover.
•To remove a door tray, remove all the contents
and then simply push the door tray upwards
from the base.
11. Make sure that the special plastic tray at
the bottom of the appliance which collects
defrost water is clean at all times. If you want
to remove the tray to clean it, follow the
instructions below:
•Take out the ventilation cover that is located
at the bottom of the appliance by pulling it
toward yourself.
•Pull out the plastic tray at the bottom.
•Put this tray in its place after cleaning it with
soapy water.
•Insert the bottom ventilation cover in its place
by pressing.
Note: Never use gasoline or similar materials
for cleaning purposes
This accessory is designed to use the door
shelves’ volume more efficiently. It’s property
of moving right or left helps to easily settle
high bottles to the lower shelf.
Temperature adjustable compartments
(Fig. 11)
These compartments are designed for optional
usage. You can either use these compartments
for zero temperature compartment or for
second floor crisper when you need extra
volume for your vegetables.
Attention! You can extend your fridge’s volume
by removing the left-side second floor crisper.
To do this, pull the crisper and the crisper will
stop because it will reach the stopper. Raise
the front part of the crisper 1 cm., repull the
crisper and it will be removed easily. The right-
side second floor crisper can be moved right
and left by the help of its sliding mechanism.
So you can move this compartment according
to the volume of the pots in the fridge.
Replacing the interior light
bulb
Should the light fail, switch off at the socket
outlet and pull out the mains plug.
Then ensure the bulb is screwed securely in
the bulb holder. Replace the plug and switch
on.
If the light still fails, obtain a replacement E14
screw-cap type 15 Watt (Max) bulb from your
local electrical store and then fit it.
Carefully dispose of the burnt-out light bulb
immediately.

10
Trouble - shooting
If the appliance does not operate when
switched on, check;
•That the plug is inserted properly in the socket
and that the power supply is on. (To check the
power supply to the socket, plug in another
appliance)
•Whether the fuse has blown/circuit breaker
has tripped/main distribution switch has been
turned off.
•That the temperature control has been set
correctly.
•That the new plug is wired correctly, if you
have changed the fitted, moulded plug.
If the appliance is still not operating at all after
above checks, contact the dealer from whom
you purchased the unit.
Please ensure that above checks have been
done, as a charge will be made if no fault is
found.
Do’s and don’ts containing carbonated liquids into the freezer,
as they may burst.
Don’t- Exceed the maximum freezing loads
when freezing fresh food.
Don’t- Give children ice-cream and water ices
direct from the freezer. The low temperature
may cause 'freezer burns' on lips.
Don’t- Freeze fizzy drinks.
Don’t- Try to keep frozen food which has
thawed; it should be eaten within 24 hours or
cooked and refrozen.
Don’t- Remove items from the freezer with
wet hands.
Do- Wrap all food in aluminium foil or freezer
quality polythene bags and make sure any air
is excluded.
Do- Prepare fresh food for freezing in small
portions to ensure rapid freezing.
Do- Always choose high quality fresh food
and be sure it is thoroughly clean before you
freeze it.
Do- Store commercially frozen food in
accordance with the instructions given on the
packets.
Do- Keep food for as short a time as possible
and adhere to "Best Before" and "Use by" etc.
dates.
Do- Check contents of the freezer every so
often.
Do- Wrap cheese firstly in greaseproof paper
and then in a polythene bag, excluding as
much air as possible. For best results, take
out of the fridge compartment an hour before
eating.
Do- Wrap bread well to keep it fresh.
Do- Chill white wines, beer, lager and mineral
water before serving.
Do- Wrap frozen food immediately after
purchasing and put it in to the freezer as soon
as possible.
Don’t- Store bananas in your fridge
compartment.
Don’t- Cover the shelves with any protective
materials which may obstruct air circulation.
Don’t- Store poisonous or any dangerous
substances in your appliance. It has been
designed for the storage of edible foodstuffs
only.
Don’t- Consume food which has been
refrigerated for an excessive length of time.
Don’t- Store cooked and fresh food together
in the same container. They should be
packaged and stored separately.
Don’t- Leave the door open for long periods,
as this will make the appliance more costly to
run.
Don’t- Put hot food into the appliance. Let it
cool down first.
Don’t- Put liquid-filled bottles or sealed cans
Instructions for useGB
1
Nous vous félicitons d'avoir choisi un Appareil de qualité
conçu pour vous offrir de nombreuses années
de service.
La sécurité d'abord !
Ne connectez pas votre appareil à l'alimentation
électrique avant d'avoir enlevé tous les emballages et
protections de transport.
• Attendez au moins 4 heures avant de le brancher
pour que l'huile du compresseur se stabilise s'il a été
transporté couché.
• Si vous vous débarrassez d'un vieil appareil à ressort
ou loquet intégré à la porte, prenez soin de le rendre
hors de danger pour éviter que les enfants ne
s'enferment à l'intérieur.
• L'utilisation de cet appareil s'applique exclusivement
à l'usage prévu, c'est-à-dire à la conservation et
congélation des denrées alimentaires.
• Ne vous débarrassez pas de l'appareil en le brûlant.
L'isolation de votre appareil contient des substances
non CFC qui sont inflammables. Veuillez contacter les
autorités locales pour obtenir des renseignements
concernant la mise au rebut et les endroits existants.
• L'utilisation de cet appareil dans une pièce froide, non
chauffée n'est pas recommandée. (garage, jardin d'hiver,
annexe, abri, remise, etc.)
Afin d'obtenir le meilleur résultat possible et un
fonctionnement sans encombres de votre appareil,
veuillez lire ces instructions attentivement. Le non-
respect de ces instructions pourrait annuler votre droit
à l'assistance sans frais pendant la période de garantie.
Veuillez conserver ces instructions soigneusement à
titre de référence pratique.
Notice d'utilisationFR

2
Conditions électriques
Avant de brancher l'appareil à la prise murale,
vérifiez que la tension et la fréquence indiquées
sur la plaque signalétique à l'intérieur de
l'appareil correspondent à votre alimentation
électrique.
Nous recommandons de connecter cet
appareil au réseau électrique par le biais d'une
prise dotée d'un commutateur et d'un fusible
et placée de façon à être facile d'accès.
Avertissement ! Cet appareil doit être
branché à une borne de mise à la terre.
Les réparations de l'appareillage électrique
sont réservées exclusivement à un technicien
qualifié. De mauvaises réparations réalisées
par une personne non qualifiée peuvent
occasionner des risques dont les
conséquences peuvent être critiques pour
l'utilisateur de l'appareil.
Instructions de transport
1. L'appareil doit être transporté en position
debout uniquement. L'emballage fourni doit
rester intact pendant le transport.
2. Si l'appareil a été couché pendant le
transport, il ne doit pas être mis en service
pendant au moins 4 heures pour permettre
au système de se stabiliser.
3. Le non-respect des instructions ci-dessus
pourrait endommager l'appareil et ne saurait
engager la responsabilité du fabricant.
4. L'appareil doit être protégé contre la pluie,
l'humidité et autres conditions atmosphériques.
Important !
• N'essayez pas de vous asseoir ou de monter
sur l'appareil, celui-ci n'étant pas prévu à cet
effet. Vous pourriez vous blesser ou
endommager l'appareil.
• Assurez vous que le câble d'alimentation
n'est pas coincé sous l'appareil pendant et
après son déplacement, cela pourrait
endommager le câble.
• Veillez à ce que les enfants ne jouent pas
avec l'appareil et ne touchent pas aux
commandes.
Instructions d'installation
1. Ne conservez pas votre appareil dans une
pièce ou la température est susceptible d'être
inférieure à 10°C pendant la nuit ou en hiver,
car l'appareil est conçu pour fonctionner à des
températures ambiantes comprises entre +10
et +43°C. A des températures inférieures,
l'appareil ne fonctionnera pas, entraînant une
réduction de la durée de conservation des
denrées.
2. Ne placez pas l'appareil à proximité de
cuisinières, radiateurs ou à la lumière directe
du soleil, car cela entraînerait un effort
supplémentaire des fonctions de l'appareil. S'il
est installé à côté d'une source de chaleur ou
d'un congélateur, respectez les dégagements
latéraux minimum suivants :
des Cuisiniènes 30 mm
des Radiateurs 300 mm
des Congélateurs 25 mm
3. Assurez-vous de laisser suffisamment
d'espace autour de l'appareil pour que l'air
puisse circuler librement.
• Fixez la grille d'aération inférieure fournie
avec l'appareil tel qu'illustré dans le schéma,
les fixations placées face à face au niveau du
pied du bas de la porte. Assurez-vous que les
fixations sont correctement engagées (Fig. 3).
4. L'appareil doit être posé sur une surface
lisse. Les deux pieds avant peuvent être ajustés
si nécessaire. Pour faire en sorte que votre
appareil soit à niveau, réglez les deux pieds
avant en tournant dans le sens des aiguilles
d'une montre ou dans le sens contraire jusqu'à
ce que l'appareil soit bien calé au sol. Le
réglage approprié des pieds évite les vibrations
excessives et le bruit.
5. Référez-vous à la section « Nettoyage et
Entretien » pour préparer votre appareil à
l'emploi.
Notice d'utilisationFR

3
réfrigérateur.
• Les denrées que vous souhaitez congeler doivent
être fraîches et en bon état.
• Il est conseillé de séparer les denrées en portions
en fonction de vos besoins quotidiens ou par repas.
• Même si les denrées ne sont stockées que pendant
une courte période, il faut les emballer de manière à
empêcher leur dessication. Les matériaux d'emballage
doivent être résistants au froid, à la déchirure, à
l'humidité, et doivent être imperméables aux odeurs,
aux graisses et aux acides. Ils doivent également être
imperméables à l'air. Ils doivent par ailleurs se fermer
correctement, être facile à manipuler et être composés
de matériaux supportant la congélation.
4. Les produits laitiers doivent être conservés dans le
compartiment spécial fourni dans le casier de la porte.
5. Les aliments cuisinés doivent être conservés dans
des récipients hermétiques.
6. Les produits frais emballés peuvent être placés sur
la clayette. Les fruits et légumes frais doivent être
lavés et rangés dans le bac à légumes.
7. Les bouteilles peuvent être placées dans la porte.
8. Pour conserver la viande crue, emballez-la dans
des sachets plastiques et placez-la dans le
compartiment basse température. Veillez à ce qu'elle
ne touche pas les aliments cuisinées afin d'éviter toute
contamination. Pour votre sécurité, ne conservez pas
la viande crue plus de deux à trois jours.
9. Pour une efficacité optimale, ne couvrez pas les
clayettes amovibles de papier ou autres matériaux
afin que l'air puisse circuler librement.
10. Ne conservez pas d'huile végétale dans les
balconnets de porte. Conservez les denrées emballés,
enveloppées ou couvertes. Laissez refroidir les aliments
et boissons chauds avant de les introduire dans le
réfrigérateur. Le reste du contenu des boîtes de
conserve ne doit pas être conservé dans la boîte.
11. Ne congelez pas de boissons gazeuses et ne
consommez pas de produits tels que des bâtonnets
glacés à l'eau lorsqu'ils sont trop froids.
12. Certains fruits et légumes s'abîment s'ils sont
conservés à une température avoisinant 0 °C. Emballez
les ananas, melons, concombres, tomates et produits
similaires dans des sacs en polyéthylène et placez-
les dans le bac à légumes.
13. L'alcool à teneur élevée doit être conservé debout
dans des récipients fermés hermétiquement. Ne
conservez jamais de produits contenant du gaz
propulseur inflammable (crème en bombe, bombes
aérosols, etc.) ou des substances explosives. Ils
présentent un risque d'explosion.
Suggestion d'agencement
des denrées dans l'appareil
Indications pour obtenir une conservation et une
hygiène optimales :
1. Le compartiment réfrigérateur est destiné à
la conservation à court terme d'aliments frais et
de boissons.
2. Le compartiment congélateur est évalué
comme et destiné à la congélation et
la conservation de denrées surgelées. La
recommandation de conservation
indiquée sur l'emballage des aliments doit
toujours être respectée.
3.• Les plats chauds doivent être refroidis à
température ambiante avant d'être placés dans le
Apprendre à connaître votre
appareil (Fig. 1)
Eclairage du compartiment congélateur
Etagère en plastique du compartiment congélateur
Bac de transfert de l'eau du distributeur de glaçon
Distributeur de glaçons
Bac à glaçons
Cache arrière du distributeur de glaçons
Ioniseur
Filtres d'odeurs
Clayette porte-bouteilles
Casiers à bouteilles
Etagère coulissante en verre du compartiment
réfrigérateur
Etagère en verre du compartiment réfrigérateur
Eclairage du compartiment réfrigérateur
Bac à légumes en verre du compartiment
réfrigérateur
Deuxième étage du bac à légumes
Filtres d'humidité
Bac à légumes
Couvercle de circulation d'air en bas
Pieds avant réglables
Etagère de la porte du compartiment congélateur
Support à œufs
Etagère de la porte du compartiment du réfrigérateur
à paroi coulissante
Boîtes coulissantes de stockage
Etagère de la porte du compartiment du réfrigérateur
Casier à bouteilles
Grille de support
Compartiment congélateur
Compartiment réfrigérateur
1.
2.
3.
4.
5.
6.
7.
8.
9.
10.
11.
12.
13.
14.
15.
16.
17.
18.
19.
20.
21.
22.
23.
24.
25.
26.
27.
28.
Notice d'utilisationFR

4
Avant l'utilisation
Vérification finale
Avant de commencer à utiliser l'appareil,
vérifiez que :
1. Les pieds ont été ajustés et sont parfaitement
à niveau.
2. L'intérieur est sec et l'air peut circuler
librement derrière l'appareil.
3. L'intérieur est propre comme l'indique la
section « Nettoyage et entretien ».
4. La prise de l'appareil a été branchée dans
la prise murale et le courant passe. Lorsque
la porte est ouverte, l'éclairage intérieur
s'allumera.
Et notez que :
5. Vous remarquerez un bruit lorsque le
compresseur se met en marche. Le liquide et
les gaz intégrés au système du réfrigérateur
peuvent également faire du bruit, que le
compresseur soit en marche ou non. Ceci est
tout à fait normal.
6. Une légère ondulation du dessus de la
carrosserie est normale du fait du procédé de
fabrication utilisé et ne constitue pas un défaut.
7. Nous recommandons de laisser la
température au réglage d'usine (ex.: -18/+4°C)
et de contrôler la température pour vérifier que
l'appareil maintienne les températures de
conservation souhaitées (voir la section
Commande de température et Réglage).
8. Ne remplissez pas l'appareil immédiatement
après l'avoir branché. Attendez que la bonne
température de conservation soit atteinte.
Nous vous conseillons de vérifier la
température à l'aide d'un thermomètre précis
(voir Commande de température et Réglage).
Notice d'utilisationFR
Commande de température
et réglage
Fonctionnement du réfrigérateur
Lorsque vous allumez l'appareil pour la
première fois, l'indicateur du compartiment du
réfrigérateur présentera une température de
+4°C et celui du compartiment du congélateur
indiquera la température définie en usine de
-18°C.
(Fig. 2 - 2 et Fig. 2 - 5 ).Le compresseur
commencera à fonctionner environ 1 minute
après avoir branché l'appareil. Après son
allumage, les températures des différents
compartiments atteindront leurs réglages
respectifs en moins de 24 heures, en fonction
de la température ambiante et du niveau de
remplissage du réfrigérateur. Vous pouvez
contrôler le refroidissement à l'aide des
indicateurs de température du réfrigérateur et
du congélateur.
Important !
• Lorsque les températures des compartiments
congélateur et réfrigérateur sont réglées au
maximum, les denrées doivent être stockées
dans le compartiment base température.
Table of contents
Languages:
Other Beko Refrigerator manuals

Beko
Beko DSA25020X User manual

Beko
Beko TSE 1260 User manual

Beko
Beko GNEV220G User manual

Beko
Beko RCNA400O40XB4YN Instruction Manual

Beko
Beko GN163120X User manual

Beko
Beko KS 13200 User manual

Beko
Beko WSA 24000 User manual

Beko
Beko 191641EI User manual

Beko
Beko SSA24020 User manual

Beko
Beko B5RCNE594ZXB User manual

Beko
Beko 674580 EI User manual

Beko
Beko FXF5075 S User manual

Beko
Beko CN236220 User manual

Beko
Beko ASL1342S User manual

Beko
Beko DNE27000KLS User manual

Beko
Beko BFBF2815SS User manual

Beko
Beko DN161220DX User manual

Beko
Beko CS 321CA-PBW10 User manual

Beko
Beko RCSA365K20W Instruction Manual

Beko
Beko RDNE18C2E21W User manual