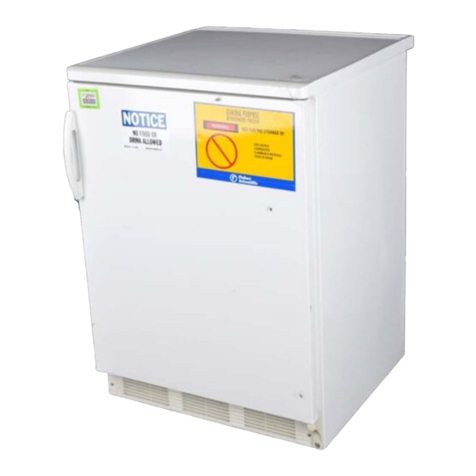
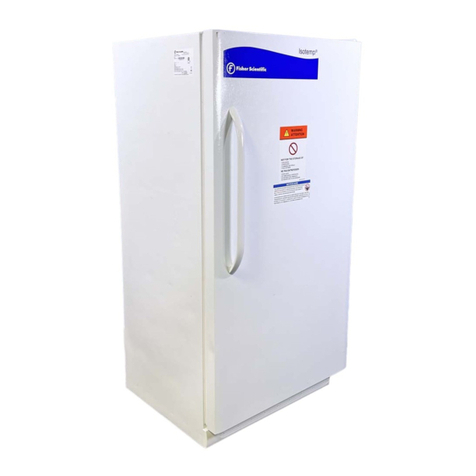
Fisher Scientific 10ECEEFSA User manual

Isotemp Explosion Proof
and
Flammable Materials Storage
Refrigerator/Freezers
Explosion Proof
Model# 10ECEEFSA
Catalog# 13-986-116A
Flammable Material Storage
Model# 10FCEEFSA
Catalog# 13-986-111A
106726 • Rev. B

Ta ble of Contents
Safety Information ................................................................................................................... .................................3
Alert Signals.........................................................................................................................................................3
Unpacking ................................................................................................................................................................4
Visible Loss or Damage.......................................................................................................................................4
Concealed Loss or Damage ..............................................................................................................................4
Performance Characteristics .......................................................................................................... ..........................5
Temperature Ranges ..........................................................................................................................................5
Capacity...............................................................................................................................................................5
Construction.........................................................................................................................................................5
Refrigerant .................................................................................................................................... ......................5
Applications ...............................................................................................................................................................6
Explosion-Proof Refrigerator/Freezer ................................................................................................. ...............6
FMS Refrigerator/Freezer ..................................................................................................................................6
Installation .................................................................................................................................................................7
Leveling the Unit ................................................................................................................................................7
Explosion-Proof Refrigerator Installation .............................................................................................
................7
Electric Connection Check Points ............................................................................................................... 10
FMS Refrigerator/Freezer Installation ...............................................................................................................11
Loading Procedures...........................................................................................................................................11
Operation .................................................................................................................................................................12
Maintenance.............................................................................................................................................................13
Defrost ...............................................................................................................................................................13
Cleaning.............................................................................................................................................................13
Cleaning Behind the Unit
............................................................................................................. .............14
Cleaning the Defrost Pan ...........................................................................................................................14
Troubleshooting .......................................................................................................................................................15
Warranty
...................................................................................................................................................................16
How to Seal Killark® Box Conduit with Fiber and Sealing Compound to Help Protect Against
Explosions .....................................................................................................................................................8

3
Your satisfaction and safety are important to Fisher
Scientific and a complete understanding of this unit is
necessary to attain these objectives.
As the ultimate user of this apparatus, it is your responsi-
bility to understand its proper function and operational
characteristics. This instruction manual should be thor-
oughly read and all operators given adequate training
before attempting to place this unit in service. Awareness
of the stated cautions and warnings, and compliance with
recommended operating parameters – together with
maintenance requirements – are important for safe and
satisfactory operation. The unit should be used for its
intended application; alterations or modifications will void
the Warranty.
This product is not intended, nor can it be used, as a ster-
ile or patient connected device. In addition, this appara-
tus is not designed for use in Class I, II or III locations as
defined by the National Electrical Code, unless otherwise
noted.
Safety Information
Warning
Warnings alert you to a possibility of
personal injury.
Caution
Cautions alert you to a possibility of
damage to the equipment.
Note
Notes alert you to pertinent facts and
conditions.
Alert Signals
Warning
As a routine laboratory precaution,
always wear safety glasses when
working with this apparatus.
DANGER:RISK OF CHILD ENTRAP-
MENT. BEFORE YOU THROW AWAY
YOUR OLD REFRIGERATOR OR
FREEZER:
•T
AKE OFF DOORS
•LEAVE THE SHELVES IN THE
PLACE SO THAT CHILDREN
MAY NOT EASILY CLIMB
INSIDE.

4
Unpacking
Save all packing material if apparatus is received dam-
aged. This merchandise was carefully packed and thor-
oughly inspected before leaving our factory.
Responsibility for its safe delivery was assumed by the
carrier upon acceptance of the shipment; therefore, claims
for loss or damage sustained in transit must be made
upon the carrier by the recipient as follows:
Visible Loss or Damage
Note any external evidence of loss or damage on the
freight bill, or express receipt, and have it signed by the
carrier’s agent. Failure to adequately describe such exter-
nal evidence of loss or damage may result in the carrier’s
refusing to honor your damage claim. The form required
to file such a claim will be supplied by the carrier.
Concealed Loss or Damage
Concealed loss or damage refers to loss or damage,
which does not become apparent until the merchandise
has been unpacked and inspected. Should either occur,
make a written request for the carrier’s agent within 15
days of the delivery date; then file a claim with the carrier
since the damage is the carrier’s responsibility.
If you follow the above instructions carefully, we will
guarantee our full support of your claim to be compensat-
ed for loss from concealed damage.
DO NOT – FOR ANY REASON – RETURN THIS UNIT
WITHOUT FIRST OBTAINING AUTHORIZATION

Temperature Ranges
Refrigerator 1° to 12°C (33.8° to 53.6°F)
Freezer -12° to -20°C (10.4° to -4°F)
Capacity
Net storage volume (Refrigerator) 8.1 cu. ft. (229.4 liters)
Net storage volume (Freezer) 2.0 cu. ft. (56.6 liters)
Construction
Exterior Enameled Steel
Interior ABS Plastic
Insulation Foamed Polyurethane
Door Gasket Magnetic Soft Vinyl
Shelves (3) Steel Wire
Net Weight 143 lbs. (65 kg)
Refrigerant
R134A, Charge 4.9 oz.
5
Performance Characteristics
Note
Product specifications are those
in effect at the time of this publi-
cation. Fisher Scientific reserves
the right to make additions, dele-
tions or changes in the product
line without notice.

Explosion-Proof Refrigerator/Freezers and Flammable
Material Storage (FMS) Refrigerator/Freezers have dis-
tinct features. Understanding the proper application for
each is necessary to assure safe operation.
Explosion-Proof
Refrigerator/Freezer
The Explosion-Proof Refrigerator/Freezer (13-986-116A/
10ECEEFSA) has been designed to store volatile or
flammable materials and can be used in hazardous loca-
tions containing explosive atmospheres. These units are
also suitable for storing such volatile materials as ethyl
ether, hexane, naptha, methyl, ethyl ketone, acetone, ben-
zol, butane, gasoline, alcohols, cyclopropane, lacquers,
solvents, fuels, pharmaceuticals, and anesthetics.
Explosion-Proof Refrigerators (13-986-116A/
10ECEEFSA) comply with the following:
A. UL listed, Commercial Refrigerator/Freezer for
hazardous locations, control number 27R2.
B. Suitable for use in Hazardous Locations;
Operating Temperature Code T4A, Class 1,
groups C & D., Class I Zone 1 Group IIB
C. Occupational Safety and Health Standards,
29CFR 1910.307.
FMS Refrigerator/Freezer
The FMS refrigerator/freezer (13-986-111A/10FCEEFSA)
has been designed to provide maximum protection for
storing and refrigerating volatile or flammable materials.
When used in a ventilated laboratory, non-hazardous
area, this product complies with the following code,
Federal Agency Standard and Listing.
A. National Fire Protection Association Code
NFPA 45
B. UL listed, Special Purpose Refrigerator.
6
Applications
Note
This instrument can also be used in
non-hazardous areas, where you
wish to refrigerate volatile or flam-
mable materials.
Warning
THIS PRODUCT IS NOT
APPROVED TO BE USED IN HAZ-
ARDOUS LOCATIONS CONTAIN-
ING EXPLOSIVE ATMOSPHERES.

7
For proper installation follow the instructions below:
Leveling the Unit
Adjustable legs at the front corners of the refrigerator
should be adjusted so that the refrigerator is firmly posi-
tioned on the floor and the front is raised just enough that
the door closes easily when opened halfway. Turn leveling
legs clockwise to raise and counterclockwise to lower, see
Fig. 1.
Explosion-Proof Refrigerator
Installation
IMPORTANT: PLEASE READ CAREFULLY
This unit is for free standing installation only. The appro-
priate materials and wiring methods must be used in order to
comply with current NFPA No. 70 NEC. for Class I, Group C
and Group D Hazardous Locations and Local Codes.
Determine the total amount of current presently being
used by other apparatus connected to the circuit that will
be used by this unit. It is critical that this added current
not exceed the rating of the fuse or circuit breaker in use.
Installation
Warning
If the unit is tilted in excess of 30
degrees, level the unit, then wait 12
hours before applying power.
Tu rn clockwise to raise, counter-
clockwise to lower.
Figure 1
Warning
BEFORE ANY ELECTRICAL
CONNECTIONS ARE MADE, BE
SURE THERE IS NO EXPLOSIVE
CONCENTRATIONS IN THE AREA.
Caution
Be sure the voltage supplied to the
refrigerator/freezer is equal to that
specified on the data plate.
Warning
For personal safety, this unit must be
properly grounded before use.
The National Electrical Code (NEC) must be referred to
for proper fusing and service conductor size and type.

8
Figure 1: Sealing the Killark Box 1
Unscrew and Remove Cover
INSTALLATION
How to Seal Killark® Box Conduit with Fiber
and Sealing Compound to Help Protect Against
Explosions (Explosion-Proof Units Only):
The purpose of the procedure that follows is to build fiber rope
dams on the left and right hubs of the horizontal conduit. The
fiber rope damns will surround conduit wiring that is housed
inside the horizontal conduit.
When both the left and right fiber rope dams have been
pressed into place, sealing compound is poured between the
two and forms into an airtight plug.
All of this is done in order to prevent the very real threat of
gas entering the Killark box and a resulting serious explosion.
After the unit wires have been pulled through the horizontal
conduit the following procedure is required:
•Turn power off at the circuit breaker before
proceeding.
•Place a small amount of sealing compound
granules, enclosed, into a clean mixing vessel.
Add small amounts of water while stirring until a
thick paste is formed, then carefully continue
adding smaller amounts of water until a thick gravy
consistency is achieved—NOT WATERY. Discard
any material that becomes too stiff to use. Never
attempt to restore workability by stirring in more
water.
•Locate silver Killark box, back/top-center of unit.
•Unscrew conduit domed-cover.
Figure 2:Sealing the Killark Box
Cond
uit D
omed
-Cover
Conduit
Op
enin
g
Horizontal
Cond
uit
Right Hub
Left Hub

9
INSTALLATION
Figure 3:Horizontal Conduit, Cutaway
•Insert fiber rope material down into horizontal conduit opening. Pressing down firmly, work the material into
the left hub and—most importantly—being sure the material COMPLETELY SURROUNDS THE WIRING,
from the top to the bottom, completely blocking this end of the horizontal conduit.
•Insert fiber rope material down into horizontal conduit opening. Pressing down firmly, work the material into
the right hub and—most importantly—being sure the material COMPLETELY SURROUNDS THE WIRING,
from the top to the bottom, completely blocking this end of the horizontal conduit.

10
INSTALLATION
•Pour sealing compound down in between the two fiber rope dams filling the remaining space. Pour
slowly, being careful not to trap air bubbles. Immediately wipe off any spilled sealing compound.
•Screw conduit domed-cover back onto conduit opening.
NOTE: INITIAL SETUP OF SEALING COMPOUND WILL OCCUR IN APPROXIMATELY 30 MINUTES
HOWEVER, THE SEALING COMPOUND REQUIRES A MINIMUM OF 8 HOURS ABOVE 32ºF TO
DEVELOP SUFFICIENT STRENGTH TO WITHSTAND EXPLOSIONS.
Electric Connection Check Points
• Have proper connections been made at the
junction box?
• Is the junction box lid fastened tightly to the
junction box?
• Are all wire connections secure?
• Are the service conductor sizes adequate to
carry rated load?
• Is the unit properly grounded?
• Is the unit connected to a properly fused branch
circuit?

FMS Refrigerator/Freezer
Installation
The power cord on this instrument is equipped with a
grounded NEMA 5-15P plug, which must be mated with a
NEMA 5-15R grounded receptacle.
The power cord of the FMS frig/freezer is equipped with a
3-prong grounding plug NEMA 5-15P, which mates with a
3-prong grounded receptacle, NEMA 5-15R. The cus-
tomer should have the wall receptacle and circuit checked
by a qualified electrician to verify the receptacle is
grounded.
Where a 2-prong receptacle is encountered, it is the
responsibility of the customer to have it replaced with a
properly grounded 3-prong receptacle.
Determine the total amount of current presently being
used by other apparatus connected to the circuit that will
be used by this unit. It is critical that this added current
not exceed the rating of the fuse or circuit breaker in use.
Loading Procedures
There is no mechanical air circulating system within this
unit. Therefore, if minimum temperature variation is
desired, allow clearance between each item for adequate
gravity convection air circulation.
11
INSTALLATION
Warning
For personal safety, this unit must be
properly grounded before use.
Caution
Do not under any circumstances, cut
or remove the ground prong from the
power cord. DO NOT USE A 2-PRONG
PLUG ADAPTER.
Caution
Be sure the voltage supplied to the
refrigerator/freezer is equal to that
specified on the data plate.
Caution
The aluminum evaporator and other
portions of these units should not be
exposed to the corrosive effects of
acidic or caustic materials. Extreme
care must be exercised if such materi-
als are stored within to prevent voiding
the warranty.
Warning
Under no circumstances should any-
one open the door of this refrigerator
or freezer cabinet while in the vicinity
of a lit cigarette or a glowing or heated
object. The vapor pressure of chemi-
cals is greatly reduced with refrigera-
tion, however vapors may still be pres-
ent which could ignite in the presence
of heated objects.
Warning
Do no store edible items with chemi-
cals.

The refrigerator and freezer sections of the unit each
have a separate access door. The freezer section is locat-
ed in the upper section of the unit.
The refrigerator/freezer is energized through a thermostat
on the top of the unit.
The graduated thermostat dial on these units is not meant
to be a direct indicator of operating temperatures. Also,
reference settings and resultant temperatures may vary
slightly from unit to unit, and it may be necessary to make
slight adjustments when seasonal or drastic changes
occur in ambient conditions.
12
Operation
Warning
Never open the screw type cover to
gain access to the thermostat in
order to change temperature set-
tings or perform any kind of service
unless electrical power to the unit
has been turned OFF and the sur-
rounding area has been cleared of
combustible vapors. See Fig. 2.

13
At colder settings in humid atmospheres or after pro-
longed use, it may become necessary to defrost the unit.
Defrost the unit when any frost becomes 1/4” to 1/2” thick.
Defrosting may become necessary more often if doors
are opened more frequently or the unit is operating in a
high humidity condition.
Defrosting
To defrost the unit, remove the contents from the refriger-
ator/freezer and adjust the temperature control full clock-
wise for the Explosion-Proof Refrigerator and counter
clockwise for the FMS Refrigerator. Allow the unit several
hours to completely defrost. While the refrigerator is
defrosting, water will collect in the base of the unit.
Sponge up the water as it collects in the bottom compart-
ment.
Also, place a folded towel at the front of the compartment
to soak up water that would otherwise run down the front
of the refrigerator.
Cleaning
The cabinet interior should be cleaned frequently. Any
spilled liquid should be wiped off immediately since stains
resulting from some spills could be permanent if not
quickly removed. The most convenient time to clean the
interior is after defrosting.
A mild detergent and lukewarm water or solution of bicar-
bonate of soda (1 tablespoon per gallon of water) is rec-
ommended for cleaning the interior and exterior of the
cabinet.
Surfaces should be rinsed and dried carefully and thor-
oughly.
The exterior of the cabinet should be cleaned occasional-
ly with a damp cloth of mild detergent and water. Do not
use an abrasive or harsh detergent on these surfaces.
Clean door gaskets with mild suds, rinse with clear water
and wipe dry.
Maintenance
Caution
Do not use sharp or pointed instru-
ments as a scraper. Damage to the
evaporator may occur.
Caution
Do not use any type of abrasive such
as steel wool or fluids such as gaso-
line, naphtha, or paint thinner that
could be harmful to plastic materials,
door gasket and/or painted surface.

Cleaning Behind the Unit
Place a hard surfaced strip under the front legs to prevent
damage to the floor covering. Carefully move the unit
straight out. If necessary, vacuum the wire and tube con-
denser on the back of the refrigerator.
Cleaning the Defrost Pan
The defrost water pan, located on the top of the compres-
sor at the rear of the refrigerator, should be cleaned at
least once a year. Simply empty and wipe clean with a
damp cloth. DO NOT REMOVE THE PAN.
After cleaning, move the refrigerator back into position,
reconnect power to the unit, and turn the thermostat knob
to the desired setting.
14
MAINTENANCE
Warning
Always disconnect power to the unit
when moving the refrigerator to
clean behind it.

15
Troubleshooting
If the refrigerator is not operating properly, it may be a minor problem that is easily corrected. A few things to
check are as follows:
A. Does not run, be sure that:
1. Thermostat knob is positioned to cool refrigerator.
2. Power is connected to unit.
3. Circuit breaker or fuse has not been blown.
B. Runs continuously:
1. If the unit gets too cold from continuous running, turn the control knob to a warmer setting.
Clockwise for Explosion- Proof refrigerators and counter clockwise for FMS refrigerators.
2. If constant running does not cool cabinet adequately, check for heavy frost build-up on the refrigera-
tion coil.
C. Noise:
The refrigerator/freezer has been designed for operation at a minimum noise level. All mechanical refrigera-
tors make some noise, but this does not necessarily indicate trouble. Hissing, gurgling and churning noises
(low level) are caused by the circulation of refrigerating gases within the system and are normal.
D. Clicking Sound:
In case the compressor overheats, a safety device will shut of the motor, thereby preventing damage. This
safety device, a thermal protector, functions to prevent damage to the motor windings in case of overload,
overheating or improper power supply. A clicking sound occurring about every 20 seconds, indicates that the
thermal protector is functioning. If this happens, turn the unit off and turn off the power supply to the unit. The
problem causing this action must be corrected before the unit is put back into
service.
E. Low Voltage:
In certain areas the voltage may be subject to fluctuation. Low voltage is one of the major causes of refrigera-
tion failure. Low or fluctuating voltage may be the result of overloaded power lines or inadequate wiring. This
condition may be noticed only during certain periods; and should it occur, we recommend contacting the local
power company and/or a electrician.
F. Insufficient Cooling:
Cause Remedy
Unit frosted Defrost
Thermostat set at warm setting Change thermostat to colder setting.
Condenser coil is dirty Clean with vacuum
NOTE: If the above actions do not correct the problem, contact Service @ 1-800-438-4851.

Laboratory instruments and equipment manufactured by Fisher Scientific Company L.L.C. – Laboratory
Equipment Division (hereinafter called “the Company”) are warranted only as stated below.
Subject to the exceptions and upon the conditions specified below, the Company agrees, at its election, to
correct by repair, by replacement, or by credit to the purchaser, any defect of materials or workmanship which
develops within one year (13 months for refrigerator and freezer products) from the date of purchase by the
original purchaser by the Company or by an authorized dealer of the Company provided that investigation or
factory inspection by the Company discloses that such defect developed under normal and proper use
The exceptions and conditions mentioned above are the following:
a. The Company makes no warranty concerning components or accessories not manufactured by it,
such as tubes, batteries, etc. However, in the event of the failure of any component or accessory not
manufactured by the Company, the Company will give reasonable assistance to the purchaser in
obtaining from the respective manufacturer whatever adjustment is reasonable in the light of the
manufacturer’s own warranty.
b. The Company shall be released from all obligations under its warranty in the event repairs or
modifications are made by persons other than its own service personnel or authorized dealer
personnel unless such repairs by others are made with the written consent of the Company.
c. THE COMPANY MAKES NO WARRANTY OF MERCHANTABILITY, FITNESS FOR ANY
PARTICULAR PURPOSE, OR ANY OTHER WARRANTY, EXPRESS OR IMPLIED, EITHER IN
FACT OF BY OPERATION OF LAW,…STATUTORY OR OTHERWISE.
d. The above warranty and the above obligations to repair, replace, or credit are complete and
exclusive and the Company expressly disclaims liability for lost profits or for special, indirect,
incidental, consequential, or exemplary damages of any nature whether attributable to contract,
warranty, negligence, strict liability, or otherwise even if the Company has been advised of the
possibility of such damages.
e. Representations and warranties made by any person, including dealers and representatives of the
Company, which are inconsistent or in conflict with the foregoing warranty shall not be binding upon
the Company unless reduced to writing and signed by an officer of the Company.
Warranty
16
This manual suits for next models
3
Table of contents
Other Fisher Scientific Refrigerator manuals

Fisher Scientific
Fisher Scientific 17LREEFSA User manual

Fisher Scientific
Fisher Scientific Isotemp 153 Original instructions

Fisher Scientific
Fisher Scientific 13-986-120A User manual

Fisher Scientific
Fisher Scientific Isotemp 13-986-153 User manual

Fisher Scientific
Fisher Scientific ISOTEMP 97-920-1 User manual

Fisher Scientific
Fisher Scientific 17LREEFSA User manual

Fisher Scientific
Fisher Scientific 13-986-127G User manual

Fisher Scientific
Fisher Scientific 13-986-450R Instruction Manual

Fisher Scientific
Fisher Scientific Isotemp Series Programming manual