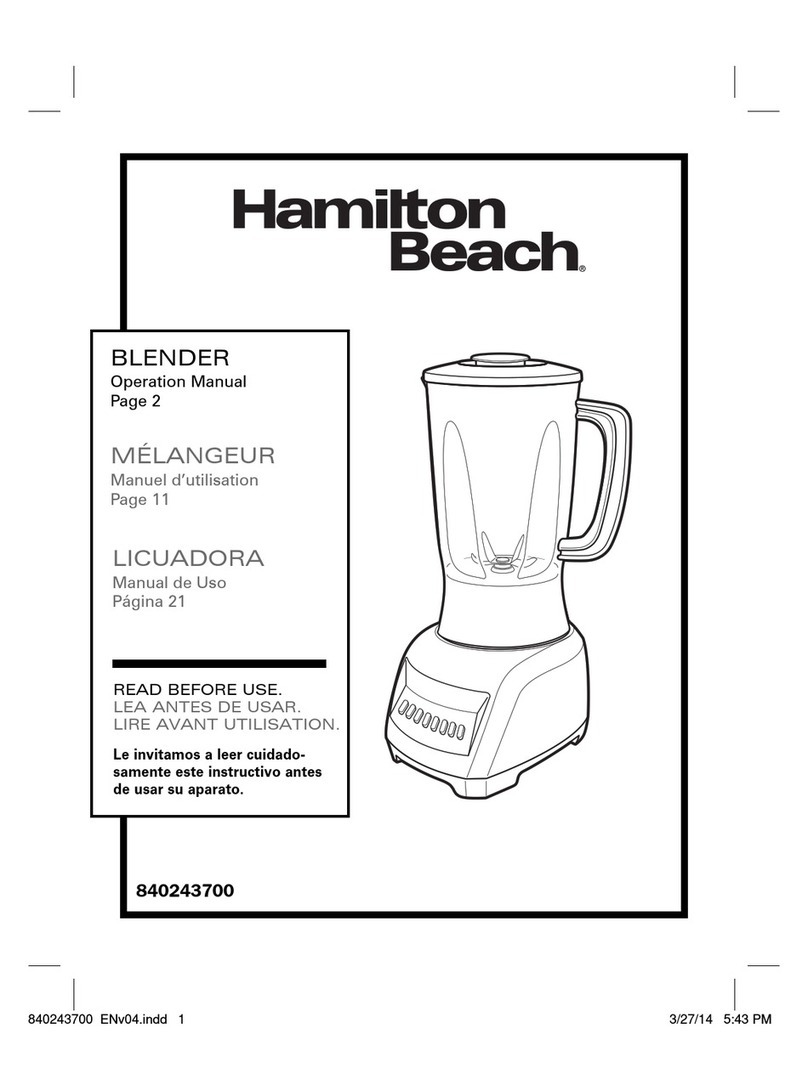
Bella Professional Bella Professional 90018 User manual

Instruction Manual • Manuel d’instructions • Manual de instrucciónes
Blender
Mélangeur
Batidora
1-866-832-4843
www.sensioinc.com
For customer service questions or comments
Pour le service à la clientèle, questions ou commentaires
Dudas o commentarios para departmento de servico a clientes
SO-304058_90018_Cover r1:Layout 1 9/4/08 4:56 PM Page 1

Blender
TABLE OF CONTENTS
Important Safeguards ....................................................................................................................................................................2
Notes on the Plug .............................................................................................................................................................................4
Notes on the Cord............................................................................................................................................................................4
Getting to Know Your Blender .....................................................................................................................................................5
Before Using for the First Time .......................................................................................................................................................6
Blender Assembly Instructions ......................................................................................................................................................6
Operating Instructions.....................................................................................................................................................................7
Hints for Best Results..........................................................................................................................................................................9
DO NOT!.............................................................................................................................................................................................10
User Maintenance Instructions ....................................................................................................................................................10
Care & Cleaning Instructions.........................................................................................................................................................11
Storing Instructions ..........................................................................................................................................................................12
TABLE DES MATIÈRES
Consignes de sécurité importantes...........................................................................................................................................13
Notes sur la fiche.............................................................................................................................................................................15
Notes sur le cordon........................................................................................................................................................................15
Connaître votre mélangeur.........................................................................................................................................................16
Avant d’utiliser l’appareil pour la première fois.....................................................................................................................17
Instructions pour l’assemblage du mélangeur......................................................................................................................17
Instructions d’utilisation ..................................................................................................................................................................18
Conseils pour des résultats optimaux.......................................................................................................................................21
À NE PAS FAIRE!................................................................................................................................................................................22
Instructions pour l’entretien .........................................................................................................................................................22
Instructions d’entretien et de nettoyage.................................................................................................................................23
Instructions de rangement ..........................................................................................................................................................24
ÍNDICE
Instrucciones de seguridad importantes ...............................................................................................................................25
Notas sobre el enchufe...............................................................................................................................................................27
Notas sobre el cable ...................................................................................................................................................................27
Conozca su batidora..................................................................................................................................................................28
Antes de utilizar por primera vez.............................................................................................................................................29
Instrucciones de montaje de la licuadora ............................................................................................................................29
Instrucciones de funcionamiento .............................................................................................................................................30
Consejos para obtener mejores resultados.........................................................................................................................33
Cosas que no debe hacer.........................................................................................................................................................34
Instrucciones de mantenimiento para el usuario................................................................................................................34
Instrucciones de limpieza y cuidado .....................................................................................................................................35
Instrucciones de almacenamiento ..........................................................................................................................................36
1
SO-304058_90018_IM r3:Layout 1 9/4/08 4:57 PM Page 1

IMPORTANT SAFEGUARDS
When using electrical appliances, basic safety precautions should always be followed
including the following:
1. READ ALL INSTRUCTIONS.
2. To protect against risk of electrical shock do not put cord, plugs, or appliance in water
or other liquid.
3. Close supervision is necessary when any appliance is used by or near children.
4. Unplug from outlet when not in use, before putting on or taking off parts, and before cleaning.
5. Avoid contacting moving parts.
6. Do not operate any appliance with a damaged cord or plug or after the appliance
malfunctions, or is dropped or damaged in any manner. Bring it to a qualified technician
for examination, repair or electrical or mechanical adjustment.
7. The use of attachments, including canning jars, not recommended by the manufacturer
may cause a risk of injury to persons.
8. Do not use outdoors.
9. Do not let cord hang over edge of table or counter.
10. Do not let cord contact any hot surface, including the stove.
11. Keep hands and utensils out of the glass blending jar while blending to reduce the risk
of severe injury to persons or damage to the Blender. A scraper may be used but must
be used only when the Blender is not running.
12. Blades are sharp. Handle carefully.
13. To reduce the risk of injury, never place blade assembly on motor housing
without blending jar properly attached.
14. Always operate Blender with blending jar lid in place.
15. When blending hot liquids, remove measuring cap of 2-piece lid. Do not fill blending jar
beyond half-way (3 cups). With the protection of an oven mitt or thick towel, place one hand
on top of the lid during blending. Always begin processing at the LOW speed setting.
Keep hands and other exposed skin away from the blending jar lid opening to
prevent possible burns. 2
SO-304058_90018_IM r3:Layout 1 9/4/08 4:57 PM Page 2

FOR HOUSEHOLD USE ONLY
SAVE THESE INSTRUCTIONS
ADDITIONAL IMPORTANT SAFEGUARDS
1. All users of this appliance must read and understand this owner’s manual before operating
or cleaning this appliance.
2. The cord to this appliance should be plugged into a 120 V AC grounded 3-prong
electrical outlet only.
3. Do not leave this appliance unattended during use.
4. If this appliance begins to malfunction during use, press the OFF/PULSE button.
Immediately unplug the cord. Do not use or attempt to repair the malfunctioning appliance.
5. If this appliance falls or accidentally becomes immersed in water, unplug it immediately.
Do not reach into the water! Do not use this appliance after it has fallen into
or becomes immersed in water.
6. To reduce the risk of injury to persons or property, never use this appliance
in an unstable position.
7. Do not use this appliance for other than its intended use.
8. Do not use if the glass blending jar is cracked or chipped.
3
Blender
SO-304058_90018_IM r3:Layout 1 9/4/08 4:57 PM Page 3

NOTES ON THE PLUG
This appliance has a grounded 3-prong plug. Connect to a properly grounded outlet only.
Do not attempt to modify the plug in any way.
NOTES ON THE CORD
The provided short power-supply cord (or detachable power-supply cord) should be used
to reduce the risk resulting from becoming entangled in or tripping over a longer cord.
Do not use an extension cord with this product.
PLASTICIZER WARNING
CAUTION: To prevent Plasticizers from migrating from the finish of the counter top or table top
or other furniture, place NON-PLASTIC coasters or place mats between the appliance
and the finish of the counter top or table top. Failure to do so may cause the finish to darken;
permanent blemishes may occur or stains can appear.
ELECTRIC POWER
If the electrical circuit is overloaded with other appliances, your appliance may not
operate properly. It should be operated on a separate electrical circuit from other appliances.
4
SO-304058_90018_IM r3:Layout 1 9/4/08 4:57 PM Page 4

GETTING TO KNOW YOUR BLENDER
Product may vary slightly from illustrations.
5
Blender
2 oz. Measuring Cap
Figure 1
Blending Jar Lid
48 oz. Glass
Blending Jar
Rubber Seal Ring
Blade Assembly
Cutting Blade
Collar
Motor Housing
Control Panel
Power Cord with
Grounded 3-Prong Plug
Cord Wrap
(not shown)
SO-304058_90018_IM r3:Layout 1 9/4/08 4:57 PM Page 5

BEFORE USING FOR THE FIRST TIME
CAUTION: Use extreme care when handling blades. Do not touch the blades with your fingers.
The blades are very sharp and can cause injury if touched.
1. Carefully unpack the Blender, glass blending jar, and all parts.
2. Wash the blending jar lid, measuring cap, glass blending jar, rubber seal ring,
collar, and cutting blade in warm soapy water.
3. Rinse and dry thoroughly.
4. Make sure the cord is unplugged and all control panel indicator lights are off.
CAUTION: To protect against risk of electrical shock, do not place motor housing,
plug or cord in water or any other liquid.
5. Wipe the motor housing clean with a moistened cloth.
6. Dry thoroughly.
BLENDER ASSEMBLY INSTRUCTIONS
NOTE: Before assembling, make sure the cord is unplugged and all control panel indicator lights
are off.
CAUTION: Use extreme care when handling the blades.
Do not touch blades with your fingers. The blades are very sharp and can cause injury if touched.
1. See Figure 1. Carefully place the rubber seal ring over the cutting blade. These two pieces
combine to create the blade assembly.
2. Place the blade assembly into the glass blending jar.
3. Place the collar over the blade assembly. Hold the glass blending jar and turn the collar
counter-clockwise to firmly secure it into position on the glass blending jar.
NOTE: The collar and blade assembly must be firmly attached to the blending jar
before putting any foods or liquids into the blending jar.
6
SO-304058_90018_IM r3:Layout 1 9/4/08 4:57 PM Page 6

OPERATING INSTRUCTIONS
HIGH/MED/LOW SPEEDS
CAUTION: Keep hands and utensils out of the blending jar while blending to prevent
the possibility of severe injury to persons or damage to the unit. A scraper may be used
but must only be used when the unit is not running.
CAUTION: Use extreme care when handling the blade assembly.
Do not touch blades with your fingers. The blades are very sharp and can cause injury if touched.
IMPORTANT: Your blending jar and blades are subject to wear during normal use.
Always inspect for broken, cracked or loose blades. If blades are damaged, do not use.
Before starting, make sure power cord is unplugged and all control panel indicator lights are off.
See
HINTS FOR BEST RESULTS
and
DO NOT!
sections of this owner’s manual before using this Blender.
1. Make sure that the cutting blade or rubber seal ring, and collar are properly assembled
and securely fastened to the blending jar. See
BLENDER ASSEMBLY INSTRUCTIONS
for details.
2. Place the assembled blending jar on top of the motor housing.
CAUTION: Never place the blade assembly on the motor housing without the blending jar
and collar being completely assembled and securely tightened.
3. Add ingredients to the glass blending jar.
4. NOTE: When blending, foods or liquids tend to expand as they rise up the sides
of the blending jar. Do not fill the glass blending jar more than 3/4 full, 4-1/2 cups (36-oz.)
and pay close attention while processing.
WARNING: Never operate when the blending jar is empty.
5. Make sure the measuring cap is in position in the lid.
Place blending jar lid with measuring cap onto the glass blending jar.
Press the blending jar lid firmly into the glass jar so that the lid is tightly sealed.
IMPORTANT: Always hold the lid in place during processing.
7
Blender
SO-304058_90018_IM r3:Layout 1 9/4/08 4:57 PM Page 7

6. Plug the power cord into a 120 V AC electrical outlet.
7. Press the desired speed button: HIGH, MED, or LOW; the button will illuminate.
To change speeds during Blender operation, press the desired speed button.
IMPORTANT: As a safety feature, after 2 minutes of continuous processing,
the Blender will automatically shut itself OFF.
8. To stop processing, press the OFF/PULSE button. The speed button’s light will go out.
9. Make sure blades have stopped rotating.
10. If a scraper is needed to combine ingredients, lift the glass blending jar straight up
and off the motor housing to remove. Remove the lid or the measuring cap.
Use a long handle spoon or scraper to collect food from the sides of the jar.
11. Replace blending jar onto the motor housing. Replace lid assembly.
Press any power button to resume Blender operation.
12. Continue to blend until ingredients have reached desired consistency. When blending
is complete, press the OFF/PULSE button. The speed button’s light will go out.
Unplug the unit after use.
13. Make sure blades have stopped rotating. Lift the glass blending jar straight up
and off the motor housing to remove. NEVER TWIST THE GLASS BLENDING JAR TO REMOVE.
CAUTION: If the glass blending jar rotates during blending, immediately press the OFF/PULSE
button and wait for blades to stop operation; then remove and secure by tightening
the collar and blade assembly on blending jar.
- Do not touch blades
- Do not interfere with the blade movement
- Do not remove blending jar lid
PULSE
1. For short bursts of power, press the OFF/PULSE button.
2. The button’s power indicator light will illuminate as PULSE is active. Blades will stop
and the light will go out when pressure on the button is released.
8
SO-304058_90018_IM r3:Layout 1 9/4/08 4:57 PM Page 8

TO CRUSH ICE
1. Add 1 cup of ice cubes, about 9 average sized, to the glass blending jar.
2. For best results, add 1/4 cup water or other liquid.
3. Place the lid on glass blending jar.
4. Press the OFF/PULSE button and quickly release 3 to 5 times, until the cubes are reduced to
the desired consistency. Blades will stop operation when pressure on the button is released.
HINTS FOR BEST RESULTS
1. Always place liquid ingredients into the blending jar first, unless recipe directs otherwise.
2. Most foods require only seconds, not minutes, to process.
3. Blend small amounts of solid food at a time for best results.
4. Break or cut food into uniform 1-inch to 2-inch size pieces and hard fibrous food into uniform
1⁄2-inch pieces before processing. This will allow the food to drop down around the blades
for faster, more thorough blending action.
5. To prevent splattering, always place lid assembly on blending jar before turning Blender ON.
6. To add foods while Blender is operating, turn measuring cap to remove from lid
and slowly add ingredients through the center of the lid.
7. The removable measuring cap may be used as a 1- or 2-oz measure.
8. Always remove bones, pits, hard shells, seeds, and cores before processing to avoid
damaging the unit.
9. If food sticks to sides of blending jar and blending action stops, press the OFF/PULSE button.
Make sure blades have stopped rotating. Lift the glass blending jar straight up
and off the motor housing to remove. Remove lid or measuring cap. Carefully push food
down using a rubber spatula or scraper. Replace blending jar onto the motor housing.
Replace lid assembly and press any power button to resume Blender operation.
9
Blender
SO-304058_90018_IM r3:Layout 1 9/4/08 4:57 PM Page 9

DO NOT!
CAUTION: DO NOT ATTEMPT TO OPERATE WITHOUT THE BLADES, RUBBER SEAL RING, COLLAR,
BLENDING JAR, AND LID WITH MEASURING CAP INSERT PROPERLY IN PLACE.
1. Do not attempt to process extremely hard food which is difficult to cut with a kitchen knife.
2. Do not fill the blending jar with food more than 3/4 full.
3. Do not store foods in the blending jar.
4. Do not attempt to use the Blender to mash potatoes, whip egg whites or cream,
grind raw meat, knead heavy doughs, or extract juices from fruits and vegetables.
5. Do not remove blending jar from motor housing or replace it until motor has stopped.
6. Do not remove lid assembly while processing. Twist to remove the 2 oz. measuring cap
on the lid to add ingredients. To avoid splattering, replace when finished.
7. Do not attempt to use any utensils inside the glass blending jar unless the blades
have fully stopped operation.
USER MAINTENANCE INSTRUCTIONS
This appliance requires little maintenance. It contains no user serviceable parts.
Do not try to repair it yourself. Any servicing that requires disassembly other than cleaning
must be performed by a qualified appliance repair technician.
10
SO-304058_90018_IM r3:Layout 1 9/4/08 4:57 PM Page 10

CARE & CLEANING INSTRUCTIONS
CAUTION: Never immerse the motor housing, plug or cord in water or any other liquid.
1. Always unplug the unit before cleaning.
2. Whenever possible, rinse parts immediately after processing to make cleanup easier.
CAUTION: Use extreme care when handling the blade assembly. Do not touch the blades
with your fingers. The blades are very sharp and can cause injury if touched.
3. Disassemble Blender. Wash the glass blending jar, lid, measuring cap, blade assembly
and collar in warm soapy water. Rinse and dry thoroughly. Never use rough scouring pads
or abrasive cleansers on any plastic or metal parts as the surface may be damaged.
Do not wash any parts in the dishwasher.
4. If necessary, wipe exterior surface of the motor housing with a moist cloth or sponge
and dry thoroughly.
5. Do not fill the glass blending jar with boiling water or place any of the parts in boiling water.
6. Do not allow the blade assembly to soak in water for long periods of time.
7. For quick clean-ups, the interior of the glass blending jar can be cleaned by using the
PULSE function. Simply add some warm water and a small amount of detergent
into the glass blending jar. Following the
OPERATING INSTRUCTIONS
described in this manual,
press the OFF/PULSE button and repeat for several short bursts. The unit will clean itself,
without having to handle the sharp blades. Unplug the Blender, disassemble,
rinse and dry thoroughly. Take care as the blades are sharp.
8. Properly reassemble all parts before storing.
11
Blender
SO-304058_90018_IM r3:Layout 1 9/4/08 4:57 PM Page 11

STORING INSTRUCTIONS
1. Unplug and clean unit.
2. Always assemble clean and dry Blender parts correctly before storing on the motor housing.
CAUTION: Severe injury can result if the Blender is accidentally turned ON
when unit is not properly assembled.
3. Never store Blender while it is hot or plugged in.
4. Use the cord wrap on the bottom of the unit to store cord. Never wrap cord tightly
around the appliance. Never place any stress on cord, especially where the cord enters
the unit, as this could cause the cord to fray and break.
5. Store in original box or in a clean, dry place.
12
SO-304058_90018_IM r3:Layout 1 9/4/08 4:57 PM Page 12

CONSIGNES DE SÉCURITÉ
IMPORTANTES
Lorsqu'on utilise des appareils électriques, certaines consignes de sécurité élémentaires
doivent être respectées:
1. Lire toutes les instructions.
2. Afin de prévenir tout risque d’électrocution, ne pas immerger le cordon, les fiches ou l’appareil
dans l’eau ou dans tout autre liquide.
3. Une surveillance étroite est requise lorsqu’on utilise l'appareil en présence d'enfants.
4. Débrancher l’appareil de la prise murale lorsqu’il n’est pas utilisé, avant d’installer ou de retirer
des pièces et avant le nettoyage.
5. Éviter tout contact avec les pièces mobiles.
6. Ne pas utiliser un appareil électrique dont le cordon ou la fiche est endommagé ni
un appareil défectueux ou endommagé d’une quelconque façon. On doit le faire examiner,
réparer ou faire faire un ajustement mécanique ou électrique par un technicien qualifié.
7. L’utilisation d’accessoires, y compris de bocaux pour la mise en conserve, non recommandés
par le fabricant présente un risque de blessures pour les utilisateurs.
8. Ne pas utiliser à l’extérieur.
9. Ne pas laisser le cordon pendre d’un bord de table ou d’un comptoir.
10. Ne pas laisser le cordon entrer en contact avec une surface chaude, y compris la cuisinière.
11. Tenir les mains et les ustensiles hors du récipient en verre lorsque le mélangeur est en marche
afin de prévenir des blessures corporelles graves et d'éviter d’endommager le mélangeur.
Une raclette peut être utilisée seulement lorsque le mélangeur n’est pas en marche.
12. Les lames sont acérées. Les manipuler avec soin.
13. Afin de prévenir tout risque de blessures, ne jamais placer le bloc de coupe sur la base
motorisée sans que le récipient en verre ne soit bien fixé.
14. Toujours faire fonctionner le mélangeur avec le couvercle du récipient en verre en place.
13
Mélangeur
SO-304058_90018_IM r3:Layout 1 9/4/08 4:57 PM Page 13

15. Lorsque des liquides chauds sont mélangés, retirer le bouchon-mesure du couvercle
deux-pièces. Ne pas remplir le récipient en verre au-delà de la moitié (3 tasses).
À l’aide d’un gant de cuisson ou d’une serviette épaisse, placer une main sur le dessus
du couvercle pendant que le mélangeur est en marche. Toujours débuter le mélange
à la vitesse LOW (basse). Tenir les mains et autres parties du corps exposées loin
de l’ouverture du couvercle du récipient en verre afin de prévenir les brûlures.
POUR USAGE DOMESTIQUE
SEULEMENT
CONSERVER CES INSTRUCTIONS
CONSIGNES DE SÉCURITÉ IMPORTANTES ADDITIONNELLES
1. Toutes les personnes qui utilisent cet appareil doivent lire le manuel du propriétaire et le
comprendre avant d’utiliser cet appareil ou de le nettoyer.
2. La fiche de cet appareil doit être branchée uniquement dans une prise murale à 3 broches
avec mise à la terre de 120 V c.a.
3. Ne jamais laisser cet appareil en marche sans surveillance.
4. Si l’appareil montre des signes de défectuosité durant l’utilisation, appuyer sur le bouton
OFF/PULSE (arrêt/pulsation). Débrancher le cordon immédiatement. Ne pas utiliser un appareil
défectueux ou tenter de le réparer.
5. Si cet appareil tombe dans l’eau ou qu’il est accidentellement immergé dans l’eau,
le débrancher immédiatement. Ne pas tenter de sortir l’appareil de l’eau! Ne pas utiliser
cet appareil après qu’il ait tombé dans l’eau ou qu’il ait été immergé.
6. Afin de réduire tout risque de blessures corporelles et de dommages matériels, ne jamais
utiliser cet appareil sur une surface instable.
7. Ne pas utiliser cet appareil à des fins autres que celles pour lesquelles il a été conçu.
8. Ne pas utiliser cet appareil si le récipient en verre est craqué ou ébréché.
14
SO-304058_90018_IM r3:Layout 1 9/4/08 4:57 PM Page 14

NOTES SUR LA FICHE
Cet appareil est muni d’une fiche à 3 broches avec mise à la terre. Brancher dans une prise
avec mise à la terre seulement. On ne doit pas modifier la fiche soi-même en aucun cas.
NOTES SUR LE CORDON
Le cordon court fourni (ou cordon amovible) devrait être utilisé afin de prévenir tout risque
d’enchevêtrement ou de trébuchement sur un plus long cordon. Ne pas utiliser de rallonge
avec ce produit.
AVERTISSEMENT DE MIGRATION DE PLASTIFIANTS
MISE EN GARDE: Afin d’éviter la migration de plastifiants vers le fini de comptoirs, de tables
ou de tout autre meuble, placer des sous-verres faits de matière non plastique ou des napperons
entre l’appareil et la surface du comptoir ou de la table. Si cette consigne n’est pas respectée,
le fini du comptoir ou de la table noircira et s’en suivront des ternissures permanentes
ou des taches indélébiles.
ALIMENTATION ÉLECTRIQUE
Si le circuit électrique est surchargé parce qu’il doit alimenter d’autres appareils en plus du nouvel
appareil, ce dernier ne fonctionnera pas correctement. Il est conseillé de faire fonctionner
l’appareil sur un circuit électrique distinct.
15
Mélangeur
SO-304058_90018_IM r3:Layout 1 9/4/08 4:57 PM Page 15

CONNAÎTRE VOTRE MÉLANGEUR
Le produit peut légèrement différer des illustrations.
16
Bouchon-mesure
de 2 onces
Figure 1
Couvercle du
récipient en verre
Récipient en verre
de 48 onces
Joint d’étanchéité
en caoutchouc
Bloc de coupe
Couteau
Collier
Base motorisée
Tableau de commande
Cordon
d’alimentation
avec fiche à
trois broches
avec mise à
la terre
Range-cordon
(non illustré)
SO-304058_90018_IM r3:Layout 1 9/4/08 4:57 PM Page 16

AVANT D’UTILISER L’APPAREIL POUR LA PREMIÈRE FOIS
MISE EN GARDE : Redoubler de prudence en manipulant les lames. Ne pas toucher les lames
avec les doigts. Les lames sont acérées et peuvent causer des blessures au toucher.
1. Déballer avec soin le mélangeur, le récipient en verre et toutes les pièces.
2. Laver à l’eau chaude savonneuse le couvercle, le bouchon-mesure, le récipient en verre,
le joint d’étanchéité en caoutchouc, le collier et le couteau.
3. Bien rincer et laisser sécher à fond.
4. S’assurer que le cordon est débranché et que tous les voyants lumineux du tableau
de commande sont éteints.
MISE EN GARDE : Afin de prévenir tout risque de choc électrique, ne pas immerger
la base motorisée, la fiche ou le cordon dans l’eau ou dans tout autre liquide.
5. Essuyer l’extérieur de la base motorisée à l’aide d’un chiffon humide.
6. Bien sécher.
INSTRUCTIONS POUR L’ASSEMBLAGE DU MÉLANGEUR
REMARQUE : Avant de procéder à l’assemblage, s’assurer que le cordon est débranché
et que tous les voyants lumineux du tableau de commande sont éteints.
MISE EN GARDE : Redoubler de prudence en manipulant les lames.
Ne pas toucher les lames avec les doigts. Les lames sont acérées et peuvent causer des blessures
au toucher.
1. Voir la Figure 1. Placer avec soin le joint d’étanchéité en caoutchouc sur le couteau.
Ces deux pièces composent le bloc de coupe.
2. Placer le bloc de coupe dans le récipient en verre.
3. Placer le collier sur le bloc de coupe. Tenir le récipient en verre et visser le collier dans le sens
inverse des aiguilles d'une montre afin de le fixer fermement en place sur le récipient en verre.
REMARQUE : L’assemblage du collier et du bloc de coupe doit être fermement fixé au récipient en
verre avant d’y mettre des aliments ou des liquides.
17
Mélangeur
SO-304058_90018_IM r3:Layout 1 9/4/08 4:57 PM Page 17

INSTRUCTIONS D’UTILISATION
VITESSES HIGH/MED/LOW (HAUTE/MOYENNE/BASSE)
MISE EN GARDE : Tenir les mains et les ustensiles hors du récipient en verre lorsque le mélangeur
est en marche afin de prévenir des blessures corporelles graves ou d’endommager l’appareil.
Une raclette peut être utilisée seulement lorsque l’appareil n’est pas en marche.
MISE EN GARDE : Redoubler de prudence en manipulant le bloc de coupe.
Ne pas toucher les lames avec les doigts. Les lames sont acérées et peuvent causer des blessures
au toucher.
IMPORTANT : Le récipient en verre et les lames s’usent au cours d’une utilisation normale.
Toujours vérifier les lames pour s’assurer qu’elles ne sont pas brisées, fêlées ou lâches.
Ne pas utiliser l’appareil si les lames sont endommagées.
Avant de commencer, s’assurer que le cordon d’alimentation est débranché et que tous les voyants
lumineux du tableau de commande sont éteints. Voir les sections
CONSEILS POUR DES RÉSULTATS
OPTIMAUX
et
À NE PAS FAIRE !
de ce manuel du propriétaire avant d’utiliser le mélangeur.
1. S’assurer que le couteau, le joint d’étanchéité en caoutchouc et le collier sont assemblés
correctement et fixés solidement au récipient en verre.
Voir
INSTRUCTIONS POUR L’ASSEMBLAGE DU MÉLANGEUR
pour plus de détails.
2. Placer le récipient en verre assemblé sur le dessus de la base motorisée.
MISE EN GARDE : Ne jamais placer le bloc de coupe sur la base motorisée sans que
le récipient en verre et le collier ne soient complètement assemblés et vissés bien en place.
3. Ajouter les ingrédients dans le récipient en verre.
4. REMARQUE : Pendant le mélange, les aliments et les liquides ont tendance à augmenter
en volume et remonter sur les côtés du récipient en verre. Ne pas remplir le récipient en verre
au-delà des 3/4, 4 1/2 tasses (36 onces) et faire preuve de vigilance pendant le mélange.
AVERTISSEMENT : Ne jamais mettre le mélangeur en marche lorsque le récipient
en verre est vide.
18
SO-304058_90018_IM r3:Layout 1 9/4/08 4:57 PM Page 18

5. S’assurer que le bouchon-mesure est inséré dans le couvercle.
Placer le couvercle du récipient en verre muni du bouchon-mesure sur le récipient en verre.
Appuyer fermement sur le couvercle du récipient en verre pour l’enfoncer sur le récipient en
verre afin qu’il soit hermétiquement fermé.
IMPORTANT : Toujours tenir le couvercle en place pendant le mélange.
6. Brancher la fiche dans une prise murale de 120 V c.a.
7. Appuyer sur le bouton de vitesse désiré : HIGH, MED ou LOW (haute, moyenne ou basse);
le bouton s’allume. Afin de changer de vitesse pendant que le mélangeur est en marche,
appuyer sur le bouton de vitesse désiré.
IMPORTANT : Après 2 minutes d’utilisation continue, le mélangeur s’arrêtera
automatiquement. Il s’agit d’une caractéristique de sécurité.
8. Pour arrêter le mélange, appuyer sur le bouton OFF/PULSE (arrêt/pulsation). Le voyant
lumineux du bouton de vitesse s’éteint.
9. S’assurer que les lames ne tournent plus.
10. Lorsqu’il est nécessaire d’utiliser une raclette pour combiner les ingrédients, soulever le
récipient en verre et le dégager de la base motorisée afin de le retirer. Retirer le couvercle
ou le bouchon-mesure. Utiliser une longue cuillère ou une raclette afin de dégager les
aliments des côtés du récipient.
11. Remettre le récipient en verre en place sur la base motorisée. Remettre le couvercle en place.
Appuyer sur l’un des boutons de mise en marche pour remettre le mélangeur en marche.
12. Poursuivre le mélange jusqu’à ce que les ingrédients aient la consistance désirée.
Une fois le mélange terminé, appuyer sur le bouton OFF/PULSE (arrêt/pulsation).
Le voyant lumineux du bouton de vitesse s’éteint. Débrancher l’appareil après utilisation.
13. S’assurer que les lames ne tournent plus. Soulever le récipient en verre pour le retirer
de la base motorisée. NE JAMAIS FAIRE TOURNER LE RÉCIPIENT EN VERRE POUR LE RETIRER.
Mélangeur
SO-304058_90018_IM r3:Layout 1 9/4/08 4:57 PM Page 19
Table of contents
Languages:
