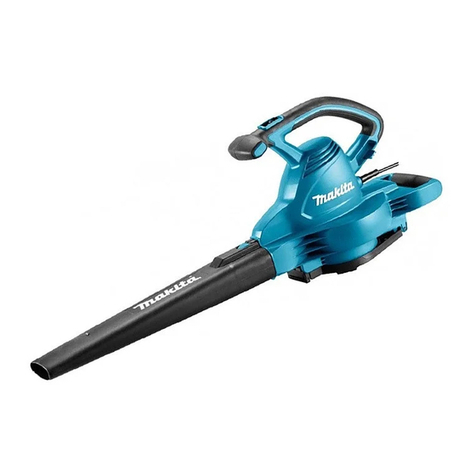
Benchmark 5124-250 User manual

3 IN 1 BLOWER/VAC
WEAR CSA APPROVED
EYE PROTECTION
WEAR EAR
PROTECTION
WEAR A
FACE MASK
BV-14EG V
*5 year limited warranty on tool.

1
PRODUCT SPECIFICATIONS
BENCHMARK 3 IN 1 BLOWER/VAC
Voltage 120V~60Hz
Motor 12 AMP
Mulch Ratio 13 : 1
Collection bag capacity 1.1 Bushel (40L)
Air speed 1st Speed – 173 MPH, 2nd Speed – 248 MPH
Air Volume 1st Speed – 252 CFM, 2nd Speed – 360 CFM
Weight 9.9lbs (4.5kg)
NEED ASSISTANCE?
Call us on our toll-free customer support line:
1-866-349-8665 (Monday through Friday 9am – 5pm Eastern Standard Time)
• Technical questions
• Replacement parts
• Parts missing from package

5124-250
3 IN 1 BLOWER/VAC
2
TABLE OF CONTENTS
Product Specifications .................................................................................. 1
Table of Contents .......................................................................................... 2
General Safety Warnings ............................................................................ 3-5
Specific Safety Rules .................................................................................. 6-9
Extension Cord Safety ............................................................................ 10-11
Symbols ...................................................................................................... 12
Know your 3 in 1 Blower/Vac ....................................................................... 13
Assembly .................................................................................................... 14
Operation ............................................................................................... 15-17
Maintenance ............................................................................................... 18
Troubleshooting .......................................................................................... 19
Exploded View ............................................................................................ 20
Parts List .................................................................................................... 21
Warranty ..................................................................................................... 22

3
GENERAL SAFETY WARNINGS
IMPORTANT SAFETY INSTRUCTIONS
Read and understand all safety and operational instructions. Failure to follow the
safety rules listed below and other basic safety precautions may result in serious
personal injury. Keep this manual, sales receipts and applicable warranty forms for
future reference.
WARNING: Before using this tool or any of its accessories, read this manual
and follow all Safety Rules and Operating Instructions. The important precautions,
safeguards and instructions appearing in this manual are not meant to cover all
possible situations. It must be understood that common sense and caution are
factors which cannot be built into the product.
SYMBOL MEANING
ALWAYS WEAR EYE PROTECTION THAT CONFORMS WITH CSA
Z94.3 or ANSI SAFETY STANDARD Z87.1
FLYING DEBRIS can cause permanent eye damage. Prescription
eyeglasses ARE NOT a replacement for proper eye protection.
Non-compliant eyewear can cause serious injury if broken during
the operation of a power tool.
Use hearing protection, particularly during extended periods of
operation of the tool, or if the operation is noisy.
WEAR A DUST MASK THAT IS DESIGNED TO BE USED WHEN
OPERATING A POWER TOOL IN A DUSTY ENVIRONMENT.
Dust that is created by power sanding, sawing, grinding,drilling, and
other construction activities may contain chemicals that are known to
cause cancer, birth defects, or other genetic abnormalities.
These chemicals include:
• Lead from lead-based paints
• Crystalline silica from bricks, cement, and other masonry products
• Arsenic and chromium from chemically treated lumber
The level of risk from exposure to these chemicals varies, according to
how often this type of work is performed. In order to reduce exposure
to these chemicals, work in a well-ventilated area, and use approved
safety equipment, such as a dust mask that is specifically designed to
filter out microscopic particles.
ELECTRICAL SAFETY
WARNING: To avoid electrical hazards, fire hazards or damage to the tool, use
proper circuit protection.
This tool is wired at the factory for 120V AC operation. It must be connected to a
120V AC, 15 A circuit that is protected by a time-delayed fuse or circuit breaker. To
avoid shock or fire, replace power cord immediately if it is worn, cut or damaged in
any way.

5124-250
3 IN 1 BLOWER/VAC
4
WARNING: Read all safety warnings and instructions. Failure to follow the
warnings and instructions may result in electric shock, fire and/or serious injury.
SAVE ALL WARNINGS AND INSTRUCTIONS FOR FUTURE REFERENCE.
WORK AREA SAFETY
Keep work area clean and well lit. Cluttered or dark areas invite accidents.
Do not operate power tools in explosive atmospheres, such as in the presence of
flammable liquids, gases or dust. Power tools create sparks which may ignite the
dust or fumes.
Keep children and bystanders away while operating a power tool. Distractions can
cause you to lose control.
ELECTRICAL SAFETY
Power tool plugs must match the outlet. Never modify the plug in any way. Do not
use any adapter plugs with earthed (grounded) power tools. Unmodified plugs and
matching outlets will reduce risk of electric shock.
Avoid body contact with earthed or grounded surfaces such as pipes, radiators,
ranges and refrigerators. There is an increased risk of electric shock if your body is
earthed or grounded.
Do not expose power tools to rain or wet conditions. Water entering a power tool will
increase the risk of electric shock.
Do not abuse the cord. Never use the cord for carrying, pulling or unplugging the
power tool. Keep cord away from heat, oil, sharp edges or moving parts. Damaged or
entangled cords increase the risk of electric shock.
When operating a power tool outdoors, use an extension cord suitable for outdoor
use. Use of a cord suitable for outdoor use reduces the risk of electric shock.
If operating a power tool in a damp location is unavoidable, use a residual current
device (RCD) protected supply. Use of a ground fault circuit interrupter (GFCI)
reduces the risk of electric shock.
PERSONAL SAFETY
Stay alert, watch what you are doing and use common sense when operating a
power tool. Do not use a power tool while you are tired or under the influence of
drugs, alcohol or medication. A moment of inattention while operating power tools
may result in serious personal injury.
Use personal protective equipment. Always wear eye protection. Protective
equipment such as dust mask, non-skid safety shoes, hard hat, or hearing
protection used for appropriate conditions will reduce personal injuries.
Prevent unintentional starting. Ensure the switch is in the OFF position before
connecting to power source and/or battery pack, picking up or carrying the tool.
Carrying power tools with your finger on the switch or energizing power tools that
have the switch on invites accidents.
Remove any adjusting key or wrench before turning the power tool on. A wrench or a
key left attached to a rotating part of the power tool may result in personal injury.

5
Do not overreach. Keep proper footing and balance at all times. This enables better
control of the power tool in unexpected situations.
Dress properly. Do not wear loose clothing or jewellery. Keep your hair, clothing and
gloves away from moving parts. Loose clothes, jewellery or long hair can be caught
in moving parts.
If devices are provided for dust extraction and collection, ensure these are
connected and properly used. Use of dust collection facilities can reduce dust-
related hazards.
POWER TOOL USE AND CARE
Do not force the power tool. Use the correct power tool for your application. The
correct power tool will do the job better and safer at the rate for which it was
designed.
Do not use the power tool if the switch does not turn it on and o. Any power tool
that cannot be controlled with the switch is dangerous and must be repaired.
Disconnect the plug from the power source and/or the battery pack from the
power tool before making any adjustments, changing accessories, or storing power
tools. Such preventive safety measures reduce the risk of starting the power tool
accidentally.
Store idle power tools out of the reach of children and do not allow persons
unfamiliar with the power tool or these instructions to operate the power tool. Power
tools are dangerous in the hands of untrained users.
Maintain power tools. Check for misalignment or binding of moving parts, breakage
of parts and any other condition that may aect the power tool’s operation. If
damaged, have the power tool repaired before use. Many accidents are caused by
poorly maintained power tools.
Keep cutting tools sharp and clean. Properly maintained cutting tools with sharp
cutting edges are less likely to bind and are easier to control.
Use the power tool, accessories and tool bits etc. in accordance with these
instructions, taking into account the working conditions and the work to be
performed. Use of the power tool for operations dierent from those intended could
result in a hazardous situation.
Use auxiliary handles supplied with the tool. Loss of control can cause personal injury.

5124-250
3 IN 1 BLOWER/VAC
6
SPECIFIC SAFETY RULES
WARNING: Some dust created by power sanding, sawing, grinding, drilling,
and other construction activities contain chemicals known to cause cancer, birth
defects, or other reproductive harm. Some samples of these chemicals are: lead
from lead-based paints, crystalline silica from bricks and cement and other masonry
products, arsenic and chromium from chemically treated lumber.
Your risk from these exposures varies, depending on how often you do this type of
work. To reduce your exposure to these chemicals: work in a well-ventilated area,
and work with approved safety equipment, such as those dust masks that are
specially designed to filter out microscopic particles.
WARNING: Know your 3 in 1 blower/vac. Do not plug in the tool until you have
read and understand this Instruction Manual. Learn the tool’s applications and
limitations, as well as the general and specific potential hazards related to this tool.
Following these instructions will reduce the risk of electric shock, fire or serious injury.
Always wear appropriate eye protection. Any power tool can throw
foreign objects into your eyes and cause permanent eye damage.
Always wear appropriate safety goggles or properly fitted safety
glasses that comply with the most recent version of ANSI Z87.1 safety
standard. Ordinary vision or sunglasses generally do not provide
adequate impact or side shield / wrap around penetration protection.
Ordinary glasses ARE NOT safety glasses. To reduce the risk of injury to
your face you should also wear a face shield over your safety goggles or
safety glasses.
WARNING: Glasses, goggles or face shields not in compliance with ANSI Z87.1
or CAN/CSA – Z94.3 could cause serious injury if they break upon impact.
WARNING: Prevent foot injuries! Never operate when barefoot, or wearing
open toed shoes, or sandals. Always, wear sturdy protective shoes or boots with
nonslip soles when operating the 3 in 1 blower/vac. Steel-toed safety boots are
recommended.
WARNING: Protect your hands by wearing heavy duty, nonslip gloves and to
improve your grip and control when handling the 3 in 1 blower/vac.
WARNING: Clothing must be durable and snug fitting yet allow for freedom of
movement.
WARNING: Avoid loose clothing such as scarves, neckties, jewellery, flared or
cued pants, loose-fitting shirts or jackets, unconfined long hair or anything that
can be pulled into the air intake of the blower. Secure hair to above shoulder level.
Wear long pants of durable material to protect your legs.
Cover as much of your body as possible to help protect you from debris and pieces
of toxic and allergenic plants being thrown by the 3 in 1 blower/vac.
WARNING: Use hearing protection. Use hearing protection such as ear plugs
or ear muers to protect your hearing, particularly if the 3 in 1 blower/vac is used
for extensive periods or if the surrounding environment of operation exposes the

7
operator to loud noises. When wearing hearing protection, you will have impaired
ability to hear alarms, warnings and shouts from approaching people or approaching
vehicles. Be extra diligent and observant of hazards and bystanders when wearing
hearing protection devices. When someone approaches, turn the 3 in 1 blower/vac
OFF immediately.
WARNING: The high velocity of the air flow coming through the nozzle will
throw objects and debris violently. These objects and debris will ricochet in all
directions. You or bystanders can be blinded or injured. Keep children, bystanders,
pets and other animals at least 50 feet (15 meters) away from the operating 3 in
1 blower/vac. Turn the 3 in 1 blower/vac OFF immediately if approached, or if you
are approaching such bystanders. Bystanders should be encouraged to wear eye
protection, even if they are kept at a distance.
Thrown objects may also ricochet and strike the operator or bystander.
WARNING: Utilize extra caution, when the 3 in 1 blower/vac is being used
near, or on paved or hard surfaces, as pieces of metal, concrete, brick, stones,
gravel, sand, glass, sticks and other objects can be thrown at high speed and force
and such objects can be thrown, skip along or ricochet long distances o of hard
surfaces.
WARNING: Do not use this 3 in 1 blower/vac for sweeping debris that may
contain hard objects, e.g. pebbles, stones, sticks, glass, metal, etc. as such
hard objects can be thrown with great force and cause injury to the operator or
bystanders, and / or damage property, e.g., screens, windows, building siding, glass
doors, or vehicles.
WARNING: Avoid operating the 3 in 1 blower/vac near property that can be
easily damaged by thrown or ricocheting objects such as screens, windows, building
siding, glass doors and vehicles. Always wear breathing protection when operating
the tool. Bystanders should be encouraged to wear breathing protection devices
even if they are kept at a distance as hazardous dust can travel considerable
distances, especially if the dust is windblown.
WARNING: Know what you are going to blow, before you use your 3 in 1 blower/vac.
WARNING: Inspect the area to be cleared for hazards before each use. Remove
any foreign objects such as sticks, rocks, broken glass, nails, wire, tools, toys, etc.
which can be thrown by the 3 in 1 blower/vac.
WARNING: If you are suspicious or uncertain if the material that you are
considering blowing would cause hazardous dusts, first, identify and investigate
the nature of the materials. If the materials have the potential to be hazardous,
do not use the tool, instead, utilize other safe clean up procedures and disposal
procedures. If you are suspicious that you have been blowing, vacuuming or
mulching or come into contact with asbestos, or crystalline silica materials or
hazardous chemical or biological materials, contact your doctor, your employer
if your use of the 3 in 1 blower/vac is job related, and the local EPA or OSHA
representative immediately. Clean up and dispose of hazardous chemicals and
substances prior to using the 3 in 1 blower/vac, using appropriate clean up
procedures, personal protective equipment and disposal methods.

5124-250
3 IN 1 BLOWER/VAC
8
WARNING: Dust created by use of this product may contain chemicals known
to the State of California and medical experts to cause cancer, respiratory injuries,
birth defects or other reproductive harm. Some examples of these chemicals are:
• Compounds in fertilizers.
• Compounds in insecticides, herbicides and pesticides.
• Arsenic and chromium from chemically treated lumber.
• Commercial and household chemicals.
WARNING: To reduce your exposure to these chemicals, wear approved safety
equipment such as dust and / or vapour masks that are specifically designed to
filter out microscopic particles or gaseous components. Additionally, dust created
by this product may contain allergens, bacteria and viruses, PM 10 and / or PM
2.5 particulates, exposure to such hazardous airborne matter can be reduced
by wearing approved safety equipment such as dust masks that are specifically
designed to filter out the microscopic particles.
WARNING: Breathing asbestos or dust with silica in its composition may
contain hazardous crystalline silica. Silica is a fundamental component of sand,
quartz, brick, clays, granite and many other materials and rocks, including masonry,
concrete and cement products. Such crystalline silica dust is dangerous and must
be avoided, as it can cause severe or fatal respiratory illness or cancer.
WARNING: Avoid blowing/vacuuming/mulching near open windows or doors,
or anywhere near bystanders or animals as doing such may cause exposure to the
potentially hazardous dust, particularly downwind of your blowing operation due to
the respiratory hazard reasons previously stated.
WARNING: Do not work against the wind as the dust will blow back towards the
operator increasing the exposure to the dust.
WARNING: Keep the 3 in 1 blower/vac below waist level and point the 3 in 1
blower/vac nozzle below waist level.
WARNING: Check the blower fan screen before each use to make sure the air
intake screen and the fan are in good condition. If any damage is identified, replace
the part immediately before using the 3 in 1 blower/vac. A damaged fan may shatter
and a damaged air intake screen will allow your fingers to be injured by the fan.
WARNING: Never operate the 3 in 1 blower/vac without the nozzle and the
intake fan screen in place. Serious injury or damage to the 3 in 1 blower/vac may
result.
WARNING: Never insert a foreign object such as a screwdriver, stick, etc.
into the nozzle, air exhaust tube or the intake fan screen. Any foreign article that
becomes lodged in the air system may be ejected at great speed causing serious
injury when the 3 in 1 blower/vac is turned ON. It may also severely damage the
blower fan.

9
WARNING: Always unplug the tool before making adjustments, changing the
nozzle, removing debris from the blower screen, leaving the tool idle or unattended,
cleaning, servicing, storing or transporting the tool. Such preventive measures reduce
the risk of starting the tool accidentally and causing serious injury.
WARNING: Never modify the 3 in 1 blower/vac in any way. The use of any other
accessory or modifying the tool may create a safety hazard. This action will also void
the warranty. Never use the blower without the nozzle properly installed. This will
allow you to direct the air flow where you want it and make the tool more ecient.
WARNING: Always keep the handles clean. Handles that are covered with
grease, chemicals or debris will make holding onto the blower dicult. Use a clean
cloth dampened with soapy water to clean these surfaces. Never use a pressure
washer, garden hose or any other liquid or chemical solvents to clean the 3 in 1
blower/vac.
WARNING: When blowing very dusty materials in extremely dry conditions for
long periods of time, static electricity may build up and discharge without warning.
To avoid this situation in dry dusty conditions, only operate the blower for short
periods of time and turning the 3 in 1 blower/vac OFF at regular intervals.
WARNING: Maintain firm footing and balance at all times. Do not overreach
or use the 3 in 1 blower/vac from unstable surfaces such as ladders, trees, steep
slopes, slippery surfaces, rooftops, etc. Always grasp the 3 in 1 blower/vac using
the handles on the machine. Use only in daylight or in good quality artificial light.
Never use the 3 in 1 blower/vac for anything other than its intended purpose. Use
for anything else can be dangerous. It may also damage the 3 in 1 blower/vac. Never
walk backwards while the 3 in 1 blower/vac is turned ON as you might trip and may
not hear approaching persons or vehicles.
SERVICE
Have your power tool serviced by a qualified repair person using only identical
replacement parts. This will ensure that the safety of the power tool is maintained.

5124-250
3 IN 1 BLOWER/VAC
10
EXTENSION CORD SAFETY
WARNING:
Keep the extension cord clear of the working area. Position the cord so it will not get
caught on the workpiece, tools or any other obstructions while you are working with
the power tool.
Make sure any extension cord used with this tool is in good condition. When using
an extension cord, be sure to use one of heavy enough gauge to carry the current
the tool will draw. An undersized cord will cause a drop in line voltage resulting in
loss of power and overheating.
The table below shows the correct size to use according to cord length and
nameplate ampere rating. If in doubt, use the next heavier gauge. The smaller the
gauge number the heavier the cord.
Be sure your extension cord is properly wired and in good condition. Always replace
a damaged extension cord or have it repaired by a qualified electrician before using
it. Protect your extension cord from sharp objects, excessive heat and damp or
wet areas.
Use a separate electrical circuit for your power tools. This circuit must not be less
than 14 gauge wire and should be protected with either a 15 AMP time delayed fuse
or circuit breaker. Before connecting the power tool to the power source, make sure
the switch is in the OFF position and the power source is the same as indicated on
the nameplate. Running at lower voltage will damage the motor.
MINIMUM GAUGE (AWG)
EXTENSION CORDS (120V USE ONLY)
Amperage Rating Total Length
More than Not more
than
25'
(7.5 m)
50'
(15 m)
100'
(30 m)
150'
(45) m
0 6 18 16 16 14
6 10 18 16 14 12
10 12 16 16 14 12
12 16 14 12 Not Applicable
To reduce the risk of disconnection of 3 in 1 blower/vac cord from the extension
cord during operating: Make a knot as shown in Fig. 1.
Use one of the plug receptacle retaining straps or connectors described in
this guide.
Avoid unintentional starting – Don’t carry plugged in 3 in 1 blower/vac with finger
on On/O switch. Be sure switch is o when plugging in.

11
Handle cord carefully – Never carry the 3 in 1 blower/vac by cord or yank it to
disconnect from power source. Keep cord away from heat, oil, and sharp edges.
Don’t force 3 in 1 blower/vac – It will do the job better and with less likelihood of a
risk of injury at the rate for which it was designed.
Don’t overreach – Keep proper footing and balance at all times.
Stay alert – Watch what you are doing. Use common sense. Do not operate tool
when you are tired or under the influence of alcohol, drugs or medications that
cause drowsiness.
Disconnect 3 in 1 blower/vac – Disconnect the 3 in 1 blower/vac from the power
supply when not in use, before servicing, when changing accessories such as 3 in 1
blower/vac tubes.
Keep guards in place and in working order.
Keep hands and feet away from blowing area.
(A) Tie cord as shown
APPLIANCE CORD
EXTENSION CORD
(B) Connect plug and
receptacle
Fig. 1

5124-250
3 IN 1 BLOWER/VAC
12
SYMBOLS
SYMBOL MEANING
WARNING: Please read all of the safety and operating instructions carefully before us-
ing this tool. Please pay particular attention to all sections of this User Guide that carry
warning symbols and notices. Some of the following symbols may be used on this tool.
Observe caution and safety notes.
To reduce the risk of injury, user must read and understand User Guide before
using this tool.
Wear ear protection.
Wear protective helmet and eye protection.
Switch o and remove plug from power source before cleaning or maintenance.
Do not use in the rain or leave outdoors while it is raining.
Keep bystanders away.
Don’t touch the inlet and outlet when the vacuum cover is opened or the tube is
removed.
Double insulation.
Remove plug from the power source immediately if the power cord is damaged
or cut.
BV-14EG V
This symbol designates that this tool is listed with Canadian and
U.S. requirements by cSGSus Testing Laboratories, Inc.
UL1017 CSA C22.2 No.243-17

13
KNOW YOUR 3 IN 1 BLOWER/VAC
Main handle
Motor housing
assembly
Lower blower tube
Upper blower tube
Blower tube lock
button
Two speed /
O switch
Collection bag
Vacuum
cover
Upper
vacuum/
mulcher
tube
Lower vacuum/
mulcher tube
Front
handle

5124-250
3 IN 1 BLOWER/VAC
14
ASSEMBLY
ASSEMBLY FOR BLOWER MODE
1. ATTACHING THE BLOWER TUBE (Fig. 3 & 4)
Ensure vacuum cover is attached to the
motor housing. If not, attach cover as
shown in (Fig. 3).
NOTE: Tool will not operate in blower
mode without vacuum cover in place.
2. Push the lower tube firmly into the
upper tube, until the tubes “click”
(Fig. 4) into place.
3. Push blower tube forward until the
notched areas on the blower housing
locks into the slots on the tube as
shown in (Fig. 5).
Fig. 3
Fig. 5
Fig. 4
NOTE: Blower tube must be assembled to the motor housing before use. Never
operate without tube assembled.
ASSEMBLY FOR VACUUM / MULCHER MODE
1. Attach the push on collection bag
connector to the outlet tube of the
housing. Push the fitting of the
collection bag directly onto the outlet
until it “clicks” into position as shown in
(Fig. 6).
2. Push the lower tube firmly in to the
upper tube, until the tubes “click” into
place (Fig. 7).
Fig. 6
Fig. 7
3. Open the vacuum cover from the bottom of the
motor housing by depressing the lock button
and pulling the cover down (Fig. 8).
4. Attach the vacuum/mulcher tube assembly to
the motor housing by locating the assembly as
indicated by arrow, then pivot about this point
until the locking/release catch is fully engaged
(Fig. 9 & 10).
Fig. 8
5. To remove the vacuum/mulcher/tube, depress the lock button and pull straight
o (Fig. 11).
Fig. 9 Fig. 10 Fig. 11

15
OPERATION
WARNING:
Flying debris can cause serious personal injury to the operator, bystanders or pets.
Keep bystanders and pets at least 15 ft (4.5 meters) away from the area of work and
always wear suitable eye and ear protection, long pants and sturdy shoes or boots
while operating the tool.
USE OF EXTENSION CORD
WARNING: A damaged extension cord can cause electric shock or a fire.
Please inspect the extension cord periodically. The tool must not be used if the
cord is damaged in any way. Replace a damaged extension cord before use.
1. Use a heavy duty extension cord, suitable for
outdoor use and so marked. An ordinary duty
extension cord will cause loss of power and
may overheat.
2. Keep the extension cord behind you, away
from the area of operation.
3. Loop the extension cord as shown in (Fig. 12). Fig. 12
OPERATION OF THE 3 IN 1 BLOWER / VAC
The 3 in 1 blower/vac is fitted with a two speed switch located on the top of the
handle. Prior to using the 3 in 1 blower/vac ensure you have read and understood
this User Manual.
Ensure you are wearing suitable clothing and also safety equipment like safety
glasses, ear protection and mask if necessary. Ensure the attachments to the 3 in 1
blower/vac are correctly fitted and adjusted. Be aware of other people and animals
in the area where you are to be operating the 3 in 1 blower/vac.
TO TURN THE 3 IN 1 BLOWER / VAC ON
1. Plug the power cord into an
approved electrical extension
cord, and connect to the power
source.
2. To start the tool at the lowest
speed, move the button to
position 1 (Fig. 13).
Fig. 13 Fig. 14
TURN ON
lower speed
level 1
TURN ON higher
speed level 2
3. To start at the higher speed move the button to position 2. (Fig.14). Go back to
zero (0) to shut it down.
WARNING: Be sure to be holding the 3 in 1 blower/vac firmly on start up.

5124-250
3 IN 1 BLOWER/VAC
16
TO TURN THE 3 IN 1 BLOWER / VAC OFF
To turn tool O, pull the switch button back to
position “0” (Fig. 15).
IMPORTANT: After you have turned the 3 in 1
blower/ vac o, do not leave tool plugged into
the power source.
WARNING: The tool runs for
approximately 5 seconds after it has been
switched o. Let the motor come to a complete
standstill before setting the tool down. Fig. 15
TURN OFF
WARNING: Ensure product is switched o and disconnected from the power supply.
BLOWER MODE (FIG. 16)
• Close vacuum cover firmly.
• Attach the blower tube assembly to the front of the housing.
• Connect extension cord into the tool, then plug into power supply.
• Hold the blower tube approximately 2" to 4" (5 to 10cm) above ground. Turn the
blower on and, using a sweeping motion from side to side, advance slowly keeping
the accumulated debris/ leaves in front of you.
• Once you have blown the debris/leaves into a pile, you can convert to vacuum/
mulcher mode to collect the debris.
Fig. 16 Fig. 17
VACUUM/MULCHER MODE (FIG. 17)
• Remove blower tube and attach the shoulder collection bag onto the tool.
• Attach the vacuum/mulcher tube.
• Attach the collection bag to the motor housing.
• Connect extension cord into the tool, then plug into power supply.
• Position the tube slightly above the debris/leaves. Turn the vacuum/mulcher
on, then using a sweeping motion the debris/leaves will be sucked up the tube,
mulched and deposited into the collection bag.
• As the bag fills the power of the suction will decrease, turn the 3 in 1 blower/vac
o and unplug from power supply.

17
WARNING: Always make sure the collection bag is correctly attached.
Always be aware of what is being drawn up into the 3 in 1 blower/vac tube.
This product is only designed for garden debris like leaves, twigs and
garden cuttings.
TO EMPTY THE COLLECTION BAG
The collection bag is attached to the 3 in 1 blower/vac in two places. It is not necessary
to remove the collection bag from the 3 in 1 blower/vac when the bag needs to be
emptied. The rear of the bag has a full length zipper. Simply open the zipper and empty
the contents. Ensure to close the zipper prior to operating the 3 in 1 blower/vac again.
WARNING: Normal usage of the bag causes it to wear and deteriorate over
time. A worn or deteriorated bag allows small objects to be thrown through the
bag, possibly injuring the operator or bystanders. Check the bag frequently. If
it is worn or deteriorated, replace it with a new vacuum/ mulching bag.
OPERATING TIPS
The following points may assist you in the operation of the 3 in 1 blower/vac. Always
try to vacuum dry leaves, cuttings or general garden debris. Wet materials are
dicult to mulch and can cause the 3 in 1 blower/vac to clog. If the leaves or other
debris are damp, then use the 3 in 1 blower/vac in blow selection to pile the leaves
or other debris into one area, vacuum and mulch the leaves when dry. Avoid using
the vacuum on areas where there are stones, or other hard objects. These objects
will damage the impellor of the 3 in 1 blower/vac. It is also advisable not to allow
the 3 in 1 blower/vac to pick up soil. Soil generally contains moisture and when
combined with other garden debris can clog the 3 in 1 blower/vac. The 3 in 1 blower/
vac is not a garbage disposal unit. Do not attempt to mulch any material other than
general garden debris. For better performance and comfort, it is recommended the
collection bag is emptied when it becomes approximately half full. This reduces
the weight and allows the vacuum to operate at its highest level. Once a year, hand
wash the bag in soapy water and allow it to air dry.

5124-250
3 IN 1 BLOWER/VAC
18
MAINTENANCE
WARNING: Always wear protective gloves during maintenance operations.
Do not carry out maintenance when the engine is running or hot.
WARNING: Use only manufacturer approved replacement parts,
accessories and attachments. Failure to do so can cause possible injury and
poor performance.
1. Store the tool, User Manual and accessories in a secure, dry place. This way you
will always have the information ready.
2. Keep the tool’s air vents unclogged and clean at all times.
3. Remove dust and dirt regularly. Cleaning is best done with a rag or brush.
4. Never use caustic agents to clean plastic parts.
5. Empty the bag after each use to avoid deterioration and obstructing air flow,
which will reduce the performance of the tool.
6. Wash the bag regularly and let it fully dry before zipping it closed.
WARNING: Do not use cleaning agents to clean the plastic parts of the tool.
A mild detergent on a damp cloth is recommended. Water must never come into
contact with the tool.
STORAGE
• Clean the blower or vacuum tubes thoroughly before storing.
• Store the 3 in 1 blower/vac in a dry, well-ventilated place that is inaccessible to
children.
• Store the tool locked up to prevent unauthorized use or damage.

19
TROUBLESHOOTING
WARNING: Read User Guide first! Follow all safety precautions whenever
diagnosing or servicing the tool. Disconnect power supply.
PROBLEM POSSIBLE CAUSE FAULT CORRECTION
Tool will not start.
Tool's On/O switch is in the
O position.
Check whether the On/O switch is in
the On position.
Cord not connected. Check the cord is plugged in.
No power at outlet.
Check power at outlet. If outlet is un-
powered, turn o tool and check circuit
breaker. If breaker is tripped, make
sure circuit is right capacity for tool and
circuit has no other loads.
Defective power cord. Replace the cord.
Tool will not vacuum.
Leaf collection bag is full. Empty leaf collection bag.
Vacuum cover in the wrong position. Place the vacuum cover in the correct
position.
Internal damage or wear.
Please contact Toll Free Help Line at
1-866-349-8665; Mon. - Fri.:
9 am - 5 pm EST.
Tool will not blow.
Blower cover in the wrong position. Place the blower cover in the correct
position.
Internal damage or wear.
Please contact Toll Free Help Line at
1-866-349-8665; Mon. - Fri.:
9 am - 5 pm EST.
NOTE: If the tool vibrates, please immediately stop using it. Please contact Toll Free
Help Line at 1-866-349-8665; Monday - Friday: 9 am to 5 pm Eastern Standard
Time.
Table of contents
Other Benchmark Blower manuals
