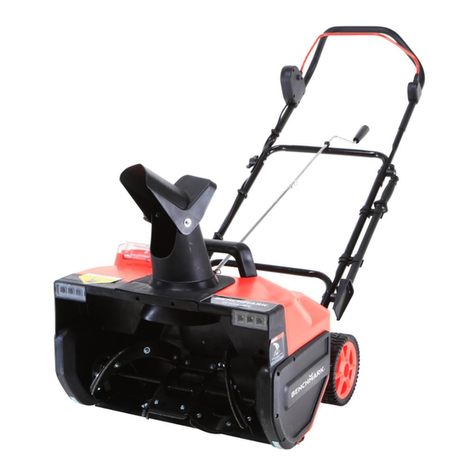
Benchmark BS7680 User manual

BS7680
TM
MANUAL
5554-048

This product is supported by Midland Power. Contact us
directly for assistance and warranty help. Do not return this
product to store.
You must register online for your warranty to be valid.
It only takes a minute, do it now while you still have your
purchase receipt.
Support for your product is available online, including parts,
service center locations, and live expert advice.
Or call us anytime at 1-877-528-3772.
TM
MC
Register Your Product Online
www.benchmark.midlandpowerinc.com/
register-warranty
Visit us online at
www.benchmark.midlandpowerinc.com

Thanks for choosing the BS7680!
You're excited to get started, we'll keep this brief.
READ THIS ENTIRE GUIDE BEFORE USING THIS
PRODUCT AND SAVE FOR LATER USE.
This user guide contains important instructions including safety,
setup, operation, and maintenance that must be followed. All
information in this guide is based on information available at
the time of print. This guide or revised editions can be found on
our website for download. No part of this publication may be
reproduced without written permission.
THIS PRODUCT MEETS ALL CERTIFICATION REQUIREMENTS FROM:
The engine exhaust from this product contains chemicals known
to cause cancer, birth defects or other reproductive harm.
©2023 Benchmark. All Rights Reserved.
BS7680_Manual_EN_2023-11-10

TABLE OF CONTENTS
1. Safety 1
2. Learn About Your Snowthrower 5
3. Assembly instructions 8
4. Pre-Operation Check 28
5. Starting the Engine 28
7. Using your snowthrower 29
7.1 Adjusting the Chute and Chute Deector 29
7.2 Engaging the Auger and Impeller 30
7.3 Engaging the Drive Wheels 31
7.4 Using the Power Steering Trigger 32
7.5 Adjusting the Skid Shoe Height 33
7.6 Using the Headlight 34
7.7 Using the Heated Hand Grips 34
7.8 Clearing a Clogged Discharge Chute 35
7.9 Using the Auger Height Adjust Trigger 36
8. Maintenance 37
8.1 Maintenance Schedule 38
8.2 Changing the Engine Oil 38
8.3 Spark Plug Service 38
8.4 Spark Arrester Maintenance 38
8.5 Fuel Filter Maintenance 38
8.6 Lubricating the Snowthrower 38
8.7 Adjusting the Auger and Propulsion Cable 39
8.8 Adjusting the Power Steering Cables 40
8.9 Replacing the Auger Shear Bolt 41
8.10 Replacing the Scraper Bar 42
8.11 Emission Control System 43
9. Transportation & Storage 45
10. Troubleshooting 47
11. Technical Specications 49
12. Appendix 49
13. Limited Warranty 50

1
BS7680
1. SAFETY
WARNING!
U.S.A. Models: It is a violation of California Public Resource
Code Section 4442 to use or operate the engine on any forest-
covered, brush-covered, or grass-covered land unless the
exhaust system is equipped with a spark arrester, as dened
in Section 4442, maintained in effective working order. Other
states or federal jurisdictions may have similar laws. Contact the
original equipment manufacturer, retailer, or dealer to obtain a
spark arrester designed for the exhaust system installed on this
engine.
1.1 SNOWTHROWER SAFETY
The snowthrower is designed and intended only for clearing of snow from hard-
surface ground-level walkways and driveways and is not intended for any other
purpose.
Only allow operators who are responsible, trained, familiar with these instructions,
and physically capable operate the machine. If it is misused or not properly
maintained, it can be dangerous. Remember you are responsible for your safety and
those around you.
This snowthrower is capable of amputating hands and feet, and throwing objects.
Hand contact with the rotating impeller inside the discharge chute is the most
common cause of injury associated with snowthrowers.
This machine is capable of throwing objects that could injure bystanders
or cause damage to buildings.
When leaving the operating position always disengage the auger, turn
off the engine, and remove the key. Never leave a running machine
unattended.
A note from our designer:
When I was a child in Kingston Ontario my family lived beside a retired fellow
named Basil. I remember one day Basil got down on one knee to clean out his
clogged snowblower, reaching deep into the machine to remove the buildup
of hard snow and ice. Once the blockage was clear the augers quickly sprang
back to life, he had forgotten to shut off the engine. For the rest of his life Basil
only had two ngers on that hand because he’d left his snowblower running.
Don’t be like my kind neighbour Basil, be careful and stay safe!

2
TM
Never operate the snowthrower without proper guards, and other safety
protective devices in place and working.
Be careful when operating on or crossing gravel drives, walks, or roads.
Stay alert for hidden hazards or trafc.
Never operate the snowthrower without good visibility or light. Always
be sure of your footing, and keep a rm hold on the handles. Walk;
never run.
Be careful to avoid slipping or falling, especially when operating the
snowthrower in reverse.
Be careful when operating on slopes.
After striking a foreign object, stop the engine, remove the wire from the
spark plug, thoroughly inspect the snowthrower for any damage, and
repair the damage before restarting and operating the snowthrower.
Do not operate the equipment without wearing adequate winter
garments. Avoid loose tting clothing that can get caught in moving
parts. Wear footwear that will improve footing on slippery surfaces.
Never touch a hot mufer or engine. Allow mufer and engine cylinder to
cool before touching.
1.2 ENGINE SAFETY
WARNING!
Always perform an oil and fuel check before starting the engine.
Properly clean and maintain the equipment.
Before operating, read the user guide carefully. Otherwise, personal
injuries or equipment damage may result.
Pay attention to the warning labels. The engine exhaust system will
become heated during operation and remain hot immediately after the
engine is stopped.
Gasoline is a highly ammable and explosive liquid. Refuel in a well
ventilated area with the engine stopped.
TOXIC FUMES HAZARD. Running engines give off
carbon monoxide, an odourless poisonous gas
that can cause nausea, fainting, or death. Do
not start engine indoors or in an enclosed area,
even if the windows and doors are open.
DANGER TOXIQUE. Faire fonctionner un moteur dégage de
l’oxyde de carbone, un gaz inodore toxique qui peut
provoquer la nausée, évanouissement ou la mort. Ne
démarrer pas le moteur à l’intérieur ou dans une espace clos,
meme si les fenêtres et les portes sont ouvertes.

3
BS7680
Use of gasoline with an ethanol content greater than 10% can damage
the engine and fuel system and will void the manufacturer’s warranty.
When refueling, keep it away from cigarettes, open ames, smoke and/
or sparks.
Do not touch the spark plug while the engine is operating or shortly after
the engine has been shut down.
Know how to stop the engine quickly and understand operation of all
the controls. Never permit anyone to operate the engine without proper
instructions.
Do not operate in rain or snow.
To avoid breathing in poisonous carbon monoxide from the exhaust
gases, adequate ventilation should be provided if running in a partially
enclosed space.
If stored outdoors, check all electrical components before each use.
Moisture can damage the eletronics and can lead to an electric shock.
Do not connect an extension to the exhaust pipe.
If you start to feel sick, dizzy, or weak after the engine has been running,
move to fresh air RIGHT AWAY. See a doctor. You could have carbon
monoxide poisoning.
1.3 AC SAFETY
WARNING!
Before connecting the snowthrower to an electrical device or power cord:
Make sure that everything is in proper working order. Faulty devices or
power cords can lead to an electrical shock.
Turn off immediately if the device begins to operate abnormally. Then
disconnect and investigate the problem.
Use only a three-conductor power cord properly grounded to the power
source.
Use a tough rubber sheathed exible cable (according to IEC245 or
equivalent standards). The maximum length of the extension cable: 196
feet (60 meters) for cable of 15.5 gauge (1.5mm2); 328 feet (100 meters)
for cable of 13.25 gauge (2.5mm2).

4
TM
1.4 MAINTENANCE SAFETY
WARNING!
After any maintenance is performed, wash immediately using soap and
clean water because repeated exposure to lubricant may cause skin
irritation.
Allow the engine to cool down and turn off the engine before performing
any maintenance. Failure to do so can cause severe personal injury or
death.
Do not clean with a pressure washer.
Use rubber gloves when coming into contact with engine oil.
Always stop the engine before removing the oil ller cap.
Only qualied maintenance personnel with knowledge of fuels,
electricity, and machinery hazards should perform maintenance
procedures.

5
BS7680
2. LEARN ABOUT YOUR SNOWTHROWER
This section will show you how to identify key parts of your snowthrower. Going over
the terminology below will make sure we’re on the same page.
2.1 COMPONENT IDENTIFICATION
Skid Shoes
Headlight
Chute Rotation
Crank Auger Height
Adjust Trigger
Power
Steering Trigger
Auger
Chute Deector
Lever
Mufer
Deck
Impeller
Chute
Auger Control
Lever
Chute Deector
Speed Selector
Lever
Propulsion
Control Lever
Clean Out
Tool
Headlight
Switch
Headlight
Switch
Heated Grip
Switch

6
TM
2.2 CONTROL FUNCTIONS
Auger Control Lever
Augers and impeller will activate when lever is engaged.
Clean Out Tool
NEVER clean a clogged impeller or chute with your hands, always use a
clean out tool.
Electric Start Module
Connect a 15A extension cord from a wall receptacle to this module to
enable electric starting.
Power Steering Trigger
Pull the trigger underneath the left grip to turn left, and right grip to turn
right.
Primer Button
Press 2 times before starting. Do not press if engine is warm.
Propulsion Control Lever
Engages the self-propelled wheels to run at the speed set by the speed
selector lever.
With one-hand control feature, the propulsion control lever locks the
auger control lever in an engaged state, so you can release the auger
control lever to reach other controls without stopping the unit.
Oil Cap
Primer Button
Choke Lever
Power Key
Fuel Cap
Recoil Grip
Throttle Lever
Fuel Shut-off
Valve

7
BS7680
2.3 MAKE SURE YOU HAVE EVERYTHING
Make sure your snowthrower has everything listed in the table below.
Chute Clamps ChuteSnowthrower
Chute Clamps
(Pre-installed)
ChuteSnowthrower
Skid Shoes
Extra Shear Bolts Extra Bow-tie Locking
Cotter Pins
Speed Selector
Knob
Chute Deector
Knob
Ignition keysSpark Plug WrenchOil Bottle
Speed Selection Rod
Chute Rotation
Crank
Handle

8
TM
3. ASSEMBLY INSTRUCTIONS
3.1 Installing the Handle
1. The handle mounting bolts are pre-installed in the correct location. Note the
location, then loosen and remove.
2. Thread the bolts through the handle and re-screw into the snowthrower
body.

9
BS7680
3. Resting the handle grips on the ground behind the snowthrower, pivot the
mounting end of the handle upwards. Align the mounting holes of the
handle with the height position of your choice.
4. On each side of handle as seen from operator’s point of view, insert the bolt
and secure with washer and handle knob.
5. Pivot handle grips upwards until aligned with second set of holes in handle.

10
TM
6. Insert the bolt and secure with washer and handle knob.
NOTE
Remove the reusable zip tie on the propulsion control lever and auger
control lever by pressing the pin lock and pulling the head to remove.
Pin Lock
Speed Selector Knob
Chute Deector Knob

11
BS7680
3.2 Installing the Speed Selector and Chute Deector Lever
Screw the speed selection lever into the top panel.
Screw the chute deector lever into the top panel.
Pin Lock
Speed Selector Knob
Chute Deector Knob
Pin Lock
Speed Selector Knob
Chute Deector Knob

12
TM
3.3 Installing the Speed Selection Rod
The speed selection rod needs to match the height of your handle. There are 4
length positions on the speed selection rod that match the 4 height positions of the
handles. For example, if you assembled your handles at the tallest position choose
the longest length of the speed selector rod. If you assembled your handles at the
shortest position choose the shortest length of the speed selector rod.
1. Assemble the two parts of the speed selection rod and adjust the height
(1, 2, 3 or 4). Align the holes and secure with pin clip.
2. Move the speed selection lever to lowest position, Reverse-2 on most
models.
3. Add spring and washer to angled end of speed selection rod. Push rod
through bracket on bottom casing, secure with pin clip.
Speed Selector Lever
Speed Selector Lever
Pin Clip
Spring
Speed
Selection Rod
Pin Clip
SpringSpeed
Selection Rod

13
BS7680
4. Move the bracket on bottom casing to the lowest position, ensure it stays
here until the end of this section.
5. Thread right angle bracket down threaded end of speed selection rod until
it aligns with bottom bracket of speed selection lever.
6. Add spring and washer to right angle bracket. Push right angle bracket
through bottom bracket of speed selection lever, secure with pin clip.
Speed Selector Lever
Pin Clip
Spring
Speed
Selection Rod
Pin ClipSpringSpeed
Selection Rod

14
TM
3.4 Installing the Chute
1. The chute mounting bolts are pre-installed in the correct location. Note the
location, then loosen the bolts.
2. Remove the bolts, washers and chute clamps.

15
BS7680
3. Place chute over, ensuring chute gear teeth mate with worm gear.
4. Fasten the three clamps to chute with washers and bolts.

16
TM
3.5 Installing the Chute Rotation Crank
1. Route the cable under the dashboard and secure it to the chute rotation
crank handle.
2. Ensure crank can easily rotate chute with little effort.
3. If needed, adjust the worm gear position by loosening, adjusting, and
re-tightening the worm gear mounting bolts.
Chute Rotation Crank
Chute Rotation Crank
Chute Rotation Crank
Table of contents
Other Benchmark Snow Blower manuals
