BeStableCam SteadyGim 6 Plus User manual
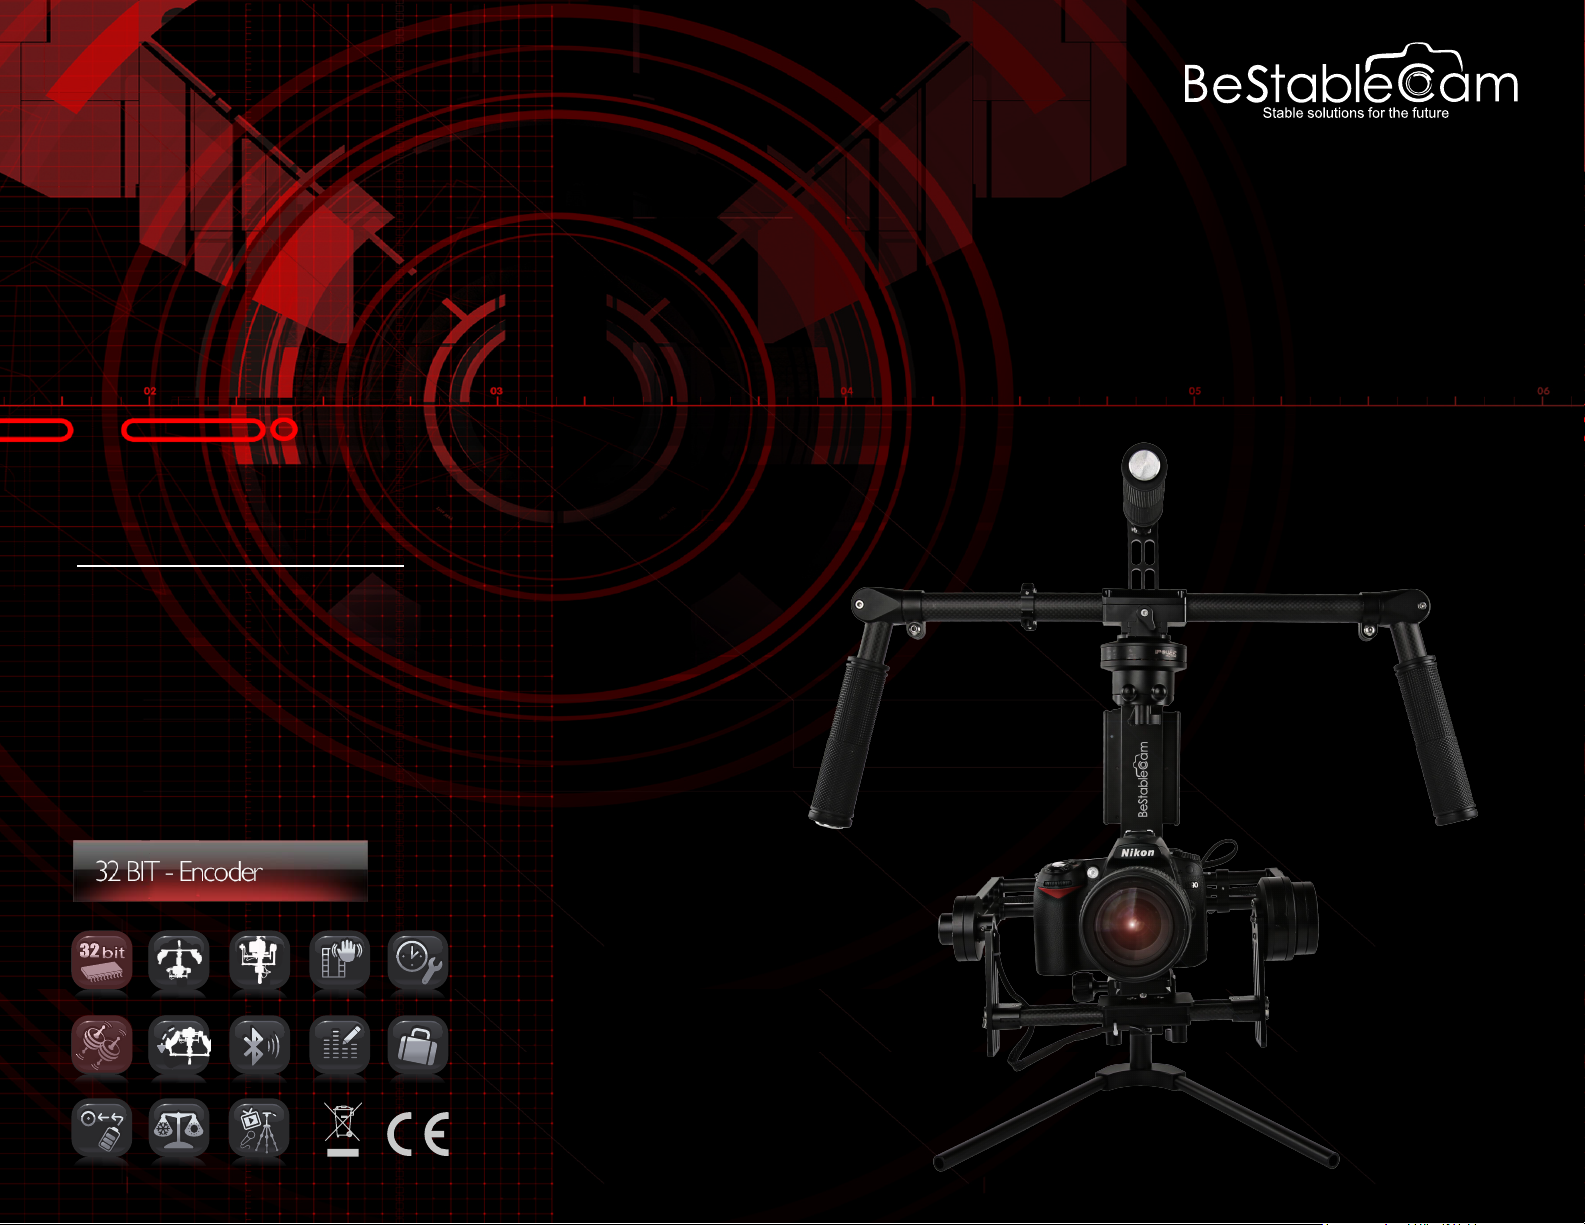
SteadyGim6 PLUS
Last Modified: November 18, 2015
SteadyGim6 PLUS WARRANTY
v1Year Warranty on Parts
v30 Days Warranty on Parts & Labor
v30 Days Phone Support and 90 days free email support
BESTABLECAM STABILIZED GIMBAL SYSTEMS USER GUIDE
NOTICE
All BeStableCam warranties, instructional manuals, or any miscellaneous documentation for the SteadyGim6 PLUS must be speculated.
BeStableCam does their best to resolve any technical errors in order to increase the overall efficiency of the SteadyGim6 PLUS.
DISCLAIMER
While the SteadyGim6 PLUS does not require a license to use, please regard this as advanced cinema gear that must be handled with
caution and good judgment. A basic understanding of mechanical functions is needed in order to operate the SteadyGim6 PLUS safely
and responsibly. Failure to do so could not only result in injury of yourself and others, but irreparable damage to your gimbal.
It is essential to read our User Manual to ensure a safe and smooth experience. Please note that BeStableCam will not be held
responsible for any contrary interpretation made by the user that is different from what the manual intended. BeStableCam reserves the
right to adjust the manual when needed and is not responsible to alert any user of such changes.
Package content
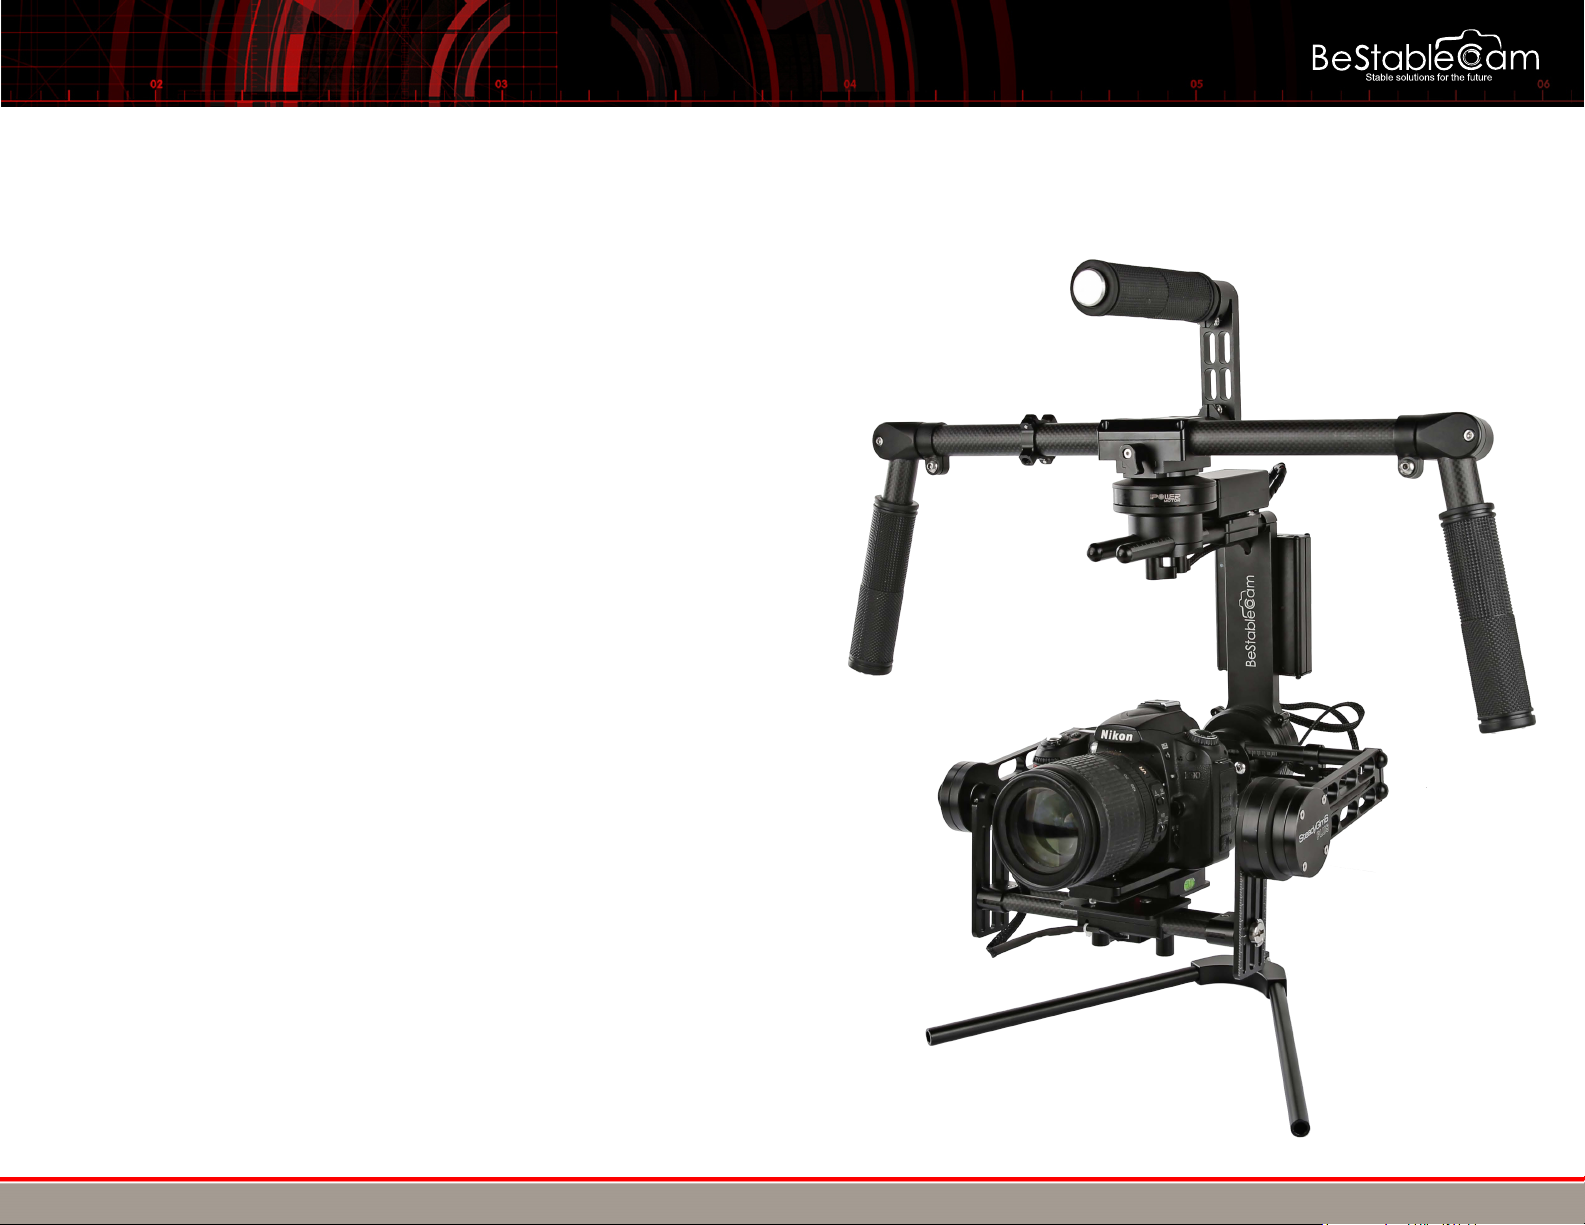
QTY 1 x SteadyGim6 PLUS 3 Axis Handheld Camera Stabilizer
QTY 1x Joystick controller
QTY 1x Gimbal Tuning Stand
QTY 1x Battery Pack
QTY 1x Battery Charger
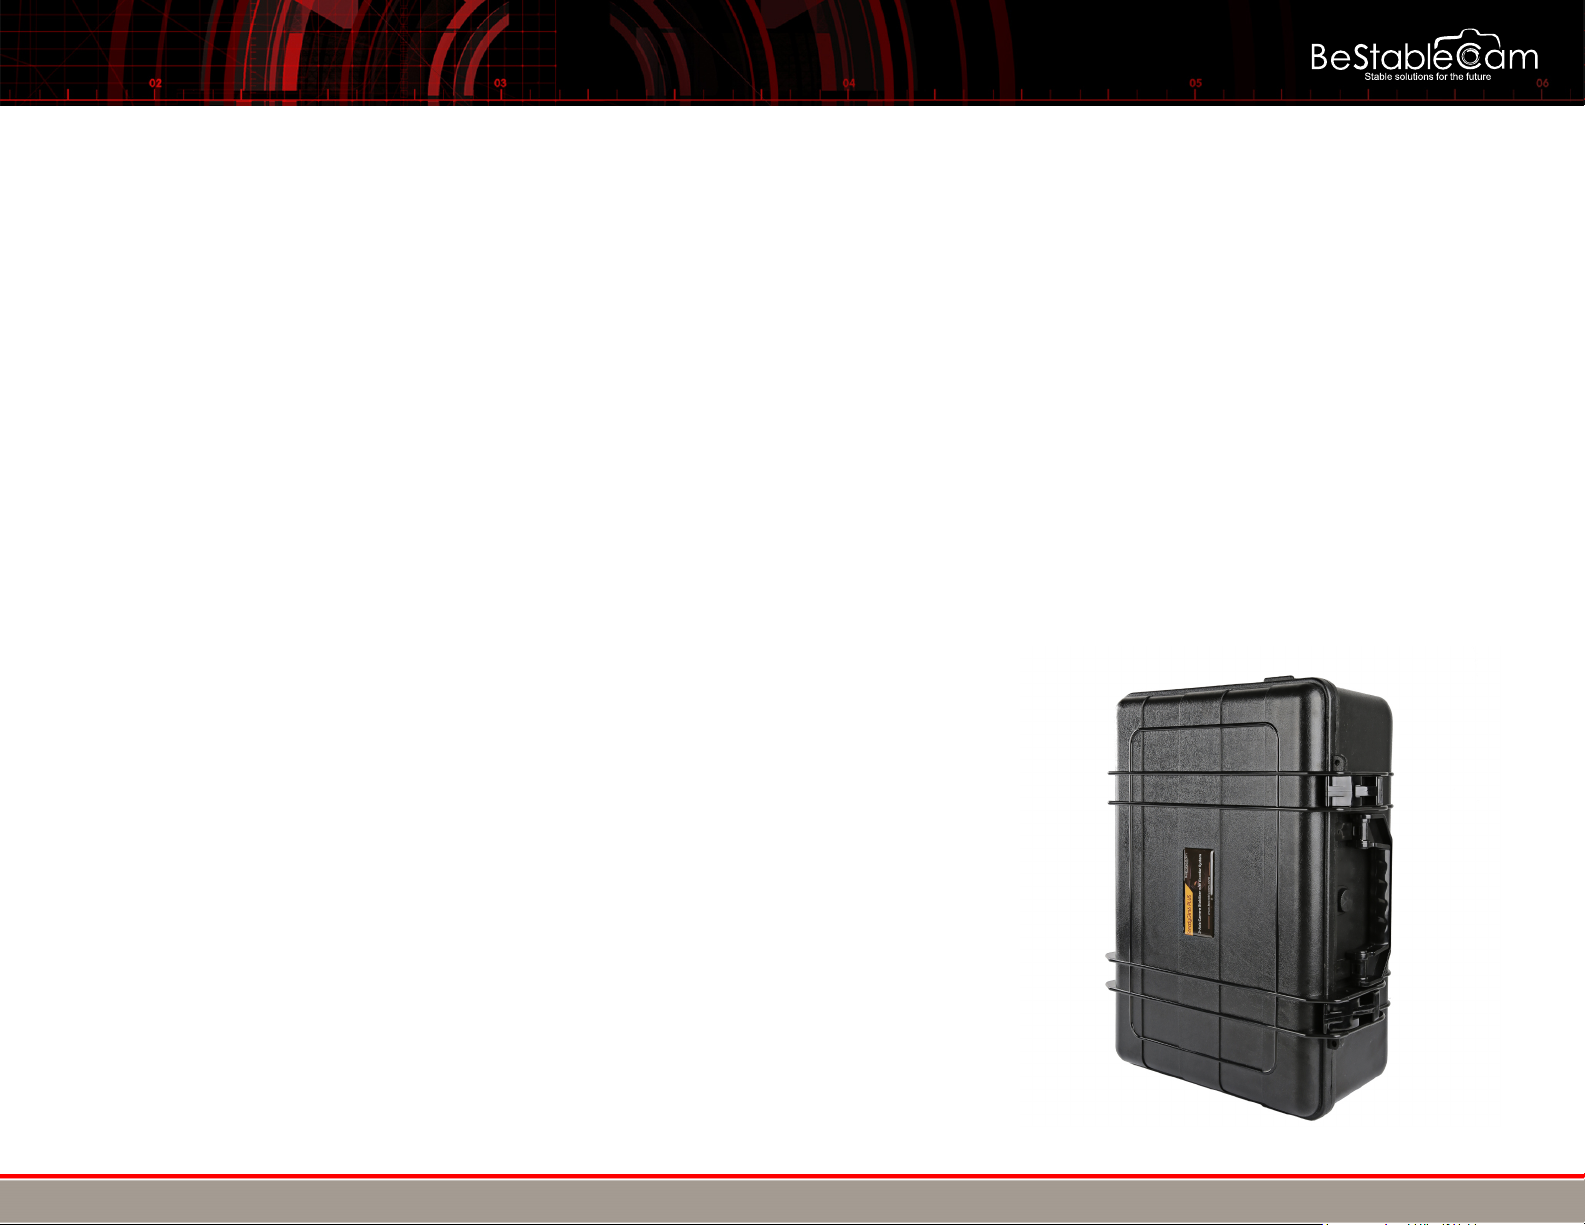
QTY 1x Hard Case with Preformed Foam Inserts
BESTABLECAM STABILIZED GIMBAL SYSTEMS USER GUIDE
Copyright © 2015 BeStableCam. All rights reserved.
CONTENTS
I. WARNING BEFORE USE
II. BATTERY & CHARGER
III. BALANCING YOUR GIMBAL
oHorizontal Tilt
oVertical Tilt
oRoll Balance
oPan Balance
IV. OPTIONAL EQUIPMENT
V. PROGRAM MODES
VI.
VII.
VIII.
IX.
BESTABLECAM STABILIZED GIMBAL SYSTEMS USER GUIDE
Copyright © 2015 BeStableCam. All rights reserved.
GIMBAL TUNING GUIDE
OPERATING POSITIONS
SIMPLE BGC GUI SOFTWARE SET UP
TROUBLE SHOOTINGS

I. WARNING BEFORE USE
Please save the profile before you change any settings
BESTABLECAM STABILIZED GIMBAL SYSTEMS USER GUIDE
Copyright © 2015 BeStableCam. All rights reserved.
After SteadyGim6 PLUS is correctly balanced with your camera setup, it is ready for use. First, install battery on to handle where the Velcro is. Plug
battery into yellow XT30 connector. The on/off switch is located on the right side of the XT30 connector.Press the switch down turns the gimbal on.
Hold SteadyGim6 PLUS still while powering on, as to avoid improper start up.
Steps to start to use the gimbal
1.Quick to accemble the kit
2.Accemble the tuning stand
3.Put the gimbal onto the gimbal tuning stand
5.Plug on the battery pack
6.Plug on Joystick connector
4.Balance your camera
8.Power on your gimbal,ready to use.
7.Remove the gimbal tuning stand.
NEVER DO THIS:
1. NEVER TURN ON THE GIMBAL WITHOUT PLUG ON JOYSTICK
2.NEVER TURN ON THE GIMBAL WHEN IT'S ON THE STAND
3.NEVER TURN OFF THE GIMBAL DURING USE THE INVERTED MODE
4.NEVER CHANGE THE SETTINGS BEFORE YOU READ THIS INSTRUCTION
SteadyGim6 PLUS comes equipped with 5 modes. The default mode is “Follow Underslung” mode with disable joystick function. The camera follows
heading of the gimbal. The second mode is still “Follow Underslung” mode with activated Joystick function. The third mode is “Lock axis” mode. The
fourth mode is Pan and Pitch Follow".The Fifth mode is"Inverted" mode.
Pan and tilt can be controlled by operating the joystick or using a RC Tx (optional)

BESTABLECAM STABILIZED GIMBAL SYSTEMS USER GUIDE
Copyright © 2015 BeStableCam. All rights reserved.
II.
**Never leave charger unattended, exceed maximum charge rate, charge with non-approved batteries or charge batteries in the wrong mode.
**Always ensure the battery you are charging meets the specifications of this charger and that the charger settings are correct. Not
doing so can result in excessive heat and other related product malfunctions, which can lead to user injury or property damage.
PLEASE DO NOT…
Ø
Ø
Ø
Ø
Ø
Ø
Ø
Ø
Ø
Ø
Ø
Ø
…leave the power supply, charger and battery unattended during use.
…attempt to charge dead, damaged or wet battery packs.
…attempt to charge a battery pack containing different types of batteries.
…allow minors to charge battery packs.
…charge batteries in extremely hot or cold places or place in direct sunlight.
…charge a battery if the cable has been pinched or shorted.
…connect more than one battery pack to this charger at a time
…connect the charger if the power cable has been pinched or shorted.
…connect the charger to an automobile 12V battery while the vehicle is running.
…attempt to dismantle the charger or use a damaged charger.
…reverse the positive and negative terminals.
…connect battery to AC power.
**Failure to follow the advised steps while using this product will not only result in product malfunction, but can also cause
severe injury and property damage.
Battery & Charger
KEEP IN MIND TO ALWAYS…
Ø
Ø
Ø
Ø
…power on the charger before connecting the battery
…use only rechargeable batteries designed for use with this type of charger.
…inspect the battery before charging.
…keep the battery away from any material that could be affected by heat.
Ø
Ø
...monitor the charging area and have a fire extinguisher available at all times.
…end the charging process if the battery becomes hot to the touch or starts to change form (swell) during the charge process.
How to use the charger
The charger comes preset for the battery included.
1. Plug charger into a working 110V AC power source.
2. Connect charger to the battery.
3. Charger has two LED indicators on front, LED will be red while battery is
charging and automatically changes to green once charge is complete.
4. Tight up the battery with battery velcro strap and hook up the connectors.
5. Turn on the power and you are ready to operate.
BESTABLECAM STABILIZED GIMBAL SYSTEMS USER GUIDE
Copyright © 2015 BeStableCam. All rights reserved.
III. BALANCING YOUR GIMBAL
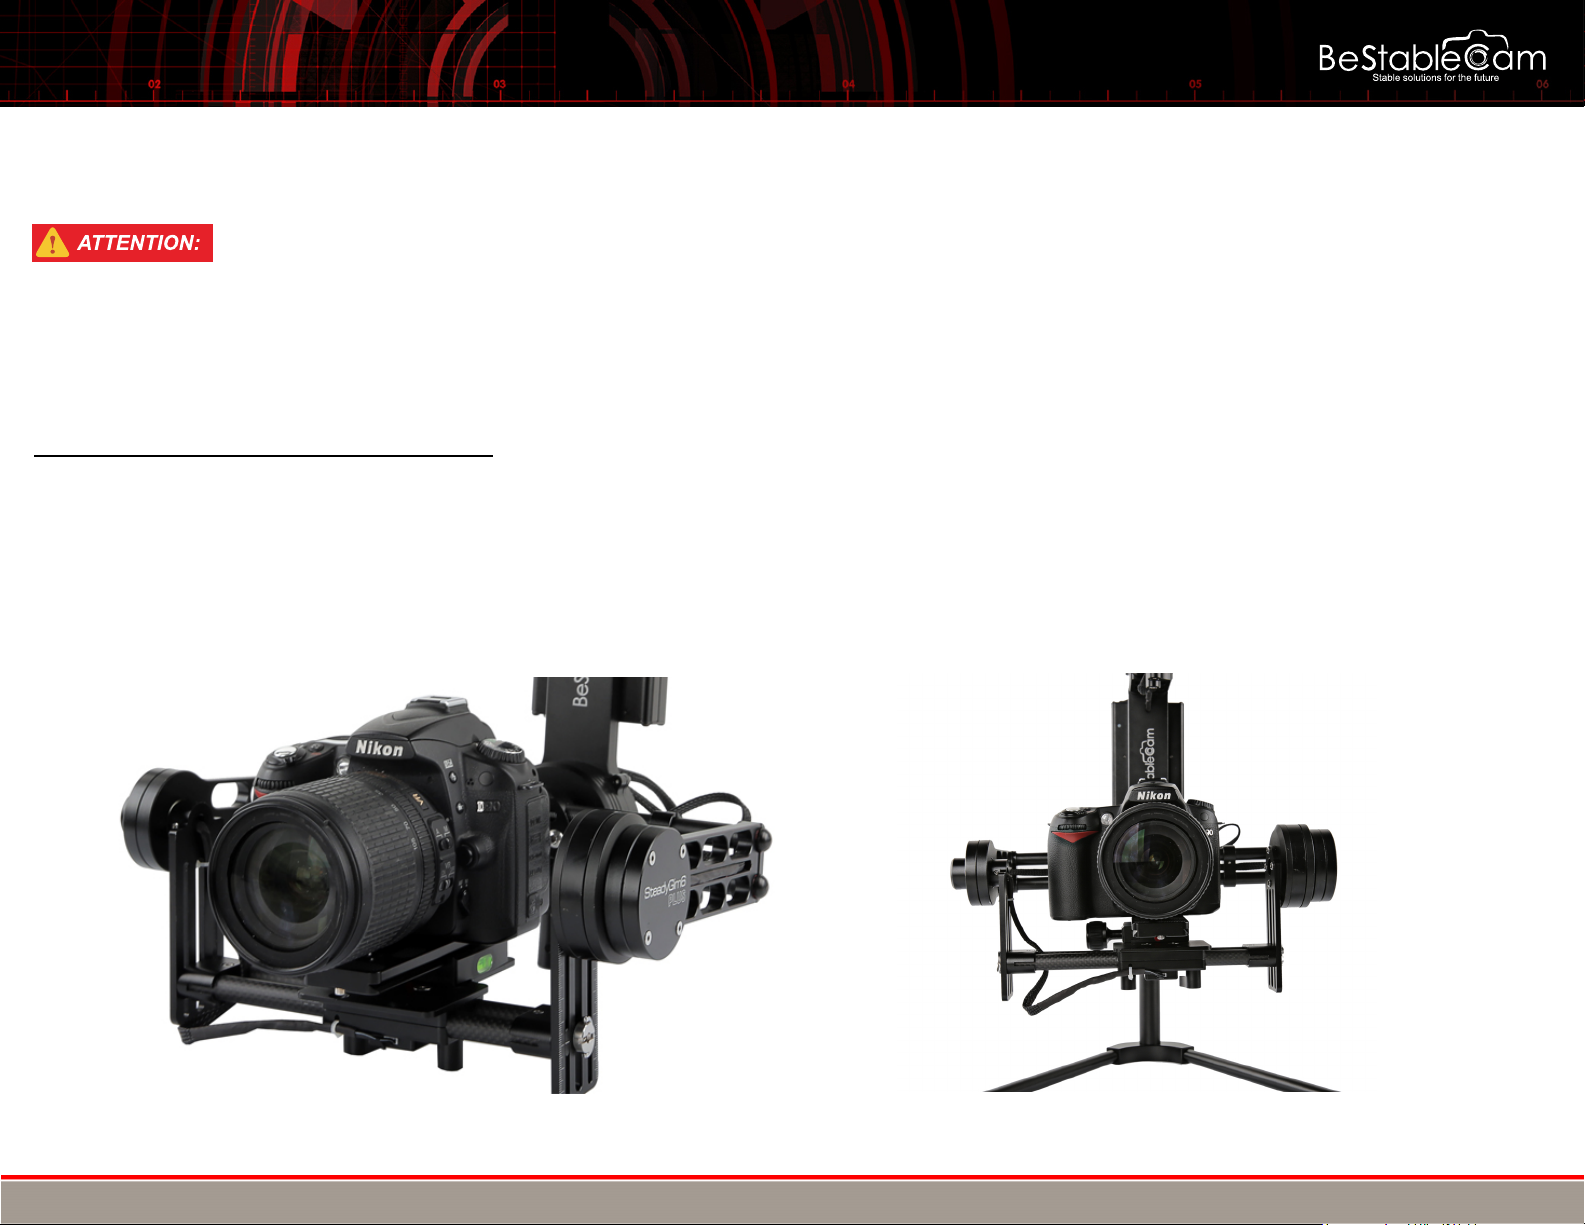
We recommend you have your camera and accessories (i.e. filter, batteries, etc.) mounted before balancing the gimbal. If your
lens has an adjustable zoom, set the zoom to the desired position before balancing.
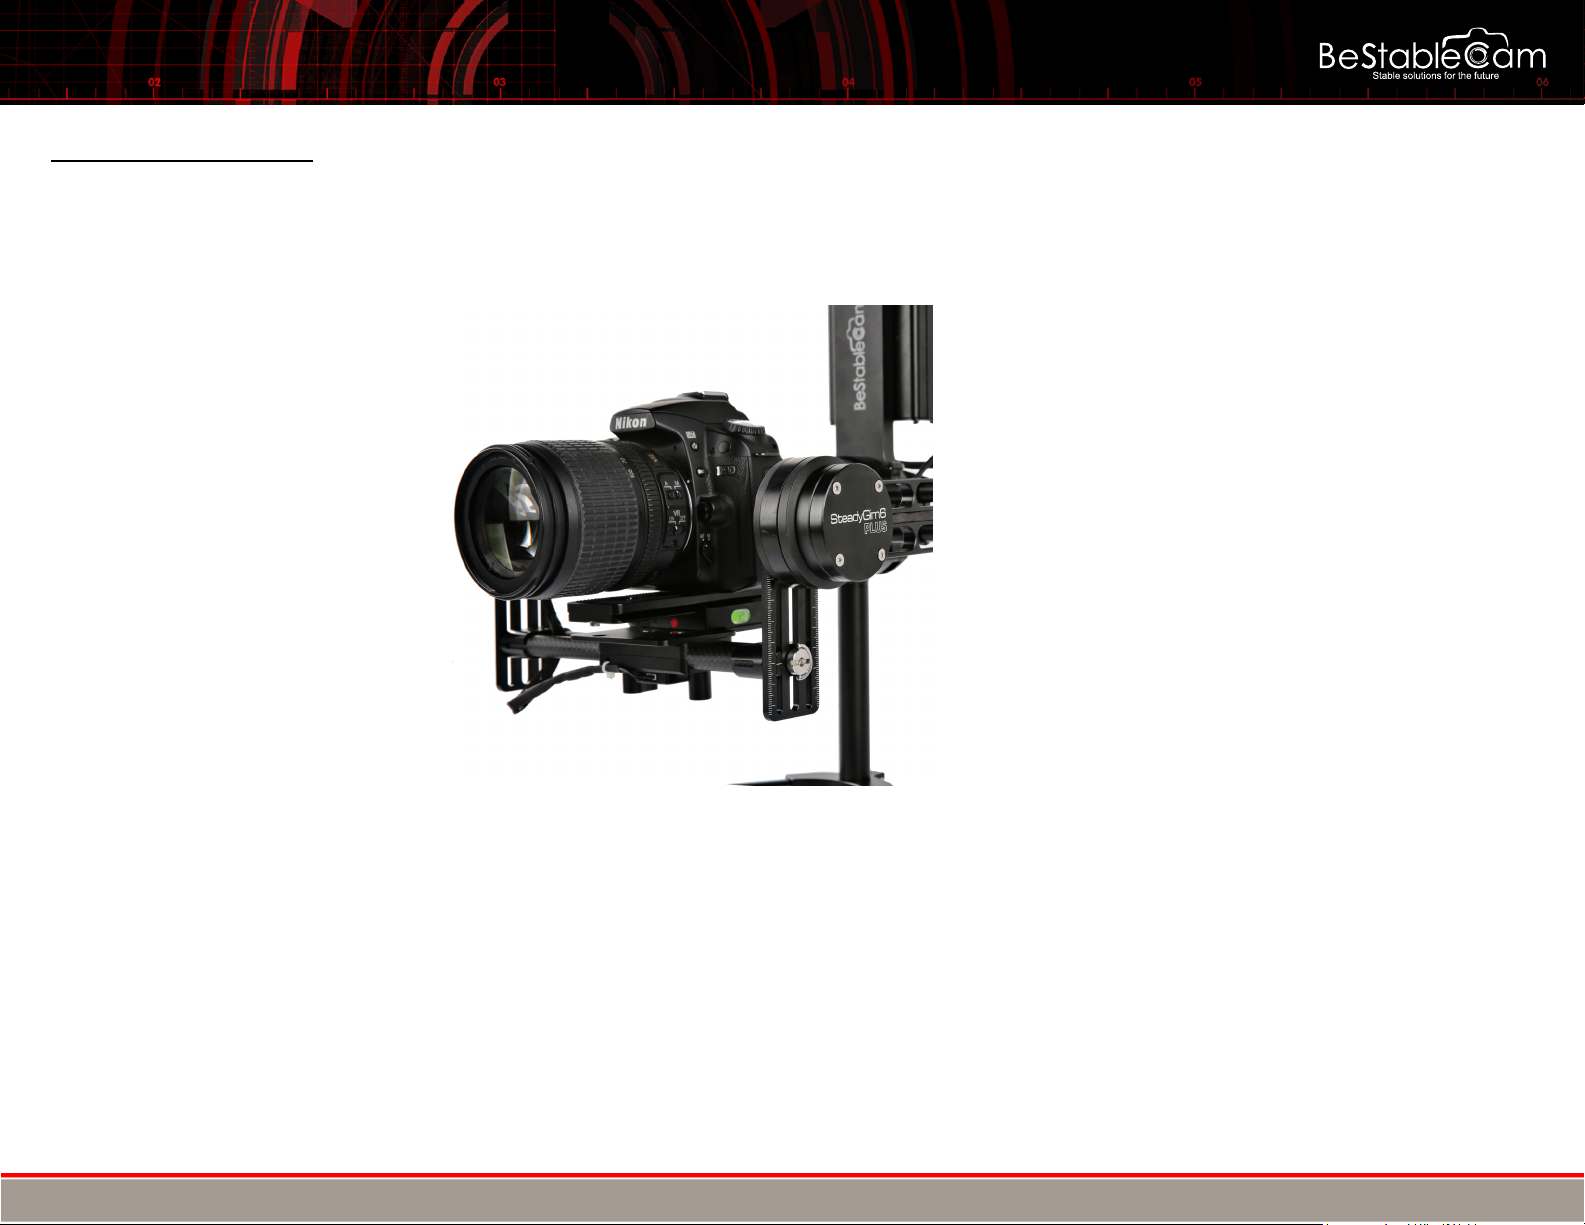
STEP 1: HORIZONTAL TILT/VERTICAL TILT
How to balance and adjust SteadyGim6 PLUS centre of gravity
The centre of gravity needs to be balance before SteadyGim6 PLUS can be used. The centre of gravity can be adjusted by moving the camera
around and certain mounting points. Little movements are all that are needed. Proper balancing is essential to correct operation of SteadyGim6
PLUS gimbal. When the gimbal is able to never return to the same position after being gently tapped, balancing is complete.
First, the camera itself needs to be adjusted forwards/backwards. Work towards making the camera sit level.
Next, the up/down sliders on the pitch assembly need to be adjusted. Camera should roll without stopping in same position.
forwards/backwards up/down
BESTABLECAM STABILIZED GIMBAL SYSTEMS USER GUIDE
Copyright © 2015 BeStableCam. All rights reserved.
STEP 2: ROLL BALANCE
Verify the balance by moving your Roll Axis to several locations. If roll stays and does not fall to either side, your roll is balanced.
The roll needs to be adjusted next. There are two options to adjust roll. It can be adjust where the camera mounts or the back mounts on the roll
poll. Sometimes both need adjustment to get correct balance. We prefer that to move camera mount to adjust the camera balance.Move assembly
left/right to get balance correct on either camera side or rear mounts. Pay attention to keep everything lined up horizontally.
left/right
BESTABLECAM STABILIZED GIMBAL SYSTEMS USER GUIDE
Copyright © 2015 BeStableCam. All rights reserved.
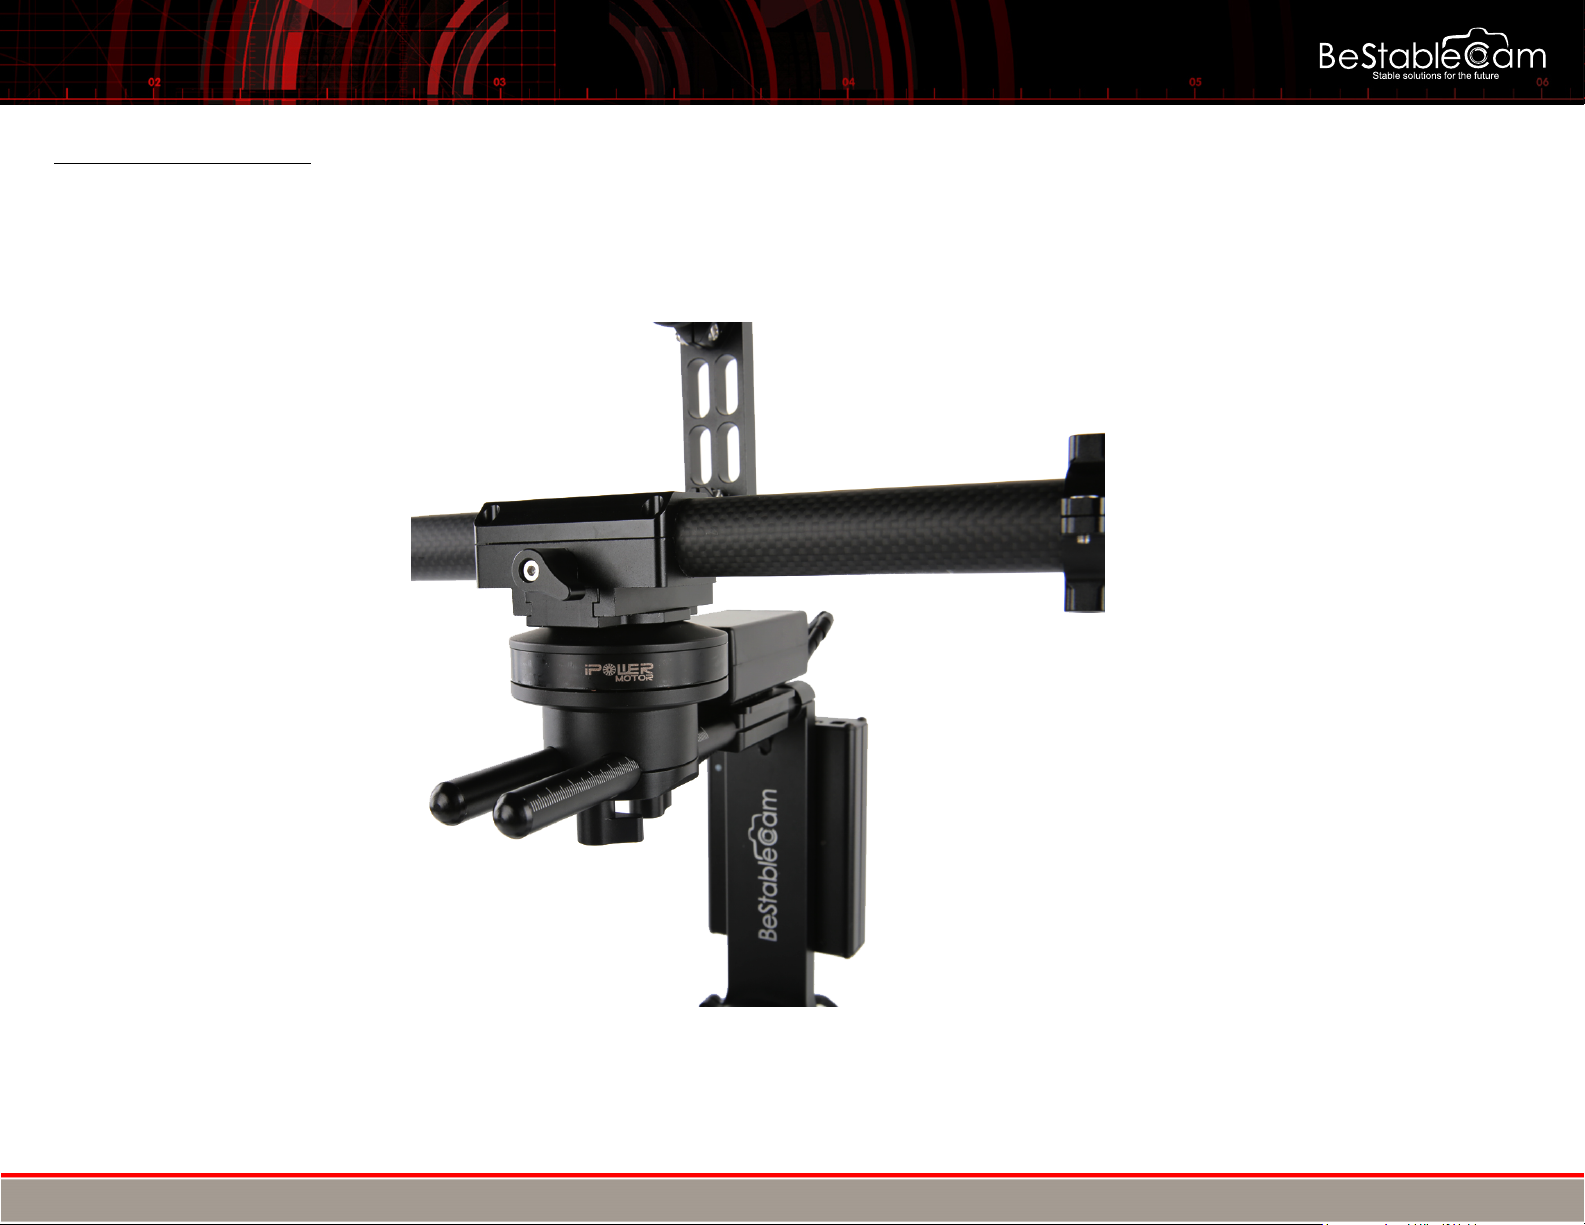
STEP 3: PAN BALANCE
The pan balance is the last axis to balance for the SteadyGim6 PLUS. The Pan Balance will ensure that the entire mass below the pan
motor is balanced on the central axis line of the pan motor. The simplest way to check for your Pan Axis to be balanced is to tilt the
gimbal in the stand and see which way the Pan Axis swings.
front/rear
BESTABLECAM STABILIZED GIMBAL SYSTEMS USER GUIDE
Copyright © 2015 BeStableCam. All rights reserved.
IV. OPTIONAL EQUIPMENT
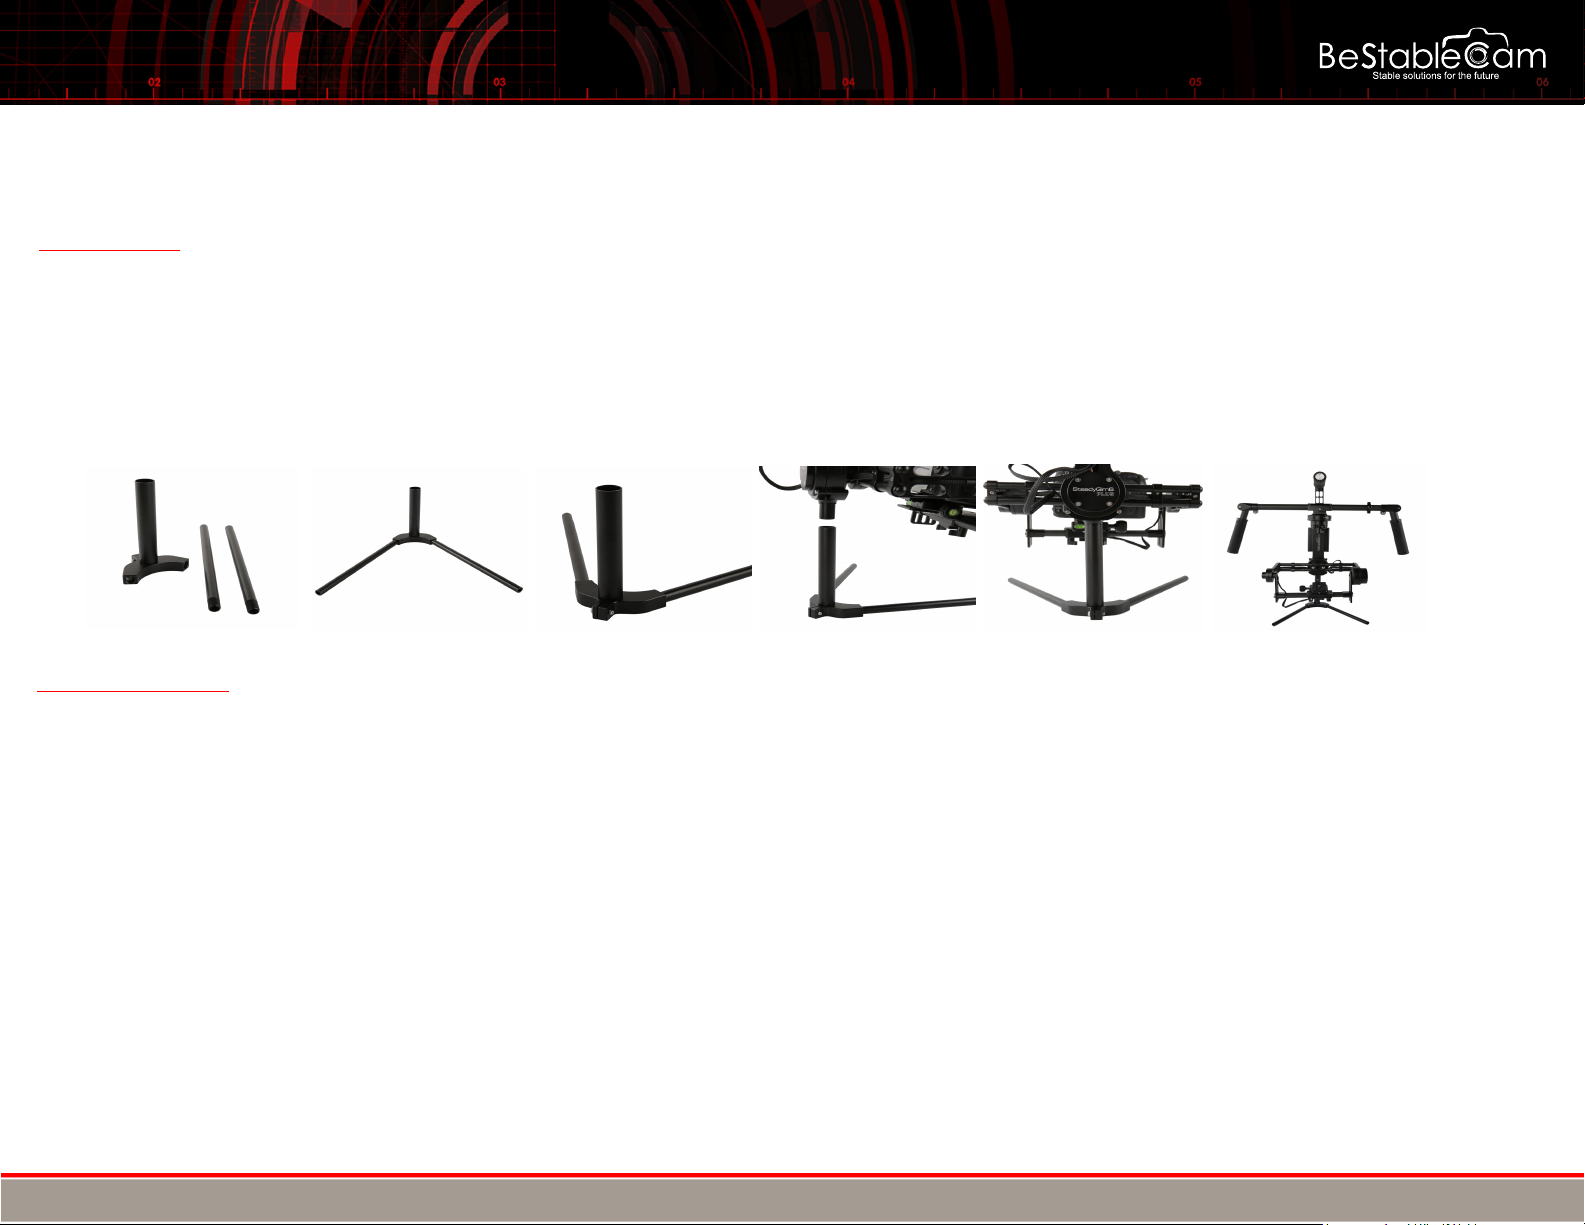
Tuning Stand
The tuning stand is a very useful tool for the SteadyGim6 PLUS gimbal. The stand allows you to hang the gimbal by the handle bars,
allowing the camera tray to rotate freely. This is very important for balancing, tuning, and setting down the gimbal when not in use.
To use the tuning stand, You just need to lock the two ALUM sticks the base mount,then put your gimbal onto the base mount..It is easy
and simple design.
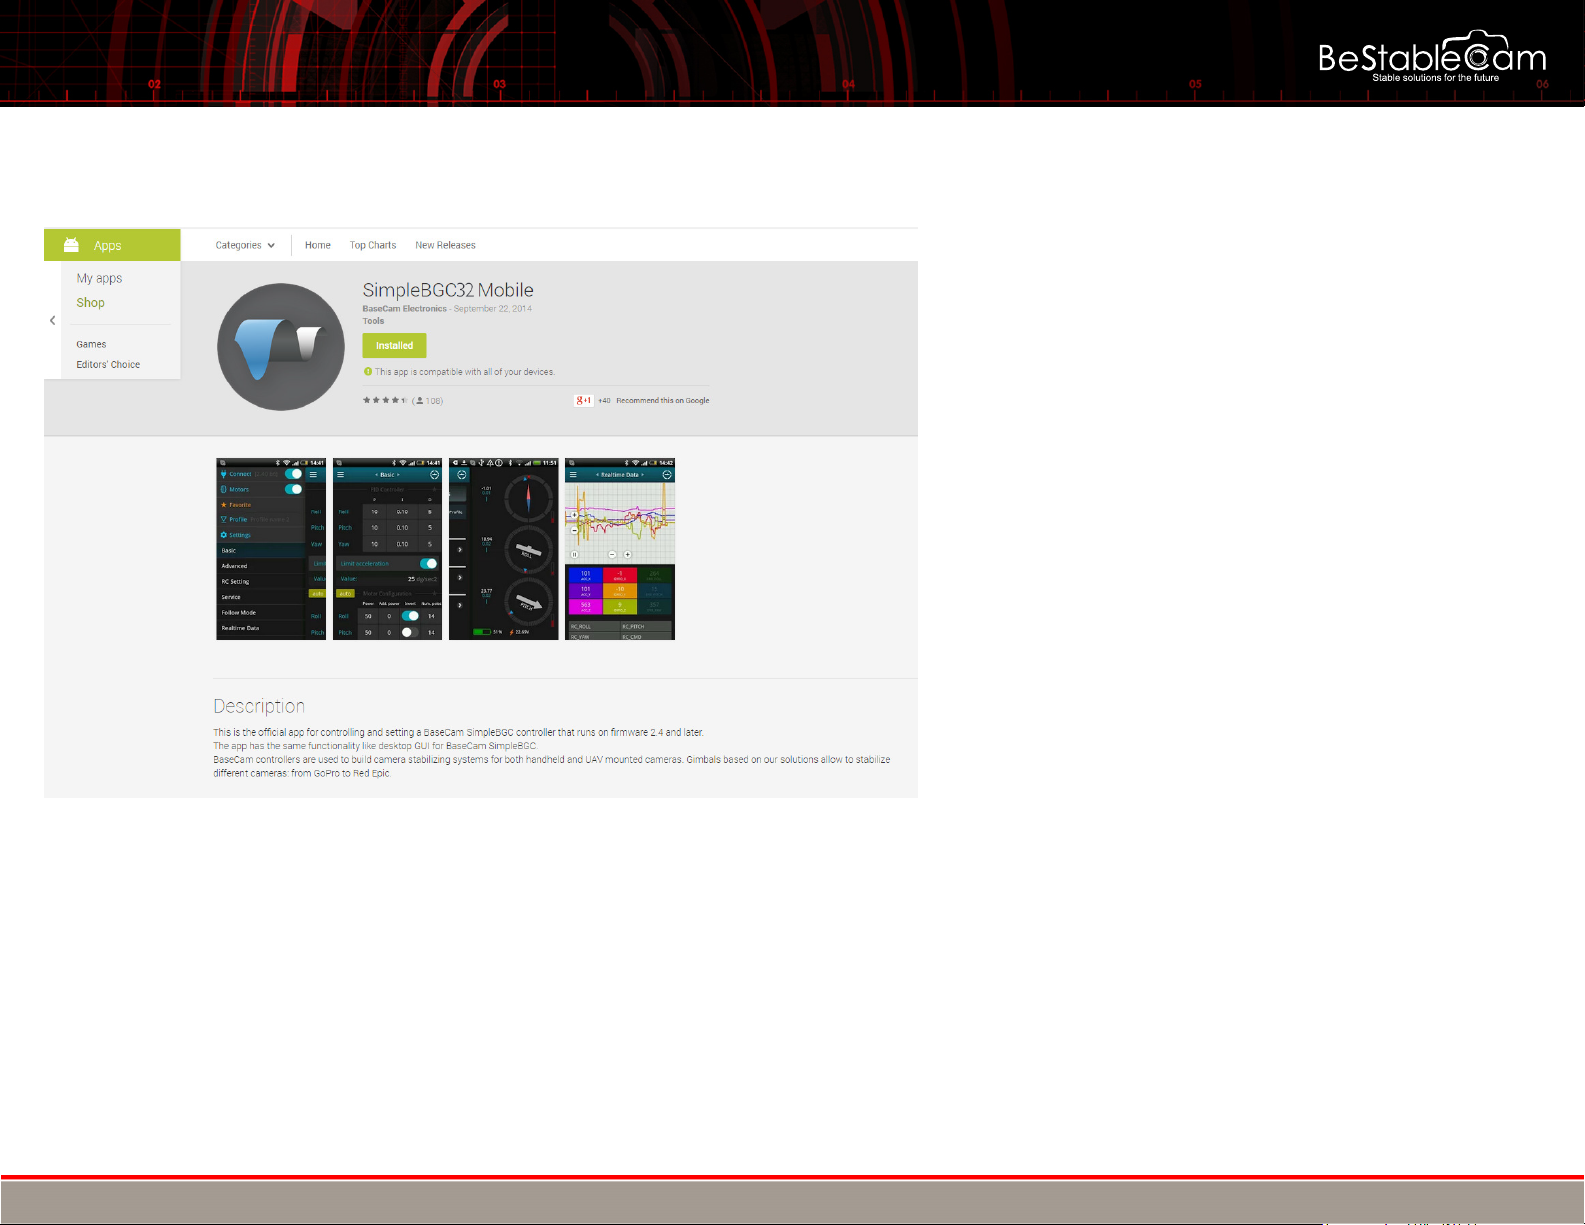
Bluetooth Module
You can tune your gimbal controller without having to drag along a USB cable or using a computer, download SimbleBGC app on
your phone and enjoy the freedom of wireless.
How to connect using Bluetooth (PC)
1. Open devices and printers from the control panel.
2. Click add device in upper left hand corner.
3. Turn SteadyGim6 PLUS on. After a few seconds, Bestablecam will be visible.
4. Select Bestablecam
5. Enter 0000 for the devices pairing code.
After pairing is complete, find the SimplBGC32 device and right click properties. Go to the hardware tab and look for what COM number you have. (Example
COM4)
6. Open BaseCam software and under connection choose the correct COM# and click connect.
7. SteadyGim6 PLUS is now connected through Bluetooth. And all of the adjustments can be now done wirelessly.
BESTABLECAM STABILIZED GIMBAL SYSTEMS USER GUIDE
Copyright © 2015 BeStableCam. All rights reserved.
How to connect using Bluetooth ((Android))
(https://play.google.com/store/apps/details?id=ru.smartsoft.simplebgc&hl=en)
1. Install SimpleBGC from Play Store.
2. Click SimpleBGC32 App > Settings > Bluetooth
3. Turn SteadyGim6 PLUS on. After a few seconds, Bestablecam will be visible.
4. Select Bestablecam
5. Enter 0000 for the devices pairing code.
6. After pairing is complete, SteadyGim6 PLUS is now connected through Bluetooth. And all of the adjustments can be now done wirelessly.

BESTABLECAM STABILIZED GIMBAL SYSTEMS USER GUIDE
V. PROGRAM MODES
The SteadyGim6 PLUS has 5 pre-programmed operating modes. These different modes affect how the gimbal controller behaves. These
modes do not affect operating position (i.e. inverted mode, briefcase mode). For more information on operating positions, see section VIII
below.
Default Setting
Mode 1 – Heading Follow Mode
The Camera slowly tracks your movements,the joystick doesn't activate at this time.
oTo activate mode 1, press down the power switch"ON" and wait 1 - 3 seconds.(default mode)
Mode 2 – Joystick Mode( Still Mode 1 but activated Joystick function)
Press once the mode button to avtivate the joystick mode,you can use joystick to control pan and tilt axis from this step..
oTo activate mode 2, press the Mode button Twice and wait 1 - 3 seconds.
Copyright © 2015 BeStableCam. All rights reserved.
Mode 3 – Lock Mode
The operator canʻt move any direction and camera stays locked in one position.
oTo activate mode 3, press the Joystick or Mode button THREE times consecutively and wait 1 - 3 seconds.
Mode 4 – Heading and Pitch Follow Mode
The Camera slowly tracks your movements on pan and tilt axis.
oTo activate mode 3, press the Joystick or Mode button FOUR times consecutively and wait 1 - 3 seconds.
BESTABLECAM STABILIZED GIMBAL SYSTEMS USER GUIDE
Copyright © 2015 BeStableCam. All rights reserved.
Mode 5 – Inverted Mode
An inverted mode can be achieved by flipping the gimbal upside-down in Heading follow mode or you can restart in an inverted mode.
oTo get the gimbal into the Inverted Position, long press the Joystick or Mode button until the motors are off,flipping the gimbal upside-down,turn
the camera 180°,then press FIVE times consecutively the Joystick or Mode button,the gimbal start to work in the inverted mode.To get back to the
normal position(under-slung position),long press the Joystick or Mode button to turn the motors off,then flip the gimbal to normal postion,press FIVE
times consecutively the Joystick or Mode button,now it's back to Uder-Slung Position
Note: When powering the gimbal ON and OFF, the gimbal will always default to Mode 1.
Note: DO NOT POWER ON AND USE IN THE NORMAL POSITION(DEAFAULT MODE) WHEN YOU TURN OFF THE GIMBAL
DURING USE THE INVERTED MODE.
Mode operation:
- Turn on the power,the default mode is heading follow mode
- Click the mode button twice, to activate the joystick function,you can manually operate the pan and tilt with a joystick.(Use joystick control from this step)
- Click 3 times continuously, it is in heading lock mode,the operator canʻt move any direction and camera stays locked in one position.
- Click 4 times continuously, it is in heading and pitch follow mode,the camera slowly tracks your movements on pan and tilt axis.
- Click 5 times continuously, it is in inverted mode,it can be achieved by flipping the gimbal upside-down in follow mode or you can restart in an inverted mode.

BESTABLECAM STABILIZED GIMBAL SYSTEMS USER GUIDE
Copyright © 2015 BeStableCam. All rights reserved.
VI.OPERATING POSITIONS
The SteadyGim6 PLUS can operate in many positions, allowing you to get shots from down low and up high or even mount the gimbal to a
tripod or crane. These operating positions can be changed very quickly by cycling the gimbals power. The gimbal can operate in all five of
the program modes while in any of these operating positions.
Under-Slung Mode
This is the most commonly used mode with the handles up on top and the camera down below. When the gimbal is resting in the tuning stand, it is in the
Under-Slung mode.
oSimply power on the gimbal from the tuning stand, or while in your hands, to begin using the gimbal in the Under-Slung Position.
Inverted Mode
Use this mode when you want to get the camera to sit comfortably at an elevated level. You can also hold the gimbal up high to get shots from above.
oTo get the gimbal into the Inverted Position, long press the mode button,then the motors are off,flipping the gimbal upside-down,then press 5
times the mode button,the gimbal start in the inverted mode.To get back to the normal position(under-slung position),long press the mode
button to turn the motors off,then flip the gimbal to normal postion,press 5 times the mode button,now it's back to Uder-Slung Position
oInvert the rubber grip handles 180 degrees.
Briefcase Mode
Use this Position to get shots down low. In this position, you will be holding the gimbal at your side with one hand on the rubber side handle.
oTo get the gimbal into the Briefcase Position, start by holding the gimbal in your hands in the Under-Slung position with the gimbal motors
are powered off.
Under-Slung Mode Briefcase Mode Inverted Mode
BESTABLECAM STABILIZED GIMBAL SYSTEMS USER GUIDE
Copyright © 2015 BeStableCam. All rights reserved.
VII.SIMPLE BGC GUI SOFTWARE SET UP
Connecting SteadyGim6 PLUS to computer.
SIMPLEBGC GUI SOFTWARE
Achieve the best shootig stabilizing effect. Using SimpleBGC GUI software for
setting and fine tuning the PID sensitivity, adjust motor power due to the different
camera weights. Best results for the stabilization will be achieved by a good setup.
Download SimpleBGC GUI software from Basecamelectronics.
http://www.basecamelectronics.com/downloads/32bit/#latest
Java Runtime environment is required in order to start the application. Ensure
you have Java Runtime installed, if not download it at www.java.com To
start the application you need to have Java Runtime Environment by Oracle
in your system:http:www.java.com
GUI for Windows:
Simply run SimpleBGC GUI.exe
GUI for MAC OS:
Run SimpleBGC GUI.jar
GUI uses a virtual COM port. Create a lock file to access it:
1.Start terminal (navigate to /Applications/Utilities and double click on Terminal)
2.Make folder “/var/lock” by command: sudo mkdir /var/lock
3.Change permissions by command: sudo chmod 777 /var/lock
4.Allow to run non-signed applications in System Preferences > Security&Privacy > General> Allow
Applications downloaded from: Anywhere
GUI for LINUX:Run run.sh.
Connection for computer
A connection between a controller and a computer can be established via a Micro-USB
You will need to install a driver the first time you establish a connection. If the driver is not
installed automatically. You can download it under follow link:
http://www.silabs.com/products/mcu/pagesusbtouartbridgevcpdrivers.aspx
BESTABLECAM STABILIZED GIMBAL SYSTEMS USER GUIDE
Copyright © 2015 BeStableCam. All rights reserved.
Although the SteadyGim6 PLUS is tested with a camera before shipping, it does not come pre-tuned or balanced for your specific camera setup. Customers will be
responsible for tuning and balancing their camera. With the help of Bluetooth,we can quickly and simplely tune the gimbal .The following profiles is we tested with
Canon 5D2 camera,suit for camera weight 1.5-1.8kgs.
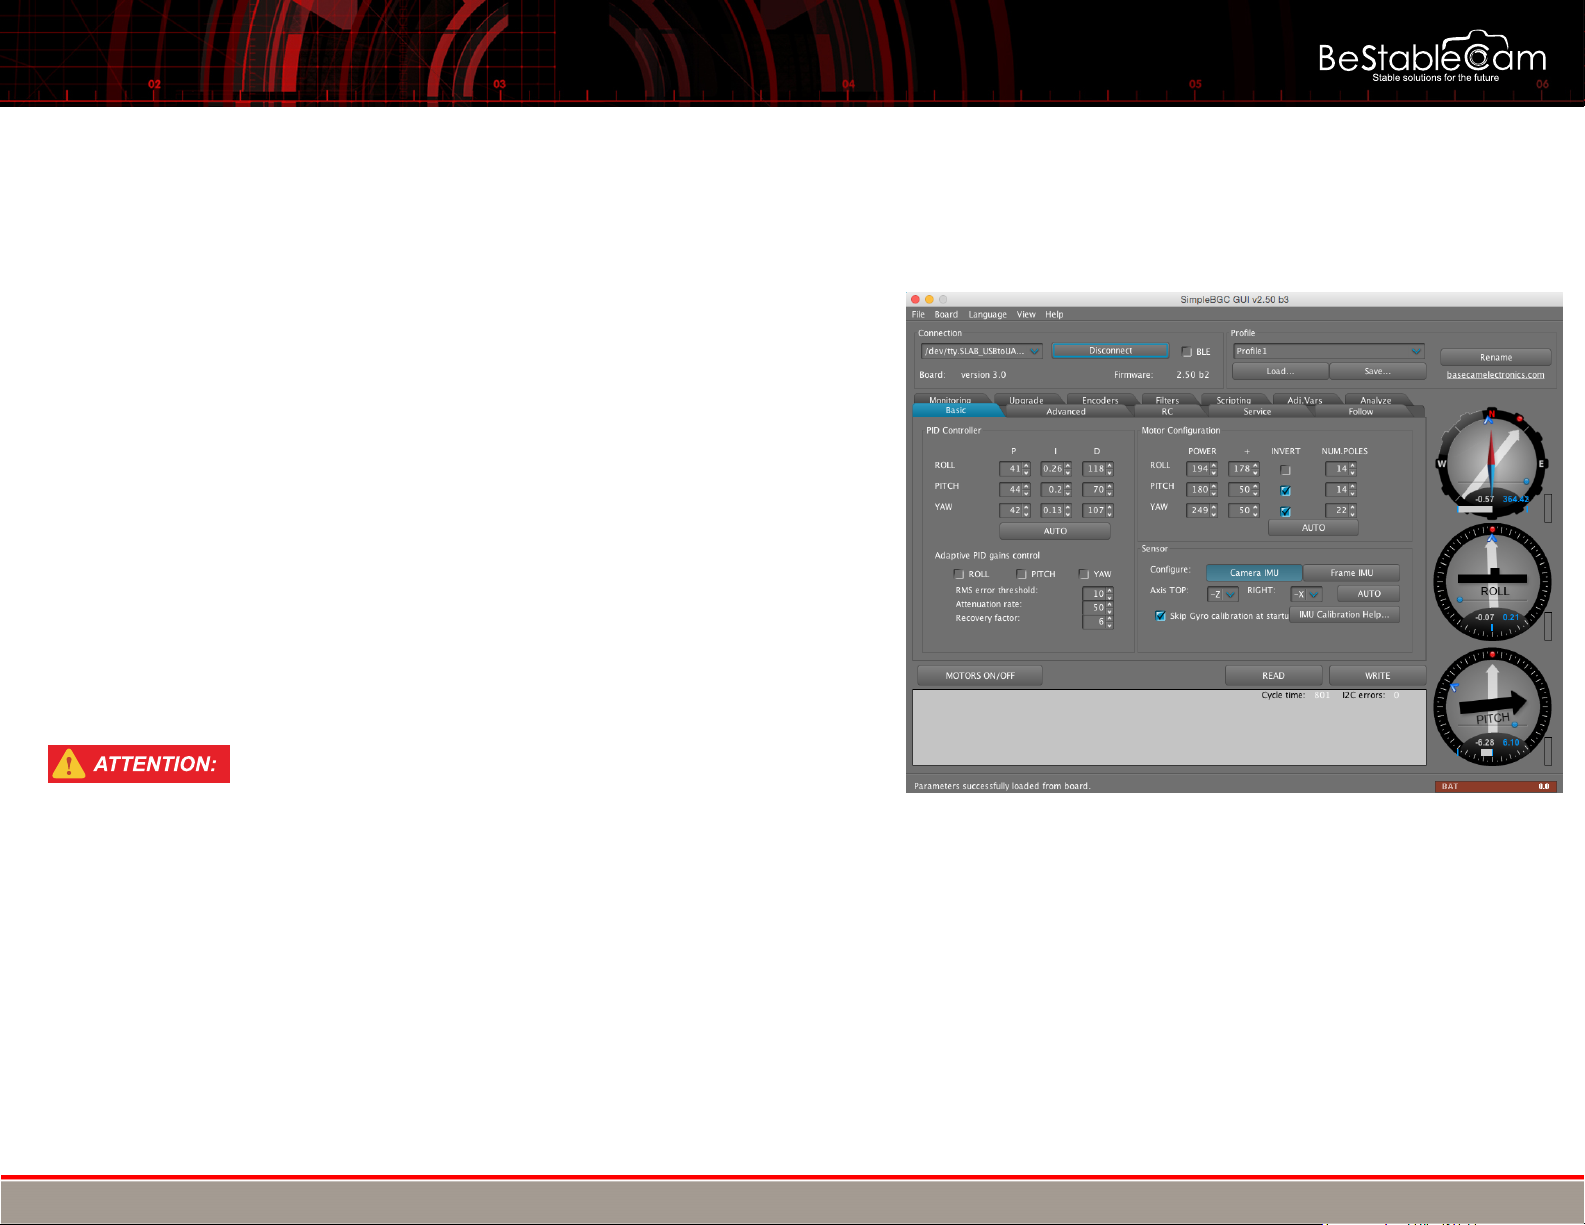
VIII.GIMBAL TUNING GUIDE
Please save the profile before you change any settings
Don't change setting in the RED Aera
Please save the profile before you change any settings
Please save the profile before you change any settings
Don't change setting in the RED Aera
SOME REFERANCE PID & POWER SETTING:
SONY GH4 AND SIMILAR WEIGHT:
Canon 5DII AND SIMILAR WEIGHT:
BMCC AND SIMILAR WEIGHT:
Please contact us for more P.I.D and power settings @ www.facebook.com/bestablecam
BESTABLECAM STABILIZED GIMBAL SYSTEMS USER GUIDE
Copyright © 2015 BeStableCam. All rights reserved.
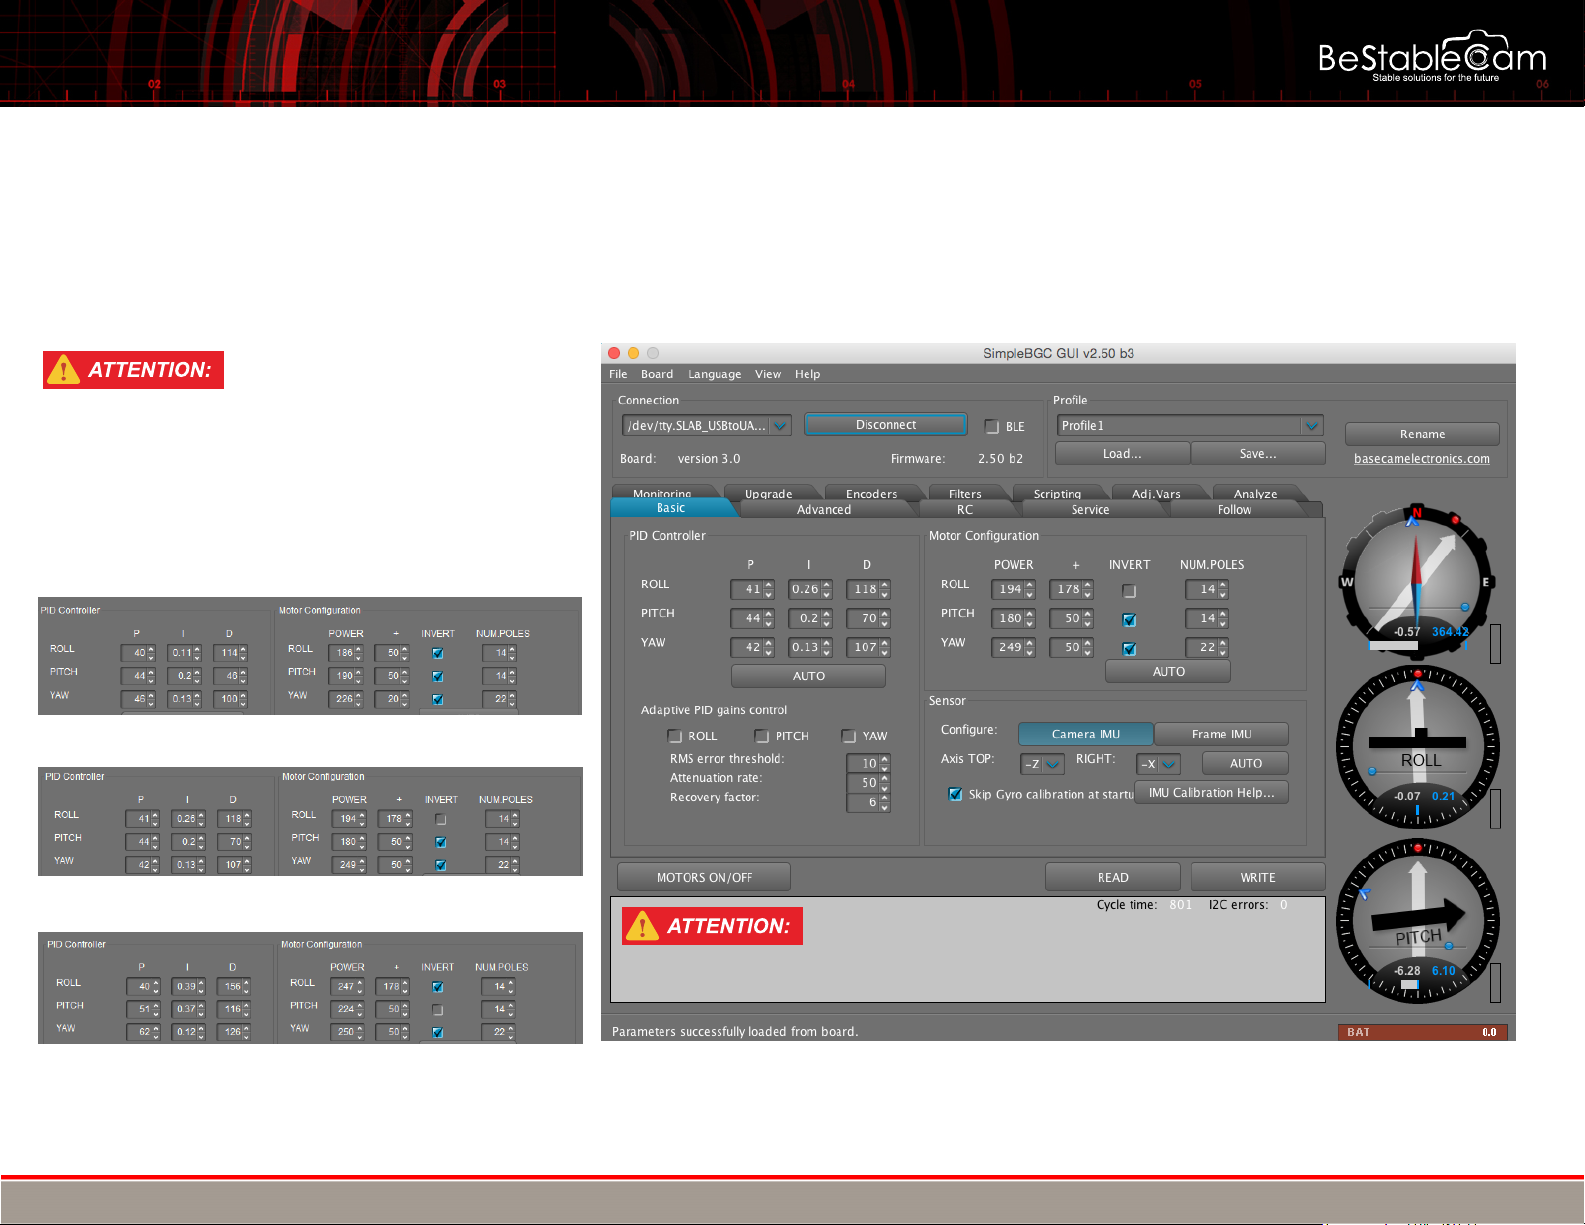
Don't change setting in the RED Aera
Advanced Setting P.I.D and Motor Settings
·P,I,D – PID regulation parameters for all axes.
◦P – describes the power of disturbance response. Higher values means a stronger
response reaction to external disturbance. Raise this value until the stabilization quality of
fast disturbances will be adequate. If the “P” value is too high, oscillations of the axis will
start to be present. These oscillations will get worse if there are vibrations that reach the
IMU sensor board. If oscillations occur, raise the “D” parameter by 1 or 2 units, and then try
to raise the “P" value again.
◦D – The “D” value reduces the reaction speed. This value helps to remove low-frequency
oscillations. A “D” value that is too high can cause high-frequency oscillations, particularly
when the IMU sensor is exposed to vibrations. In special cases, it may be filtered out by
digital filters (see below).
◦I – The “I” value changes the speed at which the gimbal moves to incoming RC commands
and to move the gimbal back to neutral. Low values result in a slow and smooth reaction
to RC commands and to getting back to neutral. Increase this value to speed up the
movement.
·POWER – maximum voltage supplied to the motors (0 - 255, where 255 means full battery
voltage). Choose this parameter according to your motor characteristics. Basic tuning:
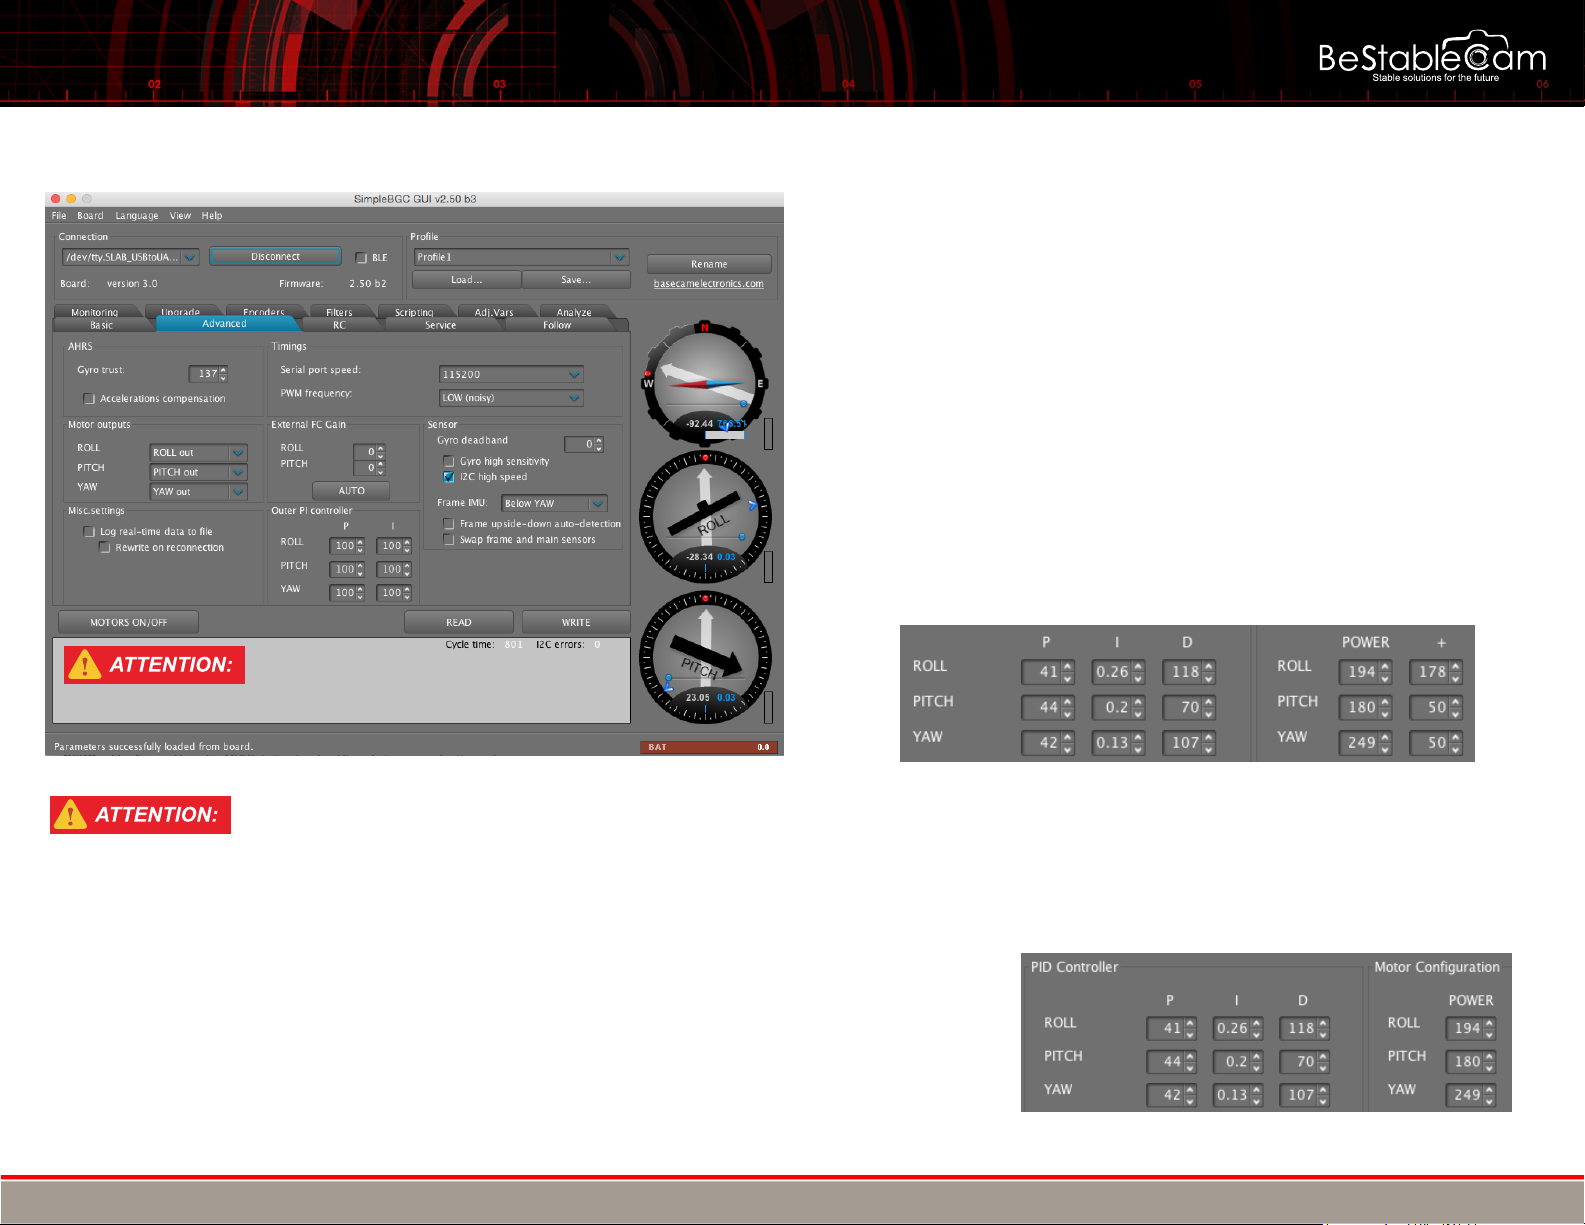
For SteadyGim6 PLUS with Encoder technology,when coming to setting parameters it goes easier than the normal BGC without built-in
encorder.The default setting is for canon camera 5DII,1.5kgs,Lens 24-70mm,if you use the different camera weight,you should just
simply follow the "rules" as bellow:
1.Camera weight lighter than 1.5kgs: lower the "D" values and Motor POWER values
2.Camera weight more than 1.5kgs: Raise the "D" values and Motor POWER values
BESTABLECAM STABILIZED GIMBAL SYSTEMS USER GUIDE
Copyright © 2015 BeStableCam. All rights reserved.
IX. TROUBLE SHOOTINGS
Problem Possible causes Solutions
High-frequency oscillations
.Feedback self-exitating as a result of high D parameter
.Motor Power too high
.LPF setting
.Check the graphs to understand on what axis the problem is,
and lower D value
.Low of power of motor
.Try 0-2 for Gyro Deadband to eliminate low or high frequency
oscillations.
Low-frequency oscillations .Feedback self-exitating as a result of high D parameter
or high P .Lower P, increase D
Camera slowly drifts by any or
all axes just after power on .Bad gyro calibration .Re-caligrate gyro
GUI can not connect to board .Wrong COM-port selected GUI and firmware versions
doesn't match.
.Try different COM-ports
.download matching GUI version
Click and crunch are heard
during work.LED is
synchronously blinking
.I2c erros peresent. Errors are possible if sensor wires
are too long, or motors outs affects sensor by
capacitive Interference.
.Check the wiring of the sensor
POSSIBLE PROBLEMS AND SOLUTIONS
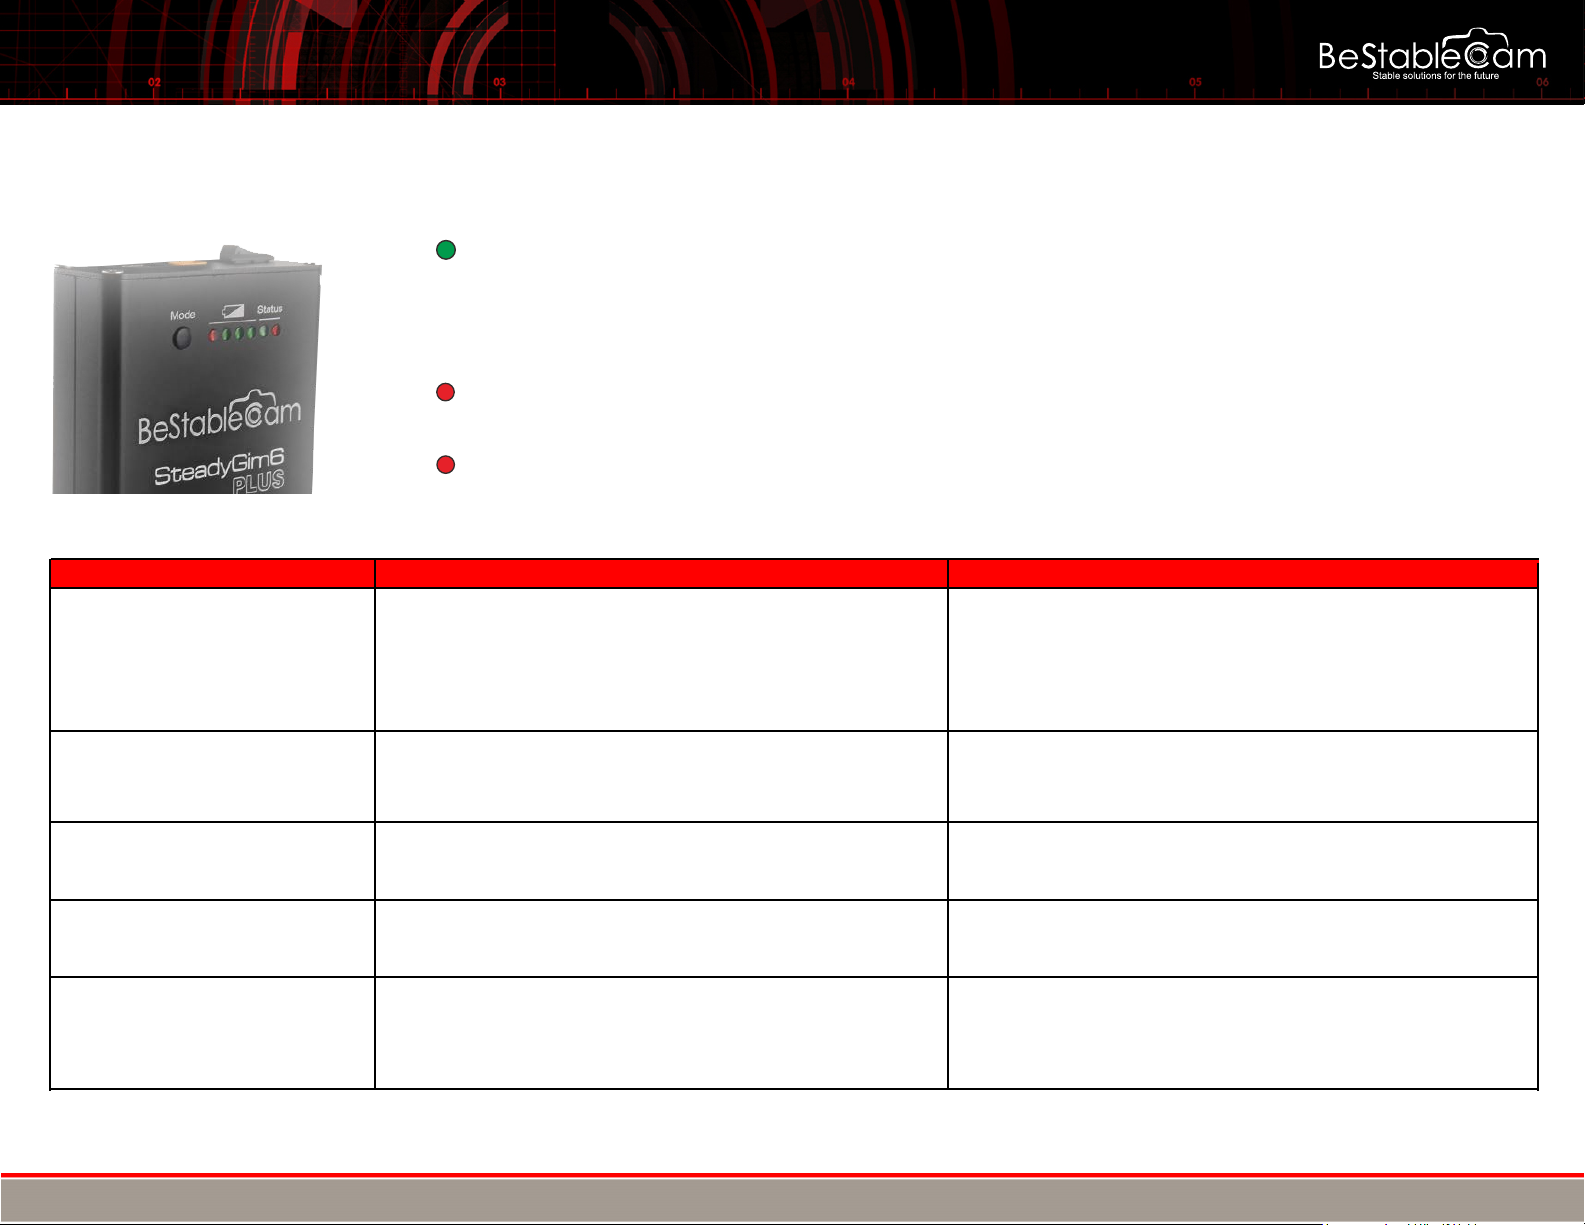
LED Status
Green LED — Normal operation mode
Slow flashing - Calibration in action - [with short sound - If beep with motors are on]
Fast flashing - Change using mode - [with short sound - If beep with motors are on]
Continuing fast flashing - Low battery - [with cricket sound - If beep with motors are on]
Flashing one time(Mode#1),twice times(Mode#2),third time(Mode#3),four time(Mode#4),five time(Mode#5)
Status Red LED — Normal operation mode.
Blinks irregularly indicates system error
Battery Red LED — Battery low.
Table of contents
Other BeStableCam Camera Accessories manuals

Popular Camera Accessories manuals by other brands


Trojan
Trojan GC2 48V quick start guide

Calumet
Calumet 7100 Series CK7114 operating instructions

Ropox
Ropox 4Single Series User manual and installation instructions

Cambo
Cambo Wide DS Digital Series Main operating instructions

Samsung
Samsung SHG-120 Specification sheet

Ryobi
Ryobi BPL-1820 Owner's operating manual