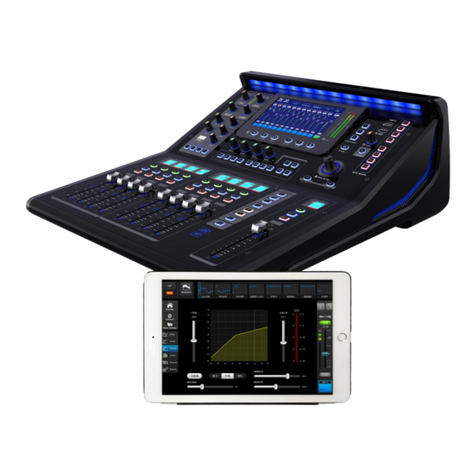
Beta Three TQ-22 User manual

TQ-22
DIGITAL
LIVE SOUND CONSOLE
Ap plicable to : Firmwar e Versi on 2.2
Refe rence man ual
Digital mixer

UG-TQ22-EN (V2.2-211226)
TQ-22
Mixer Reference
manual

UG-TQ22-EN (V2.2-211226)
TQ-22
Mixer Reference
manual
Before installation, operation and maintenance of this product,
Please make sure to firstly read the [ Important Safety Information ]
on page Iof this Manual.
Revision history
Revision
Revision description and content updated
V1.0
Initial version
V2.0
Official version
V2.2
Add user-defined USER fader function.

TQ-22
Mixer Reference
manual
- I -
UG-TQ22-EN (V2.2-211226)
Symbols used in this Manual
The following symbols are used for explanations on limiting, warning and prompt in
operation and instructions so as to ensure safety:
" Warning ! " is the term denoting the instructions on relevant personal safely. Failure to
follow these instructions may result in personal casualty.
" Caution! " is the term denoting the instructions on damages that may be caused to the
relevant devices. Failure to follow these instructions may result in equipment damage
and this damage is not within the range of quality guarantee.
Important Safety Information
In order to prevent fire or electric shock, please do not expose this equipment in the rain or
a damp environment. The max. working environmental temperature is 40℃, please do not
insert power source in the unwatched condition. Please make sure to pull out the power
plug immediately after completing the use.
Please do not use the power source with the voltage and frequency not in conformity with
those indicated on the machine, use of different ones may cause a fire or an electric shock.
Please do not scrape, damage or alter the power cord nor place any heavy objects on the
power cord, do not pull or over-bend the power cord.
Lay the power cord at places far away from the heat, or otherwise the skin of the power
cord will be softened and may cause a fire or an electric shock.
Please do not use the power cord whose electric contact at any of its ends is found with the
sign of corrosion or overheat, nor any power cord that it seems damaged in any way, as the
damaged power cord may cause a fire or an electric shock.
Make sure to use the power supply, outlet and power cord with protective grounding, so
as to maintain the equipment in good protective grounding.
Immediately turn off the power switch and unplug the power plug from the receptacle when
the machine falls off or gets damaged in any way.
Please do not make bold to open the cabinet and repair or reconstruct the machine, the
high voltage and sharp components inside the machine may hurt you.
Clean the machine with a piece of wiping cloth dipped with mild detergent and water and
fully dried. Please do not use alcohol, paint thinner or other inflammable substances such
as gasoline, nitrocellulose lacquer thinner etc.
The purpose of the excalmatory mark in an equilateral triangle is to
remind the user of paying attention to the important safety, operation
and maintenance instructions existing in the Manual.
The arrow headed lightning symbol in the triangle is to remind the
user of the un-insulated "dangerous" voltage that exists in the product
housing and may constitute an electric shock risk to the human body.

TQ-22
Mixer Reference
manual
UG-TQ22-EN (V2.2-211226)
- II -
Repair and Maintenance
This equipment belongs to precision electronic products, requiring a special maintenance
and repair method. In order to avoid equipment spoilage, personal injury and /or add potential
safety hazards, all the maintenance and repair of the equipment must be undertaken by the
authorized service station or distributor. Our company will not take any liability for any hurt,
impairment or mutilation caused by unauthorized repair conducted by the equipment client,
owner or user.
FCC statement
Note: This machine conforms to the limitation for digital equipment of Category B
as specified in Part 15 of FCC Rules after testing.
These limitations are specified for providing rational protection, preventing any harmful
interference caused to the dwelling house facilities. This machine will produce, use and
radiate radio frequency energy, failure to follow the directions for installation and operation of
the machine may cause harmful interference to the telecommunication. But anyhow, we can
not eliminate the possibility of any interference generated in special installation conditions. If
the machine indeed brings harmful interference to radio or television reception (can be
determined by turn on or turn off the machine), users are encouraged to try one or more of the
following measures to rectify this interference:
• Change the orientation of the receiving antenna or resetting.
• Increase the distance between the equipment and the receiver.
• Separate the power outlet used by the equipment and the receptacle used by the receiver.
• Consult the dealer or experienced radio or TV technician for help.
RoHS Statement
This digital mixer complies with the 2011/ 65 / EU Command on Restriction of the Use of
Certain Hazardous Substances in Electrical and Electronic Equipment ( RoHS ).
This digital mixer complies with " China RoHS " standard. The table below is suitable for
the products used in China and other regions:
Name of Components
Toxic or hazardous Substances and Elements
Pb
Hg
Cd
Cr (VI)
PBB
PBDE
PCB Assemblies
×
○
○
○
○
○
Chassis Assemblies
×
○
○
○
○
○
○: Indicates that this toxic or hazardous substance contained in all of the homogeneous materials for this part is below the
limit requirement in SJ/T11363_2006.
×: Indicates that this toxic or hazardous substance contained in at least one of the homogeneous materials used for this part
is above the limit requirement in SJ/T11363_2006.

UG-TQ22-EN (V2.2-211226)
- III -
TQ-22
Mixer Reference
manual
Packing content of TQ-22 Mixer
TQ-22 Main Unit
( Not including tablet )
1pcs
AC power cord
1pcs
WIFI wireless adapter
( USB interface )
1pcs
Bluetooth adapter
( USB interface )
1pcs
User’s
reference manual
1pcs

- IV -
UG-TQ22-EN (V2.2-211226)
TQ-22
Mixer Reference
manual
Content
Symbols used in this Manual
I
Important Safety Information
I
Repair and Maintenance
II
FCC Statement
II
RoHS Statement
II
Packing content of TQ -22 Mixer
III
Chapter 1
TQ-22
Quick Start
1
1.1. Registration and upgrade
1
1.2. About the TQ-22 mixer
1
1.2.1. Main features
2
1.2.2. Introduction of front panel functions
4
1.2.3. Introduction of rear panel functions
6
1.3. Tip wizard for quick start
7
1.4. Recall a preset scene and easily restore the required working parameters
8
1.5. Use Presets to tune
8
1.6. Monitor headphone
9
1.7. Restrictions on USB interface power
9
Chapter 2 Detailed Description of
TQ-22
10
2.1. Input Channels
11
2.1.1. Home of the input channels
11
2.1.2. Overview of input channels
12
2.1.3. Send operation of the channels
13
2.1.4. Parametric equalization (PEQ )
14
2.1.5. Gate
15
2.1.6. Compressor
16
2.1.7. Copy to
17
2.1.8. Preset
18
2.1.9. Configuration
19
2.2. Output Channels
21
2.2.1. Home of the output channels
21
2.2.2. Overview of output channels
22
2.2.3. PEQ ( Same as the input channel, please refer to section 2.1.4 )
23
2.2.4. GEQ
23
2.2.5. Compressor ( Same as the input channel, please refer to section 2.1.6 )
24
2.2.6. Copy to ( Same as the input channel, please refer to section 2.1.7 )
24
2.2.7. Preset
24
2.2.8. Configuration
25
2.2.9. Main L/R channel setup
26

TQ-22
Mixer Reference
manual
- V -
UG-TQ22-EN (V2.2-211226)
Content (continued )
2.3. Route assignment operation
27
2.4. Effect processor
29
2.4.1. TAP of effect
29
2.4.2. Signal Chain of FX
29
2.4.3. Add effect
30
2.4.4. Chorus effect
31
2.4.5. Echo effect
32
2.4.6. Flanger effect
32
2.4.7. Pitch-Shift effect
33
2.4.8. Reverb effect
33
2.4.9. Stereo Delay
34
2.4.10. Effect Presets
35
2.5. USB recording and playback
36
2.5.1. USB playback
36
2.5.2. USB recording
37
2.5.3. Bluetooth playback
38
2.6. Grouping shortcuts
39
2.6.1. DCA volume grouping
39
2.6.2. Mute Groups
41
2.7. User-defined fader
42
2.8. SCENES
43
2.9. System settings
44
2.9.1. Automatic microphone mixing control (AMMC )
45
2.9.2. Signal Generator
46
2.9.3. User operation authority control
47
2.9.4. User interface parameters
48
2.9.5. Device Information
48
2.9.6. Firmware Upgrade
49
2.9.7. Network settings and iPad remote operation
49
2.10. Power standby and recovery
51
2.11. Function operation lock
51
2.12. Programmable central control remote operation
51
Appendix 1. Technical performance parameters
52
Appendix 2. The Mixer Block Diagram
54
Appendix 3. Dimensions
55

UG-TQ22-EN (V2.2-211226)
- 1 -
TQ-22
Mixer Reference
manua
Chapter 1
TQ-22
Quick Start
Notice :This manual is applicable to TQ -22 digital mixer of firmware version 2.2.
The old version is unable to support the full functions below, partial functions may have
some difference. Firmware of higher version may have the manual of corresponding new
version, please acquire the latest information in time .
1.1. Registration and upgrade
Before using TQ-22 digital mixer, please take some minutes to visit website and register your TQ
-22 mixer. After completing registration, you can:
You can also obtain the related application knowledge and technique, find
out video and other tools to help you easily and pleasantly use the TQ-22 digital mixer.
1.2. About the TQ-22 mixer
PRESET&SCENES function can easily save or recall optimized parameter configurations. From now
on, you can experience the professional tuning fun easily and contentedly.
■Download the latest available firmware version of TQ -22 , install The latest functions for
your mixer , or optimize and upgrade the performance.
■Timely receive the latest update notice.
■Obtain the relevant member favorable convenience, understand about the latest product
pulse and the support you will probably obtain.
Professional field tuners often require four-band parametric frequency equalization ( PEQ ) ,
high-pass filter ( HPF ), compressor ( COMP ) and noise gate ( GATE ) on each input. They often use
more high-quality digital effect processors at the same time. On the output channel, they also need
to conduct equalization, compressing and time-delay operation, and also use the DCA and MUTE
grouping functions.
On the whole signal chain, the professional
audio engineer has an endless pursuance for high
quality of audio signals, including the top low
distortion pre-amplifiers, professional-grade
digital to analog /digital converter at input and
output ends.
TQ-22 digital mixer provides you with professional,
gliding and perfect performance. The simple and powerful

-2-
UG-TQ22-EN (V2.2-211226)
TQ-22
Mixer Reference
manual
1.2.1. Main features
With the digital signal processors ( DSP ) of the fourth generation ( SIMD core ), precise 450MHz /
40bit floating-point mathematical operation,24bit /48KHz high performance ADC/DAC, Concerned
about the details of the sound you care about, showing a rich sound content.
TQ-22 digital mixer is configured with :
Input (22ch) of 16-channels Mic /Line with full digital control gain analog pre-processing
( XLR female plug and ¼" TRS combinatorial input interface ), 2 stereo Line-In channels,
1 stereo USB Media channel ( U disk playback or Bluetooth audio ).
Output (18ch) of 8 channels AUX, 4channels MTRX, 1 stereo channel Main L /R( Both
are XLR male plug interfaces, differential balanced output circuits )
1 stereo channel USB recording, 1 stereo headphone channel.
All Mic /Line input channels are made of high quality professional grade microphone pre-amplifier:
high dynamic, low distortion, full digital control 63-stage analog gain, that easily meet your
requirements, to achieve good signal matching.
All Mic /Line input channels are configured with 48V Phantom power supply, Polarity switching
(Pol. ), Noise gate ( Gate ), Compressor ( Comp ), 4-band parametric frequency Equalizer ( PEQ )/
including high shelf filter ( HSF ),low shelf filter ( LSF ), high pass filter ( HPF ), low pass filter
(LPF ).
All output channels are configured with Delay, Compressor ( Comp ), graphic frequency Equalizer
(GEQ ), 4-band parametric frequency Equalizer ( PEQ )/including high shelf filter ( HSF ),low shelf
filter( LSF ), high pass filter ( HPF ), low pass filter( LPF ).
Configuration 4 professional DSP effectors ( FX ), 6 effect types: Chorus,Echo,Flanger,Pitch-Shift,
Reverb,Stereo Delay, totally over one hundred types of effect preset.
Use the functions such as wizards,
message indicators and [ Scenes ] /
[Presets ] / [Copy to ]help users easily
complete channel configuration, gain
settings, and effect selection. [ User
Scenes ]and [ Presets ]can be stored or
recalled from the internal or external
USB disk.
12 DCA volume groups and 8 MUTE
groups that can be easily operated with
one key.
Perfect switch "pop" sound automatic elimination function in the full voltage range ( 85Vac ~
240Vac), than no annoying switch impact sound .
USB Media playback, support MP3,AAC,WAV,AIFF,APE or FLAC file format. Direct use of
external USB disk recording.
USB Bluetooth interface, plug and play, connect to your phone's Bluetooth device at any time to
achieve wireless music playback.
With light entity touch switch and intelligent servo electric fader, give you the experience of smooth
hand feeling. More visual and quick control is obtained with the color capacitive touch screen, user
graphic operations interface combined with hardware physical buttons.
The large 1.44 "color TFT guide screen provides real-time channel parameter information at a
glance. The user-definable content includes: (1). Eye-catching channel names. (2). Nine
channel colors You can choose one of them. (3). A large number of channel icons are
preset, you can click to change.

UG-TQ22-EN (V2.2-211226)
- 3 -
TQ-22
Mixer Reference
manua
Exquisite processing technology, beautiful and humane appearance design. True color gorgeous
LED lighting, 9 colors are available, brightness can be adjusted, scene change parameter settings
are automatically updated.
The channel parameters (Gate / Comp. / PEQ / PAN / Gain) are associated with external physical
knobs, and the software interface automatically follows them. The operation is simple and quick
and can be obtained at will. The software interface provides dual modes: channel parameter
overview and parameter full-screen display, global overview and parameter fine-tuning.
Powerful routing setting function, adding input channel sending mode, volume distribution is as
simple as that. Quickly assign volume, whether on the input channel page or the routing settings
page.
Provide 6 scene mode dedicated shortcut buttons, which can be associated with preset scene modes
in advance, and quickly call up new scenes when needed.
Automix can be set on AUX1~8, and the input channels include microphones from CH01 to CH16
channels. It has intelligent algorithms for weight distribution and gain sharing.
ISUeasyTM remote firmware upgrade function supports comprehensive upgrade of the system by
piloting the upgrade package data from the USB port ( including MCU programs ), ensuring that the
mixer you purchased will be readily and completely upgraded to the latest state.
TQ-22 mixer provides Wireless WiFi hot spot, the IOS device ( Apple iPad etc. ) can be wirelessly
connected to the mixer for remote controlled operation. The APP software can conduct wirelessly
remote control operation of nearly all the parameters of the mixer.
Programmable central control remote control, using the device's network port or WIFI hotspot, this
digital mixer can accept the remote control command of the center console. The communication
protocol uses an easy-to-understand ASCII command language and a flexible and extensible syntax
structure.
IP-based HTML5 web version of the device system management platform, which can be set
up and upgraded through a computer or smartphone.

-4-
UG-TQ22-EN (V2.2-211226)
TQ-22
Mixer Reference
manual
1.2.2. Introduction of front panel functions
01
When the routing button number
08
is selected,
this fader and button are used as the volume and
mute control of the corresponding output bus.
The other states are main output channel control:
monitor / mute / volume fader.
02
Channel control area, including: (1). Channel
guide screen, used to display key information of
the channel, such as channel name, volume, etc.
(2). Click the button [SEL] to select the current
channel for parameter setting. (3). Monitor
button. (4). Mute button. (5). Electric fader.
03
Motorized faders. Used to adjust the volume or
gain.
04
Mute the channel or mute the route. In GEQ, it
is used to zero the gain of the current frequency.
05
Monitor button.
06
Channel selection button. Click to enter the
channel parameter setting interface.
07
The colorful channel guide screen displays relevant
channel information in real time, including channel
status, channel name, channel icon, channel color,
channel gain, channel level meter, etc.
08
Bus routing settings. Click the required bus
button, the mixer switches to the routing state,
selects the input channel page, and the fader can
be used to control the routing volume control.
Click the bus button again to exit.
24
25
23
22
07
05
09
04
08
03
01
26
02
28
06
27
29
30
12
10
13
14
11
15
16
17
18
19
20
21

UG-TQ22-EN (V2.2-211226)
- 5 -
TQ-22
Mixer Reference
manua
Introduction of front panel functions (continued)
Note:
1. The indicator of the knobs on the panel will only light up when the parameters allow adjustment !
2. When using the quick knobs and buttons on the panel, the software interface quickly and automatically follows,
displaying related parameters and graphics in time.
3. Fast knobs with symbol " ", press to enable or disable this function.
4. Press and hold the mute group button for a long time (more than 1 second), and then click the button
of the channel to select whether the channel joins the mute group. The indicator light indicates that the channel
has been added to the mute group.
5. On the input or output channel page, press the buttons of adjacent channels at the same time to
quickly set the channel binding. Only support channel bundling of (CH01, CH02), (CH03, CH04) ... etc. For
channel bundling, please refer to Chapter 2.1.9.
09
Volume send knob. Send the selected input channel to
the output bus. The four knobs correspond to the four
buses, and the button lights of the corresponding
buses are lit. Click the other buses to switch to the
remaining buses for sending operations.
10
PEQ control: buttons [1] ~ [4] are used to select
frequency bands, which correspond to BAND1 ~
BAND4 respectively. Adjustable parameters
include: Gain / frequency / Width. Press the Gain
knob to enable / disable the PEQ filter.
11
Frequency knob of high-pass filter and low-pass filter.
Press to enable / disable the filter.
12
Input channel Pan. For adjusting the pan and
balance of the output assigned to the Main bus.
13
Compressor Control: Attack -- start time;
Release -- release time; Thresh -- threshold;
Ratio -- compression ratio; Gain -- output gain
14
Analog gain adjustment knob for the current
input channel. Current input channel level meter.
The phantom power indicator and polarity
indicator are on to indicate that it is valid.
15
Gate: Attack -- start time; Release -- release time; Thresh -- threshold; Hold -- hold time; Range -- attenuation
amount.
16
Shortcut keys: --- Back to the home page. --- During parameter adjustment, click this button to set
the parameter to the default value. --- Overview of the system volume. --- System parameter menu
button. --- Auto mix button. --- USB and BT control page buttons. --- U disk REC indicator.
17
Display and touch screen integrated control area.
18
Main L/ R meter.
19
Scene shortcut keys. Click [1] [2] ~ [6] to quickly
switch to the preset scene.
20
USB interface, which can be connected to U disk
to play, record, import and export files or upgrade
system firmware. Can also be connected to a BT
adapter or WIFI adapter.
21
The volume knobs of the headphones, and indicators.
23
Standby switch. Press and hold until it blinks, then
click to enter standby mode. Click this button in
standby mode to return to normal operation.
Double-click to lock or unlock the device to avoid
misoperation of the device.
22
Mute group shortcut button.
24
Parameter adjustment main knob (press for
switching between fine adjustment mode and
coarse adjustment mode).
On the main screen, click the parameter to be
adjusted. The parameter will be selected with a
yellow border. You can adjust the parameter by
rotating the main knob.
25
Effect TAP. The mixer automatically measures the
time interval between two hits of the button as the
effect delay parameter. The flashing time of the button
indicator is the same as the effect delay time.
27
Fader page button: used for bus output channel.
26
Fader page button: Used for input channels.
28
Fader page button: for GEQ, [LO] => GEQ low frequency page, [HI] => GEQ high frequency page.
29
Quickly switch to the DCA control page.
30
Click to switch to the user-defined fader page.
Double-click to enter the USER setting menu.

-6-
UG-TQ22-EN (V2.2-211226)
TQ-22
Mixer Reference
manual
1.2.3. Introduction of rear panel functions
01
16-channel MIC / LINE differential balanced input
( XLR female plug and 1/4 " TRS combined input
interface), independent 48V phantom power control.
02
Analog stereo input, single-ended signal input,
1/4 " TRS interface or RCA socket.
03
Bus output MTX1~MTX4, single channel,
differential balanced output, XLR male interface.
04
Bus output AUX1 ~ AUX8, single channel,
differential balanced output, XLR male
interface.
05
Bus output Main L / R, single channel, differential
balanced output, XLR male interface.
06
Expansion interface (reserved).
07
AC power input interface and power switch.
Warning: Be sure to use a three-pin plug, socket and cable with protective grounding. The safety ground must
be reliable !! To ensure the safety of people and equipment, and to avoid equipment interference and work unstable
or damaged.
08
Power fuse: T2AL250V
09
AC power switch.
10
Control network interface, can be used for IP
network remote control.
11
Headphone monitor output interface.
02
05
04
06
03
11
01
10
08
07
09

UG-TQ22-EN (V2.2-211226)
- 7 -
TQ-22
Mixer Reference
manua
1.3. Tip wizard for quick start
You can have a quick start
1). Connect TQ-22 mixer with Mics, Music instruments, amps etc.
2). Turn on the power of TQ-22, wait for start of the unit, normally it will take around 25
seconds.
3). In the navigation zone ,you can select the input / output channels,
single click enter setup menu, or you can click the fade pages
button ,then click button to enter the setup the channel. Then you
can click【Config】,and adjust the analog gain,or adjust with the gain knob on
the left,check the channel level and make sure it is within the right level, you can click
【Solo】to monitor,to know about the level of input.
Note: GATE, COMP and EQ /HPF /LPF function will probably effect the input level,or
even lead to dramatically decay of input signal.
4). Same way to setup other input channels, single click other can setup other channels,
or you can use【Copy to】function to paste the specifications to other channels rapidly
5). Single click the key or 【Back】of menu to return to overview of channels,put the
volume fader to right level, normally it`s 0dB, single click【MUTE】button to cancel the
channel MUTE.
6). Under Default mode, the input channel signal will go through Main L / R as output, you can
adjust the volume to right level, and MUTE off, then you can hear the sound.
7). If you choose mix output as BUS output, single click on the mixer
,now the mixer is under status of
routing setup, the input channels which can be used as routing will be shown with brown
color, you only need to adjust the volume of the input channels, the effect sent volume will
also setup here.
8). Single click again will quit the
routing setup mode.

-8-
UG-TQ22-EN (V2.2-211226)
TQ-22
Mixer Reference
manual
9). In the navigation menu you can choose the output group,or single
click the fader page to switch to the output BUS, then put the output volume to
right level, MUTE off,then you can see there would be signal from the related output BUS,
check the output level and see if it`s in the right level.
10).If you need effect function, follow step 7) 8) to setup input routing for the selected effect,
then in the navigation menu single click ,then click the related
channel to enter FX setup menu,choose the effect and setup specifications. Or
single click the fader page button to switch to the effect interface,single click
can also enter the setup for effect. And follow step 7) 8), send the effect to the
related output BUS, the output channel will work with the effect.
11).Congratulations, the quick tuning operation is successful !! You can learn and master the
TQ-22 digital mixer in the following chapters to experience the joy of tuning !!
1.4. Recall a preset scene
and easily restore the required working parameters
What is a scene? Scene are a group of settings saved in advance by manufacturer or by the user,
and can be recalled at any time, and all the parameters of the TQ-22 digital mixer can be set as the value
of the scene.
TQ-22 digital mixer includes a lot of preset scenes to be used in all kinds of performance
occasions. In allusion to the performance that you will tune for, you can find the most suitable scene.
( Refer to Paragraph 2.8 for details )
You will see a lot of scenes by manufacturer or by the user, choose one and single click [ Recall ].
After recalling you can modify the specs per your request.
1.5. Use Presets to tune
What is the preset? The channel preset is a group of multi-parameter settings saved and aimed at
one channel, it can be recalled at any time. All the input channels /bus channels/effect channels of TQ
-22 digital mixer have the corresponding Presets, the fussy parameter adjusting work is completely
avoided, it is only required to save the adjusted parameters as presets, and recall it to restore the
original operating state when it is used in the future.
The preset is suitable for common microphone and musical instrument and is preset by the skilled
and experienced audio engineer for performance application on site. The preset is very useful and has
very good effect with less modification required, or no modification is required at all.
Preset which you can single click the icon【Preset】,you can choose the preset from the list and
recall. ( details refer to 2.1.8 / 2.2.7 / 2.4.10 )

UG-TQ22-EN (V2.2-211226)
- 9 -
TQ-22
Mixer Reference
manua
1.6. Monitor headphone
On the panel turn ,the system will pop up the Solo setup,the user can setup specs, view
the headphone output level, also you can clear Solo which is clear all monitor.
1.7. Restrictions on USB interface power
This mixer has two USB ports and a USB light port ( only 5V power supply ), but no matter which
USB port, its power supply capacity is less than 500mA, it is strongly recommended:
1). Do not insert a high current USB device.
2). Do not insert the phone into the above socket for charging, the test has proved: when the
phone into the USB port charge, and the same time the phone as the input source for the
mixer, it will produce interference ! !
Use the phone comes with the charger from other places to take power, and the phone as the input
source of the mixer will not be a problem.
01
Rotate the headphone monitor knob on the panel to automatically pop up this monitor control interface. If there is
no operation, it will automatically retreat in 3 seconds.
02
Headphone monitoring can be accessed by clicking the button【Solo】on the screen or by clicking the button
on the panel. Multiple channels can be monitored simultaneously.
03
Headphone monitor output level meter.
04
Clear all related setup with headphone monitor.
05
Quit operation.
06
Volume adjustment.
07
For the input channels, the headphone monitor access point can be selected before the fader or after the fader. The
access points of the earphones of the output channels are all before the faders.
02
01
03
04
05
06
07

-10-
UG-TQ22-EN (V2.2-211226)
TQ-22
Mixer Reference
manual
Chapter 2 Detailed Description of
TQ-22
This section details the screen and operational controls of the TQ-22 Digital Mixer. The operation
of this tuning station basically consists of input channel setting, bus output channel and routing settings,
effect settings, and system settings.
Key points: The faders and buttons on the panel are mainly used during operation, and the TFT
touch screen is supplemented by two-way synchronous control. What is the function of the fader can be
distinguished by the corresponding guidance display. Channels that are prohibited from operating
display a black screen.
Noise indication: (invalid)
Compressor meter :( invalid)
GEQ gain: -15dB ~ +15dB
Cha nne l No .:A U X 01~ 08/ MT X 01 ~ 04
Frequency: GEQ frequency
(GEQ Channel co lo r: user-define d)
Channel meter: (inactive)
Channel icon: GEQ-s pec ific icon
QEQ of bus
GEQ Freq.No.: GEQ01~15
Status: GEQ settings
Channel name: Disable
operation channel
Channel meter: (inactive)
Disabled channel
Noise indication: (invalid)
Compressor meter :( invalid)
DCA channel
Status: DCA channel
Channel icon: DCA-specific
icon
(DCA Chann el color: us er-d efined)
Channel No.:DCA01~DCA12
DC A Ch an n el na m e : DC A1 ~ 12
DCA Ch ann el gain : -Inf ~ +1 0dB
Channel meter: (inactive)
Channel meter: po st-fader indicatio n
FLAG: Comp/EQ/Link
Channel icon: user-defined
Cha nne l No .:A UX 01~ 08 /M TX 01~ 04
(Channel color: user-defined)
Channel name: user-defined
Status: Output channel
Output channel
Channel gain: -Inf ~ +10dB
Com p ress or me te r: Co m p . ind ic ato r
Noise indication: (invalid)
Channel meter: Pre-fader indication
Gate indication: Red is forbidden
Com p ress or m eter : Co m p. ind ic ato r
Channel gain: -Inf ~ +10dB
Channel icon:
user-defined
Cha nne l No .: CH 01 ~C H1 6/ST /U S B
Channel name: user-defined
Status: Input channel
(Channel color: user-defined)
Input channel
FL AG : Ga te/C om p /4 8V /E Q /L ink
Channel meter: Pre-fader
indication
Channel icon:
user-defined
Status: routing settings
Channel No.:CH 01~CH1 6/ST/U SB
FLAG: Ga te /Comp/4 8V /EQ /Link
Channel name: user-defined
Routing channel
Gate indicatio n: Red is forb id den
Com p ress or m eter : Co m p. ind ic ato r
Routing gain:-Inf ~ +10dB
(Chan nel color: user-defin ed)

UG-TQ22-EN (V2.2-211226)
- 11-
TQ-22
Mixer Reference
manua
2.1. Input Channels
2.1.1 Home of input channels
01
In the navigation bar, click the corresponding index
page or the fader page button on the panel to
quickly switch to the page where the channel is
located. The small bright spot in the figure is the
channel gain position indication of the channel.
02
System setup button, click to enter the system
parameter control page. Same function as the
button on the panel.
03
Scene button, click to enter scene control page, save
or load the scene parameters you need. It has the
same function as the button on the panel.
04
This channel is assigned to the pan of the Main
L/R. Adjust it in the channel settings, or click the
screen to select the channel, and then adjust the
knob on the panel.
05
SOLO monitor switch.
06
Channel gain. Changed by fader adjustment.
07
Channel linking indicator. This indicator lights up
when two adjacent channels are linked.
08
The phantom power indicator lights up to
indicate that the + 48V output is valid.
09
Noise gate indicator, when lit, indicates that the
noise gate is valid.
10
Compressor indicator, lit to indicate that the
compressor is valid.
11
Channel gain fader.
12
Channel gain scale, unit: dB.
13
Channel mute switch, mute when lit.
14
The channel label contains the physical channel
numbers CH01, CH02, etc, as well as
user-definable channel names, such as
"MIC-01", "Guitar-02", and so on.
Click the channel label to enter the channel
edit menu
.
15
Channel preview area. Click the screen to select a
channel as the current channel, and rotate the main
knob to adjust its parameters.
16
Main L / R channel master control board with
adjustable gain and mute.
02
01
03
04
05
06
07

-12-
UG-TQ22-EN (V2.2-211226)
TQ-22
Mixer Reference
manual
2.1.2 Overview of input channels
Click the channel label or click the channel button , the system
automatically enters the input channel overview page. On this page, you can view most of the
parameter settings of the current channel. The physical knobs and buttons on the machine panel
can be used for quick adjustment. Related parameters. There are 5 overview areas: [Config],
[PEQ], [Gate], [Comp], [Route Assignment], click the first 4 areas to enter the full screen mode
of the corresponding function.
01
In the navigation bar, click the index page or the
fader page button to switch to the page where the
channel is located. The small bright spot in the
figure is the gain position indication of the channel.
02
System setup button, click to enter the system
parameter control page. Same function as the
button on the panel.
03
Scene button, click to enter scene control page, save
or load the scene parameters you need. It has the
same function as the button on the panel.
04
Home button, click to return to the channel home
page.
06
Click to switch to the noise gate control page.
05
Click to switch to the PEQ control page.
08
Click to switch to the copy control page.
07
Click to switch to the compressor control page.
10
Click to switch to the channel setting page.
09
Click to switch to the parameter preset page.
12
Channel overview area. Display only, not screen
operation. Click to enter full screen mode.
11
Click to switch to the channel overview page.
14
Comp. overview area, only display. Click to
enter full screen mode.
13
Gate overview area, only display cannot be
operated on screen. Click to enter full screen mode.
16
Routing routing overview area. Display only
cannot be operated on the screen. The progress
bar indicates the amount of transmission, and red
indicates that the transmission is muted. The
green text indicates the bus corresponding to the
current send knob.
15
PEQ overview area, only display can not be
operated on screen. Click to enter full screen mode.
17
Current channel master control board, adjustable
gain and mute.
03
02
01
04
06
07
08
09
11
10
17
05
14
15
12
16
13
Table of contents
Other Beta Three Music Mixer manuals
