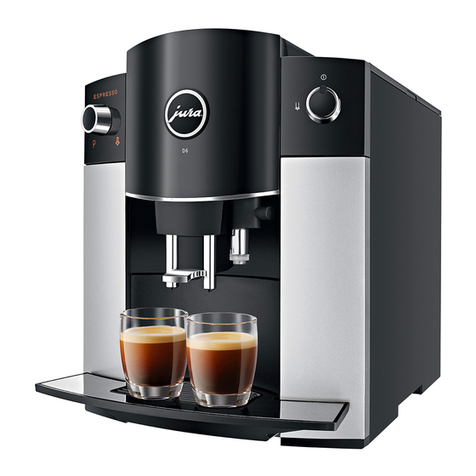
BEZERRA DE MBM01 User manual

ESPRESSO MACHINE
DE MBM01
INSTRUCTION MANUAL

2
INDEX
Chapter 1- GENERAL WARNING
1.1 General Warning Pag. 4
1.2 Use Allowed Pag. 5
Chapter 2 - TRANSPORT
2.1 Packing Pag. 6
2.2 Handling Pag. 6
2.3 Warehousing Pag. 6
Chapter 3 - MACHINE DESCRIPTION
3.1 Machine Operating Cycle Pag. 7
3.2 Controls Description Pag. 7
3.3 Specifications Pag. 7
Chapter 4 - MACHINE INSTALLATION
4.1 Warning Pag. 9
4.2 Installation Presetting Pag. 9
4.2.1 Electrical Connection Pag. 9
4.2.2 Water Supply Connection Pag. 10
4.2.3 Drain Connection Pag. 10
4.3 Deconcentrator Instructions Pag. 10
Chapter 5 - USE OF THE MACHINE
5.1 Machine Start and Water Supply Pag. 11
5.2 Heating Pag. 12
5.3 Coffee Preparation Pag. 12
5.4 Steam Outlet Pag. 13
5.5 Getting Hot Water Pag. 13
5.6 Dose Programming Pag. 13
5.6.1 Dose programming for 4 groups Pag. 14
5.6.2 Pre-infusion programming Pag. 14
5.7 Machine Stop Pag. 14
Chapter 6 - MAINTENANCE
6.1 Safety Rules Pag. 15
6.2 Machine Cleaning Pag. 15
6.3 Scheduled Inspections Pag. 15
6.4 Thermostat Reactivation Pag. 16

3
Power and water supply installations must be prearranged by the user
according to the indications of Chapter 4 of this booklet "Machine
Installation".
The installer is not allowed for any reason to modify the preexistent
installation prepared by the user.
This booklet is integrating part of the machine and has to be read carefully
by the user before starting up the machine.
Keep this document as a reference manual for the future.
The machine is delivered without water into the boiler so as to avoid
possible damages due to ice.
Take care of the electrical installation grounding.
Do not touch the machine with damp and/or wet hands and feet.
Do not use the machine barefoot.
Do not connect the power supply cable to temporary extensions or similar
devices.
Do not turn off the machine by pulling the power supply cable.
Do not operate the machine with the power supply cable rolled up.
Do not allow unskilled personnel and/or children to operate the machine.
In order to avoid seepages of water into the machine, take care to put the
cups on the warmer with open side up.
CHAPTER 1
GENERAL WARNING
1.1 General Warning

4
The espresso machine DE MBM01 is intended to dispense espresso, hot water,
tea, camomile and other infusions, to create steam and to warm drinks (milk,
chocolate, cappuccino, punch, etc.).
This machine has been planned only and exclusively for the above mentioned
purposes.
All other uses are to be considered unfit and therefore strictly forbidden.
The manufacturer shall not be held responsible for damages due to unsuitable
use of the espresso machine.
1.2 Use allowed

5
The espresso machine DE MBM01, at first is wrapped up in bubble-lining and
protected with foam polystyrene then is packed in carton with pallet
Warning:
- After the unpacking, make sure that the machine and relevant equipment
are complete and undamaged.
- The unpackings must be kept out of the reach of children and disposed
at the proper dumps.
- Should you detect damage to the machine or missing pieces in the
equipment, do not use the machine and inform immediately the area
agent.
The espresso machine can be handled by means of a transpallet or a lift truck.
The machine, properly packed, shall be kept dry, with temperature ranging from
5 to
30 oC and humidity below 70%.
Four cases maximum are allowed, one upon another.
CHAPTER 2
TRANSPORT
2.1 Packing
2.2 Machine handling
2.3 Warehousing

6
The water coming from the water supply by a motor pump with a pressure
ranging from 9 to 10 bar, passes through an overpressure valve set to 12 bar.
From the volumetric meter, controlled electronically, the water goes into the
boiler by means of exchanger.
The boiler water heated by a resistance, heats in its turn the water in the
exchanger, which, by means of a suction lift allows a constant temperature .
From the exchanger, the water goes directly into the group which, by an electric
valve controlled electronically by a push-button panel, allows the water to get in
for the coffee infusion.
(Refer to fig. 1)
For the description of the controls, refer to the table of the inside back cover of
this instruction booklet.
The espresso machine DE MBM01 is produced in different versions from 1 to 4
groups.
Starting from 2-group version, resistances with power above 3000 W (except
the versions feeded by 110-120 V 50-60 Hz) can be supplied, on request.
This handbook describes the 2-group version; however, use instructions and
control panel apply to the other versions too.
CHAPTER 3
DESCRIPTION OF THE MACHINE
3.1 Machine operating cycle
3.2 Controls Description
3.3 Specifications

7
1 group 2 groups 3 groups 4 groups
Power Supply V 110 - V 120 - 50/60 Hz
Resistance (V) 110-120 110-120 110-120 110-120
Resistance (W) 1400 2600 3000 3000
Power Supply V 220 - V 230 - V 240 - V 380 - 50/60 Hz
Resistance (V) 220-230-240 220-230-240 220-230-240 220-230-
240
Resistance (W) 2000 3000 5000 5000
Boiler (liters) 5 11 17 24
Width (mm) 540 720 930 1140
Depth (mm) 470
Height (mm) 505
Net Weight (kg) 50 66 79 96
Gross Weight (kg)
(carton with pallet) 60 79 94 114
Nipple for water
supply G 3/8"
Drain Connector
Diameter (mm) 17

8
The installation must be carried out by qualified operators according to
manufacturer’s instructions and laws in force.
Put the machine on a plane surface with sizes and solidity suitable to overall
dimensions of the equipment.
The machine is electrically powered and requires for its operating:
- power supply connection
- water supply connection
- drain system connection.
Warning:
- The power supply connection must be carried out by qualified
personnel.
- The installation must be carried out in compliance with the laws in
force and must be equipped with proper grounding.
The machine is supplied with power cable without plug; cable terminals shall be
connected to an omnipolar switch with a minimum opening of 3 mm.
On request, the machine can be supplied with cable-plug :
- mono/three-phase up to 3000 W with socket 16 Ampere according to EEC
regulations
- three-phase above 3000 W with special five-ended plug.
CHAPTER 4
MACHINE INSTALLATION
4.1 Warning
4.2 Installation Presetting
4.2.1 Power Supply Connection

9
Make sure that the water supply installation is connected to drinkable water
supply with operating pressure ranging from 0 to 6 bar.
Should the pressure be above 6 bar, provide a reducer.
Provide an intercepting tap upstream the machine connection.
A nipple G 3/8 " is already provided for the water supply connection.
Warning: Do not turn on for any reason the threaded tap and the boiler
drain cock housed near the water supply nipple; danger of burns.
Connect a rubber pipe with inner diameter of 17 mm to the provided connector
of the machine drain well and join the open drain-trap, previously prepared.
Connect the machine as shown in the illustration 2.
Fig. 2 - Deconcentrator connection
For use and maintenance, refer to the deconcentrator instructions enclosed
to this booklet.
4.2.2 Water Supply Connection
4.2.3 Drain Connection
4.3 Deconcentrator Instructions
Machine water supply connection
Drinkable water supply
connection

10
The general view of the machine is on page 19 of this booklet.
a b c d e
Fig. 3 - Placing of Product Supply Controls.
Legend:
a Selection touch-key for one dose of regular coffee.
b Selection touch-key for one dose of weak coffee.
c Selection touch-key for two doses of regular coffee.
d Selection touch-key for two doses of weak coffee.
e Selection touch-key for non-stop supply/programming/stop
Turn on the intercepting water tap.
Set the omnipolar lever switch to ON.
Setting the switch (fig. 4) in position 1 the green light and the red one will light
up.
The water is automatically supplied to the boiler and after 120 seconds the
indicators LED on the keypad will light up; repeat the above operation more than
once, till the pump has completely supplied the boiler and doesn’t start any
longer.
When you reach the minimum water level the red light (fig. 4) will switch off and
setting the switch in position (/VV ) the yellow light (fig. 4) will light up.
CHAPTER 5
USE OF THE MACHINE
5.1 Machine Start and Water Supply

5.3 Coffee Preparation
11
N.B.: Do not set the switch in position (/\/\/) when the red light is on.
In order to have the right temperature for the machine, make sure that the
pressure on the gauge is from 1 to 1,2 bar, then turn the steam knob (fig. 1; pos.
4) and let out 2 or 3 times the steam into the drain tray.
The green light (fig. 4), if on, points out the activation of the machine.
The red light (fig. 4;) if on, points out the water level in the boiler is not enough.
The yellow light (fig. 4;. ), if on, points out the activation of the heating element.
Caution: When the red light is on (fig. 4;) a safety device prevents the
machine from operating; ask for the technical assistance service.
1) Remove the filter holder from the supply group.
2) Put the ground coffee into the filter holder, press it and make attention that
the filter holder edge is not dirty with coffee.
3) Replace the filter holder in its housing.
4) Press the proper touch-key on the dose control board to supply coffee.
To change the dose programming, follow the instructions described in the
chapter 5.6 of this booklet.
The machine is preset to supply coffee in “non-stop mode” :
1) Press the “non-stop mode” key to start the supply (fig. 3; pos. e).
2) Press again the “non-stop mode” key (fig. 3; pos. e) to stop the coffee
supply.
Caution: The machine is equipped with an automatic safety device that
stops the nonstop supply after deliverying three consecutive liters.
5.2 Heating

SWITCH
CONTROL LAMP
GREEN
CONTROLLAMP
YELLOW
CONTROLLAMP
RED

12
1) In order to avoid eddies in the boiler, let off steam by turning the relevant
knob (fig. 1; pos. 4).
2) Insert the nozzle into the container with the water to be heated.
3) Turn the steam knob.
The outlet steam depends on the knob turning: the more the knob is turned, the
more the steam is let off .
4) After the steam has been blown off, turn the knob off, take out the container
and clean immediately the nozzle with a damp cloth in order to remove
residual heated water .
1) Place the water container under the dispenser (fig. 1; pos. 9).
2) Turn on the knob(fig. 1; pos. 14) to get the required quantity of water.
To program each single dose (fig. 3; pos. a ÷ d), do as follows: keep the key
[PROG] pressed (fig. 3; pos. e) of the group interested in the dose programming
till the relevant LED flashes.
Within 4 seconds press the required dose (fig. 3; pos. a ÷ d) and when the
quantity has been supplied press again the same touch-pad.
During the programming, only the leds relating to the touch-pad PROG and the
pressed touch-pad are left on.
To program another dose, repeat the same procedure; however, this time the
led relating to the dose previously programmed, will not light up, but that doesn’t
prevent the dose reprogramming .
Programming the first group, you program automatically the other groups. This
first group only, allows to transmit the programming to the others which can be
programmed also individually.
5.4 Steam Outlet
5.5 Getting hot water
5.6 Dose Programming

13
For the doses programming follow the instructions reported to chapter 5.6 of this
manual.
N.B.:
The 1° group automatically programme the 2° group and the 3° group
automatically programme the 4° group.
There is the possibility to select the function "PRE-INFUSION".
Machine OFF. Switch on the machine keeping pressed:
Touch-key a (fig. 3) of the 1st group TO ENABLE THE PRE-INFUSION
Touch-key b(fig. 3) of the 1st group TO TAKE OFF THE PRE-INFUSION
The system confirms the operation keeping alight the leds "PROG/CONT".
Switch off the machine and then switch it on once again.
Check the desired setting.
The pre-infusion phases you use are the ones you program.
1) Turn off the water knob.
2) Set the switch (fig. 4) in position 0 and verify if the green light is off .
3) Switch OFF the omnipolar switch.
5.6.1 Dose programming for machine with 4 groups
5.6.2 Pre-infusion programming
5.7 Machine Stop

14
For a proper working of the machine, follow the maintenance instructions given
below.
Do not wash the machine with water jets.
Disconnect the machine by positioning the omnipolar lever switch to OFF
and turn off the water knob before carrying out maintenance and/or
cleaning operations.
In case of malfunctioning machine, do not carry out any temporary repair
and call immediately the technical assistance service.
Should the power supply cable be damaged, switch off immediately the
machine, stop the water supply and ask for the technical assistance
service. Do not replace it by yourselves.
Carry out the cleaning/ maintenance when the machine is cold, wearing
preferably, protective gloves.
Clean the following pieces: steam nozzle, hot water dispenser (every time they
are used), filter holder, filter and grills of warmer and drain tray.
Wash the group every 15 days as follows: clasp the holder of the blind filter to
the group and press many times the touch-key [PROG] (fig.3; pos. e) on the
control keypad .
N.B.: You can put special powder detergents for coffee machines in the blind
filter.
Inspect every 15 days the small basin placed under the drain tray.
CHAPTER 6
MAINTENANCE
6.1 Safety Rules
6.2 Machine cleaning
6.3 Scheduled Inspections

15
For the machine equipped with deconcentrator, follow the maintenance instructions
enclosed
If the yellow light that usually indicates the working of the boiler heating element
doesn’t turn on at the machine start up or turns off during the working, reactivate
the safety thermostat by pressing the proper button inside the machine.
The button must be pressed by the suitable hole under the machine near the
support foot.
If the intervention doesn’t allow the boiler resistance light to turn on and/or the
thermostat goes on breaking off the resistance supply, ask for the technical
assistance service.
Fig. 5 - Thermostat Button Reactivation
To ask for technical assistance, apply to area agent.
6.4 Thermostat Reactivation
Area Agent Mark:

16
4 5 6 7 8 9
Fig. 1 - Controls
Legend:
1 Machine Start up Switch
2 Filter Holder
3 Steam Nozzle
4 Steam Knob
5 Supply Group
6 Control key-pad for coffee/water supply
7 Supply group
8 Control key-pad for coffee/water supply
9 Hot Water Supply
10 Steam Knob
11 Steam Nozzle
12 Gauge
13 Filter Holder
14 Hot water knob
10
11
12
14
13
2
13
Table of contents
