Blackboxav Solar Audio Post User manual


2
Safety Guide ........................................................................................... 3
Your New Solar Audio Post..................................................................... 4
Configuration.......................................................................................... 5
Programming.......................................................................................... 7
Wooden Solar Audio Post..................................................................... 10
Technical Information........................................................................... 11
Technical Drawings............................................................................... 11
Metal Solar Audio Post......................................................................... 12
Technical Information........................................................................... 13
Technical Drawings............................................................................... 13
Electronics Only.................................................................................... 14
Technical Information........................................................................... 15
Technical Drawings............................................................................... 15
Maintenance......................................................................................... 17
Troubleshooting ................................................................................... 17

3
Please observe the following when installing this device.
•For disposal of old electrical equipment
please follow the guidelines associated
with your country/territory or ship the unit
back to blackbox-av and we will
dispose/recycle the unit. The symbol on
the left indicates that this product shall not
be treated as household waste. Instead it
shall be handed to applicable collection
points for the recycling of electronic
equipment. If you dispose of this unit
correctly you will be helping prevent
future harm to the environment which is
caused by poor waste management of
this type of equipment. Follow the battery
removal guide before disposing of the
items and dispose of them separately.
•If storing the unit for long periods of time,
it is recommended that you remove the
batteries.
•Do not operate the unit below -20 or
above 60 degrees Celsius. Battery
performance will be affected by colder
temperatures.
•When deciding on a suitable installation
point please follow the installation guides
for your particular product to protect it
from environmental damage. The post
electronics are waterproof but cannot be
submerged in water so do not install in an
area which is prone to flooding. We have
designed our products to be tough and
durable but we cannot guarantee them
against vandalism and this should be
considered when selecting a suitable
installation point.
•In order to maintain good charging, it’s
advisable to wash the solar panels
periodically to remove any debris that
may have built up on the panels. You may
use some mild soapy water to do this.
•When selecting a suitable installation
location, please consider both the local
wildlife or if in a residential area the local
people from excessive noise pollution.
•The wooden post will discolour over time
and small fissures may form depending
on the atmospheric conditions. This is a
natural product and may need a light
exterior woodcare product to keep the
wooden post looking it’s best.
4
For technical specifications and
installation instructions see your specific
version of the Audio Post:
Wooden Solar Audio Post –Page 11
Metal Solar Audio Post –Page 13
Electronics Only –Page 15
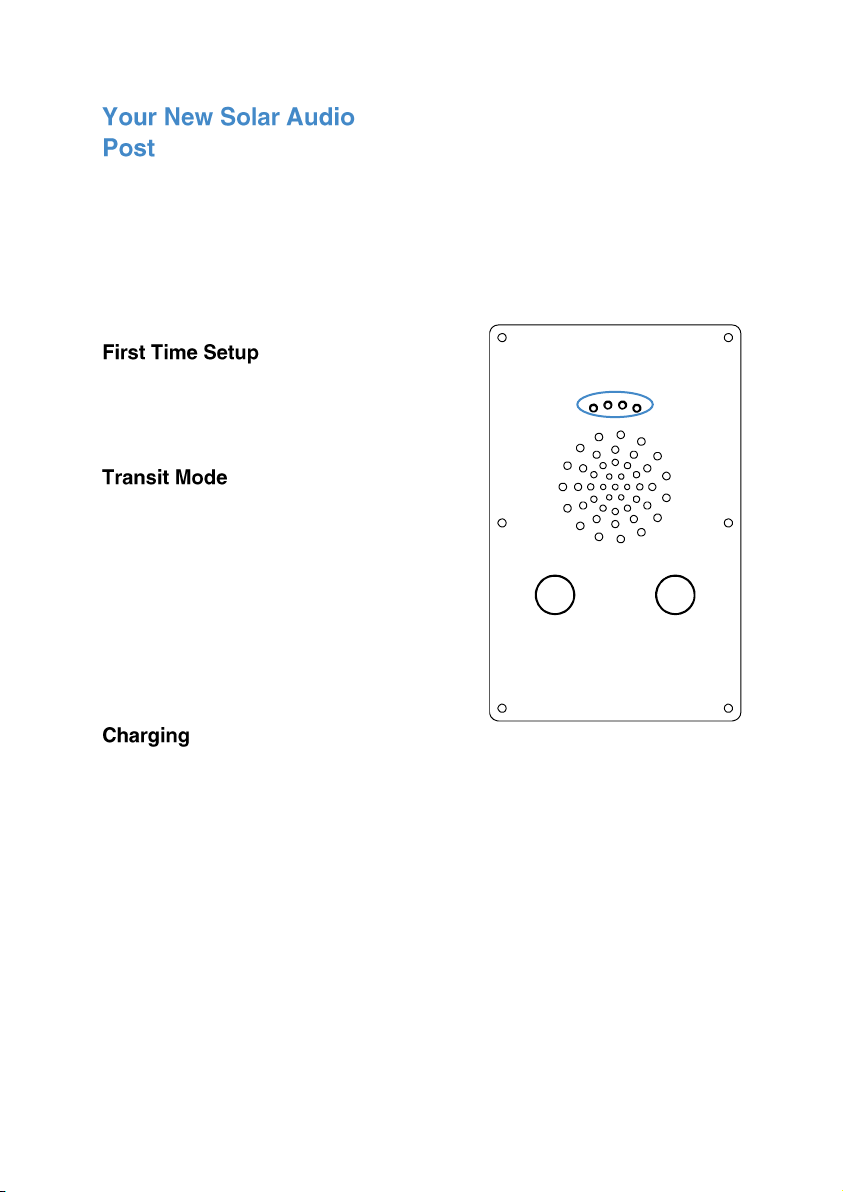
The Solar Audio Post will be in ‘Transit
Mode’ when it arrives. Pressing a button
will activate a blinking red light within the
grill.
To exit Transit Mode, simply place your
included Programming USB Dongle with
USB attached into the 4 slots above the
grill. Press a button to activate a greeting
message. The Solar Post is now ready to
use.
Note: You must always have a USB
attached to the Programming USB dongle
–even just to access settings when not
updating content.
At the end of each message a red light
located in the lower half of the grill will
blink if the electronics are receiving
charge.
5
There are various configuration options
for your Solar Audio Post. To access
these settings, ensure no messages are
playing then insert the Programming
Dongle with USB attached into the 4 slots
above the grill.
Now press a button and wait
approximately 2 seconds for the Solar
Audio Post to take you through the
settings.
Follow the audio instructions and press a
button when you hear the function you
require. Once you have completed
editing a setting the Solar Audio Post will
restart with the setting saved, repeat this
process to access consecutive functions
or to exit without changing a setting
simply remove the dongle. The settings
are accessed in the following order;
1. Volume Adjustment
2. Update Media Content
(Programming)
3. Playback Statistics
4. Erase Statistics
5. Battery / Solar Test / Delay / Serial
Information
6. Transit Mode
The Solar Audio Post will go through
volume levels 1-10, when you get to the
desired level press a button to select it
and the unit will restart with this option
saved.
Update your audio content. Select this
setting with the USB attached and
uploaded with your content. Please see
the programming instructions section for
more details on programming your USB.
This setting allows you to access the
playback statistics of your Solar Audio
Post, select the Playback Statistics option
and it will list a number of stats in the
following order;
1. Total messages played for this
period (can be reset in the Erase
Statistics Option)
2. Total messages played for each
track (1-6) (can be reset in the Erase
Statistics Option)
3. Total messages played (this statistic
cannot be erased)
Note: Removing the dongle while these
statistics are being listed will not affect
them in any way
This setting allows you to erase the
playback statistics for;
1. Total messages played for this
period
2. Total messages played for track 1-6
Select the option you require, you will
then be warned that the statistics are
about to reset, to cancel this remove the
dongle before the 5 beeps end.

6
This setting allows you to perform a
battery and solar test for your Solar Audio
Post.
Select the Battery and Solar Test option
and you will be informed of the battery
voltage, solar power availability and the
voltage used on each panel. It will also
tell you if there is no power from a panel
(Bank1-4 for Metal & Wood. Bank 1-2 for
Electronics Only) it will then tell you any
delay settings and the serial number of
the unit.
Note: The Solar Audio Post will inform you
when the charge falls below 4V and no
longer play messages.
This setting is used when the Solar Audio
Post is in Transit Mode and effectively
shut down for transportation. Remove the
dongle at the Transit Mode option then
replace the dongle when instructed.
When in Transit Mode messages will not
be activated, if a button is pushed you will
just see a blinking red light inside the
speaker grill.
To exit transit mode, simply insert the
Programming Dongle and press a button,
you will then be greeted by a message
that only plays when exiting Transit Mode.
7
Programming the Solar Audio Post couldn’t be easier. You will need 4 things;
1. A Config.txt File
2. Audio Files (1-6)
3. A Programming Dongle (Included)
4. The USB Stick provided with the Programming Dongle
Note: If provided USB stick is not available use a USB stick less than 1GB in size if
possible, if you have issues uploading your files please first retry with a different USB
stick. Files must be .MP3 format.
Windows OS is required to program your
Solar Audio Post using a PC or Laptop
(Xp-10). MacOS is not supported due to
hidden files generated by the OS.
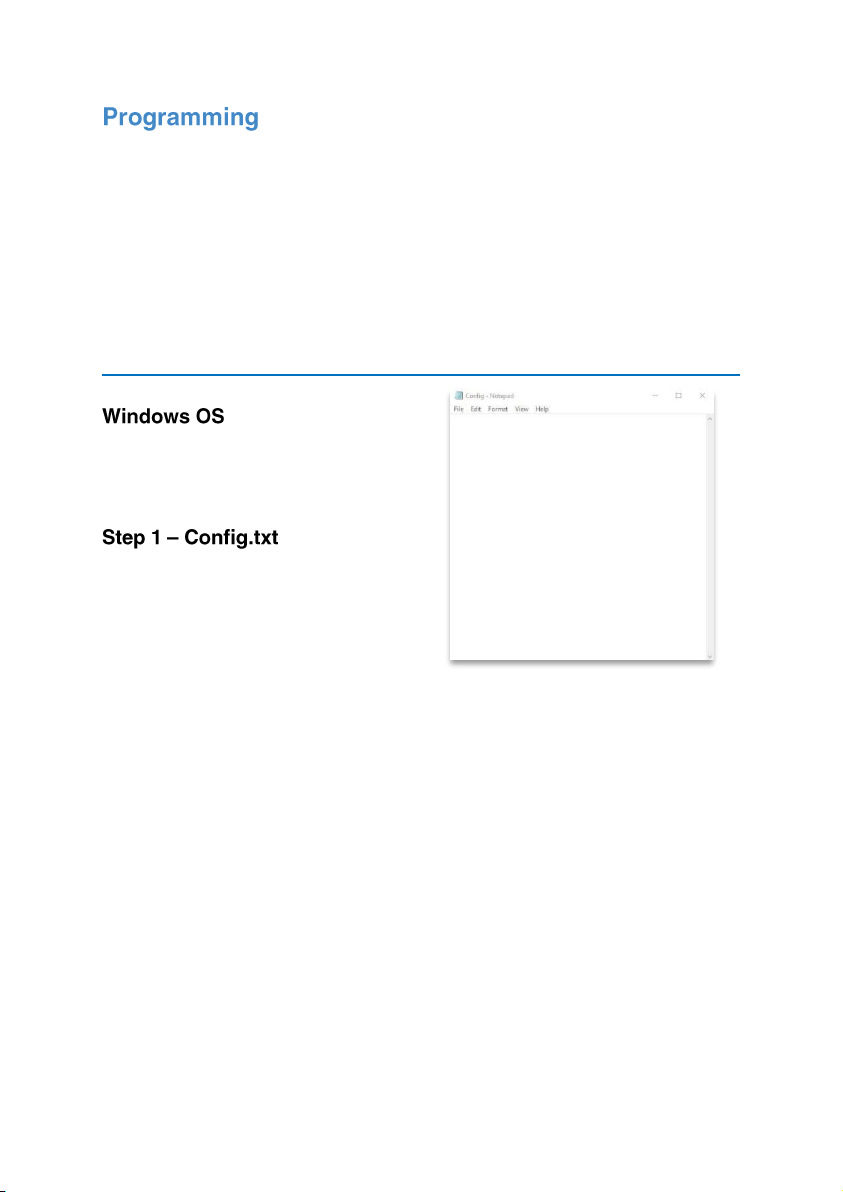
You must first create your config.txt file;
Note: We will send out your Solar Audio
Post already programmed and with a
config.txt file on your USB stick. We
suggest you keep the USB and config.txt
file for future reference and use.
The config.txt file determines a number of
settings on your Solar Audio Post,
including how your audio files are
positioned on each button.
A standard config.txt file will look
something like this;
The above config.txt file will place the
Audio Post into Mode E;
Button 1 –Track 1 and 2
Button 2 –Track 3 and 4
Users will be able to interrupt play (push
a button and start a new message mid
play).
There will be a delay of 5 seconds once a
button has been triggered before users
can trigger another
Every config.txt file must finish with the
text END.
A full list of config modes are in step 2;
MODE=E
DELAY=00:05
BEEP=Y
END
8
A
1
2
Int
B
1
2
Non-Int
E
1,2
3,4
Int
F
1,2
3,4
Non-Int
G
1,2,3
4,5,6
Int
H
1,2,3
4,5,6
Non-Int
Int = Another button trigger will interrupt
playback.
Non-Int = Another button trigger will not
interrupt playback.
Delay = The delay is set in order of
Minutes:Seconds up to a max time delay
of 05:00. The delay will stop the next
button trigger until the timer has elapsed.
Beep (Y or N) = This turns the beep on or
off at the beginning and end of the track.
End = Is always put on the last line at the
end of all configuration files.
Note: The Solar Post does not support an
unequal amount of tracks.
For example, if you had 3 tracks for
button 1 and 2 tracks for button 2, you
must add an additional blank track to
button 2 for it to be equal
Your audio tracks must be in .MP3 format
–the order you transfer them to your USB
stick will determine what track number
they are. For example, the first to be
transferred will be Track 1, the second will
be Track 2 and so on.
The name does not matter, just the order
they are transferred to your USB stick.
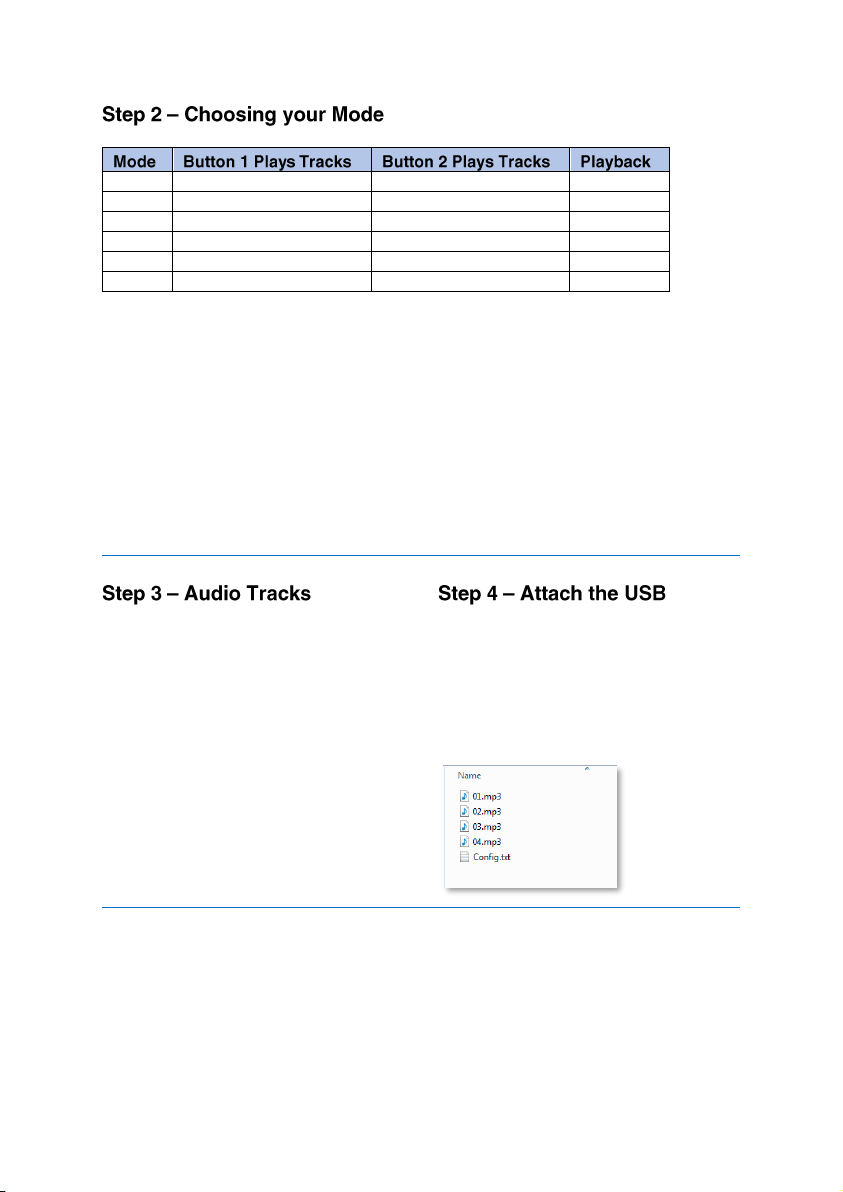
Place your audio onto your USB in the
appropriate order. Lastly, drag and drop
in your config.txt file.
Attach your USB stick to the USB
Programming Dongle then select the
‘Update Media Content’ option from the
settings menu.
This is how content should be displayed
using Mode E:

9
The Solar Audio Post will now tell you it’s
transferring your files or will inform you if
there is an issue.
You will be asked to wait until it’s finished.
This could take a few minutes depending
upon the size and length of files you are
transferring.
When finished, the Solar Audio Post will
inform you and ask you to remove the
USB Dongle Programmer.
Your Solar Audio Post is now ready to use
with the updated messages. Test each
message just to be sure and enjoy!

10
1. Wooden Solar Audio Post
2. User Manual
3. USB Programming Dongle
It is very important to install the Solar
Audio Post In-Ground where there is a
good level of sunlight to charge its
batteries. Solar Panels are installed on all
four sides, allowing the post to charge
from all angles. However, Trees and
buildings can have a significant effect on
the charge level.
When installing the Wooden Solar Audio
Post, consult a structural engineer on the
amount of concrete or post-crete required
for the installation location. You may need
special permission to install the post on
archaeological or scientifically important
sites.
When installing do not bury the post
below 500mm. Protect the area above the
concrete with tape during installation as
the concrete will discolour the wood. Do
not install the solar post in an area which
is prone to flooding.
Base Point

11
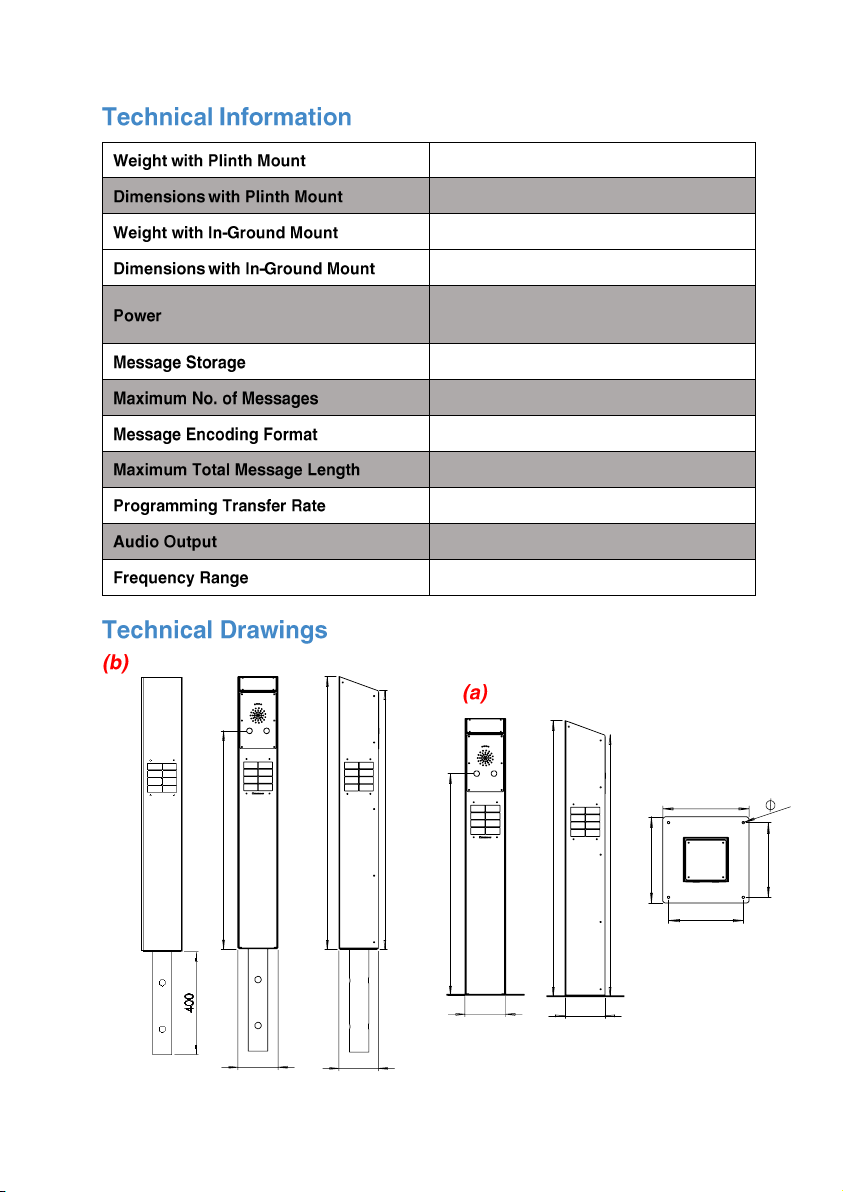
Approx. 35Kg
165 (W) x 165 (D) x 1583 (H) mm
4 built-in Solar Panels charging long life
batteries at up to 200mA per hour
(+/- 10%)
16MB Flash Memory (on board)
6 (3 on each button)
.MP3
>16 minutes @ 64kbs
Approx. 20 Seconds per MB of message
1W into 8ΩSpeaker
75Hz –20KHz
1583.67

12
1. Metal Solar Audio Post
2. User Manual
3. USB Programming Dongle
4. Mount Type
We supply the Solar Audio Post Metal with
either a plinth or in-ground mount.
It is very important to install the Solar
Audio Post where there is a good level of
sunlight to charge its batteries. Solar
Panels are installed on all four sides,
allowing the post to charge from all
angles. However, Trees and buildings
can have a significant effect on the
charge level.
(a)
You will need four suitable fixings with an
M8 thread to bolt down the Solar Audio
Post Metal onto your concrete (concrete
anchors not supplied). The only other
surface we recommend bolting on is
Asphalt but if the ground is firm enough to
accept your fixings you should be fine.
We would recommend using expandable
anchor fixings or chemical insert fixings. If
the installation area is unmanaged,
consider using security fixings.
Note: Ensure the installation area is flat
and has available drainage. Do not install
the Solar Audio Post in an area which is
prone to flooding.
(b)
When installing the In-Ground version of
the Solar Audio Post Metal, consult a
structural engineer on the amount of
concrete or post-crete required for the
installation location. You may need
permission to install on specific locations
like archaeological or scientific sites. Do
not bury above the base point. This helps
the post naturally drain of water of which it
could otherwise fill with over time.
(b)
(a)
Base Point
13
13.1Kg
300 (W) x 300 (D) x 1066 (H)
15.8Kg
158 (W) x 155 (D) x 1466 (H)
4 built-in Solar Panels charging long life
batteries at up to 200mA per hour
(+/- 10%)
16MB Flash Memory (on board)
6 (3 on each button)
.MP3
>16 minutes @ 64kbs
Approx. 20 Seconds per MB of message
1W into 8ΩSpeaker
75Hz –20KHz
854
158
1066.27
155
1011.78
854
158
1066.27
155
1011.78
300
300
8
260
260
14
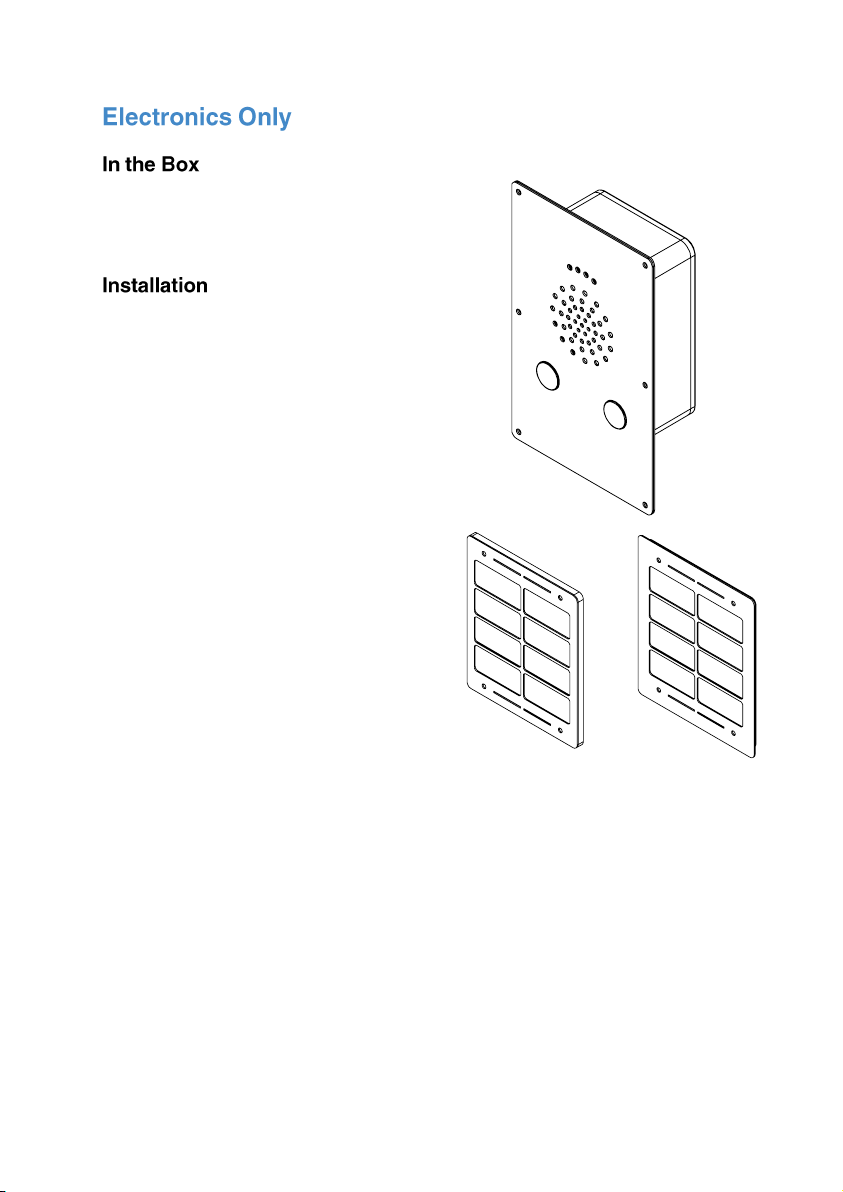
1. Electronics Only Unit
2. User Manual
3. USB Programming Dongle
4. 2 x Panels
The Solar Audio Post Electronics can be
provided to allow installation into your
own structure.
This is supplied with two solar panels of
either recessed or a surface mount type.
As standard additional panels can be
purchased if need be. When constructing
your enclosure please ensure there is
adequate drainage as the electronics are
not designed to be submerged in water.
We recommend a minimum 10mm
drainage hole.
When designing your own structure
ensure you install the solar panels, so
they will be in direct sunlight for the
maximum amount of time during the day.
To connect the Panel cables to the
Electronic Unit simply attach each colour
coded cable securely.
15
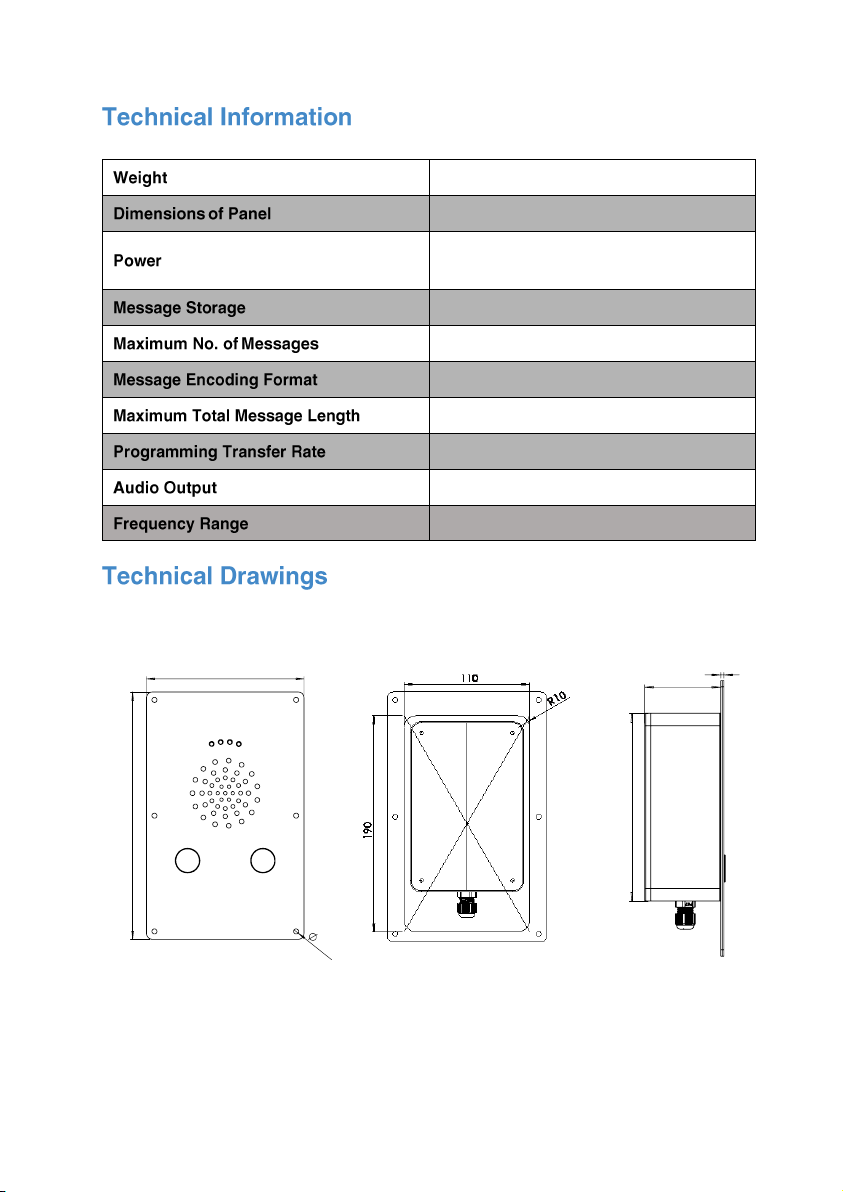
Drawings not to scale
1.7Kg
140 (W) x 63.40 (D) x 220 (H)
2 built-in Solar Panels charging long life
batteries at up to 200mA per hour
(+/- 10%)
16MB Flash Memory (on board)
6 (3 on each button)
.MP3
>16 minutes @ 64kbs
Approx. 20 Seconds per MB of message
1W into 8ΩSpeaker
75Hz –20KHz
140
220
4.50
61
150
2.40

16
130
155
R5
4.50
90
135
7.20
R5
4.50
90
135
140
165
6
1.20

17
Your Solar Audio Post uses 4
rechargeable AA 2500mAH (Ni-MH)
batteries which depending on numerous
factors will need to be replaced every 2-5
years.
Note: Do not use non-rechargeable
alkaline or zinc batteries.
1. T20H Torque Bit (security bit)
2. Cross head Screwdriver
1. Unscrew the 6 security screws from
the front panel using the T20H pin
torque screwdriver.
2. Pull the front panel forwards slowly;
do not pull on the solar cable.
3. Unplug the solar panel connections
and remove the solar electronics
from the post.
4. You will need to open the electronics
box by removing the 4 cross head
screws.
5. Locate the black battery box inside
and remove the small cross head
screw from the back.
6. Slide the box cover open.
7. Replace the old batteries with the
new. It’s a good idea to push a
button to ensure the batteries are
connected and the audio player is
working.
8. Replace cover and screw to secure
the battery box.
9. Replace 4 cross head screws to seal
the electronics.
10. Re-connect the solar panel
connections.
11. Replace the 6 screws to secure the
front panel in place.
12. Test by pressing a button. We
advise checking after replacing
batteries that charge is being
received from the solar panels (you
will need a sunny day for this).
At the end of each message a red light
located in the lower half of the grill will
blink if the electronics are receiving
charge.
If you have any issues with the Solar
Audio Post, please contact us.

18
Table of contents
Other Blackboxav Speakers manuals


