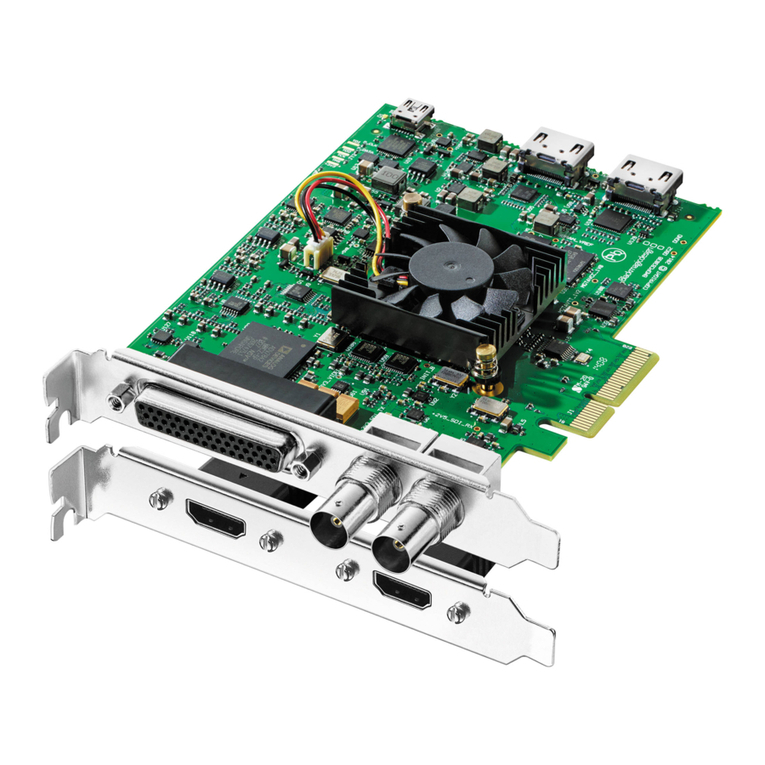
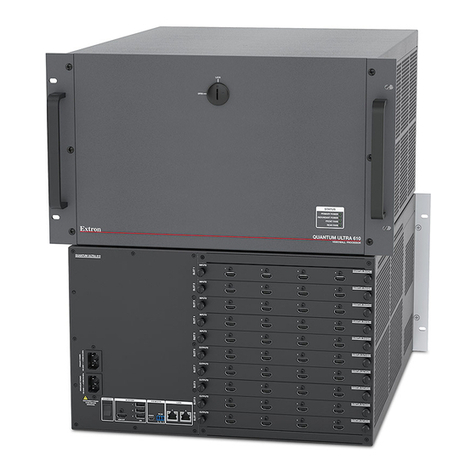
Blackmagicdesign Teranex Series User manual

Welcome
Thank you for purchasing a Blackmagic Design Teranex converter for your facility.
The Teranex converter you have purchased is an amazing quality standards converter
that you will spend hours playing with to discover all the wonderful functions it has.
I am still playing with it myself to see all the other things I can use it for! We have packed
it with the latest SDI, HDMI and analog connections so you can use it to
convert and connect anything!
One of the exciting advantages of the Teranex converter is the amazing quality
of the conversions. It features a powerful SIMD processor that allows more complex
calculations, allowing the Teranex to do a better job at processing video, removing
field movement, detecting cadence, noise reduction, timecode conversions, subtitle
conversion and much more!
Enjoy exploring your Teranex processor and we all hope you have many years
of enjoyment out of it. Please let us know of any ideas and features you would like
to see, as we are constantly updating the software so it gets better and better!
Grant Petty
CEO Blackmagic Design
English

Contents
Teranex Processors
Getting Started 5
Plugging in Power 5
Plugging in Video 5
Plugging in Audio 5
Conversions 5
Setting the Latency for Teranex AV 6
Installing Admin Software 7
Software Installation 7
Updating the Internal Software 8
Connectors 9
Teranex Express 9
Teranex AV 10
Teranex 2D 11
Teranex 3D 12
Changing Settings 13
Changing Settings using the
Front Control Panel 13
Setting your Input 13
Setting your Output 14
Control Panel Overview 15
Presets 17
Audio and System Status LEDs 17
Connecting to a Network 18
Changing Settings using
BlackmagicTeranex Setup 19
Aspect Ratio Conversions 23
Conversion Workflows 25
Up Conversion to Ultra HD
using TeranexAV andTeranexExpress 26
Down Conversion 27
Cross Conversion 29
Standards Conversion 30
Cadence Removal 32
Clean Cadence 32
Lowest Latency Processing
onTeranex AV 33
Audio Embedding 34
Teranex Processor Settings 34
Video Menu Settings 35
Audio Menu Settings 45
Noise Reduction Menu Settings 51
Ancillary Data Menu Settings 53
System Setup Menu Settings 60
3D Menu Settings 69
Capture and Playback 77
Using your Favorite Editing Software 77
DaVinci Resolve 78
Avid Media Composer 80
Apple Final Cut Pro 7 81
Apple Final Cut Pro X 83
Adobe Premiere Pro CC 84
Adobe After Eects CC 85
Adobe Photoshop CC 88
Waveform Monitoring with
BlackmagicUltraScope 89
Format Conversion Tables 94
Teranex AV and Teranex Express 94
Teranex 2D 95
Teranex 3D 96
DB-25 Connector Pin-outs
fortheTeranex2D 97
Installing Optional Blackmagic
Design FiberOptic SFP 99
Teranex AV Chassis Bumpers 100
Developer Information 101
Front and Rear Diagrams 119
Help 120
Warnings 121
Warranty 122
Contents

Getting Started
Plugging in Power
Getting started with your Teranex processor is as easy as plugging in power and connecting
your signal input and output.
To supply power, plug in a standard IEC power cable to your Teranex processor’s power input
on the rear panel.
Plugging in Video
Plug your source video input into your Teranex processor’s video input, and plug the video
output into your destination equipment. Note that all video outputs are simultaneously active so
you can connect to more equipment if needed. Confirm the signal by checking the LCD on the
control panel. The LCD can display the input or output video, pressing the ‘in’ or ‘out’ button will
set the display accordingly. The LCD also gives details about the video format and frame rate.
The Teranex Express and AV also display timecode and audio levels.
Plugging in Audio
If you are connecting SDI video, then you already have audio connected as it is embedded in
the SDI video signal. On Teranex processors with XLR connectors you can also plug in analog
or AES digital audio.
Teranex 3D has XLR connectors for analog or AES audio input
and output, plus LTC timecode in and out.
Conversions
Once you have powered your Teranex processor and connected your inputs and outputs, you
are ready to perform a conversion. To set a conversion, the first thing to do is set your input and
confirm the input signal.
Setting your input
1 Press the ‘in’ button on the left side of the control panel. The button will illuminate
when selected.
2 Using the ‘video’ buttons, select the SDI, HDMI, analog or optical video input.
3 When your input is selected, you will see the image displayed on the built in
LCDand your Teranex will automatically detect the input format and illuminate all
thecorresponding buttons, including format and frame rate.
IN
OUT
SDI
VIDEO
VIDEO
HDMI
ANLG
AUDIO
AUDIO
EMBED
AES
ANLG
FORMAT
FORMAT
486
720
2K
1080
576
1080
FRAME
FRAME
P
I
PSF
MENU
MENU
HOME
MENU
1
MENU
2
REM
LOCK
PANEL
LOCK
RATE
RATE
23.98
25
29.97
30
24
50
59.94
60
VIDEO
VIDEO
GAIN
SAT
R-Y
B-Y
BLK
HUE
SHARP
PRESETS AUDIO STATUS
SYSTEM STATUS
PRESETS
1
3
5
2
4
6
ANAM
LBOX
PBOX
ASPECT
ASPECT
SMART
14:9
CCUT
ZOOM
ADJ
PUSH
LOOP AIN BIN A
REF INDOLBY METADATA REMOTE IN/OUT Y/NTSC/PAL IN B-Y IN R-YIN Y/NTSC/PAL OUT B-Y OUT
SD/HD/3G-SDIHDMI
R-Y OUT STEREO IN TIMECODE IN TIMECODEOUT AUDIO IN 1 AUDIO IN 2 AUDIO OUT 1 AUDIO OUT 2
IN OUT
LOOP B OUT A OUT B
L
R
PUSH PUSH
55Getting Started

4 Using the ‘audio’ buttons, select the embedded, AES, or analog audio input.
5 After setting your input, you can now change your output settings for your
desiredconversion.
Press the IN button to display the video input format. In this example,
the format is 1080i50 via SDI with embedded audio.
Setting your output
1 Press the ‘out’ button on the left side of the control panel.
2 Select the video ‘format’ you want to convert to.
3 Choose the ‘frame’ line mode you want. For example, progressive, interlaced or
progressive segmented frame.
4 Choose the desired frame ‘rate’.
5 Now set the ‘aspect’ ratio you want.
Your converted video will now appear on the LCD and is available on all relevant video outputs.
Setting the Latency for Teranex AV
Teranex AV has a processing mode which by default is set to ‘lowest latency.’ This mode is ideal
for use in live productions, with a typical latency or processing delay through the Teranex AV of
2 frames. To achieve this low latency, Teranex features not required in live productions are
bypassed without affecting the overall image quality of your program. For post production
applications we recommend that you use the ‘highest quality’ setting, which will enable you to
utilize scene cut detection, noise reduction and linear interpolation algorithms as needed. To
set the latency for Teranex AV:
1 Press the ‘home’ button, then press ‘system setup’ and then ‘processing’ to reach the
‘processing’ menu.
2 Select ‘lowest latency’ for live productions or ‘highest quality’ for post production
applications.
3 Your Teranex AV will restart to enable the chosen processing mode.
That’s all there is to getting started with your Teranex processor. With the setup utility installed
and your Teranex updated with the latest internal software, you can start setting your conversion
workflows. Please keep reading the instruction manual for more detailed information on all the
different conversion types, settings and powerful features of your Teranex processor.
IN
OUT
SDI
HDMI
ANLG
EMBED
AES
ANLG
486
720
2K
1080
576
1080
P
I
PSF
HOME
MENU
1
MENU
2
REM
LOCK
PANEL
LOCK
23.98
25
29.97
30
24
50
59.94
60
GAIN
SAT
R-Y
B-Y
BLK
HUE
SHARP
SYSTEM STATUS
1
3
5
2
4
6
ANAM
LBOX
PBOX
SMART
14:9
CCUT
ZOOM
ADJ
VIDEO AUDIO FORMAT FRAME MENURATE VIDEO PRESETS AUDIO STATUSASPECT
NOTE For more information, refer to the “Conversion Workflows” section in
this manual.
66Getting Started

Installing Admin Software
Software Installation
Blackmagic Teranex Setup is used to update your Teranex processor and to change conversion
settings remotely. The software is very easy to use, and all the settings for any connected Teranex
units can be accessed by clicking on each respective unit’s settings icon on the Home page.
Installation on Mac OS X
1 Download the Blackmagic Teranex Setup software from www.blackmagicdesign.com
2 Unzip the downloaded file and open the resulting disk image to reveal its contents.
3 Double click the installer and follow the prompts to complete the installation.
Installation on Windows
1 Download Blackmagic Teranex Setup from www.blackmagicdesign.com
2 Unzip the downloaded file. You should see a Blackmagic Teranex Setup folder
containing this PDF manual and the Teranex setup utility installer.
3 Double click the installer and follow the prompts to complete the installation.
4 When the installation has finished, it will prompt you to restart your computer.
Click‘restart’ to complete the installation.
Once your computer has restarted, Blackmagic Teranex Setup will be ready to use.
After downloading and unzipping the
Blackmagic Teranex Installer, simply launch
the installer and follow the install prompts.
77Installing Admin Software

Use Blackmagic Teranex Setup for updating your
Teranex processor and for changing settings remotely
from a Mac OS X or Windows computer.
Updating the Internal Software
It is important to ensure that power is connected to your Teranex processor beforeconnecting
aUSB cable between the computer and your Teranex.
1 Power your Teranex processor.
2 Attach a USB cable from the computer to your Teranex.
3 Launch the Blackmagic Teranex Setup application. Teranex Setup will detecttheUSB
connection to your Teranex and will display it as a “Local USB” connection.
AUSBconnected device is always positioned as the first device in the list of connected
devices in Teranex Setup. Note the white dot at the bottom of the screenshot on the
previous page.
4 Click the icon below the processor’s name to establish a connection. If Blackmagic
Teranex Setup contains newer internal software than thatcurrently installed in your
Teranex, you will be prompted to update. Just follow the onscreen instructions to
complete the update. Once the internal software update is complete, disconnect the
USB cable. If you are connected to your Teranex via Ethernet, you may locate your
Teranex by name within the list of Teranex connected devices to make changes toyour
Teranex settings using the setup utility.
88Installing Admin Software

Connectors
The types of connectors will vary depending on your Teranex processor model. Generally,
allTeranex processors can convert SDI signals. Other models can also convert HDMI and
analog video, but you will need to check your particular model to know which information in
thismanual is relevant to your Teranex.
This section shows you all the connectors that are built into each Teranex model so you
canquickly identify them.
Teranex Express
1 Power
1x IEC C14 – For built-in international
90 – 240 volt AC power supply.
2 USB
1x USB Type B – Connect to
acomputer running Blackmagic
Teranex Setup software to update
theinternal software.
3 Ethernet
1x RJ-45 – Connect to a computer
running Blackmagic Teranex Setup
software to apply settings remotely.
4 REF In
1x BNC – Black burst or tri-level
reference input.
5 SDI In A
1x BNC – 12G-SDI input A.
Usable forsingle link
ordual-link≈SDI input.
6 SDI In B
1x BNC – 6G-SDI input B.
Fordual-linkinput only.
7 SDI In A Loop
1x BNC – 12G-SDI video loop output.
May also be used for one channel of
quad-3G output.
8 SDI In B Loop
1x BNC – 6G-SDI video loop output.
May also be used for one channel of
quad-3G output.
9 SDI Out A
1x BNC – 12G-SDI video output A.
May also be used for dual-link output
or for one channel of quad-3G output.
10 SDI Out B
1x BNC – 6G-SDI video output B.
Will replicate output A if output
formatis 6G-SDI or less.
May be used for dual-link output or
for one channel of quad-3G output.
11 Optical Out/In Socket
Supports SMPTE optical fiber
SFPmodules for 3G, 6G or 12G SDI
speeds to support video formats
upto Ultra HD 2160p60 depending
on the module that is installed.
12G-SDI 6G-SDI 6G-SDI 6G-SDI12G-SDI 12G-SDI
LOOP AIN BIN A
REF IN
LOOP B OUT A OUT B
OPTICAL
OUT/IN
VIDEO AUDIO FORMAT FRAME RATE ASPECT MENU VIDEO PRESETS AUDIO STATUS
SYSTEM STATUS
IN
OUT
SDI
OPT
486
720
EMBED
2K
P
1
PSF
576
1080
ULTRA
HD
23.98
25
29.97
30
24
50
59.94
60
ANAM 14:9
LBOX
PBOX
CCUT
ZOOM
SMART ADJ
HOME
MENU
1
MENU
2
GAIN
SAT
R-Y
B-Y
REM
LOCK
BLK
HUE
SHARP
1
3
5
2
4
6
PANEL
LOCK
1 2 3 5 7 84 6 9 10 11
12G-SDI 6G-SDI 6G-SDI
6G-SDI
12G-SDI 12G-SDI
LOOP AIN BIN A
REF IN
LOOP B OUT A
OUT B
OPTICAL
OUT/IN
VIDEO AUDIO FORMAT FRAME RATE ASPECT MENU VIDEO PRESETS AUDIO STATUS
SYSTEM STATUS
IN
OUT
SDI
OPT
486
720
EMBED
2K
P
1
PSF
576
1080
ULTRA
HD
23.98
25
29.97
30
24
50
59.94
60
ANAM 14:9
LBOX
PBOX
CCUT
ZOOM
SMART ADJ
HOME
MENU
1
MENU
2
GAIN
SAT
R-Y
B-Y
REM
LOCK
BLK
HUE
SHARP
1
3
5
2
4
6
PANEL
LOCK
99Connectors

Teranex AV
1 Power
1x IEC C14 – For built-in international
90 – 240 volt AC power supply.
2 USB
1x USB Type C – Connect to a
computer running Blackmagic
Teranex Setup software to update
theinternal software.
3 Ethernet
1x RJ-45 – Connect to a computer
running Blackmagic Teranex Setup
software to apply settings remotely.
4 REF In
1x BNC – Black burst or tri-level
reference input.
5 REF Out
1x BNC – Black burst or tri-level
reference generator output running at
current output video format.
6 Audio In CH 1 and CH 2
2x XLR – Two channels of balanced
analog audio in or two pairs of
AESdigital audio in, user selectable.
7 Analog Inputs, Left and Right
2x RCA Phono – Stereo audio Inputs,
left and right, unbalanced, line level.
8 SDI In A
1x BNC – 12G-SDI input A.
Usable for single link or dual-link
SDI input.
9 SDI In B
1x BNC – 12G-SDI input B.
Usable for single link or dual-link
SDI input.
10 SDI In A and In B Loop
1x BNC – 12G-SDI
input A active loop through.
1x BNC – 12G-SDI
input B active loop through.
11 HDMI In
1x HDMI type A – HDMI input.
12 HDMI Loop
1x HDMI type A – loop out of
HDMIinput that is not changed
byTeranex processing.
13 HDMI Out
1x HDMI type A – Processed
output via HDMI out
14 Optical Out/In Socket
Supports SMPTE optical fiber
SFPmodules for 3G, 6G or 12G SDI
speeds to support video formats
upto Ultra HD 2160p60 depending
on the module that is installed.
15 SDI Out A
1x BNC – 12G-SDI video output A.
May also be used for dual-link output.
16 SDI Out B
1x BNC – 12G-SDI video output B.
Replicates SDI output A, except
whenused for dual-link output
17 Quad 3G-SDI Out – CH A, B, C, D
4x BNC – Quad 3G-SDI outputs,
active with applicable Ultra HD output
formats up to 2160p60.
If output format is not Ultra HD,
thesebecome 4 replicated
SDI outputs.
106
IN
OUT
SDI
VIDEO
VIDEO
HDMI
OPT
AUDIO
AUDIO
EMBED
AES
ANLG
FORMAT
FORMAT
486
720
2K
576
1080
FRAME
FRAME
P
I
PSF
MENU
MENU
HOME
MENU
1
MENU
2
REM
LOCK
PANEL
LOCK
RATE
RATE
23.98
25
29.97
30
24
50
59.94
60
VIDEO
VIDEO
GAIN
SAT
R-Y
B-Y
BLK
HUE
SHARP
PRESETS AUDIO STATUS
SYSTEM STATUS
PRESETS
1
3
5
2
4
6
ANAM
LBOX
PBOX
ASPECT
ASPECT
SMART
14:9
CCUT
ZOOM
ADJ
PUSH
OPTICAL
OUT/IN
LOOP AIN BIN A
REF OUT
SD/HD/3G/6G/12G-SDI
REF INETHERNET
USB
STEREO IN
CH 1 CH 2
LOOP B
OUT A OUT B CH C CH D
CH A CH B
L
R
HDMI IN HDMI LOOP
HDMI OUT
QUAD 3G-SDI OUT
AUDIO IN
PUSH
ULTRA
HD
1 2
3 8 94
5
7
11 12
1710 15 16
IN
OUT
SDI
VIDEO
VIDEO
HDMI
OPT
AUDIO
AUDIO
EMBED
AES
ANLG
FORMAT
FORMAT
486
720
2K
576
1080
FRAME
FRAME
P
I
PSF
MENU
MENU
HOME
MENU
1
MENU
2
REM
LOCK
PANEL
LOCK
RATE
RATE
23.98
25
29.97
30
24
50
59.94
60
VIDEO
VIDEO
GAIN
SAT
R-Y
B-Y
BLK
HUE
SHARP
PRESETS AUDIO STATUS
SYSTEM STATUS
PRESETS
1
3
5
2
4
6
ANAM
LBOX
PBOX
ASPECT
ASPECT
SMART
14:9
CCUT
ZOOM
ADJ
PUSH
OPTICAL
OUT/IN
LOOP A
IN BIN A
REF OUT
SD/HD/3G/6G/12G-SDI
REF INETHERNET
USB
STEREO IN
CH 1 CH 2
LOOP B OUT A OUT B CH C CH D
CH A CH B
L
R
HDMI IN
HDMI LOOP HDMI OUT
QUAD 3G-SDI OUT
AUDIO IN
PUSH
ULTRA
HD
13
14
12
1010Connectors

Teranex 2D
1 Power
1x IEC C14 – For built-in
international90 – 240 volt
ACpower supply.
2 Power – 12VDC
1x – Military grade port for external
battery power or failover redundancy
with optional “brick” DC adapter.
3 Analog Inputs, Left and Right
2x RCA Phono – Stereo audio inputs,
left & right, unbalanced, line level.
4 Analog Audio In/Out
1x DB-25 – Four channels of
balancedanalog audio I/O.
5 AES/EBU Digital Audio In/Out
1x DB-25 – Four pairs of digital
audio I/O.
6 REF In
1x BNC – Black burst or
tri-level reference input.
7 HDMI In
1x HDMI type A – HDMI input
8 SDI In and Input Loop
1x BNC – 3G-SDI input.
1x BNC – 3G-SDI input active
loop through.
9 SDI Outputs
2x BNC – Replicated 3G-SDI outputs.
10 Analog Video Inputs
1x BNC – Y/NTSC/PAL
component/composite input.
1x BNC – B-Y component input.
1x BNC – R-Y component input.
11 Analog Video Outputs
1x BNC – Y/NTSC/PAL
component/composite output.
1x BNC – B-Y component output.
1x BNC – R-Y component output.
12 HDMI Out
1x HDMI type A – HDMI output.
13 Thunderbolt
1x Thunderbolt – Capture/playback
computer interface.
14 Remote In/Out
1x DB9 – Sony™ compatible
RS-422deck control port.
15 Ethernet
1x RJ-45 – Connect to a computer
running Blackmagic Teranex Setup
software to apply settings remotely.
16 USB
1x USB Type B – Connect to a
computer running Blackmagic
Teranex Setup software to update
theinternal software.
8
STEREO IN AES/EBU DIGITAL AUDIO IN/OUT HDMI IN
IN
REF IN Y/NTSC/PA L IN
Y/NTSC/ PAL OUT
B-Y IN
B-Y OUT
R-Y
IN R-Y OUT
LOOP
OUT OUT
SD/HD/3G-SDI
HDMI OUT
ANALOG AUDIO IN/OUT
GND +12V GND
AUX POWER
L
R
REMOTE IN/OUT
SD/HD/3G-SDI
IN
OUT
SDI
VIDEO
HDMI
ANLG
AUDIO
EMBED
AES
ANLG
FORMAT
486
720
2K
1080
576
1080
FRAME
P
I
PSF
MENU
HOME
MENU
1
MENU
2
REM
LOCK
PANEL
LOCK
RATE
23.98
25
29.97
30
24
50
59.94
60
VIDEO
GAIN
SAT
R-Y
B-Y
BLK
HUE
SHARP
PRESETS AUDIO STATUS
SYSTEM STATUS
1
3
5
2
4
6
ANAM
LBOX
PBOX
ASPECT
SMART
14:9
CCUT
ZOOM
ADJ
1
2
3
5 7
4 6
STEREO IN AES/EBU DIGITAL AUDIO IN/OUT HDMI
IN
IN
REF IN
Y/NTSC/ PAL IN Y/NTSC /PAL OUTB-Y IN B-Y OUTR-Y IN R-Y OUT
LOOP OUT OUT
SD/HD/3G-SDI
HDMI OUT
ANALOG AUDIO IN/OUT
GND +12V GND
AUX POWER
L
R
REMOTE IN/OUT
SD/HD/3G-SDI
IN
OUT
SDI
VIDEO
HDMI
ANLG
AUDIO
EMBED
AES
ANLG
FORMAT
486
720
2K
1080
576
1080
FRAME
P
I
PSF
MENU
HOME
MENU
1
MENU
2
REM
LOCK
PANEL
LOCK
RATE
23.98
25
29.97
30
24
50
59.94
60
VIDEO
GAIN
SAT
R-Y
B-Y
BLK
HUE
SHARP
PRESETS AUDIO STATUS
SYSTEM STATUS
1
3
5
2
4
6
ANAM
LBOX
PBOX
ASPECT
SMART
14:9
CCUT
ZOOM
ADJ
12 13 14 15 16
1110
8 9
1111Connectors

Teranex 3D
1 Power
2x IEC C14 – For built-in
international90 – 240 volt AC power
supplies forfailover redundancy.
2 USB
1x USB Type B – Connect to a
computer running Blackmagic
Teranex Setup software to
updatetheinternal software.
3 Ethernet
1x RJ-45 – Connect to a computer
running Blackmagic Teranex Setup
software to apply settings remotely.
4 Thunderbolt
1x Thunderbolt – Capture/playback
computer interface.
5 HDMI In
1x HDMI type A – HDMI input.
6 HDMI Out
1x HDMI type A – HDMI output.
7 SDI Inputs A and B
1x BNC – 3G-SDI input A
Usable for single link, encoded
3Dinput, dual link HD-SDIor
dualstream 3D left eye input.
1x BNC – 3G-SDI input B
Usable for dual link HD-SDI or
dualstream 3Dright eye input.
8 SDI Input A and B Loop
1x BNC – SDI input A active
loop through.
1x BNC – SDI input B active
loop through.
9 SDI Outputs A and B
1x BNC – 3G-SDI output A. Singlelink
output. Usable for dual linkHDSDI or
dual stream 3D left eye output.
1x BNC – 3G-SDI output B.
Replicated Single link output.
Usable for dual link HDSDI or dual
stream 3D right eye output.
10 Analog Inputs, Left and Right
2x RCA Phono – Stereo audio Inputs,
left and right, unbalanced, line level.
11 LTC Timecode In/Out
1x XLR – Timecode Input.
1x XLR – Timecode Output.
12 Analog/AES-EBU Audio In
2x XLR – Two channels of balanced
analog audio in or two pairs of
AESdigital audio in, user selectable.
13 Analog/AES-EBU Audio Out
2x XLR – Two channels of balanced
analog audio out or two pairs of
AESdigital audio out, user selectable.
14 Dolby Metadata
1x DB9 – Dolby metadata
supportusing RS-485.
15 Remote In/Out
1x DB9 – Sony™ compatible
RS-422deck control port.
16 REF In
1x BNC – Black burst or
tri-levelreference input.
18
IN
OUT
SDI
VIDEO
VIDEO
HDMI
ANLG
AUDIO
AUDIO
EMBED
AES
ANLG
FORMAT
FORMAT
486
720
2K
1080
576
1080
FRAME
FRAME
P
I
PSF
MENU
MENU
HOME
MENU
1
MENU
2
REM
LOCK
PANEL
LOCK
RATE
RATE
23.98
25
29.97
30
24
50
59.94
60
VIDEO
VIDEO
GAIN
SAT
R-Y
B-Y
BLK
HUE
SHARP
PRESETS AUDIO STATUS
SYSTEM STATUS
PRESETS
1
3
5
2
4
6
ANAM
LBOX
PBOX
ASPECT
ASPECT
SMART
14:9
CCUT
ZOOM
ADJ
PUSH
LOOP AIN BIN A
REF INDOLBY METADATA REMOTE IN/OUT Y/NTSC/PAL IN B-Y IN R-Y IN Y/NTSC/PAL OUT
B-Y OUT
SD/HD/3G-SDIHDMI
R-Y OUT STEREO IN TIMECODE IN TIMECODE OUT AUDIO IN 1 AUDIO IN 2 AUDIO OUT 1 AUDIO OUT 2
IN OUT
LOOP B
OUT A OUT B
L
R
PUSH PUSH
1
2 3 54 6
14 15 16 17
7 8
IN
OUT
SDI
VIDEO
VIDEO
HDMI
ANLG
AUDIO
AUDIO
EMBED
AES
ANLG
FORMAT
FORMAT
486
720
2K
1080
576
1080
FRAME
FRAME
P
I
PSF
MENU
MENU
HOME
MENU
1
MENU
2
REM
LOCK
PANEL
LOCK
RATE
RATE
23.98
25
29.97
30
24
50
59.94
60
VIDEO
VIDEO
GAIN
SAT
R-Y
B-Y
BLK
HUE
SHARP
PRESETS AUDIO STATUS
SYSTEM STATUS
PRESETS
1
3
5
2
4
6
ANAM
LBOX
PBOX
ASPECT
ASPECT
SMART
14:9
CCUT
ZOOM
ADJ
PUSH
LOOP A
IN BIN A
REF INDOLBY METADATA REMOTE IN/OUT Y/NTSC/PAL IN B-Y IN
R-Y IN Y/NTSC/PAL OUT B-Y OUT
SD/HD/3G-SDI
HDMI
R-Y OUT STEREO IN TIMECODE IN TIMECODE OUT AUDIO IN 1 AUDIO IN 2 AUDIO OUT 1 AUDIO OUT 2
IN OUT
LOOP B OUT A OUT B
L
R
PUSH PUSH
10
17
811 12 139
18
1212Connectors

17 Analog Video Inputs
1x BNC – Y/NTSC/PAL
component/composite input.
1x BNC – B-Y component input.
1x BNC – R-Y component input.
18 Analog Video Outputs
1x BNC – Y/NTSC/PAL
component/composite output.
1x BNC – B-Y component output.
1x BNC – R-Y component output.
Changing Settings
There are two different ways you can change settings on your Teranex processor. You can use
the front control panel, or the Blackmagic Teranex Setup software. This section will show you how
to use the control panel, or the setup software, to change settings on your Teranex processor.
Changing Settings using the Front Control Panel
Changing settings with the built in control panel is very easy! Once you know the basic
principles behind a conversion, all other conversions will become intuitive.
To set a conversion, the first thing to do is set your input and confirm the input signal.
Setting your Input
1 Press the ‘in’ button on the left side of the control panel. The button will illuminate
when selected.
Press the ‘in’ button to display the video input format. In this
example, the format is 1080i50 via SDI with embedded audio.
2 Using the ‘video’ buttons, select the SDI, HDMI, analog or optical video input.
Theinputs available will depend on your Teranex model. When your input is selected,
you will see the image displayed on the built in LCD and your Teranex will automatically
detect the input format and illuminate all the corresponding buttons, including format
and frame rate. The ‘frame’ button will also illuminate to show you whether your input
format is progressive, interlaced or progressive segmented frame.
IN
OUT
SDI
HDMI
ANLG
EMBED
AES
ANLG
486
720
2K
1080
576
1080
P
I
PSF
HOME
MENU
1
MENU
2
REM
LOCK
PANEL
LOCK
23.98
25
29.97
30
24
50
59.94
60
GAIN
SAT
R-Y
B-Y
BLK
HUE
SHARP
SYSTEM STATUS
1
3
5
2
4
6
ANAM
LBOX
PBOX
SMART
14:9
CCUT
ZOOM
ADJ
VIDEO AUDIO FORMAT FRAME MENURATE VIDEO PRESETS AUDIO STATUSASPECT
1313Changing Settings

3 Using the ‘audio’ buttons, select the embedded, AES, or analog audio input.
Ifselectinganalog, confirm your connection as either ‘XLR’, ’DB25’ or ‘RCA’ to let your
Teranex know you want analog audio from the XLR connectors, DB25 connector or
theRCAHiFi line input connectors.
Setting your Output
After setting your input, you can now change your output settings for your desired conversion.
1 Press the ‘out’ button on the left side of the control panel.
2 Select the video ‘format’ you want to convert to.
3 Choose the ‘frame’ line mode you want. For example, progressive,
interlaced or progressive segmented frame.
4 Choose the desired frame ‘rate’.
5 Now set the ‘aspect’ ratio you want.
Your converted video will now appear on the LCD and is available on all relevant video outputs.
You can improve the quality of your conversion by making adjustments to the ‘proc amp’ and
‘video’ settings, such as noise reduction, clean cadence, color correction, sharpness, and more.
Refer to the ‘Teranex processor settings’ and ‘conversion workflows’ sections for more
information about all of the settings on your Teranex and how they work together.
NOTE If selecting analog video on Teranex 2D or 3D, confirm component or
composite video on the LCD by turning the rotary knob. On Teranex AV,
pressing the SDI button more than once will alternate between the two rear
panel SDI inputs, SDI 1 and SDI 2. On the first button press, the LCD will
momentarily display which SDI input is currently selected. If you press
SDIagain within 5 seconds, the Teranex AV will switch to your other SDI
input signal.
When selecting between the 2 SDI sources on Teranex AV,
the LCD will momentarily display which input you have selected.
TIP Buttons with two options, for example the 29.97 and 30 frame rate,
alternate with each press of the button.
1414Changing Settings

Press the ‘out’ button and select a format to convert to. In this example, the conversion
is set to: 720p50, embedded SDI and HDMI audio, plus analog audio.
Control Panel Overview
This section contains a general overview of all the buttons and features on your Teranex
processor’s front control panel.
Everything you need to set up your conversions and monitor their status is right there in front
ofyou. Use the control panel LCD, soft menu buttons and rotary knob to navigate through the
menus and make your selections. For example, when setting timecode, the cursor is moved
forward or backward through the timecode register using the soft menu buttons. Timecode
digits are adjusted using the rotary knob. Pressing the rotary knob returns parameters to their
default value.
Program your conversion settings by pressing the buttons on the control panel. Buttons are
illuminated so you can quickly check the status of your audio and video connections and
output settings.
Explore the Teranex menus and experiment with conversion workflows. You’ll find examples
ofcommon workflows in the ‘Conversion Workflows’ section.
Some minor features will differ based on the model you are using, but the principles for how
they work are the same.
IN
OUT
SDI
HDMI
ANLG
EMBED
AES
ANLG
486
720
2K
1080
576
1080
P
I
PSF
HOME
MENU
1
MENU
2
REM
LOCK
PANEL
LOCK
23.98
25
29.97
30
24
50
59.94
60
GAIN
SAT
R-Y
B-Y
BLK
HUE
SHARP
SYSTEM STATUS
1
3
5
2
4
6
ANAM
LBOX
PBOX
SMART
14:9
CCUT
ZOOM
ADJ
VIDEO AUDIO FORMAT FRAME MENURATE VIDEO PRESETS AUDIO STATUSASPECT
1515Changing Settings

Below is an overview of control panel features.
1 IN
Press to display current input settings.
2 OUT
Press to display and change current
output settings.
3 VIDEO
Press to select video input type,
anddisplays all video outputs.
4 AUDIO
Press to select audio input type,
anddisplaysavailable audio outputs.
5 FORMAT
Press to select the video output format,
and displaysthe video input format.
6 FRAME
Press to select the video
outputframe type, and displays
videoinputframe type.
7 RATE
Displays video input frame rate
asframes or fields per second.
Press to select video output rate.
8 ASPECT
Press to select video input and
outputaspect ratio settings.
9 SOFT MENU BUTTONS
Press to navigate the LCD menus
andapply settings.
10 LCD
Displays the video input and output,
and menu settings.
11 ROTARY KNOB
Turn to adjust menu settings.
Press to return settings to default.
12 MENU
Press to toggle the LCD between
main menu and live video. ‘menu
1’ and ‘menu 2’ are programmable
asmenu page shortcuts.
Press and hold to program them.
13 VIDEO
Press to activate video proc
amp settings.
14 PRESETS
Press to save or recall custom
systemconfigurations.
15 AUDIO STATUS
Displays available input and
outputaudio channels.
16 SYSTEM STATUS
Displays input, output and
controlstatus information.
17 PANEL LOCK
Press and hold to lock the control
panel to prevent accidental
changes. Press and hold to unlock.
18 REM LOCK
Press and hold to prevent access
byTeranex Setup remote users.
Whenactive, button will turn red.
Remote users will see a pop up
stating that remote lock is set on the
device. Press and hold to unlock.
19 POWER
Press to power on.
Press and hold to power off.
IN
OUT
SDI
VIDEO
HDMI
ANLG
AUDIO
EMBED
AES
ANLG
FORMAT
486
720
2K
1080
576
1080
FRAME
P
I
PSF
MENU
HOME
MENU
1
MENU
2
REM
LOCK
PANEL
LOCK
RATE
23.98
25
29.97
30
24
50
59.94
60
VIDEO
GAIN
SAT
R-Y
B-Y
BLK
HUE
SHARP
PRESETS AUDIO STATUS
SYSTEM STATUS
1
3
5
2
4
6
ANAM
LBOX
PBOX
ASPECT
SMART
14:9
CCUT
ZOOM
ADJ
Main Menu
Audio
System
Setup
Ancillary
Data
Noise
Reduction
Video
1
2
3 4 96
10
875
151413
16
IN
OUT
SDI
VIDEO
HDMI
ANLG
AUDIO
EMBED
AES
ANLG
FORMAT
486
720
2K
1080
576
1080
FRAME
P
I
PSF
MENU
HOME
MENU
1
MENU
2
REM
LOCK
PANEL
LOCK
RATE
23.98
25
29.97
30
24
50
59.94
60
VIDEO
GAIN
SAT
R-Y
B-Y
BLK
HUE
SHARP
PRESETS AUDIO STATUS
SYSTEM STATUS
1
3
5
2
4
6
ANAM
LBOX
PBOX
ASPECT
SMART
14:9
CCUT
ZOOM
ADJ
Main Menu
Audio
System
Setup
Ancillary
Data
Noise
Reduction
Video
9 9
10
17
19
18
12
11
1616Changing Settings

Presets
Use the six ‘preset’ buttons to save and recall your conversion settings. Presets may also be
saved, recalled and given descriptive names via the Blackmagic Teranex Setup utility.
Presets wil save all operating parameters of your Teranex for later recall. For example, you
could store customized proc amp or aspect ratio settings for instant recall at the moment they
are needed in your production. Or, you could save special timecode, closed caption or audio
channel mapping configurations for easy repetitive use day after day.
To SAVE a preset:
Hold the desired ‘preset’ button for three seconds. The button flashes to indicate
thepreset was saved and remains illuminated until a setting is adjusted.
To RECALL a preset:
Press the desired ‘preset’ button and select ‘recall’ using the soft menu button.
Oncerecalled, the ‘preset’ button will illuminate until settings are changed.
The Preset buttons are used to easily save and recall conversion settings.
Audio and System Status LEDs
While performing your conversions, keep an eye on the status LEDs. Illuminated LEDs display
signals and communications that are present. For example, indicators tell you which channels
contain audio, what power connections are being used, if an external reference signal is present
and more. The maximum number of channels supported for each audio type is as follows:
Audio Type Teranex 2D Teranex 3D Teranex AV Teranex Express
Embedded 16 16 16 16
AES/EBU 8 4 4 0
Analog 4 2 2 0
Recall preset 1?
Cancel Recall
STEREO IN AES/EBU DIGITAL AUDIO IN/OUT HDMI IN
IN
REF IN Y/NTSC/PA L IN Y/NTSC/PAL OUTB-Y IN B-Y OUTR-Y IN R-Y OUT
LOOP OUT OUT
SD/HD/3G-SDI
HDMI OUT
ANALOG AUDIO IN/OUT
GND +12V GND
AUX POWER
L
R
REMOTE IN/OUT
SD/HD/3G-SDI
IN
OUT
SDI
VIDEO
HDMI
ANLG
AUDIO
EMBED
AES
ANLG
FORMAT
486
720
2K
1080
576
1080
FRAME
P
I
PSF
MENU
HOME
MENU
1
MENU
2
REM
LOCK
PANEL
LOCK
RATE
23.98
25
29.97
30
24
50
59.94
60
VIDEO
GAIN
SAT
R-Y
B-Y
BLK
HUE
SHARP
PRESETS AUDIO STATUS
SYSTEM STATUS
1
3
5
2
4
6
ANAM
LBOX
PBOX
ASPECT
SMART
14:9
CCUT
ZOOM
ADJ
STEREO IN AES/EBU DIGITAL AUDIO IN/OUT HDMI IN
IN
REF IN Y/NTSC /PAL IN Y/NTSC /PAL OUTB-Y IN B-Y OUTR-Y IN R-Y OUT
LOOP OUT OUT
SD/HD/3G-SDI
HDMI OUT
ANALOG AUDIO IN/OUT
GND +12V GND
AUX POWER
L
R
REMOTE IN/OUT
SD/HD/3G-SDI
IN
OUT
SDI
VIDEO
HDMI
ANLG
AUDIO
EMBED
AES
ANLG
FORMAT
486
720
2K
1080
576
1080
FRAME
P
I
PSF
MENU
HOME
MENU
1
MENU
2
REM
LOCK
PANEL
LOCK
RATE
23.98
25
29.97
30
24
50
59.94
60
VIDEO
GAIN
SAT
R-Y
B-Y
BLK
HUE
SHARP
PRESETS AUDIO STATUS
SYSTEM STATUS
1
3
5
2
4
6
ANAM
LBOX
PBOX
ASPECT
SMART
14:9
CCUT
ZOOM
ADJ
TIP Depending on the preset settings, recalling a preset may momentarily disrupt the
output video and audio. An example would be aformat conversion preset. A preset
that only changes ‘proc amp’ or ‘aspect ratio’ settings will not typically cause a loss of
output. Be sure totest your presets prior to using them.
1717Changing Settings

System Status LEDs indicate the following when illuminated:
VID Input video is present
REF External Reference is selected and External Reference input is present
PS1 Power Supply 1 is operational
PS2 Power Supply 2 is operational. For Teranex 2D and Teranex 3D only
TC Timecode is present in input or output video
CC Closed Captions are present in input or output video
<--> Ethernet communication is present
Thunderbolt™ communication is present. For Teranex 2D and Teranex 3D only
The ‘audio’, ‘timecode’, and ‘close caption’ status lights show the presence of these parameters
in either the input or output video, depending on the selection of ‘in’ or ‘out’.
Status LEDs are located on the right
side of the control panel.
Connecting to a Network
Connect your Teranex processor to your network by plugging a standard CAT-5 network cable
into the Ethernet port on the rear panel. Connect the other end of the cable to your network.
By default, your Teranex is configured to automatically acquire a network address. You may
change the network settings via the front panel ‘system setup’ menu. Press the ‘home’ button
on the front panel, select ‘system setup’ and then the ‘Ethernet’ menu via the LCD soft buttons.
Make the necessary adjustments to your network settings using the menus. Details for the
‘Ethernet’ menu are provided in the ‘System Setup Menu Settings’ section in this manual.
Plugging into your network lets you control your Teranex from a computer using the Blackmagic
Teranex Setup software. This is helpful if you need to control your Teranex from a separate
location, away from the built in control panel.
STEREO IN AES/EBU DIGITAL AUDIO IN/OUT HDMI IN
IN
REF IN Y/NTSC/PA L IN Y/NTSC/PAL OUTB-Y IN B-Y OUTR-Y IN R-Y OUT
LOOP OUT OUT
SD/HD/3G-SDI
HDMI OUT
ANALOG AUDIO IN/OUT
GND +12V GND
AUX POWER
L
R
REMOTE IN/OUT
SD/HD/3G-SDI
IN
OUT
SDI
VIDEO
HDMI
ANLG
AUDIO
EMBED
AES
ANLG
FORMAT
486
720
2K
1080
576
1080
FRAME
P
I
PSF
MENU
HOME
MENU
1
MENU
2
REM
LOCK
PANEL
LOCK
RATE
23.98
25
29.97
30
24
50
59.94
60
VIDEO
GAIN
SAT
R-Y
B-Y
BLK
HUE
SHARP
PRESETS AUDIO STATUS
SYSTEM STATUS
1
3
5
2
4
6
ANAM
LBOX
PBOX
ASPECT
SMART
14:9
CCUT
ZOOM
ADJ
STEREO IN AES/EBU DIGITAL AUDIO IN/OUT HDMI IN
IN
REF IN Y/NTSC/PAL IN Y/NTSC/PA L OUTB-Y IN B-Y OUTR-Y IN R-Y OUT
LOOP OUT OUT
SD/HD/3G-SDI
HDMI OUT
ANALOG AUDIO IN/OUT
GND +12V GND
AUX POWER
L
R
REMOTE IN/OUT
SD/HD/3G-SDI
IN
OUT
SDI
VIDEO
HDMI
ANLG
AUDIO
EMBED
AES
ANLG
FORMAT
486
720
2K
1080
576
1080
FRAME
P
I
PSF
MENU
HOME
MENU
1
MENU
2
REM
LOCK
PANEL
LOCK
RATE
23.98
25
29.97
30
24
50
59.94
60
VIDEO
GAIN
SAT
R-Y
B-Y
BLK
HUE
SHARP
PRESETS AUDIO STATUS
SYSTEM STATUS
1
3
5
2
4
6
ANAM
LBOX
PBOX
ASPECT
SMART
14:9
CCUT
ZOOM
ADJ
1818Changing Settings

Changing Settings using BlackmagicTeranex Setup
The Blackmagic Teranex Setup utility offers an intuitive way to view the status of your
TeranexProcessor and provides remote control from any location on your Ethernet network.
Thisconvenient application lets you control your Teranex remotely, away from the front panel.
All your conversion settings can be set
remotely using Blackmagic Teranex Setup.
Getting to Know the Interface
When you launch Blackmagic Teranex Setup, you’ll first see the login pane. From here you
cansee all your connected Teranex Processors on your network, and you can add more
Teranex Processors if you need to. Open the setup utility by clicking on the ‘settings’ icon
below the name of your Teranex Processor.
Resizing the Interface
Click and drag the bottom right corner of the login pane to proportionally resize the interface
tobest fit your screen size. Alternatively, drag a window edge to resize either vertically or
horizontally.
Selecting a Teranex Processor
The Teranex Setup utility will automatically locate your Teranex processor on your Ethernet
network and will display it by model name in the log in pane. If more than one Teranex
Processor is found, each will be displayed in a separate window. Simply click the arrows in the
right and left screen margins to select the desired processor, then click the icon below the
processor’s name to establish a connection.
If your Teranex Processor did not automatically appear, you can add the unit manually using
itsIP address. The IP address of your Teranex Processor can be found via the unit’s front panel
in the ‘system setup menu’. If you need to establish a new IP address, either static or via DHCP,
this can also be done from the front panel. Please refer to the ‘system setup menu’ section of
this manual for details.
1919Changing Settings

To add a Teranex Processor using Teranex Setup:
1 Press the + button at the bottom left corner of the login pane to add a device.
2 Type in the IP address and press ‘add’.
3 The Teranex Processor will appear as another controllable device on your network.
To manually add a Teranex Processor, click the “+” icon on the login pane to open
the ‘Add a Teranex’ window, then enter the IP address of your Teranex Processor.
Menus and Buttons
Most of the remote control functions and parameters in the interface are very intuitive,
especially if you are familiar with the front panel operation of the Teranex Processors.
Function Page Bar
Setup and operational controls are separated by function into six pages.
Setup
Selection of video and audio input sources, output video format, external reference and
other functions. Unlike the front panel mode of operation, a change of output format is
immediately processed and does not require confirmation.
Processing
Access to Video Proc Amp and Color Correction controls, as well as noise reduction
and other advanced functions.
Aspect
Choice of aspect ratio, including fixed aspect ratios, variable aspect ratio controls and
choice of color fill for PBOX/LBOX aspect ratios.
Data
Ancillary data parameters, including timecode, closed captions and video indexing.
Audio
Audio gain, delay and mapping functions.
2020Changing Settings
This manual suits for next models
4
Table of contents
Languages:
Other Blackmagicdesign Computer Hardware manuals
Popular Computer Hardware manuals by other brands

Preferred Instruments
Preferred Instruments JC-22-PL2-1006 Installation and Operation User Manual
Seagate
Seagate ST4000NK001 Kinetic product manual
Plura
Plura RUBIDIUM Series manual
Sonnet
Sonnet ENCORE/ZIF G4 Important information
IEI Technology
IEI Technology PCIE-G41A2 Quick installation guide
Alphacool
Alphacool NexXxos GPX-A-VEGA M07 manual


