BLAM CR20 User manual

www.blam-audio.fr
CR20
Powered Subwoofer

Panneau de contrôle et fonctions
1
A.LED DE MISE SOUS TENSION
La LED power s'allume en vert lorsque
l'amplificateur est sous tension et qu’aucun
problème n'est signalé. La LED de protection
s'allume en cas de probleme.
B.REGLAGE DE LA PHASE
Utilisez ce commutateur pour compenser les
problèmes d'alignement temporel dans le
système. De tels problèmes résultent
habituellement d'avoir le subwoofer à une
distance différente de l'auditeur que les autres
haut-parleurs du système.
C.ENTRÉES HAUT NIVEAU
Si votre autoradio n'a pas de sortie RCA, vous
pouvez utiliser les sorties haut-parleurs. Utilisez
le faisceau de câbles fournis et connectez les
sorties correctement comme indiqué dans le
schéma de connexion de ce manuel.
L'AUTO POWER ON agit seulement
pour les connexions haut niveau (haut-parleur).
Le subwoofer s'allume automatiquement quand
il y a du signal sur l’entrée et s’éteint
automatiquement lorsqu’il ne détecte plus de
signal,
D.FILTRE PASSE-BAS
Ce contrôle vous permet de définir la gamme
de fréquences que vous souhaitez que
l'amplificateur reproduise. Le caisson de graves
reproduira toute les fréquences en dessous de
celle que vous avez définie.
E.BASS BOOST
La fonction BASS BOOST augmentera le niveau
sonore dans les fréquences graves (50hz).
F.CONTROLE DE GAIN DE L'ENTRÉE
Après avoir installé votre système, passez ce
contrôle au minimum.
Allumez l'autoradio, tournez le volume de celui
ci vers environ 2/3 de niveau total.
Réglez lentement le contrôle du gain d'entrée du
subwoofer jusqu'à ce que vous entendiez une
faible distorsion. Ensuite, réduisez le niveau
jusqu'à ce que la distorsion disparaisse
complètement. Vous pourrez ajuster le niveau
de volume du subwoofer avec le bouton de
contrôle déporté.
G.TELECOMMANDE DE VOLUME
Fixez le contrôle de niveau à portée de main pour
contrôler le niveau de volume du subwoofer de
manière indépendante.
H.ENTRÉES RCA
Les entrées bas niveaux sont recommandées
si les sorties RCA sont présentes sur votre
autoradio ou autre source de signal (comme un
processeur de son).
I.FUSIBLE
N'utilisez pas de fusible avec une valeur
différente et NE JAMAIS remplacer le
fusible par un fil ou une pièce métallique.
J.BORNIER D’ALIMENTATION
A
J I G D E B F H C

2
Spécifications techniques
Puissance maximale : 360 W / Puissance nominale 180 W.
Compatible avec la plupart des autoradios d'origine.
Entrées de haut niveau avec mise en route automatique.
Entrées RCA bas niveau (5V compatible).
Réponse en fréquence réglable : 40 Hz - 150 Hz.
Basse boost (50Hz) ajustable jusqu'à +12dB.
Phase réglage 0/180 °.
Commande filaire du volume sonore (câbles 5m).
Support en mousse fourni pour utilisation en diffusion vers le bas.
Taille : H 260mm x 140mm x D W 500 mm.

Cablage des entrées bas niveau
Les entrées bas niveau (RCA) sont préférables pour de meilleures performances audio, si votre
autoradio est équipée de sorties RCA. Il est recommandé d’utiliser un cable de bonne qualité.
REMARQUE : Ne connectez jamais les entrées haut niveau et bas niveau en même temps.
Attention : Connectez au fil REMOTE de l’autoradio
Cablage des entrées haut niveau
Les entrées haut niveau ne doivent être utilisées que lorsque votre autoradio ne dispose pas de sorties
RCA. Connectez les sorties haut-parleur au connecteur d'entrée haut niveau de l'amplificateur.
Assurez-vous d'observer les polarités pour éviter les
problèmes de phase. Le fil de masse peut être connecté
à la masse de l’autoradio.
REMARQUE : Ne connectez jamais les entrées haut niveau et bas niveau en même temps.
Ne necessite pas de connecter la remote à l’autoradio.
Connexion de l’alimentation
Connectez la masse (-) au châssis du véhicule au point le plus proche.
Gardez ce fil de masse d’une longueur inférieure à 39 "(100 cm).
Utilisez un cable de 8mm2 (minimum) (AWG 8).
Connectez le cable de remote si vous utilisez les entrées RCA.
Connectez un câble de 8mm2 minimum avec un porte-fusible placé à moins de 45 cm de la batterie.
de la voiture et reliez le à la connexion "BATT +".
3
Connectez au fil
REMOTE de l’auto-
radio Batterie
Sorties RCA de
l’autoradio
Batterie
Sorties
haut-parleur
de l’autoradio

4
SYSTEMES RELAX BLAM
Nous vous remercions d’avoir choisi BLAM.
Les systèmes RELAX sont conçus pour fournir des performances incroyables. Leurs rendements
élevés permettent de fournir un son puissant et détaillé.
Ils transformeront votre banal trajet en un agréable voyage musical…
Afin d’exploiter toutes leurs performances, nous vous conseillons de lire ce livret, puis de le conserver avec
précaution pour pouvoir vous y référer ultérieurement. tout problème dû au non-respect des règles
d’utilisation peut entraîner l’invalidation de la garantie.
Avertissement
L’écoute prolongée à fort niveau au-delà de 110 dB peut détériorer durablement l’audition. des écoutes
même brèves à plus de 130 dB peuvent provoquer des lésions auditives irrémédiables.
Recommandations importantes
Dans un but d’évolution, BLAM se réserve le droit de modifier les spécifications techniques de ses produits
sans préavis. images non contractuelles.
Garantie France
Conditions de garantie
En cas de problème, adressez-vous en premier lieu à votre revendeur BLAM.
La garantie pour la France sur tout matériel BLAM est de 2 ans. en cas de matériel défectueux, celui-ci doit
être expédié à vos frais, dans son emballage d’origine auprès du revendeur, lequel analysera le matériel et
déterminera la nature de la panne. Si celui-ci est sous garantie, le matériel vous sera rendu ou remplacé en
“franco de port”. dans le cas contraire, un devis de réparation vous sera proposé. La garantie ne couvre pas
les dommages résultant d’une mauvaise utilisation ou d’un branchement incorrect (bobines mobiles brûlées
par exemple...).
En dehors de la France, le matériel BLAM est couvert par une garantie dont les conditions sont fixées
localement par le distributeur officiel BLAM de chaque pays, en accord avec les lois en vigueur sur le
territoire concerné.

Panel controls and features
A.POWER STATUS LED
B.PHASE SHIFT
Use this switch to help compensate for time
alignment problems in the system. Such
problems usually result from having the
subwoofer at a different distance from the
listener than the other speakers in the system.
C.HIGH LEVEL INPUTS
D.LOW PASS FILTER
His control permits you to define the frequency
range you want the subwoofer amplifier to
output. The subwoofer will reproduce all sound
BELOW the frequency you set.
F.INPUT GAIN CONTROL
After you have installed your system, turn this
control to minimum.
Turn the head unit on (and the subwoofer will
turn on via the remote connection). Turn the
head unit volume to about 2/3 full level.
Slowly turn up the subwoofer input gain control
until you hear a small amount of distortion. Then
reduce the level until the distortion is completely
gone. Level the control at this setting.
G.REMOTE LEVEL CONTROL PORTAL
Attach the included remote level control to
control the volume level of the subwooer
independently.
H.RCA INPUTS
Low level inputs are the recommended way
to introduce the audio signal to the subwoofer
if RCA outputs are present on your head unit
or other signal source (such as a sound
processor). Connect to remote turn-on terminal
on head unit.
I.FUSE
J.POWER INPUT TERMINAL
The LED power glows green when the amplifier
is on and no problems are present.
Do not use a fuse with a different value
and NEVER replace the fuse with a wire
or coin.
E.BASS BOOST
He BASS BOOST feature will increase the
sound level in the bass frequencies.
If your head unit does not have RCA
outputsyou can use the speaker outputs for
the audiosource for the subwoofer. Use the
supplied cable and wire harness and connect
the outputs properly as shown in the connec-
tiondiagram in this manual.
The AUTO POWER ON is for high
level (speaker-level) connections.
The subwoofer turns on automatically when
There is signal on the input and switches off
Automatically when it no longer detects
signal.
5
The LED of protection lights if there is a
problem
A
J I G D E B F H C

6
Technical specification
Maximum power : 360 W / Nominal Power 180 W.
Compatible with OEM head units.
High-level inputs with auto-turn on.
RCA low-level inputs (5V compatible).
Frequency response: 40 Hz – 150 Hz.
Bass boot (50Hz) ajustable to 12dB.
Phase setting 0/180°.
External remote level control (5m cables).
Supplied foam stand to use it down firing.
Size : H 260mm x D 140mm x W 500 mm.

7
Power connections
Connect the ground terminal to the closest point on the chassis of the vehicle. Keep this ground wire to less
than 39" (100 cm) in length. Use 8 gauge (or heavier) wire. Connect the remote terminal to the remote output
of head unit using 16 gauge ( or heavier ) wire. Connect an empty fuse holder within 18" (45 cm) of the car
battery, and run 8 gauge (or heavier) cable from this fuse to the amplifier location. Then connect the fuse
holder to the "BATT+".
Low Level Input Wiring
Low-level (RCA) input wiring is preferred for best audio performance. Most trunk or hatchback installations will
require a 15-20 feet RCA cable, while pickup trucks and under-seat installations will require a 6-12 feet RCA
cable. Always use a high quality cable. Connect to remote turn-on terminal on head unit.
NOTE: Do not connect BOTH the high level and low level inputs from your receiver to your amplifier at the
same time!
High Level Input Wiring
The high level input(s) should only be use If the RCA outputs are not present, connect the speaker outputs
from the receiver to the high level input connector of the amplifier. Be sure to observe polarity to avoid audio
phase problems. The ground wire can be connected to the ground of the Head Unit. The AUTO POWER ON
is for high level connexions. The subwoofer turns on automatically when there is a signal on the input.
NOTE: Do not connect BOTH the high level and low level inputs from your receiver to your amplifier at the
same time!
To remote TURN-ON
Terminal on Head
Unit
Power
Supply
From Outputs oh
Head Unit

8
BLAM RELAX SPEAKERS
Thank you for choosing BLAM.
RELAX systems are designed to provide incredible performance. Because of their high efficiency
and low impedance, they provide detailed, powerful sound when used with or without an amplifier.
Transform your mundane drive into a musical journey….
To obtain the best results from this product, we recommend that you follow carefully all the information
contained in this user’s manual. if not correctly followed, any fault observed may not be covered by the
guarantee.
Warning
continuous listening at high sound level (above 110 dB) can durably damage your hearing. Listening above
130 dB can damage your hearing permanently.
Important recommendations
Before attempting any installation work, it is very important to check how much space is available to fit the
speakers into the vehicle.
key points:
• Ensure the speaker is clean from debris and metallic particles that maybe attached (especially after
drilling).
• Clean before mounting the speakers. due to constant technological advances,
BLAM reserves its right to modify specifications without notice. images may not conform exactly to specific
product.

9
International guarantee
■GB Conditions of guarantee All BLAM loudspeakers are covered by guarantee drawn up by the official
BLAM distributor in your country. Your distributor can provide all details concerning the conditions of
guarantee. guarantee cover extends at least to that granted by the legal guarantee in force in the country
where the original purchase invoice was issued.
■ DE Garantiebedingungen Alle BLAM Lautsprecher sind durch eine vom offiziellen BLAM Vertragshän-
dler in ihrem Landgewährten garantie abgedeckt. einzelheiten bezüglich der garantie bedingungen
erhalten Sie von ihrem Vertragshändler. die gewährleistung erstreckt sich mindestens auf die geltende
gesetzlichegarantie des Landes, in dem der original-Kaufbeleg ausgestellt wurde.
■ E Condiciones de la garantía todos los altavoces BLAM están cubiertos por la garantía extendida por el
distribuidor oficial de BLAM de su país. Su distribuidor le proporcionará detalles concernientes a las
condiciones de la garantía. La cobertura de la garantía alcanza por menos hasta la concedida por la
garantía legal en vigor en el país en donde se emitió la factura de compra original.
■ p Condições da garantia todos os altifalantes BLAM são abrangidos por uma garantia redigida pelo
distribuidor oficial da BLAM no seu país. o seu distribuidor pode fornecer todos os pormenores relativa-
mente às condições da garantia. A cobertura da garantia estende-se pelo menos ao que é concedido
pela garantia legal em vigor no país em que o recibo de compra original foi emitido.
■ I Condizioni di garanzia tutti gli altoparlanti BLAM sono coperti dalla garanzia rilasciata dal distributore
ufficiale BLAM del vostro paese. il vostro distributore potrà fornirvi tutti i dettagli riguardanti le condizioni di
garanzia. La copertura della garanzia comprende almeno ciò che è contemplato dalla garanzia legale in
vigore nel paese in cui è stata rilasciata la fattura originale d’acquisto.
■ NL Garantievoorwaarden Alle BLAM luidsprekers vallen onder een garantie die door de officiële BLAM
-distributeur in uw land is opgesteld. Uw distributeur kan u alle details leveren met betrekking tot de
garantievoorwaarden. garantiedekking geldt ten minste voor de wettelijke toegekende garantie die van
kracht is in het land waar de originele aankoopbon is uitgegeven.
■ PL Warunki gwarancyjne Wszystkie głośniki BLAM są objęte gwarancją wydawaną przez oficjalnego
dystrybutora BLAM wTwoim kraju. Dystrybutor poinformuje Cię o wszystkich szczegółach związanych z
warunkami gwarancyjnymi. Zakres gwarancji obejmuje przynajmniej gwarancję ustawową oferowaną w
kraju, w którym wydano oryginalną fakturę zakupu.
■ RU Условия гарантии Все динамики BLAM обеспечиваются гарантийным обслуживанием,
осуществляемым официальным дистрибьютором BLAM в Вашей стране. Ваш дистрибьютор может
сообщить Вам все детали, относящиеся к условиям гарантийного обслуживания. Территорией
действия условий гарантии является, как минимум, территория той страны где было приобретено
данное изделие BLAM в соответствии с оригинальным счетомфактурой.
Table of contents
Languages:
Other BLAM Subwoofer manuals
Popular Subwoofer manuals by other brands

Mackie
Mackie MR S10 owner's manual
Xtant
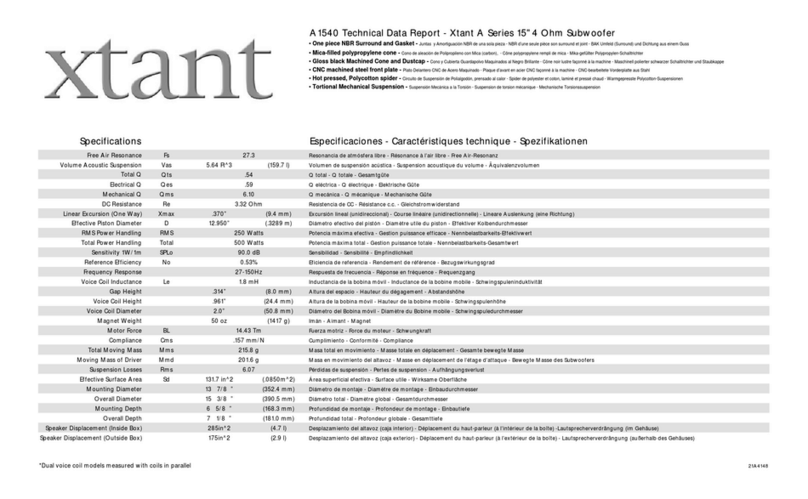
Xtant XTANT A SERIES A1540 technical information
Morel
Morel Harmony Series HARMONY 10 Getting started

Ground Zero
Ground Zero PLUTONIUM GZPW 10SPL Series owner's manual

Rockford Fosgate
Rockford Fosgate M2 Series Installation & operation

Danley
Danley DTS20 owner's manual
