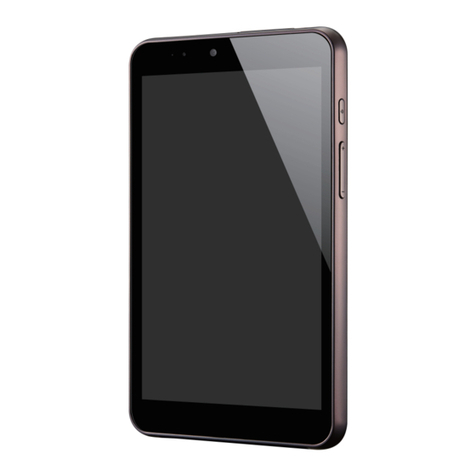
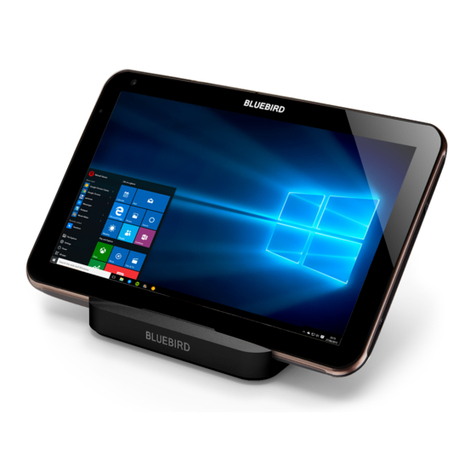
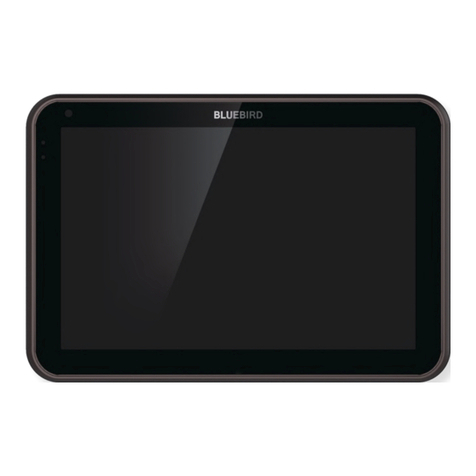
Bluebird ET100 User manual

USER
Manual
PREMIUM ENTERPRISE TABLET
ET100

This user manual is protected by copyright.
The radio equipment can’t be used for life saving services because there is possibility to have radio
interference and failure. This product’s partial functions might have problems from the environment, user
program, and other machines. This product’s program is legally protected. Illegal copying, transmitting, or
erasing of the program is prohibited. This user manual has been created by the Bluebird Inc. We have done
our best not to create typos, editing errors, and leaving out any information.
Please understand if there are any inconveniences.
Registered Trademark
BLUEBIRD is an emerging global brand, striving to lead the market in performance and mobility. Their
products represent reliability, innovation, and innovative technology. Pidion is a registered trademark from
the global brand of Bluebird Inc. and is copyright protected.
User’s guidance
Device type User’s guidance
Class B Device
(Household Information & Communication)
This device has qualified the electromagnetic wave suitable
registration and can be used as a household device at a
resi-dential area as well as any other areas.
Type registration This wireless device may cause propagation interference,
and so, it cannot be used for life-saving services.
*Please read warnings and cautious before use.

1 Safety Precautions
1.1 Symbols ...................................................................................................................................................... 01
1.2 Device ......................................................................................................................................................... 01
1.3 Environment ................................................................................................................................................ 01
2 Product Overview
2.1 Package Components................................................................................................................................. 02
2.2 Front ........................................................................................................................................................... 03
2.3 Back ........................................................................................................................................................... 04
2.4 Bottom........................................................................................................................................................ 05
3 Getting Started
3.1 Inserting USIM Cards .................................................................................................................................. 06
3.2 Charging the Device .................................................................................................................................... 07
3.3 Turning On the Device ................................................................................................................................. 08
3.4 Using Touch Gestures ................................................................................................................................. 09
3.5 Starting the Device for the First Time ........................................................................................................... 10
3.6 Locking the Device ..................................................................................................................................... 11
3.7 Unlocking the Device................................................................................................................................... 11
4 Windows 8.1 Tutorials
4.1 Start Screen ................................................................................................................................................ 12
4.2 Desktop ...................................................................................................................................................... 13
4.3 Charms Menu ............................................................................................................................................. 14
4.4 Switching between the Start screen and desktop ....................................................................................... 16
4.5 Apps Screen ............................................................................................................................................... 16
4.6 Switching Between Apps............................................................................................................................. 17
4.7 Viewing Two Apps at Once.......................................................................................................................... 18
4.8 Closing Active Apps .................................................................................................................................... 19
4.9 Turning Off the Device ................................................................................................................................. 19
5 Connecting to Networks
5.1 Connecting to a Wi-Fi Network.................................................................................................................... 20
5.2 Connecting to a Mobile Network ................................................................................................................. 20
5.3 Sharing a Mobile Connection....................................................................................................................... 21
5.4 Disconnecting from a Network .................................................................................................................... 21
6 Connecting to External Devices
6.1 Connecting to a Bluetooth Device ............................................................................................................... 22
6.2 Connecting to USB Devices ........................................................................................................................ 23
Contents

7 Customizing the Device
7.1 Configuring the Start Screen........................................................................................................................24
7.2 Changing Your Account Picture................................................................................................................... 28
7.3 Personalizing the Lock Screen..................................................................................................................... 28
7.4 Setting the Date and Time ........................................................................................................................... 28
7.5 Booting to the Desktop ............................................................................................................................... 29
7.6 Assigning Function Buttons ......................................................................................................................... 29
7.7 Using Quick Settings ................................................................................................................................... 30
8 Using the Card Slots
8.1 Inserting USIM Cards .................................................................................................................................. 32
8.2 Removing a USIM Card............................................................................................................................... 32
8.3 Inserting SAM Cards ................................................................................................................................... 33
8.4 Removing a SAM Card................................................................................................................................ 34
8.5 Inserting MicroSD Cards.............................................................................................................................. 35
8.6 Removing a MicroSD Card .......................................................................................................................... 36
8.7 Accessing Data on MicroSD Cards.............................................................................................................. 37
9 Using the Camera
9.1 Installing the Camera App............................................................................................................................ 38
9.2 Opening the Camera App............................................................................................................................ 39
9.3 Taking Pictures ............................................................................................................................................ 39
9.4 Recording Video.......................................................................................................................................... 40
9.5 Viewing Photos ........................................................................................................................................... 40
9.6 Viewing Videos ............................................................................................................................................ 40
10 Maintenance and Troubleshooting
10.1 Cleaning the Touchscreen ......................................................................................................................... 41
10.2 Extending the Battery Life.......................................................................................................................... 41
10.3 Troubleshooting......................................................................................................................................... 42
10.4 Updating Windows.................................................................................................................................... 43
10.5 Backing Up Windows ................................................................................................................................ 44
10.6 Recovering Windows................................................................................................................................. 45
11 Help and Support
11.1 Preparing for Service ................................................................................................................................. 46
11.2 Bluebird Customer Service ........................................................................................................................ 46
11.3 Conditions for After-sales Service .............................................................................................................. 47
11.4 Charged Service........................................................................................................................................ 47
Appendix A Specifications
Appendix B Accessories
Appendix C Safety and Regulatory Compliance
Appendix D Warranty Information
Contents
01
1 Safety Precautions
1.1 Symbols
This manual uses the following symbols to indicate hazards and additional information.
Symbol Name Description
Caution Indicates a potential hazard that could result in a minor injury or damage
to the device.
Note Indicates additional information that can help you get the most out of the
device.
1.2 Device
• Do not submerge the device in water or expose it to damp conditions.
Doing so may damage the device and void the warranty.
There is a label in the device that changes color when wet. You cannot receive warranty service
if this label has changed color.
• Do not press the power button when the device is wet. Doing so may result in an electric shock.
• Do not touch the power adapter or cord with wet hands. Doing so may result in an electric shock.
• Do not attempt to repair, remodel, or disassemble the device. Doing so voids the warranty on the device.
• Do not attempt to dry the device using a heater, microwave, or other tool.
Doing so may cause the device to explode or malfunction.
• Do not paint the device. Doing so may damage the screen or the exterior of the device.
• Do not expose the device to severe impacts or vibrations. Doing so may damage the device.
• Do not use this device around products that sustain life. Doing so may result in failure of these products
due to electromagnetic interference.
1.3 Environment
• Do not use the device while driving or operating heavy machinery.
Doing so may result in death or serious injury.
• Do not use the device in dusty locations. Doing so may damage the device.
• Do not use the device in hot locations. Doing so may damage the device.
• Do not use the device in moist locations. Doing so may damage the device and void the warranty.
• Do not use the device in locations with combustible goods. Doing so may result in an explosion.

02
2 Product Overview
This chapter explains the components included with the tablet package system and provides an overview of
the tablet.
2.1 Package Components
The device includes the following components. If any of these components are missing, please contact the
retailer who sold you the device.
ET100 tablet Power adapter AC power cord
The images in this manual may not reflect the color and shape of the actual device. These illustrations
are intended for descriptive purposes only.

2 Product Overview
03
2.2 Front
1
7
2
4
3
5
6
No. Name Description
1Front camera Captures pictures and video (2.0 megapixels).
2Light sensor Detects the ambient light to automatically adjust the brightness of the screen and
the exposure of the camera.
3Battery LED
Indicates the status of the battery.
• The battery LED turns red when the battery is charging.
• The battery LED turns white when the battery is fully charged.
• The battery LED blinks red and white alternately at 1 second intervals
when the battery has a problem, such as it being too hot or too cold.
4Status LED
Indicates the status of the device.
The Status LED turns on to indicate that the device is operational.
5Microphone Captures sound for video conferencing, voice recording, and speech recognition.
6Screen
Displays programs and acts as a multi-touch interface.
The default resolution is 1280 × 800.
7Function buttons
Act as predefined keys (such as the Windows key) or open apps.
For more information about function buttons,
see 7.6 Assigning Function Buttons on page 29.

2 Product Overview
04
2.3 Back
0
1
2
3
4
5
6
8
7
!
9
No. Name Description
1Air exhaust
Purges hot air from the device.
Blocking the air exhaust may cause the device to overheat.
2Rear camera Captures photos and video (5 megapixels).
3LED flash Provides additional lighting for photos and videos in low-light areas.
4Air intake
Cools the components inside the device with outside air.
Blocking the air intake may cause the device to overheat.
5Speaker Emits sound.
6Power button Turns on the device.
For more information, see 3.3 Turning On the Device on page 08.
7Reset button Restores the OS to its original state.
8Lock button Locks the device. You must log in to continue using the device after locking it.
9Audio jack Connects to the 3.5 mm adapter on headphones or computer speakers.
0USB port Connects to USB devices, such as memory sticks, keyboards, and external
hard drives.
!Power adapter jack Connects to the power adapter to charge the device.

2 Product Overview
05
2.4 Bottom
1
2
43
No. Name Description
1Cradle connector Connects the device to a cradle (optional).
2USIM slot Allows you to insert USIM (universal subscriber identity module) cards.
For more information, see 3.1 Inserting USIM Cards on page 06.
3SAM slot Allows you to insert SAM (secure access module) cards.
For more information, see 8.3 Inserting SAM Cards on page 33.
4MicroSD slot Allows you to insert removable memory cards (up to 32 GB).
For more information, see 8.5 Inserting MicroSD Cards on page 35.

06
3 Getting Started
This chapter explains the basics of how to use the device, including how to charge the device, turn it on or
off, and lock it. Subsequent chapters teach you how to navigate Windows and customize the device, but
the information in this chapter will help you start the device for the first time and configure basic settings.
3.1 Inserting USIM Cards
USIM cards allow the device to connect to mobile networks.
1 Open the cover on the bottom of the device.
2 Insert the USIM card into the top slot on the left until you hear a click.
Do not insert the USIM card into an incorrect slot. Check the shape and orientation of the slot to
ensure that it is designed for a USIM card.
3 Replace the cover.
To remove the USIM card, see 8.2 Removing a USIM Card on page 32.

3 Getting Started
07
3.2 Charging the Device
The device charges when connected to the power adapter or resting in the cradle (optional).
• Do not attempt to charge the device with anything other than the adapter it shipped with.
• Charge the device fully before using it for the first time. Failure to do so may decrease the life of
the battery.
To charge the device directly without the cradle, follow these steps:
1 Plug the adapter into an outlet
2 Open the cover on the left side of the device.
3 Plug the adapter into the port on the left.
• The battery LED turns red when the battery is charging.
• The battery LED turns white when the battery is fully charged.
• The battery LED blinks red and white alternately at 1 second intervals when the battery has a problem,
such as it being too hot or too cold
Continuing to charge the device when the battery is full will not damage the battery.
4 After the battery is fully charged, unplug the adapter jack, and then replace the cover.

3 Getting Started
08
3.3 Turning On the Device
Press the power button on the left edge of the device to turn on the device.
• The Status LED turns on to indicate that the device is operational.
• To turn off the device, see 4.9 Turning Off the Device on page 19.
The power button is also used:
• To turn off the screen without turning off the device.
To turn the screen back on, press the power button again.
• To turn off the device manually by pressing and holding the power button for about five seconds.

3 Getting Started
09
3.4 Using Touch Gestures
Touch gestures allow you to interact with Windows and the applications installed on the device.
Gesture Name Description
Tap Lightly touch an item to launch apps, interact with buttons,
and select options.
Zoom Touch two points on the screen and move your fingers
together to zoom out or move them apart to zoom in.
Press and hold Continue touching an item to open context menus and
display other options.
Swipe Flick your finger across the screen to switch between apps
and display additional menus.
Drag Move your finger across the screen to move apps and pages.

3 Getting Started
10
3.5 Starting the Device for the First Time
When you start the device for the first time, you are prompted to create a user account and configure
basic settings.
To configure Windows upon initial startup, follow these steps:
1 When the Region and language screen appears, select the desired Country or region, App language,
Keyboard layout, and Time zone, and then tap Next.
2 On the Product key screen, type the Windows product key that came with the device or tap Skip to
perform this step later.
3 Read and consider the license terms, and then tap I accept if you agree to the terms.
4 When the Personalize screen appears, select a color theme and name for the device, and then tap Next.
The PC name cannot contain spaces.
5 On the Get online screen, tap an available Wi-Fi or mobile network or tap Skip this step to perform this
step later.
6 On the Settings screen, tap Use express settings to use the default Windows settings or tap Customize
to manually configure Windows settings.
7 On the Your account screen, type a User name, Password, and Password hint.
8 When the device restarts and the lock screen appears, swipe up on the screen.
9 Tap your profile name, and then type in your password to start Windows.

3 Getting Started
11
3.6 Locking the Device
1 On the left edge of the device, press the lock button.
2 When the lock screen appears, the device is locked.
You can also press the power button on the top left edge of the device to turn off the display and
lock the device.
3.7 Unlocking the Device
1 Place your finger in the center of the lock screen and swipe upward.
2 Tap the desired profile, and then type in your password.
3 Tap OK.

12
4 Windows 8.1 Tutorials
Windows 8.1 includes features optimized for touch screens, such as the new Start screen, Charms menu,
and gestures for switching and closing apps. The next few sections will teach you about these features and
help you feel comfortable in this new environment.
4.1 Start Screen
The Start screen provides easy access to the apps and information most important to you. From the Start
screen, you can see your calendar, email, and favorite websites, search for apps or content on the web, or
log in and out of the device.
You can customize the Start screen by re-sizing the tile or adding a new tile. For more information, see
Configuring the 7.1 Configuring the Start Screen on page 24.

4 Windows 8.1 Tutorials
13
4.2 Desktop
The desktop provides a familiar experience to those who have used previous versions of Windows. It is also
where you will use certain apps, such as the File Explorer and Office applications.
If you want to boot directly into the desktop, see 7.5 Booting to the Desktop on page 29.

4 Windows 8.1 Tutorials
14
4.3 Charms Menu
The Charms menu provides quick access to frequently used functions from any screen.
The functions in the Charms menu may differ based on the current app.
To open the Charms menu, follow these steps:
1 Swipe in from the right edge of the screen.
Search
Share
Start
Devices
Settings

4 Windows 8.1 Tutorials
15
2 Tap the desired charm:
Icon Name Function
Search Finds things on the device or the web.
Share Shares files, photos, or links from the current app.
Start Opens the Start screen or desktop.
Devices Allows you to play, print, or project from peripheral devices.
Settings From apps: Changes the settings for the current app.
From the Start screen and desktop: Changes Windows settings.

4 Windows 8.1 Tutorials
16
4.4 Switching between the Start screen and desktop
1 Swipe in from the right edge of the screen.
2 In the Charms menu, tap Start.
4.5 Apps Screen
The Apps screen displays all of the applications installed on the device. The apps that you use most
frequently appear on the left side of the Apps screen. The other apps are grouped by publisher.
To show all of the apps installed on the device, follow these steps:
1 Place your finger in the center of the Start screen and swipe upwards.
2 On the Apps screen, swipe to the left or right to show more apps.
You can swipe up from the bottom of the screen to display the context menu. The context menu
allows you to pin apps to the Start screen or taskbar, uninstall apps, run apps as an administrator,
or open app locations.
Other manuals for ET100
1
Table of contents
Other Bluebird Tablet manuals

Bluebird
Bluebird RT101 User manual

Bluebird
Bluebird EF550 User manual

Bluebird
Bluebird PT550 User manual

Bluebird
Bluebird ST102 User manual

Bluebird
Bluebird BP50 User manual

Bluebird
Bluebird RT100 User manual

Bluebird
Bluebird ST100 User manual

Bluebird
Bluebird ET100 User manual

Bluebird
Bluebird RT080 User manual