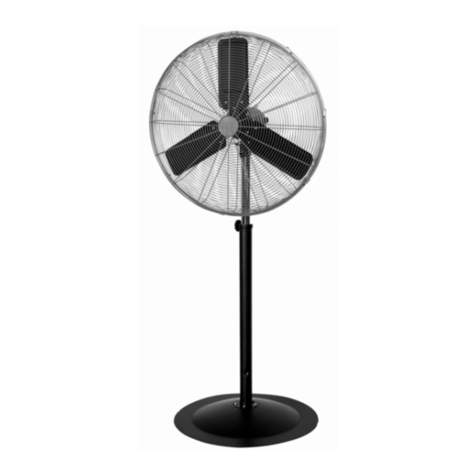
BluMill 10172 User manual

Stand Fan
with WIFI
EN - Manual...................................... 2
NL - Gebruiksaanwijzing................ 8
FR - Mode d’emploi ......................14
DE - Anleitung ...............................20
IT - Istruzioni per l’uso ................. 26
ES - Instrucciones de uso ............32
SE - Instruktioner..........................38
PL - Instrukcje................................44
EF47-1F-35R1

2
IMPORTANT SAFEGUARDS
Basic safety precautions should always be taken when using electrical
appliances, including the following:
•
Only use the fan for purposes described in the instruction manual.
•
Avoid electrical shock by not immersing the fan, plug or cord in water or any
other liquid and by not spraying these with liquids.
•
Close supervision is necessary when any appliance is used by or near
children, or near pets.
•
Unplug the appliance from any electrical socket when not in use, when
moving the fan from one location to another, before adding or removing
parts and before cleaning.
•
Avoid contact with any moving parts.
•
DO NOT operate without fan grilles properly in place.
•
Do not operate any appliance which has a damaged cord plug, or if it
malfunctions, or has been damaged in any other way.
•
The use of attachments not recommended or sold by the appliance
manufacturer may cause hazards.
•
Do not use outdoors.
•
Disconnect from the mains by removing the plug from the wall outlet. DO
NOT pull the cord.
•
Always use on a dry, level surface.
•
If the supply cord is damaged, it must be replaced by the manufacturer, its
service agent or a similarly qualied person, in order to avoid a hazard.
EN PLEASE READ AND SAVE THESE IMPORTANT SAFETY
INSTRUCTIONS.

3
•
This appliance is not intended to be used by people (including children) with
reduced physical, sensory or mental capabilities, or a lack of experience and
knowledge, unless they are supervised by, or have been given instructions on
the use of the appliance, by a person responsible for their safety.
•
Do not let children play with the appliance.
EN
1. rear safety grille
2. front safety grille
3. motor housing
4. blade
5. grille locking nut
6. blade cap
7. stand
8. base
9. height adjustment button
10. timer
11. oscillating button
12. on/off/speed button
13. speed button
14. Mode
Parts Description
1
5
9
7
10
13
8
3
2
4
6
11
14
12

4
EN
OPERATING INSTRUCTIONS
Voltage: 22 V Frequency: 50 Hz Power: 45 W
REMOTE CONTROL ASSEMBLY
The remote control requires 2 AAA batteries (not supplied) for operation. To install the
batteries, simply press the indentations on the back of the remote control with your thumb
and remove the cover. Insert the batteries according to the diagram shown inside. Replace
the cover.
Assembly
14
2
grille locking nut
3
blade cap
5
xing
clamps
1. Remove the locking nut from the fan stand by turning it counter clockwise. Place the fan
stand onto the base and x it in place by replacing the locking nut and locking it tightly
by turning it clockwise (see Fig. 1).
2. To assemble the safety grille and blade components, loosen the blade cap by turning
it clockwise. Then loosen the grille locking nut from the motor housing by turning it
anticlockwise.
3. Place the rear safety grille rmly onto the motor housing and fasten it by turning the
grille lock nut clockwise until tight, making sure that the rear safety grille ts onto the
locking lugs on the motor housing (see Fig. 2).
4. Push the blade onto the motor shaft and x in place using the blade cap, by turning it
anticlockwise (see Fig. 3).
5. Place the front safety grille against the rear safety grille. Align the holes, close the xing
clamps and insert and tighten the safety screw (see Fig. 4/5).

5
EN
Operating
Place the fan base on a dry, level surface.
Plug the cord into any standard 220V AC outlet.
Turn the fan on by pressing the ON/OFF button on the remote control or by pressing the
on/off/speed button on the control panel. Turn the fan off by pressing the ON/OFF button
on the remote control or the on/off/speed button on the control panel.
The speed can be adjusted by repeatedly pressing the SPEED button on the remote control
or the on/off/speed button on the control panel. You can choose between breeze speed,
low speed, medium speed, and high speed. The appropriate LED light on the control panel
of the fan will light up.
Oscillation control
To start and stop the fan head from oscillating, press the OSC button on the remote control
or the oscillation button on the control panel.
Timer control
To start and stop the timer, press the TIMER button on the remote control or the timer
button on the control panel to go through the timer settings: 0.5h ,1h, 2h, 4h up to 7.5h. The
appropriate LED light on the front of the fan will light up.
Natural breeze and sleep breeze setting
Setting 1: Press the MODE button once on the remote control. The fan speed will automati-
cally slow down (natural breeze mode). The appropriate LED light on the control panel will
light up.
Setting 2: Press the MODE button again on the remote control. This function causes the fan
speed to slow down (sleep breeze mode). The appropriate LED light on the control panel
will light up.
Setting 3: Press the MODE button a third time to switch off the natural breeze and sleep
breeze function.
Tilt adjustment (see Fig. 7)
The air ow direction can be adjusted simply by moving the fan head up or down as shown
in the diagram. Adjust the angle of the fan only after you have made sure it has stopped
rotating.
Height adjustment (see Fig. 8)
To raise the fan’s height, push the height adjustment button and the upper part of the fan
will go up. To lower the fan, press the motor housing down, using your hand, until the fan
spring is activated. You will hear a click when it is in place.

6
EN
Please follow these instructions to look after your fan correctly and safely.
• Always unplug the fan before cleaning or assembly.
• Do not allow water to drip onto or into the fan motor housing.
• Clean the fan using a soft cloth, moistened with a mild soap solution.
• Do not clean with petrol or thinners.
Fan storage
Your fan can be stored either partially disassembled or assembled. It is important to keep it
in a safe, dry location.
If disassembled before storage, we recommend that you use the original (or an appropria-
tely sized) box.
7
8
6
Correct Disposal of this product
This marking indicates that this product should not be disposed with other household
wastes throughout the EU. To prevent possible harm to the environment or human
health from uncontrolled waste disposal, recycle it responsibly to promote the sustai-
nable reuse of material resources. To return your used device, please use the return
and collection systems or contact the retailer where the product was purchased. They
can take this product for environmental safe recycling.
Cleaning and maintenance

7
EN
Download the app
Download and install the app ‘TUYA’ on your mobile phone for advanced fan operation.
WiFi conguration
1. Make sure you are connected to the WiFi network.
2. Open the TUYA app and click ‘Log in’ or Register’ to create an account and password.
3. Click ‘+’ in the top right corner of the screen or ‘Add Device’ in the middle of the screen
to add a device. Choose ‘Small Home Appliance’ on the left side of the menu, then click
the Fan logo.
4. Select your WiFi network and enter your WiFi password to enter the ‘Connecting’ page.
5. Make sure the fan is connected to the power supply. Press the On/off button to turn
on the fan, then click the oscillation button for at least 5 seconds to search the WiFi
network. The WiFi indicator is displayed every second. (Make sure your router, mobile
phone and the device are as close as possible.)
6. Click ‘Conrm the indicator is blinking rapidly’ to connect to the WiFi network.
7. After connecting the fan, the app will automatically enter the control page
NOTE: If no action is taken within 2 minutes, the WiFi conguration will be shut down.
Choose ‘Add Device’ again to create a new WiFi conguration.
Operating via WiFi

8
BELANGRIJKE WAARSCHUWINGEN
Houd u bij het gebruik van elektrische apparatuur altijd aan de standaard
veiligheidsvoorschriften, waaronder de volgende:
•
Gebruik de ventilator alleen zoals beschreven in de gebruiksaanwijzing.
•
Dompel de ventilator, het snoer en de stekker niet onder in water of andere
vloeistoffen en laat ze niet nat worden, om het risico van een elektrische
schok te vermijden.
•
Houd altijd toezicht als een apparaat wordt gebruikt door kinderen of in de
nabijheid van kinderen of huisdieren.
•
Haal de stekker uit het stopcontact wanneer u het apparaat niet gebruikt,
verplaatst of wanneer u het schoonmaakt.
•
Raak bewegende delen niet aan.
•
Gebruik het apparaat NIET als de roosters niet correct zijn geplaatst.
•
Gebruik het apparaat niet als het snoer of de stekker is beschadigd of als het
apparaat niet goed werkt of op andere wijze is beschadigd.
•
Het gebruik van opzetstukken die niet worden aanbevolen of verkocht door
de fabrikant kan risico’s met zich meebrengen.
•
Gebruik het apparaat niet buitenshuis.
•
Trek niet aan het snoer om de stekker uit het stopcontact te halen.
•
Zet het apparaat altijd op een vlak en droog oppervlak.
•
Als het snoer beschadigd is, moet het worden vervangen door de fabrikant of
een erkend onderhoudsbedrijf om gevaarlijke situaties te voorkomen.
•
Dit apparaat mag niet worden gebruikt door personen (inclusief kinderen)
NL
Bewaar deze handleiding goed

9
met lichamelijke, zintuiglijke of geestelijke beperkingen of met gebrek aan
ervaring en kennis, tenzij zij worden begeleid of geïnstrueerd over het gebruik
van het apparaat door iemand die verantwoordelijk is voor hun veiligheid.
•
Laat kinderen niet spelen met dit apparaat.
NL
1
5
9
7
10
13
8
3
2
4
6
11
14
12
1. achterste rooster
2. voorste rooster
3. motorbehuizing
4. schoepen
5. borgmoer rooster
6. schoependop
7. standaard
8. voet
9. hoogteverstelknop
10. timer
11. knop voor draaistand
12. aan/uit/snelheid
13. snelheid
14. Mode
Onderdelen

10
NL
GEBRUIKSAANWIJZING
SPANNING: 22 V FREQUENTIE: 50 Hz VERMOGEN: 45 W
AFSTANDSBEDIENING
De afstandsbediening werkt op 2 AAA-batterijen (niet meegeleverd) Druk met uw duim op
de inkepingen in de achterkant van de afstandsbediening en schuif het klepje eraf. Plaats
de batterijen zoals aangegeven in het vak. Sluit het klepje.
MONTAGE
14
2
borgmoer voor roosters
3
schoependop
5
borgklem-
metjes
1. Draag de borgmoer tegen de klok in los van de onderkant van de standaard. Plaats de
standaard op de voet en zet die stevig vast met de moer. Draai met de klok mee (afb. 1).
2. Voor het bevestigen van het rooster en de schoepen draait u de schoependop met de
klok mee los. Draai de borgmoer van het rooster tegen de klok in los van de motorbehui-
zing.
3. Plaats het achterste gedeelte van het rooster goed op de motorbehuizing en zet het
stevig vast met de borgmoer. Draai met de klok mee. Zorg dat het rooster goed over de
lipjes op de motorbehuizing is geschoven (afb. 2).
4. Plaats de schoepen op de as en zet ze vast met de dop door die tegen de klok in vast te
draaien (afb. 3).
5. Zet het voorste gedeelte van het rooster op het achterste gedeelte. Zorg dat de ope-
ningen zijn uitgelijnd, sluit de klemmetjes en draai de borgschroef vast (afb. 4/5).

11
NL
Gebruik
Zet de ventilator op een vlak en droog oppervlak.
Doe de stekker in het stopcontact.
Zet de ventilator aan met de ON/OFF-knop op de afstandsbediening of de aan-uitknop
op de ventilator. Zet de ventilator uit met de ON/OFF-knop op de afstandsbediening of de
aan-uitknop op de ventilator.
Om de snelheid van de ventilator te regelen, drukt u meerdere malen op de knop SPEED op
de afstandsbediening of op de knop voor aan/uit/snelheid op de ventilator. U kunt kiezen
uit natuurlijke ventilatie en een lage, gemiddelde of hoge snelheid. De gekozen snelheid
wordt aangeduid door een lampje op de ventilator.
Draaien
Druk op de knop OSC op de afstandsbediening of op de knop de ventilator om de
heen-en-weerbeweging van de ventilator te starten en stoppen.
Timer
Druk op de knop TIMER op de afstandsbediening of op de knop op de ventilator om een
van de volgende timerinstellingen te kiezen: 0,5u,1u, 2u, 4u tot 7,5u. De ingestelde tijd wordt
aangeduid door een lampje op de ventilator.
Natuurlijke ventilatie en slaapventilatie
Instelling 1: Druk eenmaal op de knop MODE op de afstandsbediening. De ventilator gaat
langzamer draaien (natuurlijke ventilatie). Het bijbehorende lampje op de ventilator gaat
branden.
Instelling 2: Druk nogmaals op de knop MODE op de afstandsbediening. De ventilator gaat
langzamer draaien (slaapventilatie). Het bijbehorende lampje op de ventilator gaat branden.
Instelling 3: Druk voor de derde keer op de knop MODE om de natuurlijke ventilatie en slaap-
ventilatie uit te zetten.
Kantelen (afb. 7)
Kantel de bovenkant van de ventilator omhoog of omlaag om de luchtstroom te richten. Zet
altijd eerst de ventilator uit en wacht tot de schoepen stilstaan voordat u dit doet.
Hoogte instellen (afb. 8)
Druk op de hoogteverstelknop op de standaard om de ventilator omhoog te bewegen. Als
u de ventilator omlaag wilt bewegen, duwt u met uw hand op de motorbehuizing totdat de
veer vastklikt.

12
NL
Volg de onderstaande instructies voor het goed en veilig onderhouden van de ventilator.
• Haal altijd de stekker uit het stopcontact voordat u begint met schoonmaken of demon-
teren.
• Houd de motorbehuizing te allen tijde droog.
• Maak de ventilator schoon met een vochtige zachte doek en een mild schoonmaakmid-
del.
• Gebruik geen benzine of thinner.
Opbergen
U kunt de ventilator eventueel demonteren voordat u hem opbergt. Bewaar de ventilator op
een droge, veilige plaats.
Indien u de ventilator demonteert, adviseren we om de onderdelen te bewaren in de oor-
spronkelijke verpakking of een geschikte doos.
7
8
6
Het symbool van een doorgekruiste afvalbak geeft aan dat de Europese
Richtlijn 2012/19/EU van toepassing is op dit apparaat. Die schrijft voor dat
dit apparaat aan het einde van zijn levensduur niet mag worden weggegooid
bij het huishoudelijke afval, maar moet worden ingeleverd bij een inzamello-
catie, recyclingpunt of afvalverwijderingsbedrijf.
REINIGING EN ONDERHOUD

13
NL
Download de app
Download en installeer de app TUYA op uw telefoon voor geavanceerde bediening van de
ventilator.
Wi-conguratie
1. Maak verbinding met het wi-netwerk.
2. Open de TUYA-app en klik op ‘Inloggen met een bestaand account’ of ‘Nieuw account’
om een accountnaam en wachtwoord aan te maken.
3. Klik op ‘+’ rechtsboven of ‘Toestel toevoegen’ in het midden van het scherm om een
apparaat toe te voegen. Kies ‘Klein huishoudelijk’ in het menu links en klik op de venti-
lator.
4. Selecteer uw wi-netwerk en voer het wi-wachtwoord in om naar de pagina ‘Verbin-
den’ te gaan.
5. Zorg dat de stekker van het apparaat in het stopcontact zit. Druk op de aan-uitknop
om de ventilator aan te zetten, en houd de knop voor draaien ten minste 5seconden
ingedrukt om naar het wi-netwerk te zoeken. De wi-indicator wordt om de seconde
weergegeven. (Zorg dat uw router, telefoon en de ventilator zich zo dicht mogelijk bij
elkaar bevinden.)
6. Klik op ‘Bevestigen dat de indicator snel knippert’ om verbinding te maken met het
wi-netwerk.
7. Nadat er verbinding is gemaakt met de ventilator, wordt in de app automatisch de
bedieningspagina geopend.
LET OP: Als u gedurende 2 minuten niets doet, wordt de wi-conguratie afgesloten. Kies
dan nogmaals ‘Toestel toevoegen’ om een nieuwe wi-conguratie te maken.
Bediening via wi

14
PRÉCAUTIONS IMPORTANTES
Toujours observer les précautions de sécurité de base lors de l’utilisation
d’appareils électriques, notamment les suivantes:
•
N’utiliser le ventilateur qu’aux ns décrites dans le manuel d’instructions.
•
Pour éviter les chocs électriques, ne jamais immerger le ventilateur, la prise
ou le cordon dans l’eau ou tout autre liquide et ne pas les asperger de liquide.
•
Une surveillance étroite est nécessaire lorsqu’un appareil est utilisé par ou à
proximité d’enfants ou d’animaux domestiques.
•
Débrancher l’appareil de toute prise électrique lorsqu’il n’est pas utilisé, lors
du déplacement du ventilateur d’un endroit à un autre, avant d’ajouter ou de
retirer des pièces et avant de le nettoyer.
•
Éviter tout contact avec les pièces mobiles.
•
NE PAS faire fonctionner l’appareil sans grilles de ventilation correctement
en place.
•
Ne pas utiliser un appareil dont le cordon d’alimentation est endommagé
ou ne fonctionnant pas correctement, ou ayant été endommagé de quelque
autre manière.
•
L’utilisation d’accessoires non recommandés ou vendus par le fabricant de
l’appareil peut être dangereuse.
•
Ne pas utiliser l’appareil à l’extérieur.
•
Débrancher du secteur en retirant la che de la prise murale. NE PAS tirer sur
le cordon électrique.
•
Toujours utiliser sur une surface sèche et plane.
FR BIEN LIRE ET CONSERVER LES PRÉSENTES
INSTRUCTIONS

15
•
Si le cordon d’alimentation est endommagé, il doit être remplacé par le
fabricant, son responsable de la maintenance ou une personne possédant
des qualications identiques an d’éviter tout danger.
•
Cet appareil ne doit pas être utilisé par les personnes (enfants compris)
aux capacités physiques, sensorielles ou mentales réduites, ou n’ayant pas
susamment d’expérience ou de connaissances, à moins qu’elles soient
surveillées ou aient été instruites du mode d’emploi de l’appareil par une
personne responsable de leur sécurité.
•
Ne pas laisser les enfants jouer avec l’appareil.
FR
1. grille de sécurité arrière
2. grille de sécurité avant
3. carter moteur
4. pales
5. écrou de serrage de la
grille
6. toupie porte-pales
7. support
8. base
9. touche de réglage de la
hauteur
10. minuterie
11. bouton d’oscillation
12. touche marche/arrêt/
vitesse
13. touche vitesse
14. Mode
Description des pièces
1
5
9
7
10
13
8
3
2
4
6
11
14
12

16
FR
INSTRUCTIONS D’UTILISATION
TENSION: 22 V FRÉQUENCE: 50 Hz PUISSANCE: 45 W
TÉLÉCOMMANDE ASSEMBLAGE
Pour fonctionner, la télécommande nécessite 2 piles AAA (non fournies). Pour installer les
piles, il sut d’appuyer avec le pouce sur les crénelures au dos de la télécommande et de
retirer le couvercle. Insérer les piles comme indiqué sur le schéma se trouvant à l’intérieur.
Remettre le couvercle en place.
ASSEMBLAGE
14
2
crou de serrage de la grille
3
toupie porte-pales
5
colliers de
xation
1. Retirer l’écrou de serrage du support du ventilateur en le tournant dans le sens inverse
des aiguilles d’une montre. Placer le support du ventilateur sur la base et xez-le en
replaçant l’écrou de serrage et en le bloquant fermement en le tournant dans le sens des
aiguilles d’une montre (voir Ill. 1).
2. Pour assembler la grille de sécurité et les pales, il faut desserrer la toupie porte-pales en
la tournant dans le sens des aiguilles d’une montre. Dévisser ensuite l’écrou de blocage
de la grille sur le carter du moteur en le tournant dans le sens inverse des aiguilles d’une
montre.
3. Placer la grille de sécurité arrière fermement sur le carter du moteur et la xer en vissant
bien à bloc le contre-écrou de la grille dans le sens des aiguilles d’une montre en s’as-
surant que la grille de sécurité arrière s’adapte aux pattes de verrouillage du carter du
moteur (voir Ill. 2).
4. Enler les pales sur l’arbre du moteur et les xer à l’aide de la toupie porte-pales en la
tournant dans le sens inverse des aiguilles d’une montre (voir Ill. 3).
5. Placer la partie avant de la grille de sécurité contre la partie arrière déjà en place. Aligner
les orices, fermer les colliers de xation puis insérer et serrer la vis de sécurité (voir Ill.
4/5).

17
FR
Fonctionnement
Placer la base du ventilateur sur une surface sèche et plane.
Brancher le cordon d’alimentation sur une prise de courant 220V CA standard.
Allumer le ventilateur en appuyant sur le bouton ON/OFF de la télécommande ou en
appuyant sur le bouton de marche/arrêt/vitesse du panneau de commande. Éteindre le
ventilateur en appuyant sur le bouton ON/OFF de la télécommande ou sur le bouton de
marche/arrêt/vitesse du panneau de commande.
Pour régler la vitesse, appuyer plusieurs fois sur la touche SPEED de la télécommande ou
sur le bouton de marche/arrêt/vitesse du panneau de commande. Vous pouvez choisir
entre vitesse de la brise, vitesse lente, vitesse moyenne et vitesse rapide. Le témoin à LED
correspondant s’allume sur le panneau de commande du ventilateur.
Commande de l’oscillation
Pour démarrer et arrêter l’oscillation de la tête du ventilateur, appuyer sur la touche OSC de
la télécommande ou sur le bouton d’oscillation du panneau de commande.
Commande de la minuterie
Pour démarrer et arrêter la minuterie, appuyer sur la touche TIMER de la télécommande ou
sur le bouton de la minuterie du panneau de commande pour parcourir les étapes de régla-
ge de la minuterie: 0,5h, 1h, 2h, 4h jusqu’à 7,5h. Le témoin à LED correspondant s’allume
sur l’avant du ventilateur.
Réglages de brise naturelle et brise de sommeil
Réglage 1: Appuyer une fois sur la touche MODE de la télécommande. La vitesse du venti-
lateur ralentit automatiquement (brise naturelle). Le témoin à LED correspondant s’allume
sur le panneau de commande du ventilateur.
Réglage 2: Appuyer à nouveau sur la touche MODE de la télécommande. Cette fonction
entraîne un ralentissement de la vitesse du ventilateur (brise de sommeil). Le témoin à LED
correspondant s’allume sur le panneau de commande du ventilateur.
Réglage 3: Appuyer une troisième fois sur le bouton MODE pour désactiver les fonctions
de brise naturelle et brise de sommeil.
Réglage de l’inclinaison (voir Ill. 7)
L’orientation du ux d’air peut être ajustée simplement en déplaçant la tête du ventilateur
vers le haut ou vers le bas comme indiqué sur le schéma. Ne régler l’angle du ventilateur
qu’après s’être assuré que les pales se sont immobilisées.
Réglage de la hauteur (voir Ill. 8)
Pour augmenter la hauteur du ventilateur, appuyer sur le bouton de réglage de la hauteur
et la partie supérieure du ventilateur s’élève. Pour abaisser le ventilateur, appuyez avec la
main sur le carter du moteur jusqu’à ce que le ressort du ventilateur soit activé. On entend
un clic lorsqu’il est en place.

18
FR
Bien suivre les instructions qui suivent pour entretenir votre ventilateur correctement et en
toute sécurité.
• Toujours débrancher le ventilateur avant de le nettoyer ou de le (dé)monter.
• Ne pas laisser d’eau s’égoutter sur ou dans le carter moteur du ventilateur.
• Nettoyer le ventilateur à l’aide d’un chiffon doux, humidié avec une solution savonneuse
douce.
• Ne pas utiliser d’essence ni de solvants pour le nettoyage.
Rangement du ventilateur
Le ventilateur peut être rangé soit partiellement démonté, soit assemblé. Il est important de
le garder dans un endroit sûr et sec.
En cas de démontage avant le rangement, il est recommandé d’utiliser l’emballage d’origine
(ou un carton de taille appropriée).
7
8
6
Le symbole ci-contre représentant une poubelle barrée sur roues indique que
cet appareil est régi par la directive 2012/19/UE. Cette directive stipule qu’en
n de vie technique, cet appareil ne doit pas être éliminé avec les ordures
ménagères ordinaires, mais doit être remis à des sites de collecte spéciaux,
des dépôts de recyclage ou des organismes de gestion des déchets.
NETTOYAGE ET ENTRETIEN

19
FR
Télécharger l’application
Téléchargez et installez l’application TUYA sur votre téléphone portable pour utiliser votre
ventilateur en mode avancé.
Conguration Wi-Fi
1. Assurez-vous d’être connecté(e) au réseau Wi-Fi.
2. Ouvrez l’application TUYA et cliquez sur «Connectez-vous» ou «Enregistrer» pour
créer un compte et un mot de passe.
3. Cliquez sur le + en haut à droite de l’écran ou «Ajouter» au centre de l’écran pour ajou-
ter un appareil. Choisissez «Petits appareils ménagers» sur la GAUCHE du menu, puis
cliquez sur l’icône Ventilateur.
4. Sélectionnez votre réseau Wi-Fi et entrez votre mot de passe Wi-Fi pour entrer sur la
page «Connexion».
5. Assurez-vous que le ventilateur est connecté à l’alimentation électrique. Appuyez sur
le bouton marche/arrêt pour allumer le ventilateur, puis cliquez sur le bouton d’oscil-
lation pendant au moins 5secondes pour chercher le réseau Wi-Fi. L’indicateur de
Wi-Fi s’ache chaque seconde. (Veillez à ce que votre routeur, téléphone portable et
appareil soient le plus proche possible.)
6. Cliquez sur «L’indicateur clignote rapidement» pour vous connecter au réseau Wi-Fi.
7. Après avoir connecté le ventilateur, l’application entrera automatiquement sur la page
de contrôle.
REMARQUE: Si vous ne réalisez aucun action pendant 2 minutes, le conguration Wi-Fi
sera annulée. Appuyez de nouveau sur «Ajouter» pour créer une nouvelle conguration
Wi-Fi.
Fonctionnement via Wi-Fi

20
WICHTIGE SICHERHEITSHINWEISE
Bei der Verwendung von Elektrogeräten müssen immer grundlegende
Sicherheitsmaßnahmen beachtet werden, wie nachfolgend aufgeführt:
•
Den Ventilator ausschließlich zu dem in der Bedienungsanleitung
beschriebenen Zweck verwenden.
•
Zur Vermeidung von Stromschlägen weder Ventilator noch Stecker oder
Kabel unter Wasser oder in eine andere Flüssigkeit tauchen und auch nicht
mit Flüssigkeiten besprühen.
•
Strenge Aufsicht von Erwachsenen ist erforderlich, wenn ein Gerät von
Kindern oder in der Nähe von Kindern oder Haustieren verwendet wird.
•
Das Gerät von der Steckdose trennen, wenn es nicht in Gebrauch ist, zu
einer anderen Stelle transportiert wird, bevor Teile hinzugefügt oder entfernt
werden und bevor es gereinigt wird.
•
Den Kontakt mit beweglichen Teilen jederzeit vermeiden.
•
Den Ventilator NICHT in Betrieb nehmen, wenn die Gitter des Ventilators
nicht korrekt angebracht sind.
•
Keine defekten oder in irgendeiner Weise beschädigten Geräte oder Geräte
mit beschädigtem Kabelstecker verwenden.
•
Die Verwendung von Anbaugeräten, die nicht vom Gerätehersteller
empfohlen oder verkauft werden, können gefährliche Situationen auslösen.
•
Das Gerät nicht im Freien verwenden.
•
Das Gerät durch Herausziehen des Steckers aus der Wandsteckdose von der
Stromversorgung trennen. NICHT am Kabel ziehen.
DE DIESE WICHTIGEN SICHERHEITSANWEISUNGEN
UNBEDINGT SORGFÄLTIG LESEN UND
AUFBEWAHREN.
Table of contents
Languages:
Popular Fan manuals by other brands
Create
Create WINDLIGHT HELIX DC user manual
Celsius
Celsius CELMF110 operating instructions
Parrot Uncle
Parrot Uncle F6215 Installation & operating instructions
Greenheck
Greenheck CUBE-098 Installation, operating and maintenance manual

Beper
Beper P206VEN600 User instructions
Boneco
Boneco F220 Quick manual

