BMS MachoMan User manual

1
MachoMan Moped Assembly Instructions
I f y ou h a v e n o m e c h a n i c a l e x p e r i e n c e , p l e a s e
h a v e t h e u n i t p r o f e s s i o n a l l y a s s e m b l e d .
Tools needed: #2 Phillips Screwdriver, 14mm Socket, 12mm Socket,
10mm Socket, 14mm Wrench, 17mm Socket, Hammer, Allen Wrench,
Wire cutters Heavy duty Scissors or Utility Knife.
Cut straps off with heavy duty scissors or
utility knife.
Remove the box
Cut the wires attaching the unit to the top
of the frame using wire cutters
Remove the bolts on the frame using a
10 mm socket. NOTE** some frames
have screws with Phillips heads.

2
Remove the bracket holding the left
handlebar to the frame using 10 mm
socket
Cut the wire (on each side) holding the
unit to the frame at the rear of the bike
Remove the trunk, rear rack, front wheel
and front fender from their location.
Trunk contains foam and rubber mat,
black plastic mounting plate, bag with
mounting screws, and mounting brackets
Rear rack

3
Front Fender and Front wheel
Remove the screws holding the front
panel using a Phillips head screwdriver
Remove the panel
Remove the bolts that will be used to
attach the front windshield using a 10
mm socket
Attach the front windshield at the center
bolt first

4
Secure the remaining bolts
Reconnect the front panel
Secure the front panel with the screws
removed using Phillips head screwdriver.
4 screws total
Open the battery box located under the
seat and remove the contents.
The box should contain 1 Sulfuric Acid
container, 1 Six Hole Funnel, 1 battery
hole plug strip.
Remove the tape covering the battery
holes.

5
Remove Six Hole Funnel from plastic
wrap and place into holes on top of the
battery
Attach Sulfuric Acid container to the
tubes in the Six Hole Funnel
Let Sulfuric Acid drain completely into
battery
Remove Six Hole Funnel and cap
battery holes with the battery hole plug
strip.

6
Insert battery nut and bolt into battery
terminal
Insert the battery as shown into the
battery compartment
Connect the BLACK WIRE to the
NEGATIVE (BLACK) TERMINAL on
the battery
Connect the RED WIRE and RED
FUSE WIRE to the POSITIVE (RED)
TERMINAL on the battery

7
Remove the bolts from the rear of the
unit using 12 mm socket. 2 on the top.
2 on the rear. 4 total.
The contents of the trunk are the black
adapter plate, 2 brackets, the foam
mat, the rubber mat, 4 long (thin)
screws, 4 nuts, 4 washers, 4 short
(wide) screws, 4 nuts
Attach the rear rack to the rear of the
unit. Secure with the 4 bolts
previously removed. Place the black
adapter plate on top of the rack and
insert the 4 long screws into the holes
as seen in the picture.
Place the brackets over the screws on
the underside of the rack. Secure
using the washers and nuts.
8
Line up the holes in the trunk with the
holes at the end of the plate closest to
the backrest on the rack. Insert the 4
short screws and tighten using 12mm
socket.
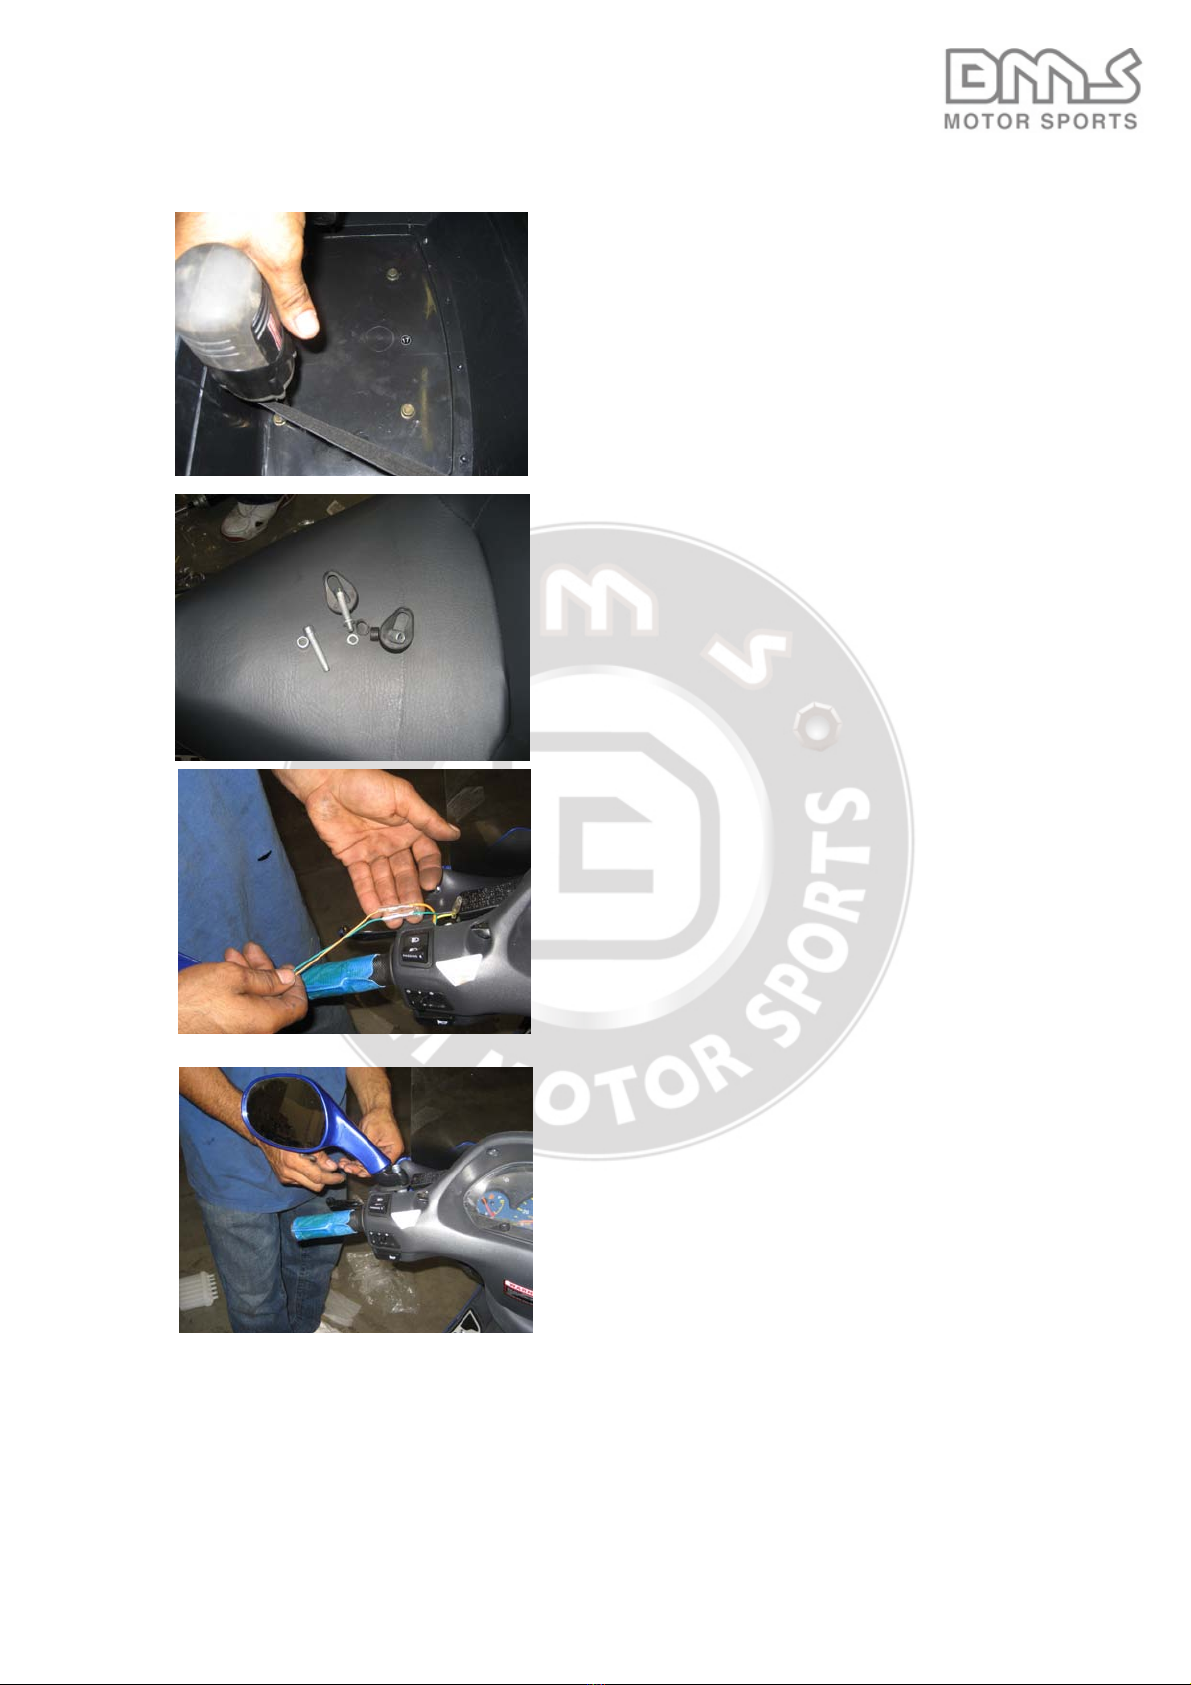
The wing mirror mounting hardware
includes 2 weatherproof rubber seals,
2 locking washers, 2 spacers and 2
rubber screw caps
Slip the wires through one of the
weatherproof seals over the end of the
wing mirror
Connect the green and yellow wires
as shown. There will be one unused
wire coming from the moped.
Insert the screw into the hole in the
wing mirror with the lock washer.
Insert the spacer between the bolt
hole in the handlebar and wing mirror.
Screw down the wing mirror using the
supplied Allen Wrench

9
Here is what the completed item looks
like
Repeat this process for the other wing
mirror
Remove the bolt holding the front forks
to the frame. DO NOT discard this
bolt, spacer, and nut
Cut the wrapping over the wheel
bearing hub assembly. It will be
hanging after it has been freed.

10
Remove the spacer from between the
front brakes
Remove the four screws located on
the front forks using a 10 mm socket.
There are 2 on each fork. 1 on the
outside 1 on the inside
Attach the front fender with the short
side toward the front. Reattach the
screws
Insert the spacer into the side of the
wheel with the brake rotor. Slide the
entire wheel into the front forks and
attach the wheel bearing hub
assembly to the side without the
brake rotor

11
Insert the bolt into the fork and wheel
assembly. Use a hammer if it proves
difficult to insert
Tighten the bolt and nut using a 17
mm socket and crescent wrench
Attach the hanging brake fluid tube to
the rear of the fender using the plug
Add fuel and finished.
Other BMS Motorcycle manuals


