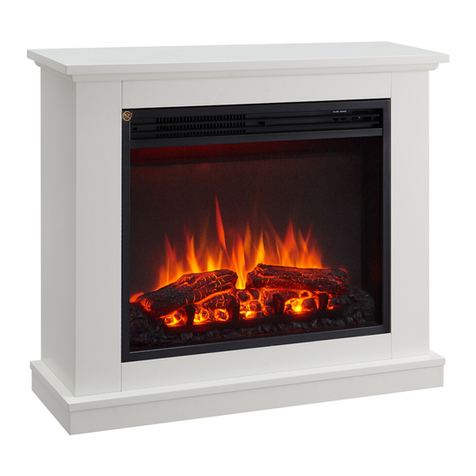
Boge WS-Q-03 User manual

!!
!
!
AC 110-120V 60Hz 1500W
!
!
!
!
!
!
!
!
!
!
!
ELECTRIC INSERT FIREPLACE HEATER
OWNERS MANUAL
18” Insert Electric Fireplace
Read and understand this entire owner’s manual, including all safety
information, before plugging in or using this product. Failure to do so could
result in fire, electric shock, or serious personal injury.
!WARNING
Keep this owner’s manual for future reference. If you sell or give this
product away, make sure this manual accompanies this product.
!CAUTION

!
!
!
IMPORTANT SAFETY INFORMATION!
●ALWAYS keep electric cords, home furnishings, drapes, clothing, papers, or other
combustibles away from the front of this heater when the unit is turned on.
●DO NOT COVER this heater or block the air vents at all. Doing so could cause a fire.
●AVOID fire or electric shock! NEVER insert or allow any foreign objects to enter the
ventilation or exhaust openings of this heater.
●Prevent Fire! Keep all flammable liquids, like gasoline or paint, away from this heater. This
heater produces arcing sparks that could ignite flammable liquids.
●DO NOT cover this heater in any manner. Doing so could block the air flow and cause the
unit to overheat, or could ignite the material covering the heater.
●NEVER run the power cord under carpet, rugs, runners, or any other covering. Doing so
could cause the cord or materials covering the cord to overheat.
●AVOID FIRE! Regularly inspect all air vents to make sure they are free from dust, lint, or
other blockage. Unplug the unit and clean with a vacuum ONLY. DO NOT rinse or get wet.
●The wall mount system is designed for use ONLY with this product. NEVER use a wall
mount system from another manufacturer.
●Use extreme caution if using this heater near children, or where children may be present.
●NEVER leave this heater unattended. ALWAYS unplug this heater when not in use.
●This heater is hot when in use. AVOID INJURY! DO NOT TOUCH hot surfaces, or
attempt to move this heater while it is hot.
●ALWAYS turn this heater off before unplugging it from the outlet.
●AVOID INJURY! Keep the cord from crossing traffic areas to avoid tripping.
●NEVER modify this fireplace. Doing so could result in personal injury or property damage.
Modification of this fireplace completely voids all warranties.
●Discontinue use if this fireplace malfunctions or is dropped or damaged in any manner.
●ALWAYS store this heater in a dry location. NEVER use the fireplace if it has become wet.
!2

!
●Risk of electric shock! DO NOT OPEN! No user-serviceable parts inside!
●ALWAYS disconnect this unit from the power supply before performing any assembly or
cleaning, before replacing the light bulb, or before relocating the electric fireplace.
●NEVER operate this heater if the power cord or plug has become damaged, or if the
grounding pin is damaged or missing.
●Place the heater near a wall outlet so an extension cord is not needed. If an extension cord
is needed, the gauge of the cord must be at least 14AWG, and the rating must be at least
1875 Watts. NEVER use a smaller gauge cord with a lower rating. Doing so may result in
fire or electric shock.
●Avoid hazards due to resetting of the thermal cut-off switch. NEVER control this unit with a
timer, or allow it to be on a circuit regularly switched off by the utility.
●ONLY use this heater on a 110~120 Volt 15 Amp grounded circuit. NEVER overload the
circuit. If this heater trips the circuit breaker, unplug all other appliances on the same circuit
before the next use. Avoid plugging other appliances into the same circuit as this heater.
●NEVER plug this heater into an outlet that is old, cracked, or has any loose wires or
connections. Plugging this heater into a faulty outlet could result in electric arcing within
the outlet that could cause the outlet to overheat or catch fire.
●ALWAYS check your heater cord and plug connections with each use!
i) MAKE SURE the plug fits tight in the outlet! Faulty wall outlet connections or loose
plugs can cause the outlet to overheat.
ii) Heaters draw more current than small appliances. Overheating may occur even if it
has not occurred with the use of other appliances.
iii) During use check frequently to see if the plug outlet or face plate is HOT!
iv) If the outlet or face plate is HOT, discontinue use immediately and have a qualified
electrician inspect and/or replace the faulty outlets.
•The cord supplied with the heater has a
plug with two blades (live and neutral) and
one round pin (ground). If a 3-slot
receptacle is not available, an adapter
MUST be used. The adapter MUST be
properly grounded to the outlet box (see
figure at right).
!
!3

!
Remove all parts and hardware from the carton and place them on a clean, soft, dry surface. Check
the parts list to make sure nothing is missing. Dispose of packaging materials properly. Please
recycle whenever possible.
!
!
!
!
!
!
!
!
!
!
!
!
!
!
!
!
!
!
!
!
!
!
!
!
!
!
!
!
!
!
!
!
!
!
!
!
!
!
!
!
!
!
!
!
!
!
Preparation
This product includes a GLASS panel! Always use extreme caution when using.
Failure to do so could result in personal injury or property damage.
!
Parts and Hardware
!
!
!
!
!
!
A – Fireplace ( 1 )
!
Remote Control (1)
Instruction Manual (1)
Drywall anchors (4)
Trim(1)
Screw(4)
!
!
!
!
!
!
!
!
!
!
!4

!
!
!
!
!
!
!
!
!
!
!
!
!
!
!
!
!
!
!
!
!
!
!
!
!
!
!
!
!
!
!
!
!
!
!
!
!
!
!
!
!
!
!
!
!
!
!
!
!
!
!
!
!
!
!
!
!
!
!
!
!
!
!
!
!
!
!
!
!
!
!
!
!
!
!
!
!
!
!
!
!
!
!
!
!
!
!
!
!
!
!
!
!
!
STEP A. Selection a dry wall to open a hole for fireplace box. Size of hole as below chart.
!
!
!
!
!
!
!
!
!
!
!
!
!
!
Installation
Model no
Screw punching pitch(inch)
Hole size(inch)
A
B
C
D
E
F
WS-Q-03
18.4
13.8
1.3
17.7
6.1
16.3
!5

!
!
!
STEP B. Fix the wall anchors in each side of the fireplace box according to the dimensions
showed on the above chart.
!
STEP C.Take the trim out of the firebox,then put the firebox in the wall.
!
STEP D.Fix the firebox with ST3.5*35mm screws
!
STEP E.Trim installation
(1).4 brackets are on either sides of the fireplace face.
(2).Slide the trim kit onto the brackets.
(3).Gently push the trim kit down until fully seated.
!
!
!
!
!
!
!
!
!
!
!
!
!
!
!
!
!
!
!
!
!
!
!
!
!
!
!
!
!
!
!
!
!
!
!
!
!
!
!
!
!
!
!
!
!
!
!
!
!
!
!
!
!
!
!
!
!
!
!
!
!
!
!
!
!
!
!
!
!
!
!
!
!
!
!
!
!
!
Operation
Read and understand this entire owner’s manual, including all safety information,
before plugging in or using this product. Failure to do so could result in electric shock,
fire, serious injury, or death.
!
!6

Power
Plug the power cord into a 110~120 Volt 15 Amp grounded outlet (see IMPORTANT SAFETY
INFORMATION on Pages 2 and 3). Make sure the outlet is in good condition and that the plug is not
loose. NEVER exceed the maximum amperage for the circuit. DO NOT plug other appliances into the
same circuit.
Methods of Operation
This electric fireplace can be operated by the CONTROL PANEL, located on the Front of the fireplace
(see figure below), or by the battery-powered REMOTE CONTROL.
The operation and functions of the two methods are the same.
Before operating, please review the IMPORTANT SAFETY INFORMATION on Pages 2 and 3, and
heed all warnings.
!
!
!
!
!
!
!
!
!
!
!
Control Panel / Remote Control Operation
!
Front View
!
!
\
!
!
!
BUTTON
FUNCTION
ACTION & INDICATION
!7

!
!
!
!
!
!
Temperature Limiting Control
This heater is equipped with a Temperature Limiting Control. Should the heater reach an unsafe
temperature, the heater will automatically turn OFF. To reset:
1. Unplug the power cord from the outlet.
ON: Enables control panel functions and
remote control. Turns on flame effect.
OFF: Disables control panel functions and
remote control. Turns off flame effect.
!
1. Press once. Indicator light turns on.
Power turns on. All functions enabled.
2. Press again. Flame effect turns off.
Power and all functions turn off.
TIMER button: Controls timer settings to
turn off fireplace at selected time.
Settings range from 0.5 hours to 7.5
hours.
1. Press once. Indicator light turns on.
Timer is set to 0.5 hours.
2. Press again until desired setting is
reached. Indicator lights show setting.
FLAME “-”: Makes flame effect dimmer.
NOTE: Flame effect stays on until power
button is turned off. Flame effect must be
on for heater to turn on.
1. Press once. Flame effect gets dimmer.
2. Press again until desired setting is
reached. Flame effect continues to get
dimmer each time button is pressed.
FLAME “+”: Makes flame effect brighter.
NOTE: Flame effect stays on until power
button is turned off. Flame effect must be
on for heater to turn on.
1. Press once. Flame effect gets brighter.
2. Press again until desired setting is
reached. Flame effect continues to get
brighter each time button is pressed.
HEATER button: Turns heater on and off.
NOTE: The heater only works when the
flame effect is on. If the flame effect is off,
the heater will not turn on.
NOTE: To prevent overheating, the heater
blows cool air for 10 seconds before the
heater turns on, and after it turns off.
1. Press once. Indicator lights up.
Fan blows cool air for 10 seconds. Low
heater turns on and blows warm air.
2. Press again. Indicator lights up.
High heater turns on and blows hot air.
3. Press again. Heaters turn off.
The fan blows cool air, then turns off.
!
HEATER
!
FLAME -
!
POWER
!
FLAME +
!
TIMER
NOTICE
When the heater is first turned on, a slight odor may be present. This is normal
and should not occur again unless the heater is not used for a long period of time.
NOTICE
To improve operation, aim the remote control at the front of the fireplace. DO NOT
press the buttons too quickly. Give the unit time to respond to each command.
!8

2. Turn the ON/OFF switch on the CONTROL PANEL to OFF. Wait 5 minutes.
3. Inspect the fireplace to make sure no vents are blocked, or clogged with dust or lint. If they are,
use a vacuum to clean the vent areas.
4. With the POWER switch in the OFF position, plug the power cord back into the outlet.
5. If the problem continues, have your outlet and wiring inspected by a professional.
!
Remote Control Battery Information
•This remote control uses two AAA batteries (Not included).
!
!
!
!
!
Cleaning
!
Metal:
•Buff using a soft cloth, slightly dampened with a citrus oil-based product.
•DO NOT use brass polish or household cleaners as these products will damage the metal trim.
Glass:
•Use a good quality glass cleaner sprayed onto the cloth or towel. Dry thoroughly with a paper
towel or lint-free cloth.
•NEVER use abrasive cleansers, liquid sprays, or any cleaner that could scratch the surface.
Vents:
•Use a vacuum or duster to remove dust and dirt from the heater and vent areas.
!
Plastic:
•Wipe gently with a slightly damp cloth and a mild solution of dish soap and warm water.
•NEVER use abrasive cleansers, liquid sprays, or any cleaner that could scratch the
surface.
!
Maintenance
NEVER dispose of batteries in fire. Failure to observe this precaution may result in an
explosion.Dispose of batteries at your local hazardous material processing center.
!
Care and Maintenance
ALWAYS turn the heater OFF and unplug the power cord from the outlet before
cleaning, performing maintenance, or moving this fireplace. Failure to do so could result
in electric shock, fire, or personal injury.
NEVER immerse in water or spray with water. Doing so could result in electric shock,
fire, or personal injury.
!
!
Risk of electric shock! DO NOT OPEN any panels. No user-serviceable parts
inside!
!
!9

!
Electrical and Moving Parts:
•The fan motors are lubricated at the factory and will not require lubrication.
•Electrical components are integrated in the fireplace and are not serviceable by the consumer.
•Storage:
•Store heater in a clean dry place when not in use.
ALWAYS turn the heater OFF and unplug the power cord from the outlet before
cleaning, performing maintenance, or moving this fireplace. Failure to do so could result
in electric shock, fire, or personal injury.
!
!10
Table of contents
Popular Indoor Fireplace manuals by other brands
Amantii
Amantii SYM-34-B Installation and operation instructions
Twin-Star International
Twin-Star International TC54-6165 manual

Nordpeis
Nordpeis N-20 U user manual

ersel
ersel Alcor user manual

Mendota
Mendota GREENBRIAR M-50 Installation & operating instruction manual

Element4
Element4 Sky User and installation manual