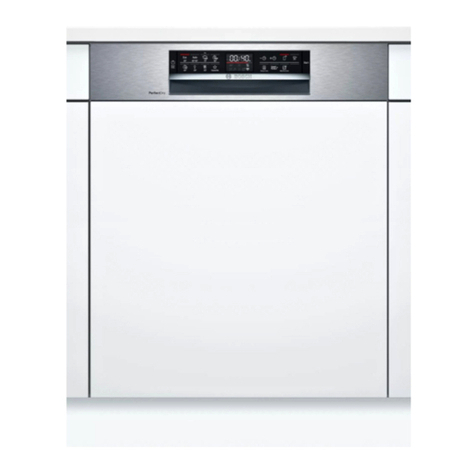
Bosch SMS6ECW04E User manual

de
Further information and explanations can be
found online:
Table of contents
1 Security ................................... 4
1.1 General information .................... 4
8 Equipment ................................ 24
8.1 Upper dish rack ............24
8.2 Cake stand ................................... 25
8.3 Lower dish rack................. 25
8.4 Folding spines....................... 25
8.5 Cutlery drawer.................... 26
8.6 Extra Clean Zone..................... 26
1.2 Intended
use ........................................... 4
1.3 Restriction of the user
group ........................................... 4
1.4 Safe installation .................... 4
1.5 Safe use .................... 6
1.6 Damaged device.................... 8
1.7 Dangers for children................... 8
9 Before first use ............27
9.1 Initial
commissioning.................................... 27
2 Avoid material damage .......... 10
2.1 Safe installation .................... 10
2.2 Safe use .................... 10
10 Softening system................... 28
10.1 Overview of the water hardness
settings ........................... 28
3 Environmental protection and saving ....... 11
3.1 Dispose of packaging............11
3.2 Saving energy ....................... 11
3.3 Sensors ................................. 11
3.4 Efficient Dry .......................... 12
10.2 Setting the softening
system................................................. 28
10.3 Special salt................................ 29
10.4 Switching off the softening
system .................................... 29
10.5 Regenerating the softening
system .................................... 30
4 Setting up and connecting ..... 12
4.1 Scope of delivery................................. 12
4.2 Setting up and connecting the
device ........................... 12
11 Rinse aid system ..................... 30
11.1 Rinse aid .......................... 30
4.3 Waste water connection................. 13
4.4 Drinking water connection ............. 13
4.5 Electrical connection ............ 13
11.2 Setting the amount of rinse aid
added ............................ 31
11.3 Switching off the rinse aid
system................................................. 31
5 Getting to know each other .......................... 15
5.1 Device.................................................. 15
5.2 Controls .......................... 17
12 Cleaners ................................... 32
12.1 Suitable cleaners ............32
12.2 Unsuitable cleaners............ 33
12.3 Notes on cleaners......... 33
12.4 Filling with cleaner.................... 33
6 programs ................................ 20
6.1 Information for test institutes......... 21
6.2 Favorites. . . . . . . . . . . . . . . . . . . . . . . . . . . . . 21
7 additional functions ........................ 23
13 Tableware ................................... 34
13.1 Damage to glass and
dishes................................. 35
2

de
13.2 Putting away the dishes.................... 35
13.3 Clearing out the dishes.............. 36
20 Customer service .......................... 57
20.1 Product number (E-No.),
production number (FD)
and counting number (Z-Nr.)........ 57
14 Basic Operation......37
14.1 Switching on the device .................... 37
14.2 Setting the program ............. 37
14.3 Setting additional functions ......... 37
14.4 Setting the time delay ............ 37
14.5 Start the program.................... 37
14.6 Activate key lock ......... 38
14.7 Deactivate key lock ..... 38
14.8 Interrupting the program ....... 38
14.9 Cancel program ........... 38
14.10 Switching off the device ............ 38
20.2 AQUA-STOP guarantee............ 57
21 Specifications ..................... 58
21.1 Information about free and open
source software .......... 58
22 Declaration of Conformity ........... 59
15 basic settings ................ 39
15.1 Overview of the basic
settings ........................... 39
15.2 Changing basic settings... 42
16 Home Connect .......................... 43
16.1 Home Connect quick start .. 43
16.2 Remote start .......................... 44
16.3 Data protection................................ 44
17 Cleaning and care ............. 45
17.1 Cleaning the rinsing container ............ 45
17.2 Cleaning agents ................... 45
17.3 Tips for device care.........45
17.4 Machine care. . . . . . . . . . . . . . . 45
17.5 Sieve system ........................... 46
17.6 Cleaning the spray arms................... 48
18 Troubleshooting ................... 49
18.1 Cleaning the waste water pump ..... 55
19 Transport, storage and
Dispose of ................................ 55
19.1 Dismantling the device ................ 55
19.2 Making the device frost-proof...... 56
19.3 Transporting the device ................ 56
19.4 Disposing of the old device.... 56
3

deSecurity
1 Security
Please note the following safety instructions.
1.1 General information
¡Read these instructions carefully.
¡Save the instructions and product information
later use or subsequent ownership.
¡Do not connect the device if it has been damaged in transit.
1.2 Intended use
Use the device only: ¡to wash
household dishes.
¡in private households and in closed rooms of the domestic
chen environment.
¡up to an altitude of 4000 m above sea level.
1.3 Restriction of the user group
This device can be used by children aged 8 years and over and by
people with reduced physical, sensory or mental capabilities or lack
of experience and/or knowledge, if they are supervised or
instructed in the safe use of the device and understand the
resulting dangers have.
Children are not allowed to play with the device.
Cleaning and user maintenance must not be carried out by
children without supervision.
Keep children younger than 8 years away from the device and the connecting
cable.
1.4 Safe Installation
WARNING - Risk of injury!
Improper installations can result in injury.
▶When setting up and connecting the device, follow the instructions in
the operating instructions and assembly instructions.
4

Securityde
WARNING - Risk of electric shock!
Improper installations are dangerous.
▶Only connect and operate the device in accordance with the
information on the nameplate.
▶Always use the power cable supplied with the new device.
▶Only connect the device to an alternating current power supply
via a properly installed earthed socket.
▶The protective conductor system of the electrical house
installation must be installed correctly.
▶Never power the device via an external switching device,
e.g. B. timer or remote control.
▶When the device is installed, the mains plug of the mains
connection cable must be freely accessible, or if free access is not
possible, a disconnecting device must be installed in the fixed
electrical installation in accordance with the installation
regulations.
▶When setting up the device, ensure that the power cable is
not pinched or damaged.
Cutting the inlet hose or submerging the Aquastop valve in
water is dangerous.
▶Never immerse the plastic housing in water. The plastic housing
on the inlet hose contains an electric valve.
▶Never cut the inlet hose. There are electrical connection cables
in the inlet hose.
WARNING - Danger of fire!
Using an extended power cord and unauthorized adapters is
dangerous.
▶Do not use extension cables or multiple socket strips.
▶Only use adapters and power cables approved by the
manufacturer.
▶If the mains connection cable is too short and no longer mains
connection cable is available, contact an electrician to adapt the
house installation.
5

deSecurity
Contact between the device and installation cables can lead to a
defect in the installation cables, e.g. E.g., gas pipes and power
lines. Gas from a corroded gas line can ignite. A damaged power
line can lead to a short circuit.
▶Make sure that there is at least 5 cm distance between the
device and installation cables.
WARNING - Danger of burns!
Improper installation of the device can cause burns.
▶For free-standing devices, make sure that the back of the
device is against a wall.
1.5 Safe use
WARNING - Danger of serious damage to health! Failure to
follow safety instructions and instructions for use on the
packaging of cleaning products and rinse aid products can lead to
serious damage to health.
▶Follow the safety instructions and instructions for use on the
packaging of cleaning products and rinse aid products.
WARNING - Danger of explosion!
Solvents in the device's flushing chamber can cause explosions.
▶Never put solvents in the cleaning compartment of the device.
Strongly caustic-alkaline or highly acidic cleaning agents in conjunction
with aluminum parts in the washing compartment of the device can lead
to explosions.
▶Never use highly caustic-alkaline or highly acidic cleaning agents,
especially from the commercial or industrial sector, in conjunction
with aluminum parts (e.g. grease filters from extractor hoods or
aluminum pots), e.g. B. for machine maintenance.
6

Securityde
WARNING - Risk of injury! Open appliance
door can lead to injuries.
▶Only open the appliance door to load and unload dishes to
prevent accidents, e.g. B. by stumbling.
▶Do not sit or stand on the open appliance door. Knives and
utensils with sharp points can cause injuries.
▶Place knives and utensils with sharp tips with the pointed side
facing down in the cutlery basket, knife rack or cutlery drawer.
WARNING - Danger of scalding!
Hot water can spray out of the appliance when the appliance door is
opened while the program is running.
▶Open the device door carefully while the program is running.
WARNING - Danger of tipping!
Overloaded dish racks can cause the appliance to tip over.
▶Never overload the dish racks on free-standing appliances.
WARNING - Risk of electric shock!
Penetrating moisture can cause an electric shock.
▶Only use the device in closed rooms.
▶Never expose the device to extreme heat or moisture.
▶Do not use a steam cleaner or high-pressure cleaner to clean
the device.
Damaged insulation of the power cord is dangerous.
▶Never bring the power cord into contact with hot parts of the
device or sources of heat.
▶Never bring the power cord into contact with sharp points or
edges.
▶Never bend, squeeze or change the power cable.
7

deSecurity
1.6 Damaged device
WARNING - Risk of electric shock!
A damaged device or a damaged power cable is dangerous.
▶Never operate a damaged device.
▶Never operate a device with a cracked or broken surface.
▶Never pull on the power cord to disconnect the device from the
power supply. Always pull on the mains plug of the mains
connection cable.
▶If the device or the power cord is damaged, immediately unplug
the power cord or switch off the fuse in the fuse box and turn
off the water tap.
▶Call customer service. →
Page 57
Improper
repairs are dangerous.
▶Only trained specialist personnel may carry out repairs on the
device.
▶Only original spare parts may be used to repair the device.
▶If the mains connection cable or the device connection cable of
this device is damaged, it must be replaced with a special power
connection cable or special device connection cable, which is
available from the manufacturer or its customer service.
1.7 Dangers for children
WARNING - CHOKING HAZARD!
Children can pull packaging material over their heads or wrap
themselves in it and suffocate.
▶Keep packaging material away from children.
▶Do not let children play with packaging materials. Children
can inhale or swallow small parts and thereby suffocate.
▶Keep small parts away from children.
▶Do not let children play with small parts.
8th

Securityde
Children can become trapped in the device and suffocate.
▶If available, use parental controls.
▶Never let children play with or operate the device.
WARNING - Danger of damage to health!
Children can become trapped in the device and endanger their
lives.
▶For old devices, pull the power plug of the power connection
cable, then cut the power connection cable and destroy the lock
on the device door to such an extent that the device door no
longer closes.
WARNING - Danger of crushing!
With high-mounted appliances, children can squeeze between the
appliance door and the cupboard doors underneath.
▶Pay attention to children when opening and closing the appliance door.
WARNING - Danger of chemical burns!
Rinse aid and cleaners can cause burns to the mouth, throat and
eyes.
▶Keep children away from rinse aid products and cleaning products.
▶Keep children away from the open device. The water in the
dishwashing room is not drinking water. There may still be
residues of detergent and rinse aid in it.
WARNING - Risk of injury!
Children can get their little fingers caught in the slots in the tablet
collector and injure themselves.
▶Keep children away from the open device.
9

deavoid
v2 property damage
avoid
avoid Contact between the unit and water
pipes may cause corrosion of the
water pipe and the water pipe may
leak.
▶Ensure that there is at least 5 cm
distance between the device and
the water pipe. The supplied lines
for the drinking water connection
and the waste water connection are
not affected.
Modified or damaged water hoses
can lead to property damage and
damage to the device.
▶Never bend, squeeze, alter or cut
water hoses.
▶Only use the supplied water hoses
or original replacement hoses.
▶Reuse water hoses that have
never been used.
Water pressure that is too low or too
high can impair the function of the
device.
▶Ensure that the water pressure at
the water supply system is at least
50 kPa (0.5 bar) and maximum
1000 kPa (10 bar).
▶If the water pressure exceeds the
specified maximum value, a
pressure reducing valve must be
installed between the drinking
water connection and the hose set
of the device.
avoid
2.1 Safe Installation
DANGER!
Improper installation of the device
can result in damage.
▶If the dishwasher is installed under
or above other household
appliances, information on
installation in combination with the
dishwasher in the
Follow the installation instructions for the
respective household appliances.
▶If no information is available or the
installation instructions do not
contain any relevant instructions,
you must contact the manufacturer
of these household appliances to
ensure that the dishwasher can be
installed above or below other
household appliances.
▶If information is not available from
the manufacturer, the dishwasher
must not be installed above or
below these household appliances.
▶To ensure the safe operation of all
household appliances, continue to
follow the dishwasher installation
instructions.
▶Do not install the dishwasher
under a hob.
▶Do not install the dishwasher near
heat sources such as radiators, heat
accumulators, ovens or other
devices that generate heat.
2.2 Safe use
DANGER!
Escaping steam can damage built-in
furniture.
▶After the end of the program, allow the
device to cool down slightly before
opening the device door.
10

Environmental protection and savingde
Special salt for dishwashers can
damage the washing container
through corrosion.
▶To ensure that overflowed special
salt is rinsed out of the rinsing
container, fill the special salt into the
special salt storage container
immediately before the program
starts.
Cleaner can damage the softening
system.
▶Only fill the storage container of
the softening system with special
salt for dishwashers.
Unsuitable cleaning agents can
damage the device.
▶Do not use a steam cleaner.
▶To avoid scratching the device
surface, do not use sponges with a
rough surface or abrasive cleaning
agents.
▶To avoid corrosion, do not use
sponge cloths on dishwashers with
a stainless steel front or rinse them
thoroughly several times before
using them for the first time.
3.2 Save energy
If you follow these instructions, your
device will use less electricity and
water.
Use the Eco 50° program.
aThe Eco 50° program is energy-
energy-saving and environmentally friendly.
→
"Programs", page 20
Change the sensor setting to
standard.
aThe consumption values are reduced
adorned.
→
"Sensors", page 11
3.3 Sensors
The sensors adapt the program
sequence and the program strength in
the auto programs depending on the
amount and type of dirt.
The sensors have different sensitivity
levels, which you can change in the
basic settings.
→
""Change basic settings", page
42
Sensor level
SE:00
Description
3 environmental protection and
Save
Optimal setting
for mixed loads
and high levels of dirt
amounts. energy saving
efficient and water saving
rend.
3.1 Dispose of packaging
The packaging materials are
environmentally friendly and recyclable.
▶Dispose of the individual components
separately according to type.
SE:01 Does the program
strength even with
small amounts of dirt
conditions for
effective elimination
leftover food. The
power consumption
and water consumption
needs will be
adapted accordingly.
11

deSetting up and connecting
Sensor level
SE:02
Description 4 Set up and
Connect
Does the program
strength for difficult ones
Terms of use
gen, e.g. B. very
dried food
sereste. Recommended
Setting when
use of organic rice
niger or eco-cleaning
ger with low
Amounts of active ingredients.
The energy consumption
needs and water
consumption is
speaking
fits.
To ensure proper operation, connect
the device to electricity and water
properly. Please note the required
criteria and the assembly
instructions.
4.1 Scope of delivery
After unpacking, check all parts for
transport damage and that the
delivery is complete.
If you have any complaints, please
contact the retailer where you
purchased the device or our customer
service.
3.4 Efficient Dry A notice:The device was checked at the
factory to ensure that it is working
properly. This may leave water stains
on the device. The water stains
disappear after the first rinse.
The device door opens automatically
during the drying phase. This results in
particularly economical drying.
For best drying results, wait for the
end of the program before clearing
out the dishes. The program is
finished when the display shows
"00h:00m".
If the automatic door opening is
deactivated, energy consumption
increases and the drying phase is
usually shortened.
→
"Overview of the basic
settings", page 39
→
"Additional functions", page 23
The delivery consists of: ¡
dishwasher
¡Instructions for use
¡assembly Instructions
¡Further information documents ¡
Mounting material
¡Salt filling aid funnel ¡
Power cord
¡quick start Guide
4.2 Set up and connect the
device
You can install your under-counter
device or integrated device in the
kitchen unit between wooden walls
and plastic walls. If you subsequently
set up your device as a free-standing
device, you must secure your device
against tipping over, e.g. B. through
screw connections on the wall or
through installation under a
12

Setting up and connectingde
adjacent worktop, which is firmly
connected to the neighboring
cupboards.
1.Follow the safety instructions.
→
page 4
4.4 Drinking water connection
Connect your device to a drinking
water connection.
Install drinking water connection
2.Follow the instructions for electrical
connection. Hints
¡Make sure you do that
Connect the device to a water inlet
with a safety device to prevent
drinking water contamination
through backflow (according to DIN
EN 1717). The connection valves/
water taps provided for this purpose
are equipped with this safety device
if the house is installed correctly.
¡If you replace the device,
you must use a new water inlet
hose.
3.Check the scope of delivery and
the condition of the device.
4.The required installation dimensions can be
found in the assembly instructions.
5.Set up the device horizontally using
the adjustable feet.
Make sure you have a secure footing.
6.Install the wastewater connection.
→
Page 13
7.Install the drinking water
connection. →
Page 13
8th.Connect the device to power.
1.Please refer to the assembly
instructions provided for the
necessary steps.
4.3 Waste water connection
Connect your device to a wastewater
connection so that water
contaminated by the rinse cycle can
drain away.
2.Connect the device to the drinking
water connection using the
included parts.
Observe the technical data.
Install waste water connection 3.Make sure that the drinking water
connection is not kinked, crushed or
twisted.
1.Please refer to the assembly
instructions provided for the
necessary steps.
2.Connect the waste water hose to
the drain connection of the siphon
using the included parts.
4.5 Electrical connection
Connect the device electrically
3.Make sure that the drain hose is not
kinked, crushed or twisted.
Hints
¡Observe the safety instructions
wise →
page 4
.
¡Please note that the water
Safety system only works when
there is power supply.
4.Make sure that there is no cover in
the drain that prevents the waste
water from flowing out. 1.Insert the cold appliance plug of the
mains connection cable into the
device.
13

deSetting up and connecting
2.Plug the power plug of the device's
power cord into a socket near the
device.
The connection data of the
device is on the nameplate.
3.Check that the power plug is firmly
seated.
14

deGet to know
2Cleaner chamber Fill the cleaner chamber with cleaner.
→
"Cleaner", page 32
3Lower dish rack Lower dish rack →
page 25
4Storage container for special
salt
Fill the special salt storage container with
special salt.
→
"Softening system", page 28
5Lower spray arm The lower spray arm cleans the dishes in
the lower basket.
If the dishes are not being cleaned
optimally, clean the spray arms.
→
"Cleaning the spray arms", page 48
6Tab drip tray During the rinsing cycle, tabs automatically
fall from the detergent chamber into the
tab collecting tray, where they can dissolve
optimally.
7Upper dish rack
Cutlery drawer
Cake stand1
Upper spray arm
Upper basket →
Page 24
Cutlery drawer →
Page 26
Cake stand →
page 25
8th
9
10 The upper spray arm cleans the dishes in
the upper basket.
If the dishes are not being cleaned
optimally, clean the spray arms.
→
"Cleaning the spray arms", page 48
11 Sieve system Sieve system →
Page 46
12 Rinse aid reservoir Fill the rinse aid reservoir with rinse aid.
→
"Rinse aid system", page 30
1Depending on the device equipment
16

Get to knowde
5.2 Controls
You can use the control panel to set all of your device's functions and receive
information about its operating status.
Some buttons allow you to perform different functions.
1 2 3 4 5 6 7
14 13 12 1110 9 8
1ON/OFF button
button
and reset Switch on device →
Page 37
Switch
off the device →
Page 38
Cancel
program →
Page 38
2program keys
Program progress display
programs →
Page 20
3The program sequence display shows
which program sequence the device is
in, e.g. B. Cleaning, rinsing or drying.
4display The display shows you information about
the program sequence, the remaining
running time or basic settings. You can
use the display and the setting buttons
d Change basic settings.
→
""Change basic settings", page
42
She ie
5Zeitvo rwahl and egg nput Keys Z
G
a long time ago
around
Set choice →
Page 37
Change settings
6Remote start →
"Remote Start", page 44
tart →
Page 37
7Start button
1Depending on the device equipment
program s
17

deGet to know
8th Program buttons and additional
functions
programs
→
"Programs", page 20
Additional functions
→
"Additional functions", page 23
9button If you approx. 3 seconds
Press to open the basic settings.
→
""Change basic settings", page
42
10 WiFi display
Rinse aid refill indicator
Home Connect →
Page 43
11 Rinse aid system
→
"Filling with rinse aid", page 30
12 Water inlet indicator
Special salt refill indicator
Water inlet indicator
13 Softening system
→
"Fill in special salt", page 29
14 Door handle1
1Depending on the device equipment
Open the device door.
symbols in the display1symbol Description
Depending on the device equipment, the
display shows the following symbols. You can
find the explanations for this.
If the special salt refill
indicator lights up in the
display, fill with special
salt immediately before
the program starts
into the storage container
for special salt.
→
"Fill in special salt",
page 29
Icon Description
If the symbol for
machine
maintenance lights up,
carry out machine
maintenance.
→
"Machine care", page
45
If the device is connected
to a wireless Wi-Fi
home network connected
the symbol lights up
in the display.
→
"Home Connect",
page 43
If the rinse aid refill
indicator lights up in the
display, top up the rinse
aid.
→
"Filling with rinse aid",
page 30
The symbols indicate in
which program
the device is located,
such as: B. cleaning,
rinsing
or drying.
1Depending on the device equipment
18

Get to knowde
symbol Description
If you have activated
the time delay,
the symbol lights up in the
display.
→
"Setting the time
preselection", page 37
If you have activated the
key lock, the symbol
lights up in the display.
→
"Activate key lock",
page 38
If there is a problem with
the water supply or water
The symbol in the display
lights up or flashes.
→
"Eliminate faults",
page 49
19

deprograms
6 programs
Here you will find an overview of the
adjustable programs. Depending on
the device configuration, various
programs are available, which you
can find on the control panel of your
device.
Depending on the program you choose,
the duration may vary. The running time
depends on the water temperature, the
amount of dishes, the degree of soiling
and the additional function selected →
Page 23
away. When off
If the rinse aid system is switched on or if
there is a lack of rinse aid, the running time
changes.
You can find the consumption values
in the quick guide. The consumption
values refer to normal conditions and
a water hardness value of 13
- 16 °dH. Different influencing factors
can lead to deviations, e.g. B. Water
temperature or line pressure.
program use Program Sequence
Dishes:
¡Pots, pans, insensitive
crockery and cutlery Degree
of soiling:
¡strongly adhering, burned-in,
Dried, starchy and protein-
containing leftover food
Intensive:
¡Pre-rinse
¡Clean 70°C ¡
Intermediate rinsing
¡Rinse 69 °C ¡dry
Intense 70°
Dishes:
¡mixed crockery and
plug
Degree of pollution:
¡slightly dried household
usual leftovers
Sensor-optimized:
¡Becomes dependent on
of pollution
of the rinse water
optimized by sensors
mingled.
Auto 45-65°
Dishes:
¡mixed crockery and
plug
Degree of pollution:
¡slightly dried household
usual leftovers
Most economical pro
gram:
¡Pre-rinse
¡Clean 50°C ¡
Intermediate rinsing
¡Rinse 48 °C ¡dry
Eco 50°
Dishes:
¡mixed crockery and
plug
Degree of pollution:
¡slightly dried household
usual leftovers
Noise-optimized:
¡Pre-rinse
¡Clean 50°C ¡
Intermediate rinsing
¡Rinse 63 °C ¡dry
Quiet 50
20
Table of contents
Other Bosch Dishwasher manuals

Bosch
Bosch sHV68M User manual

Bosch
Bosch SMU4HVW72S User manual

Bosch
Bosch 300 Series User manual

Bosch
Bosch SHP65T55UC User manual

Bosch
Bosch SMV6ECX51E User manual

Bosch
Bosch SGV4HBX40E User manual

Bosch
Bosch SPS2IKI06X User manual

Bosch
Bosch SMV69N40EU User manual

Bosch
Bosch SHE53T55UC Owner's manual

Bosch
Bosch SMV6ZCX07E Specification sheet

Bosch
Bosch SMV4ECX26E Specification sheet

Bosch
Bosch SGI4IVS00I/01 User manual

Bosch
Bosch SN61HX02AG/13 User manual

Bosch
Bosch SRS4672EU User manual

Bosch
Bosch SHX3AR Series User manual

Bosch
Bosch SGV63E03UC Instruction Manual

Bosch
Bosch SGV4HAX48E User manual

Bosch
Bosch SMV2ITX22G User manual

Bosch
Bosch SMD8YCX02G User manual

Bosch
Bosch SMS2ITW03Z User manual