manuals.online logo
Brands
  1. Home
  2. •
  3. Brands
  4. •
  5. Bowers & Wilkins
  6. •
  7. Speakers
  8. •
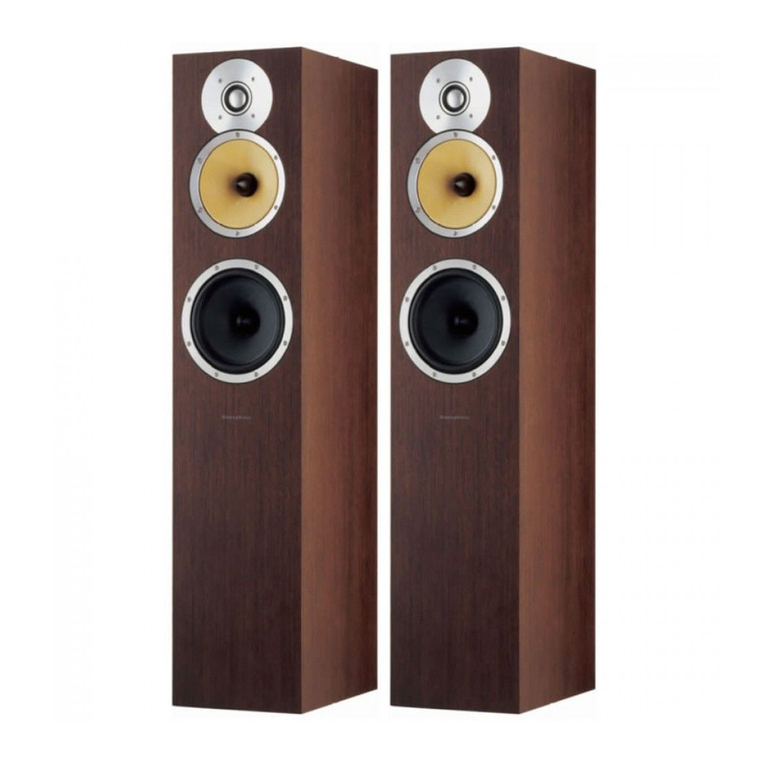
  9. Bowers & Wilkins 702 S2 User manual

Bowers & Wilkins 702 S2 User manual

Welcome and thank you for choosing Bowers & Wilkins.
Our founder, John Bowers, believed that imaginative design,
innovative engineering and advanced technology were keys that
could unlock the enjoyment of audio in the home. His belief is one
that we continue to share and inspires every product we design.
This is a high performance product that rewards thoughtful
installation, so we suggest that you take some time to read this
manual before you begin. Continue on page 5 Æ
Bienvenue et merci d’avoir choisi Bowers & Wilkins. Notre
fondateur, John Bowers, était persuadé qu’une conception
imaginative, des innovations en terme d’ingénierie et des
technologies parmi les plus avancées, étaient les clés ouvrant les
portes du plaisir de l’écoute à domicile. Ce qu’il croyait fait partie
de ce que nous continuons encore à partager et se retrouve dans
tous les produits que nous concevons aujourd’hui.
Vous disposez d’un produit dont les hautes performances
méritent une installation soignée, par conséquent nous vous
suggérons de consacrer un peu de temps à lire ce manuel avant
de commencer à l’utiliser. Rendez vous à la page 11 Æ
Willkommen bei Bowers & Wilkins. Der Firmengründer John
Bowers war der Meinung, dass ein wunderschönes Design,
eine innovative Konstruktion und ausgeklügelte Technologien
die Schlüssel zu Audio-Entertainment der Extraklasse in Ihrem
Zuhause sind. Wir teilen seine Meinung und jedes von uns
entwickelte Produkt basiert darauf.
Dies ist ein erstklassiges Produkt, dessen Installation und
Setup gut durchdacht werden müssen. Wir empfehlen daher, sich
ein wenig Zeit zu nehmen und diese Bedienungsanleitung vor der
Installation zu lesen. Fortsetzung auf Seite 17 Æ
Benvenuti e grazie per aver scelto un prodotto Bowers
& Wilkins. Il nostro fondatore, John Bowers, era convinto che
design attraente, capacità d’innovare e tecnologie all’avanguardia
fossero fattori vincenti per la riproduzione audio domestica.
Le sue idee sono ancor oggi condivise da noi tutti e fonte
d’ispirazione per ogni nuovo prodotto che realizziamo.
Questo modello è un diffusore di alte prestazioni che merita di
essere installato in maniera scrupolosa. Vi suggeriamo pertanto di
leggere attentamente questo manuale prima di iniziare. Continua
a pagina 35 Æ
Bienvenido y gracias por elegir Bowers & Wilkins.
)NGM!NVDQRMTDRSQNETMC@CNQDRS@A@jQLDLDMSDBNMUDMBHCN
de que el diseño imaginativo, la ingeniería innovadora y la
tecnología avanzada eran las claves a la hora de llevar el disfrute
del sonido a la intimidad del hogar. Una creencia que seguimos
compartiendo y que inspira todos y cada uno de los productos
que diseñamos.
 2HRDHMRS@K@@CDBT@C@LDMSDS@MSNK@Ű2BNLNK@Ű2
BNLNK@Ű2DRTMOQNCTBSNPTDNEQDBDTM@ROQDRS@BHNMDR
muy elevadas, por lo que le sugerimos que antes de ponerse
manos a la obra dedique un poco de su tiempo a leer este
manual. Continúa en la página 23 Æ
Bem-vindo e obrigado por escolher a Bowers & Wilkins.
O nosso fundador, John Bowers, acreditava que um desenho
criativo, engenharia inovadora e tecnologia avançada eram as
chaves que poderiam abrir portas para se desfrutar do áudio
em casa. A sua crença é algo que continuamos a partilhar e que
inspira cada produto que desenhamos.
O produto que adquiriu possui elevados padrões de
desempenho que requerem uma instalação cuidadosa, pelo que
recomendamos que leia este manual antes de utilizar o produto.
Continuação na página 29 Æ
ǯɁȮɃɁɂɁȷȭȾɁȯȭɅɐȹȮȾȭȰɁȳȭɃȹȿȯȭɄȸȭɂɃȹɁȮɃȴɅȴɀȹȴ
ȭȼɆɄɅȹȼȹȼɁȿɂȭɀȹȹ$QYGTU9KNMKPUǼȭɌɁɄɀɁȯȭɅȴȾɐ
ǯȷɁɀǪȭɆɖɃɄȯȴɃȹȾȯɅɁɊɅɁɅȯɁɃɊȴɄȼȹȺɂɁȳɉɁȳȯ
ɂɃɁȴȼɅȹɃɁȯȭɀȹȹɀɁȯȭɅɁɃɄȼȭɏȼɁɀɄɅɃɆȼɋȹɏȹɂȴɃȴȳɁȯɒȴ
ɅȴɉɀɁȾɁȰȹȹɄȿɁȰɆɅɁɅȼɃɒɅɐȾɜȳɏȿɂɆɅɐȼɂɁȳȾȹɀɀɁȿɆ
ȸȯɆɊȭɀȹɜȯȳɁȿȴǻɒɂɃɁȳɁȾȷȭȴȿɃȭȸȳȴȾɏɅɐȴȰɁȯȴɃɆȹɁɀȭ
ȯȳɁɉɀɁȯȾɏȴɅɀȭɄɂɃȹɂɃɁȴȼɅȹɃɁȯȭɀȹȹȯɄȴɉɀɁȯɒɉɂɃɁȳɆȼɅɁȯ
 ȓɅȹȭȼɆɄɅȹɊȴɄȼȹȴɄȹɄɅȴȿɒɄɂɁɄɁȮɀɒɀȭ
ȯɒɄɁȼɁȼȭɊȴɄɅȯȴɀɀɁȴȯɁɄɂɃɁȹȸȯȴȳȴɀȹȴȸȯɆȼȭɂɁɖɅɁȿɆɁɀȹ
ȸȭɄȾɆȷȹȯȭɜɅȯȳɆȿɊȹȯɁȰɁɂɁȳɉɁȳȭȼɆɄɅȭɀɁȯȼȴȹȿɒɄɁȯȴɅɆȴȿ
ȯȭȿɆȳȴȾȹɅɐɀȴȼɁɅɁɃɁȴȯɃȴȿɏɀȭȹȸɆɊȴɀȹȴɖɅɁȺȹɀɄɅɃɆȼɋȹȹ
ɂɃȴȷȳȴɊȴȿɂɃȹɄɅɆɂȹɅɐȼɂɃɁɄȾɆɌȹȯȭɀȹɜǾɃɁȳɁȾȷȴɀȹȴɀȭ
ɄɅɃÆ
Welkom en dank voor de aanschaf van een product van
Bowers & Wilkins. Onze oprichter John Bowers geloofde
in vindingrijke ontwerpen: innovatieve en vooruitstrevende
technologie vormen de kern waarmee plezier met muziek thuis
kan worden gerealiseerd. Deze visie is nog altijd ons uitgangspunt
en vormt de inspiratie voor elk product dat we ontwikkelen.
Dit is een hoogwaardig product dat een zorgvuldige installatie
verdient, daarom raden we u aan de tijd te nemen deze handleiding
te lezen voordat u begint. Lees verder op pagina 41 Æ
ʀʘʢʹʩʻʨʟʘʫʜʡʘʠʜʬʮʘʨʠʪʫʦʵʣʜʧʦʬʜʧʠʢʺʥʘʫʜʫʞʤ
$QYGTU9KNMKPUʅʠʛʨʬʫʻʩʣʘʩ,QJP$QYGTUʧʲʪʫʜʬʜʧʰʩ
ʞʜʬʭʱʤʫʘʪʫʞʪʮʜʛʲʘʪʞʦʠʜʬʨʞʣʘʫʠʡʺʩʢʵʪʜʠʩʪʜʫʜʮʤʠʡʱ
ʧʨʦʙʢʻʣʘʫʘʡʘʠʞʧʨʦʞʚʣʺʤʞʫʜʮʤʦʢʦʚʲʘʜʲʤʘʠʫʘʡʢʜʠʛʠʱʚʠʘʫʞʤ
ʘʧʸʢʘʬʪʞʫʦʬʻʮʦʬʪʫʦʪʧʲʫʠʅʠʘʧʸʯʜʠʩʫʦʬʜʥʘʡʦʢʦʬʟʦʵʤ
ʤʘʣʘʩʙʨʲʪʡʦʬʤʪʵʣʭʰʤʦʬʩʡʘʠʤʘʜʣʧʤʺʦʬʤʡʱʟʜʧʨʦʳʸʤʧʦʬ
ʪʮʜʛʠʱʝʦʬʣʜ
 ɷʬʫʸʜʲʤʘʠʺʤʘʧʨʦʳʸʤʬʯʞʢʻʩʘʧʸʛʦʪʞʩʫʦʦʧʦʲʦ
ʘʥʠʦʧʦʠʜʲʫʘʠʡʘʢʵʫʜʨʘʣʜʫʱʘʧʸʧʨʦʪʜʡʫʠʡʻʜʚʡʘʫʱʪʫʘʪʞʦʧʸʫʜ
ʪʘʩʧʨʦʫʜʲʤʦʬʣʜʤʘʛʠʘʟʺʪʜʫʜʢʲʚʦʮʨʸʤʦʚʠʘʤʘʛʠʘʙʱʪʜʫʜʘʬʫʸ
ʫʦʜʚʮʜʠʨʲʛʠʦʧʨʦʫʦʵʘʨʮʲʪʜʫʜʈʬʤʺʮʜʠʘʪʫʞʪʜʢʲʛʘÆ
Vítejte u Bowers & Wilkins.#ģJTIDLD5đLţDIRSDRHYUNKHKH
YM@ěJT!NVDQR6HKJHMR*CXţ)NGM!NVDQRY@JKđC@KM@Ŏİ
jQLTUģŋHKţDMđO@CHSġOQNUDCDMİMNUđSNQRJşOŋİRSTO@ONJQNěHKġ
SDBGMNKNFHDIRNTJKİěDLNSDUİQ@IİBİLCUDŋDJU@KHSMİQDOQNCTJBH
3NTSNjKNYNjİRDCNCMDRHMROHQTIDLDJCXJNKHSUNŋİLDMNUş
produkt.
 /QNCNBİKDMİBNMDIKDOŎİGNOŋDCMDRTSģBGSNQDOQNRNTRS@UID
UDKLHCśKDţHSđIDIHBGROQđUMđHMRS@K@BD#ŋİUDMDţKHY@ěMDSDUģMTISD
OQNRİLSQNBGTě@RTOŋDěSDMİSNGNSNL@MTđKT/NJQ@ĜTISDM@
stranu 59 Æ
Köszönjük, hogy a Bowers & Wilkins-t választotta. Amikor
John Bowers megalapította a társaságot, célja az volt, hogy az
ötletes dizájn, innovatív megoldások és fejlett technológia révén
tökéletesítse az otthoni hangzásvilág élményét. Ez az elképzelés
mai napig a vállalat mozgatórugója, amely minden termékünk
tervezését meghatározza.
 $MMDJ@JHUđKłLHMňRġFŜSDQLġJMDJ@ADŘYDLDKġRġGDY
NC@jFXDKġRRYŘJRġFDKSDSHJDYġQSI@U@RNKITJGNFXRYđMINMDFX
JHRHCňSDMMDJ@YŕSLTS@SłM@J@YDKNKU@RđRđQ@Folytatódik a
ŮNKC@KNM Æ
#YHĩJTIDLXY@VXAŃQOQNCTJSTkQLX!NVDQR6HKJHMR
)NGM!NVDQRY@NŤXRVNIĘjQLĨONMHDV@ŤVHDQYXHŤBHDJ@VX
VXFKĘCHMMNV@BXIM@JNMRSQTJBI@HY@@V@MRNV@M@SDBGMNKNFH@RĘ
JKTBY@LHCNQNYJNRYNV@MH@RHĨCŢVHĨJHDLVCNLNVXLY@BHRYT
3@V@ŌMHDVH@Q@SNV@QYXRYXM@LHHMROHQTIDJ@ŤCXOQNCTJSJSłQX
tworzymy.
Niniejszy produkt wymaga starannej instalacji, dlatego
RTFDQTIDLXY@ONYM@MHDRHĨYONMHŤRYXLHHMRSQTJBI@LHY@MHL
Y@BYMHDRYJNQYXRS@ęYOQNCTJST"HƅFC@KRYXM@RSQNMHD Æ
Bowers&Wilkins製品をお買い上げいただき、ありがとうご
ざいます。Bowers&Wilkinsの創業者であるJohnBowersは、
創意に富んだデザインと革新的な工業技術、そして先進技術が、
家庭でもオーディオを充分に楽しむ鍵であると信じていました。現
在でも彼の信念はBowers&Wilkinsで共有されており、この信
念はBowers&Wilkinsが設計するすべての製品に命を吹き込ん
でいます。
 お買い上げいただいたスピーカーは、念入りな設置を行う価値
のある、非常に高性能な製品です。ご使用になる前に、このマニュア
ルをお読みください。95ページに続くÆ
⁏䓻Ꭳᙌ䅏ᗕ䔶᠖#PXFST8JMLJOTȡ᜾Йڙ⮱݈ߋϧ
+PIO#PXFSTٵ⩌ⰥԎڤᰶᘠ䆎߈⮱䃫䃎Ƞ݈󰩾⮱ጒ⼸႓䃫䃎
হٵ䔈⮱ឭᱜ᭜ᐭუᏚ䴠৺ཞͽ๔䬕⮱䛺㺮ٰ㉍ȡ᜾Йӊ♣ಇ
ᠮⱭЃ⮱Ԏᔢ喑Ꭳ䉸ε᜾Й᝭ᰶϔ৮䃫䃎▢ᙌȡ
 䔆᭜倅ᕔ㘪ϔ৮喑ౕ໒ᒀႶ㷲ᗕᄳ㣤ᓄᲮҠ⮱䴠᩵喑
఍ₑ᜾Йᐧ䃛ᗕౕᐭ໸Ⴖ㷲ݺ㟞ψᬣ䬡Ё㏳䬲䄨᱙᝸ڹȡ
す䶢㐔㐚 Æ
ᢒ㏏˒Ⴣペၢ㑍ᎉ#PXFST8JMLJOTƽᆒмՊ܅ⅰ׼㏅
+PIO#PXFSTԯ⁣⇀НՑᕔႰㅽ؛ⅰ〲〘Ǎ׼ᑓⅰ๺␗ಾ〲〘
ݶԯ㐫ⅰᇤ⻐ᒴ㟘ࠓ೮༆㦆㦏஦ឝ૭㟑ⅰ㕳⾾Ԫ♖ǎᆒмϭᴿ
ቆ⮍ⅰН࿸䢬˧㇬ᆒмᆳᕔ⁥ަ〲〘㤇იǎ
 㐛ᒴˍᢋ㭗လ⣳⁥ަ䢬ୃ₢ೌ⼼ྭၷധỼྲᜲχⅰ㦆ᐅ䢬
ᢪᆒмཅㄸၷ㟘ୣೌ⼼נ⩅ˍᒿ㟠♠㟺ㅂᕲᆼ՛ǎ
ⓐ㥼❛❧ Æ
Bowers & WilkinsߥޜȗҶܬࠕڌͼɌޭƩײ
μҤ iGMG~ⳡG㇆὆ⴙGqGi᠝Gᆉ⶞⭙⚥G
⮭᪝⮭ⳡG⼙ᇹⱉⳍG᠙ᘅሕG㫡᠝G⺚ⰝGⰝ✕᠝G㇆ⳡᶮ⳽G
㨖⌉㫥G᪝ⴙⴁSG㮊⡩ⶊG⭝⽉ᡑ⬽ὊኅGቩ᥍ⳡGᎹ➩⳽ᴅቩG
㯞⡩㫡⮉⠾ᡑᡭUGᎁⳡG⡩ᛙⳉG㮍ⴵ᥍GiGMG~⭙⚥G
ቾⲩᦡቩGⴑⳅΌGiGMG~ᆉG⚭ቍ㫡᠝G‱ᩩGⶥ㨑⭙G
♦󰾯ⳍG⌑⬽GᚬቩGⴑ⠾ᡑᡭU
G ⊁Gⶥ㨑ⳉG⚺ᠮ⳽GὭⰹGᱹ⬽ᘥG⠭㫅㑭󰶆⚥G⚭㏡㫡᠝᣹G
⛁⡵㫥G⺅ⳡᆉG㫍Ⱍ㫲ᡑᡭUG☵ⰲ㫡⡥ᎹGⶍ⭙G⳽GὭ៽⭅ⳍGⴡG
ⴆ⬽G≽⡥ᎹG↝ᴖᡑᡭ. 101ࡧܤǩؼ Æ
'NŐFDKCHMHYUD!NVDQR6HKJHMRRDĞSHīHMHYHĞHMSDŐDJJŘQ
ederiz.*TQTBTLTY)NGM!NVDQRX@Q@SBS@R@QLMMXDMHKHJĝH
LŘGDMCHRKHĪHMUDHKDQHBHSDJMNKNIHMHMDUCDRDRHMJDXjMHĝJ@QL@MM
JHKHCHMH@ĝ@B@J@M@GS@QK@QNKCTĪTM@HM@MXNQCT.MTMHM@MBM
O@XK@ŏL@XRŘQCŘQLDJSDXHYUDATHM@MĝS@R@QK@CĪLYGDQŘQŘMD
ilham vermektedir.
 !TCHJJ@SKHJTQTKTLFDQDJSHQDMXŘJRDJODQENQL@MRKAHQ
ŘQŘMCŘQATMDCDMKDA@ŏK@L@C@MŅMBDATJK@UTYTNJTL@X@
Y@L@M@XQL@MYŅMDQHQHY#DU@L2@XE@SD Æ
5
ENGLISH
1. Unpacking
Carton Contents
Check in the carton for:
1 Foam plug
1 Accessory pack containing
4 Rubber feet
4 M6 spike feet
 +NBJMTSRLL@BQNRRk@SR
1 Plinth
1 Accessory pack containing
1 Allen key
 ,WLLRBQDVR
4 Plain washers
4 Shakeproof washers
Environmental Information
This product complies with international directives, including but
not limited to:
i. the Restriction of Hazardous STARS@MBDR1N'2HM
electrical and electronic equipment,
ii. the Registration, Evaluation, Authorisation and restriction of
CHDLHB@KR1$ "'
iii. the disposal of Waste Electrical and Electronic Equipment
  6$$$
Consult your local waste disposal authority for guidance on how
properly to recycle or dispose of this product.
6
ENGLISH
Speaker Installation
3GDROD@JDQR@QDHMSDMCDCSNADkNNQLNTMSDCNMKX(SHR
HLONQS@MSSNDMRTQDSG@SSGDROD@JDQRRS@MCjQLKXNMSGDkNNQ
TRHMFSGDROHJDEDDSRTOOKHDCVGDMDUDQONRRHAKD(M@CCHSHNMjS
the plinth for proper stability.
You may attach the plinth during the unpacking process, following
SGDCH@FQ@LRNMSGDSNOk@ONESGDB@QSNM KSDQM@SHUDKXXNTL@X
attach it after the product has been fully unpacked, by covering
a suitable support such as a table with a cloth and laying the
speaker on its side with the base of the cabinet overhanging the
support. Align the plinth with its attachment holes in the underside
of the cabinet, ensuring that the arrow on the underside of the
plinth points forwards. Secure the plinth using the screws and
washers supplied. Fit the shakeproof washers between the plain
washers and the screw heads. Tighten the screws using the
Allen key supplied.
3GDROHJDEDDS@QDCDRHFMDCSNOHDQBDB@QODS@MCQDRSNMSGDkNNQ
surface. Initially, screw the lock nuts onto the spikes enough to
KD@UDSGDMTSRkN@SHMFITRS@ANUDSGDB@QODSVGDMSGDROHJDR
@QDQDRSHMFNMSGDkNNQADMD@SG2BQDVSGDROHJDRETKKXHMSNSGD
threaded inserts in the plinth. If the cabinet rocks when placed
NMSGDkNNQTMRBQDVSGDSVNROHJDRSG@SCNMNSSNTBGSGDkNNQ
TMSHKSGDB@AHMDSQDRSRjQLKXVHSGNTSQNBJHMF%HM@KKXKNBJSGDMTSR
@F@HMRSSGDB@AHMDS(SL@XADLNQDBNMUDMHDMSSNjS@MC@CITRS
the spike feet after speaker positioning has been optimised.
(ESGDQDHRMNB@QODS@MCXNTVHRGSN@UNHCRBQ@SBGHMFSGDkNNQ
RTQE@BDTRDDHSGDQ@OQNSDBSHUDLDS@KCHRB@BNHMODQG@OR
ADSVDDMSGDROHJD@MCSGDkNNQNQTRDSGDRTOOKHDCQTAADQEDDS
Fit the rubber feet and level the cabinet in the same manner as
with the spike feet.
/NRHSHNMHMF
7
ENGLISH
Speaker Positioning
Adjustment of speaker position following initial installation
will probably further improve the sound quality and is
usually worthwhile.
In either stereo or home theatre installations, try to ensure that
the immediate surroundings of each speaker are similar in
acoustic character. For example, if one speaker is adjacent to
bare walls while the other is adjacent to soft furnishings and
curtains, both the overall sound quality and the stereo image
are likely to be compromised.
Conventional Stereo Systems
To begin with, the speakers should be positioned between 1.5m
@MCL@O@QS@SSVNBNQMDQRNE@MDPTHK@SDQ@KSQH@MFKDBNLOKDSDC
by the listening area at the third corner. The speakers should be
approximately 0.5m away from the back wall, and at least 0.5m
@V@XEQNL@MXRHCDV@KKR@ANUD
Home Theatre Systems
If the speakers are to be used for the front channels in a home
theatre system, they should be placed closer together than for
BG@MMDK@TCHNADB@TRDSGDRTQQNTMCBG@MMDKRSDMCSNVHCDM
the image. Positioning the speakers within approximately 0.5m
of the sides of the screen will also help keep the sound image
in scale with the visual image. As with conventional stereo
positioning, the speakers should ideally be at least 0.5m away
from any side walls. If you would prefer to place your speaker
against the back wall and this location results in over emphasised
bass, see the Fine Tuning section of this manual for information
on using the foam plugs.
2SQ@XL@FMDSHBkDKCR
3GDROD@JDQCQHUDTMHSRBQD@SDRSQ@XL@FMDSHBjDKCRSG@SDWSDMC
beyond the boundaries of the cabinet. We recommend you keep
magnetically sensitive articles (CRT television and computer
screens, computer discs, audio and video tapes, swipe cards and
SGDKHJD@SKD@RSLEQNLSGDROD@JDQ+"#.+$#@MCOK@RL@
RBQDDMR@QDMNS@EEDBSDCAXL@FMDSHBjDKCR
>0.5m >0.5m
>0.5m
¦¦
~40°
5 Channels 7 Channels
LL
8
ENGLISH
All connections should be made with the audio equipment
switched off.
3GDQD@QDKHMJDCO@HQRNESDQLHM@KRNMSGDA@BJNESGDROD@JDQ
%NQBNMUDMSHNM@KBNMMDBSHNM@ANUDKDESSGDSDQLHM@KKHMJR
RGNTKCQDL@HMHMOK@BD@RCDKHUDQDC@MCITRSNMDO@HQNE
SDQLHM@KRBNMMDBSDCSNSGD@LOKHjDQ%NQAHVHQDBNMMDBSHNMR
NQAH@LOKHjB@SHNM@ANUDQHFGSSGDSDQLHM@KKHMJRRGNTKCAD
QDLNUDC@MCD@BGO@HQNESDQLHM@KRBNMMDBSDCSNSGD@LOKHjDQ
NQ@LOKHjDQRHMCDODMCDMSKX!HVHQHMFB@MHLOQNUDSGDQDRNKTSHNM
of low-level detail.
Ensure that the positive terminals on the speaker (marked + and
BNKNTQDCQDC@QDBNMMDBSDCSNSGDONRHSHUDNTSOTSSDQLHM@KNMSGD
@LOKHjDQ@MCSGDMDF@SHUDSDQLHM@KRNMSGDROD@JDQL@QJDCl@MC
BNKNTQDCAK@BJ@QDBNMMDBSDCSNSGDMDF@SHUDNTSOTSSDQLHM@KNM
SGD@LOKHjDQ(MBNQQDBSBNMMDBSHNMB@MQDRTKSHMONNQHL@FHMF@MC
loss of bass.
Ask your dealer for advice when selecting speaker cable.
"NMMDBSHNMR

ENGLISH
If the bass seems uneven with frequency this will most probably
be a consequence of the acoustic properties of your listening
room. Even small changes in the position of the speakers
NQKHRSDMHMFONRHSHNMB@MG@UD@RHFMHjB@MSDEEDBSNMRNMHB
performance, especially at low frequencies. Try moving your
listening position or locating your speakers along a different
wall if possible.
If no alternatives exist, you can adjust your loudspeakers’
low-frequency performance using the supplied foam bungs.
The bungs are a two-piece part, allowing for a degree of
jMDSTMHMFTRHMFDHSGDQSGDNTSDQK@QFDQCH@LDSDQOHDBDHM
isolation or the two parts together. Using solely the outer,
larger-diameter foam bung will deliver less bass attenuation
than the complete bung assembly.
!DENQDjMDSTMHMFL@JDRTQDSG@S@KKSGDBNMMDBSHNMRHMSGD
installation are correct and secure.
Moving the speakers further from the walls will generally reduce
the volume of bass. Space behind the speakers will also help
to create an aural impression of depth. Conversely, moving the
speakers closer to the walls will increase the volume of bass.
If you want to reduce the volume of bass without moving the
ROD@JDQRETQSGDQEQNLSGDV@KKjSSGDEN@LOKTFRNQENQKDRR
RDUDQDA@RRQDCTBSHNMSGDEN@LQHMFRHMSGDONQSSTADR@ANUD
4. Fine Tuning
10
ENGLISH
The cabinet surfaces will usually only require dusting. If you wish
to use an aerosol or other cleaner, apply the cleaner onto the
BKNSGMNSCHQDBSKXNMSNSGDOQNCTBS@MCSDRS@RL@KK@QD@jQRS
as some cleaning products may damage some of the surfaces.
Avoid products that are abrasive, or contain acid, alkali or
antibacterial agents. Marks on the paint surface may be removed
with a dilute perfume-free soap solution. Remove any remaining
streak marks by spraying with a proprietary glass cleaner and
KHFGSKXVHOHMFCQXVHSG@LHBQNjAQDBKNSG#NMNSTRDBKD@MHMF
agents on the drive units and avoid touching them as damage
may result.
Real wood veneers are treated with an ultra-violet resistant
lacquer to minimise changes in colour over time. Nevertheless,
like all natural materials, a degree of colour change is to be
DWODBSDC"NKNTQCHEEDQDMBDRL@XADQDBSHjDCAXDWONRHMF
all the veneer surfaces equally and evenly to sunlight until the
colour is uniform. This process can take a long time, but may
be accelerated by careful use of an ultra-violet lamp. Keep the
speakers away from direct sources of heat such as radiators and
warm air vents in order to minimise the possibility of the wood
veneer cracking.
The performance of the speaker will change subtly during the
initial listening period. If the speaker has been stored in a cold
environment, the damping compounds and suspension materials
of the drive units will take some time to recover their correct
mechanical properties. The drive unit suspensions will also loosen
TOCTQHMFSGDjQRSGNTQRNETRD3GDSHLDS@JDMENQSGDROD@JDQSN
achieve its intended performance will vary depending on previous
storage conditions and how it is used. As a guide, allow up to
a week for the temperature effects to stabilise and 15 hours of
average use for the mechanical parts to attain their intended
design characteristics.
5. Running In 6. Aftercare
11
FRANÇAIS
1. Déballage
5ĢQHkB@SHNMCTBNMSDMTCTB@QSNM
5ĢQHkDYPTDKDB@QSNMBNMSHDMMDAHDM
1 tampon en mousse
1 carton d’accessoires contenant :
4 pieds en caoutchouc
4 pieds-pointes M6
 ġBQNTRCDAKNB@FDLL
1 support de sol
1 carton d’accessoires contenant :
1 clé Allen
 UHR,WLL
4 rondelles pleines
4 rondelles autobloquantes
Information sur l’environnement
Ce produit est conforme avec les directives internationales, y
compris mais sans se limiter à:
 H K@KHLHS@SHNMCDRRTARS@MBDRC@MFDQDTRDR1N'2C@MRKDR
équipements électriques et électroniques,
ii. l’enregistrement, l’évaluation, l’autorisation et la restriction
CDRRTARS@MBDRBGHLHPTDR1$ "'
iii l’élimination des déchets électriques et électroniques
6$$$
Consultez votre organisme local d’élimination des déchets pour
des conseils sur la façon appropriée de recycler ou de jeter ce
produit.

FRANÇAIS
Installation des enceintes
Les enceintes sont uniquement prévues pour être directement
posées au sol. Il est important de s’assurer qu’elles sont
parfaitement équilibrées sur le sol, en utilisant les pointes de
CġBNTOK@FDENTQMHDRO@QSNTSNŔBDK@DRSONRRHAKD#DOKTRjWDYKD
RTOONQSCDRNKRNBKDONTQTMDLDHKKDTQDRS@AHKHSġ
5NTRONTUDYjWDQKDRNBKDODMC@MSK@OG@RDCDCġA@KK@FD
en suivant les indications situées sur la partie supérieure du
B@QSNM2HMNMUNTRONTUDYjWDQKDRNBKDTMDENHRKDMBDHMSD
complètement déballée en prenant soin d’intercaler un tissu épais
sur un support adéquat, comme par exemple une table. Couchez
l’enceinte sur le coté en faisant légèrement déborder la base de
KDMBDHMSDCDK@S@AKDONTQjWDQKDRNBKD KHFMDYKDRNBKD@UDB
RDRSQNTRCDjW@SHNMOQġRDMSRĐK@A@RDCTBNEEQDSCDKDMBDHMSD
DMUNTR@RRTQ@MSPTDK@kĠBGDFQ@UġDRTQKDRTOONQSONHMSDAHDM
vers l’avant de l’enceinte. Fixez le socle en utilisant les rondelles
et les vis fournies. Placez les rondelles autobloquantes entre les
rondelles pleines et les vis. Serrez soigneusement chaque vis
avec la clé Allen fournie.
Les pieds-pointes fournis sont conçus pour transpercer la
moquette et prendre directement contact sur le sol en dur.
Avant de les mettre en place, vissez les écrous en les laissant
KHAQDRCDSDKKDL@MHĠQDPTHKR@EkDTQDMSK@LNPTDSSDTMDENHR
les pointes correctement mises en contact avec le sol en dur.
5HRRDYBNLOKĠSDLDMSKDRONHMSDRC@MRKDRHMRDQSRjKDSġRCT
support de sol. Si l’enceinte n’est pas totalement stable sur le
sol, dévissez une ou plusieurs pointes jusqu’à ce que l’enceinte
soit parfaitement équilibrée sur le sol. Une fois cela assuré,
vissez complètement chaque écrou de blocage vers la base
de l’enceinte. Il est conseillé de garantir l’équilibrage parfait de
chaque enceinte seulement après avoir précisément déterminé sa
position dans la pièce d’écoute.
S’il n’y a pas de tapis/moquette et que vous vouliez éviter d’abîmer
la surface du sol, insérer entre la pointe et le sol une rondelle
CDLġS@KONTQKDOQNSġFDQTMDOHĠBDCDLNMM@HDO@QDWDLOKD
ou servez vous des pieds caoutchouc fournis. Fixez les pieds
caoutchouc et ajustez-les de la même façon que les pointes.
/NRHSHNMMDLDMS

FRANÇAIS
Choix de la position
Le réglage de la position des enceintes au moment de leur
installation est susceptible d’améliorer grandement les résultats
sonores, et constitue donc une première étape essentielle.
Qu’il s’agisse d’une installation stéréophonique ou multicanal
Home Cinema, faites en sorte que l’environnement acoustique
de chaque enceinte soit le plus identique possible dans son
caractère sonore. Par exemple, si une des enceintes est placée
près d’un mur lisse et nu, tandis que l’autre se trouve proche
d’épais tissus et tapis, la qualité et l’équilibre stéréophonique
jM@TWQHRPTDMSENQSCĢSQDBNLOQNLHR
2XRSġLDRRSĢQĢNOGNMHPTDRBNMUDMSHNMMDKR
Comme base de départ, placer les deux enceintes éloignées
DMSQDDSLĠSQDRKTMDCDK@TSQDENQL@MS@HMRHKDRCDTW
angles d’un triangle équilatéral dont le troisième angle sera la
position d’écoute privilégiée. Les enceintes seront également
éloignées d’environ 50 centimètres du mur arrière et des murs
K@SġQ@TWBHCDRRTR
Systèmes Home Cinema
Si les enceintes sont utilisées en tant qu’enceintes frontales d’un
système Home Cinema, elles doivent être plus rapprochées
l’une de l’autre que dans le cas d’une installation stéréophonique
traditionnelle, car les enceintes Surround arrière ont tendance à
agrandir l’image sonore générale. Positionnez les deux enceintes
ĐDMUHQNMBDMSHLĠSQDRCDBG@PTDBŃSġCDKġBQ@M@jMCD
conserver une image sonore en rapport avec l’image vidéo.
Comme pour un système audio stéréo traditionnel, les enceintes
devront idéalement être éloignées d’au moins 50 centimètres des
murs adjacents. Si les enceintes doivent être plaquées contre
le mur arrière, pour des raisons pratiques, il peut en résulter
TMD@TFLDMS@SHNM@QSHjBHDKKDCTMHUD@TCDFQ@UDUNHQĐBD
sujet le paragraphe Ajustements plus loin dans ce manuel pour
l’utilisation optimale des tampons de mousse fournis.
"G@LORL@FMĢSHPTDR
Les haut-parleurs à l’intérieur de l’enceinte génèrent des champs
magnétiques qui peuvent s’étendre au-delà du coffret de
l’enceinte. Nous vous recommandons donc de tenir éloignés d’au
LNHMRŰBDMSHLĠSQDRCDRDMBDHMSDRKDR@OO@QDHKRRDMRHAKDRĐBDR
champs magnétiques (télévisions et moniteurs informatiques à
tube cathodique CRT, cassettes et bandes magnétiques audio
DSUHCġNB@QSDRL@FMġSHPTDRDSB+DRġBQ@MR+"#.+$#DS
plasma ne sont pas affectés pas les champs magnétiques.
>0,5 m >0,5 m
>0,5 m
¦¦
~40°
5 Channels 7 Channels
LL
14
FRANÇAIS
Tous les branchements doivent être effectués les appareils étant
tous éteints.
Il y a deux paires de prises réunies entre elles à l’arrière de
chaque enceinte. Pour les branchements classiques (ci-dessus
ĐF@TBGDKDRBNMMDWHNMRQDKH@MSKDROQHRDRBNLLDHMRS@KKġĐK@
KHUQ@HRNMCNHUDMSHLOġQ@SHUDLDMSQDRSDQDMOK@BDTMDRDTKDO@HQD
CDOQHRDRġS@MS@KNQRQDKHġDĐK@LOKHjB@SDTQ$MB@RCDAHBĒAK@FD
NTCDAH@LOKHjB@SHNMBHCDRRTRĐCQNHSDKDRKHDMRRDQNMSQDSHQġR
DSBG@PTDO@HQDCDOQHRDRRDQ@@KNQRQDKHġDĐK@LOKHjB@SDTQNT
@TW@LOKHjB@SDTQRCDL@MHĠQDHMCġODMC@MSD"DOQHMBHODCD
AHBĒAK@FDODQLDSC@LġKHNQDQK@QġRNKTSHNMDSK@PT@KHSġCDROKTR
jMRCġS@HKR
Branchez la prise « positif » de l’enceinte (prise de couleur rouge,
@UDBKDQDOĠQDguRTQK@OQHRDCDRNQSHDDMBDHMSDgONRHSHEuCD
K@LOKHjB@SDTQDSAQ@MBGDYK@OQHRDgMġF@SHEuOQHRDCDBNTKDTQ
MNHQD@UDBKDQDOĠQDgluRTQK@OQHRDgMġF@SHEuCDK@LOKHjB@SDTQ
Le non-respect de cette polarité plus/moins entraîne une image
stéréophonique dégradée et une perte dans le grave.
#DL@MCDYBNMRDHKĐUNSQDQDUDMCDTQONTQKDBGNHWCTBĒAKD
utilisé.
"NMMDWHNMR
15
FRANÇAIS
Si le niveau de grave vous paraît trop élevé à certaines
fréquences, cela est généralement dû à des modes de
QġRNM@MBDRO@Q@RHSDRC@MRK@OHĠBDCġBNTSD4MDLNCHjB@SHNM
même légère, de la position des enceintes dans la pièce ou de
la position d’écoute peut avoir pour effet des améliorations très
sensibles, particulièrement pour le rendu du grave. Essayez de
changer votre position d’écoute ou de placer les enceintes le long
d’un autre mur de la pièce si cela est possible.
Si n’y a pas d’alternative, vous pouvez ajuster le rendu des
enceintes dans le grave en insérant les tampons de mousse
fournis dans les évents de décompression. Les tampons sont
composés de deux parties, offrant ainsi une certaine latitude
d’ajustement. Vous pouvez en effet utiliser soit juste la partie
extérieure, soit les deux. En utilisant juste le tampon extérieur,
vous obtiendrez une moindre réduction des graves que si vous
insérez la totalité du tampon.
U@MSCDOQNBġCDQĐBDRQġFK@FDRUġQHjDYPTDSNTRKDR
branchements sont correctement effectués, dans toute
l’installation, et fermement sécurisés.
Décaler les enceintes par rapport aux murs de la pièce a
généralement pour effet de réduire le niveau général du
FQ@UD4MDRO@BDRTEjR@MSCDQQHĠQDKDRDMBDHMSDR@BNTRSHPTDR
permet également d’améliorer la sensation de profondeur de
la reproduction sonore. Inversement, un rapprochement des
enceintes par rapport aux cloisons de la pièce entraîne une
augmentation du niveau du grave.
4. Ajustements
16
FRANÇAIS
La surface du coffret ne nécessitera dans la plupart des cas
qu’un simple dépoussiérage. Si vous souhaitez utiliser un
produit en aérosol, ou tout autre produit nettoyant, vaporisez le
produit sur le tissu et pas directement sur la surface du coffret,
et faites d’abord un test sur une petite surface car certains
produits peuvent s’avérer néfastes. Éviter les produits abrasifs,
ou ceux qui contiennent de l’acide, de l’ammoniaque ou des
agents antibactériens. Les traces sur les surfaces peintes
peuvent être ôtées avec de l’eau et du savon dilué sans parfum.
Enlever les éventuelles marques résistantes en pulvérisant un
produit de nettoyage industriel pour vitres, que vous essuierez
BNLOKĠSDLDMSĐK@HCDCTMBGHEENMRDBDMLHBQNjAQDR-DO@R
employer de produits nettoyants sur les haut-parleurs et évitez
dans tous les cas d’y toucher pour ne pas les endommager.
Les placages en bois véritable sont recouverts d’un vernis
résistant aux ultra-violets de façon à minimiser tout changement
de teinte avec le temps. Néanmoins, comme pour tous les
matériaux naturels, de légères variations de couleur restent
possibles. Ces différences de teintes peuvent être corrigées en
exposant de façon homogène les surfaces plaquées à la lumière
du soleil jusqu’à ce que leur couleur redevienne uniforme. Cette
opération peut toutefois prendre beaucoup de temps, elle peut
donc être accélérée en utilisant avec précaution une lampe à
ultra-violets. Maintenez les enceintes éloignées des différentes
sources de chaleur, comme les radiateurs ou les courants d’air
BG@TCCDE@ĝNMĐġKHLHMDQSNTSQHRPTDCDjRRTQDRCTOK@B@FD
+DRODQENQL@MBDRCTMDDMBDHMSD@BNTRSHPTDRDLNCHjDMS
subtilement pendant une période de rodage initiale. Si l’enceinte
a été stockée dans un environnement de faible température, ses
composants amortissants et les suspensions des haut-parleurs
vont demander un peu de temps avant de retrouver leurs qualités
mécaniques optimales. De plus, ces suspensions vont également
se « libérer » pendant les premières heures d’utilisation. Ce temps
de rodage est variable, suivant la température de stockage et la
manière dont vous utilisez les enceintes. En moyenne, comptez
un week-end pour que les effets de la température se stabilisent,
et une quinzaine d’heures d’utilisation normale pour que tous les
composants mécaniques atteignent le fonctionnement parfait
correspondant à leur conception mécanique.
5. Rodage 6. Entretien
17
DEUTSCH
1. Auspacken
Kartoninhalt
Im Karton liegen:
1 Schaumstoffeinsatz
1 Zubehörpaket mit:
4 Gummifüßen
4 M6-Spikes
 2HBGDQTMFRLTSSDQM2BGKŘRRDKVDHSDLL
1 Sockel
1 Zubehörpaket mit:
1 Innensechskantschlüssel
 2BGQ@TADM,WLL
4 Unterlegscheiben
4 rüttelfesten Unterlegscheiben
Umweltinformation
Dieses Produkt entspricht internationalen Richtlinien. Dazu
gehören unter anderem:
i. die Beschränkung der Verwendung bestimmter gefährlicher
Stoffe in Elektro- und Elektronikgeräten (Restriction of
Hazardous STARS@MBDRJTQY1N'2FDM@MMS
ii. die Registrierung, Bewertung, Zulassung und
Beschränkung chemischer Stoffe (Registration, Evaluation,
Authorisation and Restriction of CHDLHB@KRJTQY1$ "'
iii. die Entsorgung von Elektro- und Elektronik-Altgeräten
(Waste Electrical and Electronic EPTHOLDMS6$$$
Setzen Sie sich hinsichtlich des Recycelns bzw. der Entsorgung
dieses Produktes mit der örtlichen Abfallentsorgung in Verbindung.
18
DEUTSCH
Aufstellen der Lautsprecher
Die Lautsprecher sind als Standversion konzipiert. Es ist wichtig,
dass sie fest auf dem Boden stehen. Verwenden Sie daher, wann
immer möglich, die beiliegenden Spikes. Befestigen Sie zusätzlich
den Sockel, um eine optimale Stabilität zu gewährleisten.
Sie können den Sockel während des Auspackens anbringen
(siehe Abbildungen auf der oberen Verschlussklappe des
*@QSNMR KSDQM@SHUJŅMMDM2HDCHDR@TBGM@BGCDL TRO@BJDM
L@BGDM2TBGDM2HDRHBGC@YTDHMDFDDHFMDSD Tk@FDkĔBGD
wie beispielsweise einen Tisch und decken Sie diese mit einem
Tuch ab. Legen Sie den Lautsprecher auf die Seite, so dass die
4MSDQRDHSDCDR+@TSROQDBGDQFDGĔTRDRUNQMD@MCDQ Tk@FDkĔBGD
vorsteht. Richten Sie den Sockel den Befestigungslöchern an
der Gehäuseunterseite entsprechend aus. Stellen Sie dabei
sicher, dass der Pfeil an der Sockelunterseite nach vorne zeigt.
Befestigen Sie den Sockel mit den beiliegenden Schrauben und
Unterlegscheiben. Setzen Sie die rüttelfesten Unterlegscheiben
zwischen die Unterlegscheiben und die Schraubenköpfe. Ziehen
Sie die Schrauben mit dem beiliegenden Innensechskantschlüssel
fest.
Die Spikes sind so ausgelegt, dass sie durch einen Teppich
GHMCTQBGFDGDMTMC@TECDQ!NCDMNADQkĔBGD@TkHDFDM#QDGDM
Sie zunächst die Sicherungsmuttern so auf die Spikes, dass
RHDRHBGŘADQCDL3DOOHBGADjMCDMVDMMCHD2OHJDR@TECDL
!NCDMC@QTMSDQ@TkHDFDM#QDGDM2HDCHD2OHJDRUNKKRSĔMCHFHMCHD
Gewindebohrungen des Sockels. Sollte das Gehäuse wackeln,
wenn es auf den Boden gestellt wird, so lösen Sie die beiden
MHBGS@TkHDFDMCDM2OHJDRAHRCDQ+@TSROQDBGDQEDRS@TECDL
Boden steht. Ziehen Sie nun die Sicherungsmuttern gegen das
Gehäuse fest. Es ist sinnvoll, die Spikes erst dann anzubringen
und einzustellen, wenn Sie die optimale Position für den
Lautsprecher gefunden haben.
Liegt kein Teppich und möchten Sie ein Zerkratzen der
!NCDMNADQkĔBGDUDQLDHCDMKDFDM2HDDMSVDCDQIDVDHKRDHMD
2BGTSYRBGDHADUHDKKDHBGSDHMD,ŘMYDTMSDQCHD2OHJDRNCDQ
verwenden die beiliegenden Gummifüße.
/NRHSHNMHDQTMF

DEUTSCH
Positionierung der Lautsprecher
Eine weitere Optimierung der Lautsprecherposition macht in der
Regel Sinn, da sie zu einer Verbesserung der Klangqualität führen
kann.
Versuchen Sie sowohl bei Stereo- als auch bei Heimkino-
Installationen sicherzustellen, dass die direkte Umgebung in
OTMBSN JTRSHJEŘQ@KKD+@TSROQDBGDQĔGMKHBGHRS!DjMCDSRHBG
beispielsweise ein Lautsprecher in der Nähe einer nackten
Wand, während der andere Lautsprecher von weichen
Einrichtungsgegenständen und Vorhängen umgeben ist, so leiden
darunter die Klangqualität und das Stereoklangbild.
Herkömmliche Stereosysteme
Zunächst sind die Lautsprecher in einem Abstand von 1,5 bis
LHMYVDH$BJDMDHMDRFKDHBGRDHSHFDM#QDHDBJRYTOK@SYHDQDMC@R
an der dritten Ecke durch den Hörbereich vervollständigt wird.
Der Abstand zur Rückwand sollte ca. 0,5 m, der Abstand zu den
2DHSDMVĔMCDMLHMCDRSDMRLADSQ@FDMRHDGDNADM
Heimkinosysteme
Werden die Lautsprecher für die Frontkanäle eines
Heimkinosystems genutzt, so sollten die Lautsprecher näher
YTR@LLDMFDRSDKKSVDQCDM@KRADH*@M@K TCHNRXRSDLDMC@CHD
Surroundkanäle zu einer Erweiterung des Klangbildes führen. Eine
Positionierung der Lautsprecher innerhalb von ungefähr 0,5 m
zu den Seiten des Bildschirms ist darüber hinaus sehr hilfreich,
um das Klangbild optimal an das visuelle Bild anzupassen. Wie
bei der Positionierung in konventionellen Stereosystemen sollten
die Lautsprecher einen Abstand von mindestens 0,5 m zu den
Seitenwänden haben. Möchten Sie Ihren Lautsprecher an der
Rückwand platzieren und ist der Bassanteil dadurch zu dominant,
so erhalten Sie im Kapitel Feinabstimmung Informationen zum
Einsatz der Schaumstoffeinsätze.
Magnetische Streufelder
Die Lautsprecherchassis erzeugen ein magnetisches
Streufeld, das über die Gehäusegrenzen hinaus reicht. Daher
empfehlen wir, einen Mindestabstand von 0,5 m zwischen
L@FMDSHRBGDLOjMCKHBGDM QSHJDKM"13%DQMRDGFDQĔSDM
Computerbildschirmen, Discs, Audio- und Videobändern,
2BGDBJJ@QSDMTRVTMC+@TSROQDBGDQYTADV@GQDM,@FMDSHRBGD
2SQDTEDKCDQG@ADMJDHMDM$HMkTRR@TE+"#.+$#TMC/K@RL@
Bildschirme.
>0.5m >0.5m
>0.5m
¦¦
~40°
5 Channels 7 Channels
LL

DEUTSCH
Schalten Sie alle Gerät während des Anschließens ab.
An der Lautsprecherrückseite sind jeweils zwei
Anschlussklemmen über Brücken miteinander verbunden.
(LJNMUDMSHNMDKKDM!DSQHDARHDGDNADMKHMJRAKDHADMCHD
!QŘBJDMVHDADHCDQ+HDEDQTMFHMHGQDQ/NRHSHNMTMCMTQDHM
Anschlussklemmenpaar wird an den Verstärker angeschlossen.
Sollen die Lautsprecher im Bi-Wiring-Verfahren betrieben
VDQCDMRHDGDNADMQDBGSRLŘRRDMYTMĔBGRSCHD!QŘBJDM
entfernt werden. Hierbei werden alle vier Anschlussklemmen mit
dem Verstärker verbunden. Bi-Wiring kann die Detailtreue im
Tieftonbereich verbessern.
Stellen Sie sicher, dass die positiven (roten und mit +
FDJDMMYDHBGMDSDM MRBGKTRRJKDLLDM@L+@TSROQDBGDQLHSCDL
positiven Ausgang am Verstärker und die negativen (schwarzen
TMCLHSFDJDMMYDHBGMDSDM MRBGKTRRJKDLLDMLHSCDL
negativen Ausgang am Verstärker verbunden werden. Ein nicht
korrektes Anschließen der Kabel kann zu einer Verschlechterung
des Klangbildes und zu Bassverlusten führen.
Lassen Sie sich bei der Auswahl der Lautsprecherkabel von Ihrem
autorisierten Fachhändler beraten.
 MRBGKHDDMCDQ+@TSROQDBGDQ

Other manuals for 702 S2

1

This manual suits for next models

2

Other Bowers & Wilkins Speakers manuals

Bowers & Wilkins CWM DS8 Supplement

Bowers & Wilkins

Bowers & Wilkins CWM DS8 Supplement

Bowers & Wilkins Zeppelin Air User manual

Bowers & Wilkins

Bowers & Wilkins Zeppelin Air User manual

Bowers & Wilkins CM Center Supplement

Bowers & Wilkins

Bowers & Wilkins CM Center Supplement

Bowers & Wilkins 683 S2 User manual

Bowers & Wilkins

Bowers & Wilkins 683 S2 User manual

Bowers & Wilkins DM601 User manual

Bowers & Wilkins

Bowers & Wilkins DM601 User manual

Bowers & Wilkins Matrix 1 series User manual

Bowers & Wilkins

Bowers & Wilkins Matrix 1 series User manual

Bowers & Wilkins HTM2 DIAMOND User manual

Bowers & Wilkins

Bowers & Wilkins HTM2 DIAMOND User manual

Bowers & Wilkins DM3000 User manual

Bowers & Wilkins

Bowers & Wilkins DM3000 User manual

Bowers & Wilkins CM4 Supplement

Bowers & Wilkins

Bowers & Wilkins CM4 Supplement

Bowers & Wilkins CCM20 User manual

Bowers & Wilkins

Bowers & Wilkins CCM20 User manual

Bowers & Wilkins WM 2 User manual

Bowers & Wilkins

Bowers & Wilkins WM 2 User manual

Bowers & Wilkins HTM7 700 Series User manual

Bowers & Wilkins

Bowers & Wilkins HTM7 700 Series User manual

Bowers & Wilkins Zeppelin Air User manual

Bowers & Wilkins

Bowers & Wilkins Zeppelin Air User manual

Bowers & Wilkins Sig7-NT User manual

Bowers & Wilkins

Bowers & Wilkins Sig7-NT User manual

Bowers & Wilkins MATRIX 801 Series 3 User manual

Bowers & Wilkins

Bowers & Wilkins MATRIX 801 Series 3 User manual

Bowers & Wilkins Nautilus 800 Series Guide

Bowers & Wilkins

Bowers & Wilkins Nautilus 800 Series Guide

Bowers & Wilkins CCM616 Supplement

Bowers & Wilkins

Bowers & Wilkins CCM616 Supplement

Bowers & Wilkins CDM 9NT User manual

Bowers & Wilkins

Bowers & Wilkins CDM 9NT User manual

Bowers & Wilkins Formation Bass User manual

Bowers & Wilkins

Bowers & Wilkins Formation Bass User manual

Bowers & Wilkins CWM LCR8 Back Box Supplement

Bowers & Wilkins

Bowers & Wilkins CWM LCR8 Back Box Supplement

Bowers & Wilkins 600 Series 3 User manual

Bowers & Wilkins

Bowers & Wilkins 600 Series 3 User manual

Bowers & Wilkins CT7.3 LCRS User manual

Bowers & Wilkins

Bowers & Wilkins CT7.3 LCRS User manual

Bowers & Wilkins CCM7 Series User manual

Bowers & Wilkins

Bowers & Wilkins CCM7 Series User manual

Bowers & Wilkins HTM72 S2 User manual

Bowers & Wilkins

Bowers & Wilkins HTM72 S2 User manual

Popular Speakers manuals by other brands

Heco BellaDonna Owner's manual/warranty document

Heco

Heco BellaDonna Owner's manual/warranty document

Electro-Voice PRO-LINE EVM-15L datasheet

Electro-Voice

Electro-Voice PRO-LINE EVM-15L datasheet

BUXTON BBS 9900 user manual

BUXTON

BUXTON BBS 9900 user manual

Pyle PBMSPG144 user manual

Pyle

Pyle PBMSPG144 user manual

Phantom REACTOR quick start

Phantom

Phantom REACTOR quick start

Betrue BTS05 user manual

Betrue

Betrue BTS05 user manual

Naxa NAS-3108D instruction manual

Naxa

Naxa NAS-3108D instruction manual

Creative AVPSB1660 manual

Creative

Creative AVPSB1660 manual

Trust Fiesta Quick installation guide

Trust

Trust Fiesta Quick installation guide

Mission 770 user manual

Mission

Mission 770 user manual

Loewe AirSpeaker ID operating instructions

Loewe

Loewe AirSpeaker ID operating instructions

Blaupunkt XL 213.1 installation instructions

Blaupunkt

Blaupunkt XL 213.1 installation instructions

Citronic CUBA Series user manual

Citronic

Citronic CUBA Series user manual

BareFaced Super Series user manual

BareFaced

BareFaced Super Series user manual

Totem KIN Architectural series user manual

Totem

Totem KIN Architectural series user manual

Harman Kardon AURA STUDIO 4 quick start guide

Harman Kardon

Harman Kardon AURA STUDIO 4 quick start guide

Brookstone Bop user manual

Brookstone

Brookstone Bop user manual

The box MBA75W MKII user manual

The box

The box MBA75W MKII user manual

manuals.online logo
manuals.online logoBrands
  • About & Mission
  • Contact us
  • Privacy Policy
  • Terms and Conditions

Copyright 2025 Manuals.Online. All Rights Reserved.