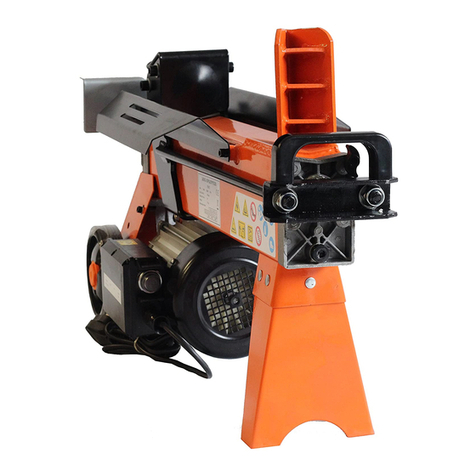
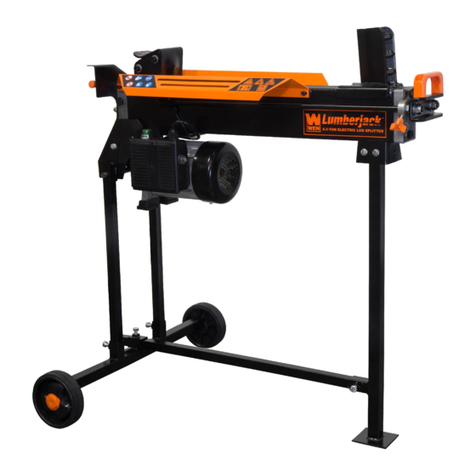
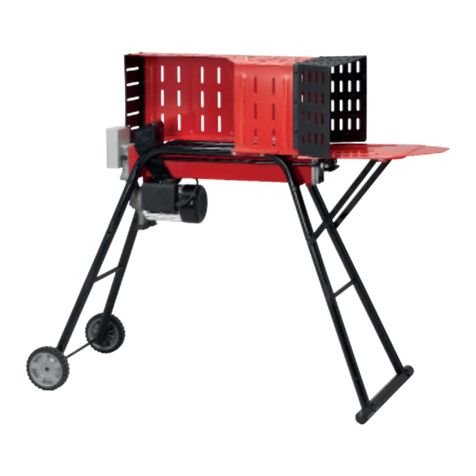
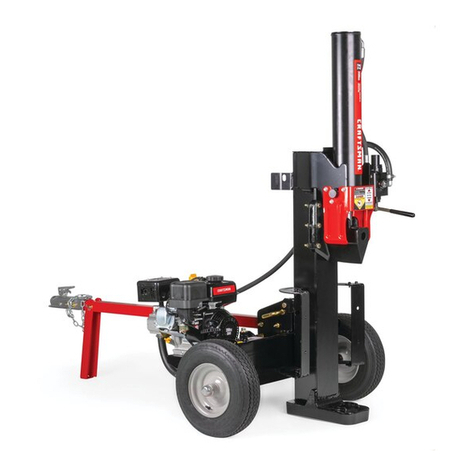
BOXER LSP22T User manual

S
afety
O
perator’s
M
anual
L
o
g
S
p
L
i
tt
e
r
IMPORTANT
R
EAD THESE INSTRUCTIONS BEFORE INSTALLING AND USING
THIS IMPLEMENT


www.hanmey.com.au
2
PRODUCT SPECIFICATIONS
Product Models
LSP22T
Hydraulic powered ~ 3PL Cat 1 ~22 tonne hydraulic pressure
Implement Specifications
MODELS
LSP22T
Tractor HP
15-55hp
3-Point Linkage
Cat-1
Length
490mm
Width
1300mm
Height
1940mm
Weight
210kg
Operation
Hydraulic
RAM
22 tonne
Working Position
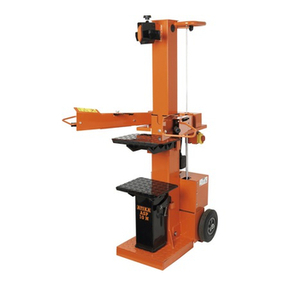
Vertical
Log Splitter
Hydraulic powered 22 tonne log splitter
Uses:
Splitting straight or knotty grained firewood
Features:
Three point linkage mounted, tractor remote hydraulic operation makes wood splitting easy and
safe ~ vertical positioning ~ wide blade for multiple log splitting ~ easy for one person to operate ~
safe & strong.

www.hanmey.com.au
3
SAFETY INSTRUCTIONS
CONGRATULATIONS! On the purchase of your new Boxer log splitter. This information is to
assist you in preparing, operating and maintaining your log splitter. Please read and understand
the information completely before operating your log splitter, paying special attention to all the
safety details. Keep this manual handy for a ready reference.
1.1 Safety First
YOU are responsible for the SAFE operation and maintenance of your Log splitter. YOU must
ensure that you and anyone else who isgoing to operate, maintain or work around the Log splitter is
familiar with the operatingandmaintenance procedures andrelatedSAFETYinformation contained
in this manual. This manual will take you step-by-step through your working day and alert you to all
good safety practices that should be adhered to while operating the Logsplitter.
Remember, YOU are the key to safety. Good safety practices not only protect you but also the
people around you. Make these practices a working part of your safety program. Be certain that
EVERYONEoperatingthisequipmentisfamiliarwiththe recommendedoperatingandmaintenance
procedures and follows all the safety precautions. Most accidents can be prevented. Do not risk
injury of death by ignoring good safety practices.
1 Log splitter owners must give operating instructions to operators or employees before allowing
them to operate the machine.
2 The most important safety feature on this equipment is a SAFE operator. It is the operator’s
responsibility to read and understandALL Safety and Operating instructions in the manual and
to follow these. Most accidents can be avoided.
3 Aperson who has not read and understood all operating and safety instructions is not qualified
to operate the machine. An untrained operator jeopardise himself and bystanders to possible
serious injury or death.
4 Do not modify the equipment in any way. Unauthorized modification may weaken thefunction
and/or safety and could affect the life of the equipment.
5 Think SAFETY! Work SAFELY!
1.2 General Safety
1. Read the operator’s Manual and all safety signs carefully before operating, maintaining,
adjusting or removing the Log splitter.
2. Operate only at safe distance from bystanders. Clear the area of people, especially small
children, before starting.
3. Never split wood in wet or slipperyconditions
4. Never stand on, straddle, or climb over the log splitter at any time
5. Keep all shields in place. If shield removal becomes necessary for repairs, replace the shield
prior to use.
6. Always retract the ram and uncouple the log splitter from the hydraulic remotes before moving,
adjusting, servicing or to remove any debris.
BeforeoperatingtheLogsplitterreadthefollowingsafetyinstructions.
Failure to comply with these warnings may result in serious injuryor
death.

www.hanmey.com.au
4
SAFETY INSTRUCTIONS
7. Review safety related items annually with all personnel who will operate or maintain the Log
splitter.
8. Do not operate machine if you feel unwell or physically unfit, in which case you should stop
working.
9. This machine was designed with safety very much in mind. However, there is no real substitute
for caution and attention in preventing accidents. Once an accident has happened, it is too late
to think about what you should have done.
10. Never exceed the limits of a piece of machinery. If its ability to do a job, or to do so safety, is in
question –DON’T TRY IT.
11. Do not repair a hydraulic leak while it is under pressure, oil at high pressure can penetrate the
skin and cause severe injury.
1.3 Operating Safety
The Log splitter must be operated safely to prevent orminimize the risk of minor or moderateinjury.
Unsafe operation can create a number of hazards for you. Always take the following precautions
when operating this log splitter:
1. Keepinmindthattheoperatoror userisresponsiblefor accidentsorhazardsoccurringto other
people, their property, and themselves.
2. Wear long pants while splitting wood.
3. Always cut the ends of the log you are splitting as squarely as possible.
4. Never split more than one log at a time unless the ram has been fully extended and a second
log is needed to complete the split of the first log.
5. Never put anything between the log guiding plates and the side of a log; logs spread as they
are forced against the wedge.
6. Never operate the ram in a stalled position for more than 5 seconds. the hydraulic fluid may
overheatanddamagethemachine.if thewoodbeingsplitisexcessivelyhard,stopthemachine,
rotate the log 90° and try again. if you still cannot split the log, reject the log as it exceeds the
capacity of the machine.
7. Never leave the wood splitter unattended. if you leave the area, unplug the powersource.
8. Clean up as you work; accumulated split wood and wood chips can create a hazardous work
environment.
9. Always check the alignment of moving parts and for damaged or wornparts.
10. Keep all nuts and bolts tight and keep the equipment and attachments in good operating
condition.
11. Review safety instructions with all operators annually.
1.4 Storage Safety
1. Store the machine in an area away from human activity.
2. Do not permit children to play on or around the stored machine.
3. Store the machine in a dry, level area.
4. Clean grease and oil as required and protect it from theelements.

www.hanmey.com.au
5
SAFETY INSTRUCTIONS
1.5 Maintenance Safety
1. Good maintenance is your responsibility. Poor maintenance is an invitation totrouble.
2. Follow good shop practices.
3. Keep service area clean and dry.
4. Be sure electrical outlets and tools are properly grounded.
5. Use adequate light for the job at hand.
6. Make sure there is plenty of ventilation. Never operate the engine in a closed building. The
exhaust fumes may cause asphyxiation.
7. Before working on this machine, shut off the engine, set the brakes, and remove the ignition
key.
8. Never work under equipment unless it is secured by a mechanicalstand.
9. Use personal protection devices such as eye, hand and hearing protectors, when performing
any service or maintenance work.
10. Always release residual energy from pressurised hydraulic fluid and allow the fluid to cool
before doing any maintenance or repair work on the log splitter.
11. Never use your hand or any part of your body to check for hydraulic system leaks while the
system is pressurised.
12. Never remove the fill/dipstick cap from the hydraulic fluid port while the hydraulic circuit is live
or while the tank is still warm after operation. Hot pressurised fluid can cause serious injury, so
wait for the hydraulic tank to cool before removing cap.
13. The log splitter must be on a level surface.
14. Get professional medical help at once if hydraulic oil penetrates anyone’s skin.
15. Never adjust the hydraulic system.
16. Only use genuine parts for service and maintenance.
17. Afireextinguisherandfirstaidkitshouldbekeptreadilyaccessiblewhileperformingmaintenance
on this equipment.
18. Periodically tighten all bolts, nuts and screws and check that all pins are properly installed to
ensure unit is in a safe condition.
19. When completing a maintenance or service function, make sure all safety shields and devices
are installed before placing machine in service.

www.hanmey.com.au
7
OPERATION
2.1 CHECKING BEFORE OPERATING
The Log splitter will fit most Category 1 tractors equipped with a standard 3-point hitch. The pins
needtobeinstalledtotheinsideofthe3-pointframeforusewithCategory1tractors,ThisImplement
is designed for use on tractors must be equipped with remotehydraulics
Check the tractor’s 3-point hydraulic lift system.
It should operate up and down smoothly and hold its position when set.
Refer to your tractor owner’s manual or dealer for any adjustments necessary to put the 3-point
hydraulic lift system in good working order.
Tractor should be equipped with stabiliser bars, adjustable swaychains, or sway blocks tokeep the
implement from swinging side to side.
Smaller size tractors may need front counter weights to counter-balance the weight of the
implement.
2.2 ASSEMBLY AND MOUNTING
1. Lower the hydraulic linkage arms using the position control.
Note:It may be necessary to add weight to the three points hitch to lower the lift arms.
2. Back the tractor at low speed towards the Implement and adjust the lower links to the proper
level.
3. Stop tractor, set park brake, remove ignition key and wait for all moving parts to stop before
dismounting.
4. Connect the tractor’s lower links with implement’s left and right lower suspension bracket and
put pins in. Connect the chain top-link with implement’s top-link bracket and put pinin.
5. Connect hydraulic couplers to tractor remotes, use the 3 points hitch to raise the machine from
the ground before moving the machine.
6. Reverse the above procedure when removing the machine from the tractor.
2.3 Field operation
1. Position the Log Splitter on solid level ground when operating.
2. Apply the tractor brake securely and put transmission into Park / Neutral.
3. Using right hand to select direction of movement.
4. Operate ram to lift wedge above height of log to besplit.
5. Position centre of log under wedge. Move wedge until contact is made with thelog.
6. Keep two hands on control levers while splitting log. The speed can be controlled by how much
pressure you put on the control valve.
7. Stop splitting if log starts to go sideways and reposition per above instructions.
8. Should the wedge lodge or become stuck in the log, return wedge to fully open position and
gently rock log free before continuing.
2.4 Transporting
When transporting the machine, review and follow these instructions:
1. Be sure that the machine is securely attached to the tractor and all retainer pins areinstalled.
2. Be sure you have installed extra weights on the front of the tractor.
3. Be sure you are in compliance with all applicable lighting and marking regulations when
transporting.
4. Be sure your machine can be seen clearly by overtaking and oncoming traffic.
5. Do not allow riders.
6. Always use hazard flashers on the tractor when transporting.

www.hanmey.com.au
8
SERVICE ANDMAINTENANCE
3.1 Service
3.1.1 FLUIDS AND LUBRICANTS
1. Grease:
Use multi-purpose lithium based grease.
2. Hydraulic Oil:
Use SAE 10W-30 hydraulic oil.
3. Storing Lubricants:
Your machine can operate at top efficiency only if clean lubricants are used. Use clean
containers to handle all lubricants. Store them in an area protected from dust, moisture and
other contaminants.
3.1.2 GREASING
1. Use a hand-held grease gun for all greasing.
2. Wipe frame slide clean before greasing.
3.2 Maintenance
The recommended period is based on normal operating conditions. Severe or unusual conditions
may require more frequent maintenance.
3.2.1 8 HOURS OR DAILY MAINTENANCE
1. Check and tighten all nuts and bolts in connection parts.
2. Pump grease onto the frame side as required.
3. Clean the implement; take away all dirt, debris and residue.
3.2.2 SEASON MAINTENANCE
1. Check the machine as above for daily maintenance.
2. Check the hydraulic oil ; replace it if it iscontaminated.
3. Check the limiting block for wear and tear. If warn, disassemble, clean and replace them if
necessary.
4. Check the hydraulic hoses and coupling & replace if required.
3.2.3 ANNUAL MAINTENANCE
1. Thoroughly clean the log splitter from debris and residue.
2. Check splitting wedge, sharpening if require. (Just use a file on it as it does not have to have a
razor sharp edge)
3. Apply a thin coating of oil or Grease to the Wedge Cutting Edge to prevent rust.

www.hanmey.com.au
9
SERVICE ANDMAINTENANCE
3.3 STORAGE
After the season’s use, the machine should be thoroughly inspected and prepared for storage.
Repair or replace any worn or damaged components to prevent any unnecessary down time at the
start of next season. Toinsure a long, trouble free life, follow the procedure outlinedbelow:
1. Thoroughly wash the machine using a pressure washer to remove all dirt, mud, debris and
residue.
2. Inspect the splitting wedge and ram for damage or entangled material. Repair or replace
damaged parts. Remove all entangled material.
3. Coat all exposed cylinder shafts with corrosion preventative.
4. Touchup all paint nicks and scratches to prevent rusting.
5. Move to storage area.
6. Select an area that is dry,level and free of debris.
7. Unhook from tractor.
8. If the machine cannot be placed inside, cover with a waterproof tarpaulin and tie securely in
place.
Store the machine in an area away from human activity. Do not allow children to play on or around
the stored machine.

www.hanmey.com.au
11
PARTS LIST
No
Part NO.
Name &Specifications
Qty
1
LSP22T-011
Frame
1
2
GB 6184-86
Locking nut M10
11
3
LSP22T-101
Limiting block
2
4
GB 819-85
Screw M10X55
6
5
LSP22T-012
Wedge
1
6
GB 97.1-85
Plain washer 10
6
7
GB 91-86
Split pin 3.2X20
1
8
LSP22T-102
Pin shaft
1
9
GB 6184-86
Locking nut M12
4
10
GB 97.1-85
Plain washer 12
4
11
GB 5783-86
Bolt M12X50
4
12
LSP22T-015
Oil cylinder
1
13
LSP22T-020
Oil return pipe
1
14
LSP22T-021
Oil enter pipe
1
15
GB 5783-86
Bolt M10X20
4
16
LSP22T-016
Valve
1
17
LSP22T-022
Oil tube
2
18
LSP22T-014
Pull rod
1
19
GB 6170-86
Nut M10
4
20
GB 5780-86
Bolt M10X80
2
21
GB 97.1-85
Plain washer 6
1
22
GB 91-86
Split pin 2X14
1
23
GB 882-86
Pin 6X30
1
24
LSP22T-013
Control cylinder rod
1
25
LSP22T-103
Handle sheath
1
26
200.56.011
Lock pin
3
27
LSP22T-019
Traction bracket
1
28
EF100.00.019
Pin shaft
1
29
GB 6170-86
Nut M14
4
30
GB 93-87
Spring washer 14
4
31
GB 5783-86
Bolt M14X30
4
32
LSP22T-018
Left bracket
1
33
GB 5780-86
Bolt M10X140
1
34
LSP22T-017
Right bracket
1

www.hanmey.com.au
12
BOXER IMPLEMENT WARRANTY
Warranty Policy
Thiswarrantyreferstotheproductlistedin thisOperationManual,soldordistributedbyMidway
Sales or through an authorised dealer. In order to qualify for this warranty, the registration form
attached must be completed and returned to Midway Sales at their registered address within
10 days from date of purchase.
The Boxer product shown inthisoperationmanualis warrantedagainstdefectsin workmanship
and materials for a period of six (6) months from the date of purchase. In the case of products
purchased specifically for agricultural use the warranty shall be extended to a period of twelve
(12) months provided that this intended use is made known to the manufacturer/dealer at the
time of purchase.
Hydraulic components, including cylinders and controls, are warranted againstfaulty parts and/
or workmanship for a period of six (6) months commercial use/(12) twelve months agricultural
use from the date of delivery of the implement to the’ original end-user.
This warranty is limited to faults or defects occurring in the product under normal operating
conditions. The replacement or repair of any defective parts, or correction of operating parts
under this warranty is made only after Midway Sales or their authorised representatives have
examined the unit to their satisfaction. Implements are to be returned to Midway Sales or their
authorised dealer, freight forward and return pre-paid. The manufacturer shall not be liable
for indirect, special or consequential damages arising out of or in connection with the use or
performance of the product including damage with respect to economic loss, loss of property,
loss of revenue or profits, cost of removal, installation orreinstatement.
This warranty does not extend to cover any products manufactured to the purchaser’s
specifications, or modifications or repairs by customers or third parties, carried out without the
written permission of the manufacturer.
This warranty does not extend to cover parts subject to normal wear such as, but not limited
to chains, bearings, seals, filters and blades.
This warranty extends only to the original purchaser and is not transferable. This warranty
does not extend to cover damage in transit, damage or failure caused by or attributed to Acts
of God, exceeding the power limits specified in the technical data, abuse, using non-genuine
parts, improper or abnormal use by the purchaser, its servants, employees or agents, faulty
installation,impropermaintenanceor anyrepair other than those providedbythe manufacturer
or it’s duly authorised dealers.
This warranty does not authorise any person to create for it any other obligation or liability in
connection with its products.
Other than the warranty hereby expressly given, the manufacturer makes no implied warranty
of merchantability or fitness for purpose in so far as any such implied warranty is deemed to
be given under any Commonwealth or State Law, then the manufacturer shall only be liable to
the extent expressed in any such law.
PRODUCT IMPROVEMENT
Due to a continual product development program, Boxer reserves the right to change models
and specifications without notice.

18
Table of contents


