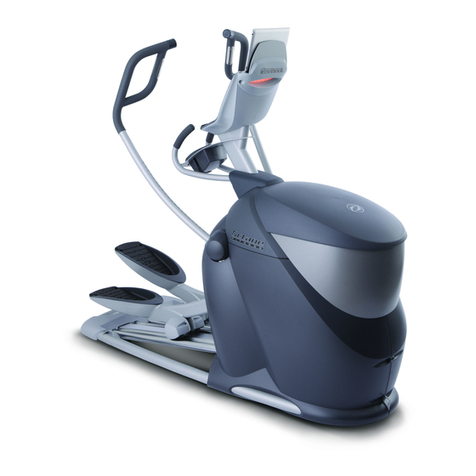
Boyles Fitness FUL0005 User manual

FUL0005
-2013-
Z100 / Z300 Z500 Z700
PLEASE CAREFULLY READ THIS ENTIRE MANUAL BEFORE
OPERATING YOUR NEW ELLIPTICAL!
OWNER’S MANUAL
AVENGER

AVENGER Elliptical
1
Product Registration…………………………………………………………………………..2
Important Safety Instructions………………………………………………………………… 3
Important Electrical Information……………………………………………………………… 4
Important Operation Instructions…………………………………………………………….. 4
Assembly Instructions………………………………………………………………………… 5
Features……………………………………………………………………………………….. 12
Operation of Your New Elliptical…………………………………………………………….. 13
Maintenance……………………...…………………………………………………………… 18
Parts List and Explode Drawing.……………………………………………………………. 19
Manufacturer’s Limited Warranty…………………………………………………………… 22
Table of Contents

AVENGER Elliptical
2
Thank you for your purchase of this quality elliptical trainer. Your new elliptical was
manufactured by one of the leading fitness manufacturers in the world and is backed by
one of the most comprehensive warranties available.
Please take a moment at this time to record the name of the dealer and the date of
purchase below to make any future, needed contact easy. We appreciate your support
and we will always remember that you are the reason that we are in business.
Yours in Health,
BOYLES FITNESS Equipment Pty Ltd.
Name of Dealer______________________________________
Purchase Date_______________________________________
AVENGER/ FUL0005_20120910
CONGRATULATIONS ON YOUR
NEW ELLIPTICAL AND WELCOME
TO THE
FUEL
FAMILY!

AVENGER Elliptical
3
WARNING - Read all instructions before using this appliance.
■ Do not operate elliptical on deeply padded, plush or shag carpet. Damage to both carpet
and elliptical may result.
■ Keep children away from the elliptical. There are obvious pinch points and other caution
areas that can cause harm.
■ Keep hands away from all moving parts.
■ Never operate the elliptical if it has a damaged cord or plug. If the elliptical is not working
properly, call your dealer.
■ Keep the cord away from heated surfaces.
■ Do not operate where aerosol spray products are being used or where oxygen is being
administered. Sparks from the motor may ignite a highly gaseous environment.
■ Never drop or insert any object into any openings.
■ Do not use outdoors.
■ To disconnect, turn all controls to the off position, then remove the plug from the outlet.
■ Do not attempt to use your elliptical for any purpose other than for the purpose it is
intended.
■ The hand pulse sensors are not medical devices. Various factors, including the user’s
movement, may affect the accuracy of heart rate readings. The pulse sensors are intended
only as exercise aids in determining heart rate trends in general.
■ Wear proper shoes. High heels, dress shoes, sandals or bare feet are not suitable for use
on your elliptical. Quality athletic shoes are recommended to avoid leg fatigue.
SAVE THESE INSTRUCTIONS - THINK SAFETY!
Important Safety Instructions

AVENGER Elliptical
4
WARNING!
●NEVER remove any cover without first disconnecting AC power supply.
●If A.C. voltage varies by ten percent (10%) or more, the performance of your elliptical may
be affected. Such conditions are not covered under your warranty. If you suspect the
voltage is low, contact your local power company or a licensed electrician for proper testing.
●NEVER expose this elliptical to rain or moisture. This product is NOT designed for Use
outdoors, near a pool or spa, or in any other high humidity environment. Maximum
environmental ratings are 40-120 degrees Fahrenheit, 95% humidity non-condensing (no
water droplets forming on surfaces).
●NEVER operate this elliptical without reading and completely understanding the results of
any operational change you request from the computer.
●Understand that changes in resistance do not occur immediately. Set your desired level on
the computer console and release the adjustment key. The computer will obey the
command gradually.
●NEVER use your elliptical during an electrical storm. Surges may occur in your household
power supply that could damage elliptical components.
●Use caution while participating in other activities while using your elliptical such as
watching television, reading, etc. These distractions may cause you to lose balance,
resulting in serious injury.
●Always hold on to a handrail or hand bar while making control changes.
Do not use excessive pressure on console control keys. They are precision set to properly
function with little finger pressure. Pushing harder is not going to make the unit go faster or
slower. If you feel the buttons are not functioning properly with normal pressure, contact your
dealer.
Important Electrical Information
Important Operation Instructions

AVENGER Elliptical
5
ASSEMBLY PACK CHECK LIST
Step 1
Assembly Instructions
Step 2
#105. 5/16" × 20 ×1.5T
Flat Washer (4pcs)
#113. 5/16" × 23 × 1.5T
Curved Washer (2pcs)
#80. 5/16" × 15m/m
Button Head Socket Bolt (6pcs)
#111. 5/16" × 1.5T
Split Washer (6pcs)
#84. M5 × 10m/m
Phillips Head Screw (4pcs)
#104. Ø8.5× 26 × 2.0T
Flat Washer (2pcs)
#112. 3/8" × 23 × 1.5T
Curved Washer (2pcs)
#80. 5/16" × 15m/m
Button Head Socket Bolt (2pcs)
#96. 3/8"
Cap Nut (2pcs)
#77. 3/8" × 3"
Carriage Bolt (2pcs)

AVENGER Elliptical
6
Step 3
Step 4
#104. Ø8.5× 26 × 2.0T
Flat Washer (2pcs)
#82. M5 × 15m/m
Phillips Head Screw (4pcs)
#74. 5/16" × 15m/m
Hex Head Bolt (2pcs)
#76. 5/16" × 1-3/4"
Hex Head Bolt (6pcs)
#113. 5/16" × 23 ×1.5T
Curved Washer (4pcs)
#91. 5/16" × 7T
Nyloc Nut (6pcs)
#87. Ø3.5 × 12m/m
Sheet Metal Screw (6pcs)

AVENGER Elliptical
7
Tools
#118. Combination M5 Allen Wrench
& Phillips Head Screw Driver (1pcs)
#116. 12 mm Wrench (1pcs)
#115. 13&14 mm Wrench (1pcs)

AVENGER Elliptical
8
Step 1. Front Stabilizer and Connecting Arm Assembly
1. Install the Front Stabilizer (14) on the front stabilizer holding plate at the bottom of the main
frame with the transportation wheels facing forward and secure them with 2pcs of 3/8" × 3"
Carriage Bolts(77), 2pcs of 3/8" × 23m/m × 1.5T Curved Washers (112) and 2pcs of 3/8" Cap
Nuts(96) by using 13.14m/m Wrench(115).
2. Insert the shaft on left connecting arm (7) to the bushing on left pedal arm (5) and secure with
1pcs of 5/16" × 15m/m Button Head Socket Bolt (80) together with 1pcs Ø8.5 × 26m/m × 2.0T
Flat Washer (104) by using Combination M5 Allen Wrench & Phillips Head Screw Driver
(118). Do it the same way for right connecting arm (8) and right pedal arm (5).

AVENGER Elliptical
9
Step 2. Console Mast Assembly
1. Use cable tie to guide the 1150m/m Computer Cable (36) through Console Mast(11) and then
pull out of the console holding plate, and Insert the console mast into main frame and secure
with 6pcs of 5/16" × 15m/m Button Head Socket Bolts(80), 6pcs of 5/16" × 1.5T Split
Washers(111), 4pcs of 5/16" × 20m/m × 1.5T Flat Washers (105) and 2pcs of 5/16" × 23m/m
× 1.5T Curved Washers (113) by using Combination M5 Allen Wrench & Phillips Head Screw
Driver(118).
2. Take off the cable tie which ties the 1150m/m Computer Cable (36) and plug in the
connectors of the Computer cable and the two 800m/m Handpulse W/Cable Assemblies (40)
on the Console. Secure the Console on the Console Assembly (35) with 4pcs of M5 × 10m/m
Phillips Head Screws (84) by using Combination M5 Allen Wrench & Phillips Head Screw
Driver(118). Pay attention to Avoiding scratching the cables.

AVENGER Elliptical
10
Step 3. Handle Bar Assembly
1. Install the Lower Handle Bar (L) (9) in the left shaft of Console Mast(11) and the Lower
Handle Bar (R) (10) in the right shaft of Console Mast(11), and secure them with 2pcs of
5/16" × 15m/m Hex Head Bolts (74) and 2pcs of Ø8.5 × 26m/m × 2.0T Flat Washers(104) by
using 12m/m Wrench(116)
2. Release rod end shafts (18) which are on left and right connecting arms. Connect the
connecting arm with lower handle bar and secure with rod end shafts (18) and the screw by
using Combination M5 Allen Wrench & Phillips Head Screw Driver (118).
3. Secure 2pcs of slide wheel cover (65) on left and right pedal arm(5) with 4pcs of M5 × 15m/m
Phillips Head Screws (82) by using Combination M5 Allen Wrench & Phillips Head Screw
Driver (118).

AVENGER Elliptical
11
Step 4. Connecting Arm Assembly
1. Connect the Swing Arm (L) (15) to the left Lower Handle Bar and connect the Swing Arm (R)
(16) to the right Lower Handle Bar, and secure them with 6pcs of 5/16" ×1-3/4" Hex Head
Bolts (76),4pcs of 5/16" × 23m/m × 1.5T Curved Washers (113) and 6pcs of 5/16" × 7T Nyloc
Nuts (91) by using 12m/m Wrench(116) 13.14m/m Wrench(115).
2. Put the Front Handle Bar Cover (L) (69) and the Rear Handle Bar Cover (L) (69~1) together
on the left Handle Bar and secure with 3pcs of Ø3.5 × 12m/m Sheet Metal Screws(87) by
using Combination M5 Allen Wrench & Phillips Head Screw Driver(118). Repeat the same
procedure for the right side.

AVENGER Elliptical
12
Correctly aligned orthopedic foot pads
Through research performed with a leading sports scientist and physical rehabilitation expert,
engineering has developed a breakthrough in pedal design. No other elliptical, at any price,
offers these unique features. The history of elliptical use over the past few years tells us that
many users suffer from numb toes while working out on elliptical trainers. Many other users
complain of ankle, Achilles tendon, knee and/or hip pain. While researching a solution to these
common problems the engineers consulted Richard DeKok, P.T., M.T.C., of St. Bernard’s
Industrial Rehabilitation Center in Jonesboro Arkansas.
Together we identified the inherent problem in elliptical designs and developed solutions to solve
the problems. What we found is that when you use an elliptical you tend to push outward during
the power stroke and not just straight back. This causes stress on the outer part of the foot and
throws off the natural alignment of the joints. The solution was to add a 2-degree inward angle to
the footpads. This might sound simple but what it does is straighten the user’s joints back into a
neutral alignment. This eases the over stressing of the ankles, knees and hips.
Transportation
The elliptical is equipped with two transport wheels, which are engaged when the rear of the
Elliptical is lifted.
POWER CONNECTOR LOCATED ON
FRONT, LEFT HAND SIDE OF UNIT.
Lubrication
Features
1. Pour 2c.c of the lubricant under the middle of
Rail. You must be pour lubricant each three
months.
2. If the user felt the exercise is not smooth or there
were some noise during exercising, please pour
2 c.c.of the lubricant on the middle of Rails.

AVENGER Elliptical
13
Getting familiar with the control panel
■Console
Key Functions:
ENTER: 1. Press this button to confirm the setting value of Year- Month- Date- Hour-Minute and
alarm.
2. Press this button to select functions of Distance, Time, Calories, T.H.R, Gender, Age,
Height, Weight and heart Rate% to be preset, the chosen function will be blinking.
Please note that not all functions can be selected in each program.
3. Hold this button down two seconds to reset all of the value (Distance- Time- Calorie-
T.H.R) to zero.
4. Select the function and display on the main screen during exercise. (Speed- RPM-
Distance- Time- Calorie-Watt- Pulse)
START/STOP: Start or Stop exercising for the chosen program.
UP (Turn the knob to right)
1. Increase the setting value of functions during setting mode. ( The monitor has to be
in stop condition.)
2. Increase the level of loading.
3. Select the program form Manual, Preset programs of P1~ P12, Body Fat program,
Target Heart Rate program, Heart Rate control program and user programs of U1~U4
during stop condition.
Operation of Your Elliptical

AVENGER Elliptical
14
DOWN (Turn the knob to left)
1. Decrease the setting value during setting mode. (The monitor has to be in stop
condition.)
2. Decrease the level of loading.
3. Select the program form Manual , Preset programs of P1~ P12, Body Fat program,
Target Heart Rate program, Heart Rate Control program and 4 users programs of
U1~U4 during stop condition.
MODE: Press this button to select the function value to display on the main screen
PULSE RECOVERY: Press this button to check your pulse recovery condition during stop
condition.
** KM/MILE SWITCH: During the stop situation, press ENTER and Recovery key and hold 2
seconds then can change from Km to Mile or from Mile to Km
automatically.
** CALENDAR SETTING: During the stop situation, press MODE and Recovery keys and hold 2
seconds then can enter setting mode of Calendar.
Functions
1. Calendar: Display the month, date and week.
2. Temperature: Display current room temperature from 10℃to 60℃.
3. Clock: Display the current time.
4. Alarm: The monitor has the alarm function.
5. Scan: Display all functions value from SPEED- RPM- DIST-TIME-CAL-WATT-PULSE.
6. Speed: Display current training speed. Maximum speed is 99.9 KM/H or MILE/H.
7. RPM: Display current rotation per minute.
8. DIST: Accumulate the total distance form 0.00 up to 999.9 KM or Km or Mile. Or users can
preset the target distance they want to reach.
9. Time: Accumulate the workout time from 00:00 to 99:59. Or users can preset the target time
they want.
10.CAL: Accumulate the calories consumption from 0 to 9999. Or users can preset the target
Calories they want to consume.
11.WATT: Display current watt.
12.Pulse: Display the current heart rate in beats per minute.
13.T.H.R.: Users can preset their Target Heart Rate.
14.Body Fat Measurement: Display body fat ratio, body type and BMI.
15.Pulse Recovery: Check the condition of pulse recovery when stop exercising.
16.Programs: There are 20 different programs of Manual, Preset Programs of P1-12, Body Fat
program, Target Heart Rate program, Heart Rate Control and 4 users programs to choose for
training.
Each program has 16 columns of loading bars and 8 bars in each column. Each column
represents 1 minute work out (without the change of time value) and each bar represents 2
levels loading.

AVENGER Elliptical
15
Operation Instructions:
1. The full LCD display will be shown with beep sound at the same time after the monitor is
power on. After that the ODO and wheel size will be shown 2 seconds on the lower display.
2. Set up Calendar & Clock Turn the knob to right or left to set the value while the number of
year, month, date and time is blinking then press Enter key to confirm each setting value.
(If users did not enter any value over 20 seconds, the display will proceed with next step. At
this time you can press START and ENTER keys for 2 seconds to enter setting of Calendar &
Clock again.) Calendar, room temperature and time will show out while stop exercising and
without pressing key over 256 seconds, and reset all the function value to be zero.
Alarm Turn the knob to right or left to set the value while the number of hour and minute for
alarm is blinking, press ENTER key to confirm each setting value. After that turn the knob to
right or left to have the alarm signal showing on the display then press ENTER key to confirm
it. Once the alarm is ringing, press any key to stop it.
3. Program selection and Operation Turn the knob to right or left to select the program after
confirming of Calendar and Time.
There are total 20 programs of Manual, Preset programs of P1~ P12, Body Fat program,
Heart Rate Control program and 4 user programs of U1~U4 to choose for training.
Preset DIST/ TIME/ CAL/T.H.R.
After choosing desire program, users can preset their specific request of Distance, Time,
Calories and THR in Manual, Preset programs of P1~P12, Target Heart Rate program and
User programs of U1~U4. )
Press Enter key to enter setting mode in stop condition.
Use Up or Down key to set the target value while the number is blinking then press Enter key
to confirm it.
a. DIST:
The monitor will count up the distance from 0.0 ~ 999.9 Km or Mile without setting the
value.
User can set the target value from 0.5 to 999.5 Km or Mile then the monitor will count
down from the setting value.
Once reach the setting value, the monitor will alarm then stop. If user would like to
continue exercise, press Start key then the value will count up from 0.0.
b. TIME:
The monitor will count up the time from 00:00 to 99:59 without setting the value.
User can set the target value from 1:00 to 99:00 then the monitor will count down form
the setting value.
Once reach the setting value, the monitor will alarm then stop. If user would like to
continue exercise, press Start key then the value will count up from 00:00.
c. CAL:
The monitor will count up the calories form 0.0 to 9999 without setting the value.
User can set the target value from 10 to 9990 then the monitor will count down form the
setting value.
Once reach the setting value, the monitor will alarm then stop. If user would like to
continue exercise, press Start key then the value will count up from 0.0.

AVENGER Elliptical
16
d. T.H.R. (Target Heart Rate)
User can preset the target heart rate from 60 to 220.
Place your palms on the both of the contact pads appropriately and the monitor will show
up your heart rate in beat per minute on the lower LCD display.
Once your heart rate reach your setting value (T. H.R.), the value of pulse rate will be
blinking until your heart rate under your T.H.R.
Press START key to start the chosen program after finished your target values.
*Manual program:
Users can follow up above steps to set up their requests for target Distance, Time, Cal
and T.H.R, then press START/STOP key to exercise.
Or users may just press START key to exercise directly without presetting any specific
requirements of Distance, Time, Calories and T.H.R.
The default level of lading is level 6, user can change the level by turning the knob to right
or left during workout.
*Preset programs of P1~P12
Users can follow up above steps to set up their requests for target Distance, Time, Cal
and T.H.R, then press START/STOP key to exercise.
Or users may just press START key to exercise directly without presetting any specific
requirements of Distance, Time, Calories and T.H.R.
Users can exercise with different level of loading in different intervals as the profile on the
display, and can change the level of loading by turning the knob to right or left during
workout.
*Body Fat Measurement program
Press ENTER key to enter setting your personal date of Gender, age, height and weight.
Turn the knob to right or left to select and set up your data and press ENTER key to
confirm each data.
(The default values for each data are Gender- Male, Age- 30, Height- 175 cm and
weight-70 kgs.)
After that press START/STOP key to calculate the body fat and also place your palms on
the both of contact pads appropriately.
The display will show out Body type, Body Fat ratio and BMI.
Press any key to return the main display.
Body Types: There are 5 body types divided according to the Fat% calculated.
Type 1 is Ultra Slim type (body fat 5% ~ 9%).
Type 2 is Slim type (body fat 10% ~ 19%).
Type 3 is Ideal-healthy type (body fat 20% ~ 29%).
Type 4 is Fat type (body fat 30% ~ 39%).
Type 5 is Ultra body fate type (40% ~50%)
BMI: Body Mass Index Calculate from your personal data to show the value from 1.0 ~
99.99.
Body Fat%: Calculate from your personal data to show the value from 5 ~ 50%.

AVENGER Elliptical
17
* Target heart rate program
Press ENTER key to enter setting mode to set up Distance, Time, Calories and T.H.R.
Turn the knob to right or left to adjust the value and then press ENTER key to confirm
each value.
After pressing START key to exercise and place your palms on the both contact pads
appropriately. The monitor will adjust the level of lading according to your heart rate
detected for user to exercise to make the heart rate to close the T.H.R.
*Hear Rate Control Program
Press ENTER key to enter setting mode to set up Distance, Time, Calories and Age.
Turn the knob to right or left to adjust the value and then press ENTER key to confirm
each value.
After that there are 10 kind of Heart Rate % - 50%, 55%, 60%, 65%, 70%, 75%, 80%,
85%, 90% & 95% can be selected by turning the knob to right or left and press ENTER
key to confirm your choice. Then the Target Heart Rate will show out on the lower
display.
Press START key to start exercise and place your palms on the both of contact pads
appropriately. The monitor will adjust the level of loading according to the heart rate
detected for user to exercise to make the heart rate to close the T.H.R.
*User programs of U1~U4
Press ENTER key to enter setting mode to set up Distance, Time, Calories and T.H.R.
Turn the knob to right or left to adjust the value and then press ENTER key to confirm
each value.
After that the first column will be flashing, user can adjust the level of loading by turning
the knob to right or left then press ENTER key to confirm. User can adjust the column
from 1 to 16 depends on their requirement. The monitor will store the profile for users.
Users can change the level of lading by turning the knob to right or left during workout,
but these changes will not memory in the monitor.
Pulse Recovery:
Check the condition of pulse recovery after exercising for a period of time. Press
Recovery key and also apply the heart rate detector appropriately while stop exercising.
The test will last 1 minute and Time will count down from 1:00 to 0:00 also shown on
the LCD display. After that the result will show out on the LCD from F1.0 to F6.0, the
increment is 0.1. F1.0 means the best, and F6.0 means the worst. Press any key to
return to the main display.

AVENGER Elliptical
18
Maintenance:
1. Wipe down all areas in the sweat path with a damp cloth after each workout.
2. If a squeak, thump, clicking or rough feeling develops the main cause is most likely one of
two reasons:
i. The hardware was not sufficiently tightened during assembly. All bolts that were
installed during assembly need to be tightened as much as possible. It may be
necessary to use a larger wrench than the one provided if you cannot tighten the
bolts sufficiently.
ii. Dirt build-up on the rear rails and polyurethane wheels are also a source of noise.
Clean the rails and wheels with a lint free cloth and rubbing alcohol. Stubborn
build-up can be removed with your thumbnail or a non-metallic scraper, like the
back edge of a plastic knife. After cleaning, apply a small amount of lubricant on the
rails with your fingers or a lint free cloth. You only need a thin coat of lubrication,
wipe off any excess.
3. If squeaks or other noises persist, check that the unit is properly leveled before calling the
service department.
Maintenance Menu in console software:
The console has built in maintenance/diagnostic software. The software will allow you to change
the console settings from English to Metric and turn off the beeping of the speaker when a key is
pressed for example. To enter the Maintenance menu (may be called Engineering mode,
depending on version) press and hold down the Start, Stop and Enter keys. Keep holding the
keys down for about 5 seconds and the message window will display “Engineering mode”. Press
the enter button to access the menu below. Press the up and down keys to navigate the menu.
a. Key test (will allow you to test all the keys to make sure they are functioning)
b. Display test (tests all the display functions)
c. Functions (Press enter to access settings, use up/dn keys to scroll)
i. ODO reset (reset the odometer)
ii. Units (Set to English or Metric display readings)
iii. Sleep mode (Turn on to have the console power down automatically
after 20 minutes of inactivity)
iv. Motor test (continually runs the tensioning gear motor)
v. Manual (Allows stepping of the gear motor)
vi. Key tone (Turn on or off the beep when a key is pressed)
d. Security (Allows you to lock the keypad so no unauthorized use is allowed)

AVENGER Elliptical
19
AVENGER–FUL0005 Parts List
NO. DESCRIPTION O'TY
1 Main Frame 1
3 Crank Arm Assembly 2
5 Pedal Arm 2
7 Connecting Arm (L) 1
8 Connecting Arm (R) 1
9 Lower Handle Bar (L) 1
10 Lower Handle Bar (R) 1
11 Console Mast 1
12 Idler Wheel Assembly 1
13 Crank Axle 1
14 Front Stabilizer 1
15 Swing Arm (L) 1
16 Swing Arm (R) 1
17 Rod End Sleeve 1
18 Rod End Shaft (Blackfast) 2
19 Axle for Slide Wheel (Blackfast) 2
22 Aluminum Track 2
23 6005_Bearing 2
24 6003_Bearing 4
25 6203_Bearing 2
27 Drive Belt 1
28 Flywheel 1
29 Magnet 1
30 Handgrip Foam 2
31 Steel Cable 1
35 Console Assembly 1
36 1150m/m_Computer Cable 1
37 350m/m_DC Power Cord 1
38 Gear Motor 1
39 300m/m_Sensor W/Cable 1
40 800m/m_Handpulse W/Cable Assembly 2
41 Power Adaptor 1
42 2000m/m_Transformer Power Cord 1
44 Transportation Wheel 2
46 Round End Cap 2
47 Slide Wheel , Urethane 2
48 Adjustment Foot Pad 2
49 WFM-1719-12_Bushing 4
50 J4FM-1719-09_Bushing 12
51 Drive Pulley 1
52 Button Head Plug 4
54 Rubber Foot 2
55 Round Cap 2
56 Upright Bushing 2
57 Spacer Bushing 1
58 Side Case(L) 1
59 Side Case(R) 1
60 Crank Arm End Cap 2
61 Ø56 × Ø19 × 15L_Bushing 2
62 Ø56 × Ø19 × 15L_Bushing 2
This manual suits for next models
1
Table of contents
Popular Elliptical Trainer manuals by other brands

Exerpeutic
Exerpeutic Pro Stride 23 owner's manual
NordicTrack
NordicTrack Cx 1055 Elliptical Exerciser user manual

Fitness Quest
Fitness Quest Eclipse 1000HR owner's manual
Life Gear
Life Gear Classic 93380 owner's manual
Pro-Form
Pro-Form 20.0 CrossTrainer user manual
HEALTH RIDER
HEALTH RIDER Cross Trainer 990S user manual
