Brand Developers Fish Seeker User manual

Owner’s Manual

Contents
Welcome ........................................... 2
Safety.............................................. 3
Legal Requirements .................................. 6
What’s in the Box .................................... 7
What else is needed .................................. 9
Preparing your line .................................. 10
Assembling your Fish Seeker .......................... 12
Using your Baery .................................. 17
App Informaon .................................... 18
Magna-ring Control ................................. 19
Calibrang the unit.................................. 21
Loading the dropper rig .............................. 23
Set the target heading and run me. ................... 28
Check before you launch ............................. 30
Launching & retrieving the Fish Seeker.................. 31
General Maintenance................................ 32
Guiding the Fish Seeker on the water ................... 34
Troubleshoong .................................... 35
Baery Care ....................................... 36
Warranty .......................................... 38

Fish Seeker Owner's Manual Page 2
Welcome
Why read this manual
Fishing with the Fish Seeker is not complex, but there are a few things you
need to know to ensure you get maximum enjoyment from it, and that you
comply with your local marime regulaons.
Take the me to read this manual before you get to the beach, so you can
maximise shing me.
Support
If you experience problems with your equipment or its performance, please
call NZ Customer Care: 0800 002 999 or AUST Customer Care: 1800 890 840
Welcome

Page 3 Fish Seeker Owner's Manual
Safety
Safety rst!
Your Fish Seeker is an advanced shing system. Your enjoyment will rely on
observing a high level of personal safety as well as protecng the safety of
others.
This secon sets out important safety guidelines for operang your Fish Seeker.
Keep your distance from other shers
Keep clear of other beach users and shers – whether surfcasters, kite shers
or others.
Look out for other konki users on the beach before launching your Fish
Seeker. If there are other users, nd out where their units are and set your Fish
Seeker unit accordingly.
Safety guideline
• Keep a good distance between yourself and other beach users and
shers and note the direcon of the current.
The Fish Seeker is designed to be used o sandy beaches, with a seabed
free of foul ground, obstrucons and obstacles. These features could hinder
retrieval of your Fish Seeker.
Look out for the safety of others
Be considerate to other beach occupants at all mes when using your Fish
Seeker. Watch out for:
• Children
• Onlookers and passers-by
• Animals (such as dogs, cats or seagulls)
• Swimmers and other water users
• Watercra – Boats, kayaks jet skis
Follow the guidelines below to ensure the safety of others.
Safety

Fish Seeker Owner's Manual Page 4
Safety guidelines
• Take extra care during launch me
• Warn other beach users of any dangers and make them aware of
where your Fish Seeker line is
• Keep young children away from the Fish Seeker
• Never leave hooks unaended, warn other beach users of any hooks
on land when baing your hooks
• Don’t leave baited hooks lying around as animals may try to eat them.
• Keep clear of swimmers and warn anyone swimming near your line.
• If anyone is helping you use the Fish Seeker, warn them of the dangers
and ensure they are instructed or trained in using the Fish Seeker
product.
Keep yourself safe
Follow the guidelines below to ensure your personal safety while operang the
Fish Seeker:
Safety guidelines
• Be aware of des and currents, and where they may carry your Fish
Seeker
• Always retrieve your unit if it presents a danger to other beach users
• Handle hooks with care. If a hook gets fouled, don’t try to release it.
Hooks only cost a few cents – trying to save one isn’t worth the risk of
a painful injury.
• Always disconnect the baery during transport or when it’s not in use.
Safety

Page 5 Fish Seeker Owner's Manual
Be safe around other vessels
Follow the guidelines below to operate your Fish Seeker safely around boats or
other vessels.
Safety guidelines
• Always know where your Fish Seeker is, use binoculars if
necessary.
• Do not use your Fish Seeker at night or in poor light.
Safety

Fish Seeker Owner's Manual Page 6
Legal Requirements
Know what local rules apply
Always nd out which specic local regulaons, including size and bagging
limits apply when you plan your shing expedion. Longline shing is
restricted or even prohibited in some locaons. Fishing limits also vary
dependant on the locaon. Do not break these regulaons as penales will
apply, including the loss of your Fish Seeker equipment.
Where to nd sheries informaon
For NZ go to www.mpi.govt.nz or contact the Ministry of Primary Industries on
NZ 0800 00 83 33.
For regions in Australia, please contact your local shing regulatory authority
to nd out your local rules and regulaons
Idenfy your equipment
Ensure your name and phone number is noted on your Fish Seeker unit in the
space provided at the back of the hull with permanent marker. It is a sheries
requirement that the sher is idened with their name ,(inials and surname)
on the oat (the Fish Seeker unit) which is aached to your longline. It is also a
recommendaon that a phone number is included.
Labelling your Fish Seeker and equipment is a safeguard in the event of loss
at sea, or if you leave something on the beach. We recommend naming all
components such as the baeries and both secons of the hull. If you can, we
suggest geng these details engraved, as permanent marker will wear o over
me and need to be redone.
Your insurance company may also cover the Fish Seeker as a recreaonal item
against loss. We recommend you check the extent of cover with your insurer.
Legal Requirements

Page 7 Fish Seeker Owner's Manual
What’s in the Box
Fish Seeker
1 x Complete Fish Seeker unit (with bait pod ed)
What's in the Box
Jets
Hatch Opening
Tie Rod
Hull
Magnec Switches
Parts and descripon
1 x Baery Pack
1 x Baery Charger
Bait Pod
Compass Connectors
Baery
Baery Connectors

Fish Seeker Owner's Manual Page 8
What's in the Box
1 x Fish Seeker trace
Including quicklink and swivel on a
foam trace rack
1 x Tow point pulley
1 x Maintenance grease tube
1 x Magna-ring
Used to control your Fish Seeker

Page 9 Fish Seeker Owner's Manual
What else is needed
The following equipment is required to use your Fish Seeker:
1. Fishing rod – recommended with 100lb braid of 500 or more metres in
length (range is approximately 1000 m in calm condions)
2. Fishing rod holder
3. Bait
4. Knife and chopping board
Recommended Extras:
5. Chilly bin
6. Smart phone with Fish Seeker app installed (oponal)
7. Binoculars
8. Sunblock
9. Spare hooks & line
10. Snap lock bags
What else is needed

Fish Seeker Owner's Manual Page 10
Preparing your line
Before you use your Fish seeker, you’ll need to prepare your line. This process
involves the following steps:
Step Acon
1Remove the quick link and swivel from the end of the Fish
Seeker Trace by squeezing the quick link and sliding the solid
ring out
Preparing your line

Page 11 Fish Seeker Owner's Manual
Preparing your line
2Feed the shing line from your shing rod through the tow
point pulley as shown:
3Aach the line to the swivel. The easiest way to do that is use
an Uni Knot (see below)
How to e a Uni Knot
1. Pass the line through the eye of the
swivel and make a loop with the tag end
2. Wrap the tag end mul�ple �mes
over the line (Recommend 5 or more �mes)
3. Take it out of the loop 4. Pull the tag end and the standing part
4. Make the loop to the desired size by pulling
the standing part. Trim off excess tag end
5. The finished knot looks like this

Fish Seeker Owner's Manual Page 12
Assembling your Fish Seeker
Step Acon
1Open the unit by unscrewing the e rod at the tail end of
the unit.
Assembling your Fish Seeker
Rear Secon
Front Secon
Baery
Hatch
Tie Rod
Thrusters/Jets
Main Seal
Pin Slot
Hatch Pin
Bait Pod

Page 13 Fish Seeker Owner's Manual
2Insert the baery into the front secon of the hull by pushing
the baery into the open cavity unl they are secured in past the
lip, to stop movement when the Fish Seeker is in use.
3Plug in the wires of the front secon to the wires of the rear
secon. The are 2 connecons, one to connect the compass in
the nosecone (black 6 pin plug), and 1 to connect the baeries
to the PCB (XT60 plug). Always plug the compass connecon in
before the baery connecon.
Never unplug the compass while the baery is connected.
Compass Cable
Baery Cable
Assembling your Fish Seeker

Fish Seeker Owner's Manual Page 14
4Tuck the excess wiring into the unit. Best pracse is to tuck the
compass wiring up into the side of the rear secon, and the
baery wiring into the front secon above the baery.
5Bring the openings of the front secon and rear secon together,
ensuring the at secons at the boom of both hull secons
meet.
IMPORTANT!
IT IS CRITICALLY IMPORTANT THAT THE SEAL IS CLEAN AND FREE FROM
SAND. DO NOT OPEN OR CLOSE YOUR FISH SEEKER ON THE SAND – OPEN
AND CLOSE IT ON A SAND FREE SURFACE, LIKE A TOWEL OR CHILLY BIN.
Assembling your Fish Seeker

Page 15 Fish Seeker Owner's Manual
✔
6Ensure the pieces are sealed together and water ght by
screwing the e rod at the rear of the rear secon – do not
overghten. Tighten only unl the faces shown just touch. Here
the faces are shown with a small gap:
Connue ghtening unl the gap closes in at least one place.
Small Gap
Small Gap
Small Gap
No Gap
Assembling your Fish Seeker

Fish Seeker Owner's Manual Page 16
7It is normal for a small gap to remain in some secons of the
sealing faces. This is normal. As long as the gap closes in some
areas the seal will funcon properly.
8If the e rod is not already vercal, ghten unl it becomes
vercal (less than half a turn is all that is needed)
Once this is properly fastened in the front secon, there should
be no movement between the two pieces.
A small gap at top
is not an issue if the
gap is fully closed at
the boom.
Small Gap
No Gap
Assembling your Fish Seeker

Page 17 Fish Seeker Owner's Manual
Using your Baery
Using your Baery
Your kit includes one rechargeable 12V baeries and a baery charger. If cared
for, this baery can provide over a thousand uses over many years.
Charging your baery
Follow the steps below to charge them.
Step Acon
1Plug the charger into the mains
power, the light will shine
green.
Plug in the baery, while
charging, the light will turn
red.
2When the light turns green disconnect the baeries.
This will usually take 2 to 4 hours per baery.

Fish Seeker Owner's Manual Page 18
App Control
App Informaon
The Fish seeker can be controlled with our free smartphone app for Andriod
and iOS devices, or with the included magnec ring ("Magna-ring Control" on
page 20). The Fish Seeker will respond to your commands by revving the
engine.
Our app oers the same controls as the magna-ring (with the addion of
displaying the baery level). To download and install the app, search "Fish
Seeker" on Apple or Android app stores.

Page 19 Fish Seeker Owner's Manual
Magna-ring Control
The Fish seeker can be controlled with the magna-ring or using our free
smartphone app for Andriod and iOS devices ("App Control" on page 18).
The Fish Seeker will respond to your commands by revving the engine.
The Fish Seeker has two magnec sensors that can be triggered with the
magna-ring. A square and a circle indicate where the magnec sensors are on
the back of the hull:
When the magna-ring is touched onto a symbol, the sensor is triggered. There
are three ways to interact with the sensors
Step Acon
1 Short – Momentarily touch the mag ring to the symbol then
remove
Magna-ring Control
Table of contents
Popular Fishing Equipment manuals by other brands
Shimano
Shimano RD-5700 Service instructions

Jiffy
Jiffy Pro II Lectric 53 operating manual
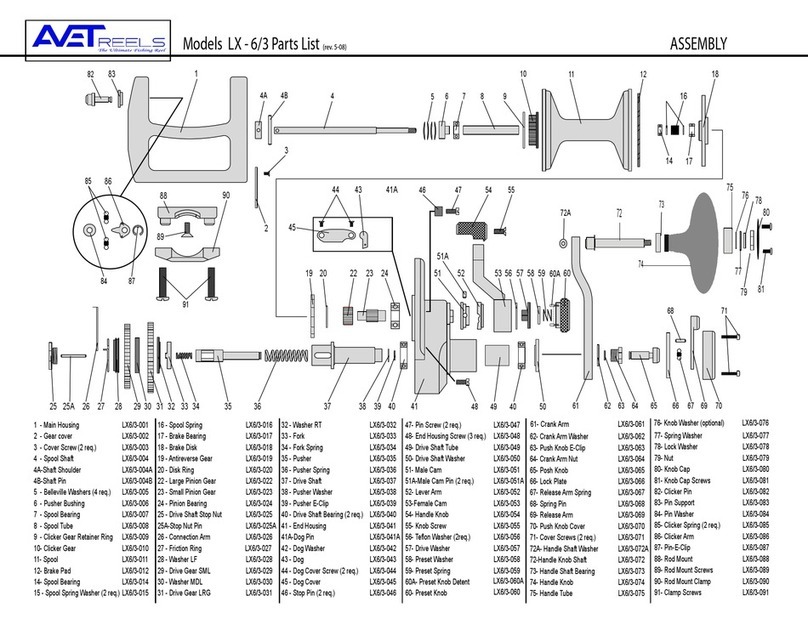
Avet Reels
Avet Reels Fishing Reel LX - 6/3 parts list

Powertiki
Powertiki PT-530 operating instructions

STRIKEMASTER
STRIKEMASTER Honda 35CC LITE owner's manual

Browning Fishing
Browning Fishing STALKER BSX1000 instructions
