BREZZICNI CL-3622 User manual

CL-3622
USER' S MANUAL

Contents
Prior To Use
Basic Functions
Congratulations
Safety Precautions
Unpacking
Phone Layout and Keys Function
Keys Description
LCD Window Icons Description
Charging Handset
Turning Handset On/Off
Installing Batteries
Installation Instruction
Making a call
Receiving a call
Muting the Microphone
Adjusting Audio Volume
Last Number Redial
CID Book
Key Lock
Handsfree
Flash Signal
Ringer Setting
Selecting a Language
HS Name
Auto Answer
Paging
Dial Mode
1
16
16
1
16
1
17
3
18
4
18
7
19
9
20
10
22
12
24
14
15 24
25
25
26
26
27
27
Part One: Cordless Phone

Contents
Advanced Functions
Feature List
Menu Navigation
Menu Map
Phone Book
BS Settings
HS Settings
Registration
Calling with more than one
Handset
CallerIDoncallwaiting
28
46
28
29
30
33
35
39
40
Troubleshooting
47
42
43
About the Noise Filter
49
Technical Specifications
48
Part Two: Wireless Doorbell
49
If you subscribe to a DSL service
Please attach a noise filter (contact your DSL provider) to the telephone line between the
base unit and the telephone line jack in the event of the following:
- Noise is heard during conversations.
- Caller ID features do not function properly.
To single-line
telephone jack
Noise filter

48
nCongratulations
on purchasing our high quality product.
Please read the manual carefully before installing your system and follow all of the directions to ensure
proper installation.
nSafety Precautions
To reduce the risk of electrical shock and injury, please follow these basic safety precautions before
using the phone.
1. Carefully read and observe the instructions in this manual.
2. Follow all warnings marked on the unit.
3. When cleaning, unplug the phone first, then use a damp cloth to wipe. Do not use liquid or aerosol
cleaners.
4. Do not place objects on the line cord that may cause damage.
5. Do not use this phone in wet surroundings or environments where there is a risk of explosion.
6. Avoid spilling of any liquid on the phone.
Prior To Use
1
Technical Specifications
Frequency Range 1.88~1.90GHz
Channels 120 Duplex channels
Frequency Stability
Carrier Power
Modulation
<250mW
GFSK
< 50 KHz
Charging time 15 hours
Ambient temperature Normal: 15 ~ 35 , Extreme: 0 ~ 40
Humidity 0%~90%
Dimensions (mm) Indoor phone: (Base): 132.1 x 132.1 x 68.5; (Handset):
176.5 x 60 x 34
159.3 x 48.4 x 28.9;
Outdoor station:
Power Supply Indoor phone (Base)
(Handset)
input: 7.5V, 300mA;
lkaline batteries
input: Ni-MH 1.2V 2, 600mAh
Outdoor station input:2Csizea
x
?Design and specifications are subject to change without notice.

247
7. Unplug this phone from the wall outlet and refer servicing to qualified service personnel only.
8. Pay attention to the polarity of the batteries, insert the rechargeable batteries in accordance with
polarity symbols (this instruction is found in the installing batteries section.)
9. Use only . Never use other ordinary batteries or
conventional alkaline batteries. Otherwise this may not only cause personal injuries but also damage
to the unit.
10. Do not mix exhausted batteries with full batteries. Exhausted batteries shall not be disposed of with
the usual household waste or in a fire.
11. If you are sure you will not be going to use the handset over a month, please take out the batteries
from the battery compartment.
12. Use only .
13. Keep the phone out of the reach of children.
14. Use the phone only in the described manner.
15. Stop using the phone if it becomes damaged.
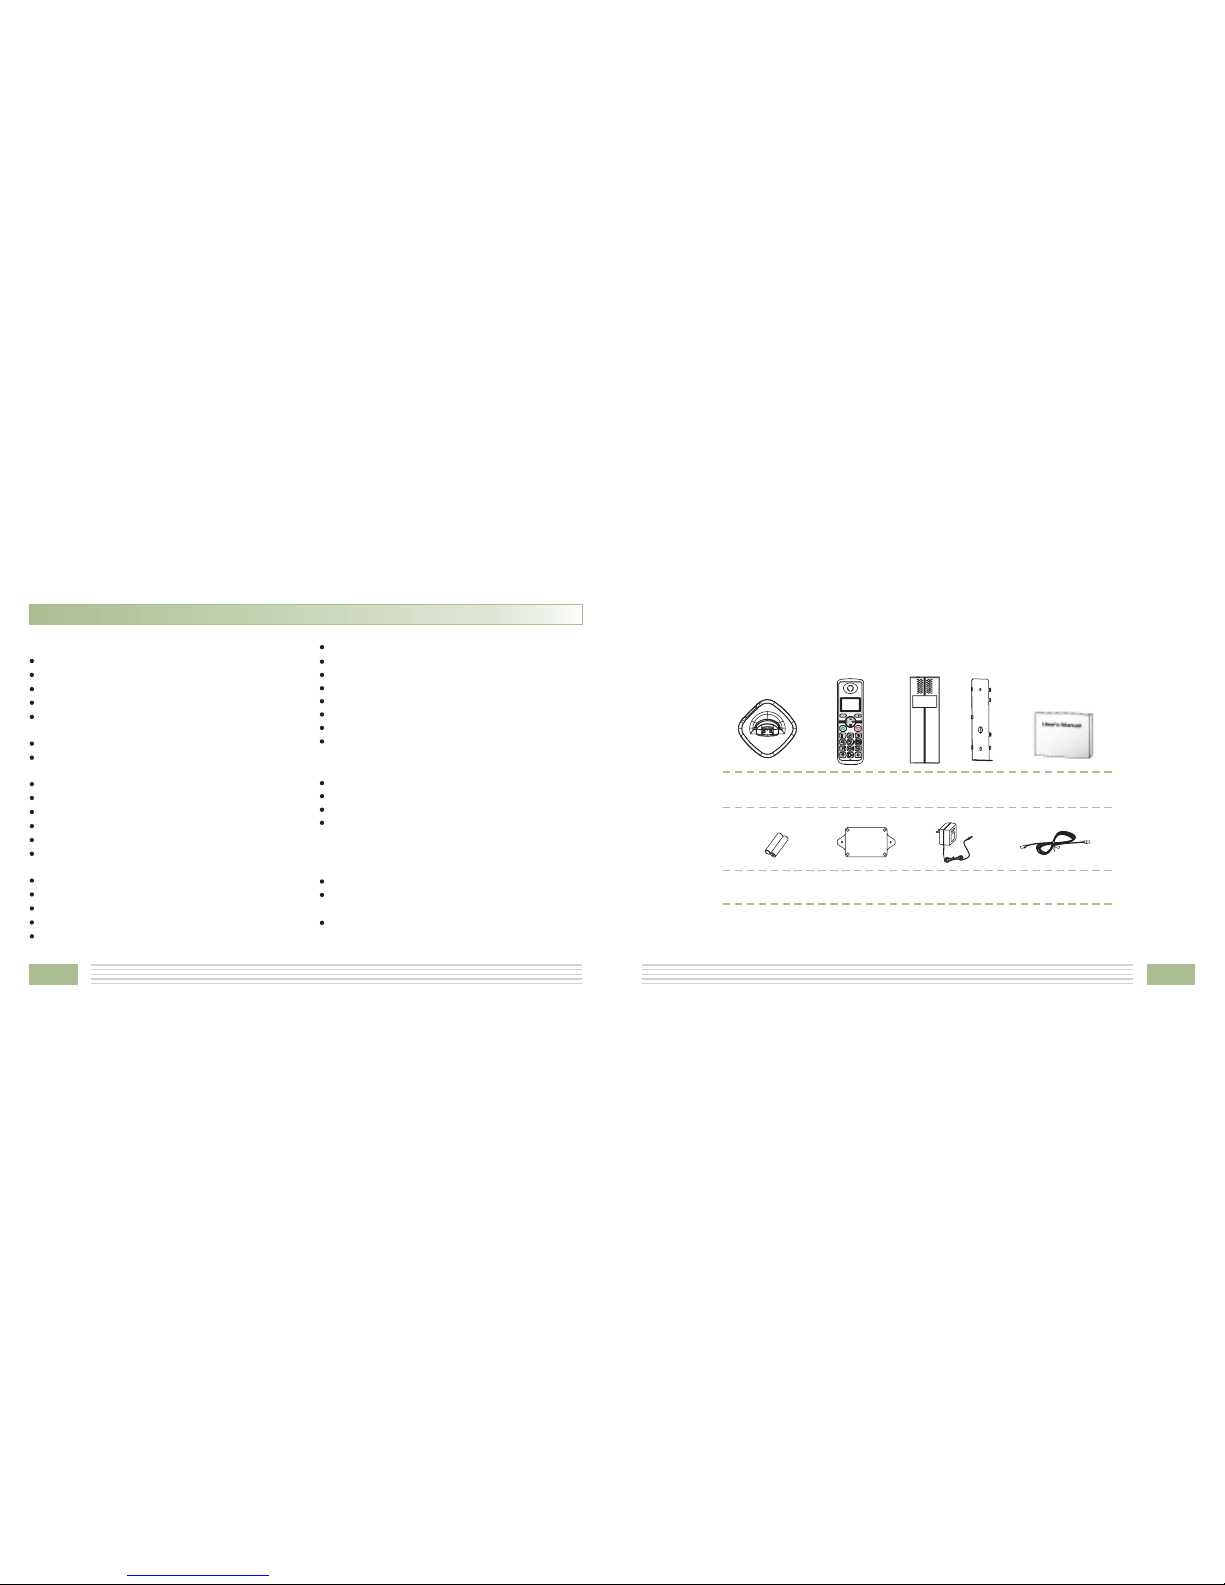
the batteries indicated in the User's Manual
the power supply indicated in the User's Manual
Troubleshooting
Symptom Check & Remedy
No operation Check that the power adapter is properly connected.
Check that the telephone line cord is properly connected.
Check that the handset batteries in full power.
Check that the handset batteries are installed properly.
No dial tone Check that the telephone line cord is properly connected.
Check that the power adapter is properly connected.
Nothing appears
on the display
Check that the handset batteries are installed properly.
Check that the handset batteries in full power.
Check that the handset is on.
Handset seems
to have very short
battery life
Caller s number
is not displayed
’
Check the charge contacts.
Consistently short battery life may indicate that replacement of the batteries is necessary.
Make sure the right batteries be used.
Make sure you have subscribed to a Caller ID service via your network provider.
The caller may have withheld their details.
Let the phone ring a couple of times as there may be a delay in receiving the Caller ID information.

346
nUnpacking
Once you have unpacked your door phone, make sure that all the parts shown below are available. If
any pieces are missing or broken, please promptly call your dealer.
Line cord*Adapter*
2 AAA Ni-MH
batteries
User's manual
Indoor phone
(Handset)
Outdoor
station
Indoor phone
(Base)
*The shape of the plugs can vary according to each country’s specification.
MENU/R C/
Feature List
1.8GHz DECT technology with GAP
Up to 5 handsets for optional for one base
Up to 4 bases for optional for one handset
Phonebook with up to 50
9 VIP ring tones setting for phonebook
entries
Redial book with up to 10 entries
10 ring tones and volume selectable (5
levels+off)
Internal call
Call transfer
3-way conference call
Receiver/Speaker volume adjustable (5
levels)
PIN protection
Predialing
Redial, Flash, Pause,
TONE/PULSE dialing mode selectable
entries
Key tone ON/OFF selectable
Full handsfree speakerphone
Mute
FLASH time selectable
Call duration display
Real time clock (set time)
Keypad lock
13 languages selectable
Auto answer ON/OFF selectable
Alarm clock include snooze option
Handset Name setting
LCD backlight
FSK and DTMF dual system Caller ID
Caller ID / Call Waiting
Caller ID list with up to 40 entries
Incoming calls can be called back/added
to phonebook/deleted
Caller ID
Compatible with audio indoor phone
Calling indoor phone and setting up a
conversation
Unlocking (optional)
Indoor phone
Outdoor station
Unlock module
Mounting
bracket

445
nPhone Layout and Keys Function
Charging contacts
Battery
compartment
cover
Speaker
Indoor phone Handset()
Earpiece
Microphone
Menu/OK key
Dial/Speaker key
Cancel/Mute key
Down
/Phonebook key
End key
Left/Int key
Up/CID key
Alph numeric
keys
a
Display
Star key Hash key
Right/Redial key
MENU/R C/
Notes:
The conversation can be up to 2 minutes. After 2 minutes, the line will be disconnected
automatically.
The ring will continue for about a minute if the indoor handset does not respond with it.
(b)

5
44
2. To call
CallWhen the visitor presses the button on the outdoor station, the internal ring will sound to indicate
the host. If the called handset is on an external line, the handset user will hear prompt tones, which
allows he/she to hang up and wait for the ring to sound again.
3. Talking
4. Unlocking (optional)
#
The host can press the key on the handset to talk with the visitor. Press the key to complete the
conversation.
During the conversation, the host can press and hold the key to unlock the door.
(a)
nPhone Layout and Keys Function (continued)
Rear and bottom View
Power Jack
Phone
Line Jack
Charge pins
Page button
Indoor phone (Base)

643
Register button
Call button
Part Two: Wireless Doorbell
1. To register
Call
Register
Before using the outdoor station, you should first register it to the base unit. First, you should hold the
key on the bottom of the base for 5 seconds or longer then release it. Second, please press the
button of the outdoor bell then hold the key on the back of the outdoor unit for 5 seconds or
longer then release. Please remember to remove the small rubber case which is sticked on the
key of outdoor station. If you still can not register successfully, you can try to turn off the power of the
base and remove the batteries from the outdoor unit before you hold the key then turn on the
power, install the batteries and then try again. After you hear a prompt tone, the station has been
registered to the base successfully. Please see the figure below for details.
Register
Register
nPhone Layout and Keys Function (continued)
Rear View
Call button
Outdoor station
1. 12V DC Positive input
2. 12V DC Negative input
3. Unlock control positive terminal
4. Unlock control negative terminal
5. Silica gel plug
1
2
3
45

7
nCaller ID on call waiting
When you subscribe to Call Waiting service
from your local telephone company, the
telephone will display the name and number
of the second caller while you are having a
conversation.
Caller 1
4361234 Caller 1
4Caller 2
2915678
Caller two's information
is displayed
Caller ID info displayed
1.When you are on the line, the telephone will
automatically display the name and number of
the second caller.
2.Press the key to answer the second caller.
3.When you have finished, press the key to
continue with your conversation with the first
caller.
Note:
If you have transferred an external call to
another handset, you cannot use the call
waiting function via the second handset.
42
MENU/R
MENU/R
nKeys Description
Dial/Speaker key
Make/Answer a call.
Activates the speakerphone if pressed during a call.
End a call.
End/Power key
Up/CID key
Down/Phonebook key
INT key
Long press to activate power on/off, as described in page 15.
Scroll up through lists and menu options.
Increase the earpiece/speakerphone volume during a call.
Enter the CID book, as described in page 22.
Scroll down through lists and menu options.
Decrease the earpiece/speakerphone volume during a call.
Enter the Phonebook, as described in page 31.
Set up an internal call to another handset.
Transfer an incoming call to another handset.
Set up a conference call with an external line and an internal handset.
Navigation key:

841
Setting up a 3-way conference call
When you have both an external call and an
intercom call in progress, you can set up a three-
way conference call, like this:
1. During an external call, press the key and
then input the number of the handset you
want to join the 3-way call.
2. The called party press key to answer.
3. The calling party can press the key to start
the 3-way call.
4. Either of the two internal handsets can press
the key to leave the conference call at any
time.
Note:
If one of the handsets drops the conference
call, the remaining handsets will continue the
conference.
Redial key
Star key
Enter the redial book, as described in page 20.
Insert a pause when pre-dialing a number.
Press and hold to turn on/off keypad lock function.
Set up a conference call, as described in page 41.
Menu/OK key (left)
Cancel/Mute key (right)
Enter the menu functions in standby mode.
Confirm selections & actions.
Return to the previous menu.
Entertomuteduringacall.
Delete an incorrect character/digit.
Performs "Flash" function.
nKeys Description (continued)
MENU/R
C/

9
40
nCalling with more than one Handset
If you have more than one handset registered to
the same base, you can make internal calls and
transfer an external call between the registered
handsets.
1. Press the key, the LCD displays as follows,
then input the number of the handset you
want to call.
Making an internal call
2. If the handset entered is valid, the called
handset will ring and display .
The handset user can press the key to
answer the internal call.
3. At the end of your conversation, press the
key.
HSX CALLING
Call transfer between handsets
You can transfer an external call between the
handsets those are registered to the same base.
1. During an external call, press the key then
input the number of the handset you want to
transfer the call to.
2. If the called party can answer your call, he/she
can press the key to talk with you. At this
time you can inform him/her of the incoming
call.
3. When the called handset answers, press the
key or replace the handset to the base to
complete the transfer.
Note:
During the internal call, if an external call
comes in, the LCD will show the caller's
number. You should press the key to end
the internal call first then press the key
to answer the call.
12345
nLCD Window Icons Description
New Call
Off Hook
Indicates you have missed one
or more calls.
Indicates the line is engaged.
Hands-free
Battery Icon
Indicates the handsfree function
is enabled.
Indicates battery charge level.
Signal Icon
Keypad Lock
Indicates whether the current
signal exists or not. If the
handset is too far from the base,
this icon will blink on the LCD.
This icon appears when the
keypad is locked.

10 39
nRegistration
The supplied handset is already registered with
the number 1.
3. Use to scroll through the Base
names list, press the key to choose a base
to your necessary. The handset will search for
the requested base and the relevant
information will flash on the LCD.
You can register up to 5 handsets
(include an outdoor station) to the same base in
order to share the same line with other people.
Before registering a handset to the base, you
should press and hold the key on the bottom
of the base for about 5 seconds then release it.
REGISTER
1. Press the key.
2. Press or key repeatedly to choose
, then press the key.
or key
4. If the base is found, and the handset is
successfully registered, you will be prompted
to enter the PIN code (the default one is 0000).
On validation of the PIN code, the
Registration tone will sound and the Base
assigns a number to the handset. If the PIN
code entered is invalid, a warning tone will
sound, and the handset will return to the
previous registration state.
5. If the base is not found, the handset will
behave according to the Out of Range
condition.
MENU/R
MENU/R
MENU/R
nInstalling Batteries
Slide the battery cover in the direction of the
arrow and pull it out.
Insert new batteries as indicated, matching
correct polarity (+,-).
The rechargeable Ni-MH batteries (AAA size) come with
your phone. Install the battery before using your
phone.
2.
1.
Indoor phone
3. To replace the battery
cover, slide the cover up
until it snaps in place.
Reversing the orientation may
damage the handset.
The batteries need to be replaced if
they do not recover their full storage
capacities after recharging.
When replacing the batteries,
always use good quality Ni-MH re-
chargeable batteries. Never use
other batteries or conventional
alkaline batteries.
Notes:

11
38
Selecting a Base
This function allows you to select a base from
those already registered to the handset. You can
access the options by scrolling the menu.
3. Press to choose the ,
press the key.
4. You can use to select the base
you want, then press the key. If you select
a non-existent base, the handset will sound a
warning tone.
5. The display will show . Press the
key to confirm. A confirm tone will be
SELECT BS
SELECT BS X
1. Press the key.
2. Press or key repeatedly to choose
menu, then press the key.
or key
or key
HS
SETTING
heard.
HS Reset
This function allows you to reset the handset
settings to the factory default.
3. Press to choose the
menu, press the key. You will be prompted
to enter the PIN code.
4. Enter the PIN code (the default one is 0000),
then press the key. If the PIN code is
validated all handset settings will return to the
factory default, otherwise a warning tone will
be heard and the settings will remain.
After resetting, the handset will return to
standby mode.
HS DEFAULT
Result:
1. Press the key.
2. Press or key repeatedly to choose
menu, then press the key.
or key
HS
SETTING
MENU/R
MENU/R
MENU/R
MENU/R
MENU/R
MENU/R
MENU/R
MENU/R
MENU/R
nInstalling Batteries (continued)
Slide the battery cover in the direction of the
arrow and pull it out.
Insert new batteries as indicated, matching
correct polarity (+,-).
You can install two
before using the outdoor station.
C size batteries (not supplied)
2.
1.
Outdoor station
3. To replace the battery
cover, slide the cover up
until it snaps in place.
Reversing the orientation may
damage the unit.
When replacing the batteries, always
use good quality C size alkaline
batteries.
If you have installed the batteries,
you do not need to connect the DC
positive input and negative input.
Notes:

12 37
2. Setting date & time
1. Press the key.
2. Press or key repeatedly to choose
menu, then press the key.
3. Press or key to choose ,
press the key.
HS
SETTING
DATE & TIME
1. Date Format
1. Press the key.
2. Press or key repeatedly to choose
menu, then press the key.
3. Press or key to choose ,
press the key.
4. Press the key to choose .
or key
HS
SETTING
DATE & TIME
DATE FORM
5. You can use to choose the Date
format ( / ), press the key to
save.
DD-MM MM-DD
Note:
At step 5 you need to enter the time in 24-
Hour format.
Setting Date & Time
4. Press or key to choose or
menu, press the key.
5. Enter the current date or time by numeric
keypad and press the key to save and exit.
SET DATE
SET TIME
MENU/R
MENU/R
MENU/R
MENU/R
MENU/R
MENU/R
MENU/R
MENU/R
MENU/R
MENU/R
nInstallation Instruction
Connect one end of the phone line cord to the phone
line jack of the base, and the other end to a standard
phone wall outlet.
Connect the modular end of the AC power adapter to
the power jack of the base, then plug the AC adapter
intoastandardACwalloutlet.
1.
2.
To AC w a ll o u tl et
To ph o ne w a ll
outlet
Indoor phone
Outdoor station
Choose a proper location for the outdoor station. Be sure to consider the average height of
visitors.
Fixuptheironmountingbracketonthewall,thendrillthescrewsinit.
Pull downward outdoor station and finish the installation.
If you do not install two batteries, you should connect the and n .
Moreover, if unlocking function is necessary, you also need to connect other two terminals.
DC positive input egative input
1.
2.
3.
4.

13
36
Key Tone
Every time you press a key, your handset
acknowledges it with a key tone. You can
disable the key tones for a silent use. In certain
error conditions, a warning tone will sound
when an incorrect key is pressed.
3. Use to choose
menu, press the key.
4. Press the key again to choose .
5. You can use to choose or
to enable or disable the function.
6. Press the key.
TONE SETUP
KEY TONE
ON
OFF
1. Press the key.
2. Press or key repeatedly to choose
menu, then press the key.
or key
or key
HS
SETTING
Audio Setup
You can also use the menu to adjust the audio
volume.
1. Press the key.
2. Press or key repeatedly to choose
menu, then press the key.
3. Press the key to choose ,
press the key.
4. Use or key to choose
or , press key.
5. The display shows the current setting. Use the
or key to choose the volume level
(VOLUME 1-VOLUME 5), press the key.
HS
SETTING
AUDIO SETUP
SPEAKER VOL
EARPIECE V
Note:
For normal use, we recommend you
leave the key tone enabled. This makes
the phone easier to use.
MENU/R
MENU/R
MENU/R
MENU/R
MENU/R
MENU/R
MENU/R
MENU/R
MENU/R
MENU/R
Note:
The silica gel plug on the rear of the outdoor station is used to prevent the screws from rusting.
You should remove this plug before connecting the line. But after the connection, remember to
cover it again.

14 35
nHS Settings
Setting Alarm
1. Press the key.
2. Press or key repeatedly to choose
menu, then press the key.
HS
SETTING
You are able to set the alarm on the handset
and adjust the alarm settings.
3. Press the key again to choose .
4. The display shows the current set. Use the
or key to select / , press the
key.
5. If you select , the display indicates you
to enter the time in : format.
ALARM
ON OFF
ON
HH MM
6. Press the key, a beep sounds and the
display shows you can
press to enable or disable the
snooze function on the alarm and press the
key.
7. When the alarm sounds, press any key to
switch it off.
SNOOZE ON/OFF,
or key
Notes
SNOOZE ON
:
At step 5 you need to enter the time in 24-
Hour format.
If you press any key at the right time the
alarm to ring, the alarm will be silent.
If you choose , the alarm will
ring at regular intervals of 10 minutes.
MENU/R
MENU/R
MENU/R
MENU/R
MENU/R
MENU/R
Wall
nCharging Handset
! Important Note YOU SHOULD FULLY
CHARGE THE HANDSET 15
: Before initial operation,
for about hours.
To charge the handset, you should place it on the base.
Result: When you place the handset on the base, the handset
automatically turns on.
MENU/R C/
Connect the wire between the outdoor station and the unlock module,
please see the figure on the right.
Unlock module (optional)

If the handset is in power off mode, when
you place the handset on the base, it
automatically turns on. To turn the handset
on or off in standby mode, follow these
steps:
1. ,
press and hold the key until you
switch the display on.
To turn on the handset when it's off
On power up, the
handset will enter subscription mode
and search for a registered base. A
message as shown below will be
displayed to the user, and the signal icon
will flash.
If the handset is successful in finding a base,
the handset will enter the standby mode, the
display will show handset number or the
handset name (if you have one saved as
described on page 25), signal icon, battery icon
and current time. If the handset is unsuccessful
in finding a base, the handset will behave
according to the Out of Range condition.
nTurning Handset On/Off
2. , keep the key
pressed until the display disappears.
To turn off the handset
Note
YOUSHOULDFULLY
CHARGE THE HANDSET BEFORE USING.
:
When battery power is very low, if you place
the handset on the base, the display will
show as below.
searching
----
1534
Modify PIN
This function allows you to change the PIN
number of the currently active Base. The default
PIN is 0000.
4. The display shows " " to prompt you to
enter the old PIN. If the old PIN code is
validated, you will be prompted to enter a new
PIN code. If the old PIN is not validated, a
warning beep will sound and you will be
returned to the menu.
3. Use to choose
menu, press the key.
5. Enter the new PIN, press the key. You will
be requested to confirm the PIN code. Enter
the new PIN again then press the key to
confirm and exit.
MODIFY PIN
MODIFY
PIN?
PIN
1. Press the key.
2. Press or key repeatedly to choose
menu, then press the key.
or key
BS
SETTING
BS Reset
This function allows you to reset the Base
setting to the factory default.
1. Press the key.
2. Press or key repeatedly to choose
menu, then press the key.
or key
BS
SETTING
3. Press to choose ,
press the key. You will be prompted to enter
the PIN code.
4. Enter the PIN code (the default PIN is 0000),
then press the key. If the PIN code is
validated all Base settings will be returned
to the factory default, otherwise the
settings will remain.
After resetting, the handset will return
to standby mode.
BS DEFAULT
Result:
MENU/R
MENU/R
MENU/R
MENU/R
MENU/R
MENU/R
MENU/R
MENU/R
MENU/R

16 33
nMaking a Call
You can enter the desired phone number in
standby mode, which allows you to make
corrections before dialing. Follow these steps:
1. Enter a telephone number (up to 32 digits).
Check it. You can also use the key to
insert a pause.
1. Pick up the handset and press the key.
3. To end the call, either press the
2. Dial a telephone number.
key
or replace the handset on the base.
Result: The icon appears on the LCD.
Basic Functions
Note
Redial
:
To make a call to the last number you dialed,
use the feature. For details, see page
20.
Note:
If you make a mistake while entering a
number, press the key to clear the
last digit.
2. When the number appears correctly, press
the key.
All descriptions in this manual assume that the handset is in standby mode. Set the telephone to
standby mode by pressing the key.
Part One: Cordless Phone nBS Settings
Terminate HS
This function allows you to delete a handset
registration from the base.
3. Press the key again to choose
. The display shows " " to prompt you
to enter the PIN Code (The default PIN Code is
"0000"). Then press the key.
4. Use the to select a handset. If
you select the current handset or a non-
existent handset, a warning tone will be heard.
5. Press the to confirm, and the selected
handset will behave according to the
unregistered condition.
TERMINATE
HS PIN?
key
1. Press the key.
2. Press or key repeatedly to choose
menu, then press the key.
or key
BS
SETTING
Flash Time
You can select to change the Flash time by the
following steps:
1. Press the key.
2. Press or key repeatedly to choose
menu, then press the key.
3. Use or key to choose the
menu. Press the key.
4. The display shows the current setting. Use the
or key to select / , press
the key.
BS
SETTING
FLASH TIME
SHORT LONG
C/
MENU/R
MENU/R
MENU/R
MENU/R
MENU/R
MENU/R
MENU/R
MENU/R
MENU/R

17
32
nReceiving a Call
When a new call is received, t
If the caller can be identified, the caller's
phone number is displayed.
1. To answer the call, press the key. If
you have activated the Auto Answer
function, when the handset is on the
base,simplyliftituptoanswer.
he call
information will appear on the LCD.
2. To end the call, either press the key
or replace the handset on the base.
Result: After you hang up, the LCD displays the
call duration.
Notes:
You can select the ringer volume by using
or key when the phone rings with an
incoming call.
If the polyphonic ring tone is set, the ring
tone may continue for 4 seconds after the
caller's hang-up or after the parallel phone
had answered the call.
Deleting the Phone book Entries
PHONE BOOK
DELETE ENTRY
CONFIRM ?
DELETE ALL
CONFIRM ?
3. Press to choose .
Press the key.
4. Press repeatedly until the name
you want to delete displays, then press the
key. The display shows " ". You can
press the key to delete it or press the
key to exit.
5. At step 3, if you choose menu and
press the key, the display will show
" ". You can press the key to
delete all the entries or press the key to
exit.
1. Press the key.
2. Press the to choose ,
press the key.
key
or key
or key
Editing the Phone book Entries
PHONE BOOK
CHANGE ENTRY3. Press the to choose
menu, press the key.
4. Press repeatedly until the entry
you want to edit displays, press the key to
confirm.
5. If necessary, press the key to clear the
digit(s) then enter the desired name and
number, press the key to save.
6. Use to select the ring you like to
associate with the number, press the key to
confirm.
1. Press the key.
2. Press the to choose ,
press the key.
key
key
or key
or key
Dialing a Number from Phone book
Find out the number you want to dial. Refer to
"Viewing the Phone book Entries". Then press the
key to dial out the number.
PB Status
The PB Status shows the number of phone book
entries already stored. When the
shows on the LCD, press the key to enter it.
PB STATUS
MENU/R
MENU/R
MENU/R
MENU/R
MENU/R
C/
MENU/R
MENU/R
MENU/R
MENU/R
MENU/R
MENU/R
C/
MENU/R
MENU/R
C/
MENU/R
Table of contents