7
Record Two Programs at Once
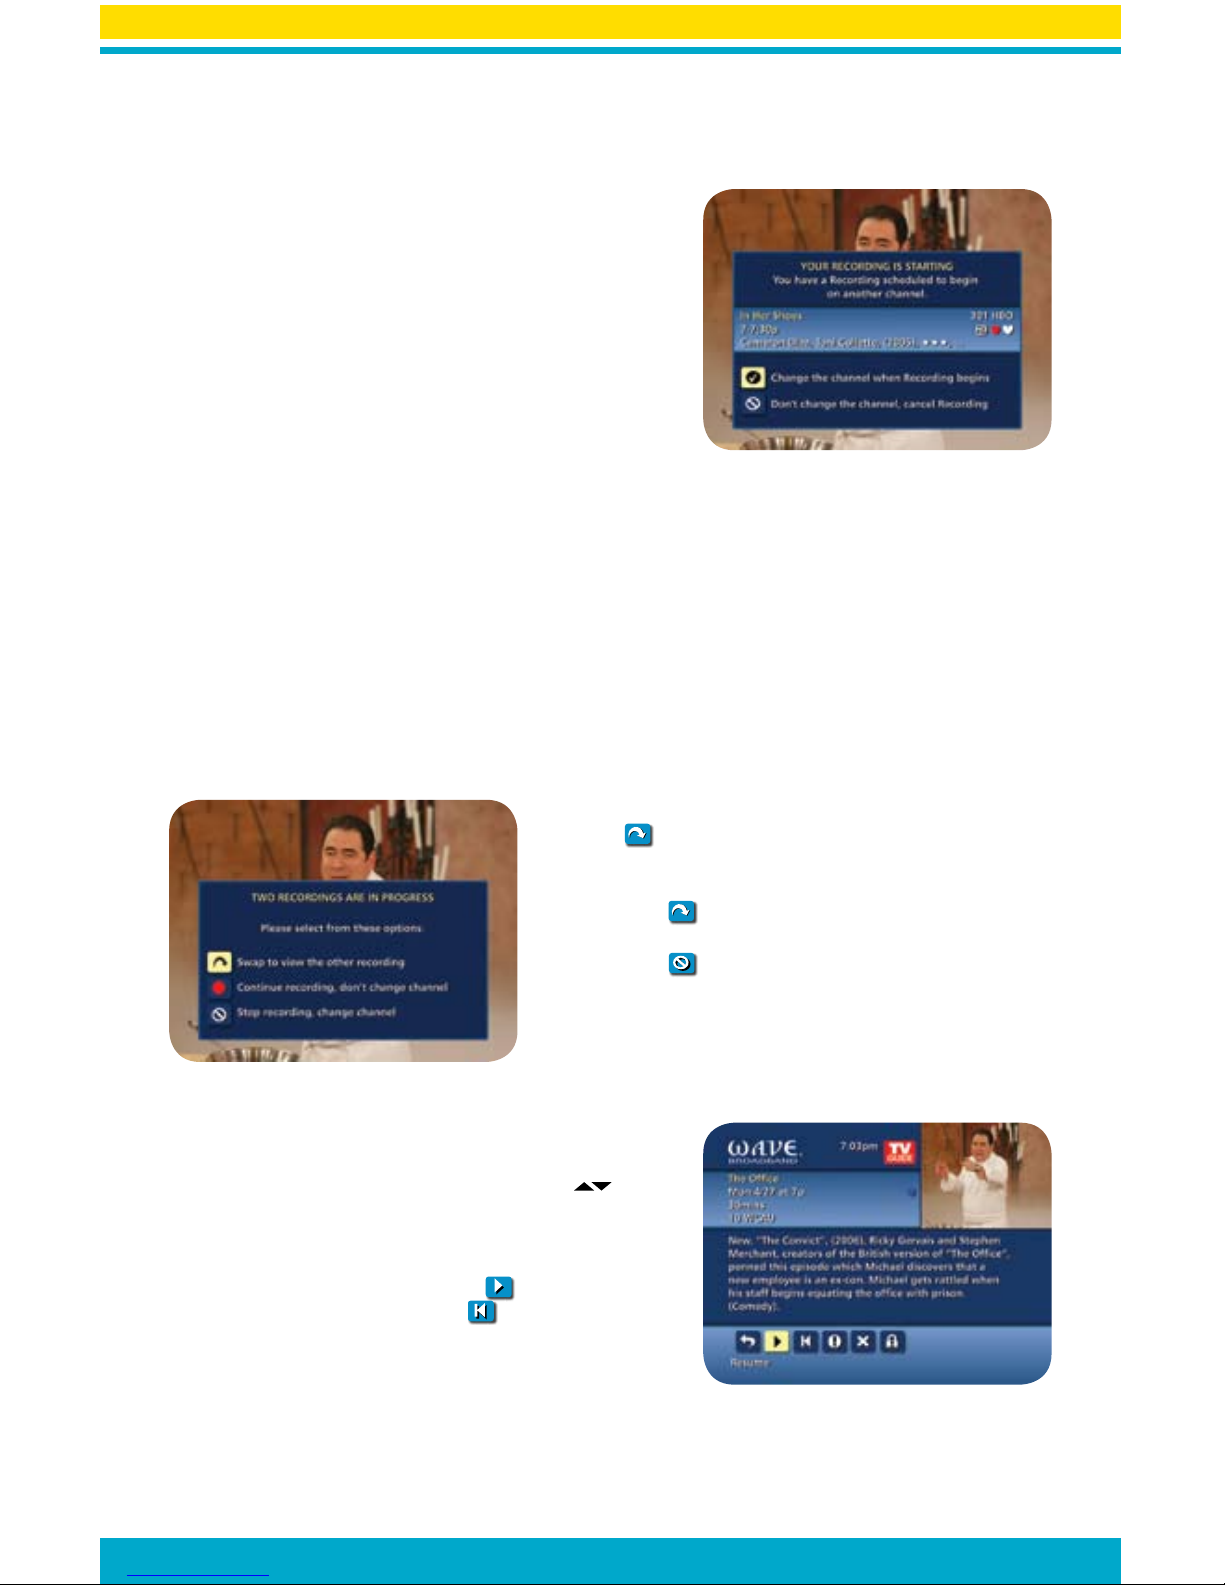
The Dual Tuner DVR allows you to set recordings for two different programs that air at the same time. While
recording two programs, you can watch and control either program up to the point of live TV by using the SWAP
buttononyourremote.Thereareseveralwaystorecordtwoprogramsatonce.Herearetwobasicexamples:
While Watching a Show
• PressRECORD to record the program you are watching.
• PressSWAP to switch to the other tuner and find the second program you want to record.
• PressRECORD when you locate the second program you want to record.
From the Guide
• Highlightaprogramyouwanttorecordfromanylistingsscreen.
• PressRECORD to set up the first recording.
• Highlightthesecondprogram.
• PressRECORD to set up the second recording.
• Whenrecordingtwoprogramsatthesametime,on-screenpromptswillaskifyouwishtoswaptuners.
Select your desired recording preference.
Record a Series
Your DVR lets you record multiple episodes of a program
according to your preferences.
• Selecttheepisodetypetorecord,suchasfirst-runonlyor
all episodes.
• Specifyhowmanyrecordingstosave.
• Specifyhowlongtosavetherecording–untilyoueraseit
or until space is needed.
• Toaccessadvancedseriessetupfeatureslikeaddminutes
to the start and end times and specify which channels to
record, select the Recording Options Icon to review all
options.
Your Series Recordings will appear in the My Recordings list
with the show title as its label. Multiple recordings of the same show will have the same label and will be listed
beginning with the most recent recordings first as default. To change your view, use the on your remote to
View by Date, View by Channel or View by Title.
You may also modify the priority assigned to a series using the Series Priority List. (See next section)
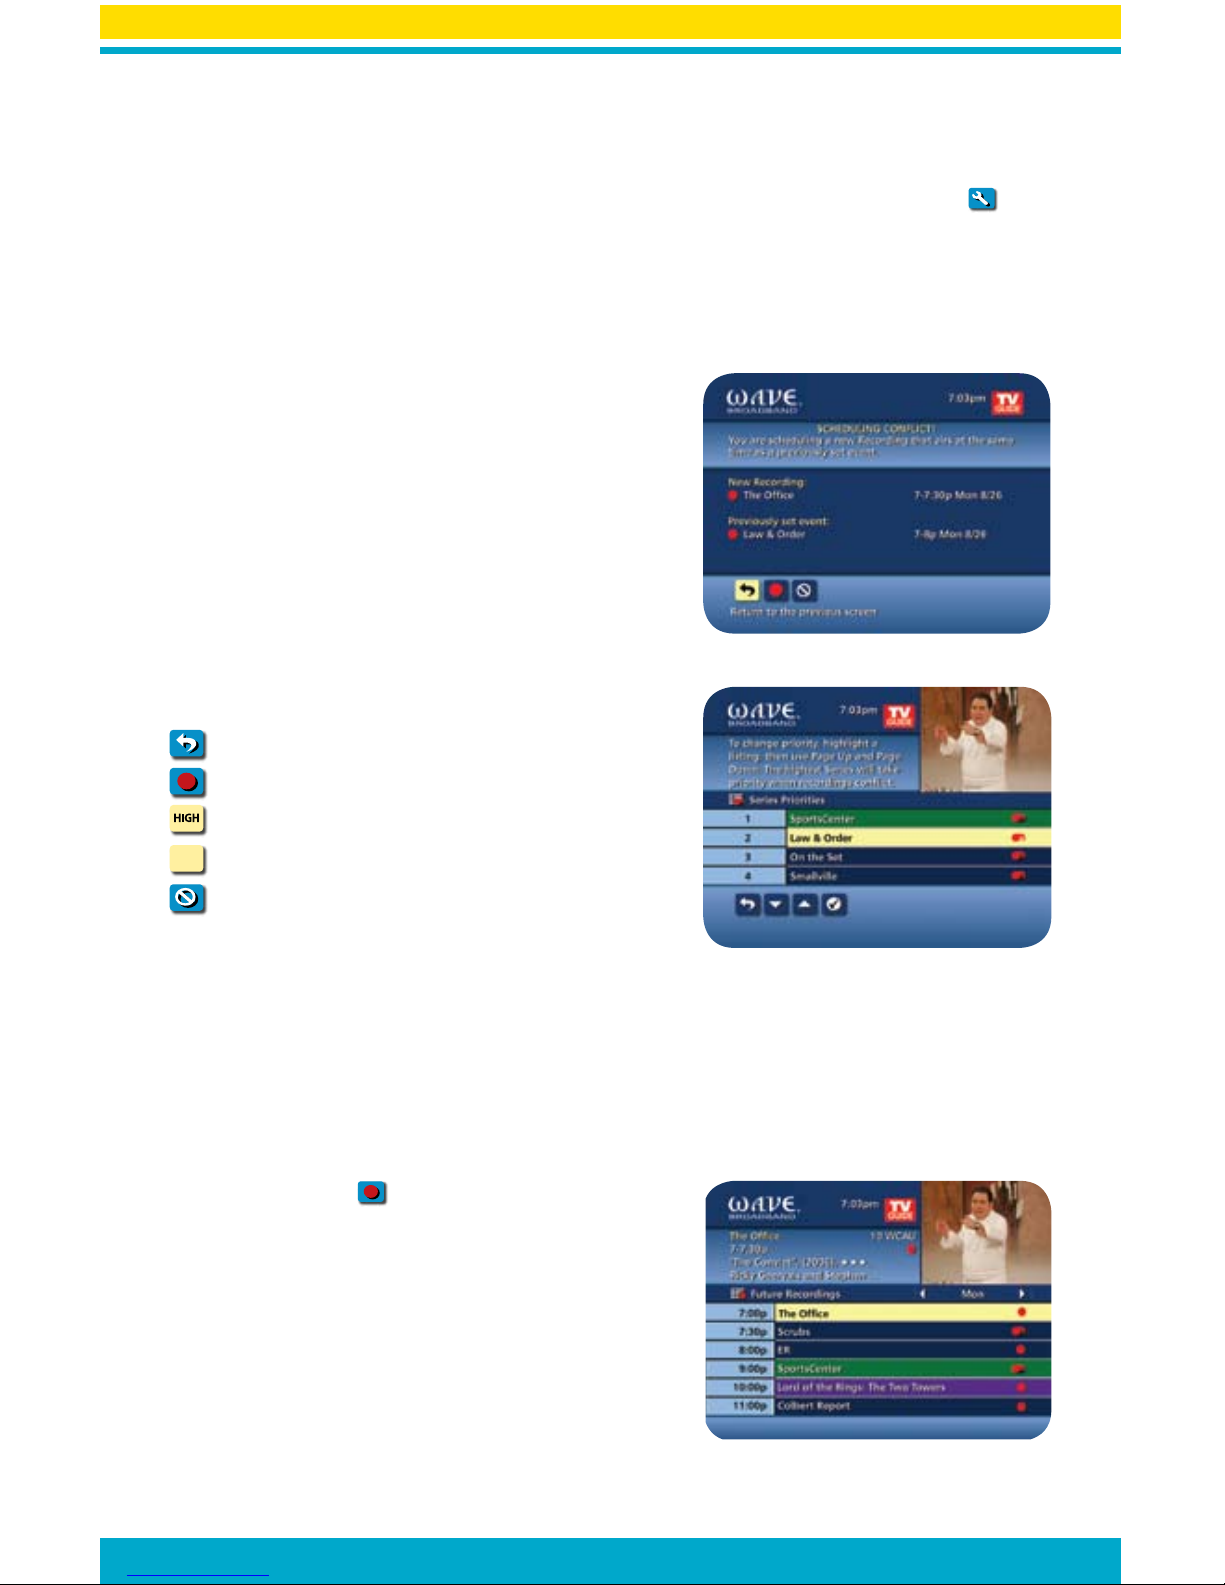
Modify the Series Priority List
To help you manage which series get recorded when there are
scheduling conflicts, your DVR automatically creates a Series Priority
List. The first series you set to record has the highest priority and is the
program recorded in case of a conflict. If there are no conflicts, each
additional series you set to record is added to the bottom of the list.
You can easily change the recording priority of the programs so that
the programs of your choice are recorded in case of a conflict.
• SelectDVR from the Main Menu or Quick Menu.
• ChooseSeries Priority List.
• HighlightaprogramandusethePage or Page buttons
on your remote to modify its priorities, then press the on-screen
check-mark icon to confirm.