6
Windows®
USB
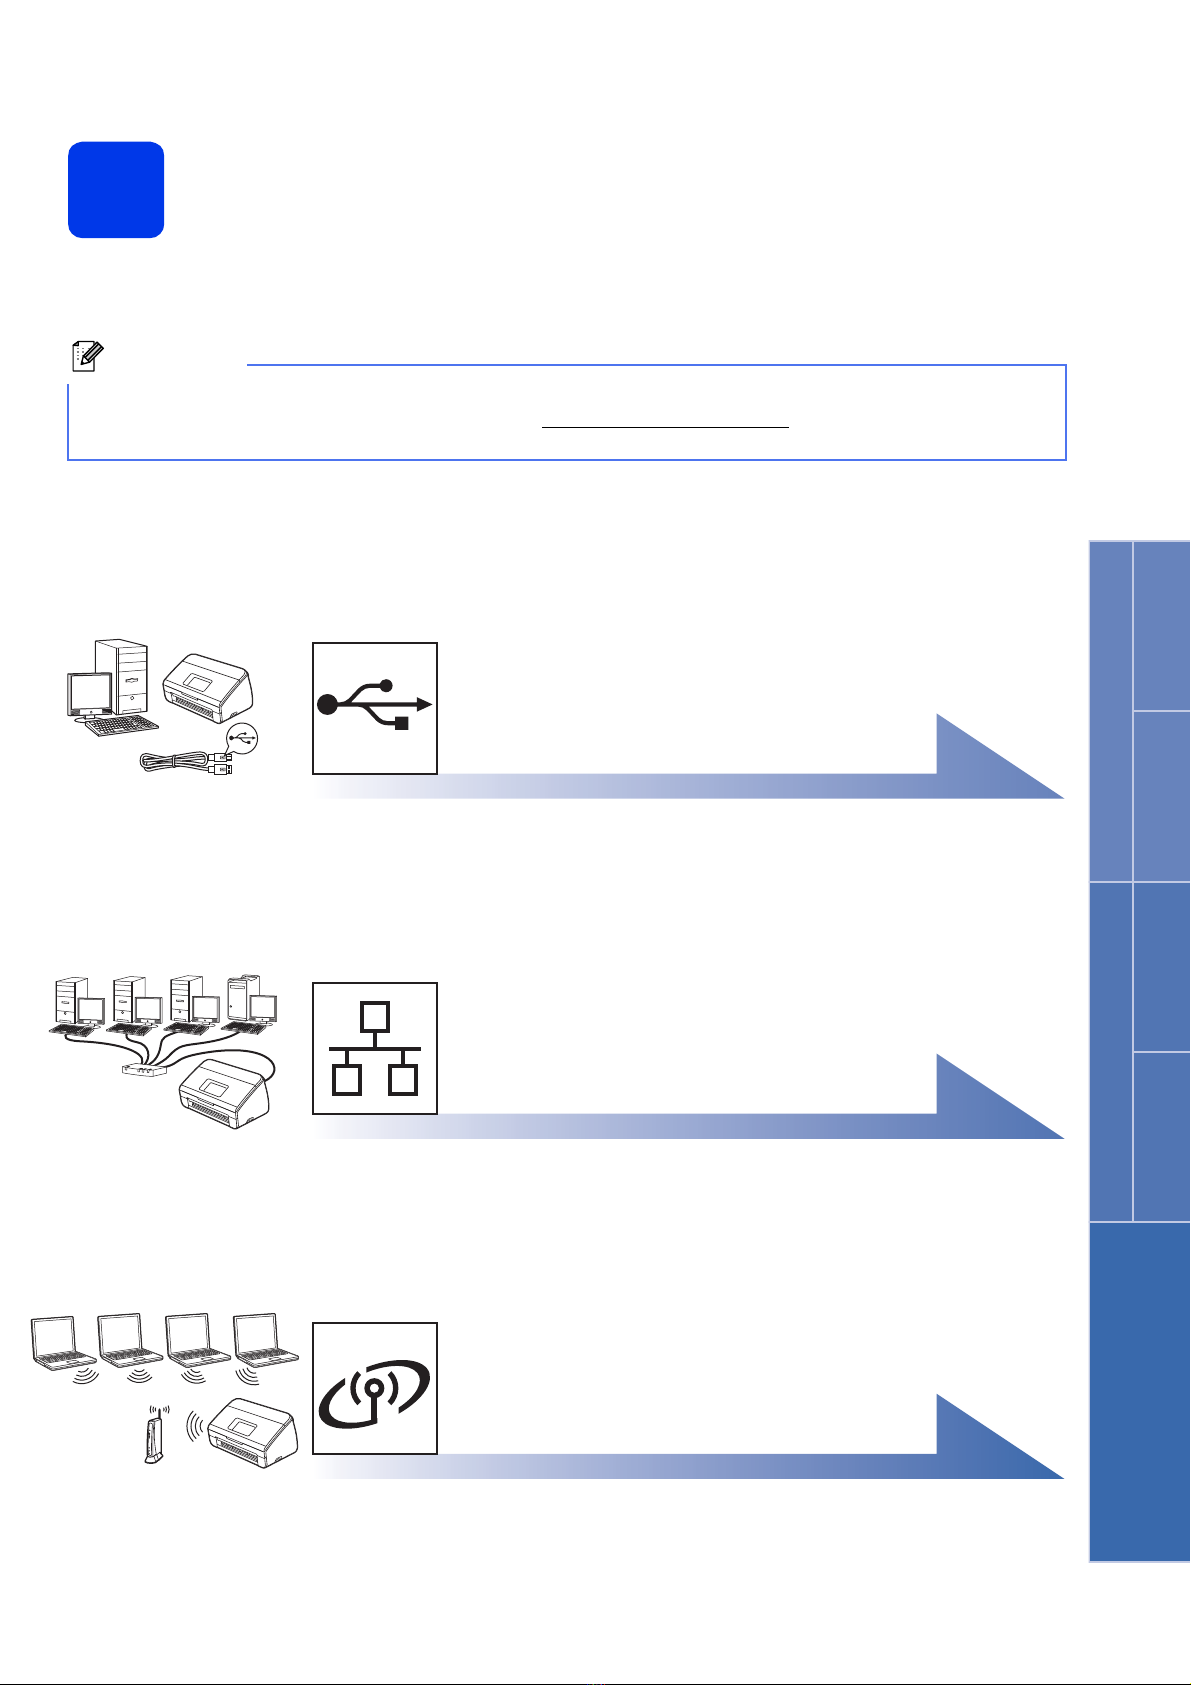
For USB interface users
(Windows®XP Home/XP Professional/Windows Vista®/Windows®7)
8
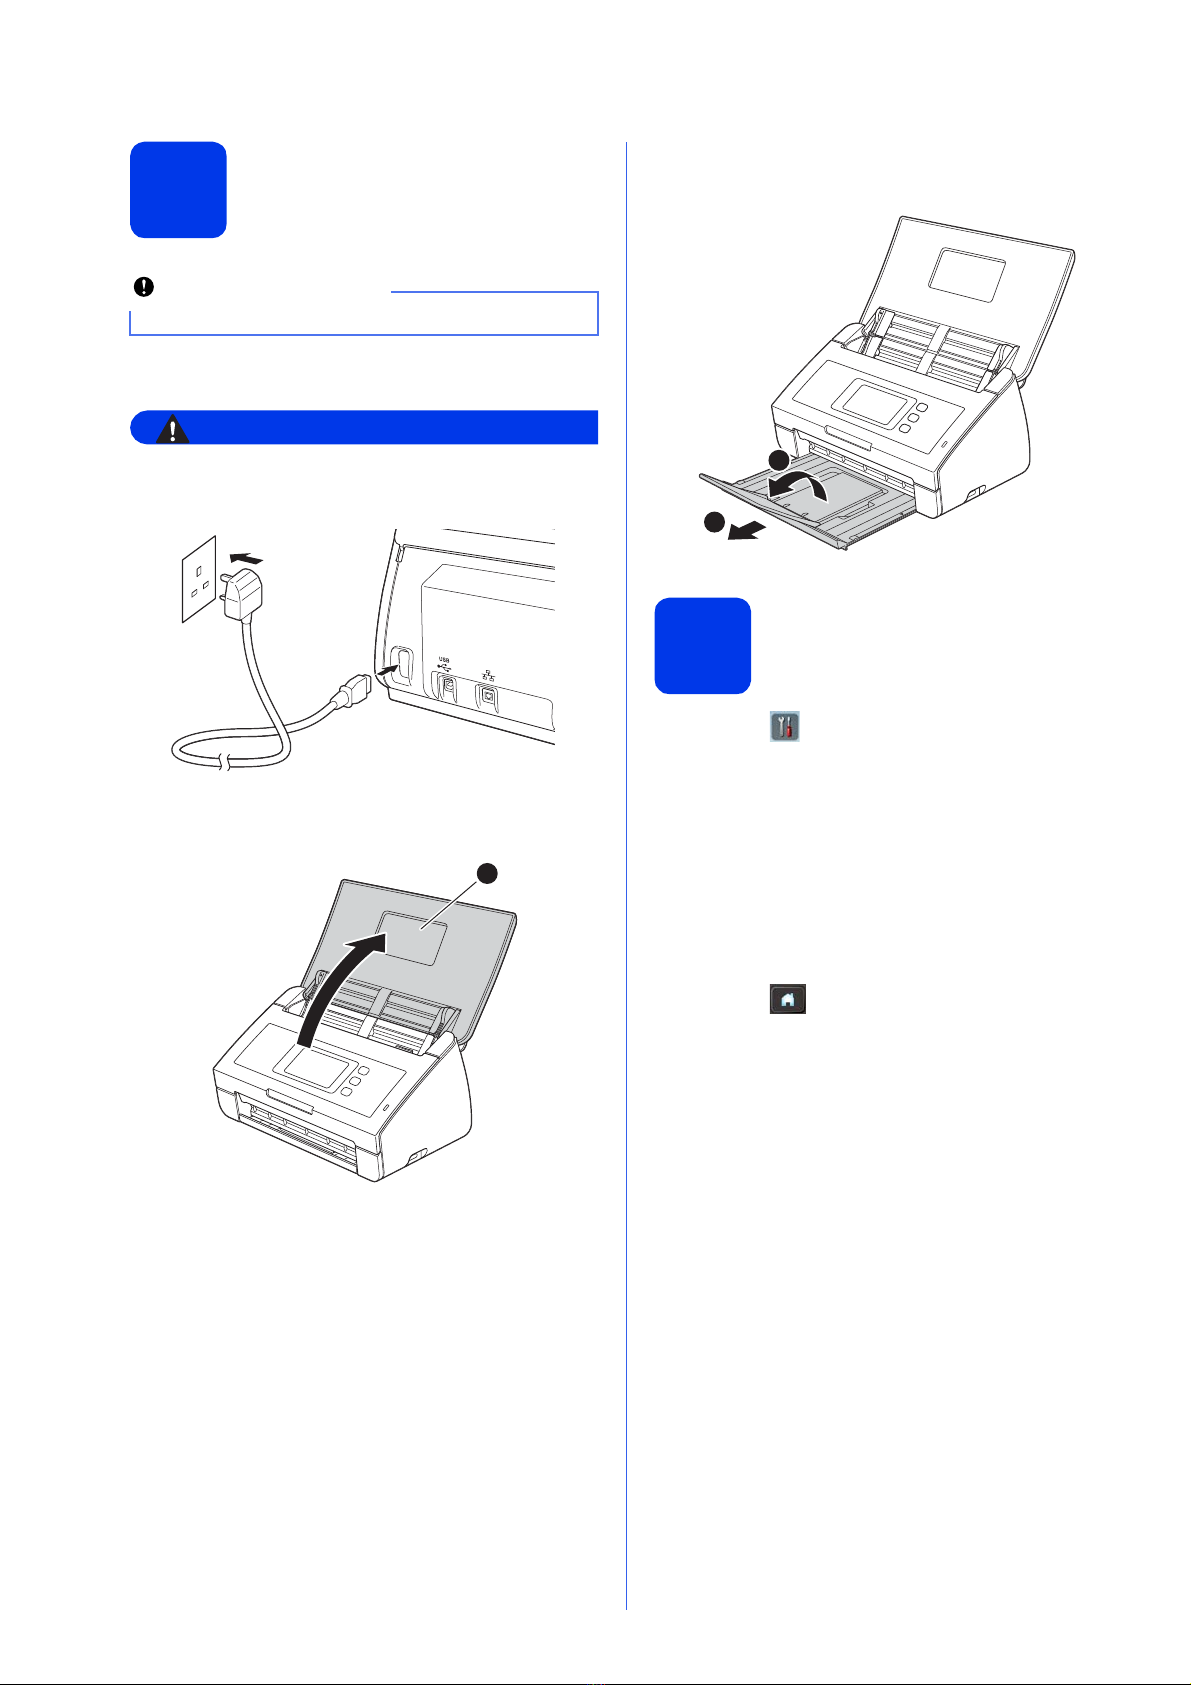
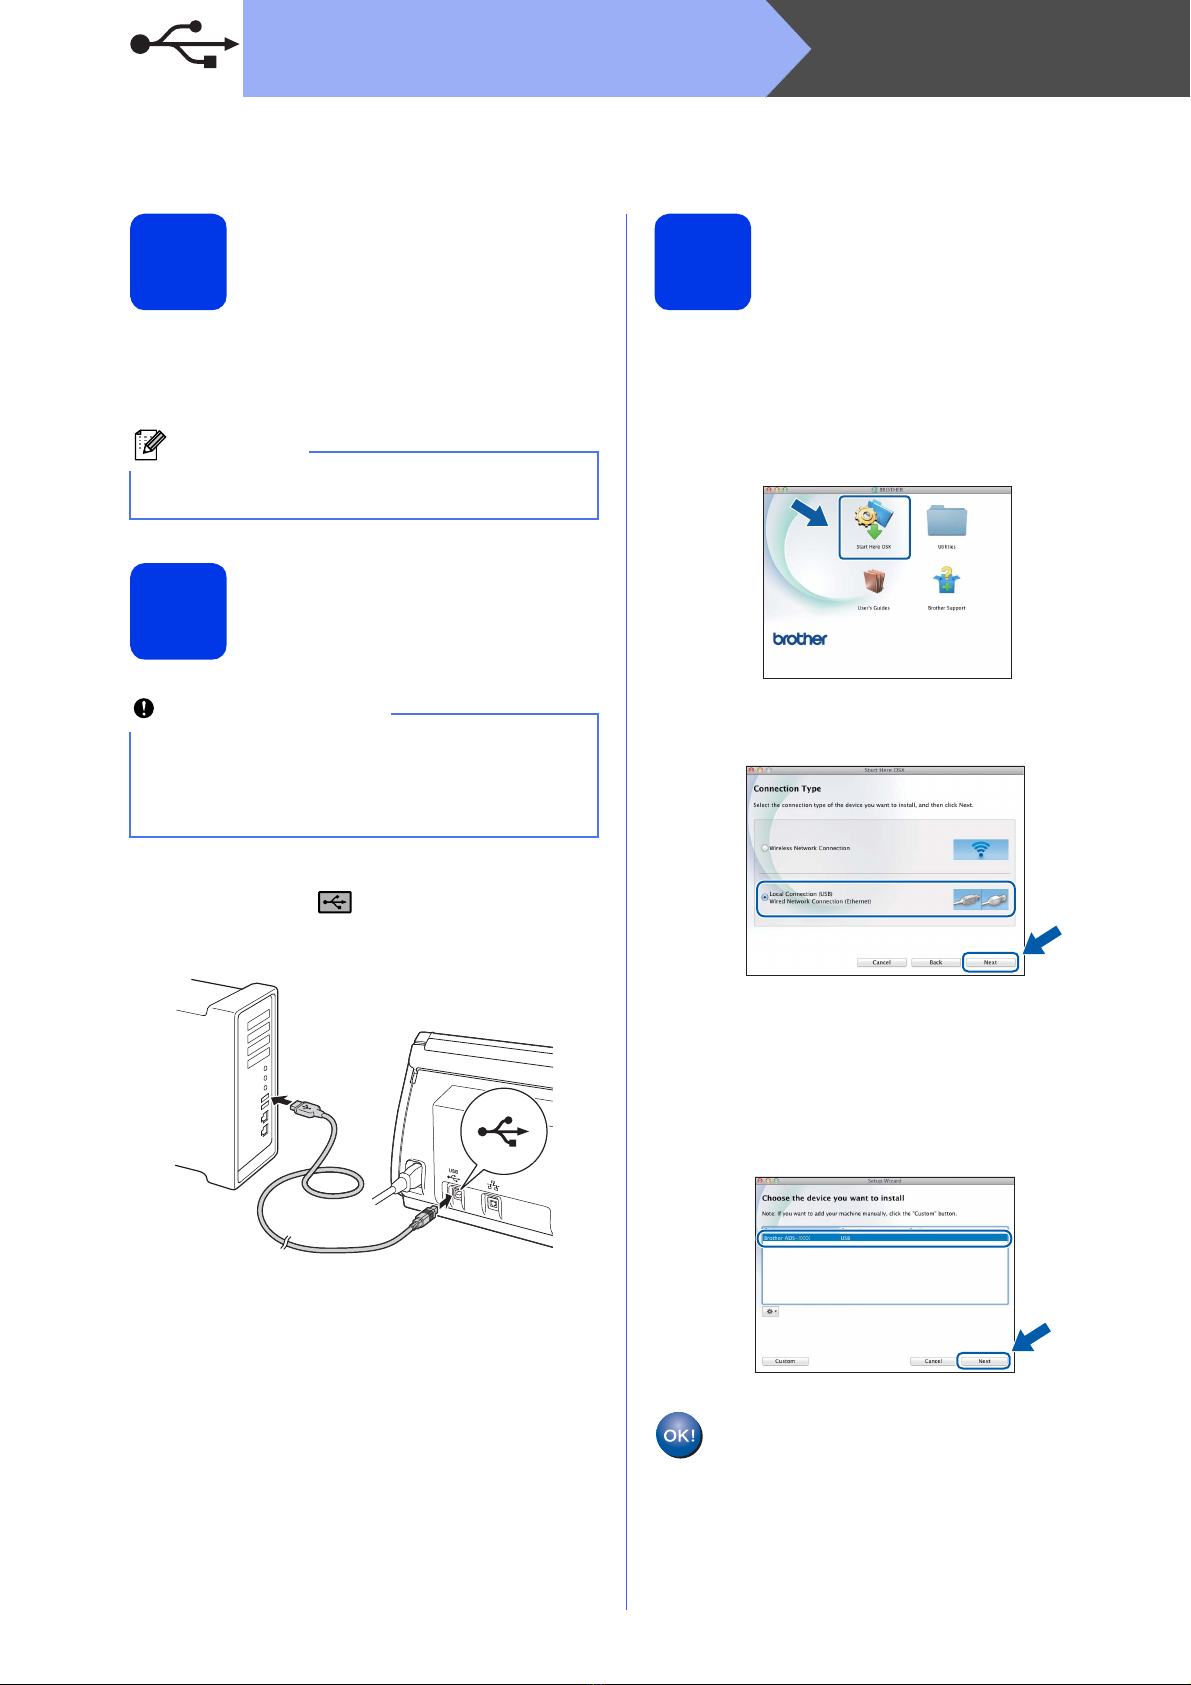
Before you install
Make sure that your computer and machine are on
and you are logged on with Administrator rights.
9
Install MFL-Pro Suite
aPut the supplied DVD-ROM into your
DVD-ROM drive. If the model name screen
appears, choose your machine. If the language
screen appears, choose your language.
bThe DVD-ROM Top Menu will appear. Click
Install MFL-Pro Suite and click Yes if you
accept the license agreements. Follow the
on-screen instructions.
cChoose Local Connection (USB), and then
click Next. The installation continues.
dWhen this screen appears, go to the next step.
• DO NOT connect the USB cable yet.
• If there are any programs running, close them.
• The screens may differ depending on your
operating system.
• The DVD-ROM includes Nuance™
PaperPort™12SE. This software supports
Windows®XP Home (SP3 or greater), XP
Professional (SP3 or greater), Windows Vista®
(SP2 or greater) and Windows®7. Update to
the latest Windows®Service Pack before
installing MFL-Pro Suite.
If the Brother screen does not appear
automatically, go to Computer (My Computer),
double-click the DVD-ROM icon, and then
double-click start.exe.
For Windows Vista®and Windows®7, when the
User Account Control screen appears, click
Allow or Yes.
For Windows Vista®and Windows®7, when the
Windows®Security screen appears, click the
check box and click Install to complete the
installation correctly.