manuals.online logo
Brands
  1. Home
  2. •
  3. Brands
  4. •
  5. Brother
  6. •
  7. Sewing Machine
  8. •
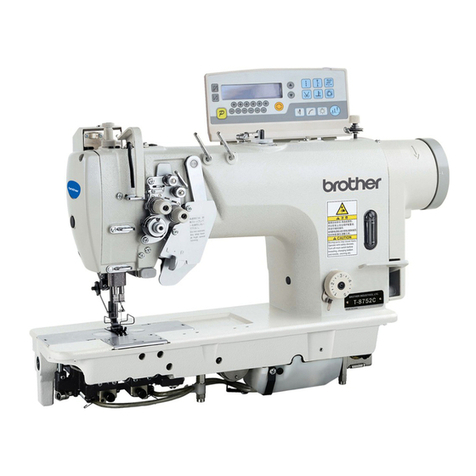
  9. Brother LT2-B841 User manual

Brother LT2-B841 User manual

Twin
Needle, Lockstitch
Machine
Doppelnadei-Verriegelungsstichmaschine
Machine
a Double
Aiguille
pour
Point
Noue
Maquina
de
Doble Pespunte con Dos Agujas
LT2-B841 · LT2-B842 · LT2-B845
LT2-B847 · LT2-B848
LT2-B872 · LT2-B875
INSTRUCTION
MANUAL
BED
IENU
NGSAN
LEITU
NG
MANUEL
D'INSTRUCTIONS
MANUAL
DE
INSTRUCCIONES
From the library of: Superior Sewing Machine & Supply LLC
CONTENTS
~
NAMES
OF
MAIN
PARTS
~
.......................
~
INSTALLATION
~
5
ITJ
PowerTable
..........
..
......
...
..
............................. 5
[2]
To Attach
the
Oil Pan and Knee Lifter ............ 6
~
To
Attach the Rubber Bases and Cushions
...
7
[1]
Installing
the
Skirt, Knee Lifter
Compl
ying
Bar...
.......................................
...
..
. 7
[5]
To
Install
the
Ma
c
hine
H
ead·
Belt
Tension.
...
8
[QJ
To Attach
the
Bobbin
Winder......................... 9
ITl
To
Attach
the
Thr
ead
Unwind
er .................... 9
[BJ
Precau
tions
Before Installing
the Belt Cover ...................................
..
............ 10
~
LUBRICATION
~
.......................................
11
ITJ
Lubrication ......................................................
11
[2]
Oiling
...............................................................
12
~
COR
RE
CT
OPERATION
~
.....................
...
13
ITJ
To Attach
the
Needles ....................................
13
[2]
To Remove
th
e Bobbin .........................
..
.....
..
.
13
~
To
Wind
the
Lower
Thread ............................ 14
[11
To Attach
the
Bobbin ...................................... 15
[5]
L
ower
Threading
............................................ 16
[Q]
UpperThreading
............................................
17
[1]
Adjustment
of
the
Presser Foot Pressure ...... 18
[BJ
Adjustment
of
the
Stitch Length .................... 18
[9]
Thread Tension .............................................. 19
[Q]
To
Stop
the
Needle Bars ................................ 23
~
STANDARD
ADJUSTMENTS
~
.................
25
ITJ
Adjustment
of
the Needles and
Fe
ed-
Timing
................................................... 25
[2]
Adjustment
of
the
Needles and
Rotary-Hook
Timing
....................................... 26
~
Adjustment
of
the Presser Foot He
igh
t .........
31
[11
Adjustment
of
the Feed Dog
Height
.............. 32
[5]
How
to
Change Gauges ................................. 33
~
TROUBL
ES
HOOTING
GU
ID
E
~
............... 37
IN
HAL
TSVERZEICHNIS
~
TEILEBEZEI
C
HNUNG
~
...........................
~
AUFSTELLUNG
~
...................................... 5
ITJ
Nahtisch .......................................................... 5
[2]
Montage
der
Olwanne
und
des
Kniehebers ......................
...
.............
..
.............. 6
~
Montage
de
r
Gummiauflagen
und
der
Dampfer
.....
..
................................................... 7
@
Montage
de
r Tulle und der
Knieheberstange ...................
..
.....................
..
7
[5]
Aufstellung
des Maschinenoberteils
und
Riemenspannung ............
..
......................
..
..... 8
[Q]
Montage
des Spulers ..................................... 9
[1]
Montage
des Spulentragers .......................... 9
[BJ
Vorkehrungen
vor
dem
Anbringen
rles
Ri
emenschutzes .......................................
10
~
SCHMIERUNG
~
.......................................
11
[I]
Schmierung ....................................................
11
[2]
Vor
der
lnb
etriebnahme .................................
12
DER
RICHTIGE
MASCHIN
EN
BETRIEB
.......................... 13
[I]
Nadelbefestigung ................................
..
......... 13
[2]
Entnehmen
der
Spulen .................................. 13
~
Aufw
ickeln des
Un
ter
fadens .......................... 14
@ Einsetzen
der
Spulen ...................................... 15
[5]
Einf
adeln des Unterfadens ............................ 16
[QJ
Einf
adeln des Obe
rf
adens ..............................
17
[1]
Einstellung des Stoffdruckerfuf?.drucks ......... 18
[BJ
Einstellung
der
Stitchlange ............................
18
[9]
Fadenspannung ..............
..
.............................
19
[Q]
Abschal
ten
einer
Nadelstange ........
..
............. 23
~
STANDARDEINSTELLUNGEN
~
.............. 25
[I]
Einstellung des Nadel- und
Tr
ansporte
ur
gleichlaufs ................................ 25
[2]
Einstellung
der
Nadei-Greifer-
synchronis
ierung
..
.
..
...................................... 26
~
Einstellung
de
r Stoffdruckerfuf?.hohe
..
........
..
31
[1]
Einstellung
de
r
Transporteurhohe
................ 32
[5]
Austauschen verschiedener T
ei
le ................. 33
~
FEHLERSUCHE
~
..................................... 38
From the library of: Superior Sewing Machine & Supply LLC
TABLE
DES MATIERES
~
NOMS
DES
PIECES
PRINCIPALES
~
~
MISE
EN
PLACE
~
...........
...
..
.
..
.
..
.
..
......
..
........ 5
[iJ Table ...........
..
..
................................................ 5
[ZJ
In
stallation du reservo
ir
d'hu
il
e et
du
relevage au genou .......................................... 6
~
In
stallation des supports
de
caoutchouc
et des amortisseurs ........................................ 7
@
Montage
de Ia jupe, de
Ia
barre de liaison
de
genoui
llere ................................................. 7
[Q]
In
stallation de Ia tete de Ia machine.
Tension de
courroie
correcte ......................... 8
~
Installation de l
'e
nrouleur
de cannette .......... 9
ITl
Installation
du
porte-bobines ......................... 9
1BJ
Precautions a prendre
avant
de
monter
le couvercle de
courroie
.................................
10
~
LUBRIFICATION
~
..
....
..
........
....
..
..
........
..
.
11
[1]
Lubrification ...................................................
11
[ZJ
Graissage ............................................
..
.......... 12
~
FONCTIONNEMENT
CORRECT
»
..
......
..
.13
[1]
Installation des a
iguill
es ................................ 13
[2]
Depose de Ia cannette .................................... 13
~
Bobinage du fil inferie
ur
................................ 14
@ Installation
de
Ia
ca
nne
tt
e .............................. 15
[5)
Enfilagedu fil i
nf
erie
ur
................................... 16
~
Enfilage du fil su
perieur
............
..
................... 17
ITl
Reglage du
pied
de biche ............................... 18
!Bl
Reglage de Ia
longueur
de
point
....................
18
~
Tension defil ..................................................
19
!!]!
Arret des barres aa
iguill
e
(droite etgauche) ...........................................
23
~
REGLAGES
STANDARD
»
....
....
..
....
..
....
..
..
25
[iJ Sync
hr
onisation des aiguilles et de
l
'e
ntraine
ment
................................................
25
[ZJ
Synchroni
sa
tion
des a
iguille
s et
du crochet
rot
atif
....................
..
...................... 26
~
Reglagede
Ia
ha
ut
e
ur
du pied de biche ........ 31
111
Reglage de
Ia
haute
ur
des griffes
..
..
............
..
32
[5)
Comment
changer les jauges ........................ 33
~
RECHERCHES
DE
PANNES
~
................... 39
INDICE
DEL
CONTENIDO
NOMBRE
DE
LAS
PIEZAS
PRIN
C
IPAL
ES
~
INST
A
LA
CION
~
....
..
..
..
........
..
..............
..
..
. 5
[1]
Mesa de Ia
maquina
....................................... 5
[ZJ
Para colocar el deposito de aceite y
e
ll
evantador de rodilla .................................. 6
~
Para colocar a
lm
ohadillas y bases de
cauc
ho
............................................................. 7
@ lnstalaci
on
de Ia falda, barra de trans-
mi
sion de
lle
vantador
de rodilia
..
.................. 7
[Q]
Para instalar Ia cabeza de Ia maquina·
Tension de Ia correa ....................................... 8
~
Para colocar
el
devanador de Ia bobina ........ 9
[Z]
Para colocar
el
port
a-conos ........................... 9
!Bl
Precauciones a
tom
ar antes de instalar
Ia
cubierta de
Ia
correa ...................................
10
~
LUBRICACION
»
......
..
..
....
..
......
....
..
....
....
...
11
[1]
Sistema de lubricacion ...................................
11
[ZJ
Aceitado
..
..
...................................................... 12
P
ARA
UN
FUNCIONAMIENTO
C
OR
R
ECTO
....
....
....
13
[iJ Para colocar l
as
ag
ujas
..
........
....
.....................
13
[ZJ
Para sacar Ia
bobin
a .......................................
13
~
Para devanar el
hilo
i
nf
e
rior
........................... 14
@ Para colocarIa bobina .................................... 15
[Q]
Para enhebrar el
hilo
inf
er
ior
......................... 16
~
Enhebrado de los hilossuper
ior
es ................
17
[Z]
A
ju
ste de Ia presion del pie
de
l
pren
sa
tel
as
..................................................... 18
!Bl
Ajuste
de
Ia
longitud
de Ia pu
nt
ada
....
..
..
.......
18
[91
Tension del hilo ..............................................
19
!!]!
Para
que
dejen de funcio
nar
las barras
de Ia aguja
._
..........................
..
..........................
23
~
AJUSTES
~
.....
....
.....
..
....
....
.....
..
..........
25
[iJ Ajuste
de
Ia
sincronizacion de las agujas y
Ia
alimentacion ...............................................
25
[ZJ
Ajuste de
Ia
sincronizacion de l
as
ag
uja
s
y
ca
ngr
e
jo
s .......................
..
..
..
.........
..
.............
26
[3]
Aju
ste de Ia altura del pin del prensatelas ..... 31
@ Ajustede Ia a
lt
ura del
alimentador
................
32
[5)
Como
ca
mbiar
los
ca
libradores .............
..
......
33
GUIA
PARA
LA
LOCALIZACION
DE
FALLAS
........
40
From the library of: Superior Sewing Machine & Supply LLC
NAMES OF MAIN PARTS
TEILEBEZEICHNUNG
NOMS DES PIECES PRINCIPALES
NOMBRE DE LAS PIEZAS PRINCIPALES
[L
T2-B841]
Twin
Needle, Needle Feed
Lock
s
titch
Machin
e
Doppeln
a
dei-Stepp
s
tich-Ma
schine
mit
Nadeltr
ans
port
Machine
a
double
aiguille
a
entrainement
par aiguilles
et
po
int
noue
Ma
quina
de
doble
pespunte
con
transporte
de aguja y
do
s agujas
0 Needle
plat
e
Stit
c
hpl
a
tt
e
Plaque a aiguille
Pl
aca
de Ia aguja
6 Face plate
Fro
ntabd
eckung
Plaque frontale
Placa frontal
0 Oil ga
uge
w
indow
Ols
ichtg
las
Fenetre de Ia jauge
d'
h
uile
Ve
nt
anilla me
di
dora
de
l
aceite
O o il
in
let
Einfi.ill6ffnu
ng
O
rif
ice
d'
hu
ile
Entrada del ace
it
e
0 P
ulley
Ri
emenscheibe
Poulie
Polea
0 Model
plat
e
Modellschild
Plaque de
mod
ele
Placa
mod
elo
[LT2-B842) Tw
in
Needle, Needle Feed
Lockstitch
Machine
with
Reverse Feed
Doppelnadei-Verriegelung
s
stichmaschine
mit
Nadeltransport
und
Transportrichtungsumkehr
Machine
a
point
noue
a
aiguilles
jumele
es
et
entrainement
reversible
Maquina
de
doble
pespunte
con
transport
e
de
aguja y
do
s agujas con re
troceso
de
Ia
alimentaci6n
[LT2-B847)
Twin
Needle,
Drop
Feed,
Lockstitch
Machine
Doppelnadei
-
Verriegelung
s
sti
c
hmaschin
e
mit
Untertransport
Machine
a
point
noue
a aiguilles
jumele
es
et
entrainement
inferieur
Maquina
de
doble
pespunte
de
do
s agujas
con
alimentac
i6n
inferior
-
1-
0 Needle plate
Stitc
hp
latte
P
la
que a aiguille
Placa de Ia aguja
6 Face plate
Fr
ontab
deckung
Plaque frontale
Pla
ca
frontal
0 Oil gauge
windo
w
Olsichtglas
Fene
tr
e de Ia jauge
d'
hu
ile
Ventan
ill
a medidora del
aceite
()
Oil inlet
Ein
fi.i
ll
6f
fn
un
g
Or
if
ice d'huile
Entrada del aceite
0 Feed adj
ustment
dial
Transporte
instellscheibe
Cadran
de
reglage
de
l'entrainement
Dial de ajuste de
al
imentac
i
6n
0 Reverse feed lever
Umkehrhebel
Levier
d'invers
ion de
l'en
tr
ainem
ent
Palanca de retroceso de
Ia
ali
mentaci6
n
From the library of: Superior Sewing Machine & Supply LLC
[LT2-B845]
Twin
Needle, Needle Feed, Lo
ckstitch
Machine
with
Angular
Stitching
Dop
pelnadei-Ecken/Ve
rri
egel
ung
sstichmaschine
mit
Nadeltransport
Machine a
point
noue aaigui
ll
es jumelees
et
entrainement
par
aiguille avec
point
oblique
Maquina
de
doble pespunte con
transporte
de
aguja y
dos
agujas con
puntada
angul
ar
[L
T2-B848]
Twin
Needle, Drop Feed, Angular S
titching
Ma
ch
in
e
Doppelnadei
-E
cke
nniihm
aschine m
it
Untertran
s
port
Machine a
point
oblique
a aiguilles jumelees
et
e
ntr
ainement
inferieur
Maquina
de
coser puntadas angulares de
do
s agujas con a
limentaci
6n
inferior
0 Needle plate
Stitchplatte
Plaque a aiguille
Placa
de
Ia
aguja
8
Face
plate
Frontabdeckung
Plaque
front
ale
Placa frontal
0
Oi
l gauge w
indo
w
Olsic
ht
glas
0 Oil inl
et
Eintulloffnung
Orifi
ce
d'
huile
Entrada del aceite
0 Feed adjustment dial
Transporteinstellscheibe
Cadran de reglage
de
l'entrainement
Dial
de
ajuste
de
alimentaci6n
0 Reverse feed lever
Umkehrhebel
Fenetre
de
Ia
jauge d'huile
Ventanilla medidora del
aceite
Levier d'inversion
de
l
'e
ntraineme
nt
Pal
anca de retroceso de
Ia
a
lim
entaci6n
-
8842
-
8845
-5 -3 -5 -3 -5
For For
For
Use
medium
-For
thick
medium
-
For
thick
medium
-
For
thick
thick
-
mat
erials
thick
mat
erials
thi
ck
mat
erials
materia
ls
materia
ls
materia
ls
Sew
ing
s
peed
(
spm
) 4
50
0 3500 4500 3500 3000
S
tit
ch l
eng
th
4
mm
5
mm
4
mm
5
mm
Presser Presser
foot
lift
er 7
mm
f
oo
t
heig
ht
Knee
lift
er
13
mm
Feed dog h
eight
1
mm
Nee
dle
s
DP
x5
#
11
-
#2
2
Nee
dl
e feed mecha
ni
sm
S
tandard
Single n
ee
dle st
op
devi
ce
N
ot
ava
il
able St
andar
d
Note: The needle feed mechanism is n
ot
provided on LT2-B8
47
a
nd
88
48
mod
els.
Hinweis: Die Typen LTZ-8847
und
8848 sind nic
ht
mit
ei
nem Nadeltransport ausgerustet.
-8847 -
8848
-7 -1
-1
For
thick
For
thin
For
thin
materials
materia
ls
materi
als
4500 3000
4
mm
DP
x 17 DP
x5#
9
-#1
4
#
16
- #23
Not
avail
ab
le
Not Sta
ndard
avail
ab
le
Remarque: Le mecanisme d'e
ntr
ainement par ai
gui
ll
e n'est pas
fo
urni s
ur
les modeles LT2-8847 et 8848.
Nota: El mecanisme de
tr
ansporte de aguja no existe
en
los modelos L
TZ
-8847 y 8848.
- 2 -
From the library of: Superior Sewing Machine & Supply LLC
[LT2-B872]
Twin
Needle, Needle Feed
Lockstitch
Machine
with
Reverse Feed (Large Hook)
Doppelnadei-Verriegelungsstichmaschine
mit
Nadeltransport
und
Transportrichtungsumkehr
(Greifer)
Machine
a
point
nou
e a aiguilles jumelees
et
entrainement
reversible (grand crochet)
Maquina
de
doble
pespunte
con
transporte
de
aguja y
dos
agujas con retroceso de
Ia
alimentaci6n
(cangrejo grande)
0 Needle plate
Stitch
platt
e
Pl
aque a aiguille
Pl
aca de
Ia
aguja
6 Face plate
Fro
ntab
deckung
Pl
aque frontale
Pl
aca frontal
E)
Oil gau
ge
win
dow
Olsic
htgl
as
Fene
tr
e de Ia
jauge
d'
huile
Ve
nta
nill
a medi
do
ra del
aceite
Ooil
inlet
Einf
ullo
ffnu
ng
Orifi
ce
d'h
uile
Entrada del aceite
0 Feed adjust
men
t dial
Tr
ansporte
in
stellsche
ib
e
Cadran de reglage de
l
'ent
ra
in
ement
Dial de ajuste de
al
ime
ntaci6n
0 Reverse feed lev
er
Umke
hrhebel
Levier
d'i
nversi
on
de
l'en
tr
ainement
Palan
ca
de
re
tr
oceso de Ia
ali
me
ntac
i6
n
[L
T2-B875]
Twin
Needle, Needle Feed,
Lockstitch
Machine
with
Angular
Stitching
(Large Hook)
Doppelnadei-Ecken/
Ver
r
iegelungsstichma
schine
mit
Nad
e
ltransport
(Greifer)
Machine
a
point
noue
a aiguilles jumelees
et
entrainement
par
aiguille
avec
point
oblique
(grand
crochet)
Maquina
de
doble
pespunte
con
transporte
de
aguja y
dos
agujas
con
puntada
angular
(cangrejo grande)
-3-
0 Needle pla
te
S
tit
chplatte
Pl
aque a
aiguille
Pl
aca de Ia aguja
6 Face pla
te
Fro
nt
abde
ck
ung
Pl
aque
fron
tale
Pl
aca
fron
tal
E)
Oil gauge
win
dow
Ol
sichtglas
Fene
tr
e
de
Ia jauge
Ve
nt
a
nilla
medidora
ace
it
e
d'h
uile
del
O o il i
nl
et
EinfUIIo
ff
nung
Or
if
ice d'h
uil
e
En
trada del aceite
0P
ull
ey
Riemenscheibe
Pou
li
e
Polea
0 Model pl
at
e
Mode
ll
sc
hild
Plaque de modele
Placa
mo
delo
From the library of: Superior Sewing Machine & Supply LLC
-8872 -8875
.,
..• -3 -5
-3
-5
-7
For F
or
U
se
medium-For thick med
ium
-For thick For thick
thick- materials thick materials materials
materials materials
Sewing speed (spm) 3000
Stitch length 7
mm
Presser Presser f
oot
lifter 7
mm
fo
ot
height Knee l
ift
er
13
mm
F
eed
dog
height 1
mm
Needles
DP
x 5 # 11 -
#22
DP
x 17
# 16 - #23
Needle feed mechanism Standard
Single needle stop device
Not
available Standard
- 4 -
From the library of: Superior Sewing Machine & Supply LLC
[I]
Power Table
[I]
Nahtisch
[I]
Table
INSTALLATION
AUFSTELLUNG
MISE
EN
PLACE
INST
ALA
CION
[I]
Mesa de
Ia
maquina
159
~
0
.
5
57
±0.3
5 5
A
--
-----------
1200
1---------------l
A-A
cross section
B-B
cross section
*
When
using a commercial table,
drill
holes in the table as
shown
above.
* Falls Sie den Tisch separat kaufen, bohren Sie die Locher entsprechend
der
obigen
Abbildung.
*Dans le cas
d'
un
e
util
isation
d'une
table
comme
rciale, percer des
trous
dans Ia table
comme
indique
ci-dessus.
*Si se
uti
li
za
una mesa en venta en los comercios,
abrir
agujeros en
Ia
mi
sma de acuerdo a las indicaciones anteriores.
P
ower
Motor
Single
-phase
2-pole,
400
W
Three
-phase
2-pole,
400
W
motor
motor
*When us
ing
a
comme
rcial
mo
tor,
se
lect one
whic
h meets the
specifications at left.
*Falls Sie den
Motor
separat kaufen,
wahlen
Sie ihn
ent
-
sprechend den links aufgefUhrten technischen Daten.
* Dans le cas
d'une
utilisation
d'un
mote
ur
commercial, chois
ir
un
modele
dont
l
es
specifications sont celles indiquees
ci-
cont
re.
* Si
se
va a ut
ili
za
r un m
otor
distinto
en venta en los comerc
io
s,
se debe observar
que
cumpla
con las especificacion
es
mencionadas en el cuadro a Ia izquierda.
-5-
From the library of: Superior Sewing Machine & Supply LLC
*Select
the correct motor pulley and V-belt by referring to the table below to suit the power frequency
of
your area.
* Wahlen Sie die Motorriemenscheibe und
den
Keilriemen entsprechend der ortlichen Stromfrequenz (siehe nachstehende Tabelle).
* Choisir
Ia
bonne poulie de moteur ainsi qu'une courroie trapezoidale appropriee qui conviennent a
Ia
frequence de puissance du
lieu d'utilisation de
Ia
machine.
Se
referer
au
tableau ci-dessous pour leur selection.
* Seleccionar
Ia
polea del motor y correa trapezoidal correctas de.acuerdo a
Ia
tabla a continuaci6n, para que
se
adecue a las
especificaciones
de
Ia
corriente de
su
localidad.
Sewing speed Frequency
Motor
pulley
V-belt
50
Hz
Motor
pulley 115 44 inches
4500
spr11
60
Hz
Motor
pulley 95 43 inches
50
Hz
Motor
pulley 100 43 inches
4000
spm
60
Hz
Motor
pulley
85
43 inches
50
Hz
Motor
pulley
90
43 inches
3500
spm
60
Hz
Motor
pulley
70 42 inches
50
Hz
Motor
pulley
75 42 inches
3000
spm
60
Hz
Motor
pulley
65
42
inches
[21
To Attach the Oil
Pan
and
Knee
Lifter
[21
Montage der Olwanne
und
des
Kniehebers
[21
Installation
du
reservoir d'huile et
du
relevage
au
genou
~
Para
colocar
el
deposito de aceite y
el
levantador de rodilla
1.
Fit oil
pan
0 into the opening in the table,
and
secure
it
with
5 nails
e.
Screw the plastic oiler 8 into the oil
pan
0.
2. Install the
knee
lifter assembly 8
to
the underside
of
the
table with the flat-head screws
e.
3. Connect the
knee
lifter 0 to the
knee
lifter assembly
e.
1.
Die
Qlwanne 0 in die Tischoffnung einsetzen und mit 5
Nageln 8 befestigen.
Den
Kunststoffbehalter 8 in die Qlwanne 0 einschrauben.
2.
Die
Knieheberhalterung
emit
den Flachkopfschrauben e
an
der Tischunterseite befestigen.
3.
Den
Knieheber 0
an
der Knieheberhalterung e befestigen.
1.
Placer le reservoir d'huile 0 dans l'ouverture de
Ia
table et
Ia
fixer avec les cinq clous
e.
Visser le graisseur
en
plastique 8 dans
le
reservoir d'huile
0.
2.
Placer !'ensemble du relevage
au
genou 8 al'arriere
de
Ia
table avec les vis atete plate
e.
3. Connecter
Ia
genouillere 0 a !'ensemble du relevage
au
genou
e.
1. Ajustar
el
deposito de aceite 0
en
Ia
abertura de
Ia
mesa y
asegurarlo con 5 clavos
e.
Atornillar
Ia
copa
de
lubricacion
de
plastico 8
en
el
deposito
de
aceite
0.
0
2.
lnstalar
el
conjunto del levantador de rodilla e
en
Ia
parte
inferior
de
Ia
mesa
utilizando los tornillos
de
cabeza
plana
e.
3. Conectar
el
levantador de cuchilla 0
en
el
conjunto del
levantador
de
rodilla
e.
-6-
From the library of: Superior Sewing Machine & Supply LLC
~
To Attach
the
Rubber Bases and Cushions
~
Montage der Gummiauflagen und der Dampfer
~
Installation des supports de caoutchouc
et
des amortisseurs
~
Para colocar almohadillas y bases de caucho
~
Installing
the
Skirt, Knee Lifter Complying Bar
~
Montage der Tulle und der Knieheberstange
1.
Install the rubber bases 0 to the table with nails
e.
2.
Install the cushions E) at the four corners
of
the table with
nails
0.
1.
Die Gummiauflagen 0
mit
Nageln e am Tisch befestigen.
2.
Die
Dampfer E)
mit
Nageln 0
an
den vier Tischecken
befestigen.
1.
Placer les supports 0 sur
Ia
table avec des clous
e.
2.
Placer les amortisseurs 8 aux quatre coins de
Ia
table avec
des clous
0.
1.
lnstalar las
bases
de
caucho 0
en
Ia
mesa con clavos
e.
2.
lnstalar las almohadillas8
en
las cuatro esquinas de
Ia
mesa
con clavos
0.
~
Montage de Ia jupe, de
Ia
barre de liaison de genouillere
~
lnstalacion de Ia falda, barra de transmision del levantador de rodilla
1.
Slide the skirt 0 onto the
knee
lifter assembly
e.
2.
Insert the
knee
lifter complying bar
8.
1.
Die Tulle 0 auf die Knieheberhalterung e setzen.
2.
Die Knieheberstange 8 einsetzen.
1.
Glisser
Ia
jupe 0 sur !'ensemble de relevage
au
genou
e.
2.
lntroduire
Ia
barre de liaison de genouillere.
1.
Deslizar
Ia
falda 0
en
el
conjunto dellevantadorde rodilla
e.
2.
lntroducir
Ia
barra de transmisi6n del levantador
de
rodilla
e.
-7-
From the library of: Superior Sewing Machine & Supply LLC
[5]
To Install
the
Machine Head·Belt Tension
(Q)
Aufstellung des Maschinenoberteils und Riemenspannung
[QI
Installation de
Ia
tete
de
Ia
machine·Tension de courroie correcte
(Q)
Para instalar
Ia
cabeza de
Ia
maquina·Tension de
Ia
correa
10-
20
mm
Put the head hinges 0 into the holes
of
the bed and adjust them to the rubber hinge
e.
then place the machine onto the head
cushions at the four corners.
©Use
a hammer to drive the head rest E) into the table.
* The correct operating direction
of
the machine is counterclockwise
(as
viewed from the pulley side).
*Press
the belt
8,
and adjust the belt tension by turning the nuts 0 so that the belt has about
10
-
20
mm
of
play.
Die Scharniere 0 in die Aussparungen einsetzen und auf die Auflagen e ausrichten. Danach das Maschinenoberteil auf die vier
Gummiunterlagen stellen.
©Die
Maschinenstutze E)
mit
einem Hammer in den Tisch treiben.
*Die
richtige Drehrichtung ist von der Seite der Riemenscheibe gesehen nach links.
*Die
Riemenspannung durch Drehen der Muttern 0
so
einstellen,
daB
sich der Riemen 8
ca.
10-
20
mm durchdrucken laBt.
Mettre les charnieres 0 dans
les
trous du socle et les regler avec
Ia
charniere
en
caoutchouc
e.
Placer
Ia
machine sur les quatre
amortisseurs de tete aux quatre coins.
@ Enfoncer
Ia
tige E) de
Ia
tete dans
Ia
table,
au
moyen d'un marteau.
*
Le
sens correct de rotation est inverse des aiguilles d'une montre
en
regardant le cote de
Ia
poulie.
* Enfoncer
Ia
courroie8 avec
le
pouce. Regier
Ia
tension de courroie
en
tournant les boulons0 afin que
Ia
courroie a
it
unefleche de
10
a
20
mm.
Ponga las bisagras0
en
los agujeros de
Ia
base y ajuste estas a
Ia
base
de
caucho de las bisagrase entonces coloque
Ia
cabeza
de
Ia
maquina en las almohadillas de
Ia
cabeza que hay
en
las cuatro esquinas.
@ Utilizar un martillo para introducir
el
apoyacabeza E)
en
Ia
mesa.
*
El
sentido de funcionamiento correcto de
Ia
maquina
es
hacia
Ia
izquierda (vista desde
el
lado de
Ia
polea).
* Empujar
Ia
correa 8 y ajustar
Ia
tension de
Ia
correa hacienda girarlastuercas 0 para que
Ia
correa tenga un juego librede
10
a
20
mm.
-8-
From the library of: Superior Sewing Machine & Supply LLC
121
To
Attach the
Bobbin
Winder
121
Montage
des
Spulers
IB1
Installation de l'enrouleur de cannette
[§]
Para
colocar
el
devanador de
Ia
bobina
111
To
Attach the Thread Unwinder
111
Montage
des
Spulentragers
111
Installation
du
porte-bobines
111
Para
colocar
el
porta-conos
*Attach the bobbin winder0
to
the table
with
two
round-head
wood screws
8.
(Attach it
so
that the bobbin winder pulley 8 will not slip.)
*
Den
Spuler 0 am Tisch mit zwei Rundkopf-Holzschrauben 8
befestigen.
(Die Spulerscheibe 8 darf nicht rutschen.)
*Placer l'enrouleur
de
cannette 0 sur
Ia
table avec les deux vis
a bois atete ronde
8.
(Le
placer de telle sorte que
Ia
poulie de l'enrouleur de
0 cannette e ne patine pas.)
*Colocar
el
devanador de
Ia
bobina 0
en
Ia
mesa y sujetarlo
con dos tornillos para madera
de
cabeza
redonda
8.
(Colocarlo
de
tal forma que
Ia
polea del devanador
de
Ia
bobina e no
se
resbale.)
*Install the spool stand 0 at the front right corner
of
the work
table.
*
Den
Spulentrager 0
an
der vorderen rechten
Ecke
des
Nahtisches befestigen.
*Monter le porte-bobines 0 dans le coin avant droit de
Ia
table.
*lnstalar
el
portacarrete 0
en
Ia
esquina derecha delantera de
Ia
mesa de trabajo.
-9-
From the library of: Superior Sewing Machine & Supply LLC
(HI
Precautions Before Installing
the
Belt Cover:
!B)
Vorkehrungen
vor
dem Anbringen des Riemenschutzes
!B)
Precautions aprendre avant de
monter
le couvercle de courroie:
(HI
Precauciones a
tomar
antes de instalar Ia cubierta de
Ia
correa:
1.
Bring
the
sewing machine
down
toward
the
horizo11tal position
1.
Die Nahmaschine
in
dieHorizontalstellung
umklappen
1.
Descendre
Ia
machinevers
Ia
position horizontale
1.
Bajar
Ia
maquinaa su posicion horizontal
3.
Install
belt
cover U.
3.
Montage
des Riemenschutzes U.
3.
Monter
lecouvercle de courroie U.
3.
lnstalar
Ia
cubierta U de
Ia
correa.
2.
Secure
belt
cover U
with
the
rubbercollar, set
screw, and washer.
2.
Die Riemenabdeckung
mit
derGummihlilse,der
UnterlegscheibeundderSchraube befestigen.
2.
Fixer le couvercle decourroie U a
I'
aide
du
collier
de caoutchouc, de
Ia
vis
d'arret
et
de
Ia
rondelle.
2.
Asegurar
Ia
cubierta U de
Ia
correa con el collarde
caucho,
tornillo
defijacion y arandela.
4.
Install
belt
cover
D.
4.
Montagedes Riemenschutzes
D.
4.
Monter
lecouvercle decourroie
D.
4. lnstalar
Ia
cubierta Dde
Ia
correa.
-10-
From the library of: Superior Sewing Machine & Supply LLC
LUBRICATION
SCHMIERUNG
LUBRIFICATION
LUBRICACION
* Use BROTH
ER
oil
(white
sp
indle
oil)
* Empfohlense Schmierol: BROTH
ER
-Nahmaschinenol
*
Ut
iliser l'huile BROTHER (huile machine)
* Utilizar aceite
BRO
THER (aceite blanco para husos)
IIl Lubrication I Schmierung I Lubrification I Sistema de lubricaci6n
1.
Filling the oil tank
on
top
of
the
arm
More
oil
Mehr
01
Plus
d'huile
Mas
aceite
Less oil
Weniger
01
Mains
d'
huil
e
Menos
aceite
*
Add
oil
from oil cap 0 until it reaches the
top
reference line
in
the gage glass 6 .
*Add
more
oil
when
the oil level
drops
to
the
bottom
reference line.
2.
Adjustment
of
oil
flow
to the rotary hook
Test sheet
Test
blatt
Papier d'essai
Hoja
de
prueba
_\
..
\_
Scattered oiI
Oltropfen
Huile
Aceite
*
When
replacing the rotary hook, be sure
to
turn
adj
ustment
screw E)
to
adjust
th
e o
il
supply
to
the rot
ary
hook.
(The
amount
of
oil scattering fr
om
the rotary hook should be as
shown
on
the test sheet above for
approximate
ly every 10
seconds.)
1.
Fullen des Nadelstangen-O
ib
ehalters
*
01
an
der
EinfUIIoffnung 0 bis zur oberen Referenzlinie
am
Schauglas 6 einfUIIen.
* Sebald
der
Olstand bis zur
unter
en Referenzlinie abgefallen ist.
mu~
01nachgefUI
It
we
rden.
2.
Einstellung
der
Greifersc
hmi
erung
*
Wenn
der
Greifer ersetzt
wird,
mu~
die
Schmierung
des Greifers
mit
der
Einstellschraube
E)
eingestel
lt
werden.
(Nach etwa 10 Sekunden Betrieb sollte die oben gezeigte Menge 01
vom
Greifer auf das Testblatt
weggespr
itzt
se
in
.)
1. Remplissage
du
reservoir situe dans Ia partie superieure du bras.
*
Ajo
ut
er de
l'huile
par
!'orifice
de
remplissage jusqu'a ce que
l'huile
atteigne
Ia
ligne de reference de l'indicat
eur
de niveau
6.
*
Ajou
t
er
de l'huile lorsque le niveau
d'h
uil
e
tombe
au-dessous de Ia ligne de reference.
2.
Reg
lage
du
debit
d'huile dans le crochet
rotatif
* Lors
du
remplacement du crochet rotatif, veill
er
a
tourn
er Ia vis de reglage
E)
pour
regl
er
!'a
li
mentati
on
d'hu
il
e
sur
le crochet rotatif.
(La
quantile
d'hu
il
e dispersee a
partir
du cr
ochet
rot
atif
doit
et
re
comme
montre
ci-dessus
sur
le papi
er
d'essai en
environ
10
secondes.)
1.
Ll
enar el tanque
de
aceite en
Ia
parte s
up
er
ior
del
br
azo
* Agregar aceite
por
Ia
tapa de aceite 0 hasta que llegue a
Ia
linea de referenda
superior
en Ia
mirilla
de v
idr
io
6 .
*
Agregar
mas aceite cua
ndo
el nivel baje por debajo
de
Ia
lin
ea
de
referencia inferio
r.
2.
Ajus
te del f
luj
o del aceite al cangrejo
* Cuando se cambia el cangrejo se debe
girar
el
tornillo
de ajuste
E)
y ajustar
Ia
alime
nt
aci6n de aceite al cangrejo.
(La
can
tid
ad de aceite esparcida
por
el cangrejo debe estar tal
como
aparece en Ia hoja de prueba de
Ia
figura a
nt
erior, despues de
10 segundos.)
* Remove
any
oil
which
has collected in the plastic
oiler
0 .
*
Das
01.
das sich
am
Kunststoffoler 0
angesamme
lt hat.
abw
ischen.
* Retirer
tout
e
l'huile
qui s'est deposee dans le graisse
ur
en
plas
tiqu
e 0 .
*
Limp
i
ar
todo el aceite que
se
haya
podido
j
unta
r en el
deposito
de plast
ico
0 .
-
11
-
From the library of: Superior Sewing Machine & Supply LLC
[21
Oiling
[2]
Vor der lnbetriebnahme
[2]
Graissage
[2]
Aceitado
Before using the machine,
be
sure
to
supply a drop
or
two
of
oil at each
of
the poins indicated by
an
arrow.
Vor Arbeitsbeginn ein bis zwei Tropfen Nahmaschinenol auf die
mit
Pfeilen bezeichneten Stellen auftragen.
Avant d'utiliser-
Ia
machine, mettre une goutte ou deux d'huile dans les points indiques par une
fiE~che.
Antes de utilizar
Ia
maquina, asegurarse de haber puesto una o dos gotas de aceite en cada uno
de
los puntos que
se
indican con una
flecha.
-12-
From the library of: Superior Sewing Machine & Supply LLC
CORRECT OPERATION
DER RICHTIGE MASCHINENBETRIEB
FONCTIONNEMENT CORRECT
PARA UN FUNCIONAMIENTO CORRECTO
ITJ
To Attach
the
Needles
ITJ
Nadelbefestigung
ITJ
Installation des aiguilles
ITJ
Para colocar las agujas
Long
groove
Lange
Nut
Longue
gorge
Ranura larga
Long
groove
La
nge
Nut
Longue
gorge
Ranura larga
0
*Loosen the screws 0 , hold the needles a with their
long
groove
facing
inward,
insert t
hem
a
ll
the
way
in
to the needle bars, and
re
-
tight
en the screws
0.
*Die Sc
hr
a
ub
en 0 losen. Die bei
de
n Nadeln a
mit
nach
in
nen gerichtet
er
Nut
ganz in die Nadelstangen schieben und mit
den
Sc
hr
auben 0 befestigen.
*Desserrer les
vis
0 ,i
nt
rodu
ir
e les aiguilles a
completement
en s'assurant
que
Ia longue
gorge
des aiguilles soit vers l'interieur
et
serrer les vis
0.
*
Aflojar
los
tornillos
0 , mantener las agujas a con su ranura la
rg
a h
aCia
adentro, insertarlas co
mp
letamen
te
en l
as
bar
ras de Ia
ag
uj
a,
y
vo
lver a apretarlas con l
os
tornillos
0.
12]
To Remove
the
Bobbin
[2]
Entnehmen der Spulen
[2]
Depose de Ia cannette
[2]
Para sacar Ia bobina
*Be sure to turn the
power
off
wh
en replacing the
bobbin
and b
obb
in case.
*
Zum
Ersetzen d
er
Spule oder der Spulenkapsel
mu
B die Nahmaschine
ausgeschaltet werden.
* Veiller a
couper
I'a
lim
e
ntation
lors du remplacement de
Ia
cannette et du
boitier
a cannette.
* Desconec
tar
Ia
corriente para
cambiar
Ia
bobina
y Ia caja de Ia
bob
ina.
1. Raise the needles 0 to the
high
est positions, and open the
slide plates a by
mo
ving
th
em
to the
right
and left.
2.
Pull the rotary
hook
latches 8
upward,
and then remove the
bobbin
0 .
1. Die Nadeln 0
gan
z nach oben stellen
und
die Deckel anach
rechts und links auseina
nder
ziehen.
2.
Di
e
Spul
en 0 an
deR
Laschen
E)
he
ra
usziehen.
1.
Re
lever les aig
uill
es 0 a
leur
position
Ia plus haute.
Ouvrir
les plaques de glissement a en les glissant vers Ia
droite
ou vers Ia gauche.
2.
Relev
er
les c
li
quets du crochet rotatif E)
et
enlever Ia
cannette 0 .
1.
Levantar las agujas 0 a l
as
posiciones mas altas y
abrir
las
placas corredizas a
mov
i
endo
las a
Ia
derecha y a
Ia
izquierd
a.
2.
Tir
ar
hacia arriba las p
er
ill
as de los cangrejos
E)
y sacar Ia
bobin
a 0 .
- 13 -
From the library of: Superior Sewing Machine & Supply LLC
To Remove the Bobbin
Cases
Entnehmen der Spulenkapseln
Depose des boites acannette
Para
sacar las cajas de
Ia
bobina
~
To
Wind
the
Lower Thread
~
Aufwickeln des Unterfadens
~
Bobinage
du
fil
inferieur
~
Para devanar el hilo inferior
1.
Die
Spule 0 auf die Spulerspindel
f)
stecken.
2.
Den
Spulerhebel e ganz nach unten drucken.
1.
Raise
the needles 0 to the highest positions, and open the
slide plates e by moving them to the right and left.
2.
Remove the bobbin
cases
E) by grasping the latches.
1.
Die
Nadeln 0 ganz nach oben stellen und die Deckel 8 nach
rechts und links auseinanderziehen.
2.
Die Spulenkapseln e
an
den Laschen herausziehen.
1.
Relever les aiguilles 0 a leur position
Ia
plus haute.
Ouvrir les plaques 8
en
les glissant vers
Ia
droite ou vers
Ia
gauche.
2.
Rei
ever les cliquet des crochets rotatifs et
en
leverles boites a
cannette
e.
1.
Levantar
Ia
agujas 0 a las posiciones mas altas y abrir las
placas corredizas 8 moviendolas a
Ia
derecha y a
Ia
izquierda.
2.
Quitar las cajas de
Ia
bobina esujetandolas por las aldabas.
1.
Push
the bobbin 0 onto the bobbin winder shaft
f).
2.
Push
the bobbin winder stop latch eall the way downward.
3.
Wind the thread around the bobbin 0 a few times (in the
direction
of
the arrow), and then operate the machine.
4.
If the thread cannot
be
wound evenly, loosen the thread
guide screw
0,
and move the thread guide 0 to the right
or
left
as
necessary.
*To
wind more thread onto the bobbin
0,
make adjustment by
tightening the screw
e.
3.
Den
Faden
in pfeilrichtung einige Male urn die Spule 0 wickeln und die Maschine betatigen.
4.
Falls der
Faden
nicht
gleichma~ig
aufgewickelt wird, die Fadenfuhrungsschraube 0 losen und die Fadentuhrung 0 seitlich
verschieben.
*Urn
mehr
Faden
auf die Spule 0 wickeln
zu
konnen,
mu~
die Schraube e angezogen werden.
1.
Pousser
Ia
cannette 0 sur
Ia
tige 8 de l'enrouleur
de
cannette.
2.
Pousser a fond
le
cliquet Q d'am!lt
de
l'enrouleur
de
cannette.
3.
Tourner le fil autour
de
Ia
cannette 0 plusieurs fois dans le sens de
Ia
fh!!che.
Faire tourner
Ia
machine.
4.
Si
le fil n'est
pas
enroule regulierement, desserrer
Ia
vis 0 du guide-til et deplacer le guide-fil 0 vers
Ia
droite ou
Ia
gauche,
comme necessaire.
* Lorsqu'on veut mettre davantage
de
fil sur
Ia
cannette, resserrer
Ia
vis
e.
1.
Empujar
Ia
bobina 0 sobre
el
carretel
8.
2.
Empujar completamente hacia abajo
Ia
aldaba de traba del devanador
de
Ia
bobina
e.
3.
Enrollar
el
hilo alrededor de
Ia
bobina 0 varias veces
(en
el
sentido indicado por
Ia
flecha) y luego, hacer funcionar
Ia
maquina.
4.
Si
no fuera posible enrollar
el
hilo
en
forma uniforme, aflojar
el
tornillo del guiahilos 0 y mover
el
guiahilos 0 a
Ia
derecha o a
Ia
izquierda segun
sea
necesario.
*Para
enrollar mas hilo
en
Ia
bobina
0,
ajustar apretando
el
tornillo
0.
-14-
From the library of: Superior Sewing Machine & Supply LLC
~
To Attach the
Bobbin
~
Einsetzen der Spulen
~
Installation de
Ia
cannette
~
Para
colocar
Ia
bobina
1.
Raise
the needles 0 to the highest positions.
2.
Place
bobbin
f)
into the rotary hook
as
shown above.
3.
Push
latch E)
of
the rotary hook flat.
4. Close the
bed
slide.
1.
Die Nadeln 0 ganz nach oben stellen.
2.
Die Spule 8 in den Greifer einsetzen (siehe Abbildung).
3. Die Lasche E) des Greifers umklappen.
4.
Den
Deckel
zuschieben.
1.
Relever les aiguilles 0
au
maximum.
2.
Placer
Ia
cannette 8 dans
le
crochet rotatif comme montre
ci-dessus.
3. Pousser le cliquet E) du crochet rotatif.
4. Fermer les plaques coulissantes.
1.
Levantar las agujas 0 a las posiciones mas altas.
2.
lnsertar
Ia
bobina
f)
dentro del cangrejo como
se
ve arriba.
3. Empujar
Ia
perilla del cangrejo
E)
para que quede horizontal.
4. Cerrar
Ia
mesa deslizante.
1.
2.
3.
4.
1.
2.
3.
4.
1.
2.
3.
4.
1.
2.
3.
4.
-15-
Raise
the needles 0
to
the highest positions.
Place
bobbin
case
8 into the rotary hook
as
shown above.
Push
latch E)
of
the rotary hook flat.
Close the bed slide.
Die Nadeln 0 ganz nach oben stellen.
Die Spulenkapsel 8 in den Greifer einsetzen (siehe Ab-
bildung).
Die Lasche E) des Greifers umklappen.
Den
Deckel
zuschieben.
Relever les aiguilles 0
au
maximum.
Placer
Ia
cannette 8 dans le crochet rotatif comme montre
ci-dessus.
Pousser le cliquet E) du crochet rotatif.
Fermer les plaques coulissantes.
Levantar las agujas 0 a las posiciones mas altas.
lnsertar
Ia
bobina 8 dentro del cangrejo como
se
ve arriba.
Empujar
Ia
perilla del cangrejo E) para que quede horizontal.
Cerrar
Ia
mesa deslizante.
From the library of: Superior Sewing Machine & Supply LLC
[QJ
Lower Threading
[QJ
Einfadeln des Unterfadens
[QJ
Enfilage
du
fil inferieur
[QJ
Para
enhebrar
el
hilo inferior
1.
Insert the bobbin e into the rotary hook
0.
2.
Pass
the thread through
slot®
and underthe tension spring
e.
3.
Pass
the thread through the needle plate and pull out about
50
mm.
1.
Die Spule e in den Greifer 0 einsetzen.
2.
Den
Faden durch den Schlitz @ unter die Span.nfeder e
einziehen.
3.
Den
Faden
durch die Stichplatte fUhren und
ca.
50
mm
herausziehen.
1.
Placer
Ia
cannette e dans le crochet rotatif
0.
2.
Placer
le
fil dans
Ia
fente @ et sous le ressort
de
tension
e.
3. Passer le fil dans
Ia
plaque aaiguille et tirer environ
50
mm.
1.
lnsertar
Ia
bobina e dentro del cangrejo
0.
2.
Pasar
el
hilo atraves de
Ia
ranura ® y por debajo del muelle
de tension
e.
3. Pasar
el
hilo a traves del placa de
Ia
aguja y sacar unos
50
mm.
1.
2.
3.
4.
1.
2.
3.
4.
1.
2.
3.
4.
1.
2.
3.
4.
-16-
Insert the bobbin 0 into the bobbin
case
e.
Pass
the thread through
slot®
and underthe tension spring
e.
Pass
the thread through slots@
and©,
and then through the
thread-loosening-prevention spring
0.
Pass
thethread through the thread hole 0 and pull out about
50
mm.
Die Spule 0 in die Spulenkapsel e einsetzen.
Den
Faden durch den Schlitz @ unter die Spannfeder e
einziehen.
Den
Faden
durch die Schlitze @ und © und durch die
Unterfaden-Spannfeder 0 fUhren.
Den
Faden
durch das
Loch
0 fUhren und
ca.
50
mm
herausziehen.
Placer
Ia
cannette 0 dans les boites acannette
e.
Placer
le
fil dans
Ia
fente @ et sous le ressort de tension
e.
Passer le fil dans les fentes@et
©puis
dans le ressort 0 qui
empeche celui-ci de
se
relacher.
Passer le fil dans le trou 0 et tirer environ
50
mm.
lnsertar
Ia
bobina 0 dentro de
Ia
caja de
Ia
bobina
e.
Pasar
el
hilo atraves
de
Ia
ranura ® y por debajo del muelle
de
tension
e.
Pasar
el
hilo a traves de las ranuras@ y ©y luego a traves
del muelle de prevenci6n
de
flojedades
en
el
hilo
0.
Pasar
el
hilo a traves del agujero del hilo 0 y sacar unos
50
mm.
From the library of: Superior Sewing Machine & Supply LLC
~
Upper Threading
~
Einfadeln des Oberfadens
[QJ
Enfilage
du
fil superieur
1§1
Enhebrado de los hilos superiores
[LT2-B841)
[LT2-B842)
[LT2-8847)
[LT2-B872)
Raise the thread take-up
to
the highest position.
Pass
the threads through the needle eyes from inside
to
Den
Fadenabnahmehebel ganz nach oben stellen. outside.
Relever le passe-til a
sa
position
Ia
plus haute. Die Faden von der Nadelinnenseite herdurchziehen.
levantar
el
tirahilo a su posici6n mas alta.
[LT2-B845]
[LT2-B848]
[LT2-B875]
Raise the thread take-up
to
the highest position.
Den
Fadenabnahmehebel ganz nach oben stellen.
Relever le passe-til a
sa
position
Ia
plus haute.
levantar
el
tirahilo a
su
posici6n mas alta.
Pass
the threadsthrough the needleeyes
from
inside to
outside.
Die Faden von derNadelinnenseite herdurchziehen.
Passer le til au travers duchas
de
l'aiguillede l'interieurvers
l'exterieur.
Tirer environ
50
mm
de
til
par le chas de l'aiguille.
Sacar unos
50
mm
de
hilo atraves del ojo de
cada aguja.
Passer le til
au
travers du chas de l'aiguillede l'interieurvers
l'exterieur.
Pasar los hilos atraves de los ojos de las agujasdesde
ellado
interiorhacia
ellado
de afuera.
Cotton thread/Baumwollfaden/
Fil
coton/Hilo de algod6n
~
Arm
thread guide
'\..__
FadenfUhrung
Guide-til du bras
Guiahilo del brazo
Synthetic thread/Synthetikfaden/
Fil
synthetique/Hilo sintetico
Pull
out
about
50
mm
of
thread through each
of
the needleeyes.
Die Faden etwa
50
mm
weit
durch die Nadelohre
ziehen.
Tirerenviron
50
mm
de fil
parle chas de l'aiguille.
Arm
thread guide
Fadenfuhrung
Guide-til du bras
Guiahilo del brazo
If
synthetic thread is used, use the felt (included) in
the armthread guide.
Bei Verwendung von Synthetik-Faden den
mitgelieferten Filz in die Fadentuhrung einsetzen.
Placer le feutre dans le guide-til du bras
en
cas de til
synthetique.
Si
se
utiliza hilosintetico, utilizarel fieltro
(incluido)
en
el guiahilodel brazo.
Pasar los hilos atraves de los ojos de las agujas desde
ell
ado
interiorhacia
ellado
de afuera.
-17-
From the library of: Superior Sewing Machine & Supply LLC

This manual suits for next models

6

Other Brother Sewing Machine manuals

Brother BAS-300G User manual

Brother

Brother BAS-300G User manual

Brother CB3-B917A User manual

Brother

Brother CB3-B917A User manual

Brother LS2400 User manual

Brother

Brother LS2400 User manual

Brother DB2-8715 User manual

Brother

Brother DB2-8715 User manual

Brother BP3500D User manual

Brother

Brother BP3500D User manual

Brother Laura Ashley Innov-ís NX2000 User manual

Brother

Brother Laura Ashley Innov-ís NX2000 User manual

Brother LZ2-B856E User manual

Brother

Brother LZ2-B856E User manual

Brother 882-S90/S91 User manual

Brother

Brother 882-S90/S91 User manual

Brother NQ900 User manual

Brother

Brother NQ900 User manual

Brother BAS H series User manual

Brother

Brother BAS H series User manual

Brother SC9500 User manual

Brother

Brother SC9500 User manual

Brother XL-5510 User manual

Brother

Brother XL-5510 User manual

Brother LT2-B875 MKII User manual

Brother

Brother LT2-B875 MKII User manual

Brother PL-2100 Mounting instructions

Brother

Brother PL-2100 Mounting instructions

Brother Quattro 2 6700D Setup guide

Brother

Brother Quattro 2 6700D Setup guide

Brother LT2-B847 MKII User manual

Brother

Brother LT2-B847 MKII User manual

Brother S-6200A User manual

Brother

Brother S-6200A User manual

Brother NS-50 User manual

Brother

Brother NS-50 User manual

Brother LT2-B842 MKII Guide

Brother

Brother LT2-B842 MKII Guide

Brother DB2-B727 User manual

Brother

Brother DB2-B727 User manual

Brother LS 217 User manual

Brother

Brother LS 217 User manual

Brother BAS-416 Manual

Brother

Brother BAS-416 Manual

Brother PR-600 User manual

Brother

Brother PR-600 User manual

Brother CE-4000 User manual

Brother

Brother CE-4000 User manual

Popular Sewing Machine manuals by other brands

Reliable MSK-8210M specification

Reliable

Reliable MSK-8210M specification

Pfaff Creative 2134 datasheet

Pfaff

Pfaff Creative 2134 datasheet

Sunshine 3400 Series instruction manual

Sunshine

Sunshine 3400 Series instruction manual

Singer 51W19 Instructions for using and adjusting

Singer

Singer 51W19 Instructions for using and adjusting

DURKOPP ADLER 838 instruction manual

DURKOPP ADLER

DURKOPP ADLER 838 instruction manual

Singer 457A105 Illustrated parts list

Singer

Singer 457A105 Illustrated parts list

Singer 1669U 101 Service manual

Singer

Singer 1669U 101 Service manual

JUKI HZL-80 series instruction manual

JUKI

JUKI HZL-80 series instruction manual

Singer QuantumLock user guide

Singer

Singer QuantumLock user guide

Viking 2780 operating manual

Viking

Viking 2780 operating manual

JUKI PLK-J4040R Technical manual

JUKI

JUKI PLK-J4040R Technical manual

JUKI TL-2200QVP Mini instruction manual

JUKI

JUKI TL-2200QVP Mini instruction manual

Singer SE017 instruction manual

Singer

Singer SE017 instruction manual

ZOJE ZJ2842-BD Operation manual

ZOJE

ZOJE ZJ2842-BD Operation manual

Duerkopp Adler 4220i-6 Instructions for service

Duerkopp Adler

Duerkopp Adler 4220i-6 Instructions for service

Singer 1411 parts list

Singer

Singer 1411 parts list

Pfaff 1163 Adjustment manual

Pfaff

Pfaff 1163 Adjustment manual

HIGHLEAD GC0518 SERIES instruction manual

HIGHLEAD

HIGHLEAD GC0518 SERIES instruction manual

manuals.online logo
manuals.online logoBrands
  • About & Mission
  • Contact us
  • Privacy Policy
  • Terms and Conditions

Copyright 2025 Manuals.Online. All Rights Reserved.