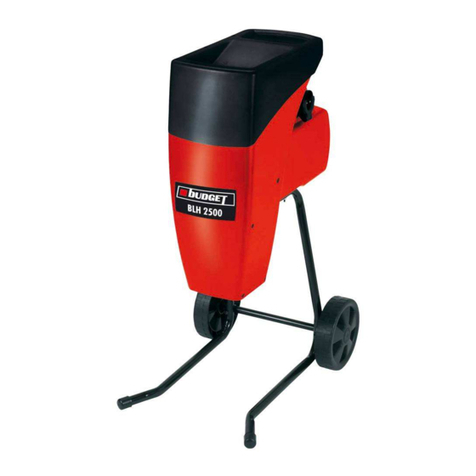
budget BGH 2401 Manual

BGH 2401
BGH 2401_Budget_mehrspr 29.12.2005 10:48 Uhr Seite 1

2
Ꮯ
ꔼ
Vor Arbeiten am Schneidwerkzeug, Netzstecker ziehen!
Withdraw main plug before working on blade!
Avant tout travail sur le dispositif de coupe, vous devez retirer la fiche de contact de la prise!
Voor werkzaamheden aan het snijwerk netstekker uit het stopcontact trekken
A vágóművön végzendő munkák előtt ki kell húzni a hálózati dugót!
Преди работа по режещия инструмент издърпайте щепсела!
1
2a
2b
쐈
쐅
3
4
BGH 2401_Budget_mehrspr 29.12.2005 10:48 Uhr Seite 2

3
5
7
9 10
8
6
쎻
a
쎻
A
BGH 2401_Budget_mehrspr 29.12.2005 10:48 Uhr Seite 3

4
D
1. Wichtige Hinweise
Bitte lesen Sie die Gebrauchsanweisung sorgfältig durch
und beachten Sie deren Hinweise. Machen Sie sich
anhand dieser Gebrauchsanweisung mit dem Gerät, dem
richtigen Gebrauch sowie den Sicherheitshinweisen ver-
traut.
Bewahren Sie die Bedienungsanleitung immer gut auf!
Der unsachgemäße Gebrauch des Elektrogarten-
häckslers kann zu schweren Verletzungen führen.
Der Elektrogartenhäcksler ist nur zum Zerkleinern von
organischem Gartenabfall bestimmt.
Achtung!
Aus Sicherheitsgründen dürfen Kin
nder und Jugendliche
unter 16 Jahren den Elektrogartenhäcksler nicht benut-
zen.
2. Sicherheitshinweise
Achtung! Vor Arbeiten am Gerät, Reinigung oder ver-
wickeltem Verlängerungskabel muss der Ein- Ausschalter
auf “0“ stehen und der Netzstecker muss aus der
Steckdose gezogen sein. Nach Abschalten läuft das
Gerät noch kurze Zeit weiter.
앬Jugendliche unter 16 Jahren sowie Personen, die
mit dieser Gebrauchsanweisung nicht vertraut
sind, dürfen den Elektrogartenhäcksler nicht
bedienen.
앬Die Bedienungsperson ist im Arbeitsbereich des
Elektrogartenhäckslers gegenüber Dritten ver-
antwortlich.
앬Beim Anwerfen oder Einschalten des Motors
muss der Elektrogartenhäcksler vorschrifts-
mäßig geschlossen sein (Aufnahmetrichter und
Auswurfeinrichtung).
앬Der Elektrogartenhäcksler muss auf ebenem
und festem Untergrund standsicher aufgestellt
werden.
앬Beim Zerkleinern Handschuhe und Schutzbrille
tragen.
앬Bei Elektrogartenhäckslern ohne Lärmschutz-
maßnahmen ist ein Gehörschutz zu empfehlen.
앬Vor dem Verlassen des Elektrogartenhäckslers
ist der Motor stillzusetzen, außerdem der Netzstecker
zu ziehen.
앬Wartungs- und Reinigungsarbeiten sowie das
Abnehmen oder Abklappen der Schutzeinricht-
ungen dürfen nur bei stillgesetztem Motor und nur,
wenn der Netzstecker abgezogen ist,
vorgenommen werden.
앬Die mitgelieferten Schutzeinrichtungen (z.B. Überlast-
schalter, Gummilamellen im Einfülltrichter,
Sicherheitsschalter zwischen Motorgehäuse und
Auslasstrichter) müssen verwendet werden.
Allgemeine Sicherheitshinweise
앬Vor Inbetriebnahme muss das Gerät korrekt
zusammengebaut werden.
앬Führen Sie vor jeder Benutzung eine Sichtprüfung
des Gerätes durch. Benützen Sie das Gerät nicht,
wenn Sicherheitsvorrichtungen beschädigt oder
abgenutzt ist. Setzen Sie nie Sicherheitsvorricht-
ungen außer Kraft.
앬Verwenden Sie das Gerät ausschließlich ent-
sprechend dem in dieser Gebrauchsanweisung
angegebenen Verwendungszweck.
앬Überprüfen Sie das Häckselgut vor Arbeitsbeginn.
앬Entfernen Sie vorhandene Fremdkörper. Achten
Sie während des Arbeitens auf Fremdkörper.
Sollten Sie dennoch beim Häckseln auf einen
Fremdkörper treffen, setzen Sie bitte die Maschine
außer Betrieb und entfernen Sie diesen. Hierzu das
Gerät ausschalten und den Netzstecker ziehen. Das
Gerät ist auf Beschädigungen zu überprüfen und ggf.
sind Reparaturen durchzuführen.
앬Arbeiten Sie nur bei guten Lichtverhältnissen oder
sorgen Sie für eine entsprechende künstliche
Beleuchtung.
앬Während des Arbeitens muss der Häcksler auf
einer festen Fläche und gleichen Ebene wie der
Bediener stehen.
앬Achten Sie beim Arbeiten immer auf sicheren und
festen Stand.
앬Lassen Sie das Gerät nie unbeaufsichtigt am
Arbeitsplatz liegen. Sollten Sie die Arbeit unter-
brechen, lagern Sie bitte das Gerät an einem
sicheren Ort. Sollten Sie Ihre Arbeit unterbrechen,
um sich zu einem anderen Arbeitsbereich zu
begeben, schalten Sie das Gerät, während Sie
sich dorthin begeben, unbedingt ab.
앬Benützen Sie das Gerät nie bei Regen oder in
feuchter, nasser Umgebung. Schützen Sie Ihr
Gerät vor Feuchtigkeit und Regen.
앬Schalten Sie den Motor ab, wenn:
- Sie das Gerät nicht benutzen
- Sie es unbewacht lassen
- Sie es kontrollieren
- das Versorgungskabel beschädigt ist
- Sie das Messer entnehmen bzw. austauschen
- Sie das Gerät von einem Ort zum anderen
transportieren
앬Halten Sie das Gerät von anderen Personen, ins-
BGH 2401_Budget_mehrspr 29.12.2005 10:48 Uhr Seite 4

D
5
besondere Kindern und auch von Haustieren fern.
앬Verwenden Sie das Gerät nie ohne die
Schutzvorrichtungen. (z.B. Überlastschalter,
Gummilamellen im Einfülltrichter, Sicherheitsschalter
zwischen Motorgehäuse und Auslasstrichter)
ACHTUNG! Die Schutzvorrichtungen (z.B. Überlastschal-
ter, Gummilamellen im Einfülltrichter, Sich
herheitsschalter
zwischen Motorgehäuse und Auslasstrichter) ist für Ihre
Sicherheit und die Sicherheeit anderer, sowie für ein kor-
rektes Funktionieren der Maschine wesentlich. Das
Nichtbeachten dieseer Vorschrift führt abgesehen davon,
dass dadurch eine potentielle Gefahrenquelle geschaffen
wird, zu
um Verlust des Garantieanspruches.
앬Achten Sie darauf, dass Luftöffnungen frei von
Verschmutzungen sind.
앬Ziehen Sie nach dem Gebrauch den Netzstecker
und überprüfen Sie die Maschine auf Beschädig-
ung.
앬Wenn Sie das Gerät nicht benutzen, bewahren
Sie es an einem trockenen und für Kinder unzu-
gänglichen Ort auf.
앬Verwenden Sie das Gerät nur so, wie es in dieser
Bedienungsanleitung beschrieben ist.
앬Überprüfen sie regelmäßig, ob die Schrauben
richtig angezogen sind.
앬Die Netzspannung muss mit der Spannung über-
einstimmen, die auf dem Datenschild angegeben
ist.
앬Der Stromkreis muss mindestens mit 16A abge-
sichert sein.
앬Die verwendeten Anschlussleitungen dürfen nicht
leichter als leichte Gummischlauchleitungen
HO7RN-F nach DIN 57282/VDE 0282 sein und
einen Mindestdurchmesser von 1,5 mm2auf-
weisen. Die Steckverbindungen müssen Schutz-
kontakte aufweisen und die Kupplung muss spritz-
wassergeschützt sein. Die Anschlussleitung muss
regelmäßig auf Anzeichen einer Verletzung oder
Alterung untersucht werden. Das Gerät darf nicht
benutzt werden, falls der Zustand der Anschluss-
leitung nicht einwandfrei ist.
앬Eine Anschlussleitung mit zu kleinem Leiterquer-
schnitt verursacht eine deutliche Verringerung der
Leistungsfähigkeit des Gerätes. Bei Kabeln bis 25
m Länge ist ein Leiterquerschnitt von mindestens
3x1,5 mm2, bei einer Länge über 25 m ein Leiter-
querschnitt von mindestens 3x2,5 mm2erforder-
lich.
앬Muss das Gerät zum Transport angehoben wer-
den, ist der Motor abzustellen und der Stillstand
des Werkzeuges abzuwarten. Vor dem Verlassen
des Gerätes ist der Motor stillzusetzen und der
Netzstecker zu ziehen. Bevor Sie das Gerät an
das Stromnetz anschließen, versichern Sie sich,
dass der Auslasstrichter gut mit dem Motorgehäuse
verbunden und die Entriegelungsschraube fest
zugedreht ist.
앬Sollte der Häcksler übermäßig vibrieren, den
Motor abstellen, Netzstecker ziehen und sofort die
Ursache suchen. Starkes Vibrieren ist ein Hinweis auf
eine Störung.
앬Für die Instandhaltung nur Original-Ersatzteile
verwenden.
앬Reparaturen dürfen nur von einem Elektrofach-
mann durchgeführt werden.
앬Wenn die Anschlussleitung dieses Gerätes be-
schädigt wird, muss sie durch den Hersteller oder
seinen Kundendienst oder ähnlich qualifizierte
Person ersetzt werden, um Gefährdungen zu ver-
meiden.
앬Vor Inbetriebnahme der Maschine und nach
irgendwelchem Aufprall, prüfen Sie sie auf An-
zeichen von Verschleiß oder Beschädigung, und
lassen Sie notwendige Reparaturen durchführen.
Halten Sie immer Hände und Füße von der
Schneideeinrichtung entfernt, vor allem, wenn Sie
den Motor einschalten.
앬Benutzen Sie nie Ersatz- und Zubehörteile, die
vom Hersteller nicht vorgesehen oder empfohlen
sind.
앬Ziehen Sie den Netzstecker ab vor Prüfungen,
Reinigungen oder Arbeiten an der Maschine und
wenn sie nicht im Gebrauch ist.
앬Tragen Sie keine lose herabhängende Kleidung
oder solche mit hängenden Bändern oder
Kordeln.
앬Benutzen Sie die Maschine nicht auf einer
gepflasterten mit Kies bestreuten Fläche, auf der
ausgeworfenes Material Verletzungen
verursachen kann.
앬Vergewissern Sie sich vor Starten der Maschine,
dass der Einwurftrichter leer ist.
앬Halten Sie mit Kopf und Körper Abstand zu der
Einwurföffnung.
앬Hände, andere Körperteile und Kleidung sind
nicht in die Einfüllkammer, Auswurfkanal oder in
die Nähe anderer beweglichen Teile zu bringen.
앬Achten Sie immer auf Ihr Gleichgewicht und
festen Stand. Strecken Sie sich nicht vor. Stehen
Sie beim Einwerfen von Material niemals höher
als die Maschine.
앬Halten Sie sich bei Inbetriebnahme der Maschine
immer außerhalb der Auswurfzone.
앬Sollten in das Schneidwerkzeug Fremdkörper
gelangen oder die Maschine ungewöhnliche
Geräusche erzeugen oder ungewöhnlich
BGH 2401_Budget_mehrspr 29.12.2005 10:48 Uhr Seite 5

6
D
vibrieren, schalten Sie sofort den Motor ab und
lassen Sie die Maschine auslaufen. Ziehen Sie
den Netzstecker ab und führen Sie folgende
Schritte aus:
- Überprüfen Sie die Maschine auf Schäden
- Überprüfen Sie Teile auf festen Sitz, ziehen Sie
gegebenenfalls nach.
- Lassen Sie jegliche beschädigten Teile ersetzen
oder reparieren, wobei die Teile gleichwertige
Beschaffenheit aufweisen müssen
앬Ist die Maschine verstopft, schalten Sie den Motor
aus und ziehen Sie den Netzstecker ab, bevor Sie
mit der Reinigung beginnen. Achten Sie darauf,
dass der Motor frei von Abfällen und sonstigen
Ansammlungen ist, um den Motor vor Schäden
oder möglichem Feuer zu bewahren.
Denken Sie daran, dass bei Inbetriebnahme des
Startmechanismus bei motorbetriebenen Maschinen
auch das Schneidewerkzeug läuft.
앬Achten Sie darauf, dass alle Abdeckungen und
Abweiser an ihrem Platz und in gutem
Arbeitszustand sind.
앬Kippen Sie die Maschine nicht bei laufendem
Motor.
앬Schalten Sie die Maschine vor Anbringen und
Entfernen des Sammelbehälters ab.
앬Niemals versuchen eine unvollständige Maschine
zu benutzen oder eine, die mit einer nicht
genehmigeten Änderung versehen ist.
앬Schließen Sie das Elektrowerkzeug über eine
mit maximal 16A abgesicherte
Schutzkontaktsteckdose an den Netzstrom
(230 V ~, 50 Hz) an. Wir empfehlen das
Verwenden einer Fehlerstrom-Schutzein-
richtung mit einem Nennauslösestrom von
nicht mehr als 30 mA. Lassen Sie sich von
Ihrem Elektroinstallateur beraten.
Erklärung des Hinweisschildes (siehe Abb. 1) auf
dem Gerät
1. Achtung! Betriebsanweisung lesen und Warn- und
Sicherheitshinweise befolgen.
2. Achtung vor rotierenden Messern. Hände und
Füße nicht in Öffnungen halten, wenn die
Maschine läuft.
3. Achtung! Dritte aus dem Gefahrenbereich
fernhalten!
4. Achtung! Gerät vor Feuchtigkeit schützen und
nicht dem Regen aussetzen.
5. Achtung! Beim Arbeiten grundsätzlich
Schutzbrille, Gehörschutz, Schutzhandschuhe
und feste Arbeitskleidung tragen!
6. Vor jeglichen Arbeiten am Häcksler wie
Einstellung, Reinigung, usw und bei
Beschädigung der Netzleitung, Schalter “0” und
Stecker aus der Steckdose ziehen.
Achtung: Nach dem Abstellen rotieren die Messer
noch einige Sekunden nach!
3. Technische Daten
Netzspannung: 230 V ~50 Hz
Leistungsaufnahme: 2400 Watt (S6-40%)
2000 W (S1)
Leerlaufdrehzahl n0:2880 min-1
Astdurchmesser: max. 40 mm
Schalldruckpegel LPA: 93 dB (A)
Schallleistungspegel LWA: 106 dB (A)
Steckdosen-Absicherung: min. 16A
Gewicht: 25 kg
Betriebsart S1 (Dauerbetrieb)
Die Machine kann Dauerhaft mit der angegebenen
Leistung betrieben werden.
Die Betriebsart S6 (40%) bezeichnet ein Belastungs-
profil, das 4 min Belastung und 6 min Leerlauf annimmt.
Max. je nach Beschaffenheit des Häckselgutes.
4. Gerätebeschreibung
(Bild 2a / 2b)
1 Einfülltrichter
2 Auslasstrichter
3 Motorgehäuse mit Messerplatte
4 Stopfer
5 Fahrgestell komplett
6 Rad komplett
7 Achse
8 Netzleitung
9 Überlastschalter
10 Ein- Ausschalter
11 Entriegelungsschraube
5. Bestimmungsgemäßer Gebrauch
Der Elektrogartenhäcksler ist nur zum Zerkleinern von
organischem Gartenabfall bestimmt. Führen Sie das bio-
logisch abbaubare Material wie z.B. Blätter, Zweige,
Blumenreste usw. in den Einfülltrichter (Bild 2a/Pos. 1)
ein.
Aufnahme des Häckselgutes
Es kann ein Behälter unter der Auswurföffnung für das
zerkleinerte Material verwendet werden.
BGH 2401_Budget_mehrspr 29.12.2005 10:48 Uhr Seite 6

7
D
6. Vor der Inbetriebnahme
6.1 Fahrgestell montieren
앬Motorgehäuse umgedreht auf den Boden legen
und die beiden Gestellteile mit der Spezialscheibe
und selbstsichernden Sechskantmutter am Motor-
gehäuse handfest anschrauben (Bild 3).
앬Achse zwischen die beiden Gestellteile einsetzen
(Bild 4).
앬Räder mit Distanzstück, Unterlegscheibe und
Schraube am Gestell mit dem Sechskantschlüssel
und Schlüsseladapter anschrauben (Bild 5).
Radkappe aufsetzen.
앬Entriegelungsschraube (A) herausdrehen (Bild
6). Anschließend lässt sich der Auslasstrichter weg-
klappen.
앬Selbstsichernde Sechskantmutter und Befestig-
ungsschrauben für Fahrgestellbefestigung fest an-
ziehen (Bild 7).
Achtung! Aussen am Fahrgestell müssen die
gekrümmten Beilagscheiben untergelegt werden.
앬Einfülltrichter (Bild 2a/Pos. 1) auf den Auslasstrichter
aufsetzen und mit drei Schrauben befestigen
(Bild 08 / Pos. A).
7. Inbetriebnahme
7.1 Motorbremse
Der Elektromotor ist mit einer Motorbremse ausgerüstet,
die den Motor und damit auch die Messer in 5 Sekunden
nach Drücken des Sicherheitsschalters stoppt.
7.2 Überlastsicherung (Motorschutz)
Wird der Motor längere Zeit überlastet, so spricht der
Überlastschalter (Abb. 2b/Pos. 9) an und schaltet das
Gerät ab. Der Ein- Ausschalter schaltet dabei auf „0“.
Nach min. 1 Minute kann der Überlastschalter gedrückt
und der Ein- Ausschalter wieder eingeschaltet werden.
Sollte der Motor nicht anlaufen, so ist der Auswurfkanal
zu reinigen (s. 7.3.).
7.3 Abbau des Trichters
- Tragen Sie immer feste Arbeitshandschuhe
- Versichern Sie sich, daß der Schalter auf Position 0
steht (Abb. 2b/Pos. 10)
- Ziehen Sie den Stecker aus der Steckdose
- den Drehknopf (Abb. 2b/Pos. 11) aufschrauben und
den Auslasstrichter (Abb.2a/Pos. 2) hochheben
- Reinigen Sie die Schneidflächen, den Auswurf und ent-
fernen Sie Holzstückchen oder andere Teile, die die
Messer blockieren können. Den Auslasstrichter (Abb.
2a/Pos. 2) aufsetzen und den Drehknopf
(Abb.2b/Pos. 10) vor Betätigen des Ein-Schalters fest
zuschrauben.
7.4 Sicherhe
eit für den Zusammenbau
Der Häcksler ist mit einem Sicherheitsschalter am
Verschluß des Auslasstrichters und an der unteren Platte
ausgestattet.
Wenn der Auslasstrichter nicht perfekt sitzt bzw. nicht
gegen die untere Platte gedrückt ist, schaltet der
SICHERHEITSSCHALTER und unterbindet die
Funktion des Motors. Wenn diese Situation eintritt,
nehmen Sie wie oben beschrieben den Trichter ab.
Dann reinigen Sie gut die Oberfläche der beiden
Platten. Beim Aufsetzen darauf achten, dass der
Fülltrichter richtig sitzt und der Drehknopf ganz zuge-
schraubt ist.
ACHTUNG = NIEMALS die Entriegelungs-
schraube (Abb. 2b/Pos. 11) lösen, ohne vorher den
Schalter (Abb. 2b/Pos. 10) ausgeschaltet und den
Stecker abgezogen zu haben.
7.5 Messerwechsel
Tragen Sie immer feste Arbeitshandschuhe.
Die Messer (Abb. 9-10) der Messertragscheibe sind
austauschbar. Falls Sie Messer ersetzen müssen, dürfen
Sie aus Qualitäts-und Sicherheitsgründen nur
Originalmesser verwenden.
AUSTAUSCH, SCCHÄRFEN, MESSERWECHSEL
(Abb. 9-10)
Wir empfehlen, diese Arbeiten von Fachwerkstätten
durchführen zu lassen. Die (austauschbaren) Messer
sind mit jeweils zwei Schrauben an der Scheibe be-
festigt. Vor jeder Arbeit an den Messern muß immer der
Schalter des Gerätes auf „0“ stehen, und der Stecker aus
der Steckdose gezogen sein.
7.6 Arbeitshinweise
앬Arbeitshandschuhe, Schutzbrille und Gehörschutz
tragen.
앬Zugeführtes Häckselgut wird selbstständig einge-
zogen.
ACHTUNG! Längeres, aus dem Gerät ragendes
Häckselgut kann beim Einziehen rutenartig
ausschlagen - ausreichenden Sicherheitsabstand
einhalten.
앬Nur soviel Häckselgut einführen, dass der Auslass-
trichter nicht verstopft.
앬Welke, feuchte, bereits mehrere Tage gelagerte
Gartenabfälle sind im Wechsel mit Ästen zu
BGH 2401_Budget_mehrspr 29.12.2005 10:48 Uhr Seite 7

8
D
Gerät läuft nicht a) Kein Strom am Stecker
b) Gerät ist ausgeschaltet
c) Überlastschalter hat ausgelöst
d) Auswurfkanal ist verstopft
e) Auslasstrichter sitzt nicht fest auf
Motorgehäuse
a) Zuleitung und Sicherung überprüfen
b) Gerät einschalten
c) Schaltstift am Überlastschalter
drücken
d) Auswurfkanal reinigen
e) Innenraum reinigen und
Sicherheitsschraube festziehen
Häckselleistung
unbefriedigend
a) Falsche Messerplatte eingesetzt
b) Messer abgenutzt
a) Messerplatte tauschen
b) Messer drehen, schleifen oder
austauschen
Häckselleistung
lässt nach
a) Messer abgenutzt
b) Auswurfkanal ist verstopft
a) Messer drehen, schleifen oder
austauschen
b) Auswurfkanal reinigen
11. Fehlersuchplan
häckseln. Dadurch wird ein Festsetzen des
Häckselgutes im Auslasstrichter vermieden.
앬Weiche Abfälle (z.B. Küchenabfälle) nicht
häckseln sondern direkt kompostieren.
앬Stark verzweigtes, laubhaltiges Gut erst vollkom-
men häckseln, bevor neues Häckselgut nachge-
führt wird.
앬Die Auswurföffnung des Auslasstrichters darf nicht
durch gehäckseltes Material verstopft werden –
Rückstaugefahr.
앬Die Lüftungsschlitze dürfen nicht abgedeckt
werden.
8. Wartung und Pflege
Achtung! Vor jedem Eingriff zur Kontrolle oder Wartung
des Gerätes unterbrechen Sie die Stromver-sorgung
indem Sie den Stecker des Gerätes aus der Steckdose
ziehen.
앬Reinigen Sie das Gerät regelmäßig. Dadurch ge-
währleisten Sie die Funktionstüchtigkeit und eine
lange Lebensdauer.
앬Nach beendeter Arbeit nehmen Sie den Auslass-
trichter ab und reinigen Sie den Innenraum. Ab-
lagerungen an den inneren Metallteilen mit einer
Bürste entfernen. Beim Aufsetzen des Auslasstrichters
achten Sie darauf, dass der Sicherheitsschalter
und die Entriegelungsschraube frei von Ver-
schmutzung ist.
앬Halten Sie während der Arbeit die Lüftungsschlitze
sauber.
앬Den Kunststoffkörper und die Kunststoffteile mit
leichten Haushaltsreiniger und einem feuchten
Tuch säubern. Verwenden Sie für die Reinigung
keine aggressiven Mittel oder Lösungsmittel!
앬Den Häcksler nie mit Wasser abspritzen.
앬Vermeiden Sie unbedingt ein Eindringen von
Wasser in das Gerät.
9. Ersatzteilbestellung
Bei der Ersatzteilbestellung sollten folgende Angaben
gemacht werden:
앬Typ des Gerätes
앬Artikelnummer des Gerätes
앬Ident- Nummer des Gerätes
앬Ersatzteil- Nummer des erforderlichen Ersatzteils
Aktuelle Informationen und Preise finden Sie unter
www. isc-gmbh.info
10. Entsorgung
Alt-Elektrogeräte sind Wertstoffe, sie gehören
daher nicht in den Hausmüll! Wir möchten Sie
daher bitten, uns mit Ihrem aktiven Beitrag bei der
Ressourcenschonung und beim Umweltschutz zu unter-
stützen und dieses Gerät bei den - falls vorhanden - ein-
gerichteten Rücknahmestellen abzugeben.
BGH 2401_Budget_mehrspr 29.12.2005 10:48 Uhr Seite 8

9
D
BGH 2401_Budget_mehrspr 29.12.2005 10:48 Uhr Seite 9

10
D
Gewährleistung
Für dieses Gerät gilt die gesetzliche Gewährleistung.
Reklamationen sind unmittelbar nach Feststellung zu melden.
Der Gewährleistungsanspruch erlischt bei Eingriffen durch den Käufer oder durch Dritte. Schäden, die durch unsach-
gemäße Behandlung oder Bedienung, durch falsches Aufstellen oder Aufbewahren, durch unsachgemäßen Anschluss
oder Installation sowie durch höhere Gewalt oder sonstige äußere Einflüsse entstehen, fallen nicht unter die
Gewährleistung. Wir empfehlen, die Bedienungsanleitung aufmerksam zu lesen, da dort wichtige Hinweise enthalten
sind.
Der Gewährleistungsanspruch ist vom Käufer durch Vorlage der Kaufquittung nachzuweisen.
Hinweise:
1. Sollte Ihr Gerät nicht mehr richtig funktionieren, so prüfen Sie bitte vorerst, ob andere Gründe, wie
z.B. unterbrochene Stromversorgung oder falsche Handhabung, die Ursache sind.
2. Beachten Sie bitte, dass Sie Ihrem defekten Gerät in jedem Fall folgende Unterlagen beifügen bzw.
bereit halten:
- Kaufquittung
- Gerätebezeichnung / Typ / Marke
- Beschreibung des aufgetretenen Mangels mit möglichst genauer Fehlerangabe, dies erleichtert
uns eine zügige Reparatur.
Bei Gewährleistungsanspruch, Störungen oder Ersatzteilbedarf wenden Sie sich bitte an:
ISC GmbH
Eschenstraße 6
D-94405 Landau/Isar
Tel. (0180) 5 120 509 (12 Ct/min)
Fax (0180) 5 835 830 (12 Ct/min)
GWL 7/02 HS/DE
ISC GmbH
Eschenstraße 6
D-94405 Landau/Isar
Tel. (0180) 5 120 509 (12 Ct/min), Fax (0180) 5 835 830 (12 Ct/min)
BGH 2401_Budget_mehrspr 29.12.2005 10:48 Uhr Seite 10

11
GB
1. Important information
Please read the directions for use carefully and observe
the information provided. It is important to consult these
instructions in order to acquaint yourself with the
machine, its proper use and safety precautions.
Keep these instructions in a safe place.
Improper operation of the electric garden refuse shredder
can lead to serious injuries.
This electric garden refuse shredder is designed only for
shredding organic garden waste.
Important!
For safety reasons, the electric garden refuse
shredder may not be operated by individuals under
16 years of age.
2. Safety information
Important! The ON/OFF switch must be set to “0” and
the power plug removed from the socket-outlet before
cleaning or doing any other work on the shredder and
whenever the cable becomes tangled. The shredder will
continue to run briefly after it is switched off.
앬The electric garden shredder is not to be used by
individuals under 16 years of age or any other persons
who are not acquainted with these directions for use.
앬The operator is responsible for the safety of third
parties within the working radius of the electric garden
shredder.
앬Make sure that the electric garden shredder is properly
closed (loading funnel and ejector) before you start up
the motor.
앬The electric garden shredder must be placed on a flat
and firm surface where it can stand securely.
앬Always wear gloves and safety goggles when working
with the shredder.
앬We recommend ear protectors when working with
electric garden shredders which have no noise-
insulating features.
앬Always switch off the motor and pull out the power plug
whenever leaving the electric garden shredder.
앬Maintenance and cleaning work on the shredder as
well as the removal or adjustment of any safety devices
may only be performed when the motor is at a standstill
and the power plug has been pulled out.
앬The supplied protective devices (e.g. overload switch,
rubber slats in the funnel inlet, safety switch between
the motor housing and outlet funnel) must be used.
General safety instructions
앬The shredder must be assembled correctly before it is
put into operation.
앬Always inspect the machine visually before using it. Do
not use the machine if safety devices are damaged or
worn. Never disable safety devices.
앬Use the machine only for the purposes indicated in
these instructions for use.
앬Before you begin your work, examine the material you
want to shred.
앬Remove any foreign bodies. Continue to watch out for
foreign bodies while you are working. If you come
across any foreign bodies while shredding, shut down
the machine and remove the items in question. To do
so, switch the machine off and unplug from the mains.
Check the machine for damage and make any repairs
that are required.
앬Work only in broad daylight or with suitable artificial
lighting.
앬While operating, the shredder must stand on a firm
surface and at the same level as the user.
앬Always make sure the machine is stable and secure
while operating.
앬Never leave the machine unsupervised at the work
area. If you stop work for a while, store the machine in
a safe place. If you stop your work in order to go to
another area to work, you must make sure that the
machine is switched off while you are going there.
앬Never use the machine while it is raining or in damp or
wet surroundings. Protect your machine against
moisture and rain.
앬Switch off the motor when
- you are not using the machine
- you leave it untended
- you are checking it
- the power cable is damaged
- you are removing or replacing the blade
- you are transporting the machine from one place to
another
앬Keep the machine away from other persons,
particularly children and pets
앬Never use the tool without the protective devices (e.g.
overload switch, rubber slats in the funnel inlet, safety
switch between the motor housing and outlet funnel)
CAUTION! The protective devices (e.g. overload switch,
rubber slats in the funnel inlet, safety swwitch between the
motor housing and outlet funnel) are there to ensure your
safety and the safety of other people. They are also criti-
cal to the proper functioning of the machine. Failure to
comply wwith these instructions will invalidate your warranty
as well as creating a potential source of dangeer.
BGH 2401_Budget_mehrspr 29.12.2005 10:48 Uhr Seite 11

12
GB
앬Make sure that air vents are free of dirt.
앬Disconnect from the mains after use and check the
machine for damage.
앬When not using the machine, keep it in a dry place out
of the reach of children.
앬Use the machine only in the way described in these
operating instructions.
앬Check that the screws are properly tightened at
regular intervals.
앬The mains supply must be the same as the voltage
indicated on the data plate.
앬The electric circuit must be protected at least by a 16A
fuse.
앬The power cables used are not to be of a lighter duty
class than light rubber-insulated HO7RN-F in
accordance with DIN 57282/VDE 0282 and they
must have a minimum diameter of 1.5 mm2. Plug
connections must have earthing contacts and the
coupling must be protected from rainwater. The power
cable must be examined regularly for signs of damage
or ageing. Do not use the machine if the power cable
is in a less than perfect condition.
앬The efficiency of the machine will be greatly reduced if
a power cable with too small a cross section is used. A
conductor cross section of at least 3x1.5 mm2is
required for cables up to 25 m long, and one of at
least 3x2.5 mm2for cables longer than 25 m.
앬If the machine has to be lifted for transporting, be sure
to switch off the motor first and wait for the cutter to
come to a standstill. Each time before you leave the
machine, switch off the motor and pull out the power
plug. Before you connect the machine to the power
supply, make sure that the outlet funnel is properly
connected to the motor housing and the release screw
is tightened.
앬If the garden refuse shredder vibrates excessively, turn
off the motor, pull out the power plug, and find out
immediately what is causing the vibrations. Strong
vibration is an indication of a fault.
앬Use only original replacement parts when repairing.
앬Repairs may only be carried out by a qualified
electrician.
앬If the power cable for this machine is damaged, it must
be replaced by the manufacturer or its after-sales
service or similarly trained personnel to avoid danger.
앬Before starting up the machine, and after any collision,
check it for signs of wear or damage and have any
necessary repairs carried out. Always keep your hands
and feet away from the cutting unit, especially when
switching the motor on.
앬Never use spare parts and accessories not provided or
recommended by the manufacturer.
앬Unplug the mains plug before checking, cleaning or
doing any work on the machine and when it is not
being used.
앬Do not wear loose clothing or clothing with hanging
belts or cords.
앬Do not use the machine on a paved area that has been
gravelled where discharged material may cause
injuries.
앬Ensure that the loading funnel inlet is empty before you
start the machine.
앬Keep your head and body away from the infeed
opening.
앬Do not move your hands, other body parts or clothing
into the infeed chamber, ejector chute or near other
moving parts.
앬Make sure that you are balanced and standing on a
firm surface at all times. Do not stretch forwards. Never
stand higher than the machine when feeding material
into it.
앬Keep away from the discharge zone when you start the
machine.
앬If foreign bodies get into the cutting tool or the
machine generates unusual noises or vibrates in a
strange way, switch off the motor immediately and
allow the machine to come to a standstill. Pull the plug
and carry out the following work:
- Check the machine for signs of damage
- Check that all the parts are secure and tighten them if
necessary.
- Have any damaged parts replaced or repaired, but
use only spare parts of the same type and equivalent
quality
앬If the machine is blocked switch off the motor and pull
the plug before you start the cleaning procedure.
Ensure that the motor is clear of waste and other
accumulations to protect the motor from suffering
damage or possibly catching fire. In case of motor-
driven machines, bear in mind that the blade also
begins to run when the starting mechanism is
activated.
앬Ensure that all the covers and guards are in position
and in good working order.
앬Do not tip the machine whilst the motor is running.
앬Switch off the machine before you fit or remove the
collection container.
앬Never try to work with an incomplete machine or a
machine with unapproved modifications.
앬Connect the electric tool to the mains power supply
(230 V ~, 50 Hz) via a socket-outlet with eartthing
contact with maximum 16A protection. We
recommend that you fit a residual-current protection
device with a maximum nominal tripping current of 30
mA. Seek the advice of your electrician.
BGH 2401_Budget_mehrspr 29.12.2005 10:48 Uhr Seite 12

13
GB
Description of the warning sign (see Figure 1) on the
machine
1. Important! Read the operating instructions and
follow the warnings and safety instructions
2. Take care when the blades are rotating. Do not
put your hands or feet into openings when the
machine is running.
3. Important! Keep other persons and animals away
from the danger zone.
4. Important! Protect the machine from the damp
and never expose it to rain.
5. Important! Always wear safety goggles, ear
protectors, protective gloves and heavy-duty work
clothes!
6. Always set the ON/OFF switch to “0” and pull
the power plug out of the socket-outlet before
doing any work on the shredder, e.g. cleaning the
shredder and making adjustments, or if the
power cable becomes damaged.
Caution! The cutters continnue to run for a few seconds
after the motor is switched off.
3. Technical data
Voltage: 230 V ~50 Hz
Power input: 2400 W (S6-40%)
2000 W S1
Idle speed n0: 2880 min-1
Branch diameter: max. 40 mm
LPA noise level: 93 dB(A)
LWA peak noise level: 106 dB(A)
Socket fusing min. 16A
Weight: 25 kg
Operating mode S1 (continuous operation)
The machine can be continuously operated with the quot-
ed power output.
S6 (40%) stands for a duty cycle based on 4 minutes on-
load and 6 minutes off-load operation. Maximum power
consumption depends on the consistency of the material
being shredded.
4. Layout of the (Figure 2a / 2b)
1 Loading funnel inlet
2 Loading funnel
3 Motor housing with cutter plate
4 Prodder
5 Complete chassis
6 Complete wheel
7 Axle
8 Mains cable
9 Overload switch
10 ON/OFF switch
11 Release screw
5. Proper use
This electric garden refuse shredder is designed only for
shredding organic garden waste. Place biologically
degradable material, e.g. leaves, branches, dead flowers
etc., into the loading funnel inlet (Figure 2a/Item 1).
Collecting the shredded material
A container can be placed underneath the ejector
opening to catch the shredded material.
6. Before starting up
6.1 Assembling the chassis
앬Place the motor housing upside down on the floor
and fasten the two parts of the frame to the motor
housing by screwing on hand-tight with a self-
locking hex nut and a special washer (Figure 3).
앬Place the axle between the two parts of the frame
(Figure 4).
앬Use the hex wrench and wrench adapter to mount
the wheels on the frame with a spacer, washer
and screw (Figure 5). Put on the wheel hubs.
앬Screw out the release screw (A) (Figure 6). The
loading funnel can then be swung away.
앬Tighten the self-locking hex nuts and the fixing
screws holding the chassis (Figure 7).
Important! The curved washers must be put
underneath on the outside of the chassis.
앬Place the loading funnel inlet (Figure 2a/Item 1) in
the loading funnel and fasten in place
with three screws (Figure 08 / Item A).
7. Starting up
7.1 SAFETY BRAKE
Electric motor is fitted with a safety brake and stops
within 5 seconds from being switched off as a
consequence the blades rotation stops as well.
7.2 Overload protection (motor circuit-breaker)
If the motor is overloaded for a lengthy period, the
overload switch (Fig. 2b/Item 9) will trigger and switch off
the machine. The ON/OFF switch is set to “0”. After
waiting for 1 minute you can press the overload switch
and re-set the ON/OFF switch to ON.
BGH 2401_Budget_mehrspr 29.12.2005 10:48 Uhr Seite 13

14
GB
If the motor fails to start, clean the ejector chute (see
7.3.).
7.3 OPENING THE PLATE-HOPPER
- always wear gloves
- ensure that the switch be on OFF position
(Fig. 2b/Item 10)
- disconnect the plug from the mains
- unscrew the knob (Fig. 2b/Item 11) and lift the
hopper (Fig. 2a/Item2);
- clean cut and discharge area and remove wood sticks
or objects which may clog the blades.
Lower the hopper (Fig. 2a/Item 2) and tighten up the
knob (Fig. 2b/item 10) tightly before activating the On
switch.
7.4 SAFETY INTERLOCK
The apparatus is fitted with a safety switch on the closure
between the hopper and the lower plate. If the hopper is
not perfectly placed and fixed against the lower plate, the
SAFETY SWITCH will trigger, stopping the motor from
working; should this occur, disassemble the hopper as
explained in the previous paragraph.
Carefully clean the 2 plates contacting faces.
Refit carefully and tighten the knob right down.
CAUTION: NEVER slacken off the knob (Fig. 2b/Item 11)
without having turned off the switch (Fig. 2b/Item 10) and
pulled the plug out of the socket.
7.5 BLADES
The blades (Fig. 9-10) of the blade-holding plate are
reversible.
For quality safety’ sake, we recommend that, in case of
substitution, you use original blades only.
REVERSING, SUBSTITUTION OF BLADES
(fig. 9-10)
We suggest that the above operations be carried out by
qualified Service Stations.
The (reversible) blades are fixed to the rotary plate with
two screws each. Before any maintenance or cleaning
work on the blades, always turn the switch OFF and
disconnect the plug from the socket.
7.6 Practical tips
앬Wear work gloves, goggles and ear muffs.
앬Material placed in the loading funnel inlet is
automatically drawn into the shredder.
CAUTION! Long pieces of material projecting out of the
funnel inlet may whiplash when it is drawn in – keep a
safe distance between yourself and the machine.
앬Judge the quantity of material which you put into
the funnel inlet so that the funnel does not clog.
앬If you want to shred withered, damp material that
has been lying in the garden for several days,
alternate between putting in this material and
branches. This will help to prevent the loading
funnel becoming clogged with material.
앬Do not shred soft waste (e.g. kitchen waste) – put
it straight in the compost box.
앬Entangled branches and leaves should be
thoroughly shredded before loading any more
material.
앬Do not allow the ejector outlet of the funnel to
become clogged with shredded material – risk of
pile-ups.
앬Do not cover the vent slots.
8. Care and maintenance
Caution! Interrupt the power supply by pulling the plug out
of the socket-outlet before you carry out any checks or
maintenance work on the machine.
앬Clean the machine regularly. This will help to keep
the machine in good working order and is the
basis for a long working life.
앬When you are finished with your work, take off the
loading funnel and clean the inside. Use a brush to
remove deposits from metal parts on the inside.
When you mount the loading funnel, make sure
that the safety switch and the release screw are
clean.
앬Keep the vent slots clean while you work.
앬Clean the plastic body and other plastic parts with
a mild household cleaning agent and a damp
cloth. Do not use any aggressive agents or
solvents for cleaning purposes.
앬Never clean the shredder by spraying with water.
앬Prevent water getting inside the machine at all
cost.
BGH 2401_Budget_mehrspr 29.12.2005 10:48 Uhr Seite 14

15
GB
The machine does not
work
a) No power at the plug
b) Machine is switched off
c) Overload switch has tripped
d) Ejector chute is blocked
e) Outlet funnel is not secure on the motor
housing
a) Check the power cable and fuse
b) Switch on machine
c) Press control on overload switch
b) Clean ejector chute
e) Clean interior and tighten safety screw
Shredding performance
unsatisfactory
a) Incorrect blade plate fitted
b) Blades worn
a) Replace blade plate
b) Turn, sharpen or replace blades
Shredding performance
falls in quality
a) Blades worn
b) Ejector chute is blocked
a) Turn, sharpen or replace blades
b) Clean ejector chute
11. Troubleshooting guide
9. Ordering replacement parts
Please quote the following data when ordering
replacement parts:
앬Type of machine
앬Article number of the machine
앬Identification number of the machine
앬Replacement part number of the part required
For our latest prices and information please go to
www.isc-gmbh.info
10. Waste disposal
Scrap electrical appliances are valuable sub-
stances and should not be put in the household
waste! Please play an active part in helping to
conserve resources and protect the environment by
sending this appliance to the designated return points, if
there are any.
BGH 2401_Budget_mehrspr 29.12.2005 10:48 Uhr Seite 15

16
GB
BGH 2401_Budget_mehrspr 29.12.2005 10:48 Uhr Seite 16

17
GB
Warranty
This device is subject to the legal warranty.
Complaints must be reported immediately upon detection.
The warranty expires in the event of manipulation by the buyer or third parties. Damages due to incorrect
treatment or operation, incorrect setup or storage, incorrect connection or installation, force majeure, or other
external influences are not covered by the warranty. Please read the instruction manual carefully, as it
contains important information.
The buyer must substantiate his warranty claim by submitting the purchase receipt.
Notes:
1.If your device does not work properly, please first check if this may be due to a power outage or incorrect handling.
2.Be sure to present or enclose the following documents with your defective device:
- Purchase receipt
- Device name/type/brand
- Detailed description of the detected defect; this will speed up the repair
Please contact our service partners listed at the end of this instruction manual in the event of warranty claims, defects,
or spare part orders.
Einhell UK Ltd
Unit 5 Morpeth Wharf
Twelve Quays
Birkenhead, Wirral
CH 41 1NG
Tel. 0151 6491500, Fax 0151 6491501
BGH 2401_Budget_mehrspr 29.12.2005 10:48 Uhr Seite 17

18
FR
1. Remarques importantes
Veuillez lire consciencieusement ce mode d’emploi
jusqu’au bout et en respecter les consignes. Familiarisez-
vous avec l’appareil, son emploi correct, ainsi qu’avec les
consignes de sécurité en vous servant de ce mode
d’emploi.
Conservez bien ce mode d’emploi !
Une utilisation non conforme aux règles de l’art de cette
hacheuse électrique peut entraîner de graves blessures.
La hacheuse électrique est uniquement conçue pour
hacher les déchets de jardin organiques.
Attention !
Pour des raisons de sécurité, les enfants et adoolescents
de moins de 16 ans ne doivent pas utiliser la hacheuse
électrique.
2. Consignes de sécurité
Attention ! Avant de travailler sur l’appareil, de le nettoyer
ou si la rallonge de câble est emmêlée, mettez l’interrup-
teur Marche / Arrêt sur « 0 » et retirez la fiche de contact
de la prise de courant. Après la mise hors-circuit,
l’appareil fonctionne encore pendant un temps bref.
앬Les adolescents de moins de 16 ans, tout comme
les personnes n’ayant pas connaissance de ce mode
d’emploi ne doivent pas se servir de cette hacheuse
électrique.
앬La personne se servant de l’appareil est responsable
de la sécurité des tierces personnes dans le rayon
de travail de la hacheuse électrique.
앬Lors de la mise en service ou du démarrage du
moteur, la hacheuse électrique doit être fermée
conformément aux prescriptions (trémie d’admission
et dispositif de rejet).
앬La hacheuse électrique doit être mise en place sur
un support plan, fixe et stable.
앬Portez des gants et des lunettes de protection
pendant le broyage.
앬Si vous travaillez avec une hacheuse électrique ne
comportant pas de mesure anti-bruit, portez un
casque anti-bruit.
앬Avant de laisser la hacheuse électrique sans
surveillance, mettez le moteur hors circuit et
déconnectez la fiche de contact.
앬Les travaux de maintenance et de nettoyage ainsi
que l’enlèvement ou le rabattement de dispositifs de
protection doivent uniquement être effectués lorsque
le moteur est immobilisé et seulement si la fiche de
contact est déconnectée du réseau.
앬Il faut employer les dispositifs de protection fournis
avec la livraison (par ex. interrupteur de surcharge,
lamelles en caoutchouc dans la trémie de
remplissage, interrupteur de sécurité entre le carter
du moteur et la trémie d’évacuation).
Recommandations générales concernant la
sécurité
앬Avant la mise en service montez l’appareil
correctement.
앬Effectuez un contrôle à vue de l’appareil avant
chaque utilisation de ce dernier. N’utilisez pas
l’appareil dès lors que des équipements de sécurité
ont été endommagés ou sont usés. N’annulez jamais
l’effet d’un dispositif de sécurité.
앬Utilisez cet appareil exclusivement dans le respect de
l’application conforme indiquée dans ce mode
d’emploi.
앬Contrôlez le matériau à hacher avant de commencer
à travailler.
앬Retirez les corps étrangers éventuellement présents.
Veillez, pendant que vous travaillez, aux éventuels
corps étrangers. Si vous deviez faire face à un
obstacle (corps étranger) pendant que vous hachez,
mettez la machine hors circuit et retirez celui-ci.
Mettez pour ce faire l’appareil hors circuit et retirez la
prise. Il faut contrôler si l’appareil n’est pas
endommagé et réaliser le cas échéant des
réparations.
앬Ne travaillez que dans de bonnes conditions de
lumière ou assurez un éclairage correspondant.
앬Pendant le travail, la hacheuse soit se trouver sur une
surface solide et au même niveau que la personne
qui s’en sert.
앬Veillez, pendant votre travail, à bien vous tenir de
façon stable et sûre.
앬Ne laissez jamais l’appareil sans surveillance dans le
poste de travail. Si vous devez interrompre votre
travail, veuillez stocker l’appareil dans un endroit sûr.
Si vous devez interrompre votre travail pour vous
rendre dans une autre zone de travail, mettez
absolument l’appareil hors circuit pendant que vous
vous y rendez.
앬N’utilisez jamais l’appareil sous la pluie ou dans un
environnement humide ou mouillé. Protégez
l’appareil contre toute humidité et pluie.
앬Mettez le moteur hors circuit à chaque fois que :
- vous n’utilisez pas l’appareil
- vous le laissez sans surveillance
- vous le contrôlez
- le câble d’alimentation est abîmé
- vous en démontez ou remplacez la lame
- vous transportez l’appareil d’un endroit à l’autre
BGH 2401_Budget_mehrspr 29.12.2005 10:48 Uhr Seite 18

19
FR
앬Gardez l’appareil éloigné d’autres personnes, en
particulier des enfants et des animaux domestiques.
앬N’utilisez jamais l’appareil sans dispositifs de
protection. (P. ex. interrupteur de surcharge,
lamelles en caoutchouc dans la trémie de
remplissage, l’interrupteur de sécurité entre le carter
du moteur et la trémie d’évacuation).
ATTENTION ! Les dispositifs de protection (p. ex. inter-
rupteur de surcharge, lamelles en caoutchoouc dans la
trémie de remplissage, l’interrupteur de sécurité entre le
carter du moteur et la trémie d’évacuation) sont essentiel-
les à votre sécurité et à celle des autres personnes. Elles
sont égaleement indispensables au fonctionnement cor-
rect de la machine. Le non-respect de cette directive
enntraînera la perte de la garantie, outre le fait que cela
ferait apparaître une source de danger poteentielle.
앬Veillez à maintenir les orifices d’air exempts
d’encrassement.
앬Tirez la fiche du secteur après l’emploi et contrôlez si
la machine n’est pas endommagée.
앬Si vous n’utilisez pas l’appareil, conservez-le dans un
lieu sec et inaccessible pour les enfants.
앬Utilisez exclusivement l’appareil tel que décrit dans
ce mode d’emploi.
앬Contrôlez régulièrement si les vis sont bien serrées.
앬La tension du réseau doit correspondre à celle
indiquée sur la plaque signalétique.
앬Le circuit électrique doit être protégé par fusible d’au
moins 16A.
앬Les lignes de raccordement employées ne doivent
pas être plus légères que de légères lignes en
gomme HO7RN-F selon DIN 57282/VDE 0282
(U.T.E) et doivent avoir un diamètre minimal de 1,5
mm2. Les raccords à fiche doivent être dotés de
contacts de protection et l’accouplement doit être
protégé contre les éclaboussures. Contrôlez
régulièrement si la ligne de raccordement montre des
signes de lésions ou de vieillissement. L’appareil ne
doit pas être utilisé si l’état de la ligne de
raccordement n’est pas impeccable.
앬Un câble de raccordement dont la section de
conducteur est trop petite entraîne une nette
réduction de la performance de l’appareil. Pour les
câbles jusqu’à 25 m de longueur, la section
transversale de conducteur minimale s’élève à 3x 1,5
mm2, pour ceux dépassant 25 m de long, elle s’élève
à minimum 3x2,5 mm2.
앬S’il faut soulever l’appareil pour le transporter, arrêtez
le moteur et attendez l’arrêt de l’outil. Avant de
s’éloigner de l’appareil, mettez le moteur hors circuit
et retirez la fiche secteur. Avant de raccorder
l’appareil au secteur, assurez-vous que la trémie
d’évacuation est bien montée sur le carter du moteur
que la vis de déverrouillage est bien resserrée à
fond.
앬Si la hacheuse se met à trop vibrer, mettez le moteur
hors circuit, débrancher la prise secteur et
recherchez immédiatement l’origine de la vibration.
Une vibration importante indique qu’un dérangement
est présent.
앬Pour la maintenance, n’utilisez que des pièces de
rechange d’origine.
앬Les réparations doivent exclusivement être
effectuées par un(e) spécialiste en électricité.
앬Si la conduite de raccordement de cet appareil est
endommagée, il faut la faire remplacer par le
producteur ou son service après-vente ou par une
personne aussi qualifiée afin d’éviter tout risque.
앬Avant la mise en service de l’appareil, et après
quelque choc que ce soit, contrôlez si des signes
d’usure ou d’endommagement sont visibles et faites
effectuer les réparations nécessaires. Tenez toujours
vos mains et pieds éloignés du dispositif de coupe,
surtout lorsque vous mettez le moteur en circuit.
앬N’utilisez jamais de pièces de rechange ou
d’accessoires n’ayant pas été prévus ni
recommandés par le producteur.
앬Tirez la fiche de contact avant tout contrôle, tout
nettoyage ou tous travaux sur l’appareil et lorsque
vous ne l’utilisez pas.
앬Ne portez pas de vêtements flottants ni de vêtements
à bandes ou cordons lâches.
앬N’utilisez pas l’appareil sur une surface pavée et
parsemée de gravier sur laquelle le matériau éjecté
pourrait provoquer des blessures.
앬Assurez-vous, avant de faire démarrer l’appareil, que
la trémie d’introduction est bien vide.
앬Tenez votre tête et votre corps à l’écart de l’orifice
d’introduction.
앬Ne mettez jamais vos mains, d’autres parties du
corps ni vos vêtements dans la goulotte
d’introduction, le canal d’éjection ou à proximité
d’autres pièces amovibles.
앬Veiller toujours à garder votre équilibre et à bien être
stable sur vos pieds. Ne vous penchez pas en avant.
Ne soyez jamais plus haut que l’appareil lorsque vous
y introduisez du matériau.
앬Maintenez-vous toujours hors de la zone d’éjection
lors de la mise en service de l’appareil.
앬Si des corps étrangers entrent dans les outils de
découpage ou que des bruits inhabituels sont
produits par l’appareil, mettez immédiatement le
moteur hors circuit et laissez l’appareil s’arrêter.
Retirez la fiche de contact et effectuez ce qui suit :
- contrôlez si l’appareil n’est pas endommagé
- contrôlez la bonne tenue des pièces, resserrez le
cas échéant
- faites remplacer toutes les pièces endommagées
BGH 2401_Budget_mehrspr 29.12.2005 10:48 Uhr Seite 19

20
FR
ou faites-les réparer. Les pièces de rechange doivent
avoir la même qualité que celles d’origine
앬Si l’appareil est bouché, mettez le moteur hors circuit
et retirez la fiche de contact avant de commencer le
nettoyage. Veillez à ce que le moteur reste sans
déchets et autres accumulations afin d’éviter qu’il ne
s’endommage ou ne soit incendié. Pensez au fait que
lors de la mise en service du mécanisme de
démarrage des machines à moteur, l’outil de coupe
fonctionne également.
앬Veillez à ce que tous les recouvrements et dispositifs
de déviation soient bien à leur place et qu’ils soient
en bon état de fonctionnement.
앬Ne basculez pas l’appareil lorsque le moteur
fonctionne.
앬Mettez l’appareil hors circuit avant d’y monter et de
retirer le réservoir collecteur.
앬N’essayez jamais d’utiliser une machine incomplète ni
encore une machine ayant été modifiée sans
autorisation.
앬Raccordez l’outil électrique via une prise de courant
de sécurité de maximum 16A à la fiche de contaact
(230V ~, 50Hz). Nous recommandons d’utiliser une
protection contre les courants de courts-circuits avec
un courant de déclenchement nominal de 30 mA.
Faites-vous conseiller par votre
installateurr/installatrice électricien/ne.
Explication de la plaque indicatrice (cf. fig. 1) sur l’appa-
reil
1. Attention ! Lisez les instructions de service et
respectez les avertissements et les consignes de
sécurité.
2. Attention aux lames en rotation. Ne mettez pas vos
mains ni vos pieds dans les ouvertures lorsque
l’appareil fonctionne.
3. Attention ! Maintenez hors de la zone de danger
toutes les personnes non impliquées ainsi que les
animaux.
4. Attention ! Protégez l’appareil de l’humidité et ne
l’exposez pas à la pluie.
5. Attention ! Pendant le travail, portez toujours des
lunettes de protection, un casque anti-bruit, des
gants de protection et des habits solides !
6. Avant tout travail sur la hacheuse tel le réglage, le
nettoyage, etc. et en cas d’endommagement du
câble réseau, mettez l’interrupteur sur “0” et retirez la
fiche de la prise de courant.
Attention : Les lames continuent à tourner pendant
quelques secondes après l’arrêt !
3. Caractéristiques techniques
Tension réseau : 230 V ~50 Hz
Puissance absorbée : 2400 Watt (S6-40%)
2000 W (S1)
Vitesse de rotation à vide n0 : 2880 tr/min
Diamètre de branche : max. 40 mm
Niveau de pression acoustique LPA : 93 dB (A)
Niveau de puissance acoustique LWA : 106 dB (A)
Protection des prises : min. 16A
Poids : 25 kg
Mode S1 (fonctionnement continu)
La machine peut être exploitée durablement à la puissan-
ce indiquée.
Le mode de service S6 (40%) désigne un profil de charge
qui accepte 4 min. de charge et 6 min. de marche à vide.
Max. en fonction de la nature du matériau à hacher.
4. Description de l’appareil
(figure 2a / 2b)
1 entonnoir de remplissage
2 trémie de remplissage
3 bâti de moteur avec plaque de couteaux
4 bouchon
5 châssis complet
6 roue complète
7 arbre
8 conduite réseau
9 interrupteur de surcharge
10 interrupteur Marche / Arrêt
11 vis de déverrouillage
5. Utilisation conforme à l’affectation
La hacheuse électrique est uniquement conçue pour
hacher les déchets de jardin organiques. Introduisez le
matériau biodégradable, comme par ex. des feuilles,
branches, restes de fleurs etc. dans l’entonnoir de
remplissage (figure 2a/rep. 1).
Introduction du matériau à hacher
On peut employer un récipient sous l’ouverture de rejet
du matériau haché.
6. Avant la mise en service
6.1 Monter le châssis
앬Placez le bâti de moteur à l’envers sur le sol et vissez
en serrant bien à la main, les deux parties du bâti
BGH 2401_Budget_mehrspr 29.12.2005 10:48 Uhr Seite 20
Table of contents
Languages:
Other budget Paper Shredder manuals
Popular Paper Shredder manuals by other brands

HSM
HSM Classic 90.2 operating instructions

Dahle
Dahle ShredMATIC 35080 instructions

Swingline
Swingline Stack-and-Shred 175X instruction manual

KRUG+PRIESTER
KRUG+PRIESTER IDEAL 2220 operating instructions

UNITED OFFICE
UNITED OFFICE UAVS 300 A1 Operating instructions and safety instructions

Fellowes
Fellowes 225Ci manual