Buffalo TeraStation HS-DTGL/R5 User manual

User Manual
TeraStation
HS-DTGL/R5
www.buffalotech.com v2.4

2
Introduction
CongratulationsonyournewTeraStation!Thisusermanualisintendedtoassistyouinconguring
it. If you run into difculties or need additional help, feel free to contact our 24/7 Technical
Supportat(866) 752-6210(USA&Canadaonly).TechnicalSupportinEuropeisavailablebetween
thehoursof9am-6pm(GMT)MondaythroughThursdayand9am-4:30pm(GMT)Fridayforthis
product. Customers in Europe can obtain Technical Support using the following information:
Email:[email protected]|Web:www.buffalo-technology.com
ThisusermanualusesimagesrepresentativeofTeraStationuserinterfacesandsoftware.Because
we’reconstantlyupdatingourproduct,theimagesandtextinthismanualmayvaryslightlyfrom
theimagesandtextdisplayedbyyourTeraStation.Thesechangesareminorandshouldnotaffect
theeaseofsetupadversely.Astimepasses,futureuserinterfaces,updatedsoftware,andlater
versionsofthismanualmaybeavailablefordownloadatourwebsite:http://www.buffalotech.
com.

3
Table of Contents
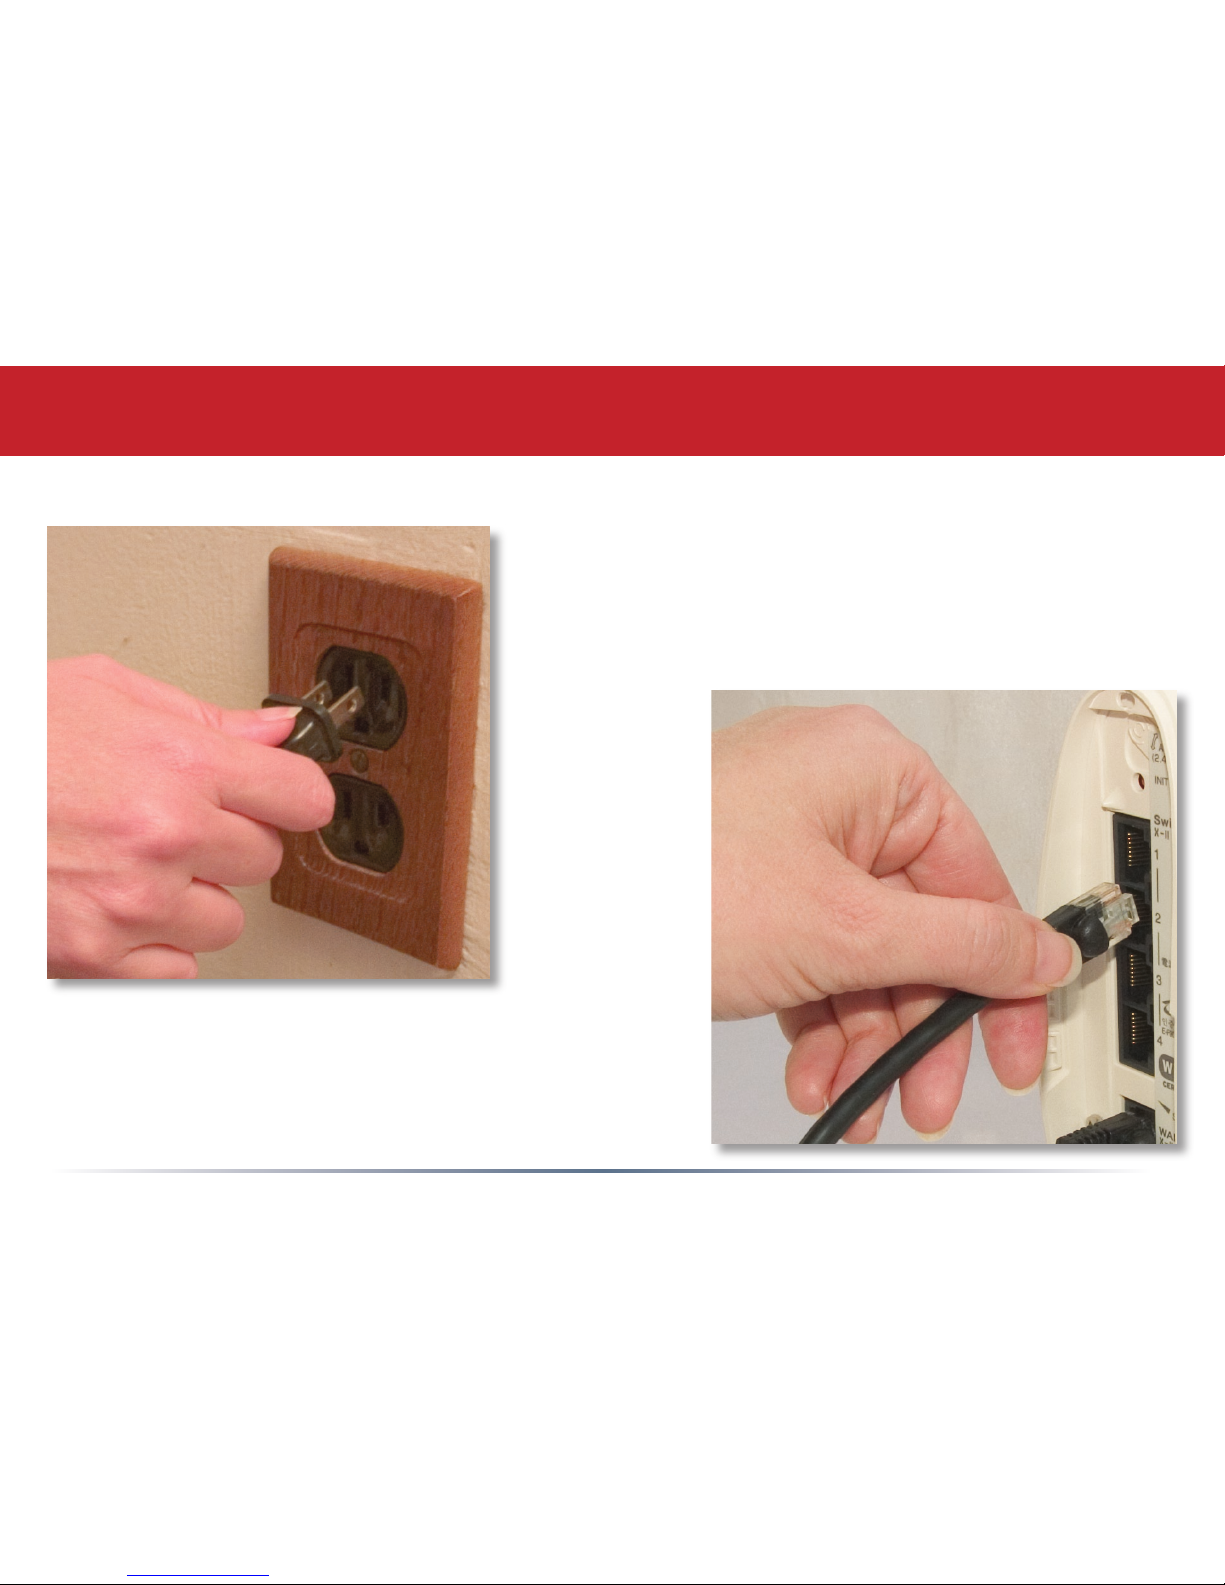
TeraStationQuickSetup...................................................4
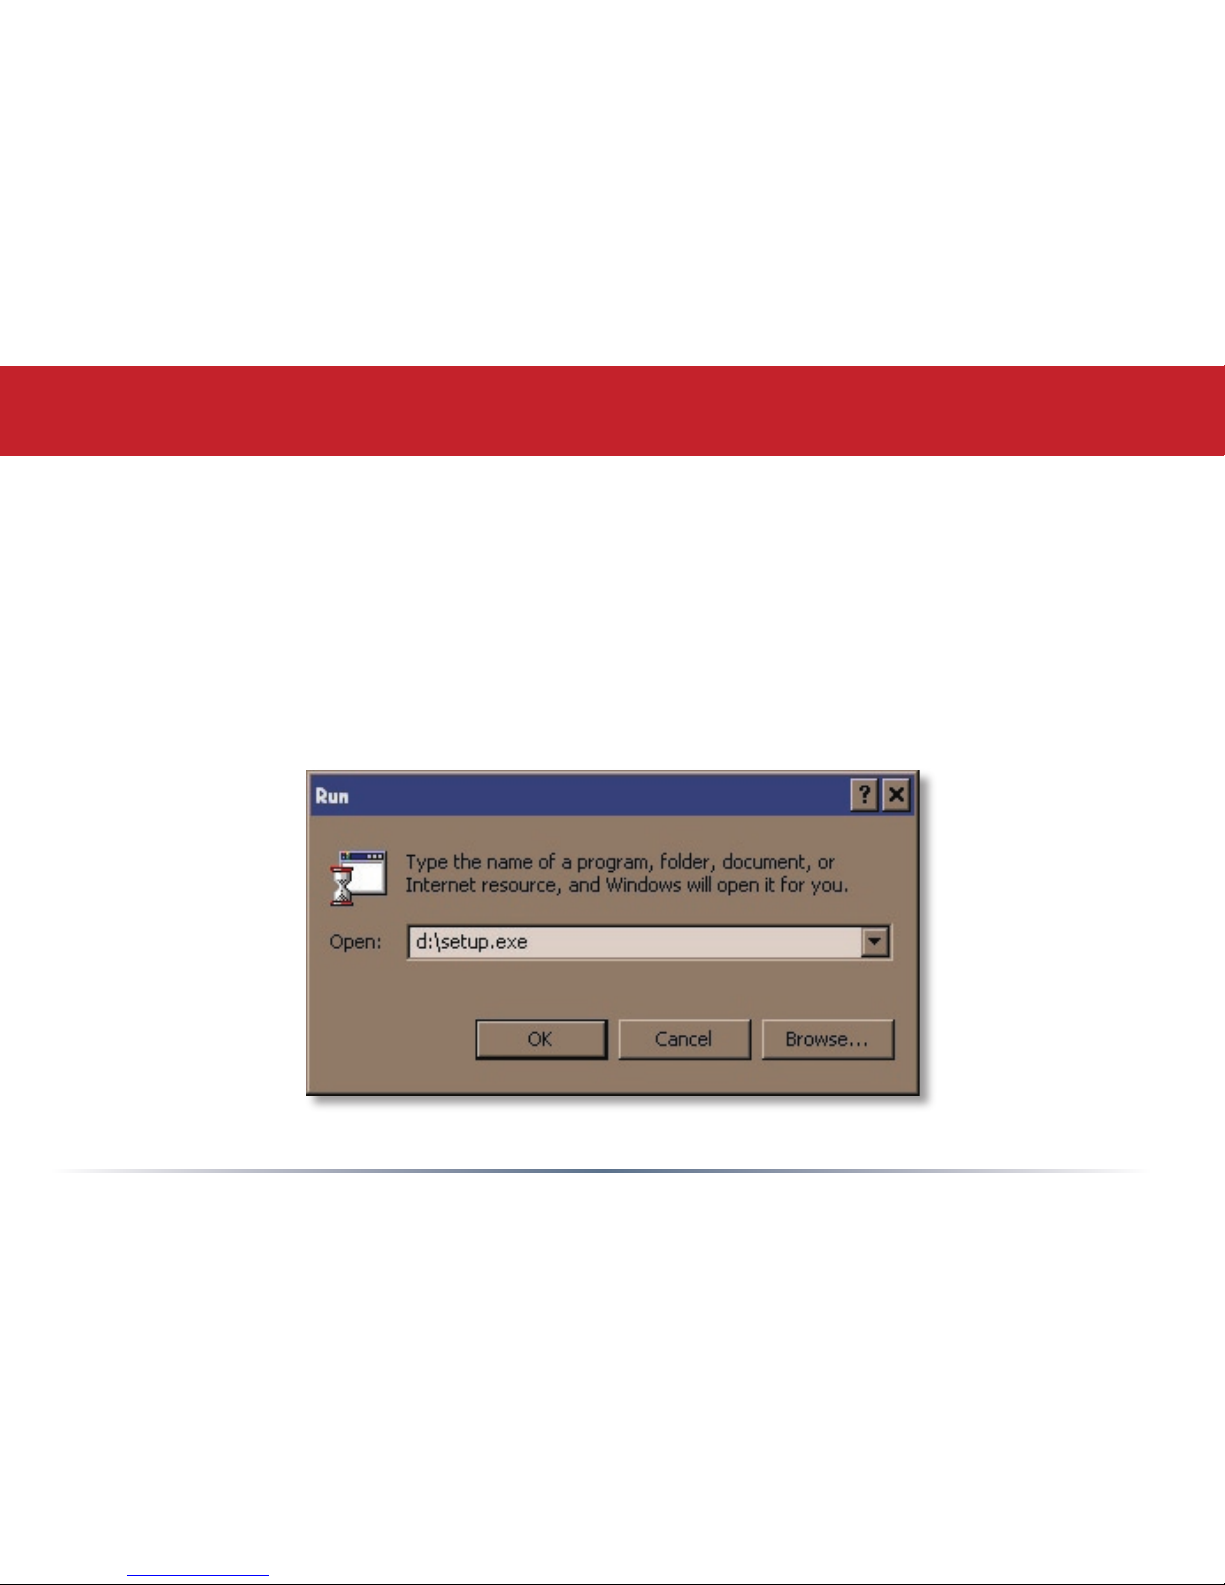
TeraNavigatorSetup..........................................................8
Accessing TeraStation Data from a PC............................. 14
AccessingTeraStationDatafromaMac........................... 17
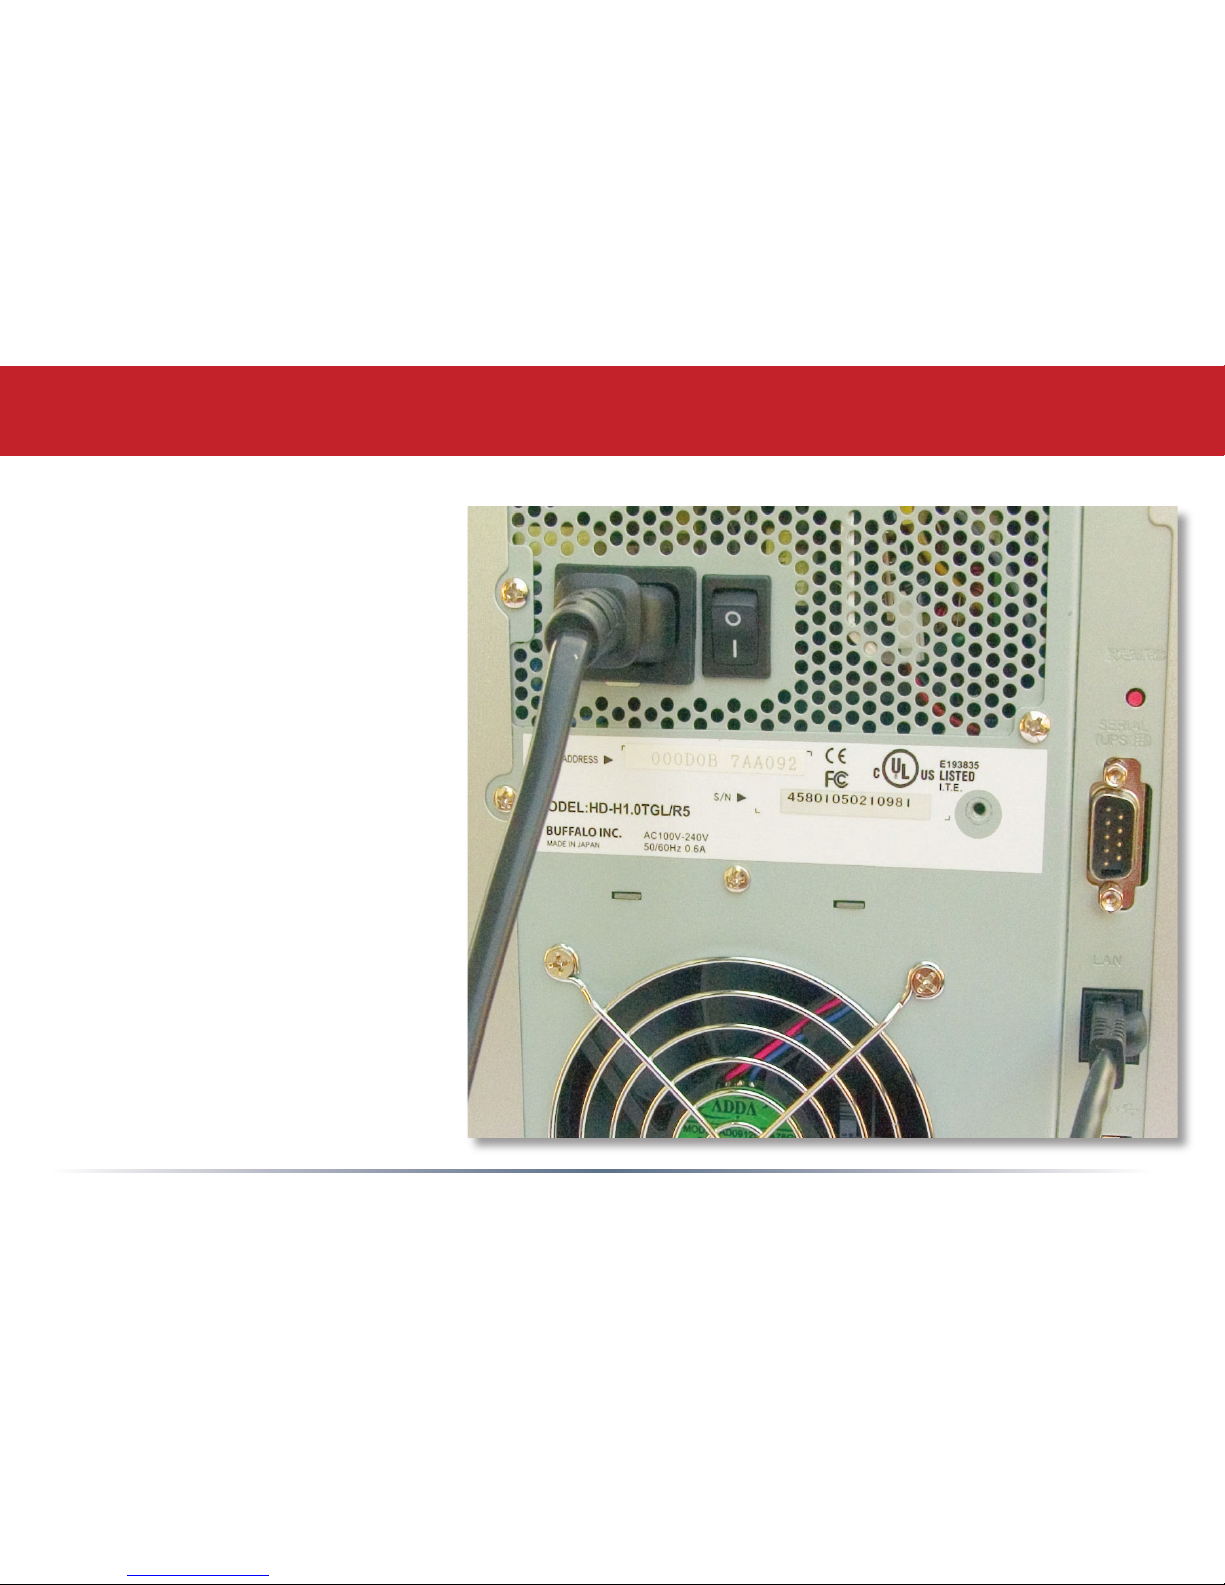
TeraStation Diagram.......................................................21
Advanced Settings........................................................... 24
BasicSettings .................................................................25
Network Settings.............................................................26
DiskManagement ...........................................................28
AddingExtraHardDrives ...............................................34
SharedFolders................................................................ 39
Groups ...........................................................................42
Users ..............................................................................43
Printers .......................................................................... 47
Backups.........................................................................51
PCast and DLNA ..................................... ....................... 55
Maintenance ...................................................................58
UPS ................................................................................59
Client Utility ...................................................................69
Troubleshooting ..............................................................71
ChangingaFailedHardDrive ......................................... 72
TechnicalSpecications ..................................................80
TechnicalSupport...........................................................81

4
BeginsettingupyourTeraStation
bypluggingyourpower cable and
Ethernet cable into the back of
the TeraStation as shown.
TeraStation Quick Setup

5
Plug the power cord into a wall
socket.
Plug the other end of the Ethernet cable
intoahub,router,orswitchinyour
network.
TeraStation Quick Setup
Connect your cables

6
Make sure that the power
switch on the rear of the
TeraStation is in the ON
position,withthe“I”symbol
presseddown.
TeraStation Quick Setup
Press the power button on the
frontpanel.TheLED’swillswirl
asyourTeraStationbootsup.
After your TeraStation has completed booting up and the LED’s have
ceasedtoswirl,checktheLINK/ACT LED on the front of the TeraStation.
Ifit’slit,thenyourTeraStationisconnectedproperly,andyoucangoon
topage8.Ifit’snotlit,turntopage7fortroubleshooting.

7
TheTeraStation’sEthernetportwillautomaticallyadjusttouseeitheraCrossoverorPatchcable,
soyoumayconnecttheTeraStationtoyournetworkwitheithertypeofEthernetcable.Buffalo
Technology doesn’t recommend connecting the TeraStation directly to a PC.
Verify that the LINK/ACT LEDonthefrontofTeraStationislit(seepage6’spicture).Ifit’slit,goto
page8tocontinuesettingupTeraStation.IftheLINK/ACT LEDisstillnotlit,trythesuggestions
belowtoverifythatyou’renotsufferingfromcommonsetupproblems.
Havingproblems?Makesurethat:
• theTeraStationandtherouter,huborswitcharebothpoweredon,
• theEthernetcableissecurelypluggedinatbothends,and
• theEthernetcableisnotdamaged.VerifythisbytryingadifferentEthernetcable.
Ifproblemspersist,contactour24/7technicalsupportat(866) 752-6210 (USA & Canada only).
TechnicalSupportinEuropeisavailablebetweenthehoursof9am-6pm(GMT)Mondaythrough
Thursday and 9am-4:30 pm (GMT) Friday for this product. Customers in Europe can obtain
TechnicalSupportusingthefollowinginformation:Email:[email protected]|Web:
www.buffalo-technology.com
TeraStation Quick Setup

8
InserttheTeraNavigatorCDintoyourPC’sCD-ROMdrive.Setupshouldautomaticallylaunch.If
itdoesnot,manuallylaunchsetup.exebypressingtheStart menu and selecting the Run... option.
When the Run dialogopens,typed:\setup.exe(wheredisthedriveletterofyourCD-ROMdrive).
Press OK to continue.
TeraNavigator Setup

9
TeraNavigatorisnowrunning.PleasepresstheInstall Client Utility icon,andthenStart. When
installationisnished,pressLaunch.
TeraNavigator Setup

10
The TeraStation Client UtilityallowsyoutoeasilycongureTeraStation’snetworksettings.The
tabsshowthenamesofavailableTeraStations.IfyouhavemorethanoneTeraStationonthe
network,clickthetaboftheoneyouwanttoselectit.WhileaTeraStation’stabisselected,its
IP AddressisvisibleandtheView Sharesbuttonwilltakeyoudirectlytoitsnetworksharesand
folders.Seepage69formoreinformationonTeraStation Client Utility.Fornow,makesurethat
theproperTeraStation’stabisselected,clickSetup,andchoose Browser Management.
TeraNavigator Setup

11
Thisloginpromptwillappear.Enter admin fortheusername.Untilyouchangeit,the
passwordfortheadminaccountwillbe password. Press the OKbuttonwhennished.
TeraNavigator Setup
Username:admin
Password:password
Seepage44tochangeyourpassword.
Ifyou’veforgottenyourpassword,see
page64.
Ifthisloginpromptdoesnotappear,
yourDHCPservermaynotbe
functioningcorrectly.IfDHCPis
disabled,youmayre-enableit,orverify
thattheTeraStation’sIPaddress(page
10)isinthesamerangeasthatof
yourPC.Seepage69andpage70to
manuallycongureyourTeraStation’s
IP address if necessary.

12
You are now logged in totheTeraStationManagementUtility. Bookmarkthispageinyourbrowser
so it can be easily accessed for future conguration changes. You can also get here by typing
http://TERASTATION_NAMEintoaWebbrowser,whereTERASTATION_NAMEisthenameofyour
TeraStationthatyousetonpage13.Fordetailedexplanationsofeachmenuandsetting,please
refer to the Advanced Settings section(startingonpage24)ofthismanual.Tocontinuesetup,click
on the Basic link on the left side.
TeraNavigator Setup

13
HereontheBasicpage,beginbychangingthe
name of your TeraStation in the TeraStation
Hostnameeld.Afriendly,easy-to-remember
name is recommended. The name cannot
containanyspacesorspecialcharacters.
Alphanumericcharacters,hyphens,and
underscores are allowed.
AshortdescriptionoftheTeraStationcanbe
entered into the TeraStation Description eld.
You’llthenseethisdescriptioninNetwork
NeighborhoodonWindowsmachines.
Makesurethatthedateandtimearecorrect
in Date and Time Setup. To synchronize clock
settingswithyourcomputer,pressUse Local
Time.
Oncedesiredeldshavebeencompleted,press
the Apply buttonatthebottomofthepage.
FormoreinformationontheConguration
Utility,turntoAdvanced Settings,beginningon
page24.
TeraNavigator Setup

14
Congratulations!You’vecompletedbasicsetup.Formoredetailontheothersettingsavailablein
yourTeraStation,turntoAdvanced Settings,beginningonpage24.
To access TeraStation data:
Press the Startmenu,selecttheRun...option.WhentheRundialogopens,type\\TeraStation_
Name (where ‘TeraStation_Name” is the TeraStation Hostname set on page 13). Press the OK
buttontocontinue.
TeraNavigator Setup

15
TeraStation’srootdirectorywillappear.Youwillseealloftheconguredshares,includingshare,
theprecongureddatafolder.Alluserscanreadandwritetoallfoldersunlessotherwisecongured.
Tosetupsecurityandpasswordprotection,oraddothersharestoyourTeraStation,pleasereferto
pages38-40ofthismanual.TochangeyourRAIDconguration,seepages29-32.Tosetupa
printerseethePrinterssectionbeginningonpage45.Driveletterscanalsobemappedtoshares
onyourTeraStation;seepage16formoreinformation.
Note: If this page does not appear, or if you
receive a popup window from your rewall
sayingthataNetBiosSessionhasbeenblocked
from your TeraStation’s IP address, you will
need to add your TeraStation’s IP address to
yourrewall’strustedzone.Youcangetyour
TeraStation’s IP address from the TeraStation
Client Utility (see page 10). Consult your
rewalldocumentationformoreinformationon
allowingnetworkaccesstoandfromaspecic
IP address.
Accessing TeraStation Data from a PC

16
FromtheTeraStation’sRoot Directoryscreen(seepage15),clicktheTools pulldownmenuand
select Map Network Drive;MapNetworkDrivewillrun.Selectthedriveletteryouwouldliketomap
from the Drive:pulldownmenu.Enterthe\\TeraStation_Name\share_name in the Folder:eld,
where TeraStation_Name is the TeraStation Namesetonpage13and share_name is share (if you’re
mappingtothispreconguredfolder)orthenameofanothersharedfolderthatyousetuponpage
25.YoumaybrowseforasharedfolderbypressingtheBrowse buttonandsearchingthroughthe
Entire Network and then the Microsoft Windows Network. Check the Reconnect at logoncheckbox
tohaveWindowsconnecttothismappeddriveeverytimeitstarts.Whennished,presstheFinish
button.TeraStationisnowmappedtoadriveletter.
Accessing TeraStation Data from a PC

17
IfyourMacdoesnotautomaticallydetectyour
TeraStation’sSharefolderandputitonyour
desktop,youwillneedtoaddtheTeraStation
totheMac’sserverlist.BeginbyclickingGo,
and then choose Connect to Server.
Accessing TeraStation Data from a Mac
In the Server Addresseld,enteryour
TeraStation’s IP address in the form smb://
ipaddress(where“ipaddress”isyour
TeraStation’sIPaddress),andclickConnect.
If you don’t know your TeraStation’s IP
address,seepage19.

18
Select Guest and click on Connect.
Accessing TeraStation Data from a Mac
Selectthevolumethatyouwanttomount,suchasshare or share-mac,
from the list of folders on the TeraStation.
Thesharewillopen.Alinktothesharedfolderwillappearonyour
desktop.

19
Ifyoudon’tknowyourTeraStation’sIPaddress,thereare
several ways to get it.
OnesimplemethodistousetheTeraStationclientutility
(includedonyourCD)tondyourTeraStation(s).Justclick
onthetabforyourTeraStationandyou’llbeabletoreadits
IP address. You must have a Windows PC running on the
networktousetheTeraStationclient.Seepage69formore
on the TeraStation client utility.
Ifyouhaveanall-MacnetworkwithnoWindowsPCs
available,youcangettheTeraStation’sIPaddressfromyour
router’scongurationutility.ManyBuffalorouterslistthis
information on the Client Monitorpage,asshowntotheright.
Consult your router’s documentation for instructions on
identifying client IP addresses.
Accessing TeraStation Data from a Mac

20
TeraStation Expansion
TeraStationhasfourUSB2.0ports,twoonthefrontpanelandtwoontherear.Theseportscanbe
usedforaddingexternalUSBHardDrivesoraUSBPrinter.TeraStationwillthensharetheUSB
devices,allowingeveryoneonthenetworktousethem.UptofourexternalUSBharddrives,or
oneprinterandthreeharddrives,maybeaddedtoTeraStation.ToconnectaUSBprinterorhard
drivetoTeraStation,simplyplugitintooneofthefourUSBPorts.
USB Hard Drive Information:
YoumaypluginadditionalUSBharddrivestoanyofthefourUSBportsonyourTeraStation.See
page34forsettingupyourUSBharddriveunderTeraStation.Seepage38forinformationon
settingupsharedfoldersonaUSBHardDrive.Page37willshowyouhowtoreformattheUSB
HardDrive.Page49showsyouhowtosetupTeraStationtobackuptoaUSBHardDrive.
USB Printer Information:
Seepage45tosetupaUSBPrinterasanetworkprinteronTeraStation.
Other manuals for TeraStation HS-DTGL/R5
1
Table of contents
Other Buffalo Home Theater Server manuals