manuals.online logo
Brands
  1. Home
  2. •
  3. Brands
  4. •
  5. BullTronics
  6. •
  7. Car Receiver
  8. •
  9. BullTronics MIB IV User manual

BullTronics MIB IV User manual

MIB IV user’s manual
Basic operation - gesture recognition
The gestures that the machine can recognize are mainly divided into
short press, long press, drag, and slide. The same function performs
differently under different gestures, and the user operates the machine by
touching the display.
Main interface - main menu
After the machine starts, it will jump to the main menu page by
default. This page mainly displays the shortcuts for arranging some
commonly used functions, and long press the blank space to pop up the
wallpaper setting button, the user can adjust the layout of the page
according to personal preference.
Main interface--application interface
Click the menu button to go to the application list interface. All the
applications installed on the car will be displayed here, and users can find
shortcuts to frequently used functions on this page, which is convenient for
operation.
Radio - radio interface
The radio can accept different broadcast program signals, users can
record their favorite broadcast channels to p1-p6, and support up to six
pre-stored radio stations. This makes it easy for users to quickly listen to
their favorite programs without searching.
Radio - Introduction to function icons
Band switching function
Quick search function
Manual Search
Radio Editing
Radio setting function
Radio - save the radio
The radio is divided into 5 bands, each of which can store 6 stations. The
user can press the button of p1-p6 to save the current band frequency
under the button. At the same time, you can also click the save button,
first click on the address you want to save, then adjust the frequency,
click the save button after the FM is completed.
Radio-band switching
Click the band switch button, the band of the radio will cycle between
FM1, FM2, FM3, AM1, AM2, and the station information on the 6 save
information buttons of the current band will also change. Due to the
inconsistent broadcast bands in each region, users can manually switch
according to local conditions.
Radio - radio search
Radio - radio settings
Click the radio settings button to enter the settings interface. In the radio
setting interface, there is AM, FM sensitivity adjustment, of course, under
the condition that the automatic stop sensitivity is on, the RDS switch,
and the area of the radio.
Main interface - navigation application settings
When we click the navigation button in the main interface for the first
time, the bottom left image will pop up: the navigation application does
not have a warning box.
Clicking on the settings will take you to the bottom right: If no
navigation is installed, install the appropriate navigation map software,
such as Gold Navigation. Select the app you just installed as the current
default navigation app launcher.
Car Settings - Sound Settings
In the sound setting interface, the sound output effect of the machine can
be set through the equalizer, power amplifier switch and other options,
and the user can experience the effect according to the actual operation.
Car Settings--GPS Information
GPS information shows the basic information of the machine
positioning, while supporting the Beidou and GPS dual module display.
The automatic sync switch can control whether the time of the machine
is synchronized with the time of the satellite being positioned when the
vehicle is positioned.
Car Settings - Factory Settings
The factory setting can be configured for the machine function.
Enter the correct pairing password. It is not recommended to change the
settings to ensure that the machine works normally.
Bluetooth - Bluetooth Phone
The Bluetooth of the mobile phone needs to be connected to the car to use
the Bluetooth phone function.
1、Turn on the Bluetooth function of the mobile phone and the car device
separately, and set the phone to "Everyone is visible."
2. Search for the Bluetooth device in the mobile phone. After searching,
select and connect. At this time, you need to enter the pairing password,
which is usually: 0000. After the input is completed, the connection is
successful.
Bluetooth - Bluetooth button
Bluetooth phone function
answer / dial function
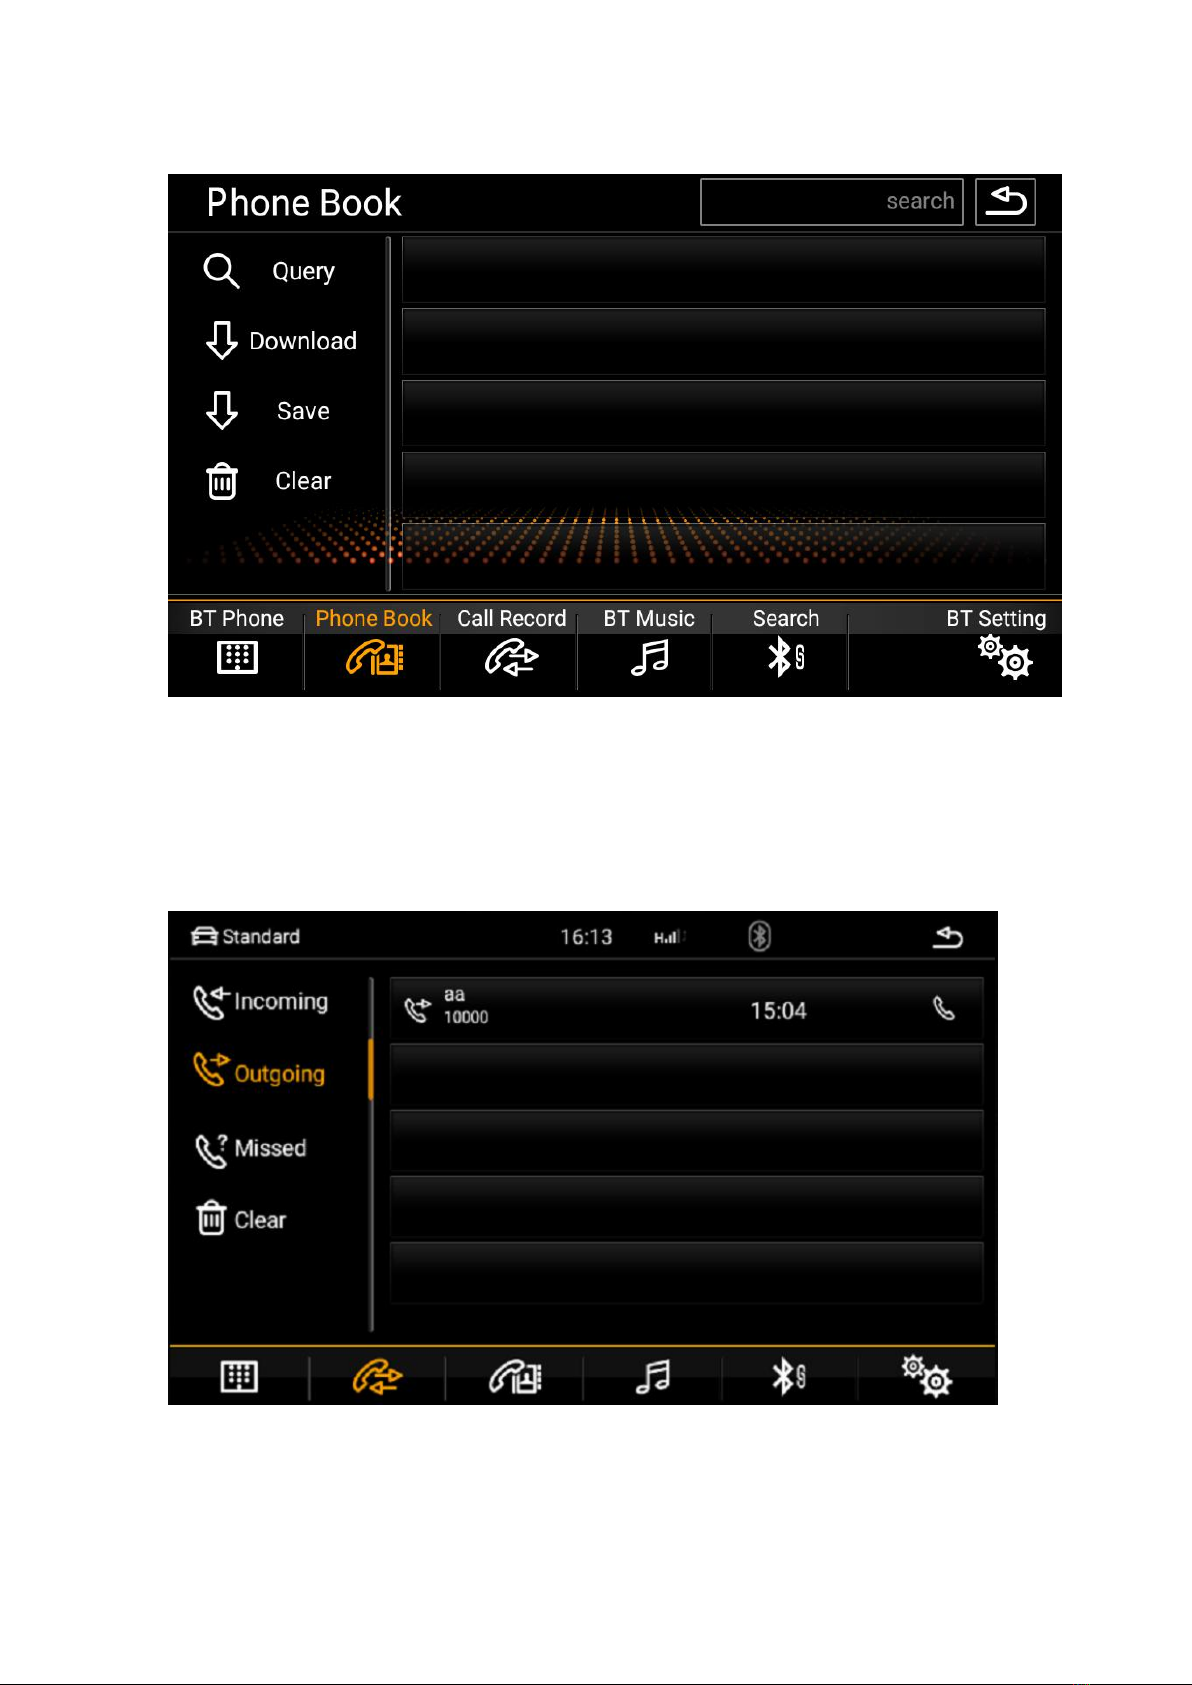
Phonebook function
Bluetooth music function
Bluetooth connection
Bluetooth setting function
Bluetooth search function
Bluetooth - setting interface
The Bluetooth Settings page displays the name of the car's Bluetooth and
the pairing password, which the user can manually change. The function
of automatic answering is that the car will automatically answer when
there is a call. Bluetooth reset button Pressing all Bluetooth information
set by the user will return to the factory settings.
Bluetooth - sync phone contacts
Synchronize the phone address book of the car, first ensure that the Bluetooth
connection between the phone and the car is normal. The following is the
synchronization method:
1. Click the Download Phonebook button and select Allow the car to
access the phone to disconnect the address book from the prompt box that
pops up on the phone.
2. Wait for the car to pop up the download completion prompt box, and
then click the save button.
Bluetooth - call history
All the call records during the Bluetooth connection between the car and
the mobile phone will be displayed under this page. The time of the
dialing is arranged from the nearest down, and can be classified according
to the incoming, outgoing, and missed calls.
Bluetooth - Bluetooth music
When the Bluetooth connection between the car and the mobile phone is
normal, the music in the mobile phone can be played through the
Bluetooth of the car, and the up and down music can be switched.
Previous song function
Next function
play pause function
Bluetooth - device search interface
Click the search button, Bluetooth will search all nearby
Bluetooth devices to find and display in the list to find and select the
Bluetooth device you want to connect to.
Click the Connect button, it will send a connection request to
the selected Bluetooth device, enter the matching password on the
selected Bluetooth device, the unconnected device is not connected icon,
if the connection icon appears, the connection is successful.
Settings - System Settings
Modifying the time displayed by the machine, language, etc. involves
changes to the system, and the user can enter the changes by clicking the
settings icon. In order to ensure the normal use of the user, it is not
recommended to change the setting options privately.
Settings - Wireless and Network
WI-FI: Click the WI-FI control switch button to activate the WIFI
function. The right side shows the nearby available wifi resource points,
select the available wifi name and click Connect.
Among the more options, there are VPN and network sharing and
portable hotspot features. Users can connect or set wifi hotspots through
this page.
Settings--device
Display: In the display options, the user can set the screen brightness,
wallpaper, font size and automatically enter the black screen function.
Settings--system
Date and time: Set the system time. In general, it provides time mode for
automatically acquiring the network.
About car machine: It mainly displays the basic information of the application
in the machine and other software of the system.
In the second step, select the function button to be learned on the machine,
and let go when a valid number (the number indicates the resistance value of
the button) appears below the button.
File Manager - File Manager Interface
All files in the machine can be viewed and manipulated in the file
manager, and the file directory on the left side of the page is allowed to
be selected. If you need to copy or move a file, just select the file you
want to operate, and a row of operation buttons will appear at the bottom.
Select the file directory to be saved and click the corresponding operation
button.
File Manager - Introduction to each operation
Application installation file
Copy file
picture file
cut file
music files
paste files
video file
view file properties
Return to previous level
increase file
Select all
Select file upgrade
Touch screen assistant
Display button
The floating button in the touch screen assistant has a number of
shortcuts for operation, which makes it easy to jump functions. If the user
needs to display the floating button, click the touch screen assistant to
enter the page and set the display button option.
boot
After setting the floating button to display, by setting the booting start
option, the floating button will be automatically displayed every time the
power is turned on, and it is not necessary to enter the touch screen
assistant to set it each time. For the video interface, navigation and other
interfaces need to hide the floating button, you can set the hidden function
when using the car-related application.
Button size adjustment
During the use of the touch screen assistant, you can set the button
size adjustment to change the size of the floating button, and the user can
set it according to personal usage habits.
Button transparency adjustment
During the use of the touch screen assistant, since the background
color difference sometimes causes the floating button display to be less
clear, the user can set the button transparency adjustment to change the
display effect of the floating button.
Music player - music playlist
Enter the main interface of the music player through the application icon
of the main interface or the application interface. If there is no play
record, the default jumps to the list interface.
All list button, click this button to display all the songs in the
car's internal storage and external storage devices.
Folder list button, click this button to display the internal storage
of the car and all the folder information containing the songs in the
external storage device.
Music player - play interface function introduction
Select the song you want to play in the list interface, and click to jump to
the playback interface. This interface displays some basic information
about the currently playing song and the commonly used control buttons.
The user can set the corresponding button to achieve the corresponding
effect, and also can drag the progress bar of the playing song to achieve
the fast forward and rewind function.
Previous song function button
Next song function button
song list function key
play / pause
Music player - play interface
By sliding the left and right gestures in the track display area, you can
switch to the lyrics of the currently playing song and the spectrum display.
The lyrics can be displayed by clicking the display area to activate the
network search or the lyrics file. This allows users to enjoy the three-
dimensional
Video player - video playback
The video player can recognize all video resources from the internal
storage of the machine as well as external storage, and supports various
common video formats such as mp4, avi, wmv, rmvb, flv, mkv, mov, ts.
Unique and simple operation interface, powerful decoding capability and
support for HD video playback.
Video player - video list
In the video list interface, the user can view the corresponding video list by
selecting the storage device type on the left.
list of video videos in the current storage device
list of video folders in the current storage device
Video player--video player interface
Select the played video through the video list interface and jump to the
video playback interface. The interface will display the title of the video
and the progress of the playback. You can fast forward and rewind by
dragging the progress bar. Touching the screen operation interface
automatically hides and appears, making it easy to watch videos.
Video list function
Loop / Random function
Pause / Play function
Next song function
Previous song function
Picture in Picture function
Video player - picture in picture
Click the PIP function button, the video playback interface will be
reduced overall and then superimposed on other application interfaces.
And click on the zoom in, full-screen button in the upper right corner of
the PIP to select the video size. The picture-in-picture feature helps users
to manipulate other applications while watching the video.
Picture in picture function

Popular Car Receiver manuals by other brands

Clarion CX505 Owner's manual & installation manual

Clarion

Clarion CX505 Owner's manual & installation manual

JVC GET0063-001A instructions

JVC

JVC GET0063-001A instructions

Pioneer DEH-3900MP installation manual

Pioneer

Pioneer DEH-3900MP installation manual

JVC KD-S20 instructions

JVC

JVC KD-S20 instructions

RetroSound Grand Prix user manual

RetroSound

RetroSound Grand Prix user manual

Sony XDP-PK1000 operating instructions

Sony

Sony XDP-PK1000 operating instructions

Alpine CDA-9885 operating instructions

Alpine

Alpine CDA-9885 operating instructions

Yamaha CRX-B370 owner's manual

Yamaha

Yamaha CRX-B370 owner's manual

Alpine X009-TND 9" installation manual

Alpine

Alpine X009-TND 9" installation manual

Pioneer MVH-AV270BT installation manual

Pioneer

Pioneer MVH-AV270BT installation manual

Onkyo T-4555 - Radio Tuner Service manual

Onkyo

Onkyo T-4555 - Radio Tuner Service manual

Sony MEX-BT2900 operating instructions

Sony

Sony MEX-BT2900 operating instructions

Philips CED1910BT user manual

Philips

Philips CED1910BT user manual

Boss Audio Systems BV7960T user manual

Boss Audio Systems

Boss Audio Systems BV7960T user manual

Sony MEXBT2600 - Bluetooth CD Receiver operating instructions

Sony

Sony MEXBT2600 - Bluetooth CD Receiver operating instructions

Seicane S168069 Replacement Instruction

Seicane

Seicane S168069 Replacement Instruction

Clatronic AR 736 CD/MP3 - Bluetooth Instruction manual & guarantee

Clatronic

Clatronic AR 736 CD/MP3 - Bluetooth Instruction manual & guarantee

VDO TR722U-BU owner's manual

VDO

VDO TR722U-BU owner's manual

manuals.online logo
manuals.online logoBrands
  • About & Mission
  • Contact us
  • Privacy Policy
  • Terms and Conditions

Copyright 2025 Manuals.Online. All Rights Reserved.