Cables to Go Port Authority2 User manual

User’s Manual
User’s ManualUser’s Manual
User’s Manual
Port Authority2
Port Authority2Port Authority2
Port Authority2
4
44
4-
--
-Port U
Port UPort U
Port USB
SBSB
SB and PS2
and PS2 and PS2
and PS2
KVM Switch
KVM SwitchKVM Switch
KVM Switch
Version 2.3 8/31/2006

Port Authority2 4-Port USB and PS2 KVM Switch
2
Index
1. INTRODUCTION……………………………………………………………………………………3
1.1 F
EATURES
…………………….…..………………………………………………………………
3
1.2 P
HYSICAL
D
IAGRAM
…………………………………………..…………………………………..4
1.3 P
ACKAGE
C
ONTENTS
…………………………………...…………………………………………4
2. SPECIFICATIONS…………………………………………………………………………………..5
2.1 G
ENERAL
………………………………………………………………………………………….5
2.2 LED I
NDICATORS
………………………………………………………………………………….6
3. INSTALLATION……………………..………………………………………………………………7
3.1 S
YSTEM
R
EQUIREMENTS
…………………………………………………………………………..7
3.2 H
ARDWARE
I
NSTALLATION
………………...………………...……………………………………7
3.3
P
OWERING
U
P THE
S
YSTEMS
……..…………….….……………………………..……………..7
3.4
H
OT
P
LUGGING
……………………………………………………………………………………7
IMPORTANT NOTE FOR USB KEYBOARD/MOUSE USERS………………………….7
3.5
U
SING THE
OSD P
ROGRAM
.………………………………………………………………………8
4. OPERATION……………………………………...………………………………………..…….…10
HOT KEY TABLE……………………………………………………………………………………11
*AUTO-SWITCH FUNCTION-USB KEYBOARD/MOUSE USERS, PLEASE READ..….……12
*AUTO-SCAN FUNCTION…………………………………………………………………………..12
*SUN MICRO SYSTEM FUNCTION KEY EMULATION……..………………………………..13
APPENDIX A-WINDOWS 98 DRIVER INSTALLATION…………………………………………14

Port Authority2 4-Port USB and PS2 KVM Switch
3
1. Introduction
1. Introduction1. Introduction
1. Introduction
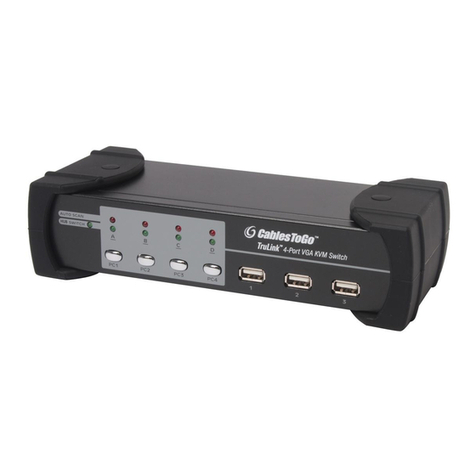
The Port Authority2 4-Port USB and PS2 KVM Switch by Cables To Go allows
you to control up to four computers with a single keyboard, mouse, and monitor.
For added convenience, this KVM switch works with both USB and PS2 mice
and keyboards. The Port Authority2 USB/PS2 KVM Switch also features a
3-port USB hub, so any of the four connected computers can share USB devices.
1.1 Features
1. Controls 4 computers from a single console (Keyboard/Mouse) over USB
connection using standard USB cables.
2. Supports PS/2 and USB Keyboard/Mouse.
3. Fully compliant with the USB 1.1 specification.
4. Supports Windows, Linux, Mac OS9/OSX, SunMicro Solaris 8.
5. 4 computers can share 3 USB Downstream ports via front panel USB hub.
6. Supports 3 types of switching: hardware push button, Hot-Keys (supported only
via PS/2 keyboard), and On-Screen-Display (OSD) utility software (for
Windows only).
7. OSD and LED display for easy status monitoring.
8. OSD utility indicates:
1. Power status of connected computer(s).
2. Active host computer.
9. USB HUB can be switched in conjunction with the PC selection (Auto Switch
mode) or independently.
10. Auto-Scan function (Time interval can be adjusted between 5-20 seconds when
the Auto-Scan function is enabled).
11. Supports VGA resolutions up to 2048x1536 @ 85HZ.
12. Plug and Play (Windows 98/SE users might need your Windows CD to install
the HID driver for USB Keyboard/Mouse).

Port Authority2 4-Port USB and PS2 KVM Switch
4
1.2 Physical Diagram
1.3 Package Contents
The product you purchased should contain the equipment and accessories as
follows:
1. Port Authority2 4-Port USB and PS2 KVM Switch
2. CD with user manual and On-Screen-Display(OSD) utility
3. Four sets of USB+VGA cables
4. Power Supply
5. Printed manual
Host LED
HUB LED
Push Button
AutoScan Button
AutoScan L
ED
Hub AutoSwitch LED

Port Authority2 4-Port USB and PS2 KVM Switch
5
2. S
2. S2. S
2. S ecifications
ecificationsecifications
ecifications
2.1 General
Specification
Operating Temperature 5~ 40°C
Humidity 0%~80%RH
Cables Included 4
Cable Length 1.8M
Dimensions (LxWxH) 200 x 82 x 44mm
Unit Weight 721g
Number Of Computer Controlled 4
PS/2 Keyboard & Mouse Support Yes
Keyboard Hot-Key Switching Supported Yes (By PS/2 Keyboard only)
USB Downstream ports 3
Compliant with USB Version USB1.0 / USB1.1
Compliant with HID Version USB HID 1.1
Over-Current protection design for USB
Downstream ports
Yes
Power By Host or External Adaptor (Recommended)
Basic Power Consumption DC 5V
Bus-Power limit current protection 500mA (Via external adaptor)
Output Voltage 5V
Output Current 2A
OSD (On Screen Display) Yes (Application Program, Windows only)
DDC, DDC2 monitor Yes (Max. Resolution: 2048x1536)
Hot Pluggable Yes (USB & PS/2)
Auto-Scan function Yes (5 ~20 seconds)
Support Sun Micro Serious Yes
Support Mac Serous Yes
Support Linux Serious Yes
Device driver No

Port Authority2 4-Port USB and PS2 KVM Switch
6
2.2 LED Indicators
Power status LED indicator:
On (Red): The power adapter is connected to the KVM. USB hub ports are in
self-powered mode. (This is the recommended state).
Off: The power adapter is not connected or not functioning. USB hub ports are
in bus-powered mode.
USB Downstream Ports LED Indicator:
ON (Green): USB ports are enabled and ready.
Off: USB ports are in over-current condition or are disabled.
Note: If an over-current situation occurs, the corresponding USB indicator will
turn OFF to indicate that this port is disabled. When the over-current situation is
resolved, the USB indicator will turn ON again.
Auto-Switch LED Indicator:
ON(Green): Auto Switch mode is on. The USB hub is switched concurrently
with your PC port selection.
Note: This mode is required when you use a USB Mouse and/or USB Keyboard.
See page 12 for details.
Off: Auto Switch mode is off. The USB hub is switched independently of your
PC port selection.
Auto-Scan LED Indicator:
Off: Auto Scan mode is off.
ON (Green): Auto Scan mode is on.
PC Host LED Indicator (Red):
ON: Indicates which PC port is selected.
HUB LED Indicator (Green):
ON: Indicates which PC is connected to the three USB downstream HUB ports.

Port Authority2 4-Port USB and PS2 KVM Switch
7
3
33
3. Install
. Install. Install
. Installation
ationation
ation
3.1 System Requirements
-One available USB port and one available VGA port
-Windows 98 or later, Mac OS9/OSX, Solaris 8 (SUN BLADE 100), Linux
Kernel 2.3 or later
3.2 Hardware Installation
1. Make sure that the USB port of your computer is enabled and working
properly.
2. Connect the USB cable Type-A end to the USB port of your computer, and the
USB cable Type-B end to any available port on the KVM Switch.
3. Connect the VGA male-to-female cable between the video port of your
computer and video port that corresponds to the USB port you selected in step 2.
4. Repeat steps 1-3 for any other computers you are connecting up. Up to 4
computers can be connected at the same time.
5. Plug the power adaptor cable into the KVM switch.
3.3 Powering Up The Systems
Boot the computers. For best performance from your display, make sure to select
a port first, and let that PC completely boot before switching to another port. Sun
Micro users; this is required. For other users, this is highly recommended.
3.4 Hot Plugging
The KVM switch supports USB plug & play technology. USB devices can be
added and removed to the front panel hub at any time without the need to
shutdown.
Note: Windows 98 users will need to install drivers. See Appendix A.
If you
are using a USB keyboard and/or mouse as your primary means of input, you
will need to enable the Auto Switch function. See page 12 for details.

Port Authority2 4-Port USB and PS2 KVM Switch
8
3.5 Using the OSD program; examples
a. “No PCs Found” means that the KVM Switch cannot acquire the PC status.
This is either because the PC did not connect or is powered off.
The large red “4” and small green “2” mean that two PCs are connected to Port 1
and Port 4 of your KVM Switch respectively, and you have switched to Port 4
already. So the OSD program will display “PC 4 On” underneath. You can click
the “2” to switch to this available host.

Port Authority2 4-Port USB and PS2 KVM Switch
9
The large red “4” and small green “1, 2, 3” means that four PCs are connected to
Port 1 and Port 4 of your KVM Switch respectively, and you have switched to
Port 4 already. So the OSD program displays a “PC 4 On” underneath. You can
click on “1, 2 or 3” to switch to a certain available host.
1) When you click the “Hide” button, the OSD program window will hide in the
Taskbar.
2) When you click on the “Close” button, the OSD program will exit.
3) If the OSD program is hidden in the Taskbar, you can use the right mouse
button to show or exit program.
1
2
3

Port Authority2 4-Port USB and PS2 KVM Switch
10
4.
4. 4.
4. O eration
The KVM Switch supports three methods to switch between computers:
Pushbutton, Hot Keys, and OSD. Due to the refresh of the video and
re-synchronization of the mouse and keyboard signal, it can take up to 3 seconds
before control is re-established after switching to ensure proper signal
synchronization.
Note for users with connected USB devices (other than keyboard/mouse):
The drivers for most USB devices (Mass Storage device, CCD Cameras,
Scanners, Card Reader, Printers, e.g.) require the device to be disabled before
you disconnect the device. Follow the “Safely Remove” process provided in
Windows before you disconnect the device to avoid system freezes or other
problems. When you switch computers via the KVM, it is the equivalent of
disconnecting the device. Therefore, if you have peripheral devices (other than a
second keyboard and mouse) connected to these ports, you must be sure to shut
down or safely remove the USB driver for them before switching computers.
1. Manual Switch by pushbutton:
You can switch to any other available active USB host connection by simply
push the appropriate switch button on the KVM Switch. The LED will be lit to
indicate which port is currently selected.
2. Two Step Hot Key Switch by PS/2 keyboard:
You can switch to any available PC by entering a two step Hot Keys sequence
directly from the PS/2 keyboard. To send commands to the KVM Switch, [Scroll]
must be pressed twice (Step 1). Then you can press [1] to [4] (Step 2) to switch
between ports.
Note: Hot keys are supported by PS/2 Keyboard only. USB keyboard users must
use manual switch method or OSD.
*After invoking the Hot Key function with the [Scroll] , [Scroll] , you must press
the corresponding final command (Step 2) within 3 seconds for each key press.
(The Scroll Lock LED on the keyboard will start blinking and wait for the final
command. After completing the hot key sequence or 3 seconds have elapsed, the
keyboard LED will revert back to its original state.)
Port Authority2 4-Port USB and PS2 KVM Switch
11
Three Steps Hot Key definition table
Step 1 Step2
Action
USB HUB Auto-Switch mode
Switches access to PC1 (Computer connected to Port A)
Switches access to PC2 (Computer connected to Port B)
Switches access to PC3 (Computer connected to Port C)
Switches access to PC4 (Computer connected to Port D)
Switch the HUB to PC 1
Switch the HUB to PC 2
Switch the HUB to PC 3
Switch the HUB to PC 4
*
AutoScan time interval is 5 seconds
(Available only when Auto-Scan function is ON)
*
AutoScan time interval is 10 seconds
(Available only when Auto-Scan function is ON)
*
AutoScan time interval is 15 seconds
(Available only when Auto-Scan function is ON)
No Scroll Key
Need
*
AutoScan time interval is 20 seconds
(Available only when Auto-Scan function is ON)
* Notice : To adjust the interval time for AutoScan, you do not need to press the
Scroll key, and this can be used only by normal number key.
3. On-Screen-Display (OSD) Switch (Windows only):
You may also use the OSD utility software from the enclosed CD to switch
between computers.

Port Authority2 4-Port USB and PS2 KVM Switch
12
* Auto
* Auto* Auto
* Auto-
--
-Switch
Switch Switch
Switch Function:
Function:Function:
Function:
When Auto-Switch mode is ON:
When you enable the AutoSwitch mode the KVM will switch the HUB when
you switch the host. This means host and HUB will switch together by hotkey,
OSD, or push button. The USB devices always follow the host. This is the
required mode for a USB keyboard or mouse to work with all connected
computers.
There are two ways to turn the HUB Auto-Switch mode ON :
A). By hot key via PS/2 keyboard; [Scroll+Scroll][H] : please reference the
hotkey table in page 11.
B). Press and hold any of the PC port selector buttons continually for 2 seconds
when the Auto-Switch mode is OFF. The Auto-Switch LED will turn ON.
When Auto-Switch mode is OFF:
You must switch the hub to the new target host by hotkey.
There are two ways to turn the HUB Auto-Switch mode OFF:
A). By hot key via PS/2 keyboard; [Scroll+Scroll][H] : please reference the
hotkey table in page 11.
B). Press any host push button continually for 2 seconds when the Auto-Switch
mode in ON. The AutoSwitch LED will turn OFF.
* Auto
* Auto* Auto
* Auto-
--
-Scan
Scan Scan
Scan Function:
Function:Function:
Function:
When you press the Auto-Scan button, the KVM Switch cycles through all the
ports and displays them on the monitor. Each port is displayed for 5,10,15,20
seconds before switching to the next. You can press the normal numeric key
1,2,3,4 to adjust the interval time (Please reference the hotkey table in page 11).
If you press the Auto-Scan button again, the monitor screen will jump back to the
port that it was started.
Note:
The mouse and keyboard have no effect while in this mode. This is necessary to
prevent errors such as erratic movement and wrong characters to display when
using the mouse or keyboard accidentally.

Port Authority2 4-Port USB and PS2 KVM Switch
13
* Sun Micro System Function Key Emulation
* Sun Micro System Function Key Emulation* Sun Micro System Function Key Emulation
* Sun Micro System Function Key Emulation:
::
:
There are 16 special functions on the Sun Micro system keyboard; the KVM
Switch can emulate these function keys via the PS/2 keyboard ( it won’t work via a
USB keyboard ). Here is the mapping table for those functions operations. To active
these emulations on the PS/2 keyboard, you have to press the LEFT Window KEY
first (this key usually is located between the left [Ctrl] and left [Alt]), then press the
second key as shown.
Sun Micro System
Function Key
PS/2 Keyboard
Stop L_Win & L_Alt
Props L_Win & L_Ctrl
Compose L_Win & L_Shift
Front L_Win & F1
Open L_Win & F2
Find L_Win & F3
Again L_Win & F4
Undo L_Win & F5
Copy L_Win & F6
Paste L_Win & F7
Cut L_Win & F8
Help L_Win & F11
Power L_Win & F12
Mute L_Win & 1
Volume Down L_Win & 2
Volume UP L_Win & 3

Port Authority2 4-Port USB and PS2 KVM Switch
14
Appendix A: Windows 98 driver installation procedure
After you connect the KVM Switch to your PC, Win 98 will automatically detect the
device and prompt for the driver installation. Please install the KVM Switch by
following the instructions from Step A-E.Have your Windows 98 CD ready.
Fig. A
Fig. B
Fig. C
A. Press “Next” to Continue.
(Ref. Fig. A)
B. Select “Search for the
best driver for your device”
and press “Next” to
continue.
(Ref. Fig. B).
C. Please insert the
“Windows 98” CD into your
CD-ROM drive. Click
“CD-Rom drive” and press
“Next” to continue.
(Ref. Fig. C)

Port Authority2 4-Port USB and PS2 KVM Switch
15
Fig. D
Fig. D1
* The driver might be located in a different directory from the figure above.
D. Press “Next” to start the
installation process.
(Ref. Fig. D)
D1. Sometimes Windows
cannot locate the necessary
driver automatically. So you
need to choose “Browse” to
specify the location of the
driver on your “Windows
98” CD manually. *
(Ref. Fig. D1)

Port Authority2 4-Port USB and PS2 KVM Switch
16
Fig. D2
Fig. E
D2. Press “OK” to continue
(Ref. Fig. D2)
E. Press “Finish” and
Windows has finished
installing the USB Human
Interface Device driver for
PS/2 keyboard & mouse.
(Ref. Fig. E)

Port Authority2 4-Port USB and PS2 KVM Switch
17
Disclaimer
DisclaimerDisclaimer
Disclaimer
Information in this document is subject to change without notice. The manufacturer does not make any
representations or warranties (implied or otherwise) regarding the accuracy and completeness of this document and
shall in no event be liable for any loss of profit or any other commercial damage, including but not limited to special,
incidental, consequential, or other damages.
No part of this document may be reproduced or transmitted in any form by any means, electronic or mechanical,
including photocopying, recording or information recording and retrieval systems without the express written
permission of the manufacturer.
All brand names and product names used in this document are trademarks, or registered trademarks of their
respective holders.
FCC Statement
FCC StatementFCC Statement
FCC Statement
This device generates and uses radio frequency and may cause interference to radio and television reception if not
installed and used properly. This has been tested and found to comply with the limits of a Class B computing device
in accordance with the specifications in Part 15 of the FCC Rules. These specifications are designed to provide
reasonable protection against such interference in a residential installation. However, there is no guarantee that
interference will not occur in a particular installation. If this device does cause harmful interference to radio or
television reception, which can be determined by plugging the device in and out, the user can try to correct the
interference by one or more of the following measures:
Reorient or relocate the receiving antenna.
Increase the separation between the device and receiver.
Connect the computer into an outlet on a circuit different from that to which the receiver is connected.
Consult the dealer or an experienced radio/TV technician for help.
Table of contents
Other Cables to Go Switch manuals

Cables to Go
Cables to Go 30505 User manual

Cables to Go
Cables to Go 40021 User manual

Cables to Go
Cables to Go TruLink 35555 User manual

Cables to Go
Cables to Go UH846 User manual

Cables to Go
Cables to Go TRULINK 89035 User manual

Cables to Go
Cables to Go TRULINK 39901 User manual

Cables to Go
Cables to Go 29508 User manual

Cables to Go
Cables to Go TruLink 35554 User manual

Cables to Go
Cables to Go TruLink 39973 User manual

Cables to Go
Cables to Go TRUlink 35566 User manual