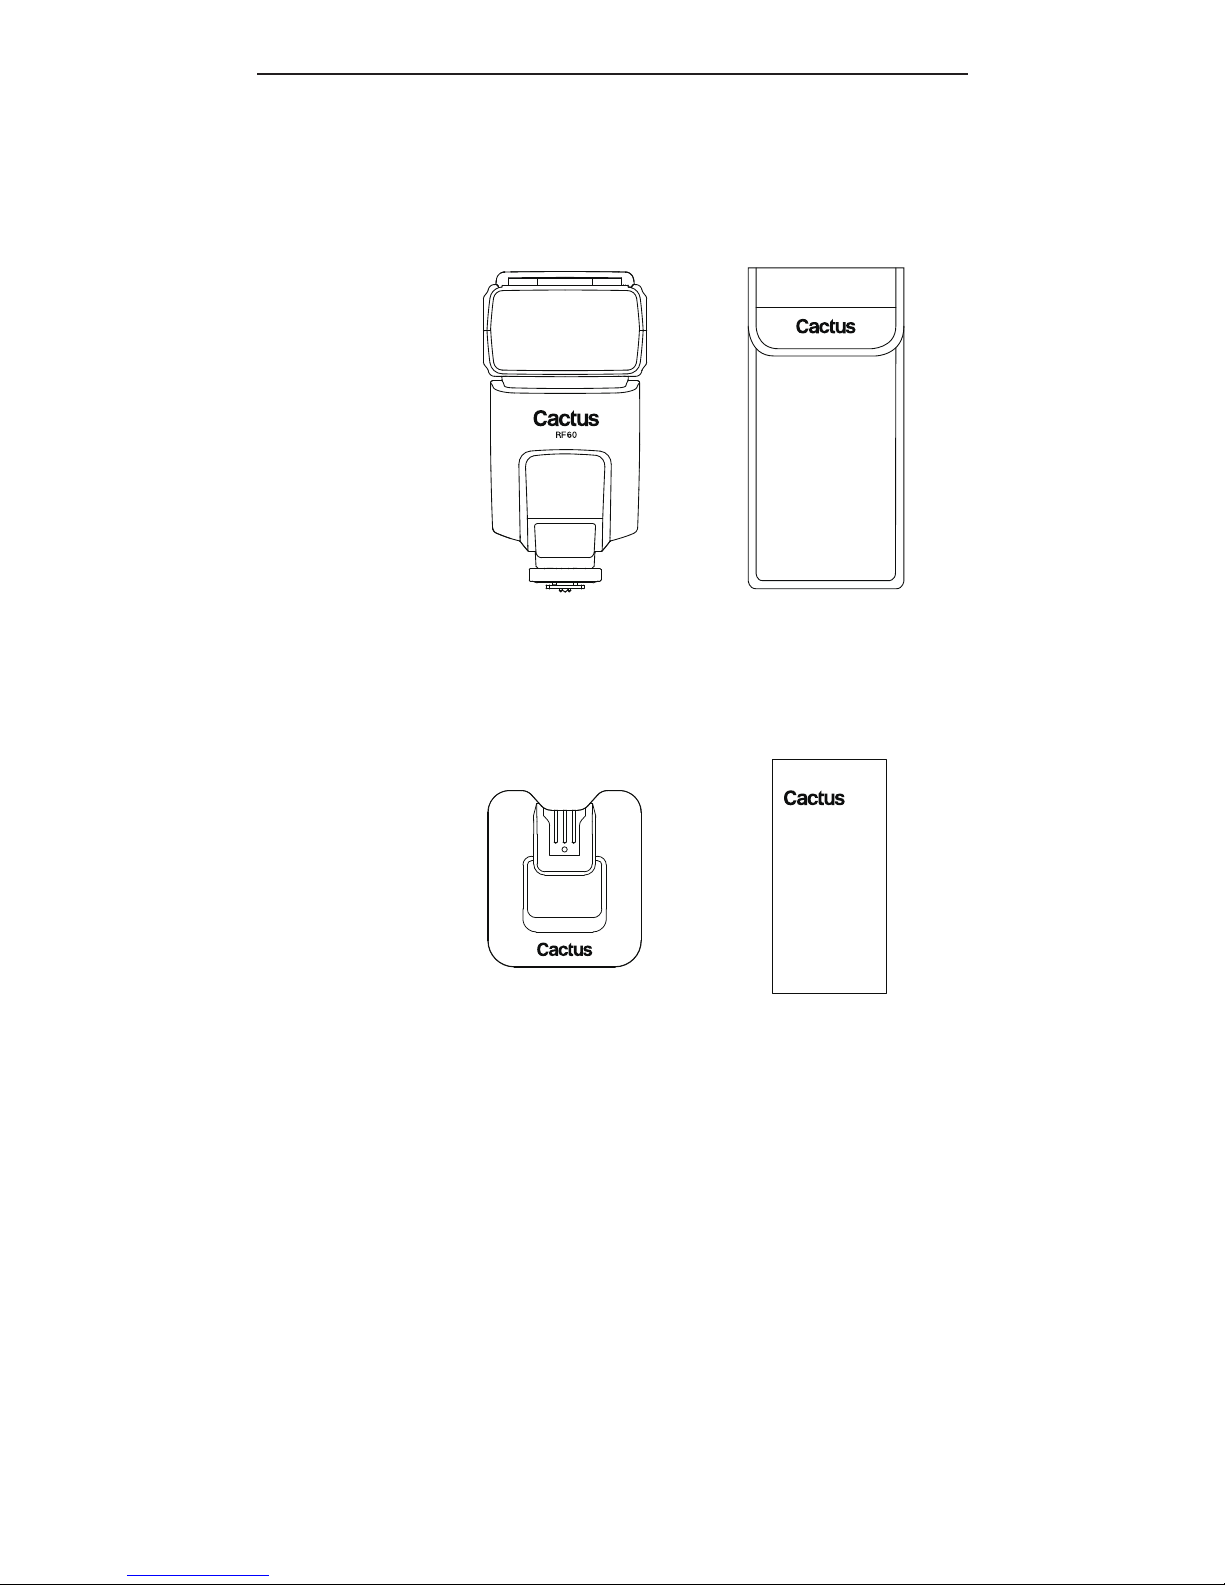
Cactus RF60 User manual

User Manual
Wireless
Flash
RF60

2
Table of Contents
1. Getting to Know your RF60 03
2. Caution and Warnings 04
3. M a j o r S p e c i c a ti o n s 05
4. Package Contents 06
5 . N o m e n c l a t u r e 0 7
6. LCD Panel 08
7. G e t ti n g S t a r t e d 0 8
8 . O n - c a m e r a O p e r a t i o n : 1 8
Local Mode
9. W i r e l e s s F l a s h : 2 0
Master and Slave Modes
10. G r o u p A l i a s e s 2 5
11. Ad va nce dO p er ation27
12. Personalizing the RF60 39
13. Working with Cactus 43
Triggers
14. E x t e r n a l P o w e r 4 5
1 5 . F o r m i n g t h e C a p a c i t o r 4 6
16.USBConnection47
17. O p t i o n a l A c c e s s o r i e s 4 7
18. Troubleshooting 48
19.Notices51
20.Warranty53

3
1. Getting to Know your
RF60
Thank you for purchasing the Cactus
Wireless Flash RF60. We know that you
w i l l e n jo y t h e b e n e t s of y o u r n e w
w i r e le s s p o r t a bl e a s h. T h e R F 60 i s
u n iq u e a m o n g ot h e r a s h e s a v a i l a b le
o n t h e m a r k e t. Wit h a b u i lt-i n
transmitterandreceiver,itnot
onlyreceiveswirelesssignals,but
it a l s o f u n ctio n s a s a c o m m a n d e r t o
control other RF60s. The
possibilities are endless!
Ple a s e t a k e t h e ti m e t o e x plo r e a l l
t h e f e at u r e s i n y o u r n e w R F60:
–Built-i n w i r el e ss c o m m a n d e ra n d
receiver
–R e m ot e c o n tr o l of p o w e r a n d z o o m
levels
–Group control of up to four groups
withcongurableGroup Alias
–Optical Slave with delay feature
–High poweru p t o G u i d e N u m b e r of
56 m e t e r s
–C o m p ati ble w it h C a c tu s V 6 Wireless
Flash Transceiver
–Multi-ash feature
–HSSSympathymode provides HSS
support when working with TTL
ashes

4
2. Caution and Warnings
B efor e u si n g t h e p r o d u c t, r e a d t h e
following instructions to ensure
correct and safe use and to help
p r e v e n t d a m a g e of t h e C a ct u s R F 6 0.
1. T u r n O F F a l l y o u r e q u i p m e n t
(C a ct u s u n it s, c a m e r a s, e t c.)
before changing batteries or
m a k i n g a c o n n e cti o n.
2. R e m o v e b a tt e r i e s a n d s w it c h of f
t h e a s h w h e n it i s n o t i n u s e.
3. U s e o n l y t h e b a tt e r i e s s p e ci e d
i n t h i s i n s tr u ctio n m a n u a l.
4. D o n o t p e r m a n e ntl y st o r e t h e
p r o d u c t i n a h i g h t e m p e r at u r e
e n v i r o n m e nt (i.e., u n d e r s tr o n g
d i r e c t s u n l i g h t, n e a r c o o k i n g
st o v e s o r o v e n).
5. T h e a s h s h o u l d n ot b e s u b m e r g e d
in liquid or exposed to heavy
rain unless it is properly
protected.
6. Do not operate the device in the
presenceofammablegasesor
fu mes.
7. D o n o t r e t h e a s h d i r e c tl y
i n t o t h e e y e s of s o m e o n e a t clo s e
ra n ge.
8. D o n ot r e t h e a s h d i r e c tl y a t
t h e d r iv e r of a m o v i n g c a r.

5
3. Major Specifications
–G u i d e N u m b e r (I S O 100):
Z o o m (m m) 24 28 35 50 70 80 105
G N ( m e t e r) 33 34 38 45 51 54 56
G N (f e e t) 108 112 124 147 168 177 183
–Motorzooms:24mm–28mm–35mm–
50 m m – 70 m m – 80 m m – 105 m m
–P o w e r l e v el s (22 i n t o t a l):
1/1 1/2 1/4 1/8 1/16 1/32 1/64 1/128
1/2+0.3 1/4+0.3 1/8+0.3 1/16+0.3 1/32+0.3 1/64+0.3 1/128+0.3
1/2+0.7 1/4+0.7 1/8+0.7 1/16+0.7 1/32+0.7 1/64+0.7 1/128+0.7
–F l a s h d u r a ti o n s: 1/300 s – 1/2 0,0 0 0s
–M o d e s: L o c a l (L), M a s t e r (M), a n d
Sl av e (S)
–W o r k i n g r a d io f r e q u e n c y: 2.4 G H z
–N u m b e r of c h a n n e l s: 16
–N u m b e r of g r o u p s: 4
–M a x i m u m w i r e le s s effe ctiv e
distance:100meters(328feet)
–B u i lt-i n o p tic a l s l av e m o d e:
S1(straighttriggering);
S2(pre-ashignoredtriggering)
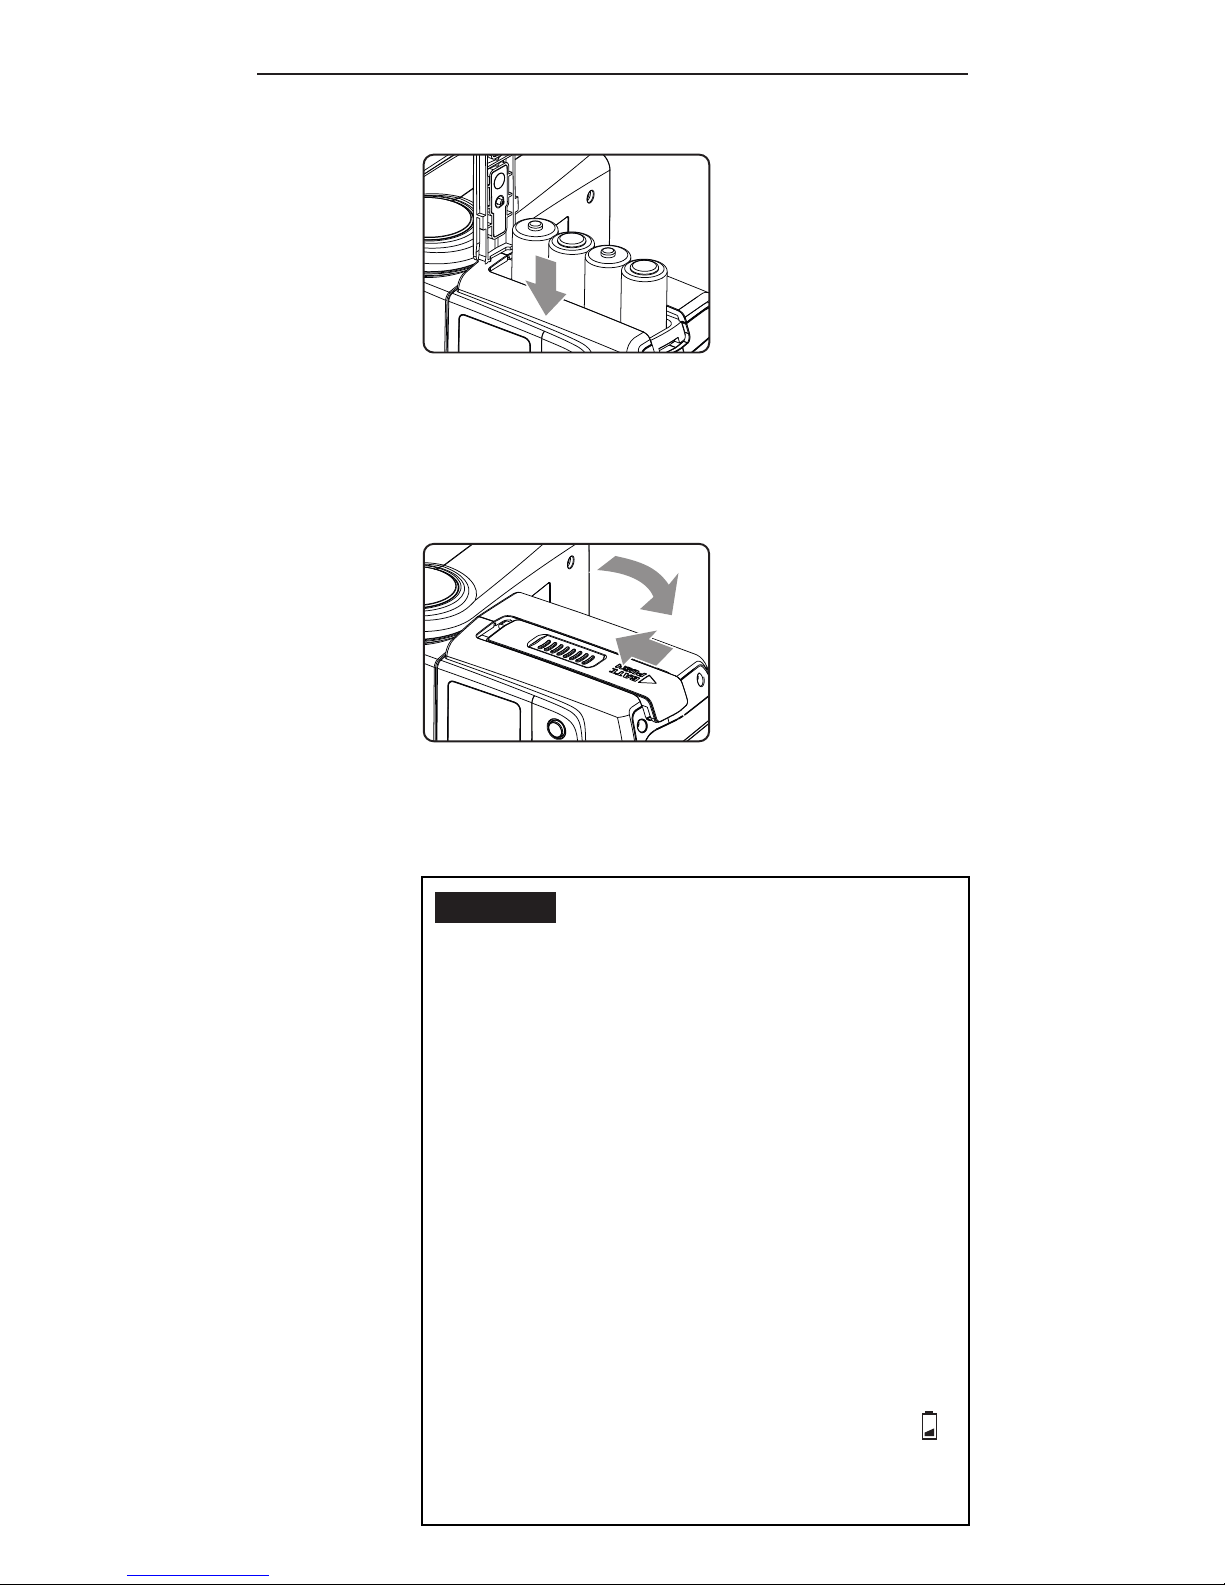
–P o w e r i n p u t:
4 AA batteries (LR6 alkaline or
Ni- M H), r e c h a r g e a ble Ni- M H f or
bestperformance
–F l a s h c o u n t p e r b att e r y c y cle:
10 0 (at 1/1 p o w e r);
200 0 (a t 1/1 28 p o w e r)
–M i n i m u m r e c y cl e ti m e:
0.1-5.0seconds(withalkaline
b a tt e r i e s); 0.1-3.0 s e c o n d s (w it h
S a n y o E n e lo o p)
–C olo r t e m p e r a tu r e: 5600 k +/- 20 0k
–Operatingtemperature:
-2 0°C t o + 50°C
–D i m e n s io n s: 2 05 x 83 x 61 m m
–N e t w ei g h t: 3 90g

6
4. Package Contents
Flash RF60 Carrying Case FC-3
User Manual
Flash Stand FS-2

7
5. Nomenclature
W I D E A N G L E DI F F U S E R
ANDBOUNCECARD F R E S N E L L E N S
O P T IC A L S E N S O R
TRIPODMOUNT
EXTERNALPOWER
CONNECTOR
CONNECTORCOVER
M O U N T I N G F O O T
CONNECTORCOVER
3.5 mmC O N N E C T O R
HOTSHOECONTACT
BOUNCEANGLE
INDICATOR
L C D PA N E L
MODEBUTTON
M E N U B U T T O N
- B U T T O N
NEXTBUTTON + B U T T O N
O N /O F F S W I T C H
TESTBUTTON/
FLASH-READYINDICATOR
BATTERYCOMPARTMENT
DOOR
MULTI/HSSBUTTON
GROUPBUTTON
USB PORT
HOT SHOE
LOCKINGWHEEL

8
6. LCD Panel
7. Getting Started
Inserting Batteries
1. Usi n g y o u r t h u m b, p r e s s o n t h e
b a tt e r y c o m p a r t m e nt d o or a n d
slide it open in the direction
shown by the arrow.
7.1
GROUPPANEL
OPERATING
MODES CHANNEL
B E E P I N D IC A T O R
O P T IC A L S L AV E DELAYINDICATOR
BATTERYLEVEL
HIGHTEMPERATURE
WARNING
P O W E R L E V E L P O W E R L E V E L
INCREMENT
HSS SYMPATHY
MODE
TEXT AREA SELECTION
INDICATORS
ZOOM
LEVEL
STATUS
BAR

9
2. I n s t a l l t h e b at t e r ie s.
M a k e s u r e t h e p o sitiv e (+) a n d
n e g ativ e (-) b a tt e r y c o nt a ct s a r e
properly oriented as shown in the
compartment.
3. S li d e t h e b a tt e r y c o m p a r t m e n t
door in the direction shown by
the arrow to close it.
Caution:
1. Use a new set of AA batteries of
t h e s a m e b r a n d a n d t y p e. W h e n
replacingbatteries,replaceall
f o u r at t h e s a m e ti m e.
2. A A-si z e d a l k a l i n e, Ni- M H, o r
l it h i u m b at t e r ie s c a n b e u s e d.
Use only one type of batteries at
a ti m e. D o n ot m i x b att e r y t y p e s.
3. If y o u c h a n g e b att e r i e s a f t e r
r i n g m a n y a s h e s c o nti n u o u sl y,
b e a w a r e t h at t h e b a tt e r i e s m a y
be hot.
4. F o r a l k a li n eor lit hiu m
b att e r ie s, t h eb att er y le vel
indicator on the LCD will show
w h e n a r o u n d 5 0% of t h e b at t er y
p o we r h a sb e e n co n su m e d, a n d

10
the indicator will blink when
t h e a s h d o e sn ot h av ee n o u g h
p o w e r t o r e. Replace batteries
i m m e d i at el yw h e n y o u s e e t h e
blinking signal. The
indicator is not applicable to
Ni- M H b a tt e r y.
5.Whentheashisnotinuse,
r e m o v e t h e b at t e r ie s t o p r e v e n t
p o s s i ble d a m a g e f r o m b a tt e r y
corrosion.
Attaching to and detaching the flash
from the camera
1. T o a tt a c h t h e a s h, s lid e t h e
a s h’s h ot s h o e m o u n ti n g f o o t
a l l t h e w a y i n t o t h e c a m e r a’s h o t
shoe.
2. T o s e c u r e t h e a s h, r o t at e t h e
lo c k i n g w h e e l o n t h e m o u n ti n g
foot to the left until it locks.
7.2

11
3. T o d e t a c h t h e a s h, r o t at e t h e
lo c k i n g w h e e l o n t h e m o u n ti n g
foot to the right until it is
loosened.
Turning the Flash on
1. S w it c h t h e O n /O ff S w it c h t o O N.
T h e a s h st a r t s c h a r g i n g.
2. C h e c k t h a t t h e a s h i s r e a d y.
- T h e a s h -r e a d y i n d ic at o r bl i n k s
i n r e d, i n d ic ati n g t h at t h e a s h
i s r e a d y f or q u i ck a s h (s e e
S e c ti o n 1 2.3).
7.3

12
- O n c e f u l l y c h a r g e d, t h e a s h -
ready indicator stays red and the
a s h i s r e a d y t o g iv e f u l l p o w e r
output.
- Press the b u tt o n t o r e a
t e s t a s h.
Adjusting the Flash Head
B y p oi n ti n g t h e a s h t o w a r d a w a l l o r
ceiling,theashwillbounceoff
thesurfacebeforeilluminatingthe
subject. This will soften the shadows
7.4
Caution:
1. W h e n t h e a s h i s s w it c h e d O N b u t
notused,afteracertainperiod
of ti m e, t h e a s h’s p o w e r t u r n s
of f a u t o m atic a ll y. H o w e v e r, t h e
a s h still c o n s u m e s p o w e r a n d
batteries discharge over a long
p er io dof ti m e, w h ic hm a y d a m a g e
t h e b a tt e r y c o nt a ct s of t h e a s h.
Therefore,s h u t of f t h e a s h
p o w e r if t h e a s h i s n o t i n u s e.
2. If y o u r e m o r e t h a n 2 0
c o n ti n u o u s a s h e s at f u l l p o w e r
i n s h o r t i nt e r v a l s, t h e i n n e r
overheating prevention function
m a y b e a ctiv at e d t o p r ol o n g t h e
r e c y cli n g ti m e t o a b o u t 8 s e c o n d s
– 20 s e c o n d s. T h e t e m p e r at u r e
warning signal will appear in
the status bar of the LCD screen.
If t h i s o c c u r s, a l lo w a r e s t ti m e
of a b o u t 15 m i n ut e s, a n d t h e a s h
w i l l t h e n r e t u r n t o n or m a l.

13
b e h i n d t h e s u bje c t fo r a m or e
natural-looking shot. This is called
abounceash.
T h e a s h h e a d of t h e R F 60 c a n b e
ti lt e d u p t o a v e r tic a l a n g le of 9 0˚,
w it h cl ick st o p s at 30˚, 6 0˚, a n d 7 5˚.
H o r i z o n t a l l y, it c a n b e r ot at e d u p t o
18 0˚ t o t h e r i g ht a n d 90˚ t o t h e l ef t,
w it h cl ick st o p s at 30˚, 6 0˚, 9 0˚, 1 20˚,
15 0˚ (r i g ht) a n d 3 0˚, 60˚ (lef t).
Tip:W h e n u si n g b o u n c e a s h, t r y t o
avoid hitting the subject with
d i r e c t a s h l i g h t. M a k e s u r e t h e
a s h h e a d i s s u f ci e ntl y a n g le d
a w a y f r o m t h e s u bj e ct.

14
Bounce Card and Wide Angle Diffuser
There is a bounce card and wide angle
diffuser set built in the RF60. The
bounce card and wide angle diffuser
c a n b e u s e d s e p a r a t el y o r at t h e s a m e
time.
Using the Bounce Card
1. P oi n t t h e a s h h e a d u p w a r d b y 9 0°.
2. Pull out the wide angle diffuser.
Thebouncecardwillcomeoutat
t h es a m e ti m e.
3. Push the wide angle diffuser back
in. The bounce card will be ready
for use.
Tip: The bounce card is useful in
bounceashapplicationsto
d i r e ct s o m e of t h e l i g h t t o w a r d t h e
subject in order to create catch
li g h tsa n d/ors of t e n str o n g s h a d o w s
fromthebouncedlight.
7.5

15
Using the Wide Angle Diffuser
1. Pull out the wide angle diffuser
andplaceitovertheashheadas
shown.Thebouncecardwillcome
o u t at t h e s a m e ti m e.
2. Push the bounce card back in.
T h e a s h w i l l i llu m i n a t e at 18 m m
covera ge.
Choosing the Operating Mode
T h e r e a r e t h r e e o p e r a ti n g m o d e s i n
t h e R F 60, n a m e l y L o c a l, M a s t e r, a n d
Sl av e. U p o n s w it c h i n g o n t h e R F 60,
press the button to choose the
a p pr o p r i at e m o d e. T h e m o d e i n d i c at o r
turnsinthefollowingsequence:
Local Master Slave
Modes Where to place
the RF60?
With wireless
control?
oncamera X
oncamera √
offcamera √
7.6

16
Setting Channel
When the RF60 units are in the Master
o r Sl a v e m o d e, t h e y n e e d t o
c o m m u n i c at e i n t h e s a m e R F w i r e le s s
channel with each other.
T o s e t t h e c h a n n e l, pr e s s . Use
the or button to select the RF
channel. Press to go back to
t h e m a i n s c r e e n. T h e s ele c t e d
channel will be shown on the LCD
pa nel.
Navigating the Menu
T h e r e a r e a n u m b e r of c o n g u r a ble
m e n u o p tio n s o n t h e R F 6 0.
T o c h a n g e a m e n u o pti o n:
1. Press the button to access
t h e r st m e n u it e m.
2. Press the button to change
themenusubjectinthesequence.
3. Press the or button to see
e a c h o pti o n of a m e n u it e m. T h e
c o n g u r a ti o n of t h e m e n u it e m
w i l l c h a n g e i m m e d i at e l y.
7.7
7.8

17
4. Press the button to leave
a n d g o b a ck t o t h e m a i n s cr e e n, o r
press the button to change the
m e n u t o t h e n e x t it e m i n t h e
sequence.
Menu item and
corresponding options
Text shown
on LCD
Applicable
modes
L M S
RF Channel
- 1-16
CH
- 1-16
√ √
DelayTimer
-0-999ms
DELAY
-0-999ms
√√√
Optical Slave
- Off
- S 1: S t r a i g h t
Triggering
- S 2: P r e - a s h I g n o r e d
OPT SL
- OFF
-S1(FIRST)
- S 2( M A I N)
√√√
Quick Flash
- Off
- On
QCK FL
- OFF
- O N
√√√
Beep Feedback
- Off
- F n 1: Q u i c k F l a s h
- F n 2: F u l l C h a r g e
- F n3: I n s u f ci e n t
Power Warning
BEEP
- OFF
- F n 1(Q C K F L)
-Fn2(READY)
- F n3(W A R N)
√√√
S le e p T i m e r
- Off
-3min
- 5 m i n
- 15 m i n
- 3 0 m i n
- 6 0 m i n
SLEEP
- OFF
-3min
- 5 m i n
- 15 m i n
- 3 0 m i n
- 6 0 m i n
√√√
LCD Backlight
- Off
- 5 s e c
- 15 s e c
- Continuous
BK LGT
- OFF
- 5 s e c
- 15 s e c
- O N
√√√

18
8.1
8. On-camera Operation:
Local Mode
S e t u p t h e R F 60 i n L o c a l m o d e
w h e n y o u w o r k w it h o n e a s h o n t h e
c a m er a’s h ot s h o e.
I n t h e m a i n s c r e e n, t h e p o w e r le v e l
i s s h o w n o n t h e lef t w h i le t h e z o o m
level is shown on the right. The
selection indicator ►will be shown
at eit h e r t h e p o w e r l e v el or z o o m
level. Press the button to
switch the selection indicator in
o r d e r t o a d ju st a s etti n g of a n it e m.
Adjusting the Power Level
T o a d ju st t h e p o w e r le v e l, pr e s s
until the selection indicator ►is
pointing to the power ratio value
(i.e.,theleftgureinthecentral
row).Press to increase or to
decrease the power level.

19
The power levels available for
adjustmentare:
1/1 1/2 1/4 1/8 1/16 1/32 1/64 1/128
1/2+0.3 1/4+0.3 1/8+0.3 1/16+0.3 1/32+0.3 1/64+0.3 1/128+0.3
1/2+0.7 1/4+0.7 1/8+0.7 1/16+0.7 1/32+0.7 1/64+0.7 1/128+0.7
Adjusting the Zoom Level
Toadjustthezoomlevel,press
until the selection indicator ►is
p o i n ti n g t o t h e z o o m v a lu e (i.e., t h e
rightgureinthecenterrow).Press
to increase or to decrease the
z o o m le v e l.
T h e z o o m le v el s a v a i l a ble f o r
adjustmentare:
Z o o m (m m) 24 28 35 50 70 80 105
8.2

20
9. Wireless Flash: Master
and Slave Modes
Wit h a b u i lt-i n R a d i o F r e q u e n c y (R F)
m o d u le, t h e R F 60 h a s t h e a b ilit y t o
c o m m u n ic a t e w it h o t h e r R F60 u n it s
w i r e le s s l y. T o c o ntr o l a n d r e t h e
R F 60 w i r ele s s l y, s e t u p o n e R F 60 i n
M a st e r m o d e a n d t h e ot h e r R F 6 0 u n it s
i n S l av e m o d e.
Setting up the RF60 Slave
1. Make sure that the RF60 units
that you want to control through
t h e M a s t e r a s h a r e s e t t o mode
(s e e S e cti o n 7.6).
2. Set the units to the s a m e R F
channel(s e e S e ctio n 7.7).
3. Assign RF60 Slave units to either
groupA,B,C,orD.Press
to select the group for each RF60.
Each press of the Group button in
Sl av e m o d e w i ll c h a n g e t h e g r o u p
in the sequence of A-B-C-D. The
selected group will be shown on
the group panel.
9.1
Other manuals for RF60
2
Table of contents
Other Cactus Camera Accessories manuals