To move one photo backward in your
Touch and hold the bottom matting.
After a few seconds, your Picture Show
will pause, and the lock symbol will
appear in the center of the screen.
To lock another photo, navigate to
photo as detailed in Step 2. Touch top
Touch the bottom of the matting to
resume your Picture Show.
To unlock a photo, follow the
If you only want to view a selection of
your photos, your frame has a number
of options for doing that.
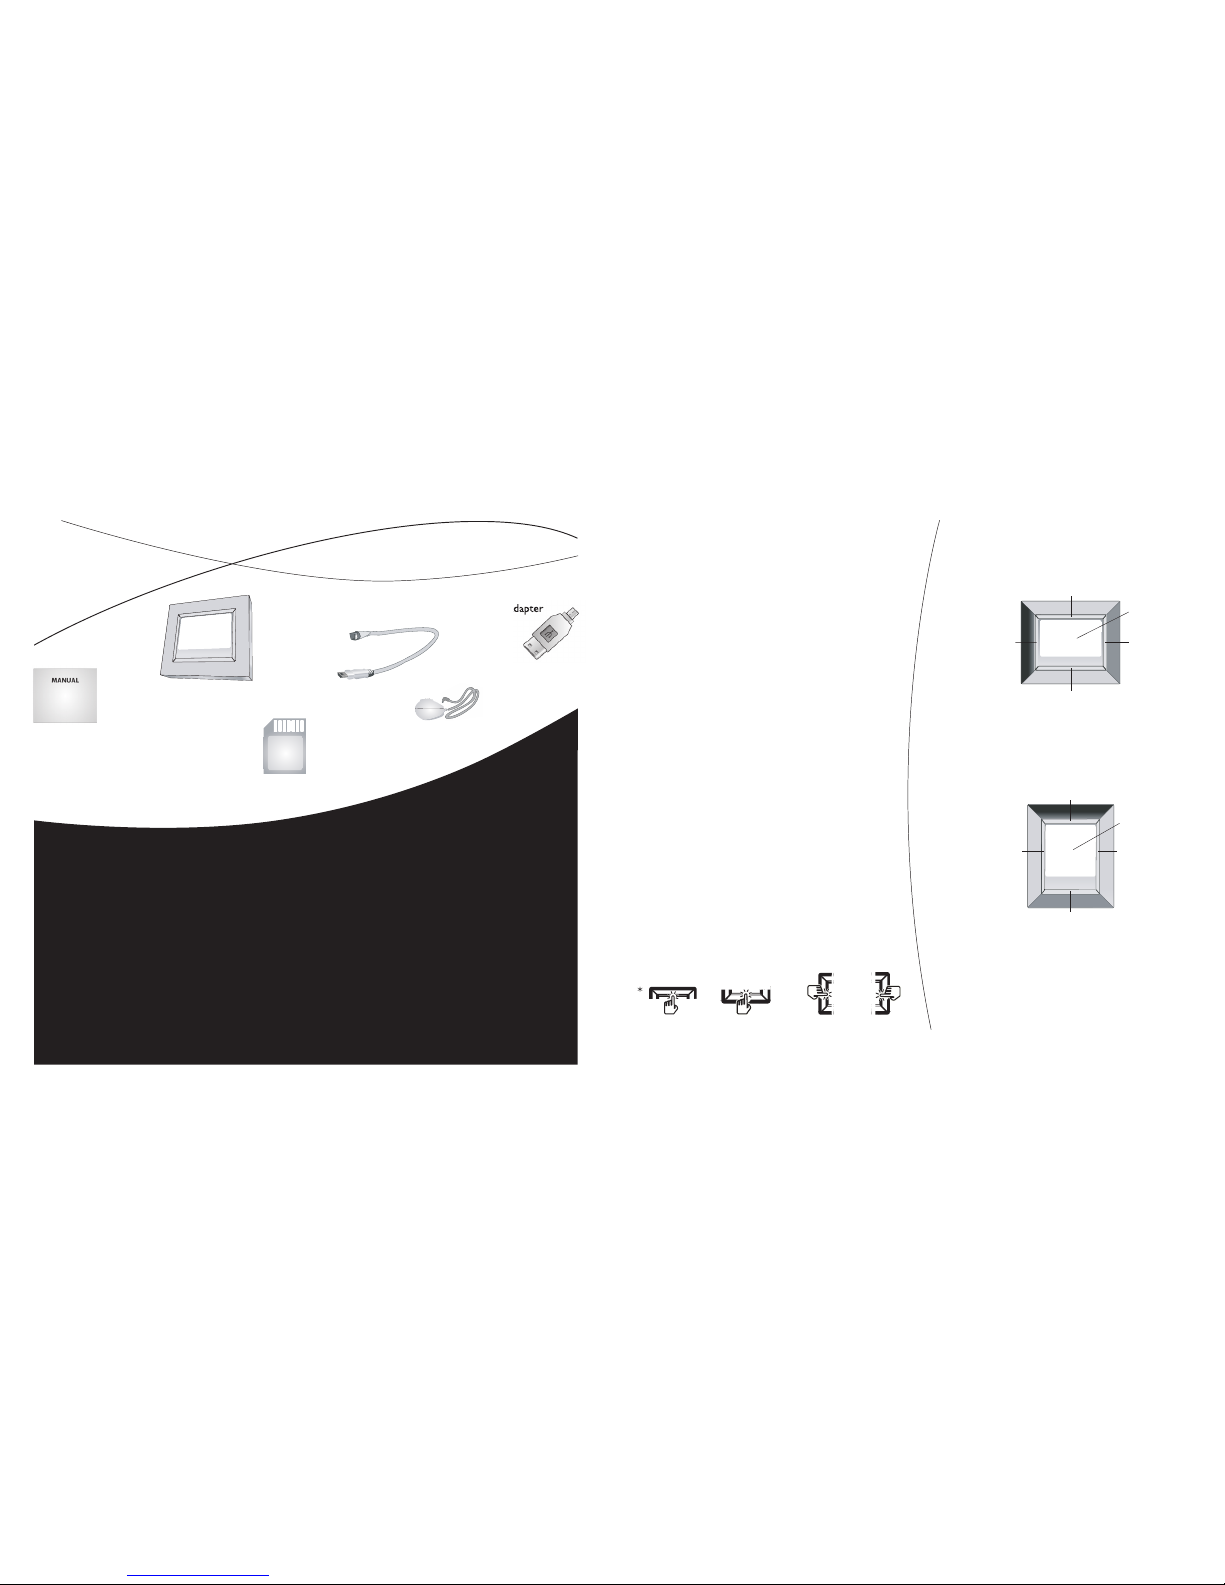
Touch any part of the matting to show
Touch and hold the bottom and right
matting* simultaneously. After a few
seconds, the screen changes to show
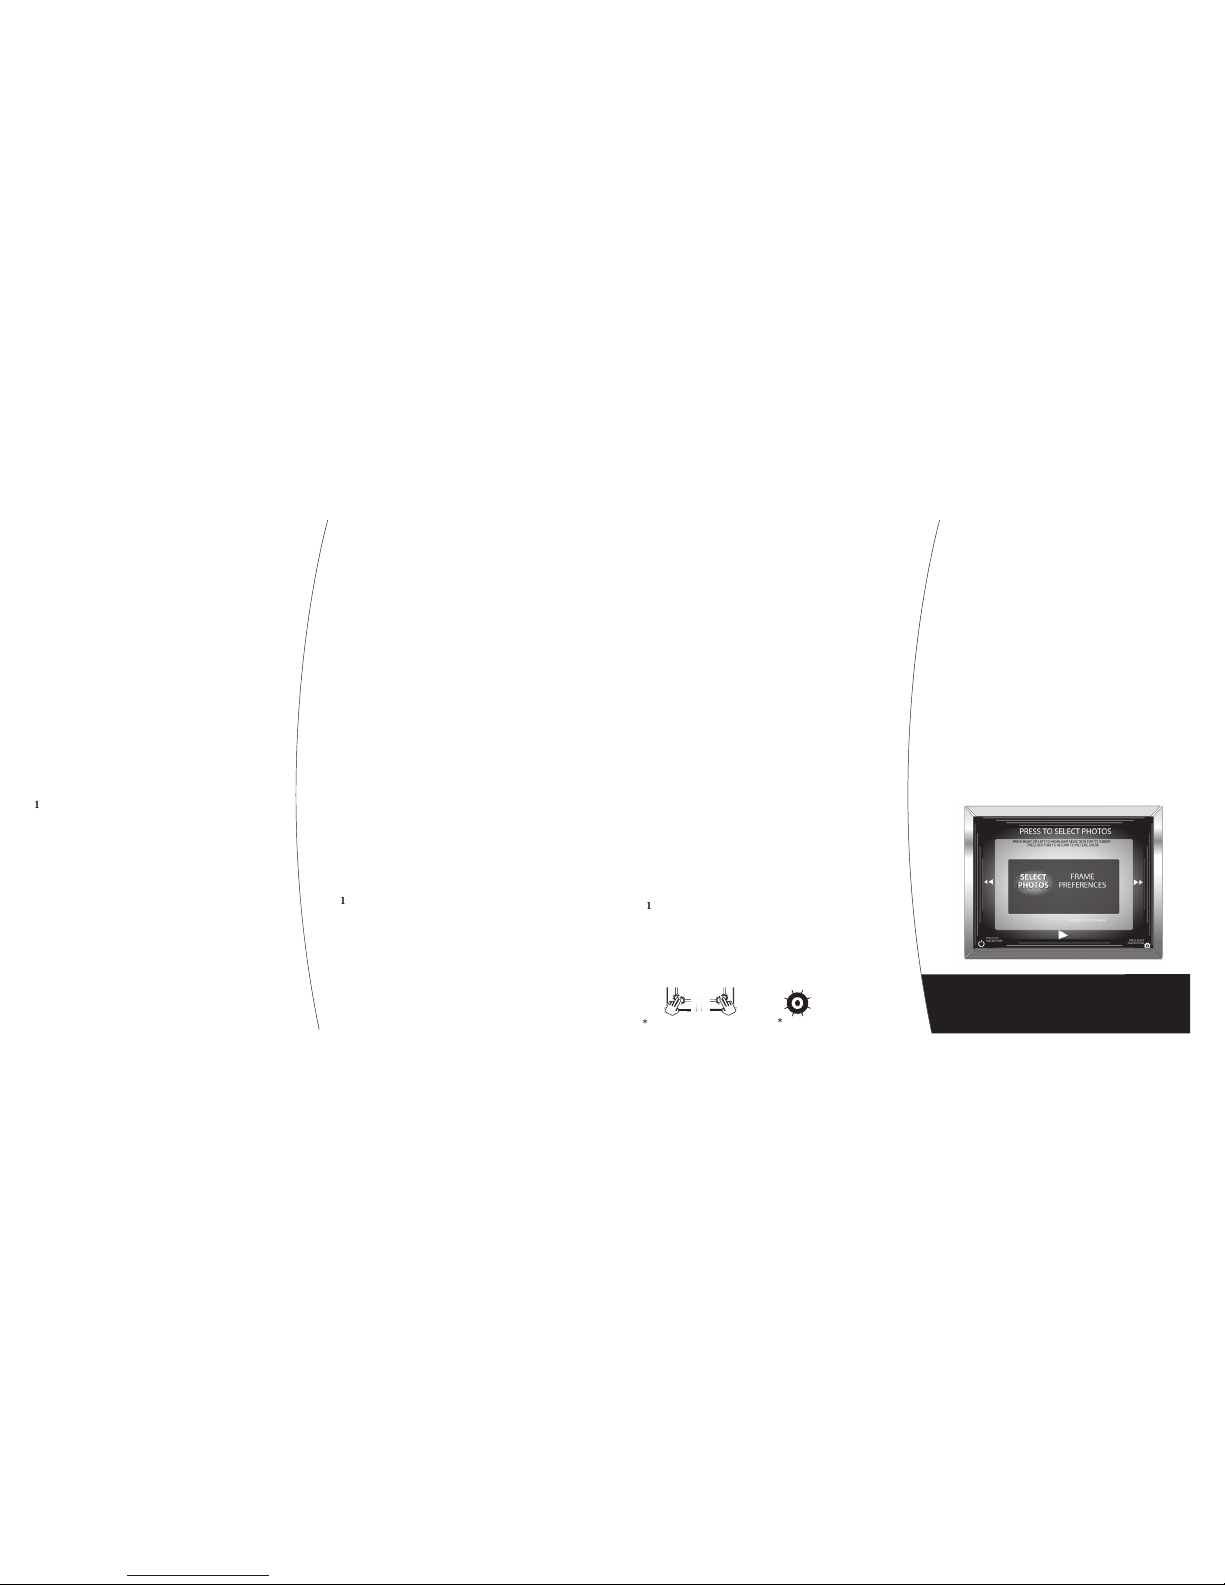
If necessary, touch the left or right
matting to choose Select Photo.
Touch the top of the matting to select
Frame Preferences. e screen changes
again to show the list of selection
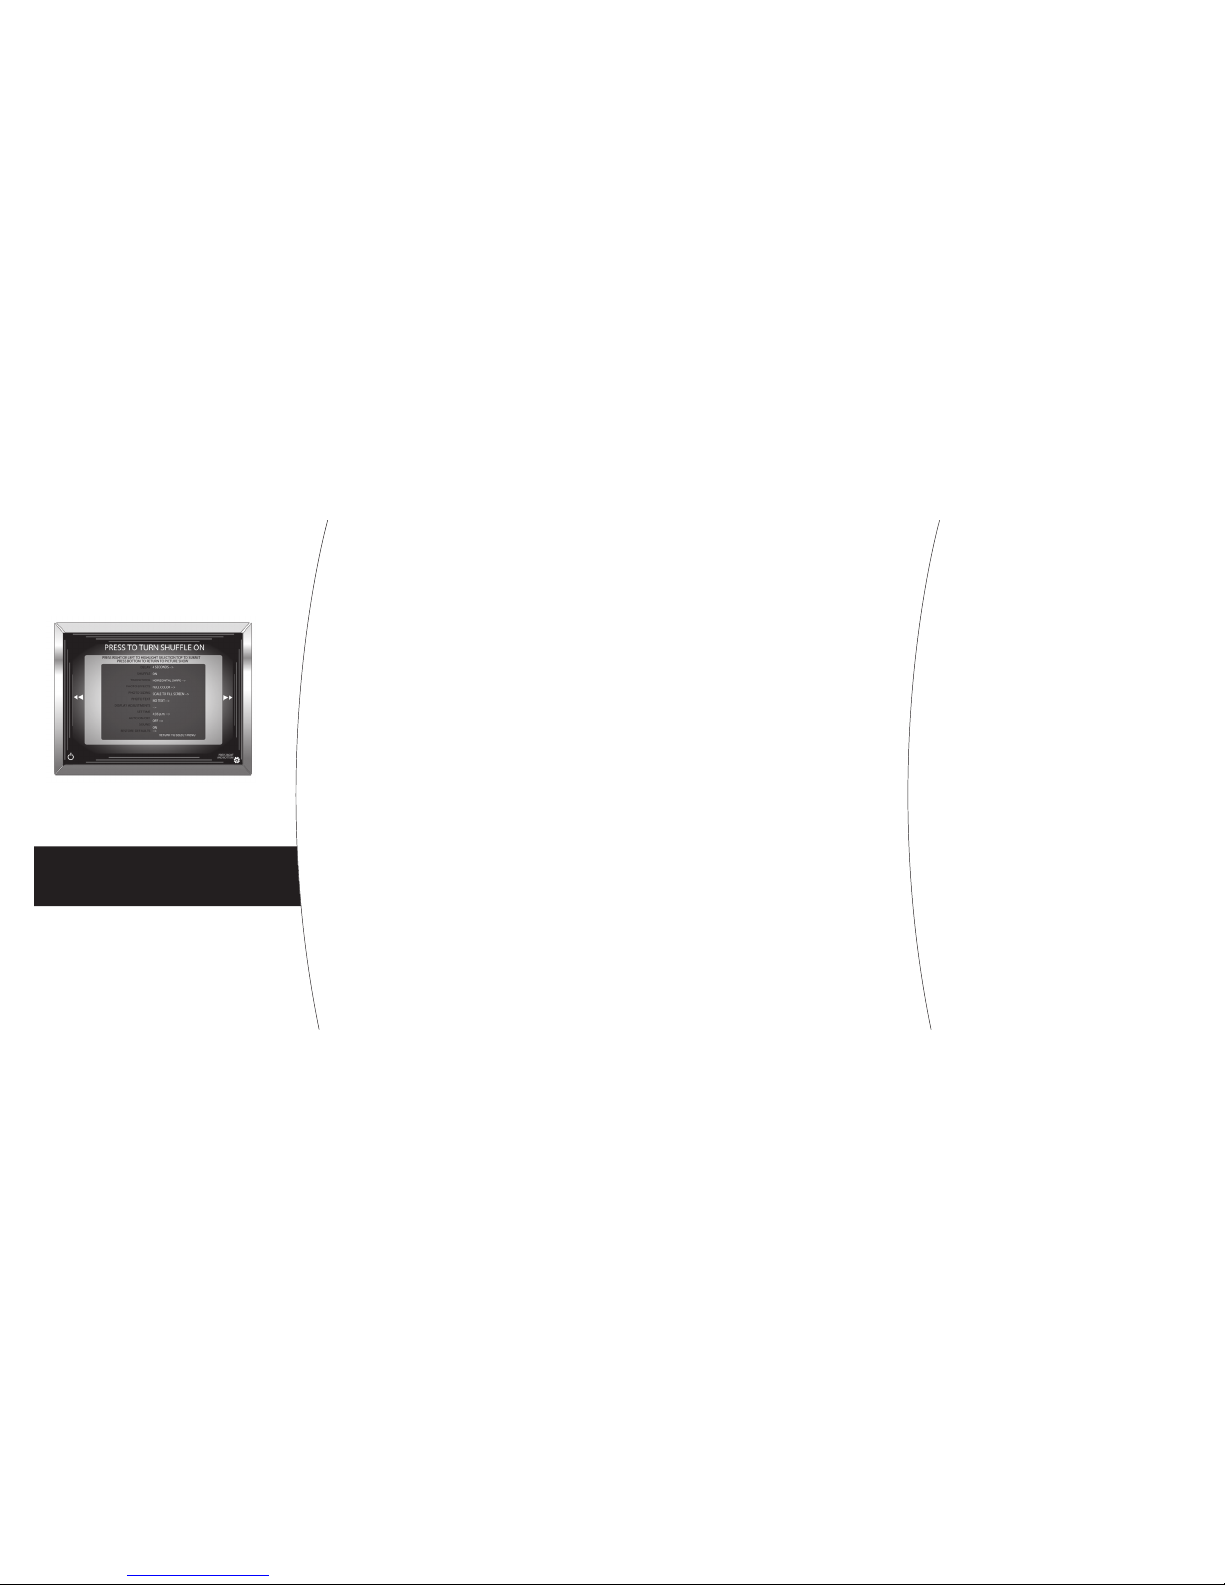
Choose a selection option by touching
the right matting to move one line down
in the list or the left matting to move one
THE FOLLOWING SECTIONS BRIEFLY DESCRIBE
EACH OF THE SELECTION SETTINGS. FOR MORE
INFORMATION ON THESE SETTINGS, SEE THE HELP
SECTION OF CAGIC’S WEBSITE AT WWW.CAGIC.COM.
To rotate a photo in your frame, fi rst
touch any part of the matting to show
the onscreen controls. en touch the
top of the matting to rotate the photo
To continue turning the photo
touch the top of the matting again
until you are satisfi ed with the photo’s
To remove a photo from your frame:
Touch any part of the matting to show
If the photo onscreen is not the one
that you want to remove, follow the
directions below to fi nd the photo:
To move one photo forward in your
To move one photo backward in your
Touch and hold the top matting.
After a few seconds, your Picture Show
pauses, and the delete symbol will
appear in the center of the screen. Touch
the matting again to confi rm you wish to
To remove another photo, navigate to
photo as detailed in Step 2. Touch top
Touch the bottom of the matting to
resume your Picture Show.
You can lock any photo in your frame to
prevent the photo from being removed.
For more information, see “Lock a Photo
LOCK A PHOTO IN YOUR FRAME
Locking a photo prevents it from being
removed from the frame, either by
accident or to make room for another
photo as you copy more photos to the
frame. To lock a photo in your frame:
Touch any part of the matting to show
If the photo onscreen is not the
one that you want to lock, follow the
directions below to fi nd the photo:
To move one photo forward in your