Cairn PP22 User manual

Knowledgebase > Hotel Support Contacts > Door Entry Systems > PP22 Portable Programmer Technical
Manual - Onity
PP22 Portable Programmer Technical Manual -
Onity
Graham Ackinclose - 2021-08-11 - Comments (0) - Door Entry Systems
Portable Programmer
Technical Manual
2. DESCRIPTION
The portable programmer (PP) is a data transporter between the main computers and
locks.

2.1. Connectors
(1) “Jack” connector : Make the connection with the locks to transfer or receive information
to or from them.
(2) Nine pins connector (DB9). Communicate with the HT24 systerm. The connection can
be done trough the encoder (HTCOM, ref: CB22485) for HT22 systems or trough the
Win distributor with same cable for HT24/28 systems (PC connected to the Win
distributor).
2.2. Keypad
It switches the portable programmer ON. Also goes back to the main menu during an
operation (CLEAR function).
It switches the portable programmer OFF. The PP will also switch off automatically after
30 seconds of no operation.
Pressing this button the menu options will appear.
When a menu option is selected starts the communication with the lock.
They select the options of the menu.
3. CONNECTIONS OF THE PORTABLE PROGRAMMER

3.1 With the locks
The connection between the PP and the locks is done with the “Jack” connector. The
connection is done by inserting it into the connector of the lock placed in its bottom, for
HT Locks or the bottom of the Reader Part in an Advance Lock.
To use the PP with an Advance Lock a “jack adapter “ is necessary. See picture below:
3.2 With the computer program
The connection with the computer program (trough Win distributor) is done with the nine
pins connector (DB9) of the PP. It can be done in two ways:
1- Trough the card encoder (HT22 system)
With the connector cable HTCOM (CB22485). The cable must be connected to the
HTCOM DB9 female connector of the HT22 and DB9 female connector of the PP.
2- Trough the Win Distributor (HT24/28w system).
Using the same cable as above, connect the DB9 female connector called PP of the
Win Distributor and the DB9 female connector of the PP.
4. OPERATION
The portable programmer has a program with five options. These options can be
selected with the MENU button. The five options of the PP are the following:
1. UPDATE
Updates the codes and timetables of the locks.
2. READ OPENINGS

Take the openings recorded in each lock, and retrieve them in the computer.
3. TEST
Option to test the status of the lock. Type of lock, firmware version, door number, date
and time, checks the batteries and checks the lock switches (handle, reader, privacy)
4. INITIALISE
Programs the lock and gives the door number to the door.
5. OPEN
It allows opening a lock without using a card, normally for emergency situations.
4.1. Transfer data to the programmer
For safety reasons, the portable programmer clears its memory every 24 hours. So, it is
necessary to transfer the data to the PP every day if it is needed. To download the data
to the Portable programmer, do the following:
1. Type the access password that allows using the maintenance menu of the HT24
program.
2. In the maintenance menu select the option “Load Portable programmer”
3. Connect the portable programmer and turn it on (see connections in this manual).
4. If there are openings registered one screen like the showed bellow will appear.

To see the openings recorded in the PP press <READ> else press <LOAD>.
5.- If the option selected is <READ> a screen with the openings will appear. See
picture below:

Then the information can be printed to a file or printer.
6.- If the option selected is <LOAD> a screen will appear asking if the Openings
Recorded in the PP would be erased.
If there is need to keep the openings in the PP press <NO> and if you want to Load the
PP with the locking plan press <YES>
7. The screen will show several options is <YES> is selected:

Select doors to open
- All Doors
All Doors will be loaded in the Portable Programmer
- Doors needing updates
Just load the Doors which need an updating
- Select Doors
Chose the Doors to be Loaded in the PP
- Download time tables and codes
The computer transfers to the PP the time tables and the codes of all the selected
locks (the memory of the PP accepts up to 300 locks). Use this option to initialise or
update the locks.
- Download only time tables.
The computer transfers to the PP only the time tables. This option is used to change
the time to the lock.
- Open Doors
Click this option to be able to open the doors with the PP
- Password
Writing a four digit code the PP needs that Code to open whatever door of the
installation
Then when the <LOAD> button is pressed the Locking plan will be loaded in the PP
When the data transfer is over, the PP will automatically turn off. Disconnect the PP. It
is ready be use to work with the locks.
4.2. Update function

This function updates the code and the time tables (or only the time tables if the codes
are not uploaded) of the locks.
Steps to follow:
1. Upload the PP with the locking plan.
2. Turn the PP on and select the option 1. UPDATE by pressing the <MENU> key.
3. All the locks that are not updated yet will appear in the list of the PP pressing the
cursor keys. When a door is updated it will disappear from the list.
4. With the cursor keys select the door to be updated.
5. Connect the PP to the lock (using the “Jack” terminal wire) and press the <TX>
button. If the data transfer has been successfully finished, the follow message will
appear:
4.3. Read openings from the locks
The PP extracts the last openings recorded by the lock. This openings will be recorded
in the PP until they are erased with the HT24 program.
To read the openings from a lock follow the following steps:
1. Turn the PP ON. With the <MENU> button select the option 2. READ OPENINGS.
2. Connect the jack to the lock and press the <TX> button. The PP will read all the

openings from the lock. The follow messages will appear in the PP:
a) Reading
b) Setting clock
c) End communication
3. With the openings loaded, read them in the HT24 program. To read the openings use
the “Lock openings” option in the Security menu.
A message “Connect the portable programmer and turn it ON” will appear. After
connecting and turning it on, the list of the collected openings will appear. Select the
lock from the list and the openings register will appear.
4.4. Test
With this function, the portable programmer checks the status of the locks.
Steps to follow:
1. Turn the portable programmer ON and with the <MENU> button select the option 3.
TEST.
2. Connect the PP to the lock and press the <TX> button.
3. The first screen will shows the electronic module type (HT24F, HT28F, HTProx or
OLHM (Advance)), and the firmware version.
4. Pressing the <TX> key again the time of the lock will appear. The PP will check also
the batteries level.

5. Press <TX> and the message “Switches test” will appear. The switches test will
check all the switches of the lock. Follow the following steps:
a) Turn the handle or the lever handle. If the switch operates well, the PP will display:
HANDLE SWITCH
b) Turn the privacy button. If the switch is well and the cable is well connected, a
message will appear:
PRIVACITY
c) Insert a card in the lock. The message will be:
CARD SWITCH
6. Press the <TX> button again. The message END OF TEST will appear.
7. If there is any card which does not open the door, to know the reason stay in the
<TEST> option and enter the card. It will shows then the reason why that card is not
opening the lock. This option is only available for locks made after April of 1995.
4.5. Initialise the locks
This option programs and personalizes the lock for each installation. The PP transfers
to the lock the installations codes, the number of the lock, the time and date, etc. The
steps to follow to initialize them are:
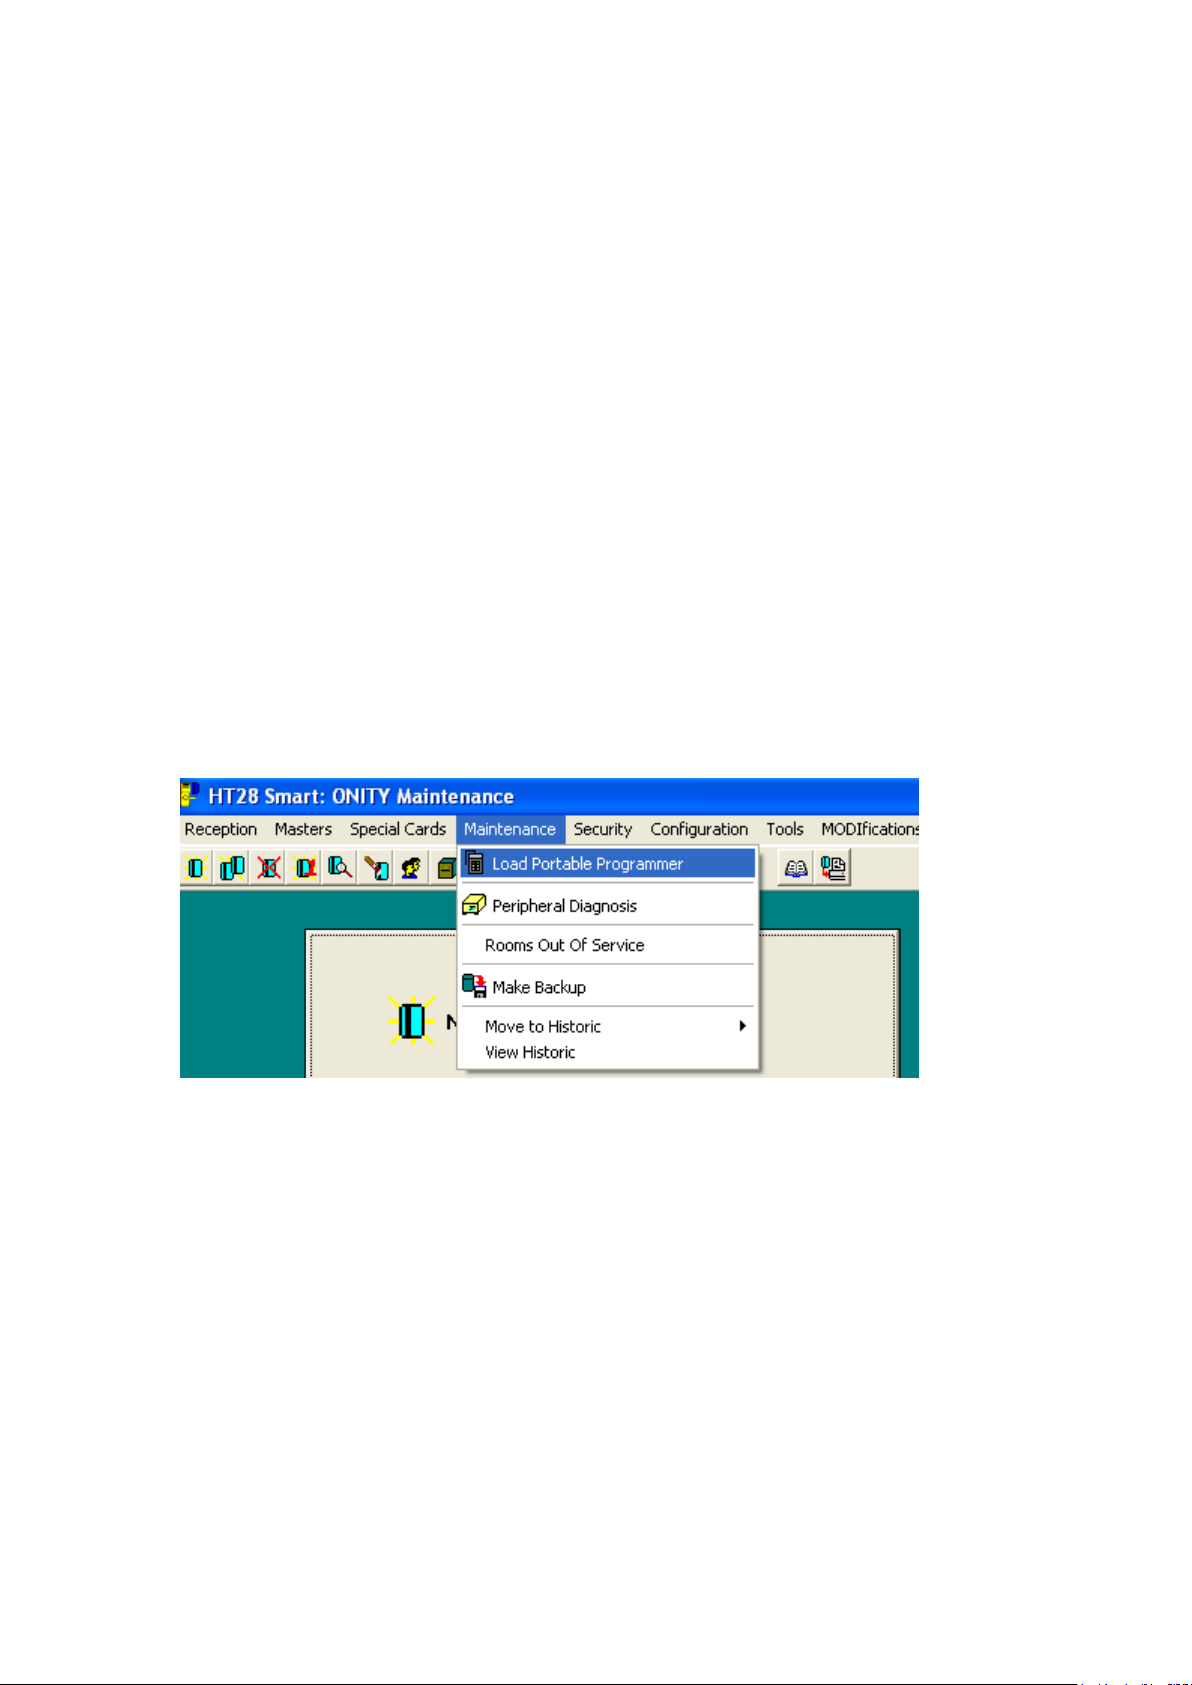
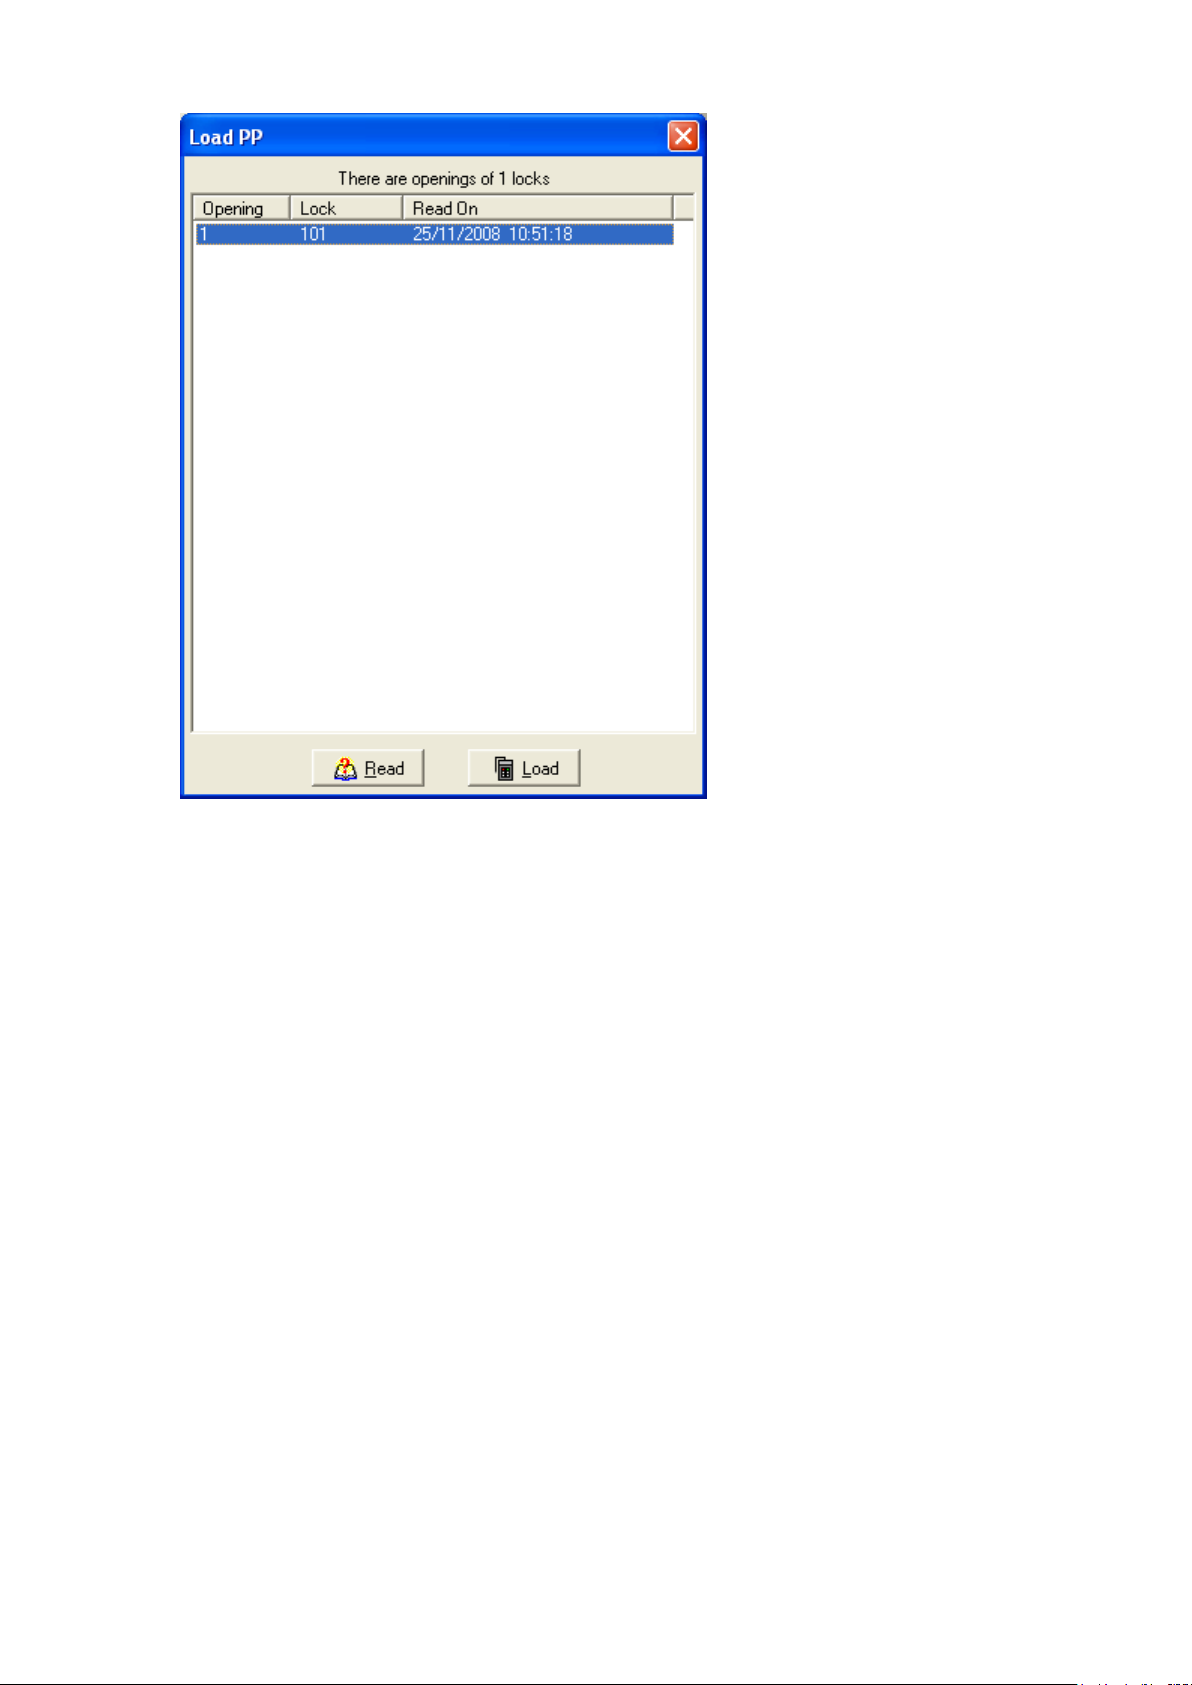
1. Load the portable programmer with the locking plan. See section 4.1.
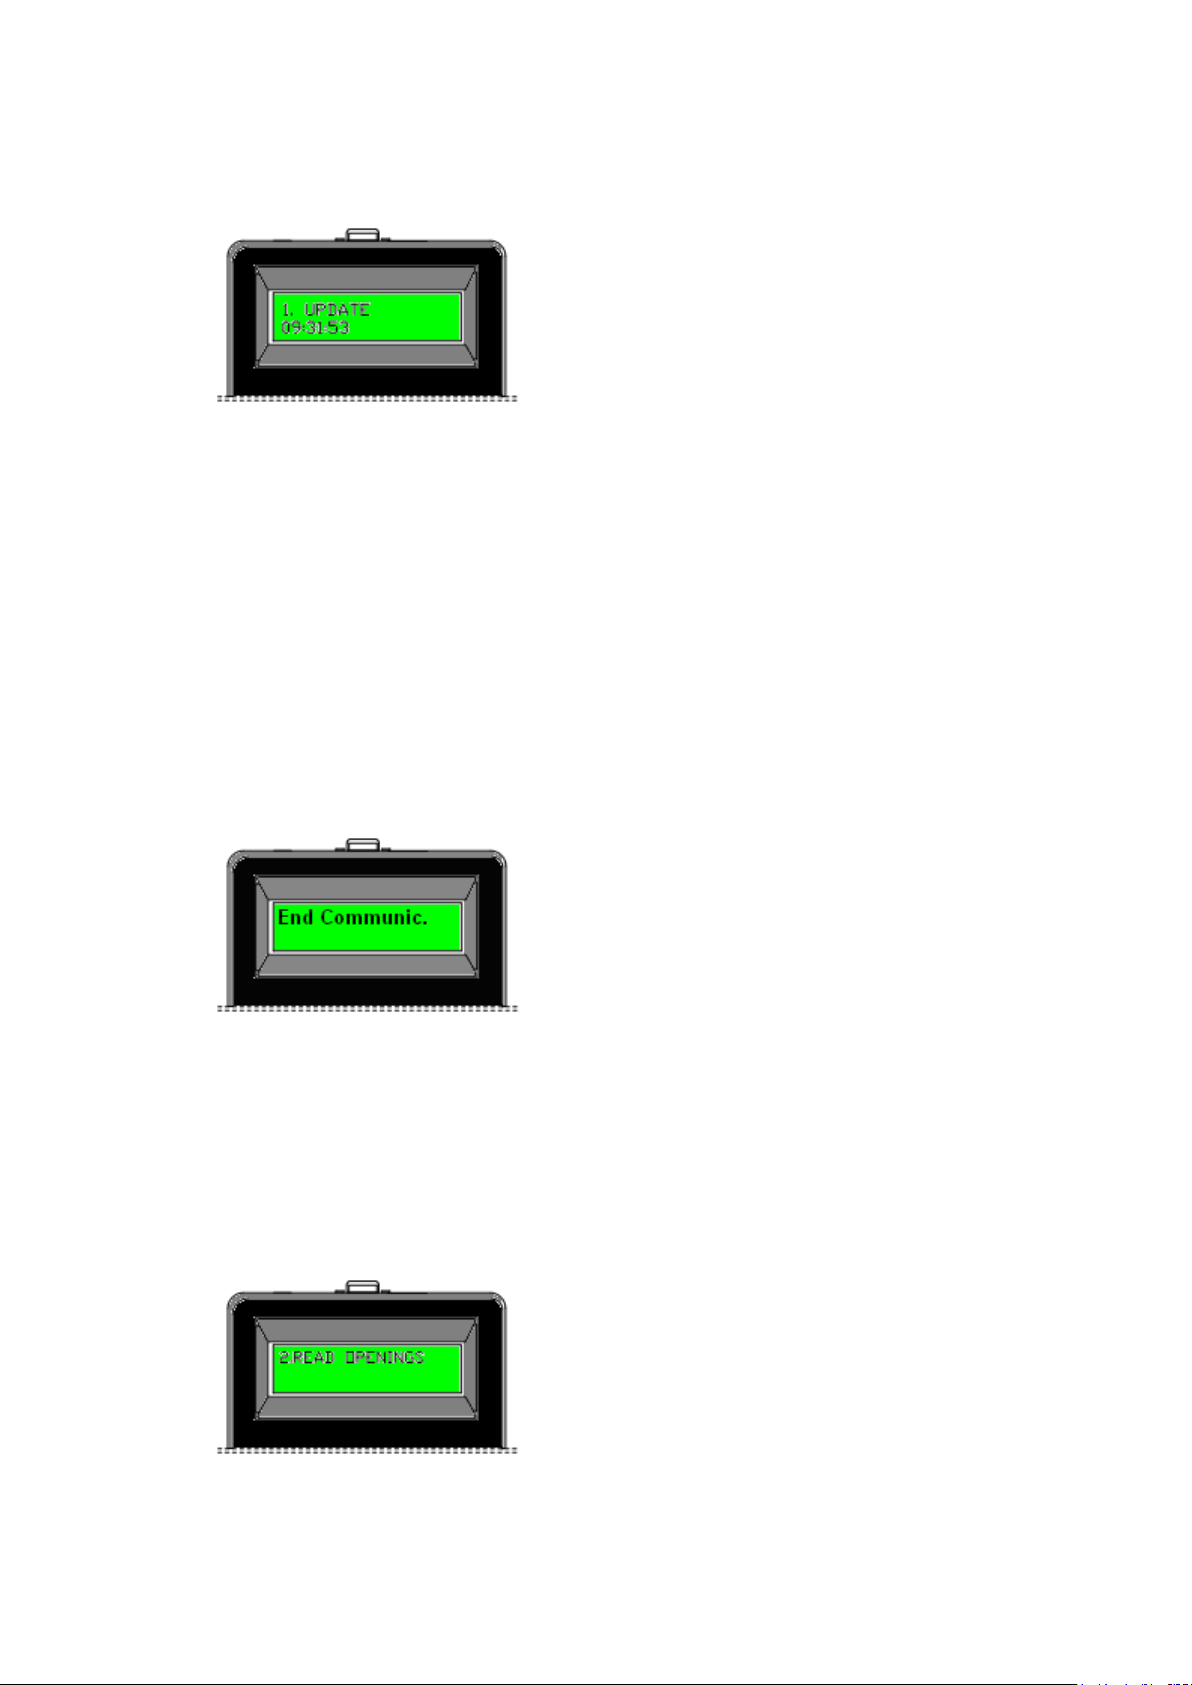
2. Turn the PP on and press the <MENU> button until the option “4. INITIALISE”
appears.
3. Press the <TX> button. The display will show:
4. DOOR?
With the cursor keys select the number of the lock to initialize.
4. Press the <TX> button again, the message “Connect to the lock “ will appear.
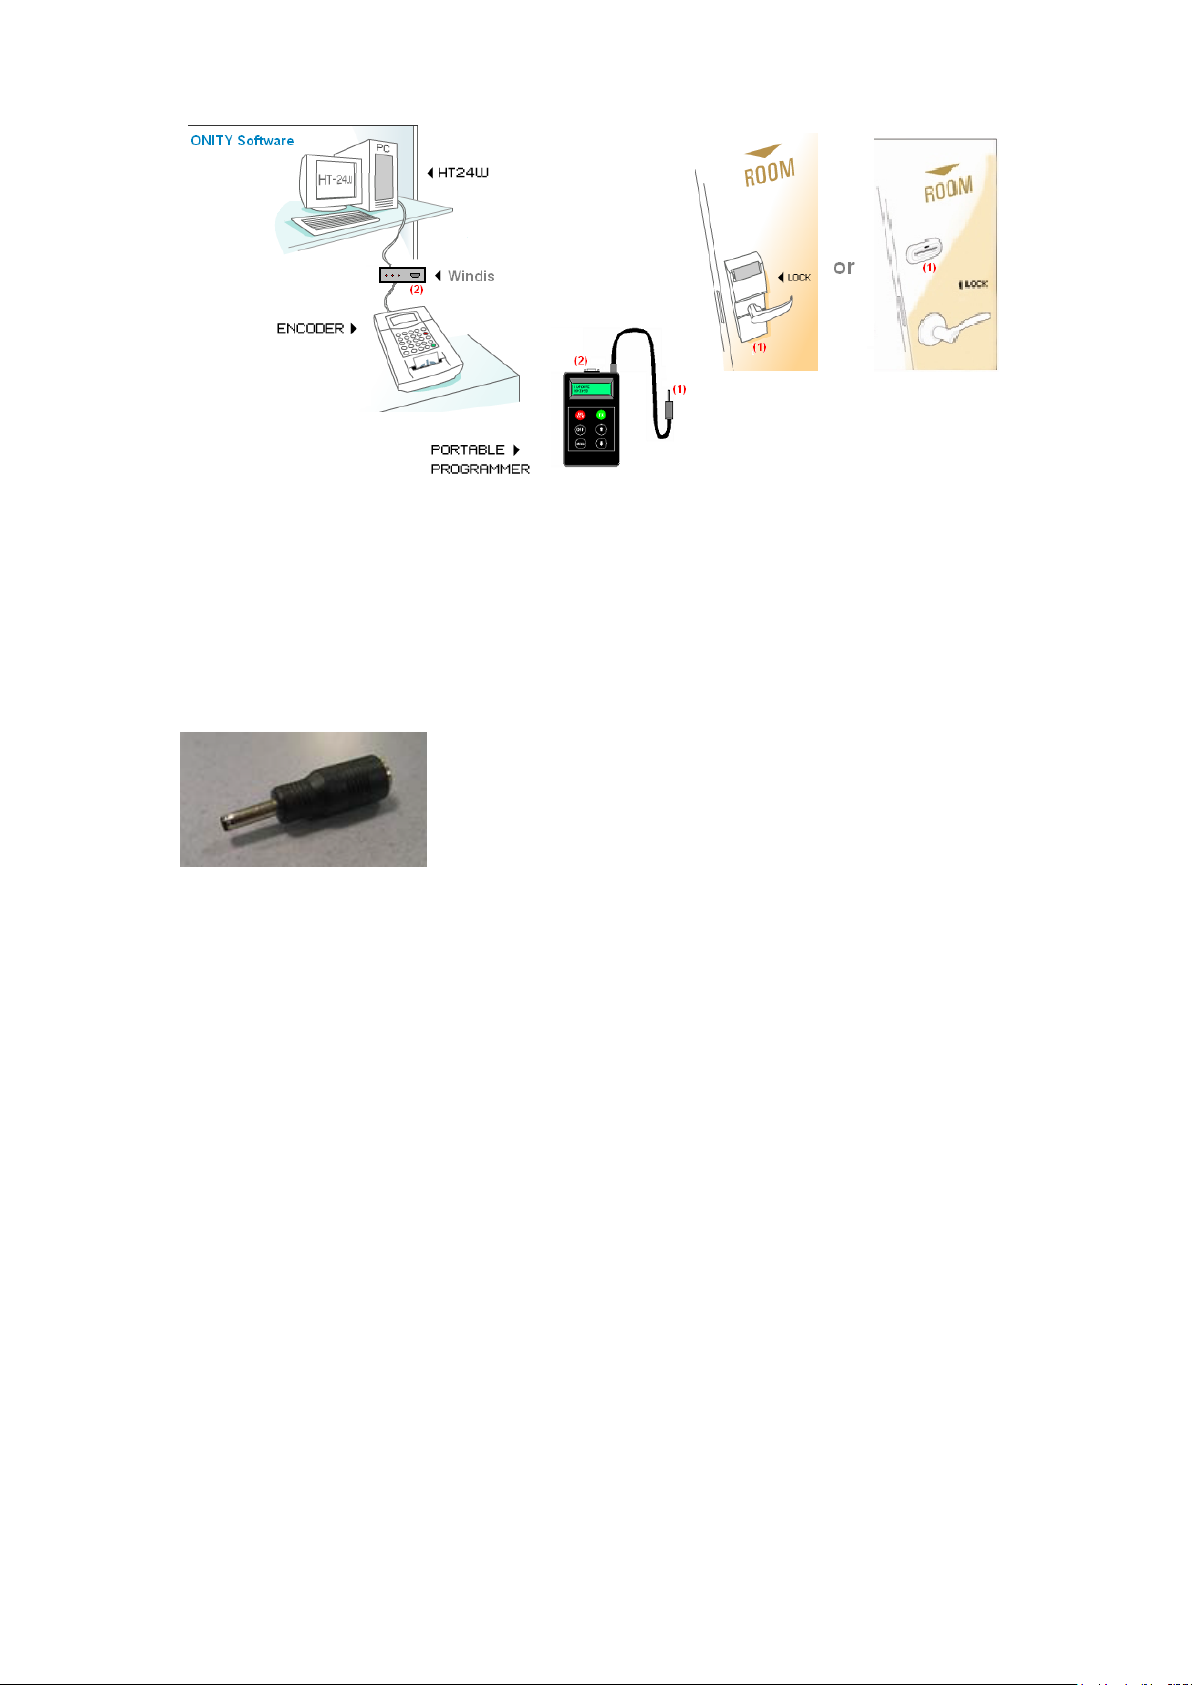
5. Connect the PP with the lock using the “Jack” connector. The communication
between the PP and the lock will be stabilized automatically and the following messages
will be displayed:
WRITING
SETTING TIME

END OF COMMUNICATION
After these steps, the lock is initialized.
4.6. Open the locks
With this option, all the locks of the installation can be opened, also if the lock has not
batteries. Of course the OPEN DOORS option when loading the locking plan has to be
selected.
1. Turn the PP ON and press the <MENU> key until the option “ 5. OPEN> appears.
2. Depending on the way that the portable programmer has been uploaded (with or
without personal code) the following messages will appear:
a) Without personal code:
Connect the portable programmer to the lock and press the <TX> button. The green
light will flash. Press down the handle and the door will be opened.
b) With personal code:
Connect the PP to the lock and press the <TX> button. the message “ PERSONAL
CODE: “ will appear. With the cursor keys select the first number and press <TX> select
the second number and repeat the operation for the 4 numbers. When all the numbers
are inserted and it is correct the lock will be opened.
5. MAINTENANCE
5.1. Replacing the batteries
The only maintenance needed for the portable programmer is to change the batteries
when they are low.
To replace the batteries you need to remove the battery cover in the back part of the
programmer, remove the old ones and insert the new being careful to observe the
correct polarity.
Table of contents