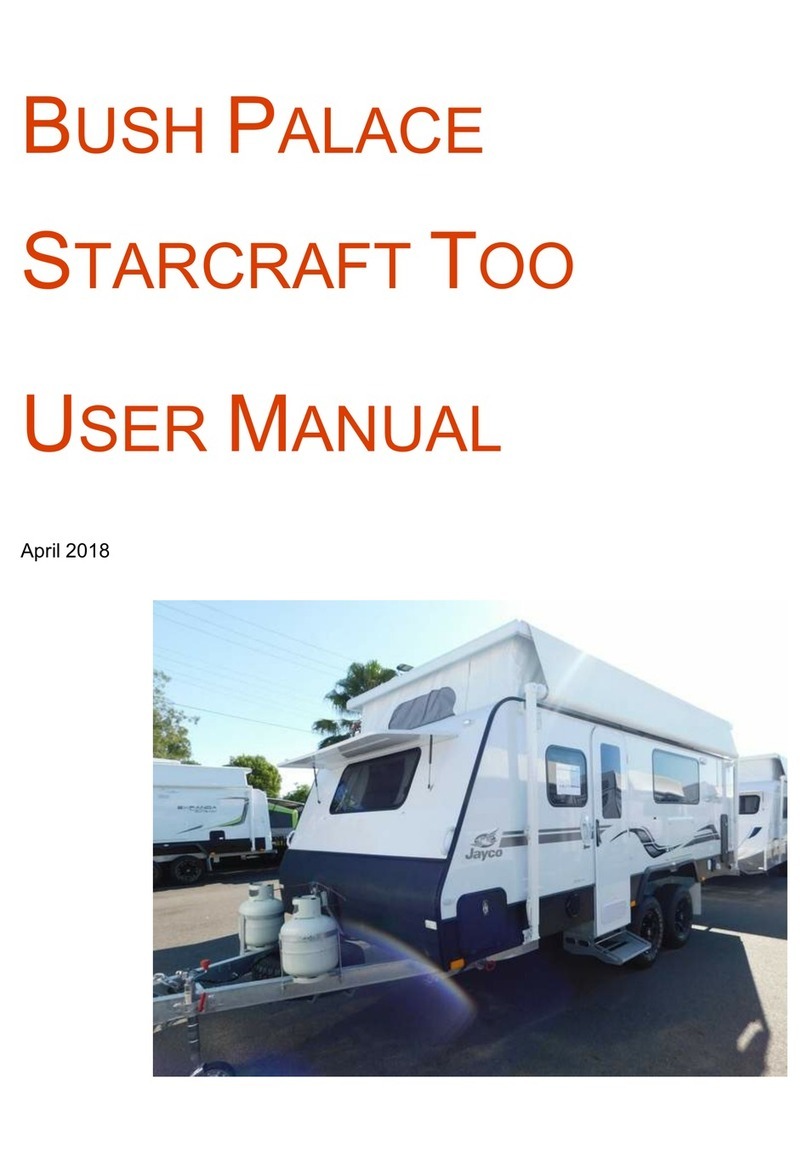
Camp-Inn 550 Street User manual

2

3
Table of Contents
Table of Contents 3
Safety Instructions 4
VIN tag & Serial # 5
Packing Your Camp-Inn™5
Setting Up 6
Locks 7
Kitchen
Hatch 8
Table 9
Stove 10
Propane Tank 11
Reserve Propane 12
Counter Lids 13
Sink/Water
Filling Tank 13
Tank Meter 14
Water Hook-up 15
Fresh/Gray Tanks 16
Water Troubleshoot 17
Winterize 18
Sanitize Water 19
LP Gas Outlet 20
Electrical
7-Prong Connector 21
AC Power 22
Bulb Replacement 23
Fuses 24
DC Disconnect 25
Volt / Amp Meter 25
Battery
Meter 25
Charging 26-29
TriMetric 27
Solar Charging 28
Troubleshoot Charge 29
Battery Life 30
Battery Isolator 31
Replacement 31
RaindropTM
Couch / Bunk Beds 32-33
Options
Alcan Cover 34
Receiver Hitch 34
Windscreens 34
Furnace 35-38
Air Conditioner 39
Door Screens 39
Roof Fan 40
Drop-Front Desk 41
Roof Rack 41
TV / Radio 42-43
GPS Tracker 44
Maintenance
Cleaning 45-47
Wheel Bearings 48
Brakes 48-51
Jacks 52
Storage 53
Towing Basics
Vehicle/Hitch Ratings 54-55
Hitching 57
Unhitching 58
Using Trailer Brakes 59
Downhill / Uphill 59
Overdrive 60
Backing 60
Tires 61
Specifications 62
Maintenance Schedule 62
Teardropping Tips 63-64
Electrical Schematics 65-69
Index 70-72

4
.IMPORTANT SAFETY INSTRUCTIONS .
FOR USING YOUR CAMP-INNTM TRAVEL TRAILER
ALWAYS make sure that your ball hitch is properly tightened and that
the ball hitch is the correct size.
NEVER unlock or rotate the hitch jack if the hitch is not on the ball
hitch.
ALWAYS block the trailer wheels BEFORE unhitching to prevent
rolling.
NEVER leave the stove unattended when the burners are lit.
ALWAYS keep a fire extinguisher nearby when using a stove.
NEVER slide a lighted stove into the storage area in the kitchen
cabinets.
ALWAYS turn off the propane tank when the stove or furnace is not
in use.
ALWAYS turn off the propane tank when you are traveling.
If you smell propane, NEVER use a flame to detect a propane leak.
Check for leaks using a soap solution on connections.
NEVER use candles, fuel type lanterns, fuel type heaters, or any other
oxygen depleting device inside the sleeping compartment.
ALWAYS open a side window or fan at least ½ inch for ventilation
and to reduce condensation when the sleeping area is occupied.
ALWAYS pull the trailer entirely off of the roadway before changing
a flat tire.
NEVER use the leveling jacks to lift both wheels off the ground at the
same time, while the trailer is in use.
If you are new to trailer towing, refer to “Towing Basics” section
before hitching, unhitching or towing your Camp-InnTM trailer.
This list does not include all possible hazards.
If you have any questions about using your trailer safely, contact
Petenwell Ind. LLC

5
VIN Vehicle Identification Number and Serial Number
The trailer’s VIN tag is located near the tongue jack on the trailer frame.
The Serial Number tag shows the build number of your trailer. Camp-
InnTM trailers are numbered sequentially as they are built. The tag is
mounted to the hatch hinge on the left side of the kitchen.
Packing your Camp-Inn™
The first rule for happy camping in your Camp-Inn™ is:
"Take only what you need! "
It is very easy to over pack and take along too much STUFF. After a few
trips you should be able to weed out the extras. The large cabin area
allows you to take along items such as beach toys, lawn chairs, canopy,
screen tent, etc… but, think about each item and determine if it is
necessary. You will have to unload these items to use the bed.
One trick for packing your teardrop is to put a piece of masking tape on
every item you pack. When you use each item, remove the piece of tape.
After 2-3 trips, if the item still has tape on it, consider leaving it home.
Exceptions will be emergency items such as spare tire, first aid kit, fire
extinguisher, or raincoats.
Pack heavy items as close to the axle as possible. Heavy items packed
directly above the axle will not affect the trailer tongue weight. See the
section on Teardrop Tips for more information on weight distribution.
Trailers often ride rougher than your car or tow vehicle. Items may
bounce or shift during travel. Objects rubbing together may cause wear
spots or scratches. Placing pieces of cloth between dishes or pans will
reduce wear. Also, it helps to pack items tightly. If objects can't move,
they can't wear. Pack the heavier items to the bottom. Avoid using glass
containers. Camp-Inns have a "frying pan slot" in the under-counter
storage compartment. This "frying pan slot" gives you a place to store
heavy fry pans, keeping them from beating against other dishes.
Items packed in the duffel shelf may not stay put if you hit bumps or
brake hard. It is best to place your duffels on the bed during travel.
During travel, clothes, on coat hangers, can be hung from the coat hooks
inside the cabin. When you stop for the night, these clothes can be laid
on the car seat to get them out of the way.
Make sure all doors and hatch are latched and locked during travel.

6
Setting Up Your Camp-Inn™
When you arrive at your campsite, select a suitable spot for setting up
your trailer. You should pick an area that is fairly level. Care should be
taken to ensure that there is adequate clearance for opening of side doors
and the rear hatch. Keep in mind that the area behind the trailer will be
your kitchen/dining area.
Wheel Chock Blocks - Before unhitching your trailer, even on level
ground, place chock blocks ahead and behind both trailer wheels to
prevent the trailer from rolling.
If you have the parking brake option, it is recommended that you
still use the chock blocks, in case the brake lever is accidentally
released.
If the camping area is extremely sloped, it is recommended to leave the
trailer hitched to the tow vehicle for stability. An extremely sloped area
would be any area that slopes more than 8 inches in the length of the
trailer or slopes more than 6 inches from side to side.
Leveling - If the ground in the campsite is not level, the trailer should be
leveled, side-to-side. Adjust the leveling jack on the ―Low‖ side first.
When the trailer is level side-to-side, lower the leveling jack on the
―High‖ side until it touches the ground.
(TIP) (no pun intended) A food can laid on it’s side, on the countertop,
will indicate level side to side. The can will roll toward the low side.
Also, small adhesive backed levels are available at many hardware
stores and may be attached to the trailer cabinets or body for reference.
NEVER use the leveling jacks to lift BOTH wheels off the ground at
the same time, while the trailer is in use.
Unhitch the trailer from the tow vehicle and use the hitch jack to raise or
lower the tongue, leveling the trailer, front to back.
(TIP) You can use the doors as level indicators. Open the doors so they
are perpendicular to the trailer. If the tongue is low, the doors will swing
further open. If the tongue is high, the doors will swing closed. Adjust
the tongue jack up or down until the doors do not swing.
You may leave the trailer hitched to the tow vehicle and still use the
tongue jack to raise the head of the bed slightly for stability and to reduce
movement. Remember to fold jack before driving.

7
Locks
When locking the doors and hatch, you may need to move the handle
slightly up and down to allow the locking mechanism to properly engage.
Do not force the lock, as this may damage the locking mechanism or
break off the key. If the lock does not turn freely even when wiggling the
handle, it may need to be lubricated.
To prevent sticking, door locks and hatch locks should be lubricated
regularly with a silicone spray lubricant. Silicone lubricants work better
than graphite, since the silicone helps repel water. After severe weather,
you should lubricate the locks to displace any water that may have
entered them.
Main Door Locks:
The main doors may be locked from both the inside and the outside. The
inside and outside locks are independent from each other.
If the inside door latch is locked, you will not be able to unlock it
from the outside.
For this reason, do not leave small children alone inside the trailer as
they may accidentally lock the doors and be unable to understand how to
unlock them. (this has happened)
Also, when packing, make sure there are no boxes or other items that
may accidentally bump the latching lever and lock it. (this has happened)
If this happens and a window is unlocked, open the window and push in
the screen. You can get a tool to reinstall the window screen at a
hardware store.
If both inside latches and both windows are locked, the only way to open
the door is to remove the hinge. NOTE: You must re-seal the screws with
urethane caulk. Apply a small dab in the hole before replacing screw.
If the outside door lock is locked, you will not be able to unlock it
from the inside.
When you open the door, do not lock the outside lock. If you are inside
the trailer and the wind blows the door shut with sufficient force, it may
engage the latch. (this has happened) If this happens open the window
and push out the screen. Hopefully you have the key to unlock the door.
Rules to Lock By:
If you are outside: Make sure BOTH inside latches are un-locked.
If you are inside: Make sure BOTH outside locks are un-locked.
Lock the hatch and doors during travel.

8
Kitchen
Hatch
To open the rear hatch
Unlock the handle and rotate it
vertically. Slowly raise the
hatch. If the hatch gives any
resistance, look under it to make
sure the prop rod is sliding
smoothly. On new trailers, you
may need to assist the prop rod,
with one hand, sliding it along
the groove on the bottom end.
Make sure that the prop rod slide
is fully moved to the bottom end
of the groove before releasing
the hatch.
To close the rear hatch
When closing the hatch, rotate
the handle vertically to pull back the locking bars.
Slowly raise the hatch with one hand lifting in the center of the hatch.
Using your other hand, slide the bottom end of the prop rod upward,
along the groove. As you guide the bottom end of the prop rod toward
the top of the groove, slowly lower the hatch. The hatch should close
smoothly without binding. If you feel resistance, do not force the hatch
closed. Check for items that are too tall and may be hitting the hatch,
ribs or prop rod. Check that the prop rod is sliding along the groove
properly.
When new, the hinge may slide from side to side. If the hatch binds
when almost closed, open hatch at least half way and then tap it
sideways to center the hatch.
Close the hatch fully and rotate the handle horizontally, extending the
locking bars, latching the hatch. Without rotating the handle, tug on the
handle to ensure that both sides of the hatch are properly latched.
Hatch should be locked during travel.
Periodically clean out gutters along side gaskets and along hinge.

9
Table -
The kitchen table is easily set up at
the campsite or roadside stop.
Fully read through this step-by-step
procedure before attempting to set
the table up for the first time.
1.Before removing the table from
the stowed position, Pull leg and
pivot, while pulling, to the
vertical position.
2.In the vertical position, make sure
leg snaps down into the stops.
3.Remove the folded table from the
countertop and rotate it so the leg
is pointing down and the hinge
end is lined up with the trailer
hinge.
4.Pull the latch lever back and slide
the hinge halves together.
5.Rotate the brace on the bottom
of the table so it is at right
angle to the table.
6.Open the tabletop.
7.Level the table by pushing the
button on the leg and moving
lower leg section in or out of
the upper section.
8.To stow the table, reverse the
order of these steps.
9.Pull leg before pivoting it to the
horizontal position.
10. When stowing, slide the guide
pins into the holes in the cabinets.
Side Table - The Side
Table/Cooler stand sets up in a
similar manner and stows on top of
the cooler with the fire extinguisher
away from you.

10
Stove - The Camp-Inn™stove gives you a two-burner stove with a
propane tank mounted on the trailer tongue. The stove slides under the
left cabinet during travel or when not needed. When needed, the stove
slides into the cooler storage area.
Using the kitchen stove
To use the stove, it must first be slid out of its storage area.
1.Grasp the elbow, on the front right corner of the stove, and slide the
stove fully to the right. The entire stove should be out from under
the cabinet. It will not be centered in the alcove.
2.Make sure that both burner valves are in the OFF position.
3.Turn ON the propane tank at the front of the trailer.
4.Light a match or lighter and hold it near the burner.
5.Slowly open the burner valve until the burner lights.
6.Do not leave the stove unattended when lit.
7.If the flame burns yellow, or soots the bottom of pans, adjust the air
mixture screws on the sides of the valves to make the flame burn
blue with slight yellow or red tips.
Stowing the kitchen stove
To safely stow the kitchen stove, follow these steps:
1.Never slide the stove under the cabinet when burners are lit.
2.Turn off burners and allow the stove to cool.
3.Clean the stove with mild soap and water.
4.Turn off the propane tank at the front of the trailer.
5.Grasp the elbow at the right of the stove and slide the stove fully to
the left under the cabinet.
6.If you do not have a cooler, fill the cooler storage area with the side
table or other gear to prevent the stove sliding out.
During the first use, the paint will burn off some of the burner and grate.
You may repaint it with a high temperature paint, like barbecue grill
paint, or leave it unpainted.
Because the stove has high output burners, it may be necessary to
use a “flame tamer” or “simmer ring” to be able to simmer or limit
heat. Flame tamers and simmer rings are available at sporting goods
stores, cooking stores, or online.

11
Refilling LP (Liquefied Propane) Tank:
The propane tank should be removed from the trailer for refilling. Make
sure the tank valve is shut off before unhooking. When reconnecting the
tank, check for leaks with a soap and water solution on the joints.
The tank is equipped with an OPD (Overfill Prevention Device).
Where to find propane refilling stations while on the road:
• Truck stops • RV Dealerships • Private Campgrounds
• Hardware Stores • Farmer Co-Ops • U-HaulTM store
The tank mount bracket is sized to also fit a 20 lb. propane tank (size on
most BBQ grills). In some situations you may want to use a 20 lb. tank.
For cold weather, when running the furnace for extended periods.
Extended trips to remote areas.
20 lb. tanks can be exchanged rather than refilling.
Keep in mind that exchanging is usually more expensive than refilling.
Checking Propane Tank Level:
To check the propane tank level with the LP Gas Meter:
1. Run the stove or furnace for at least 5 minutes.
2. While running stove or furnace, Check Gas Meter.
3. Read the scale based on the ambient temperature.
Green –Plenty of fuel
Yellow –Fuel level low
Red –Empty or almost empty
To check the level of the tank without a LP Gas Meter:
1.Unhook the propane tank.
2.On the collar, look for the Tare Weight. (example TW 13.4) This is
the weight of the empty tank.
3.Weigh the tank of propane on a scale. (example 18 lbs.) A Fish scale
works well and is portable and compact.
4.Subtract the measured weight from the Tare Weight. Result is the
weight of propane in the tank. (18 –13.4 = 4.6 lbs of propane)
5.The small Camp-InnTM tank, when full, will hold about 9-10 lbs of
propane. (example tank above is about 1/2 full)
6.A 20 lb. tank will only hold about 16-17 lbs. of propane.*
*Propane tanks are filled only 80-85% of their rated capacity. This
allows a head space for generation of the gaseous form of propane.
Weigh your tank before “topping off” and let the filling attendant
know about how much you will need. This avoids the attendant telling
you that your tank is broken because it won’t take the full amount of
propane.

12
Reserve Propane Adapter:
Your Camp-Inn trailer is supplied with a
reserve propane adapter. This adapter allows
you to use a disposable 1 lb. propane tank, if
you run out of propane in the trailer’s main
tank.
To INSTALL the Reserve Propane Adapter:
1.Turn off the stove and furnace and
extinguish any nearby cigarettes or flames.
2.Wear gloves when installing and removing
the Reserve Propane Adapter. **
3.Disconnect the propane hose from the
trailer’s main propane tank.
4.Install the Reserve Propane Adapter to the
end of the propane hose.
5.While holding the ADAPTER FIRMLY
with one hand, screw the disposable 1 lb. propane tank onto the adapter
with the other hand.**
6. Do not over-tighten the disposable propane tank.
7.Position the propane tank so it is upright or upright at an angle. DO
NOT place the tank horizontal or with the top downward.
To REMOVE the Reserve Propane Adapter, hold the ADAPTER
FIRMLY with one hand and unscrew the disposable 1 lb. propane tank
with the other hand.** Then remove the Adapter from the propane hose.
** The Adapter attaches with left-hand
threads to the hose, and right-hand threads
to the disposable tank. Tightening the tank,
without firmly holding the Adapter, may
loosen the hose connection. If this happens,
propane may vent from the loose connection.
Venting propane is VERY COLD and will
make the Adapter very cold. If this happens,
you may get frostbite if you touch the
Adapter or other connections with bare
hands.

13
Under Counter Storage Lids:
The under counter storage lids can be removed for
cleaning. Open the lid fully. Operate the release at
the bottom of the hinge at "A" and pull outward on
the bottom of the hinge.
To reinstall, hook the hinge first at "B" then push the
bottom of the hinge "A" inward until it locks.
The lids are adjusted to fit one side and thus are not interchangeable.
Sink / Water System:
If your Camp-Inn™has a water system, you can operate the sink either
from the onboard water tank or connected to city water. Your trailer
comes with an eight-gallon fresh water tank, an electric, on demand,
water pump and an eight gallon ―gray‖ (drain) water tank.
Drain –Flush –and Fill the freshwater tank before each use.
Filling the fresh water tank
Unlock and open the water
access door on the side of the
trailer.
Flip up the blue tab on the
water tank fill cap.
Unscrew the cap.
Fill the tank from a hose.
You can fill the tank from a
jug, pitcher or bucket but you
may need a funnel.
The tank has a vent line that comes out on the underside of the trailer.
When water flows as a continuous stream out of the vent line, the tank is
full.
If you attempt to fill too quickly, the water may overflow, from the
water fill, before the tank is full.
You can’t fill the freshwater tank directly from the city water quick
connect.

14
Water Tank Meter–
If your trailer has a water tank meter,
you can easily monitor the level of the
fresh water and gray water tank.
Pushing the ―FRESH‖ button will
display the current level of the fresh
water tank.
F (full), 2/3, 1/3, or E (empty)
These levels are only approximate.
Pushing the ―WASTE‖ button will
display the current level of the gray water tank.
Pushing the ―BATTERY‖ button will display the approximate charge
condition of the battery. Use the Battery Scale: C, G, F, L.
C (charging), G (good), F (fair), or L (low).
NOTE: The F, 2/3, 1/3, E scale is the WATER scale ONLY.
Switching ON the Water System- The pump on the freshwater
system is activated by a switch .. The switch is located in the kitchen
on the right side, near the AC and DC outlets. The switch is lighted in the
ON position.
If you will not be using the water for a while, turn the pump switch OFF.
A slightly dripping faucet may drain the freshwater tank in only a couple
hours. Turning OFF the switch will prevent any dripping as well as
prevent unnecessary pump cycling.
When the fresh water tank is empty, the pump will continue to run, even
if the faucet is turned OFF. Turn OFF the pump switch when the tank is
empty. Running the pump for a few minutes without water will not hurt
the pump. Extended running without water may overheat pump motor.
Do not store items in front of the switch during travel. Items may
accidentally activate the switch if items shift or bounce.

15
Cleaning the sink trap- The sink trap and drain are best kept
clean through regular preventative maintenance. If you use a
liberal amount of soap when washing dishes, that will help keep
grease from clogging the trap and gray water tank.
If the sink seems to be draining slower, try the following:
1. Check that the gray water tank is not full.
2. Pour a large kettle of boiling water down the sink drain.
3. Put 2 tablespoons of RV tank enzymes in the drain and add about
one cup of water. Let stand for 24 hrs. Then repeat #2.
4. The tank vent line may be clogged.
5. If all else fails, the trap may be removed for cleaning. You must
remove the left side access panel under the sink and the false floor
below the sink. Remove the screw holding the sink drain. Cut the
zip tye on the bottom of the trap to disconnect. The zip tye will
need to be replaced when re-assembling.
Water System Hookup Kit-
A- City water quick connect and
pressure regulator.
B- Four feet long water hose.
C- LP accessory gas line.
Using the City Water Hookup –
Install the city water quick connect and
pressure regulator (A) on the male end
of a regular garden hose. Attach the
female end of the garden hose to the spigot at the campsite. To attach the
quick connect to the trailer, pull back on the outer sleeve, push the quick
connect onto the male connector on the trailer, then release the outer
sleeve. Tug on the connection to make sure it is secure before turning on
the water spigot.
Using the Water Outlet –The water outlet will operate either from the
onboard water tank, or from city water, when it is hooked up. To operate
the water outlet from the onboard water tank, turn on the water pump
switch (see Switching on the Water System).
When you are connected to city water, the pump is bypassed and the
water outlet will use city water only.

16
The four foot long hose (B) has been supplied for connection to the water
outlet. Use this hose to fill buckets, add a sprayer, fill the freshwater
tank, or connect to other water accessories.
If you want to fill the onboard freshwater tank when you are connected
to city water, connect your four feet long hose to the water outlet and use
the hose to fill the tank.
Draining the fresh water tank-The fresh water tank is on the sink
side of the trailer. Simply remove the cap, on the drain spout, at the
bottom rear of the tank. To more fully drain the tank, raise the tongue of
the trailer. Remember to reinstall the cap before you fill the fresh water
tank. The tank should be filled with water during storage in non-freezing
weather.
The gray water tank- The sink drains into a "gray water" holding
tank. The gray water tank is the same size as the fresh water tank.
About the time that your fresh water tank is empty, your gray water tank
will be full. If the gray water tank is over filled, wastewater will flow
out of the tank's vent, under the trailer.
To drain the gray water tank, remove the cap from the gray water
tank drain valve, then open the drain valve. The valve handle is on the
underside of the valve. To more fully drain the tank, raise the tongue of
the trailer.
You may want to attach a short hose to the drain valve to help direct
the flow away from the camper or down a sewer drain.
NEVER use a gray water hose for filling the fresh water tank.
NEVER use the fresh water hose for draining the gray water tank.
In a campsite with sewer hook-up, you may leave the gray water
drain hose installed at all times.
Remember to close the valve and reinstall the cap when you are
finished draining the gray water tank,
During warmer weather, you may want to add a small amount of RV
holding tank enzymes or chemicals to control the odor. Add the
enzymes or chemicals by pouring them in the sink drain and flushing
them down with some water. These chemicals are available at all RV
dealerships.
If the drain valve clogs due to particles in the wastewater, you may
unscrew the drain valve to clean it. This will also drain the tank more
quickly and completely.

17

18
Winterizing the water system-
Before freezing weather, fully drain both the fresh water and gray
water tanks.
Turn on the pump switch and run the faucet until it starts bubbling air.
Shut off pump switch.
Reinstall the tank drain caps.
Add at least two quarts of RV (non-toxic) antifreeze (usually pink) to
the freshwater tank.
Turn on the pump switch and run the faucet until antifreeze comes out
of the faucet.
Run at least two cups of anti-freeze into the sink drain to protect the
trap and gray water tank.
Burp the side water outlet until antifreeze comes out (turns pink).
Spray the sprayer until antifreeze comes out (turns pink)..
Turn off the pump switch.
Unscrew the head of the sprayer and shake out remaining water.
Leave the sprayer head off until warmer weather returns.
DE-Winterizing the water system-
Before using a water system that has been winterized, you should fully
rinse the freshwater tank.
Screw on the sprayer head if it was removed during winterizing.
Fill the freshwater tank and drain it by removing the drain cap.
Fill the freshwater tank again.
Turn on the pump switch and run the faucet for at least 1 gallon of
water.
Run the sprayer for about one minute.
Run the side water outlet for at least one quart of water.
The water may still have a slight RV anti-freeze odor or taste, but RV
anti-freeze is non-toxic.
If you feel the odor or taste is still too strong, drain the tank again,
refill, and run the faucet, sprayer and side outlet.

19
Sanitizing the fresh water tank-
If your water has a strange odor, color or taste:
This process involves using bleach. Be careful to not spill or spray
bleach or bleach/water onto clothing, skin or eyes. Refer to bleach
container for safety precautions and what to do in case of spills or
personal contact.
Drain the fresh water and gray water tanks fully.
Replace tank drain caps. (do not mix them up)
Sanitize the fresh water tank by adding one (1) cup (8 oz.) of plain
(unscented) chlorine bleach into the tank fill. (use funnel)
Fill the tank, the rest of the way, with fresh water.
While filling, run at least one quart of water out of the faucet.
Also, run some water out of the sprayer and side water outlet. (do not
get bleach/water on clothing, skin, or eyes)
Fill tank until water runs out of the vent tube.
Let stand for one hour.
Drain the tank by running the faucet and allowing the bleach water to
go down the sink drain. This will help clean out the gray water tank as
well.
Refill the freshwater tank with fresh water,
Run at least one gallon of water out of the faucet, sprayer and side
water outlet. (do not get on clothing, skin, or eyes)
Drain the tank again by removing the drain cap.
Replace cap and refill fresh water tank with fresh water.
Run at least one gallon of water out of the faucet, sprayer and side
water outlet.
Top off tank. Fresh water is now ready to use.
After this treatment, the water may have a slight chlorine taste and
odor, but that will go away with time and is not harmful.
After about 1 hour, remember to drain the gray water tank.
Calcium/Lime Treatment-
If the water you used has a high calcium or lime content it may foul the
tank sensors and add scale to the faucet. Once a season, or more often as
needed:
Drain the fresh water and gray water tanks fully.
Replace tank drain caps. (do not mix them up)
Add two gallons of white vinegar to the fresh water tank.

20
Fill the rest of the tank with water
Run water out of the faucet, sprayer, and side water outlet.
Let sit overnight.
Run the water through the faucet and into the gray water tank.
Let that sit over night.
Drain the gray water tank.
Refill both tanks with fresh water.
Run water out of faucet, sprayer and side.
Drain both tanks.
You are now ready for storage, or refill tanks with fresh water for use.
Repeat more often for harder water.
LP Gas Outlet
Using the LP Gas Outlet –The LP
Gas Quick Connect allows you to use
LP accessories such as barbecue
grills, lanterns, or water heaters. A
four feet long LP gas hose is provided
for easy connection to your
accessories. One end of the LP gas
hose has a male quick connect for
attaching to the trailer. The opposite
end of the LP gas hose has a fitting like those on the disposable 1 lb.
propane tanks. This hose can be attached to any LP accessory that
normally uses the 1 lb. disposable tanks.
ALWAYS - turn off the main trailer LP tank before connecting or
disconnecting the LP gas quick connect.
Connect the LP gas hose to your LP accessory BEFORE connecting
to the trailer’s LP gas quick connect.
Turn off your LP accessory and disconnect the trailer’s LP gas quick
connect BEFORE disconnecting the LP gas hose from your LP
accessory.
You can use both the trailer’s stove and the LP accessory at the same
time.
This manual suits for next models
7
Table of contents