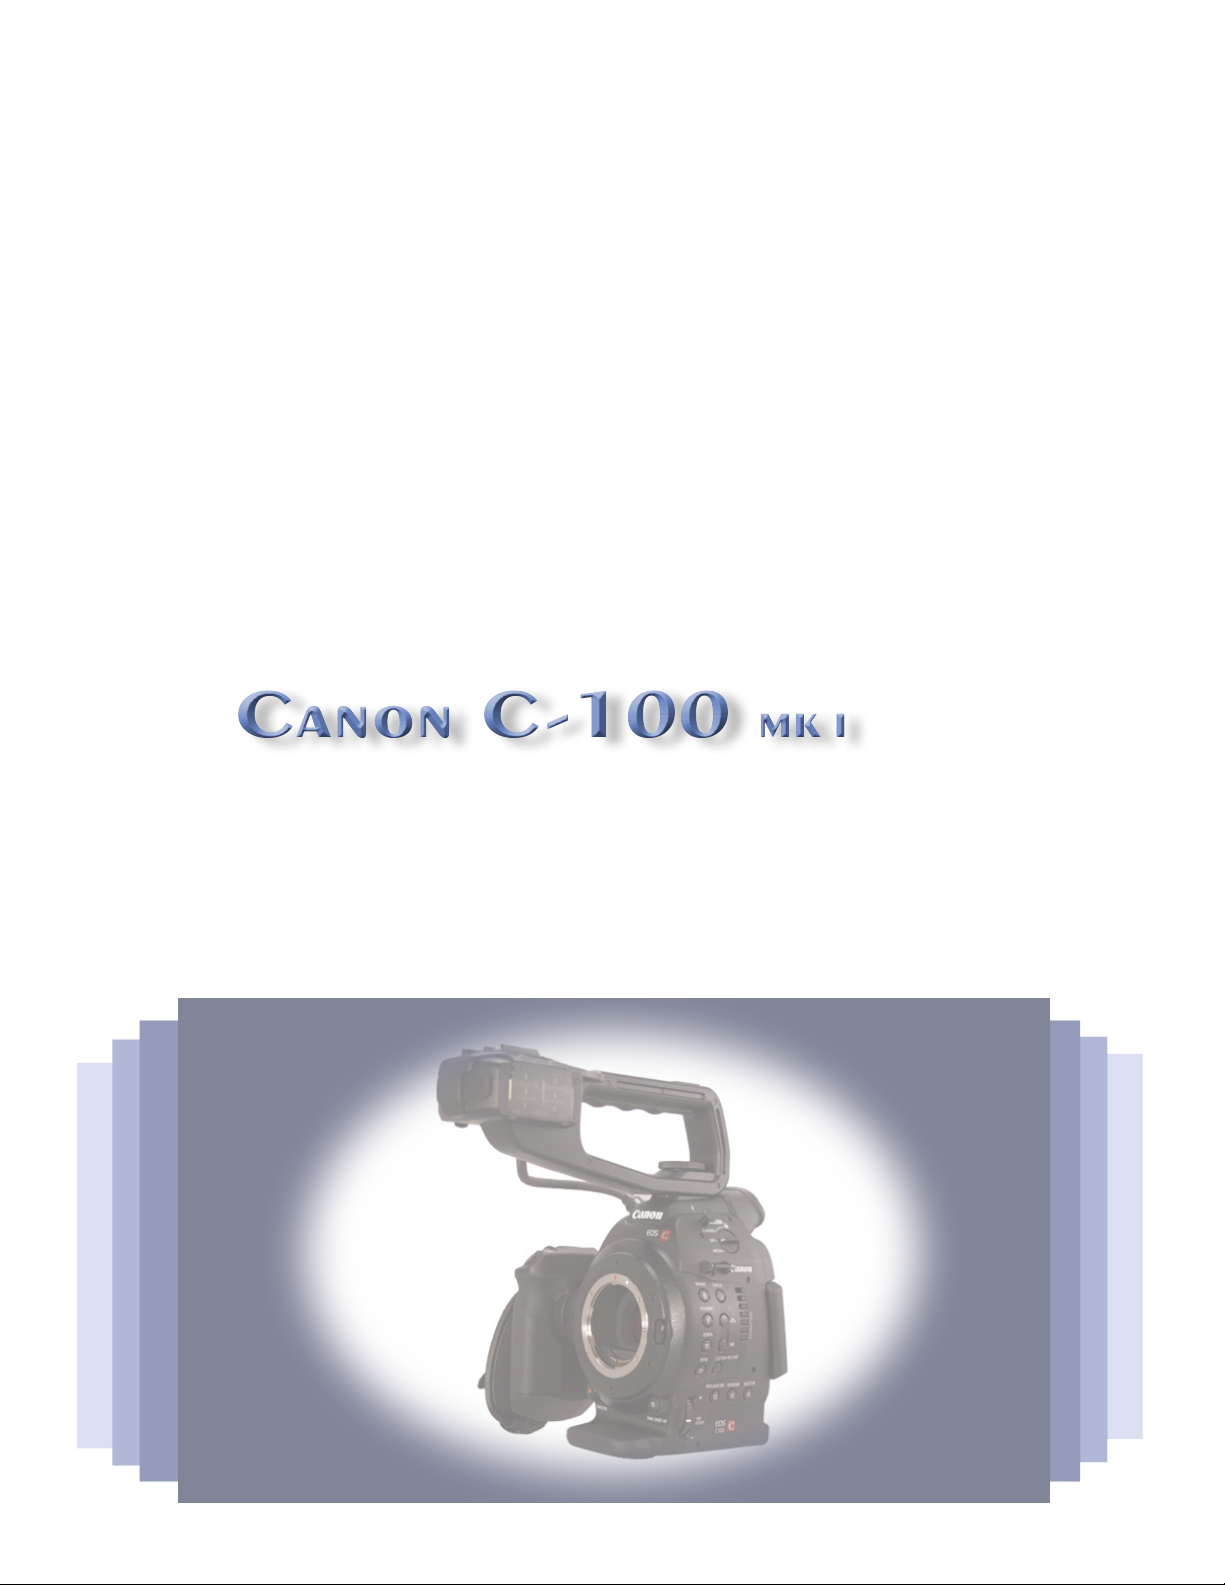
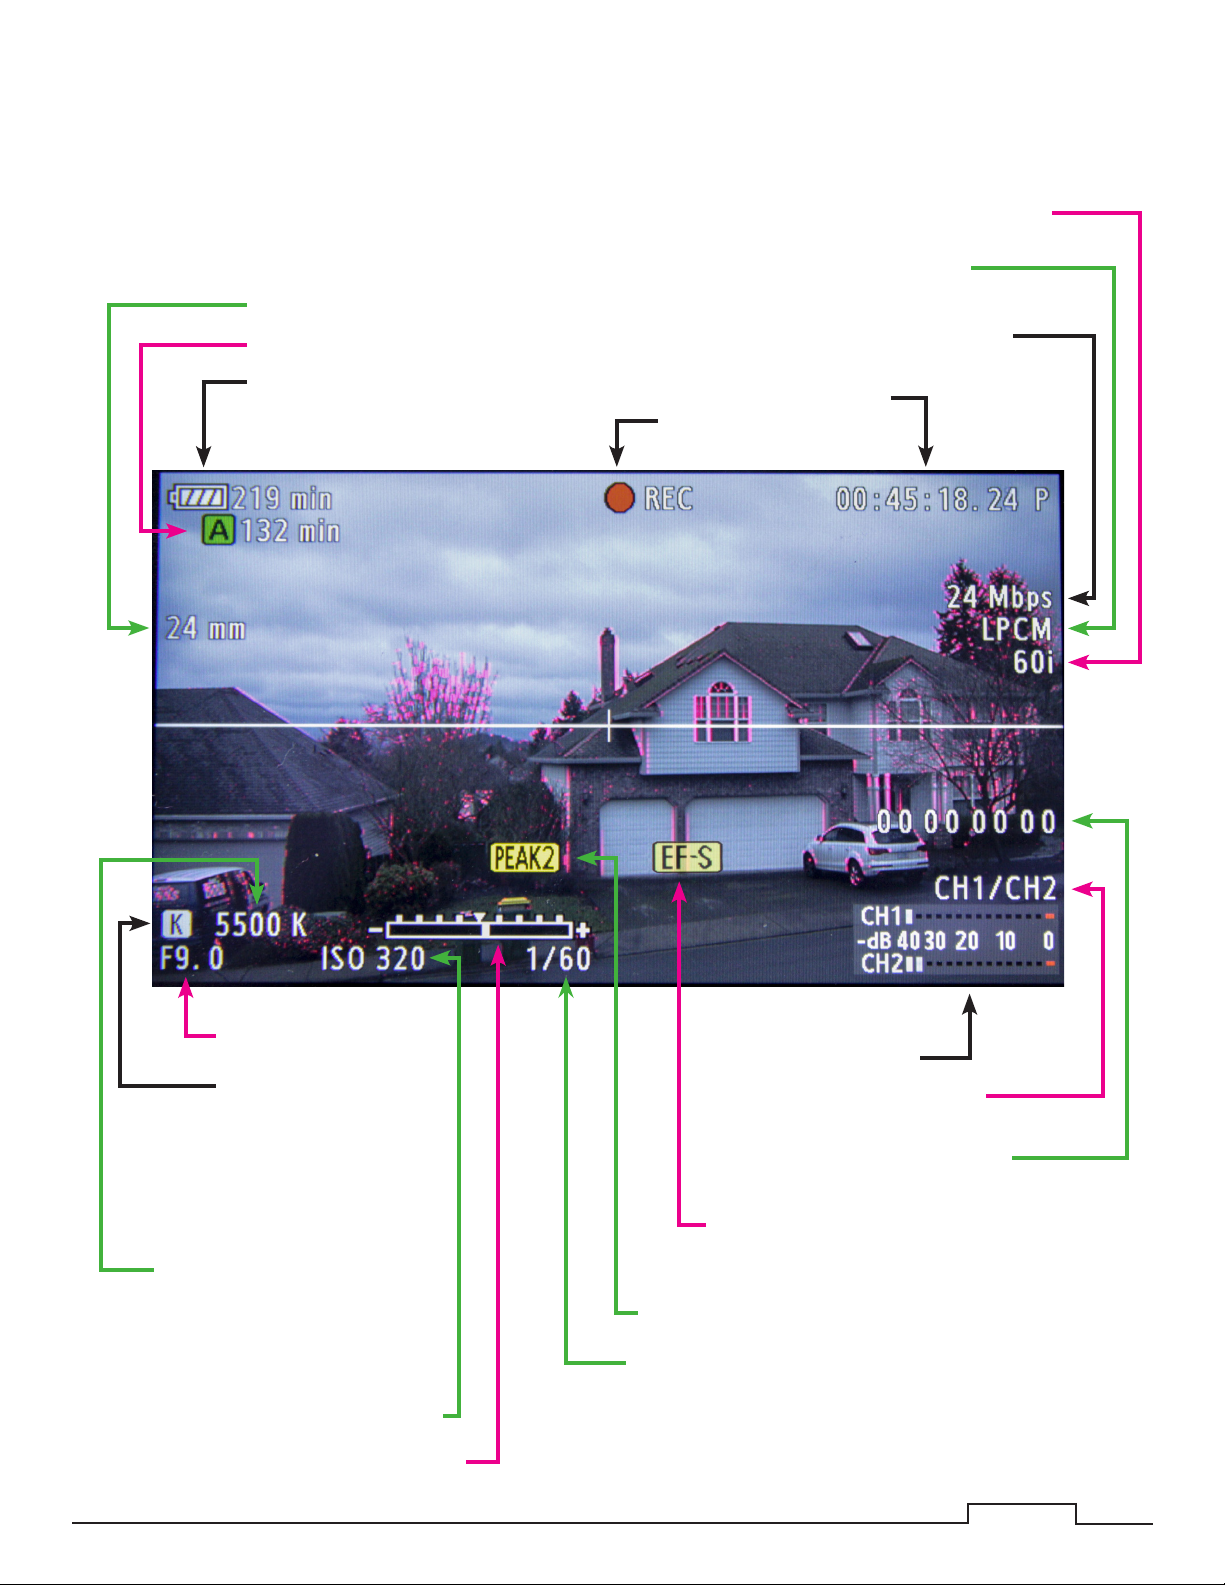
Canon C-100 MK I User manual

Community College
Video Production
Canon C-100 MK ICanon C-100 MK I
Student Handout

2 of 17
Canon C-100 MKI Overview
e Canon C-100 MK I is a professional video camcorder featuring:
• Super 35mm Canon CMOS sensor records in High Denition (HD) at 1920x1080 in
60i, 30p or 24p frame rates.
• Canon DIGIC DV III image processor allows recording at 24Mps with the AVCHD
Codec.
• Records video to standard (class 10 or better) SD/SDHC/SDXC memory cards.
• One 32GB card can hold 3hrs record time .
• Two card slots that support continuous (relay) recording or dual recording.
• Can use a wide range of Canon EF, EF-S or EF Cinema lenses or Cinema lenses with
appropriate adapters.
• Expanded Professional Capabilities include:
• HDMI output with Embedded Time Code
• Support for External Recorders
• Remote Operation
• Complete Manual Control over Video and Audio.

3 of 17
Camera Setup
Ensure there is an SD Card installed in the
camera.
• Press upwards on the lock button in the
center of the memory card door to open
the door.
• If no memory card is installed, put SD
card into the slot and then push until
you feel a click.
Reverse to remove the memory card.
NOTE: It is recommended to use only class 10
or higher SD cards. Faster cards will
download to your hard drive faster.
Insert Battery:
• Insert battery into the slot on
the back of the camera.
• e battery contacts are pointed
to the le.
• Slide battery to the le.
• e battery will click into place.
Remove Battery:
• Push the battery release
forward.
• Slide the battery to the right.
• Remove the battery.
1)
2)

4 of 17
Attach Lens.
Zoom Lens Installation.
1. Remove Rear cover on the Lens.
2. Remove cover located on the
camera.
3. Line up red dots on the camera
and lens.
4. Insert lens into camera.
5. Twist lens CLOCKWISE until lens
locks into place.
Zoom Lens Removal.
1. Press and hold the Lens lock re-
lease button.
2. Twist lens COUNTER-CLOCK-
WISE.
3. Remove the lens.
4. Install the cover on the camera.
5. Install the cover on the back of the lens.
3)
Zeiss Lens Installation.
1. Remove Rear cover on the Lens.
2. Line up Red Dots on the Lens Adapter and the
camera.
3. Insert lens adapter into the camera.
4. Twist lens adapter CLOCKWISE until adapter
locks into place (You’ll hear a Click)
5. Line up Zeiss lens to the adapter.
6. Insert the Zeiss lens into the adapter.
7. Twist lens COUNTER-CLOCKWISE until lens
locks into place.
6)
7)
4)
2)
2)

5 of 17
• Zeiss Lens Removal.
1. Press and hold the LENS RELEASE button on the camera.
2. Twist the lens COUNTER-CLOCKWISE until it stops.
3. Remove the lens.
1)
1)
2)
2)
3)
Press down and hold
Remove the Zeiss adapter from the lens.
1. Press downward and continue to hold the release
lever located on the lens adapter.
2. Twist the lens adapter Clockwise and the lens
Counter-Clockwise.
NOTE: Removing the adapter can be troublesome as
it is tight and awkward to handle.

6 of 17
5) Set your Frame Rate (Frames per Second).
1. Press the Menu button.
2. Arrow down to Other Functions the
Wrench Icon.
3. Press Enter (Push joystick inward).
4. Arrow down to Record Format.
5. Press Enter.
6. Select your Frame Rate.
7. Press Enter.
8. Press Menu to exit the Menu.
1.
6.
4) Turn on power.
Turn power switch to the ON position by
sliding the power switch to the right. Aer a
few moments the camera with power up.
Set EF-S Lens Setting.
If using an EF-S lens, set the EF-S lens setting to On.
1. Press the Menu button.
2. Arrow down to
“EF-S Lens”
3. Press Enter.
4. Select “ON”
1.
3.
6)

7)
8)
7 of 17
Hook up External Microphone.
NOTICE: All VP classes require the use of external microphones.
• Attach either a Lavelier or Shotgun microphone to the XLR plugs located on the right
front side of the camera.
NOTE: When using the XLRs with microphones ensure that the “MIC/LINE,” located on the
XLR handle, is set to “MIC”. Otherwise you will not get sound.
• Select the microphone inputs from the “INT” (internal) microphones to “EXT” (external).
• Select CH 1 / CH 2 +48v Mic Phantom power to “O N ,” if needed to power the micro-
phone.
XLR 1 / XLR 2
LINE/MIC
Focus Switch should be set to ”MF”.
For manual focus. is allows the outer ring on the lens to manually control the
focus.
NOTE: Auto focus only works on the
zoom lenses. e Zeiss lenses are only
Manually focused.
Auto Focus / Manual Focus
Diopter Adjustment Dial.
Use this to adjust the focus of the monitor
in the view nder, so you can view the image
clearly.
Diopter Adjustment Dial
9)

8 of 17
Settings for the Scene
Battery Life
Remaining Time on SD card
Recording
Indicator
Time Code
Current Focal Length
Bit Code
LPCM Audio Recording
Frame Rate
User Bit
Audio Output Channel
Audio Level Meter
Focus Peaking On Indicator
Current F-Stop
White Balance Icon
*Icon will change
depending on
current White
Balance settings.
Kelvin Setting
*is is the Kelvin setting
that the White Balance is
currently using.
ISO Setting / Gain
Shutter Speed
Exposure Bar
EF-S Setting On Indicator

9 of 17
12)
11)
10)
Use the ND FILTER (If Necessary).
In the most basic sense an ND Filter is like sunglasses
for the camera. ND lters are used to reduce to amount
of light to the sensor. Typically used in bright sun light,
they allow you to use small f-stops of the IRIS.
ND FILTER Settings:
OFF: ND Filter is not used
ND1: Cuts light intensity by up to 2 stops
ND2: Cuts light intensity by up to 4 stops
ND3: Cuts light intensity by up to 6 stops
ND Filter Control
Set the Shutter.
1. Press the Shutter Select Button.
2. e Shutter setting will highlight in Orange on the screen.
3. Use the Control Dial, located on the grip, to select disired Shutter setting.
Shutter Select Button
Control Dial
Set Custom Picture.
C7: EOS Std - Reproduces the image quality and look (high contrast, vibrant colors) of EOS
digital SLR camera with its picture style set to [Standard}.
C8: Wide DR - Applies a gamma curve with a very wide dynamic range and an appropriate
color matrix that neverthleless do not require post-production processing.
C9: CINEMA - Uses the Canon Log gamma and color matrix for an outstanding dynamic
range and a image suitable for processing in post-production.
Custom Picture Button

10 of 17
13) Set the Iris (F-Stop).
Adjust the Iris (F-Stop)for proper exposure.
• Zoom Lenses.
• Use the Control Dial, located on the
grip of the camera.
• Zeiss Lenses.
• Use the IRIS Ring located on the lens.
Control Dial
Set ISO / Gain (If Needed ).
NOTE: You may need to increase the ISO/Gain which will brighten your scene in low light conditions,
but it will increase the amount of noise to your video.
1. Press the ISO/GAIN (13) button.
2. Use the Joystick (pushing up / down) to raise or lower the ISO.

11 of 17
Zebra Pattern.
Use this function to visually see if the whites in your scene are over exposed (Blown Out).
• Pressing the ZEBRA button repeatedly will cycle the ZEBRA through its presets.
( OFF - ZEBRA1 - ZEBRA2 - OFF )
• 75% for Caucasian Skin Highlights.
• 100% will show areas that are approaching over exposure and losing detail.
Wave Form Monitor.
Use this to graphically view how lit your scene is.
Blacks Crushed
Over Exposed
100%
50%
0%

e Canon C-100 has six (6) dierent White Balance settings.
ese settings show up as a dierent icons on the monitor.
Of these settings two are presets,
set to Daylight 5600K
set to Tungsten 3200K
Only these two presets can be further ne-tuned within a range of +9 and -9.
the C-100 automatically adjusts the White Balance to the optimal level
e remaining settings are user denable:
allows you to manually set the white balance to a setting between 2,000K and 15,000K
is a user denable setting
is a second user denable setting
12 of 17
14)
Set your White Balance (AWB).
To manually White Balance (re-
ferred as Kelvin Temperature):
• Focus on and ll the screen
with a white piece of paper
or bounce card in the light at
where your subject will be.
• Press the AW B button on the
side of the camera.
• When the ashing icon in the
middle of the screen stops
ashing and goes away the
White Balance has been set.
White Balance Icon

17)
16) Adjust the Audio Levels.
While looking at the Audio Meters, located on
the bottom of the video monitor, adjust the Audio
Control Knobs until the highest Audio level (Peak)
is around the Target Level.
NOTE: Audio Levels that hit the far right of the
meter is BAD, your audio recording will be
distorted.
13 of 17
Target Level PEAK LEVEL
Audio Control Knobs
Ch 1 / Ch 2
Optical Image Stabilizer (OIS).
Use the Optical Image Stabilizer (OIS) to
reduce the eects of camera shake when
shooting by hand.
NOTE: It is not needed for tripod work.
Stabilzer On/O
15) Set the Focus.
• Zoom in on the subject as close as
possible.
• Adjust the Focus until the subject is in
focus by using the FOCUS Ring.
• Zoom out for proper scene framing.
Focus Ring
Zoom Ring

14 of 17
Set the Headphone Level.
1. Press the Menu button.
2. Arrow down to Audio Setup.
3. Press Enter (Push joystick inward).
4. Arrow down to Audio Output.
5. Press Enter.
6. Arrow down to Headphone Volume.
7. Press Enter.
8. Select your Volume Level.
9. Press Enter.
10. Press Menu to exit the Menu.
18)
19)
Set the Audio Input Source.
e camera audio inputs can be set for
• Stereo (CH1/CH2)
• Mono (CH1 or CH2)
• Mono with Safety (CH1/CH1) or (CH2/CH2)
1. Press the Menu button.
2. Arrow down to Audio Setup.
3. Press Enter (Push joystick inward).
4. Arrow down to Audio Output.
5. Press Enter.
6. Arrow down to Channel.
7. Press Enter.
8. Select your Input Choice.
9. Press Enter.
10. Press Menu to exit the Menu.
Settings for Audio
4)
8)
1)
6)
8)

15 of 17
Saving Footage To A Hard Drive
1. Turn on the video camera to Media.
2. Plug in a USB cable into the
camera’s USB2 slot.
3. While USB2 cable is plugged in the
camera there will a PC Connection
message.
4. A new drive, called “CANON_DC”,
should appear on the desktop.
5. Open the drive called “CANON_
D C ”.
6. Copy the le named “PRIVATE” to
the drive and folder where you will
be editing your project.
7. Eject the drive called “CANON_
D C .”
8. Remove the USB2 cable.
e following steps detail how to remove the footage, using the camera as a SD Card reader.
Aer lming your subject, you will need to transfer the footage to a separate hard drive to store the your
footage.
To do this you ether:
• Use the camera as a SD Card reader to transfer your footage.
• Remove the SD Card from the camera and use an external card reader to transfer the footage.
NOTE: If you use this method proceed to step 11 to remove the footage from the SD Card.
is brings up a problem with the SD Cards and using the computer to delete the les from them. De-
leting the les of an SD Card with the computer can lead to problems with the SD Card in the camera
aerwards. One of the main problems is that the SD Card will not hold as much footage as before, which
is not noticeable until you are lming.
NEVER delete les from the SD Card with the computer. is reduces the avaliabe recording time of
the card. Always use the camera to reformat the SD Card.
USB Slot
3
1

16 of 17
9. Press the MENU button.
10. Arrow down to “Initialize Media”
11. Press Enter.
12. Select which slot to format.
13. Choose “Complete”
SUPER MEGA IMPORTANT
e following steps will PERMANENTLY delete
the video footage from the SD Card.
Failure to verify that your video footage has been saved to your Hard Drive before following these
steps will result in the loss of your video footage
14. Select “OK” on “Will completely erase all
data from the SD card.” then press Enter.
15. Initializing screen will appear.
16. Aer a few moments “Process completed suc-
cessfully” will be displayed.
17. Press “MENU” button to exit the Menu
screen.
LAST CHANCE
is is your last chance to make sure that your
footage has been copied to a hard drive of your
choice.
10
12
13
14
15
16

17 of 17
Shooting Checklist
Camera Setup
1. Install Battery. (pg 3)
2. Check for SD Card installed. Install if necessary. (pg 3)
3. Attach Lens. (pg 4)
4. Turn power on. (pg 6)
5. Set Recording Frame Rate. (pg 6)
6. EF-S Lens setting - If needed. (pg 6)
7. Adjust Diopter Adjustment on eye piece. (pg 7)
8. Set Focus to Manual. (pg 7)
9. Hook up External Microphones. (pg 7)
Settings For e Scene
10. Set Custom Picture. (pg 9)
11. Set ND Filter (If Necessary). (pg 9)
12. Set the Shutter. (pg 9)
13. Adjust Iris (F-Stop). (pg 10)
• Set ISO/Gain. (pg 10)
• Check Zebra Pattern. (pg 11)
• Check Wave Form Monitor. (pg 11)
14. Set the White Balance. (pg 12)
15. Focus on subject. (pg 12)
16. Adjust Zoom (If Necessary), Compose Shot. (pg 12)
17. Adjust AUDIO LEVELS. (pg 13)
18. Set Optical Image Stabilizer. (pg 13)
Settings For Audio
19. Set the Audio Input Source. (pg14)
20. Set the Headphone Level. (pg14)
Table of contents
Other Canon Camcorder manuals

Canon
Canon E 500 User manual

Canon
Canon LEGRIA HF G26 User manual

Canon
Canon GL1 User manual

Canon
Canon MV 30 User manual

Canon
Canon XF400 User manual

Canon
Canon MV920 User manual

Canon
Canon Vixia mini X User manual

Canon
Canon DC100 - WL Remote Control User manual

Canon
Canon Canosound 1014XL-S User manual

Canon
Canon FS200 - Camcorder - 680 KP Assembly instructions

Canon
Canon Optura 400 User manual

Canon
Canon VIXIA HF R50 User manual

Canon
Canon VIXIA HF M300 User manual

Canon
Canon Optura Pi User manual

Canon
Canon ivy REC User manual

Canon
Canon EOS C100 User manual

Canon
Canon VIXIA HF R30 User manual

Canon
Canon OPTURA30 User manual

Canon
Canon VIXIA HF M30 User manual

Canon
Canon optura Xi User manual